You can process account customer refunds systematically through dedicated refund workflows in Retail Express, which enable handling paid account sales returns while maintaining accurate customer account balances and financial records. This refund capability helps retail operators manage account customer returns professionally, with effective account refund processing typically improving customer satisfaction and supporting accurate account reconciliation across Australian retail operations.
Account customer refund functionality in Retail Express enables retail operators to process returns for paid account sales, update customer account balances appropriately, and maintain accurate financial tracking for returned merchandise. This refund workflow helps ensure your retail operations can handle account customer service situations professionally while maintaining accurate account records and financial integrity.
Refunding a sale for an account customer ensures accurate record-keeping and proper management of customer transactions. This article provides step-by-step guidance on processing refunds for account-based sales, including necessary adjustments to account balances and payment records.
When refunding an Account Customer sale, you can create a Credit Note to apply against any outstanding balance on their account.
Creating the Refund
To create the credit note:
- Log into POS
- Click Returns
- Enter your User ID
- Find the sale to be refunded by entering the Original Sales Order/Invoice Number or using the filters
If the sale isn't displayed, the user may be restricted from viewing sales for that Outlet.
- Click the radio button in the Select column to select the sale
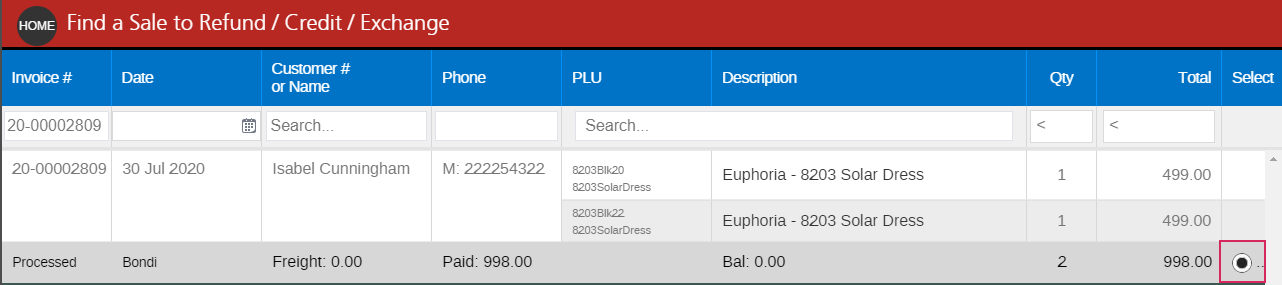
- Click Next
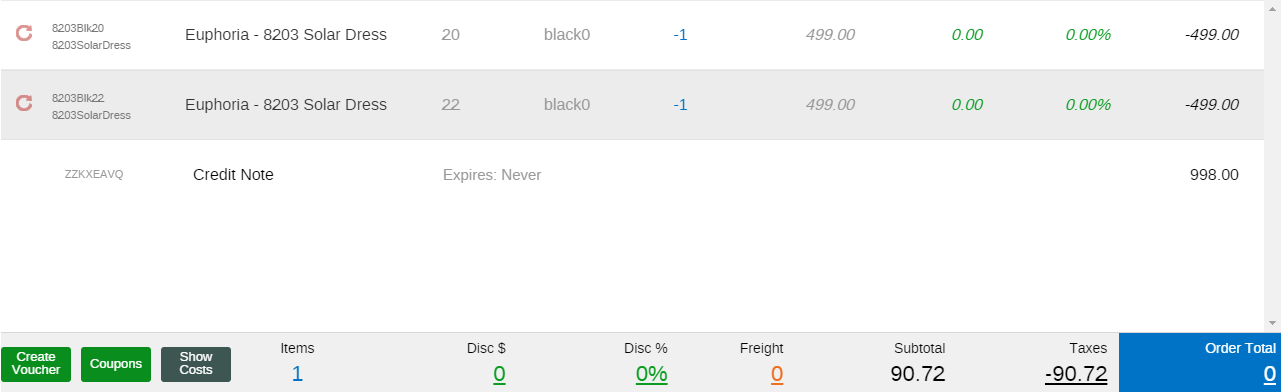
- Enter the quantity to be returned in either the Saleable or Faulty columns (this will update the Inventory for either the Available or Faulty stock buckets)

- Select the Outlet where the stock is being refunded to
- Click Next
- Adjust the Refund Amount if required
- Click Next
- Select a Return Reason
- Click Create Refund
- The Refund/Exchange transaction will be created ready to action
Create a Credit Note
- Click Create Voucher
- The Refund Amount will be automatically populated in the Voucher Value
- Ensure the Voucher Type is set to Credit Note
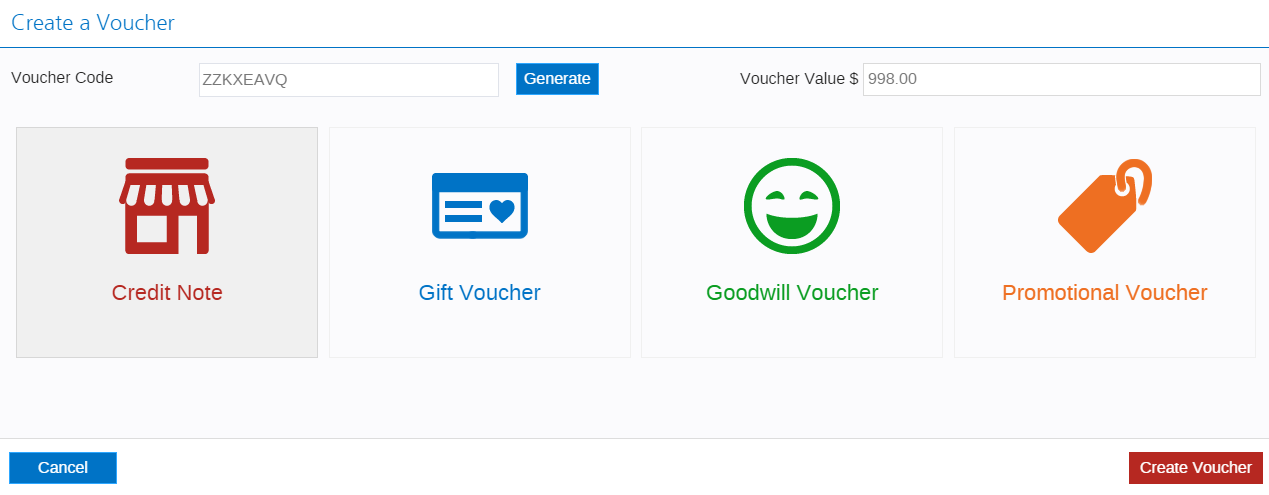
- Update the Voucher Code or Voucher Value if required
- Click Create Voucher
- As the voucher has been created for the full amount the order total will be zero
- Click Finalise
Apply Credit Note to Outstanding Balance
Once you have created all your vouchers you can now apply them to the remaining balance for the customer account.
- Navigate to Reports > Customer Reports > Account Payment
- Enter the customer's details
- Click the $ sign for the correct customer
- The CREDIT: Total Credit field will display the value of all Credit Notes for this customer
- Change the What would you like to do? drop-down to "Apply existing credit to invoices"

- Click Amortise Down next to the Credit Amount
- The Payments column will be updated
- Select the Outlet at the bottom of the screen
- Click Apply Credits