You can enrich product information and improve product differentiation through Product Attributes in Retail Express, which enable defining custom product characteristics like size, color, material, or other specifications. This attribute capability helps retail operators organize product variations and enhance product descriptions, with effective attribute use typically improving product searchability and supporting better inventory organization across Australian retail operations.
Product Attribute configuration in Retail Express enables retail operators to create structured product characteristics supporting detailed product descriptions, variant management, and enhanced product filtering. This attribute system helps ensure your retail operations can maintain detailed product information supporting customer service, inventory organization, and effective product presentation.
Product Attributes are identifying characteristics applied to your products for improved categorisation, searching, and reporting. Retail Express includes a range of default Attributes, and Custom Attributes can be created as required.
There are two kinds of Product Attributes:
Type | Description |
Default attribute | Standard attributes included in Retail Express by default are: These cannot be edited or removed, however, you can create, delete, and edit any associated attribute values. For example, the attribute "Colour" cannot be removed, however, you can add/remove the value "Blue" or not enter any Colour attribute values at all. |
Custom Attributes | Both Attributes and Attribute Values can be created, deleted, and edited. The system supports up to 8 Custom Attributes. |
Create a Custom Attribute
- Navigate to Settings > Product Attributes.
- Enter the Attribute name directly into the Create New Attribute field (you can enter up to 64 characters).
- Click Insert. The new Attribute will be added and displayed in the Attribute list on the page.

The Attribute is also added as an available field on the Edit Product screen and various reports within the System.
Custom attributes are currently not available in any APIs (e.g., Web Store API, Warehouse Management API, Inventory Planning API etc) or Offline POS
The ability to access Product Attributes is determined by the User Security Profile setting "Product Attributes". You are limited to creating 8 custom attributes (if using Franchise Connect this will be 4 Global Attributes and 4 Franchisee Attributes). If you cannot access this feature please contact your company administrative staff.
Quick Create Product from POS
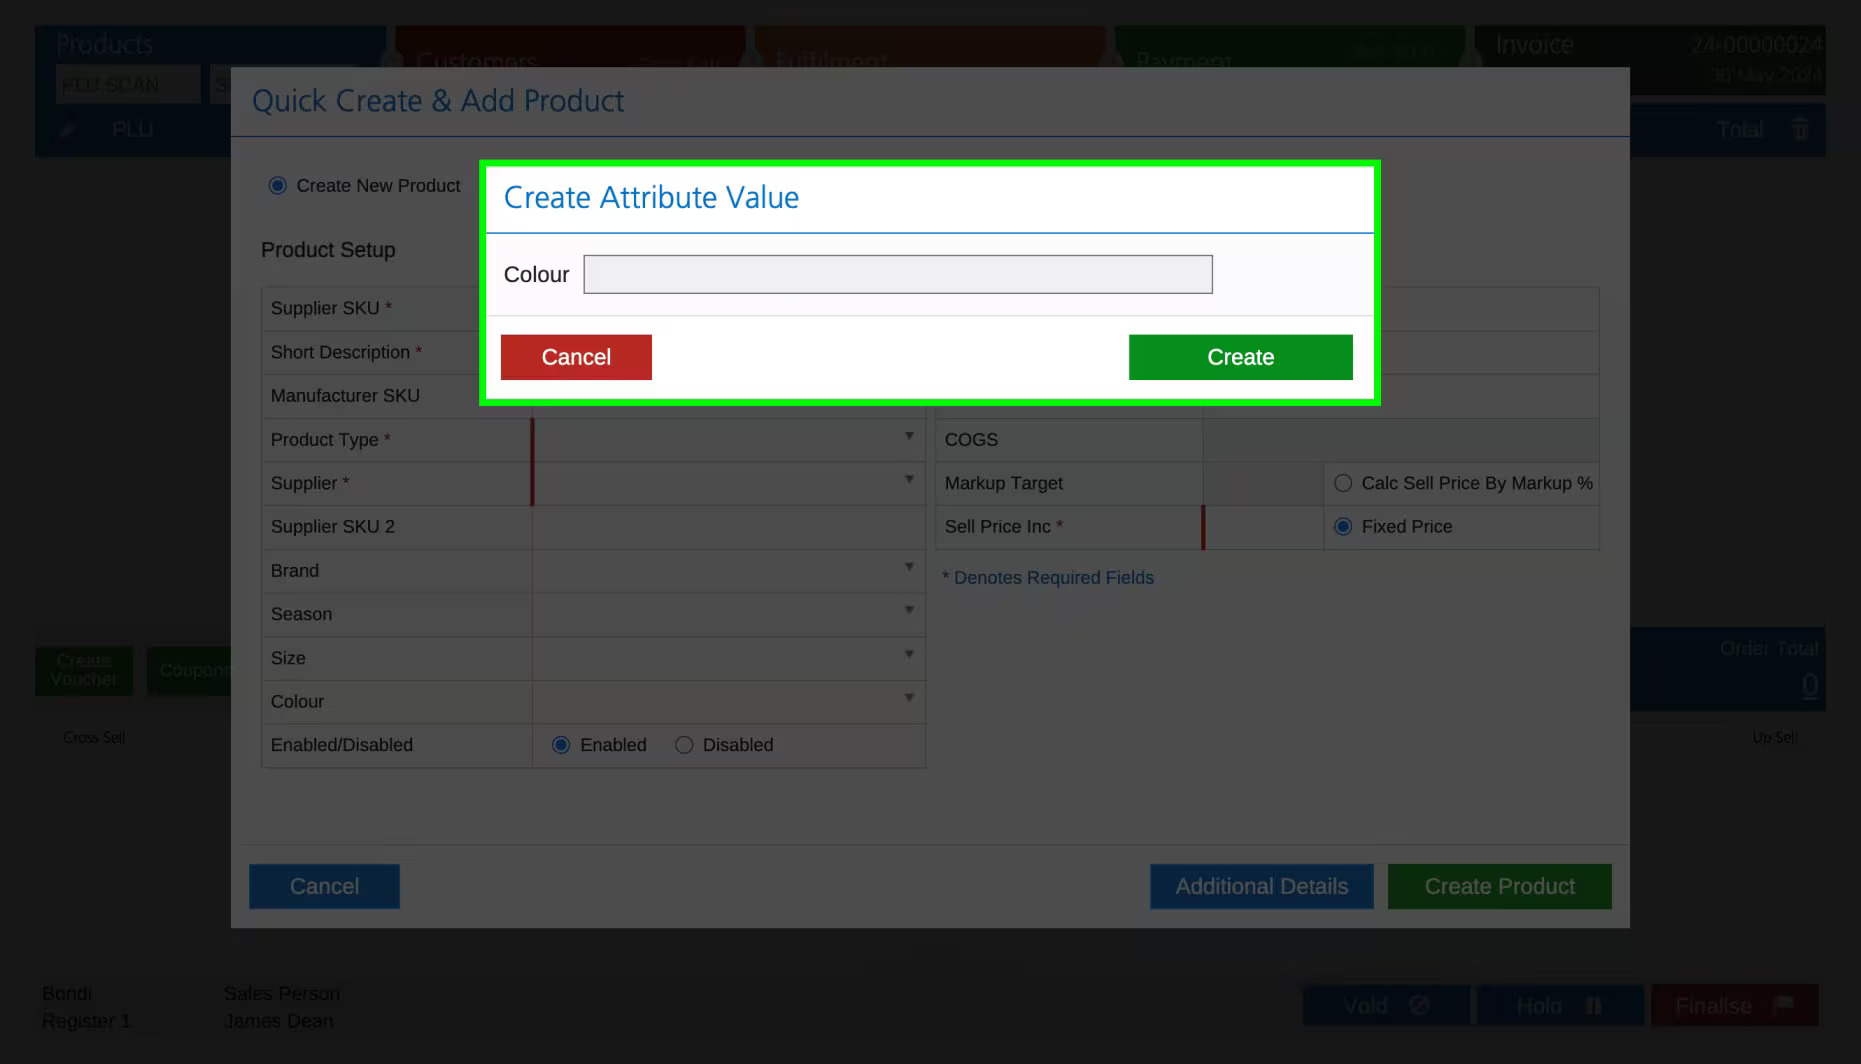
Create New Attributes On The Fly
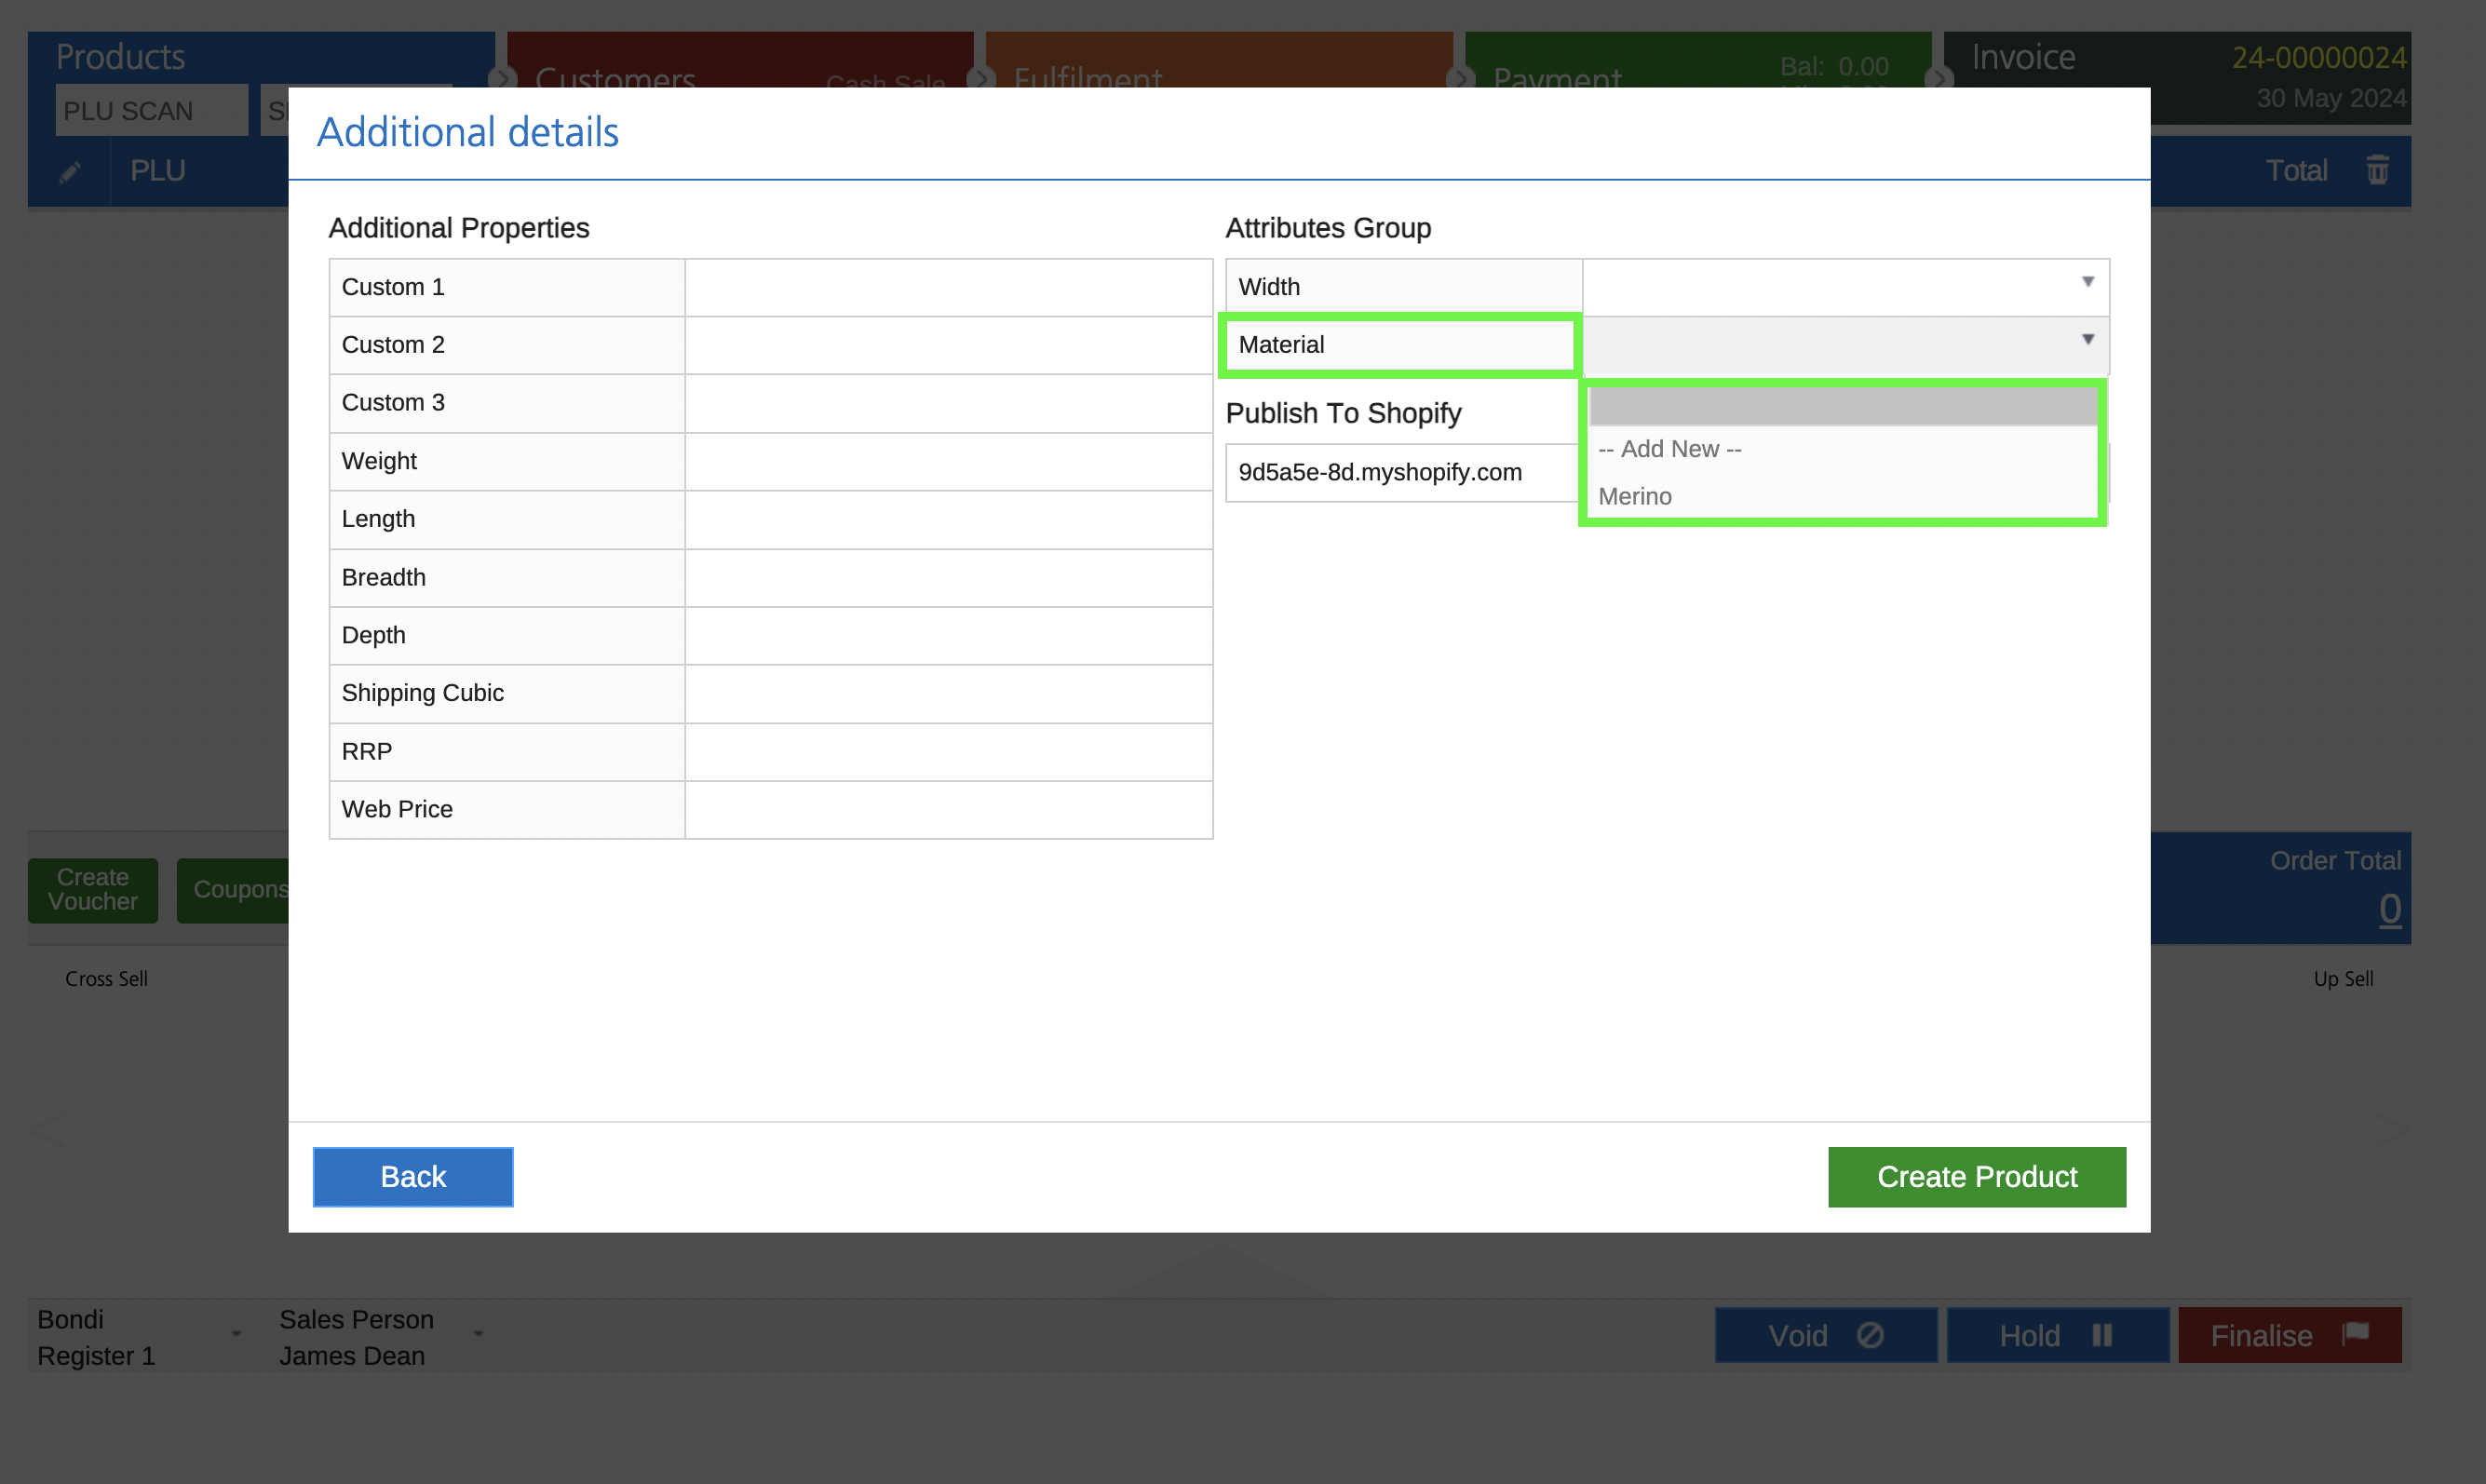
Back-office users can conveniently create attribute values within the POS Product Create page. This enhancement extends to all attributes, including custom types on the "additional details" page, and product types.
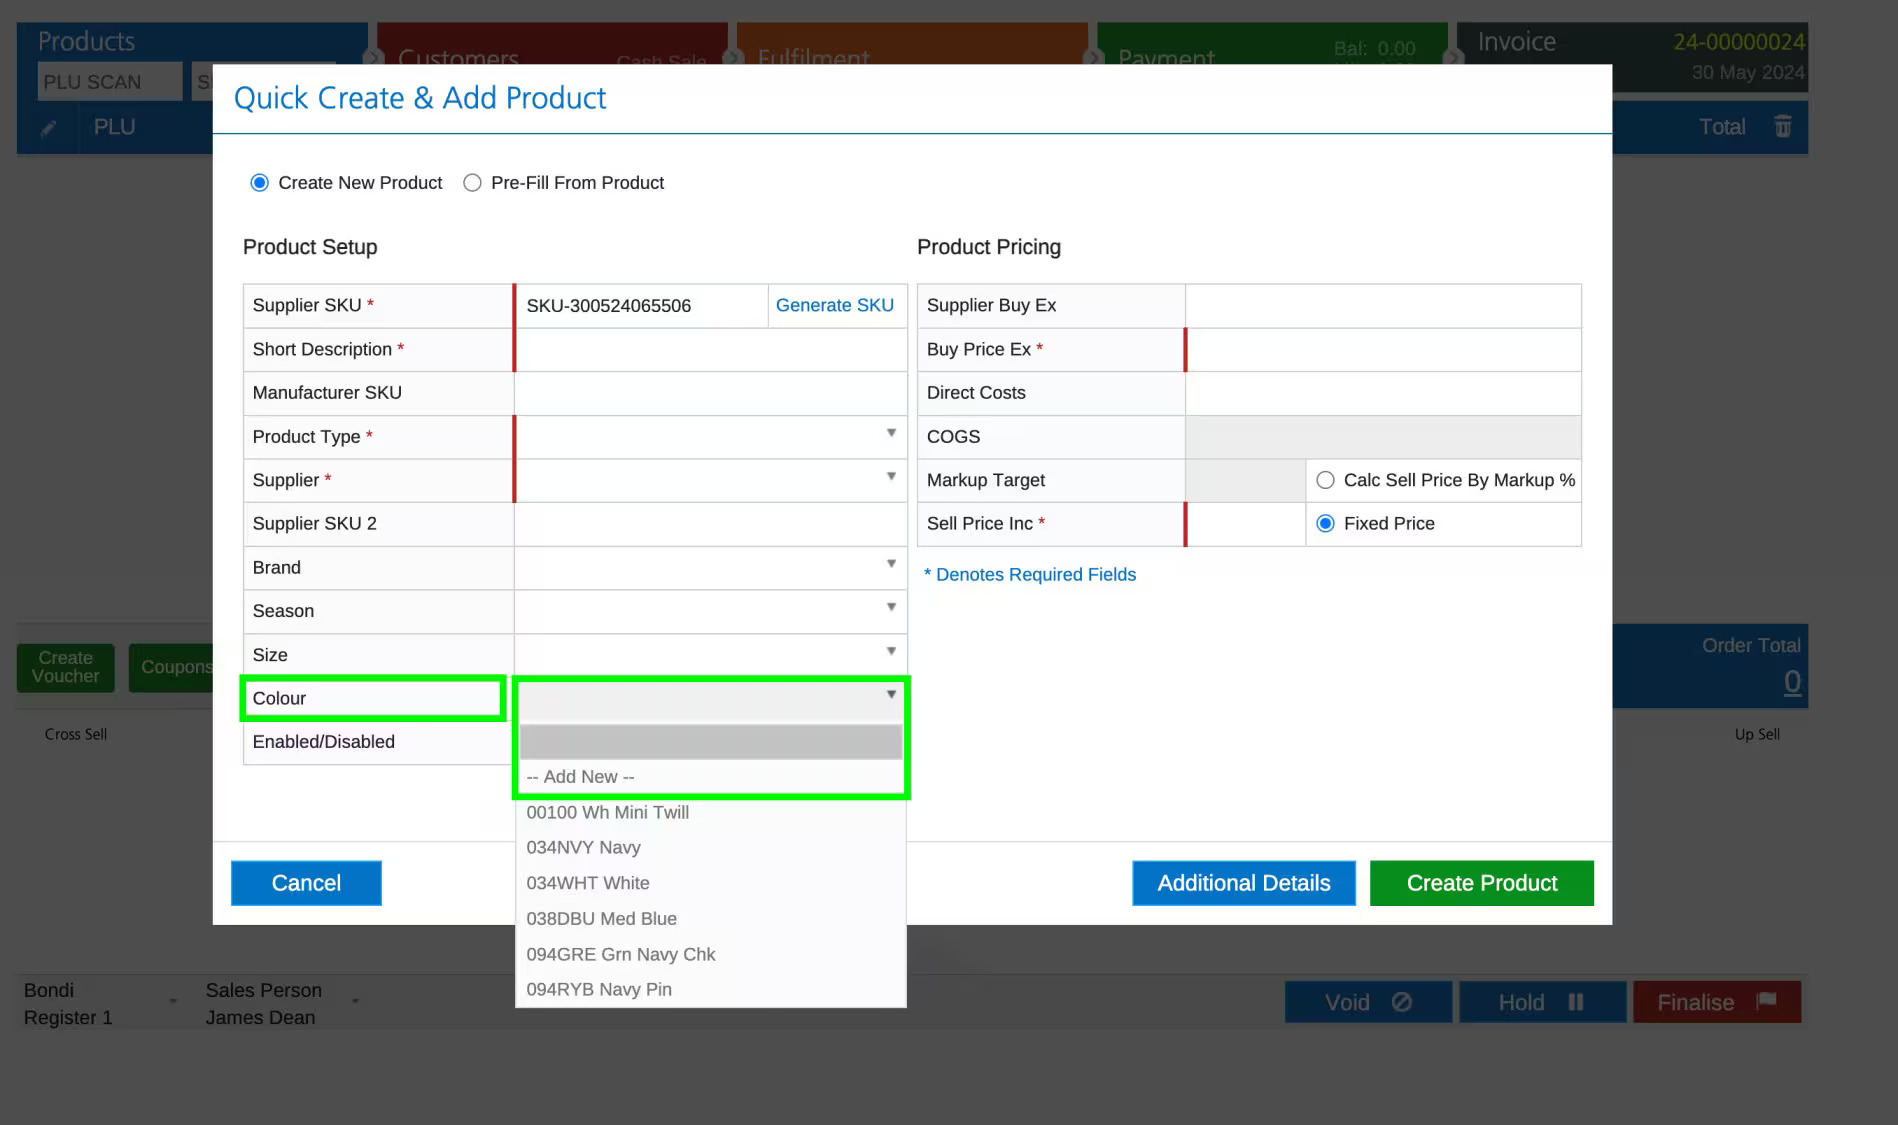
To add additional Attributes and Attribute Values, navigate to 'Additional Details page and enter the required value
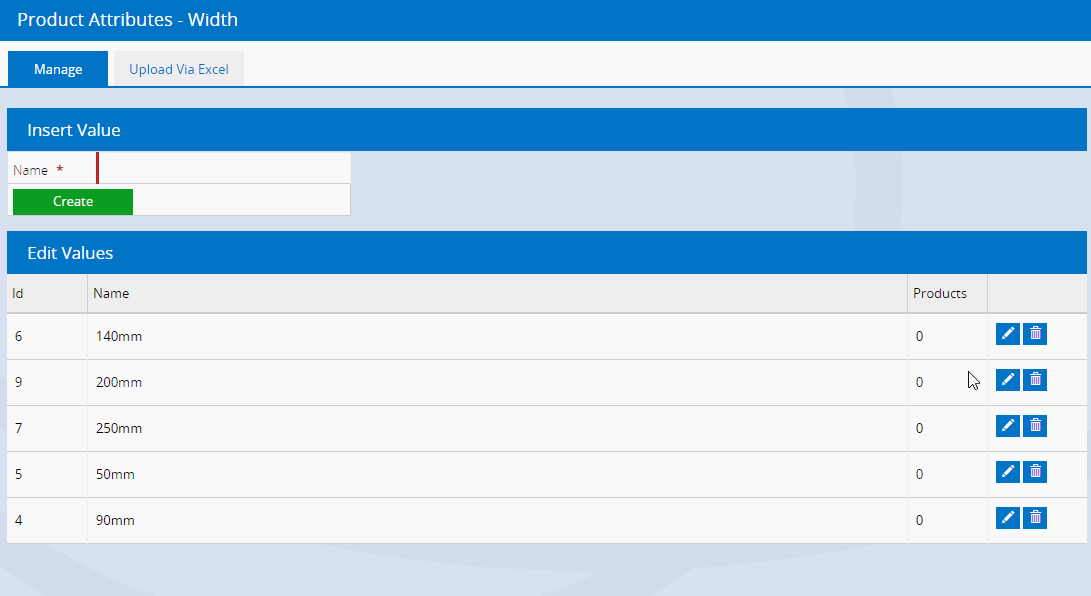
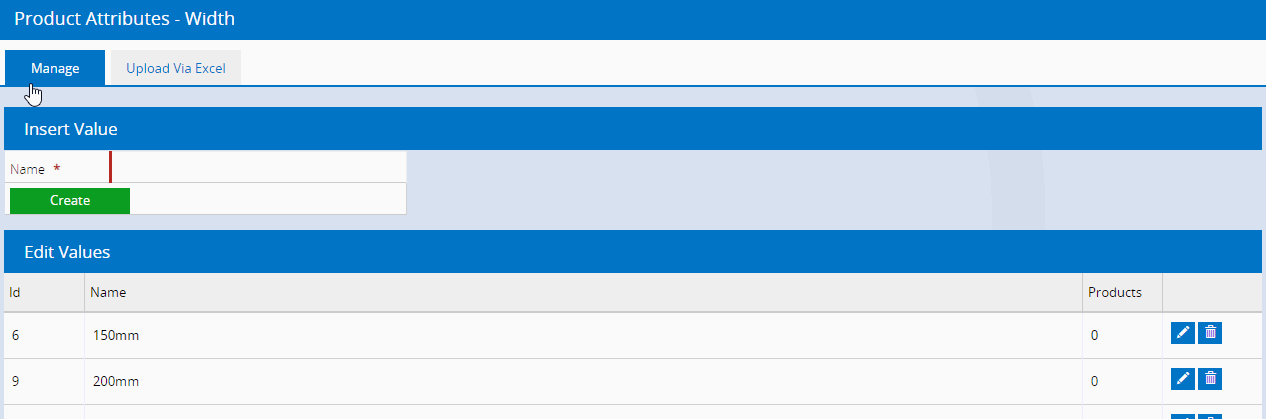
Creating/editing Attributes and Attribute Values
Attribute values can be created, edited, and deleted for both Default and Custom Attributes.
- Navigate to Settings > Product Attributes
- Click the Edit Values icon for the required Attribute
- The Attribute Values will be displayed
- Follow the instructions
Editing the name of an existing Attribute Value will automatically update all associated Products to the new Attribute Value.
Create/Edit Attributes individually
When editing the attributes individually you can:
- Add a new value
- Edit an existing value
- Delete a value
Add an Attribute Value:
- Follow the instructions above to open the Attribute Values
- Enter the Attribute Value into the Name field
- Click Insert
Edit an Attribute Value:
- Follow the instructions above to open the Attribute Values
- Click the Edit (pencil) icon
- Edit the Name
- Click the Tick icon to save the changes
Create Attributes in Bulk
Using Microsoft Excel you can bulk create the attributes, including adding new attribute Values and editing the existing ones. To create the attributes in bulk you will need to complete the following steps:
- Download and complete the Attribute Upload Template
- Edit the Template to insert the new values
- Upload and Import the Template
Click on the headings below to work through each section.
Download the Attribute Upload Template
To download the Attribute Upload template:
- Follow the instructions above to open the Attribute Values
- Click the Upload Via Excel tab
- Click the link to Download the Template in Step 1
- Make a note of where the file downloads
You must use the provided template, although you can copy & paste values into this file from another spreadsheet.
Using the Attribute Upload Template
To use the Attribute Upload Template:
- Open the file downloaded in the previous step
- Click Enable Editing
- Enter new attributes into the Name column (column A)
- If you're creating Size attributes you will need to enter a List Order - refer to the Frequently Asked Questions below for more information
- Save the file
Upload and Import the Attribute Upload Template
Once the Attribute Upload Template has been populated the file needs to be imported into Retail Express. This happens in three phases:
- Upload the file
- Review the upload
- Import the data (at this point Retail Express is updated)
Upload the Attribute Upload Template
- Log into Retail Express
- Ensure you're on the Upload via Excel tab
- Locate Step 2
- Click the Choose File button
- Navigate to where you saved the file
- Click Open
- The file name will be displayed next to the Choose File button
- Click Upload File
- The results of the upload will be displayed at the bottom in the Preview window
Review the data
- The data from the upload file will be displayed at the bottom of the Preview window
- If the data appears correct proceed with the steps below in the Import section
- If the data is incorrect, amend the Attribute Upload Template and repeat the steps above to upload the amended file
Import the data
- Click Import Excel Data
- The data will be uploaded and a Data Imported confirmation message will be displayed
Delete an Attribute
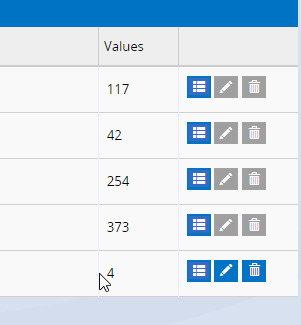
An Attribute Value can only be deleted if it doesn't have any products associated with it. When products are associated the trash can icon is greyed out to indicate the product cannot be deleted.
The Products column displays the number of products using each Attribute Value.
To delete an Attribute Value:
- Click the Trash can icon
- A prompt will be displayed
- Click OK to confirm
To delete an Attribute Value you will need to update the products so they're no longer using that value. This can be done using the Mass Download and Mass Upload process. Refer to the Create or Edit Products by Mass Download article for more information. Once the products have been updated you'll be able to delete the Attribute Value from the system.
Search and Filter by Attribute
Default Attributes can used to search and filter in many reports.
Currently, Search and Filter by Custom Attribute is restricted to these reports:
- Product Search and Management
- Product Sales Report
- Stock Value vs Sales Report
- Customer Activity Report
| - Stock Replenishment via PO
- Stock Replenishment via Transfer
- Create Purchase Order via Excel
|
Print Attributes on Invoices and Receipts
Once you have created a Custom Attribute you can configure the system to print this value on Invoices and Receipts.
The first time you enable Custom Attributes to print on Receipts you will be required to re-run and update the Retail Express Hardware Utility. Click here for step-by-step instructions.
To update the display settings for the Attributes:
- Navigate to Settings > POS Settings > Invoice and Receipt Settings
- Locate the Display Product Attributes on Invoice field
- Tick the Attributes as required
- Repeat the steps for the Display Product Attributes on Receipt field
- Click Save to save the changes
If the Attribute has been assigned to a product on the invoice/receipt the Attribute will be displayed below the Product Description and SKU:
Frequently Asked Questions
Can I search for products in POS using the Custom Attributes?
The ability to search and view Custom Attributes at POS is on roadmap for a future release. Existing Default Attributes are able to be searched and viewed.
Controlling the order Sizes appear online (List Order)
Unlike other Attributes, which are sorted alphabetically, the Size Attribute also includes a List Order. This allows you to specify a particular order for your sizes.
The List Order affects the display of Sizes in:
- Reports (when sorted by the Size column)
- Search options and drop-down menus
- Online (when using an integrated web store)
List Order details can be entered at the time of creation of a Size, or edited and maintained afterwards.
To synchronise your sizes in a particular order with the web integration you will just need to enter the List Order details for sizes using either the individual or bulk edit methods described above. This information is then sent from Retail Express during the next synchronisation.
If you are using a custom-built integration using the eCommerce API you will need to confirm with your developers if this functionality has been implemented.
What characters can I use in my attribute names?
Attribute names are limited to letters and numbers, as well as the following charactes:
- _ (underscore)
- - (hyphen)
- / (forward slash)
- + (plus)
- . (full stop)