Find FAQs and related articles at the bottom of this page
Some payment methods may incur a cost to the business, for example credit card facilities. In these instances, a surcharge may be imposed to the customer to offset the cost of the payment.
Surcharges can be created in Retail Express as either a percentage or set value (dollar amount) and activated against a Payment Type used within the POS.
The Competition and Consumer Amendment (Payment Surcharges) Act 2016 bans businesses from charging excessive payment surcharges on credit, debit and prepaid card payments. For more information refer to the ACCC website.

Using Surcharges
To implement the Surcharges feature you will need to create the Surcharge first, then assign it to your individual payment methods in POS. Surcharges can be activated and deactivated as required, and various reports within Retail Express have dedicated Surcharge sections to report on the amounts that have been charged.
Users must have access to the Surcharge functionality to be able to access the Surcharge settings. Refer to the Users - Profile Security article for more information.
To create a surcharge:
- Log into Retail Express
- Navigate to Settings > Surcharges
- Enter a Name
- Type in an Amount e.g. 1
- Select the unit by clicking either the $ symbol or % symbol to highlight the unit
The surcharge total will be calculated using the value entered and the unit e.g. 1 with the % highlighted will be calculated as 1% of the payment value; 1 with a $ highlighted being a $1 surcharge total fee.
- Click Create
- Continue to the Activate a Surcharge section to enable the Surcharge for a Payment Type
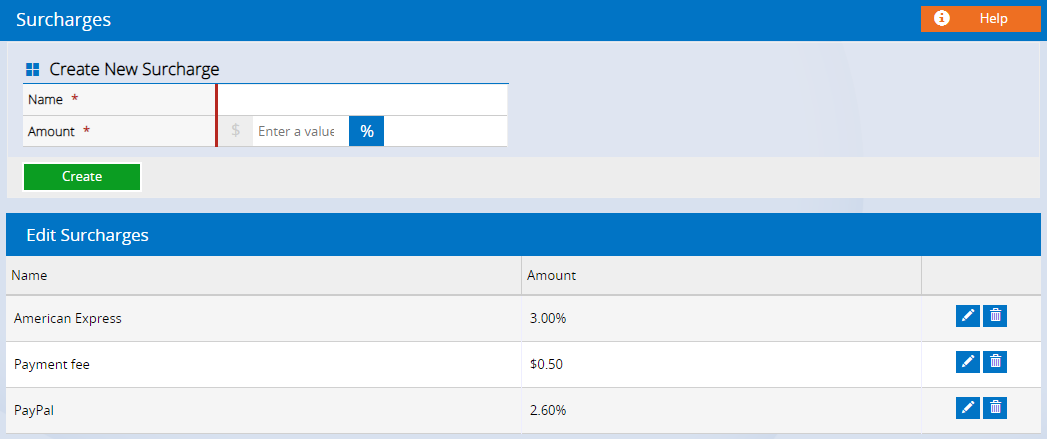
To edit or delete a surcharge:
- Navigate to Settings > Surcharge
- The list of surcharges will be displayed at the bottom
- Click the Pencil icon to edit the surcharge
- Amend the Name or Value as required
- Click the Tick button to save the changes
- Click the Trash Can icon to delete the surcharge altogether
If a surcharge is currently activated against a Payment Type (even if the Payment Type is not enabled) or there are historical orders with the Surcharge, the Surcharge cannot be deleted.
Once a Surcharge has been created it will need to be activated against a Payment Type before it can be used in POS. To activate a surcharge:
- Navigate to Settings > POS Settings > Payment Surcharges
- Select a Payment Type
- Select a Default Surcharge
- Click Activate
If you use the Tyro or PC-EFTPOS integration and require a surcharge against a credit card, you will need to activate the Surcharge against the Tyro or PC-EFTPOS Payment Type. This will prompt the Surcharge confirmation window prior to processing the payment.
Update as of February 2020 - PC-EFTPOS has been renamed to Linkly but is still currently referred to as PC-EFTPOS within the Retail Express application.
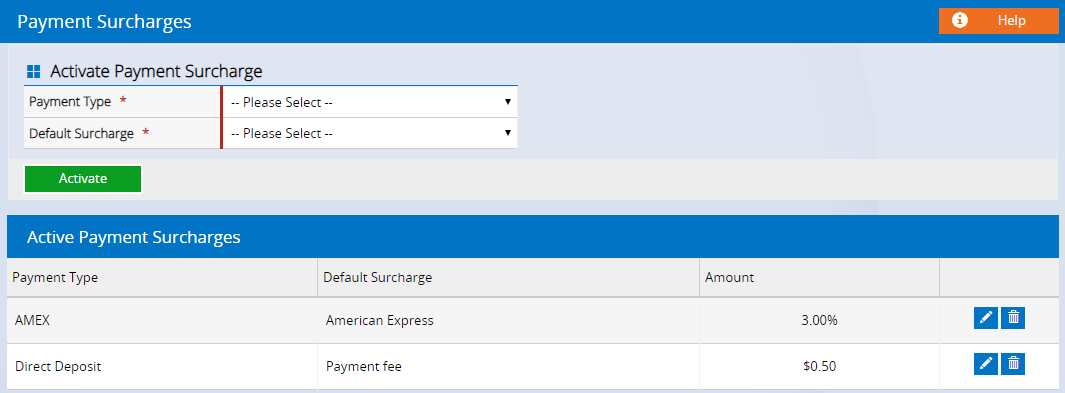
To Edit/deactivate a Surcharge
- Click the Pencil icon to edit the settings (change a Payment Type or Default Surcharge)
- Make the selection as required
- Click the Tick button to save the changes
- Click the Trash Can icon to remove a Surcharge from the Activation list
If a Surcharge is deleted from the Activation list the Surcharge will still exist in the system (it just hasn't been activated). You will need to navigate to Settings > Surcharge to delete the Surcharge from the Surcharges list
- Press OK to the message
- Log out of POS and back in again to refresh the changes
Surcharges are applied when entering a payment for the order on the Payments tab of POS. To add a surcharge to the sale:
- Create a sale as required
- Click the Payment tab
- Add a payment to the sale
POS - Enter Payments against Sales
- The Add Surcharge window will be displayed with the default Surcharge highlighted
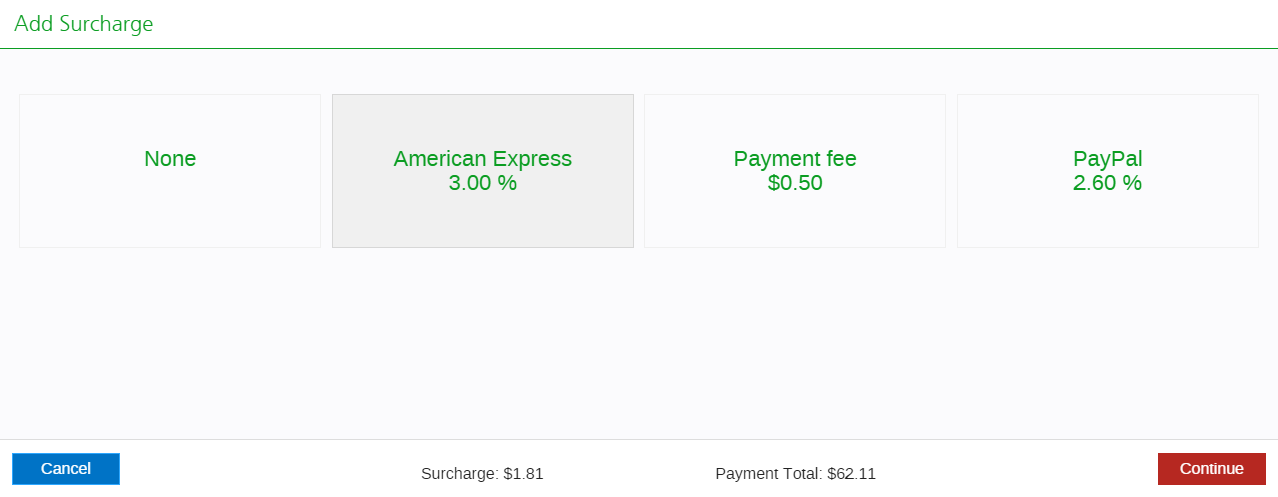
If the window doesn't display you may not have activated the Surcharge, or allocated it against the wrong Payment Type e.g. payments using the integrated Tyro or PC-EFTPOS will need to have surcharges allocated to Tyro or PC-EFTPOS, not individual cards e.g. Visa.
- The Surcharge activated against the Payment Type will be selected by default, to select a different Surcharge click on the required option or click None to remove the Surcharge altogether
- The new Payment Total including the selected Surcharge option is displayed
- Click Continue to accept the updated total, or click Cancel to cancel the payment and surcharge and return to the sale
- If an integrated payment method has been selected follow the remaining prompts to process the payment
- The payment amount and order totals will be recalculated to include the value of the Surcharge (or no change if None was selected)
- Click Finalise to commit the sale
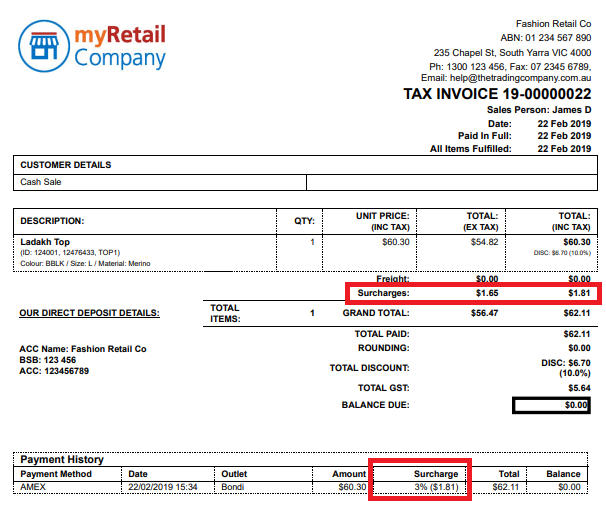
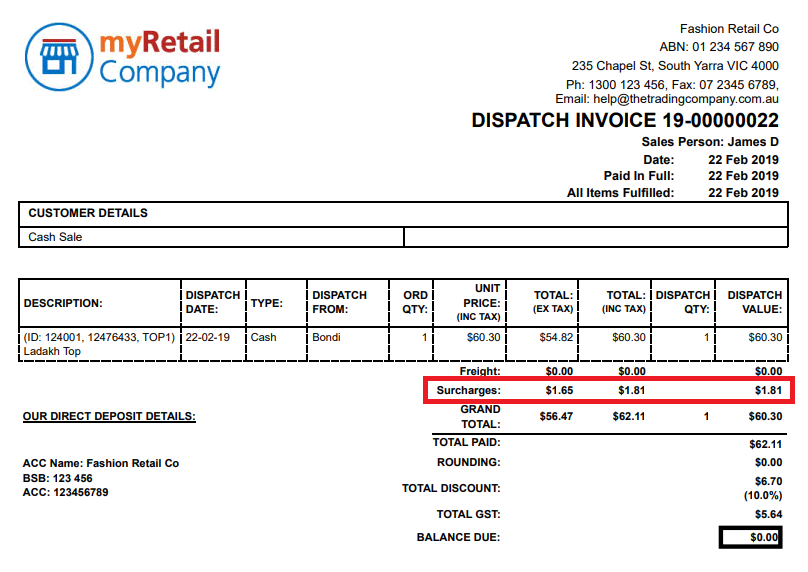
Surcharges will only be displayed if a Surcharge has been created in the system under Settings > Surcharges. Once created the Surcharge line will be displayed on the sales documents, regardless of whether there is a surcharge for the current order.
In order to display Surcharges on the Receipts you will need to update the Hardware Utility. Open the Hardware Utility, a message will be displayed to prompt the upgrade. Refer to the Hardware Utility Setup and FAQ article for more information.
Examples of the Surcharge line can be seen as per below:
Surcharges can be found in the following reports:
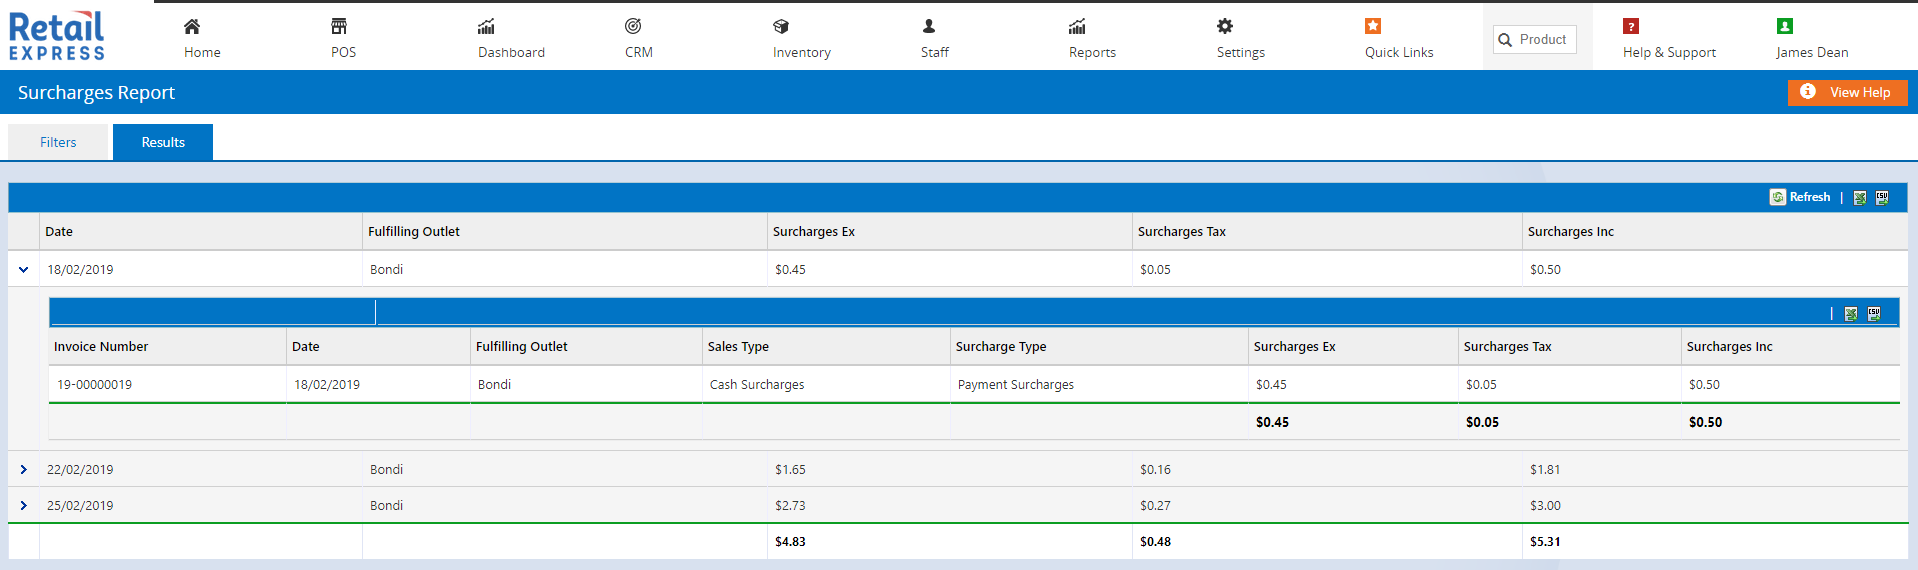
The Surcharges Report is designed to help reconcile your Surcharges against the Financial Summary Report. Using the new report you can filter by:
- Date from/to
- Order Number
- Outlet/s
- Surcharge types
- Sale type (sale, laybys etc)
The report will then display for you information on the order, including the surcharge value (both including and excluding tax, and the tax value itself).
To access the new report, navigate to Reports > Accounting Reports > Surcharges Report
For more information refer to the Reports- Surcharges Report article
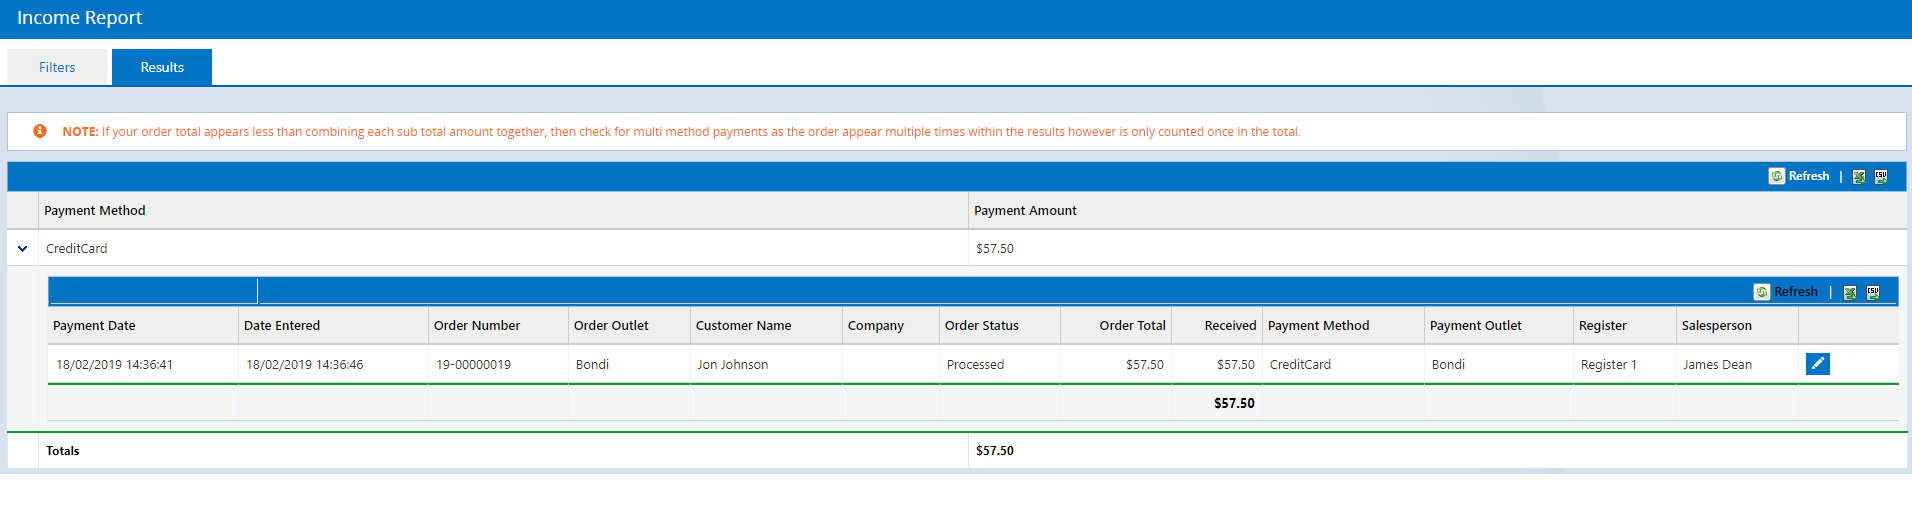
The Income Report doesn't have a dedicated Surcharges section, but note that values displayed include any surcharges associated with the payment.
The Financial Summary Report breaks down transactions into a format used for verification with accounting integrations.
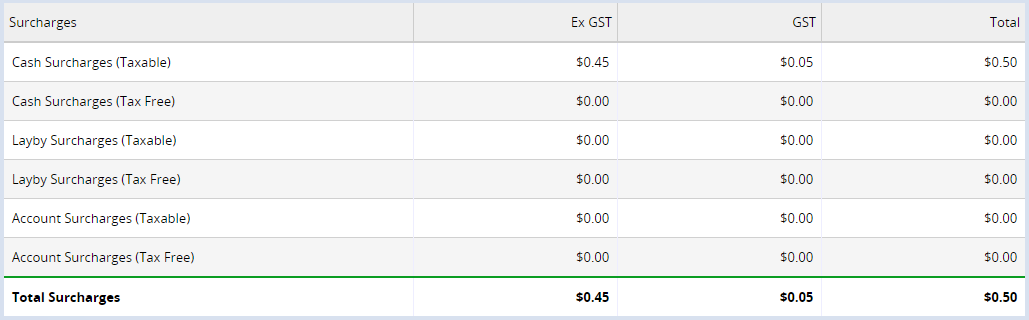
Click here for more information on the Financial Summary Report.
Surcharges can be seen on the Sales Report "Results" tab on both an Outlet level as well as for individual orders. Use the arrows on the left-hand side to expand each section.
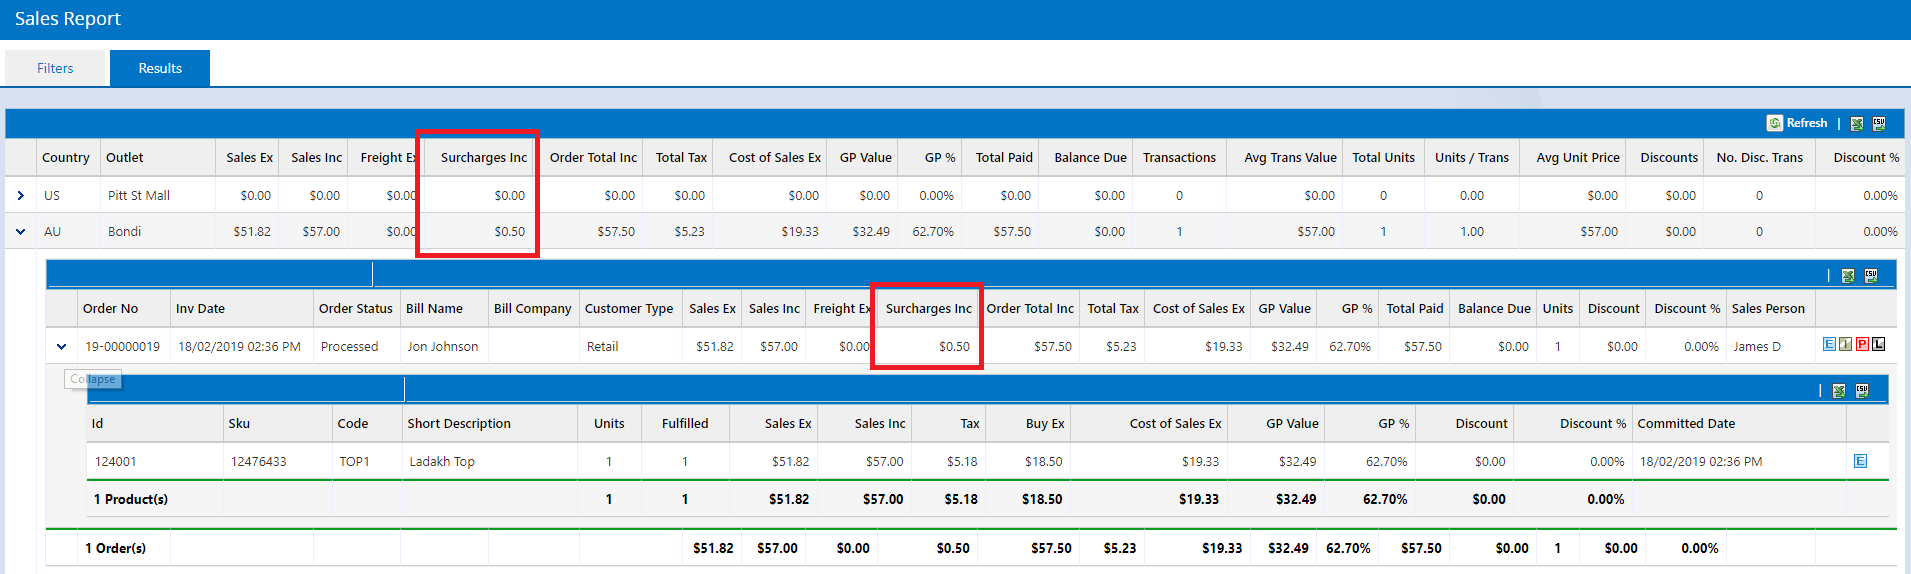
Click here for more information on the Sales Report.
Similar to the Sales Report, the Sales Report (Limited) version reports on sales but without the cost or GP information.
Surcharges are visible on the Outlet level as well as the individual Order.

Surcharges interact with the Accounting Integrations in the following manner:
- Xero:
- The integration will continue as normal until you create a Surcharge
- Once a Surcharge has been created you will need to configure and map a Surcharge GL account.
- If you try to upload the Xero file without a mapped GL account an error will occur
- Refer to the Xero Integration - Setup and FAQs article for more information
- MYOB - Surcharges are included in the export file automatically; no further action is required
Surcharges are not compatible with Accounting Link integrations
Frequently Asked Questions
Surcharges will incur tax if the products on the order are marked as taxable.
When payments with surcharges are removed or reversed on an order the value of the surcharge will be included in the total refunded amount.
However when a new order is created during the refund process, the Surcharge amount is excluded.
Refer to the POS - Process a Refund/Return or Exchange for more information.
Surcharges are not compatible with offline POS. Refer to the Offline POS article for more information.
You can set a default assigned Surcharge which will be automatically selected when the Surcharge prompt window appears at POS.
However you will need to confirm this Surcharge to continue with the sale (you're unable to bypass this step). The prompt also serves as a reminder to staff to highlight the Surcharge with the customer before processing the transaction.
If the Surcharge confirmation window doesn't show in POS when processing a sale you may not have Activated the Surcharge against the matching Payment Type.
For example, if you are using a Tyro or PC-EFTPOS integration the fee should be activated against Tyro or PC-EFTPOS. This will prompt the window to display when that method is selected. After the payment has been processed the information on the specific card used (Visa, Mastercard etc) will continue to flow back to Retail Express as per normal including the surcharge amount

Want more information? Find related articles here:
- Settings - Payment Types
- POS - Enter Payments Against Sales
- POS - Process a Refund/Return or Exchange
- Reports - Sales Report
- Users - Profile Security