You can send newsletters to customers to share promotions, product updates, and store news, helping maintain engagement and drive repeat visits. This improves your retail operations by providing customer communication tools, with properly configured newsletter functionality typically enabling better customer retention and improved customer communication effectiveness.
Understanding newsletter functionality involves recognizing customer segmentation options, content creation requirements, and delivery tracking to help retail operators focus on the right customer communication activities, ensuring your retail strategy consistently drives better customer engagement and promotional effectiveness outcomes.
The Newsletter feature allows you to easily manage and send email communications (commonly referred to as EDMs) to your entire customer database. Email marketing material, inform customers of upcoming promotions or invite them in-store by emailing through a birthday or promotional voucher.
To begin using Newsletters:
- Navigate to Settings > Global Settings > Newsletters
- Set your Display name (who is sending the email) and the From/Reply To address

- Click Save Changes
- Navigate to CRM > Newsletters to open the Newsletter Manager

Understanding the Newsletter Manager Results tab
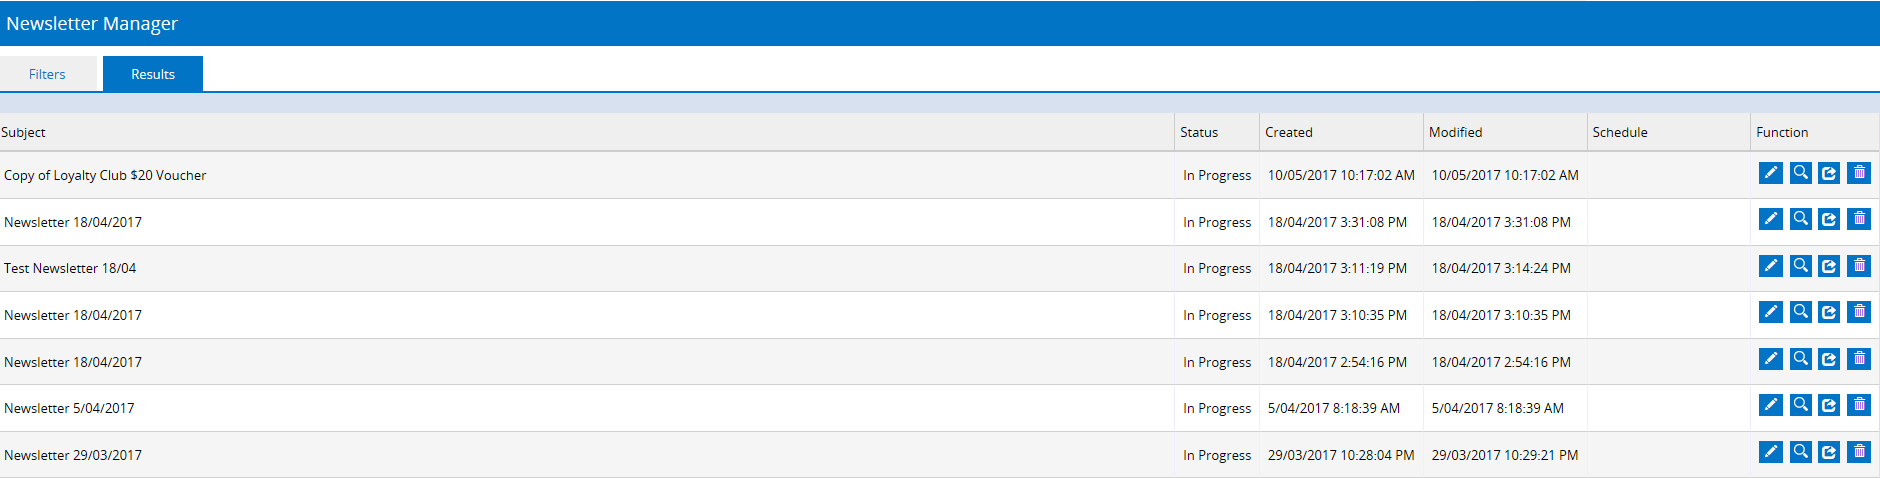
The Newsletter Manager is the central point for your Newsletters, from where you can create newsletters, and view a list of historical ones (with various action buttons).
Columns
Subject | An internal reference for your Newsletter; the default name is "Newsletter dd/mm/yyyy". Ensure the Subject of your Newsletter is relevant. Include the date and keep the Subject naming conventions consistent to ensure it's easy to search or filter. |
Status | Displays the progress of the Newsletter. - In Progress - the Newsletter has not yet been sent
- Sent - Newsletter has been sent
- Scheduled - Newsletter has been scheduled to be sent (refer to the Schedule column for the targeted date)
|
Created | The date the Newsletter was created |
Modified | The date the Newsletter was last modified |
Schedule | The scheduled date and time for the newsletter. Be mindful of when you schedule your Newsletters. If you're choosing a peak time to send your Newsletter (e.g. midnight at Christmas to advise about a Boxing Day sale) your email may not receive due attention amongst all the other email traffic in your customer's inbox. Newsletter broadcasts can sometimes be delayed beyond the scheduled transmission time due to server network queues. Retail Express accepts no responsibility for emails lost in transit. |
Action buttons
The action buttons allow you to quickly perform some actions for your Newsletters.

| The Pencil icon is used to Edit the newsletter. You cannot edit Newsletters that have already been sent. |

| The Magnifying Glass is used to display a Preview of the newsletter |

| The Arrow creates a Copy of your newsletter |

| The Trashcan is used to Delete the Newsletter. This function is not available for Sent newsletters. |
Creating Newsletters
To create a Newsletter:
- Navigate to Customers > Newsletters
- Click New Newsletter
- The Design Newsletter window will open
- Follow the sections below
The Design Newsletter is broken into 4 tabs: Edit, Products, Audience and Review. Follow the sections below to create your Newsletter
The amount of functionality available in the creation and formatting of your Newsletters is vast. In this article, we will cover the basic features, however, for advanced customisation we recommend involving a marketing specialist.
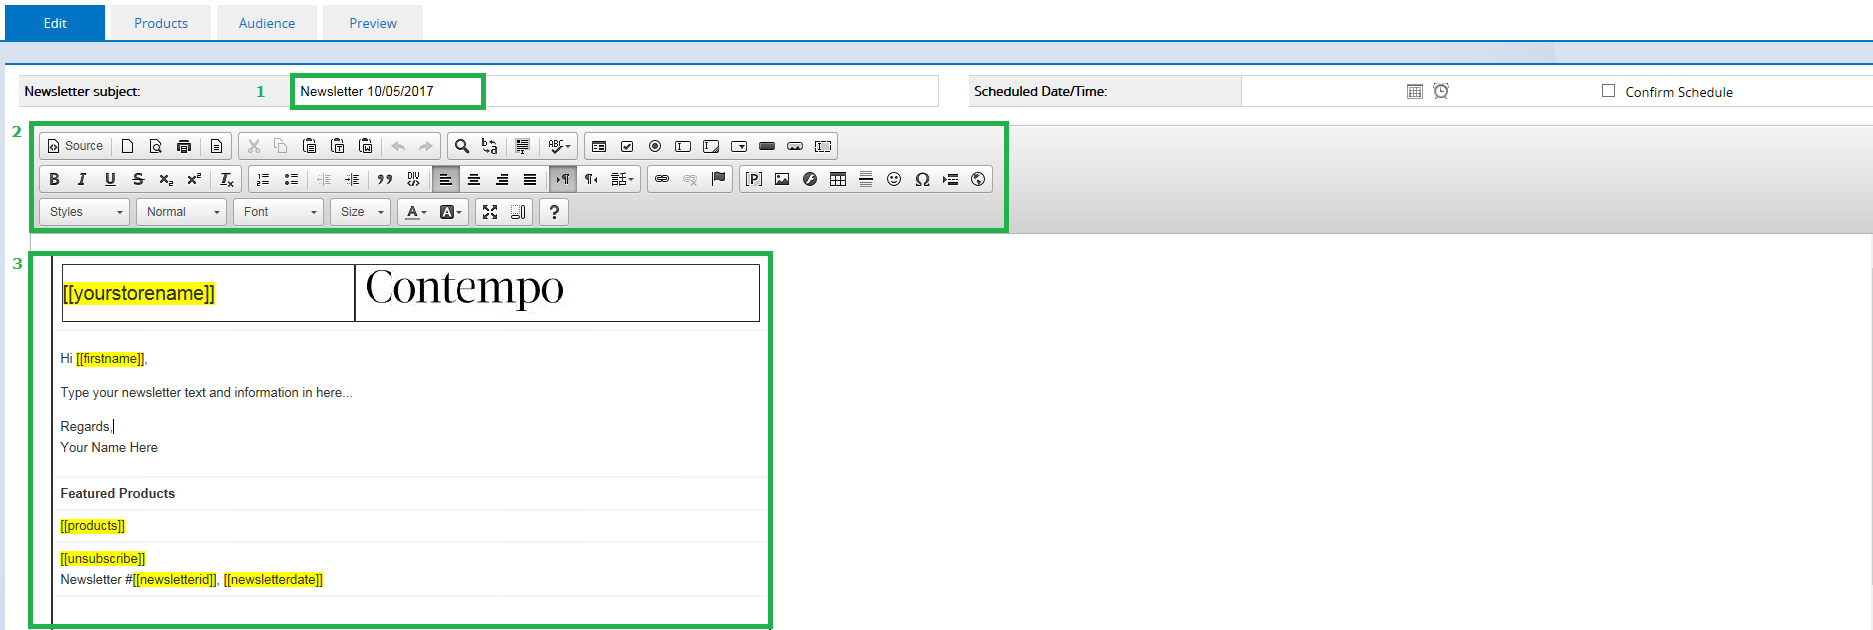
The Edit tab
The Edit tab displays the Newsletter template and allows you to design the layout of your content.
There are 3 sections:
- The Newsletter Subject
- The Style panel
- The Display panel
For advanced Newsletter designs and layouts we recommend using HTML learning tools such as w3schools.com, or consider engaging a Marketing Specialist.
Area | Details |
Newsletter Subject | The Subject line for your email visible to customers in their inbox - it should be catchy to draw their attention |
Editing Toolbar | The Editing Toolbar includes similar functionality within word processing software e.g. Microsoft Word. The most common features are covered below |

| Used to auto-populate information when the email is sent e.g. Customer details, products or even Customer Loyalty Balance. To use a placeholder: - Click the required location in your email where you would like the text to appear
- Click the Placeholder icon
- Select the Placeholder from the drop-down list e.g. Firstname
- Click OK
- The placeholder will be displayed in the email highlighted in yellow
Available Placeholders include: - Customer details (First name/surname/company)
- Products
- Store Name
- Newsletter fields (ID and date)
- Loyalty Points (points available, points-to-date, redemption value and history)
- Gift Vouchers (balance available and Voucher Code)
|

| Used to insert images into the Newsletter. To insert an image: - Click the Image icon
- Click the Upload tab
- Browse to the image location
- Click Send it to the Server
- The image will display in the Image Properties screen
- Click OK
If there are spaces in your image filename the image will not be displayed e.g. My Logo.jpg. Use an underscore or remove the space to display the image correctly e.g. My_Logo.jpg or MyLogo.jpg. Click and drag your image to reposition it within your email. |
Text entry | To enter standard text for the newsletter, click into the required location and enter the text directly into the body |
The Products tab
Select the Products to feature in your Newsletter. These Products will be displayed at the bottom of the Newsletter in the Featured Products section.

Area | Details |
Select your products | Use this option to filter for products using product code, description or a range of filters e.g. Supplier, Product Type etc |
Product PLU | Enter the code to quickly add the product (Product ID or Supplier SKU) |

| Visible once a product has been added, and can be used to edit the description displayed within the newsletter. This will not affect the name of the product anywhere else |

| Used to remove the product from the list |
The Audience tab
Select the Audience for your Newsletter.

The Audience tab allows you to add recipients to your newsletter via three ways:
- Using the Customer Search
- File Upload
- Manually adding recipients
It's always recommended to add your recipients to the database so the subscription settings are retained i.e. if the recipient chooses to unsubscribe from future emails this will be stored against their customer account. See the Unsubscribe section for more information.
Adding email recipients via file upload or manually entering in as a recipient in the newsletter will not add them as a customer. You can do this easily using the Customer Mass Upload feature, or directly from withinBack Office.
You can also add customers using the Customer Activity Report.
Select Audience via Customer Search
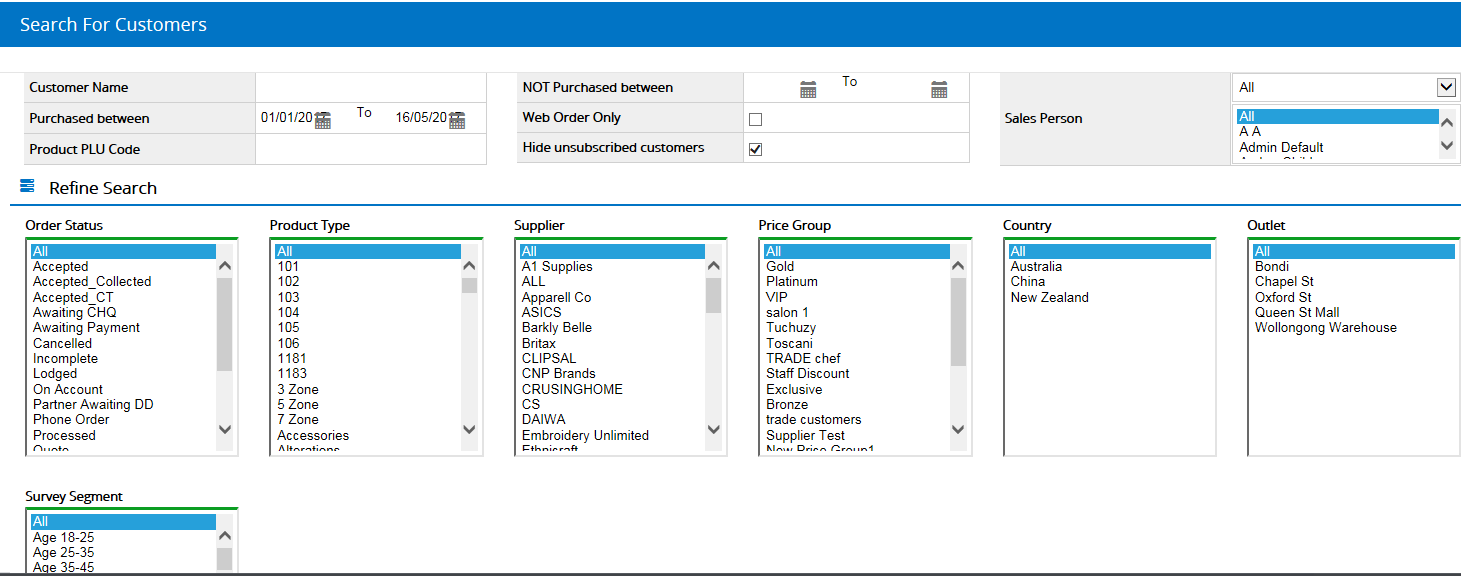
Use Customer Search to filter your current Customer database to select the Newsletter recipients. Common ways to filter your customers include:
- Purchased between - enter a date range to target customers that purchased from you during this period.
- NOT Purchased between - enter a date range to target customers that haven't purchased for you during this period - a great option to invite customers back into your store!
- Product Type and Supplier - select these options to filter for customers that have purchase specific Products
- Survey Segment - select customers based on your POS Survey Segment details. For more information on Survey Segments please see:
Select Audience via File Upload
Use this option to upload a list of customer details in Excel format.
This method is ideal when you've selected a specific set of customers that should receive the email. For example, you can download your customers using the Customer Mass Download feature, and narrow the recipient list using this file. You can then copy and paste the appropriate customer information into the Newsletter template for the recipient list.
It's strongly recommended that using a customer list from an external method you create the customers within Retail Express e.g. if collecting email addresses from a signup form. Otherwise, your customers will not be able to unsubscribe from future emails, a legal requirement in Australia (refer to the Spam Act for more information).
Uploading recipients into the Newsletter list will not create the contacts as customers. You can upload your new contacts easily using the Customer Mass Upload feature, or directly from within Back Office.
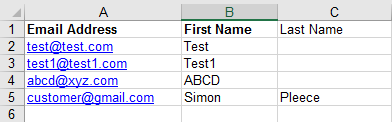
To use the Upload feature:
- Click Get Excel Template to download a copy of the Template file used to import your customers
- Update the template with your Customer's email address and names
You can either manually type these in or use the Copy & Paste feature in Microsoft Excel.
- Save the Template on your computer
- Return to Retail Express
- On the Audience tab click the Browse button in the Upload field
- Select the File saved in step 3
- Click Upload
- Your customer list is displayed for review
- Use the Delete (trashcan) icon to remove a Customer from the list.
Select Audience via Add Recipient (customers not in your database)
Use this as an option to manually add individual recipients quickly e.g. if sending to a very small list.
It's strongly recommended that you also create the customers within your database. Otherwise, your customers will not be able to unsubscribe from future emails, a legal requirement in Australia (refer to the Spam Act for more information).
Manually entering an email address in this field will not create the contact as a customer. You can upload your new contacts into your database easily using the Customer Mass Upload feature, or directly from within Back Office.
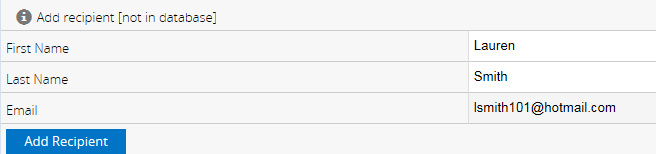
To manually add a recipient:
- Enter a First Name
- Enter a Last Name
- Enter the Email
- Click Add Recipient
- Click Save Changes
Enter your own email address so you receive a copy of the newsletter too.
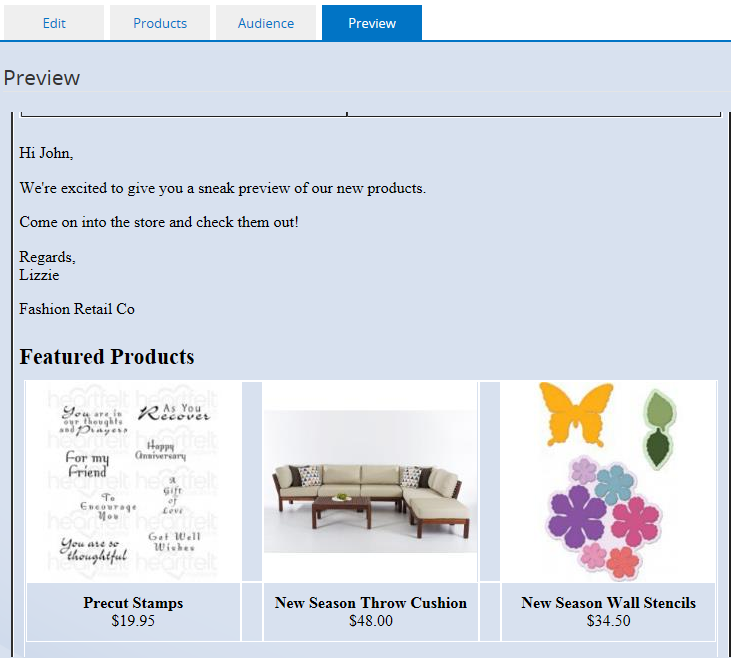
The Preview tab
This tab allows you to review your Newsletter and make final changes prior to scheduling. Return to the Edit, Products and Audience tabs to edit as required.
The blue background is the default screen background, and will not be included with the email.
You can also preview the Newsletter from the Newsletter Manager Results tab (when searching for newsletter campaigns) by clicking the Magnifying Glass icon.
Scheduling newsletters
Once you're happy with the look and feel of the Newsletter, return to the Edit tab and set your Scheduled Date/Time > tick Confirm Schedule > click Save Changes.

The newsletter will begin sending at the scheduled time.
Unsubscribing to newsletters
In the footer of the email, you can use the [[unsubscribe]] placeholder to automatically insert a link for the email recipient to unsubscribe from future emails (a legal requirement in Australia under the Spam Act).

(Pictured: unsubscribe placeholder in the newsletter footer)
For customers to be able to unsubscribe they must exist as a customer in your database. Adding email recipients via file upload or manually entering in as a recipient in the newsletter will not add them as a customer. You can do this easily using the Customer Mass Upload feature, or directly from within Back Office.
When adding a customer via the Customer Search or the Customer Activity Report methods, the customer account will be checked for the mail subscription settings. If the customer has previously unsubscribed they will not be added to the newsletter recipient list.
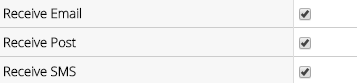
(Pictured: Customer subscription settings in the customer account)