Lay-by transactions allow you to allocate stock to a customer, holding that stock while the customer repays the full amount in incremental transactions.
Prior to launching Retail Express you can enter any existing Lay-by transaction from your previous system. Typically these Lay-bys are entered in the week leading up to launching Retail Express. Otherwise once entered any additional payments received by customers would need to be entered in the current system and Retail Express, to ensure that both systems are up-to-date.
Prerequisites:
Before proceeding you will need to ensure the following steps have already been completed:
- The Lay-by Products uploaded into your Retail Express database (typically this is done during the Implementation, but if required you can create new products)
- Your Customers uploaded into the Retail Express database (alternatively these can be created in POS as you create each sale)
- An enabled Payment Type to allocate the payment against
Using the "None" Payment Type will allow you to finalise the transaction without taking a physical payment, and allow you to separate the payment on the Income Report.
Creating Lay-by transactions
To enter an existing Lay-by:
- Log into Retail Express
- Open POS
- Click New Sale and enter the code for the staff member who originally made the sale
The sale should be entered against the original staff member to ensure that Staff reports are accurate; if this is not required you can use any valid staff member code
- Add the products to the sale
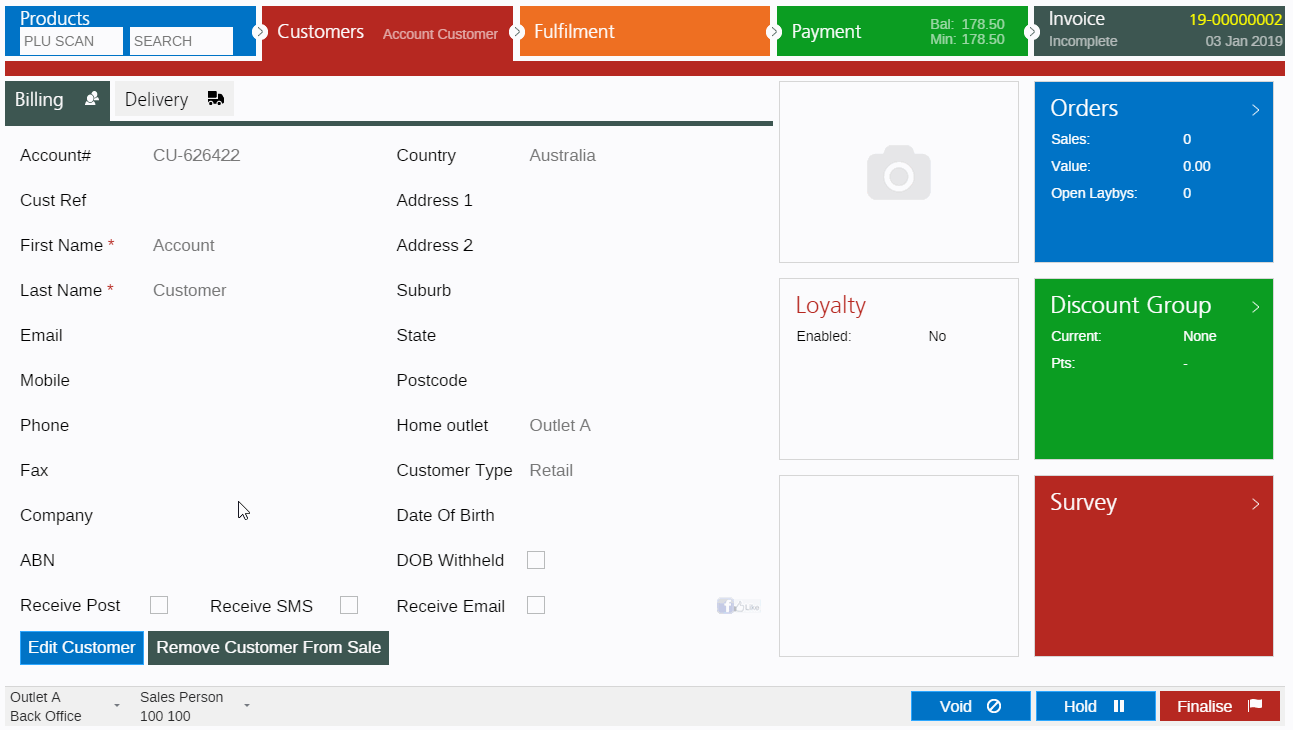
- Click the Customer tab and add the customer to the sale
- Click the Fulfilment tab and change the Fulfilment Method to Layby

- Change the Dispatch quantity for any of the items that have already been provided to the customer e.g. if the customer ordered 10 but has taken 5, enter the remaining 5 into the Dispatch field
- Click the Outlet/Register field at the bottom of the screen to modify the Order Date to the date of the original order.
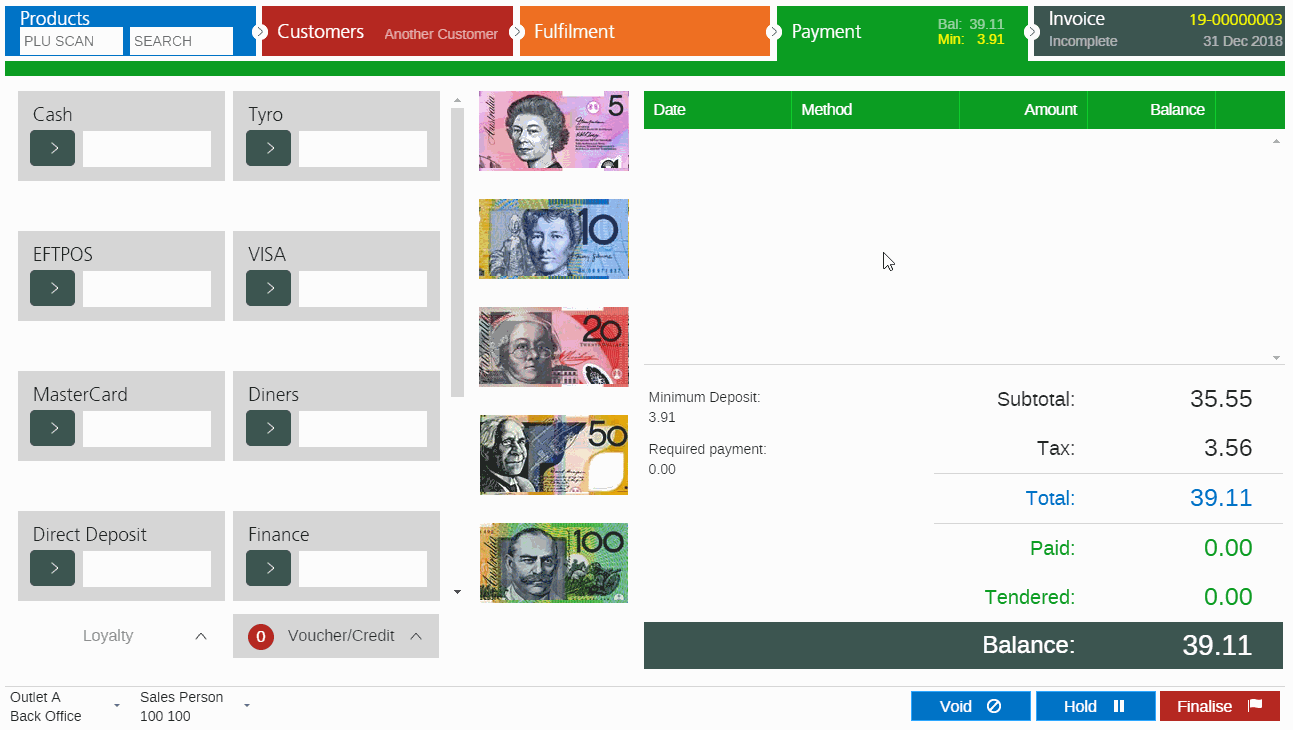
- Click the Payment tab and enter any payments that have been received against the sale
Using the "None" Payment Type will allow you to finalise the transaction without taking a physical payment, and allow you to separate the payment on the Income Report.
- Change the Payment Date to the original date the payment was received by double clicking on the payment
- Click Finalise to finalise the sale
- Repeat for any additional Lay-bys
Refer to the POS - Create a Layby/Layaway sale article for more detailed information on entering laybys.
Finalisation (end of day/stock levels)
As a result of entering historical transactions your system will have:
- Recorded payments to be reconciled through the POS End of Day/Cash up process
- Reduced Stock levels for any products added to the sales
Once all historical transactions (including any Credit Notes and Vouchers) have been entered you should process the following:
- End of Day/Cash Up
- Inventory Adjustment - this can be done either via a Stock Take or Mass Upload; refer to the article on Setting your starting Inventory Levels for more information
If the End of Day/Cash Up is not completed all historical payments will appear in the first End of Day processed in Retail Express. This may make it difficult to reconcile.