You can improve transfer planning and inventory accuracy through the stock allocation stage in Retail Express, which reserves inventory at the source location before physical dispatch and supports more controlled transfer workflows. This transfer allocation step helps retail operators prevent overselling and maintain accurate available stock levels, particularly valuable for Australian retail operations managing complex warehouse operations or high-volume transfer activities.
The transfer allocation functionality in Retail Express enables retail operators to systematically reserve stock for pending transfers, helping ensure accurate inventory availability for sales while coordinating inter-store stock movements. This allocation workflow helps ensure your retail operations maintain reliable stock availability across outlets while supporting efficient transfer processing and accurate inventory tracking throughout the transfer lifecycle.
Find related articles at the bottom of this page.
Action and progress your stock internal transfer to the next stage using the Advanced Method. The Advanced Method for managing Transfers allows more flexibility by providing extra statuses for holding of stock.
To Allocate a Transfer navigate to Inventory > Transfer Management > Allocate
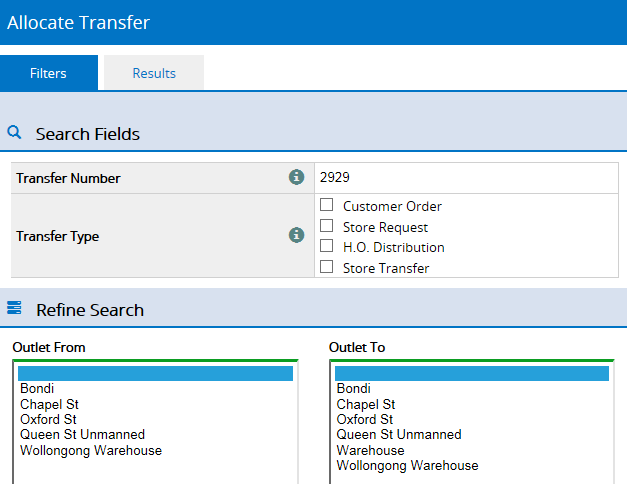
Special Filters
Most of the filtering fields are self explanatory, however see the detailed information below for the more advanced fields.
Transfer Number - entering a transfer number in this field will ignore all other search options. A transfer number that is not available to be moved to the Allocated status will return no results.
Transfer Type - limit the results to only the ticked Transfer Type. Multiple options can be ticked
Apply filters as required > click Search.

Sorting of the columns will refresh the page and erase any quantities you have entered. Ensure to apply sorting prior to entering any quantities.
View this report in-page, print or Export to Excel.
Action the Transfer
There are two options for actioning the transfer:
- enter quantities directly into the Allocated field, OR
- click Copy Across to process in bulk - the Requested Qty is copied into the Allocated field
Print - print a copy of the list if you require a physical copy to physically check stock availability.
Enter Allocated quantities as required > click Save Changes to update the inventory. This move the status of the Transfer to the next stage = Allocated
If you find you cannot access one of the Transfer statuses, it may be because the transfer was created via the Simple Method.
Simple Transfers - only progress through the statuses Proposed > Dispatched and Made Available.
Advanced Transfers - can progress through ALL statuses: Proposed > Request > Allocate > Pick > Dispatch > Receive > Make Available
You can identify the method used upon creation by editing the Transfer and viewing the Mode.

