You can build customer databases and enable relationship tracking through creating new customers during sales in Retail Express POS, which enables capturing customer information at point of sale for future engagement and service. This customer creation capability helps retail operators grow customer databases and enable loyalty programs, with effective new customer capture typically improving customer retention opportunities and supporting relationship building across Australian retail operations.
New customer creation in Retail Express enables retail operators to capture customer details during transactions, helping establish customer records supporting future personalized service and targeted communication. This customer capture helps ensure your retail operations can build comprehensive customer databases while providing seamless checkout experiences and supporting long-term customer relationship strategies.
Adding a customer to the sale offers many benefits within POS, including the ability to recall the sale later, gather customer information for your mailing lists (if agreed to), create loyalty programs for return business and more.
You can add comments to customer accounts either as Public (appears on the invoice) or private (for internal purposes only). Refer to the Customers - Public/Private Comments article for more information.
Did you Know?:Using Back Office you can manage your customers in bulk, including creating and editing customers. Refer to the Customers Mass Download article for more information.
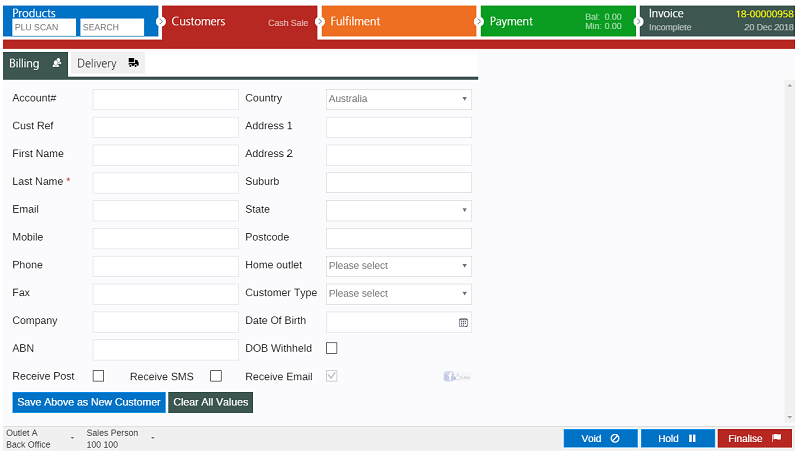
Create a new customer
To create a new customer while in a sale:
- While in the sale click on the Customers tab
- Enter the customer information into the input fields (required fields are marked with a red asterisk - these must be completed before the customer record can be created)
- To add a Delivery Address for the customer click on the Delivery tab (to match the details to the Billing information tick As Billing)
- Click Save Above as New Customer to save the customer to the database
- The Customer Account Number field will be updated
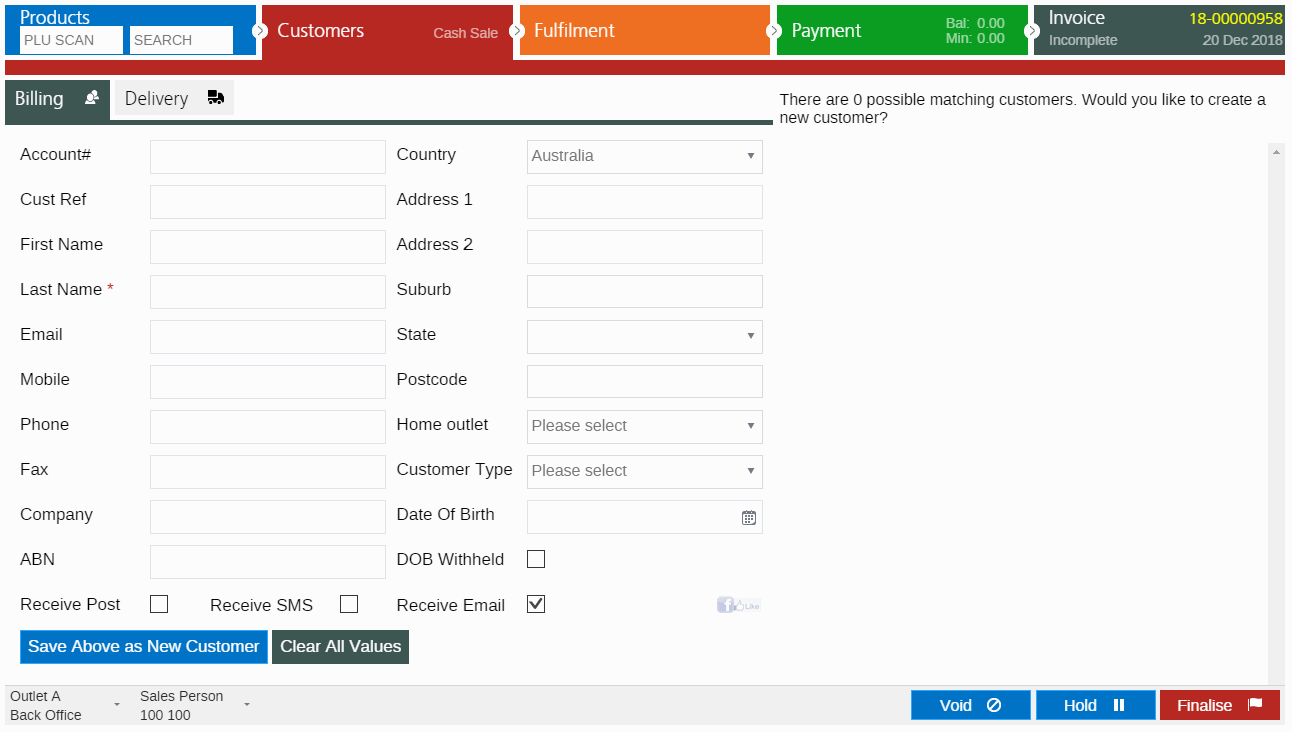
Customer Fields
Field | Description |
Account # | A unique number generated by Retail Express to refer to the customer (used for internal purposes) |
Cust Ref | Used to enter a Loyalty, VIP or Membership club number for the customer. You can either type a number, or if using pre-printed loyalty cards scan the barcode from the card into the field. Refer to the Loyalty Configuration article for more information. |
First Name | The customer's first name |
Last Name | The customer's last name |
Email | The email address for the customer. Where you have multiple customers that use the same address (e.g. a husband and wife) you can control the setting that restricts/enables the ability to enter a duplicate email. Refer to the POS Settings - Customer Settings article for more information. If you have an eCommerce integration (e.g. Shopify) this may impact your integration, so please take care when amending these settings. |
Mobile | The customer's mobile phone number |
Phone | Phone Number |
Fax | Fax Number |
Company | The Company associated with the customer |
ABN | The Customer's ABN (Australian Business Number) |
Country | The country of the customer. By modifying this field the address fields will be modified to be region-appropriate i.e. the address fields may display Town or Suburb, State or County, Post Code or Zip Code. |
Address 1 | The first address line for the address |
Address 2 | The first address line for the address |
Town/Suburb | The Town or Suburb |
State/County | The State or County |
Post code/Zip code | The Post Code or Zip Code address for the customer. This field uses a predictive search engine to quickly search for matching address fields and display the code and related Suburb/Town. |
Home Outlet | Associate the customer to a specific outlet for marketing and reporting purposes. |
Customer Type | This field is used for reporting purposes e.g. analysing your sales results based on different types of customers. Create new Customer Types (and select a default option) through the Customer Type settings. |
Date of Birth | The Date of Birth of the customer - this may be used to create a promotion down the track e.g. 10% for birthday presents to customers. |
DOB Withheld | Tick if the customer has the option to withhold their information |
Receive Post | Tick to subscribe the customer to post-marketing e.g. brochures |
Receive SMS | Tick to subscribe the customer to SMS marketing |
Receive Email | Tick to subscribe the customer to Email marketing e.g. newsletters |
Facebook Like | Clicking this button will send an email to the customer with a Facebook Like request to like your company's Facebook page. |
Related Articles
Point of Sale Operations: