You can customize email communications for invoices and receipts in Retail Express using template management, helping your retail operations maintain professional, branded customer correspondence. This capability allows you to create personalized email templates with your business messaging and formatting, which helps reinforce brand identity while ensuring customers receive clear, professional transaction documentation.
Setting up effective email templates enables your retail team to communicate consistently with customers across all touchpoints, helping optimize customer communication and brand recognition. This helps retail businesses maintain professional standards in digital correspondence while reducing the time needed to send invoice emails from the POS.
You can create custom Email Templates used to email Invoices and Receipts to your customer.
Creating a new Email Template
To edit a Template:
- Navigate to Settings > POS Settings > Email Templates
- Click New Template to create a new template
- Complete the fields as required
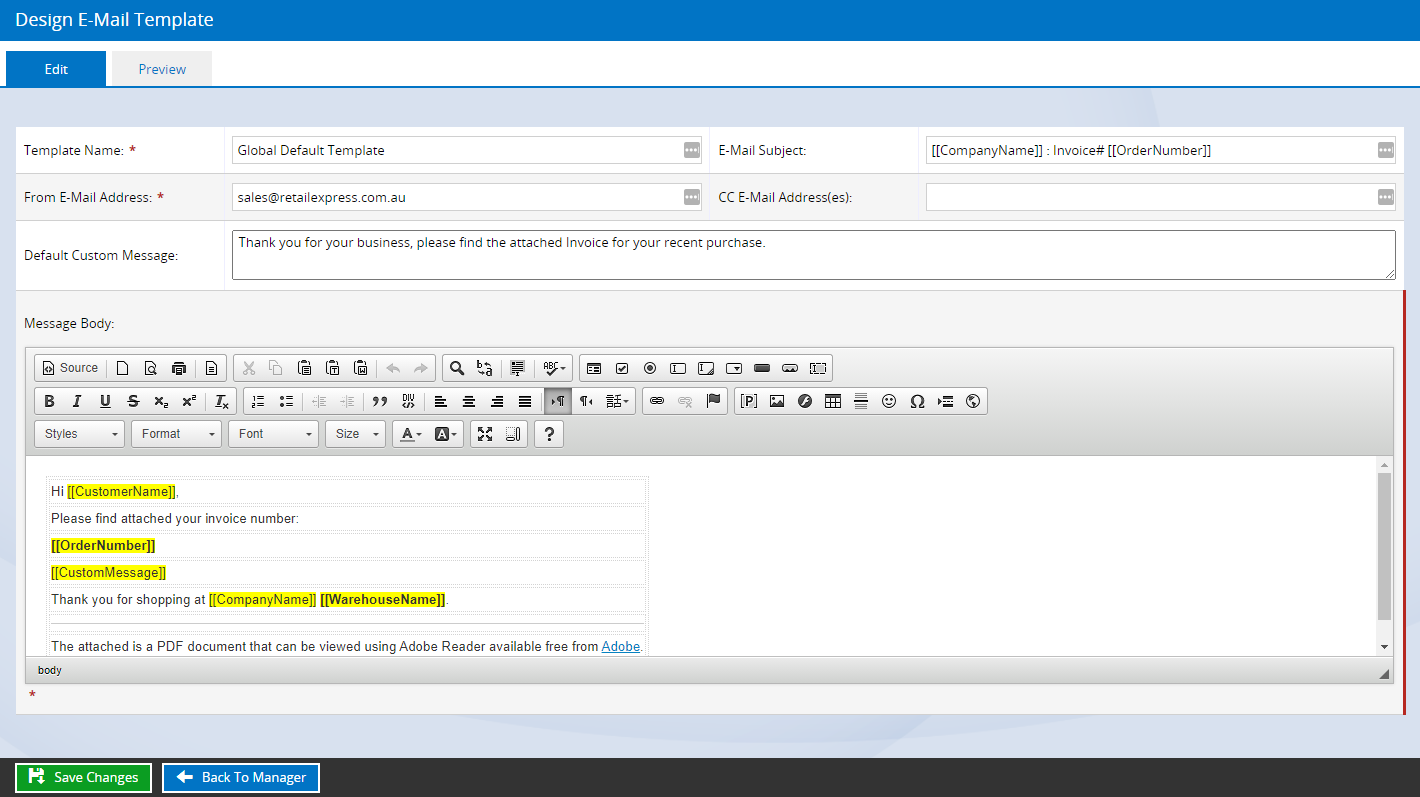
- Click the P Placeholder button to select and enter a Placeholder e.g. selecting "Customer First Name" will automatically insert the customer's first name from their account when sending the email.

- Click Save Changes to save the template
- Retail Express supports entering multiple CC email addresses when sending invoices, receipts, and other order-related emails from POS.
- Multiple CC email addresses can be entered by separating them with a comma ( , ) or semicolon ( ; ).
- All CC recipients will receive a copy of the email and any attached documents sent from POS.
Using Email Templates
To use your new Template in POS:
- Open POS
- Create a Sale
- On the Invoice tab select your new Template from the Template drop down
- Update the remaining email fields as required
- Click Send Email
Frequently Asked Questions
When sending emails from POS all mail is delivered via a central Retail Express server. This means there is no ability to see what has been sent or not sent out.
If you want to track the emails sent from the POS to ensure they have sent, we recommend using one of your "in store" email addresses as the default CC address in the email template. This will include you on every invoice sent out, and you will be able to see the customer email address it was sent to.
This feature is also available for supplier emails when sending out purchase orders. To assign a default CC address to purchase orders navigate to Settings > Global Settings.
- Navigate to Settings > POS Settings > Email Templates
- Edit a template using the process above
- Add your email address to the CC Email Address(es) field

- Log out of POS
try and use a CC email address different to your "From" email address. Some mail providers will detect when sending to/from the same address and will reject the mail upon receipt (due to a suspected email loop).