Find FAQs and related articles at the bottom of this page
Using images on your web store correctly can engage your customers and make a substantial difference to your revenue.
Do it wrong and you can slow down your site, affect the reputation of your brand, and turn your web store into a poor user experience for your clients.
When it comes to optimising and saving your images, there are three things you need to consider:
- Image file format
- Image dimensions (i.e. pixels)
- Compressing your images
There are really only two different file types that you should be concerned about for your web store:
- JPEG - best used for photos or images with lots of colour; compressed image that slightly reduces quality to produce a significantly smaller file size
- PNG - simple images or when transparency is needed (logos etc);uncompressed so higher quality but a larger file size
On your web stores you will find the majority of your images should be saved as JPEGs.
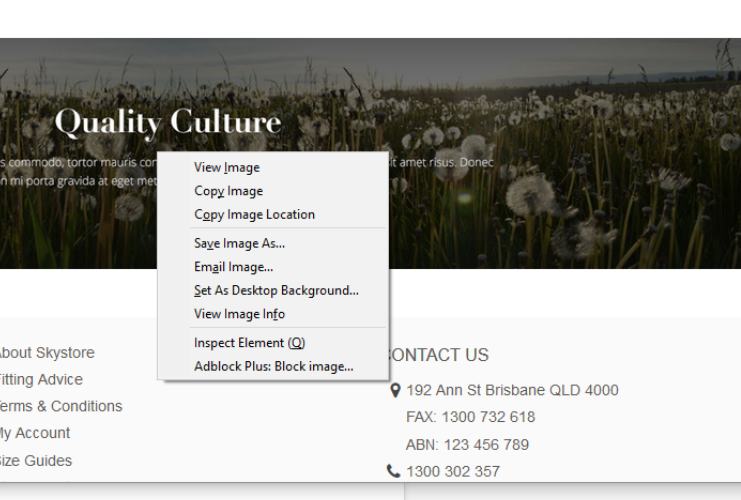
Use the guide below to find information on using a browser to view the size for the images.
Simply right click on the image that you want to see the size of and select "Inspect Element" from the menu that appears.
This will bring up the browsers development tools, which allow you to see the code that makes up the page being displayed, and the HTML for the item you right clicked will be highlighted in the code.
If you mouse over the highlighted part of the code, the image true size (highlightedc in green) will appear above the code, while the image display size (highlighted in red) will be displayed over the actuam image on the page.

To replace the image, you will need to get an image made to the same dimensions as the true size (highlighted in greeen).
For Internet Explorer you will need to right click on the image you want to know the dimensions for and save it to your computer.

Once the image has been downloaded, browse to it in Windows Explorer and right click on the image, and select Properties from the drop down.

In the "Properties" window, go to the "Details" tab at the top and you will see listed in the details the "Dimensions", which is the width and height together, as well as the Width and Height listed separately below (highlighted in Green).

If your supplier is providing your product images they may also provide you with web-friendly imagery, in which case that's great and your job may have been done for you. Typically they will just give you a standard media kit however, and the responsibility to prepare these for your web store will fall to you.
Likewise, if you're producing your own product images, you will need to ensure that you don't take these straight out of the camera. Cameras these days can produce some high quality images, however the file sizes are not appropriate for your web store. You may wish to do some tweaks to the images themselves anyway before putting them online, such as cropping and lighting adjustments.
There are plenty of tools available that you can use to compress your images, including online options.
Some of the best tools available on the market are:
- Photoshop, although this can be an expensive option (PC and Mac), includes a handy "Save for Web" option
- GIMP is a tool similar to Photoshop, and available free online (PC only)
- Tiny PNG (free web app to convert the images)
- JPEG Mini (both PC and Mac options)
- Irfanview (PC only and available for free)
You should refer to the documentation for each tool on the method used to compress the images
FAQs
If you find that you have a lot of unused images in your media folders you can remove them from the same window as you would use to add images to pages.
Simply go to CMS > Pages or CMS > Static Blocks to get to the page where you edit the content of the block or page and click on the "Insert Image" button.

Once in the media folder popup, all you have to do is select the image you want to remove and a "Delete File" button will appear in the top right corner. Press the button to remove that image.
Please do not mistake with the "Delete Folder" button, as that will remove all images from the folder.
If you accidentally delete the folder, you will need to restore these files from a backup.
