You can transfer retail financial data to MYOB accounting software by extracting data from Retail Express and uploading it to MYOB using standard import procedures, enabling integration between systems. This helps optimize your accounting efficiency by providing a systematic approach to moving sales, purchase, and payment data from your retail operations into your accounting system for financial reporting and compliance.
Extracting and uploading accounting data involves generating appropriately formatted extracts from Retail Express, preparing the data according to MYOB import requirements, and importing files into MYOB. When you follow proper extraction and upload procedures, you can expect reliable data transfer supporting accurate financial records, time savings compared to manual entry, reduced errors through structured data formats, systematic accounting workflows enabling regular synchronization, and maintained financial accuracy supporting business decisions and compliance.
Version Notes: The Accounting Data Export feature exports MYOB files formatted for direct upload to MYOB Desktop v19+ and MYOB AccountRight 2018+.
This article refers to integrating manually using MYOB format files to either MYOB Desktop or MYOB AccountRight with a local file.
Before you begin
- If this is your initial upload to MYOB, ensure your MYOB file is set up correctly for integration - see Accounting Data Export - How to Setup MYOB
- Retail Express uses a default GL Account list that cannot be individually configured (you can change your existing GL codes in your accounting system to match if you require transactions to appear directly in your existing accounts). Refer to the Accounting Data Export - How to Setup MYOB article for more information.
- As of February/March 2023, we now present accounting data as already inclusive of tax (for applicable transaction types). This is to avoid rounding discrepancies previously incurred when the accounting package calculated tax independently, sometimes resulting in small variances between each system’s “tax-inclusive” total.
Export files from Retail Express
- Log into Retail Express
- Navigate to Settings > Integrations > Accounting Data Export
- Click Download Setup Files to access the installation files
- Use the Filters as required to refine the results

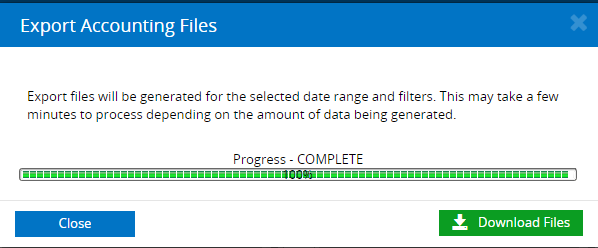
- Click Export Accounting Files to export the selected transactions
- Click Start Processing
- The file will be created according to the selected options and filters.
- Once the file has been processed ready for download click Download Files
Filters
Most of the filters are self-explanatory, however, see the detailed information below for the more advanced filtering explanations.
| Field | Details |
| Export Date From/To | These dates are inclusive and relate to the date the transaction was entered into Retail Express e.g. if you entered a payment on the 1st of July but backdated the payment to 30th of June, you will need to extract the 1st of July to extract the payment. |
| Accounting Method | Only the Accrual Method is supported - please confirm this method suitability with your bookkeeper or accountant. |
Transaction Types
| Transaction Type | Details |
| Sales | Two files are generated for sales:
- ServiceSales will include a summarised daily transaction for stock fulfilled, as well as surcharges, layby, debtors and voucher movements.
- ReceiptPayments will include Summarised daily payments for all transactions, except for direct debits which upload individually.
|
| Purchases | The ServicePurchases file includes a summary per purchase order. Once received, a purchase will be created with total costs for items, miscellaneous costs and freight. Any duty applied to purchase orders will be in the GeneralJournal file |
| Transfers |
Inter-store transfers are included in the GeneralJournal file.
Transfers between stores will run through an ?In Transit? account on the date of dispatch at the sending store and the date of receipt at the receiving store
|
| Stock Adjustments | Included in the GeneralJournal file, consists of the buy price value for all adjustments including manual, stock take and mass upload. Cost adjustments will result in adjustments to correct stock value |
| Cash Variances | Included in the GeneralJournal file, journaled as a daily total to an expensing account |
| Petty Cash/Money In Money Out | Included in the GeneralJournal file, journaled as a daily total to a clearing account for expensing |
Back to top
Extract the Export Files
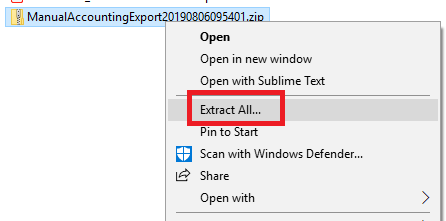
Retail Express exports the files in a compressed format so the file is smaller and faster to download. Before importing these files into MYOB, these files will need to be extracted.
📋 Note: If you don't extract the files you will be unable to import the files into MYOB.
To extract the files:
- Open the location where your files were downloaded
- Right-click the downloaded file
- Select Extract All
- Select a location for the files to be extracted to
📋 Note: Remember this location when selecting the files to be imported into MYOB
- Click Extract
Back to top
Uploading Journals
The GeneralJournals.TXT file will include:
- Stock adjustments
- Inter-store transfers
- Cash up variances
- Petty cash
- Duty on purchases
To begin the upload:
📋 Note: It is recommended that you take a backup of your MYOB file before performing any new import
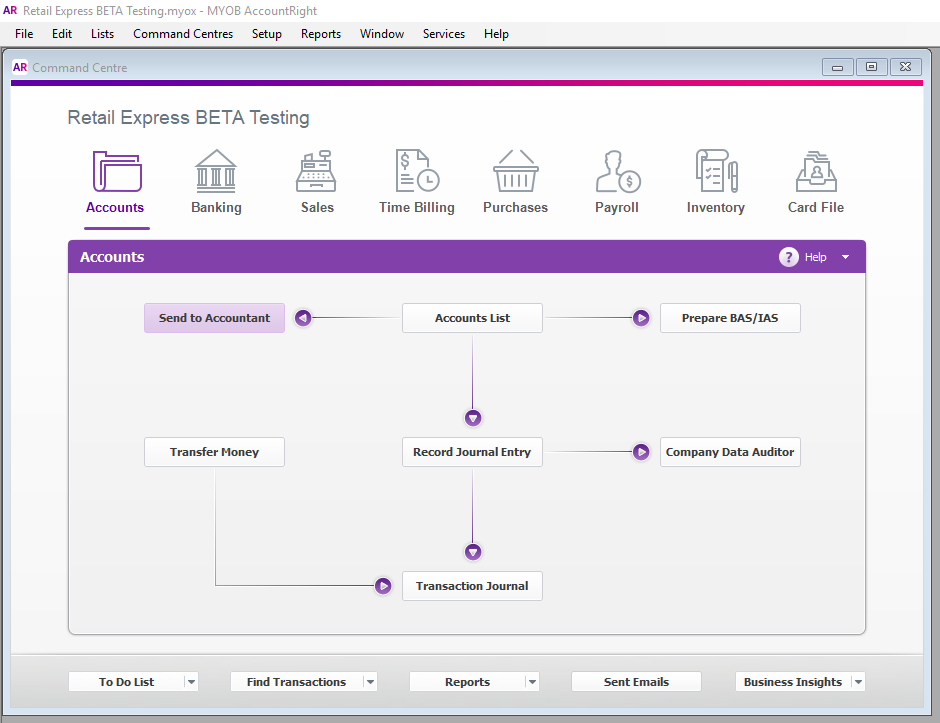
- Open MYOB to the main screen

- Navigate to File > Import/Export Assistant
📋 Note: For MYOB Desktop navigate to File > Import Data > General Journal Entries
- Select Import Data
- Click Next
- Select General Journal Entries from the Import drop-down
- Click Browse
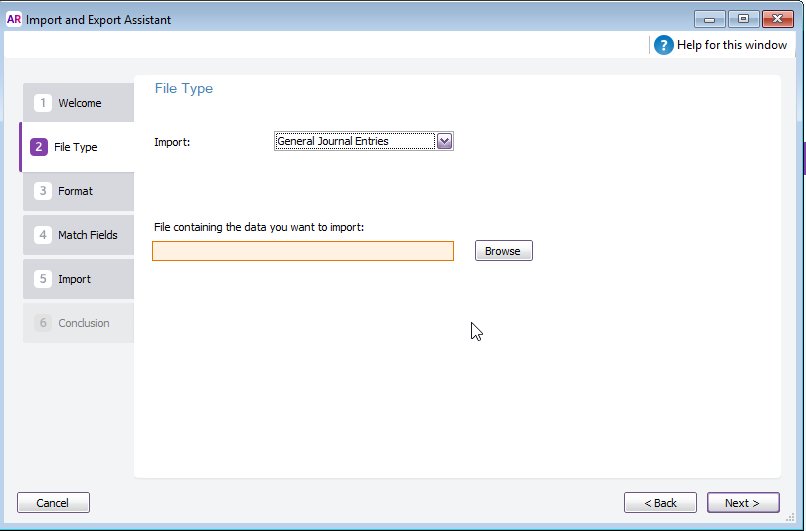
- Navigate to the location of the saved GeneralJournals.TXT file exported from Retail Express
- Click Next
- You will be prompted to configure the import format
📋 Note: Once these settings have been selected initially they should remain selected automatically during future imports
- Select Commas from the "Data is separated by" option
- Select Headers or Labels

- Click Next
- The Match Fields screen will be displayed
- Select Auto Match
📋 Note: For MYOB Desktop select Match All
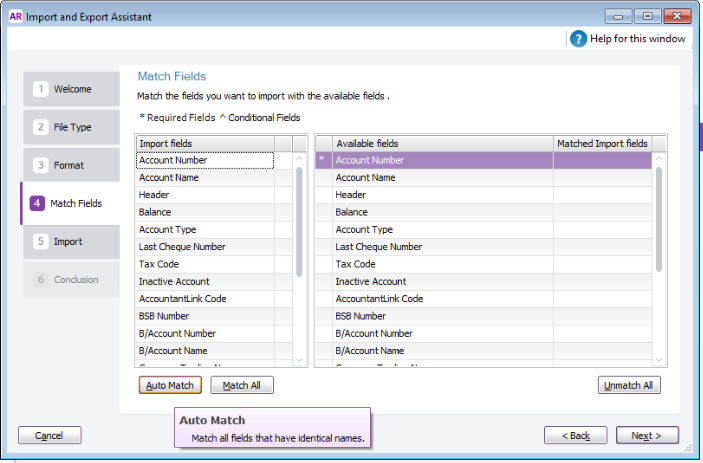
- Click Next
- You will be prompted to create a Backup prior to importing the data
📋 Note: We always recommend creating a backup prior to import
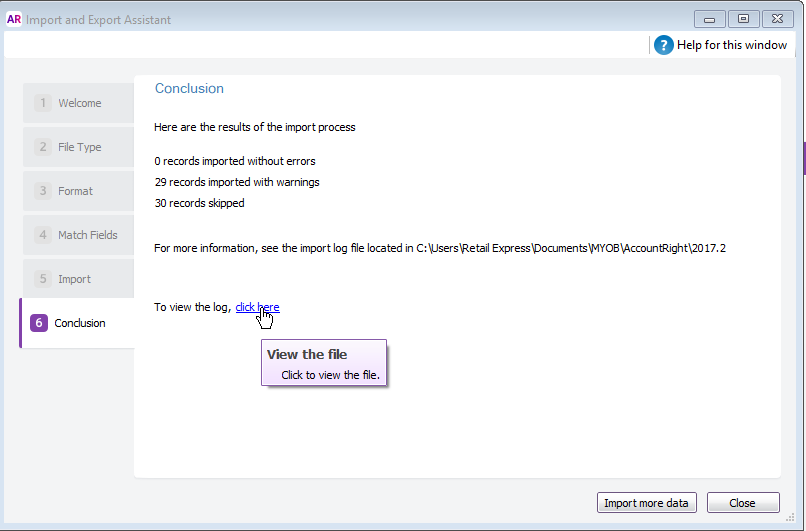
- Once the import is complete the Conclusion screen will be displayed providing a summary of the number of records imported successfully, and any warnings or errors.
- Click the link to view the log file if required
Uploading Purchases/Bills
To begin the upload:
📋 Note: it is recommended that you take a backup of your MYOB file before performing any new import
- Open MYOB to the main screen
- Navigate to File > Import/Export Assistant
📋 Note: For MYOB Desktop navigate to File > Import Data > Purchases > Service Purchases
- Select Import Data
- Click Next
- Select Purchases from the Import drop-down
- Select Service Purchases
- Click Browse
- Browse to the location of the saved ServicePurchases.TXT file
- Click Next
- You will be prompted to configure the import format
📋 Note: Once these settings have been selected initially they should remain selected automatically during future imports
- Select Commas from the "Data is separated by" option
- Select Headers or Labels
- Click Next
- The Match Fields screen will be displayed
- Select Auto Match
📋 Note: For MYOB Desktop select Match All
- Click Next
- You will be prompted to create a Backup prior to importing the data
- Once the import is complete the Conclusion screen will be displayed providing a summary of the number of records imported successfully, and any warnings or errors.
- Click the link to view the log file if required
📋 Note: As the discount and payment terms are held against the supplier in MYOB you will likely receive warnings that the default values have been used for these fields. This is expected as this information is not available for export from Retail Express.
📋 Note: If you have entered the same supplier invoice number on two different purchase orders in Retail Express, the second purchase order will be rejected by MYOB and you will have to enter it manually.
Uploading Sales
To begin the upload:
📋 Note: It is recommended that you take a backup of your MYOB file before performing any new import.
- Open MYOB to the main screen

- Navigate to File > Import/Export Assistant
📋 Note: For MYOB Desktop navigate to File > Import Data > Sales > Service Sales
- Select Import Data
- Click Next
- Select Sales
- Select Service Sales from the Type drop-down
- Click Browse
- Browse to the location of the saved Servicesales.txt file
- Click Next
- You will be prompted to configure the import format
📋 Note: Once these settings have been selected initially they should remain selected automatically during future imports
- Select Commas from the "Data is separated by" option
- Select Headers or Labels
- Click Next
- The Match Fields screen will be displayed
- Select Auto Match
📋 Note: For MYOB Desktop select Match All
- Click Next
- You will be prompted to create a Backup prior to importing the data
- Once the import is complete the Conclusion screen will be displayed providing a summary of the number of records imported successfully, and any warnings or errors.
- Click the link to view the log file if required
Uploading Payments/Receipts
📋 Note: Sales should be imported before Payments
To begin the upload:
📋 Note: it is recommended that you take a backup of your MYOB file before performing any new import
- Open MYOB to the main screen

- Navigate to File > Import/Export Assistant
📋 Note: For MYOB Desktop navigate to File > Import Data > Receipts > Receive Payments
- Select Import Data
- Click Next
- Select Receive Payments
- Click Browse
- Browse to the location of the saved ReceiptPayments.TXT file
- Click Next
- You will be prompted to configure the import format
📋 Note: once these settings have been selected initially they should remain selected automatically during future imports
- Select Commas from the "Data is separated by" option
- Select Headers or Labels
- Click Next
- The Match Fields screen will be displayed
- Select Auto Match
📋 Note: For MYOB Desktop select Match All
- Click Next
- You will be prompted to create a Backup prior to importing the data
- Once the import is complete the Conclusion screen will be displayed providing a summary of the number of records imported successfully, and any warnings or errors.
- Click the link to view the log file if required
📋 Note: MYOB does not allow payments (refunds) to be applied to credits through the upload. If your total sales for the day in a specific store are negative, for example, if you refunded more than you sold, you will need to enter the refund manually
Related Articles
Reporting & Analytics:
Purchase Orders & Suppliers: