You can efficiently update multiple products simultaneously through Mass Download capabilities in Retail Express, which enable exporting product data to Excel, making bulk edits offline, and re-importing updated information. This bulk editing approach helps retail operators reduce administrative time for catalog updates, with effective mass download use typically achieving faster product maintenance and improved data accuracy across Australian retail operations.
Mass Download functionality in Retail Express enables retail operators to manage large-scale product updates systematically through familiar Excel workflows, helping ensure efficient catalog maintenance and consistent data quality. This bulk editing capability helps ensure your retail operations can efficiently update pricing, attributes, or other product details across hundreds or thousands of products while maintaining data accuracy.
The Mass Download feature is an efficient way of managing your products en-masse using Microsoft Excel.
Products are downloaded from Retail Express, where data can be updated, and even new products added. The file is then uploaded back into Retail Express using Mass Upload, where the changes are then applied to the products.
Tips to Using Mass Download
The following tips will assist you with using the Mass Download file to edit your products efficiently:
- Keep a copy of the file as a backup
- Timing is everything
- Changing Supplier SKU
- Understand the File Structure
Keep a copy of the file as a backup
The Mass Download file is a great way to keep a copy of product data as a backup.
We strongly recommend that before making any changes to your products that you keep a separate copy of the file. That way if any errors are made during the upload process you can use the backup copy to restore the data back to what it was.
Timing is everything
The data is current at the time of downloading the products from Retail Express. Stock quantities fluctuate as transactions are made - Sales, Transfers etc. The quantities could be incorrect even minutes after the file has been downloaded!
When you upload the file back into Retail Express the option to update Inventory is unchecked by default to protect you from inadvertently uploading incorrect data. However if you choose to update the inventory levels when uploading the file we recommend:
- Removing the rows for products that shouldn't be updated (don't remove any columns)
- Deleting the Outlet tab if you don't want to change the Inventory quantities for those products
Changing Supplier SKU
The Product ID is a code automatically generated by Retail Express when the product is uploaded into this system. This column must not be modified, otherwise you risk inadvertently updating the wrong product.
As a bonus, this column gives you the option to update the Supplier SKU easily for products - just ensure you tick the option when performing a Mass Upload.
Understand the File Structure
The Mass Download file is structured in a very specific manner:
Spreadsheet Tabs | Tabs are automatically created depending on the settings selected in Retail Express before the file was downloaded: - Product Master (global product information that applies to all Outlets - refer to the "Main" tab for a product in Retail Express)
- Outlet tabs (if selected)

|
Quantities | The Available stock quantity will only be found when including Outlets in the Mass Download file - click the "Refine Search" filter to select the Outlets to include in the file before downloading the file. The Mass Download does not include Allocated stock |
Rows | Each product is listed on a single row - for example this Ladakh Top available in Size Large, Navy/Red colour.

|
Columns | Each column displays unique information about the product. At the top of the spreadsheet you'll find crucial information: - The type of data e.g. Text
- Character limit e.g. 50 chars
- Reference Only fields i.e. fields that are used to identify the product and should not be modified

The first three columns are frozen so you can still view the product codes as you scroll to the right |
Removing any of the rows/columns will change the file structure; the file will not be able to be uploaded into Retail Express to apply changes to products.
Downloading Products from Retail Express
To download products using the Mass Download:
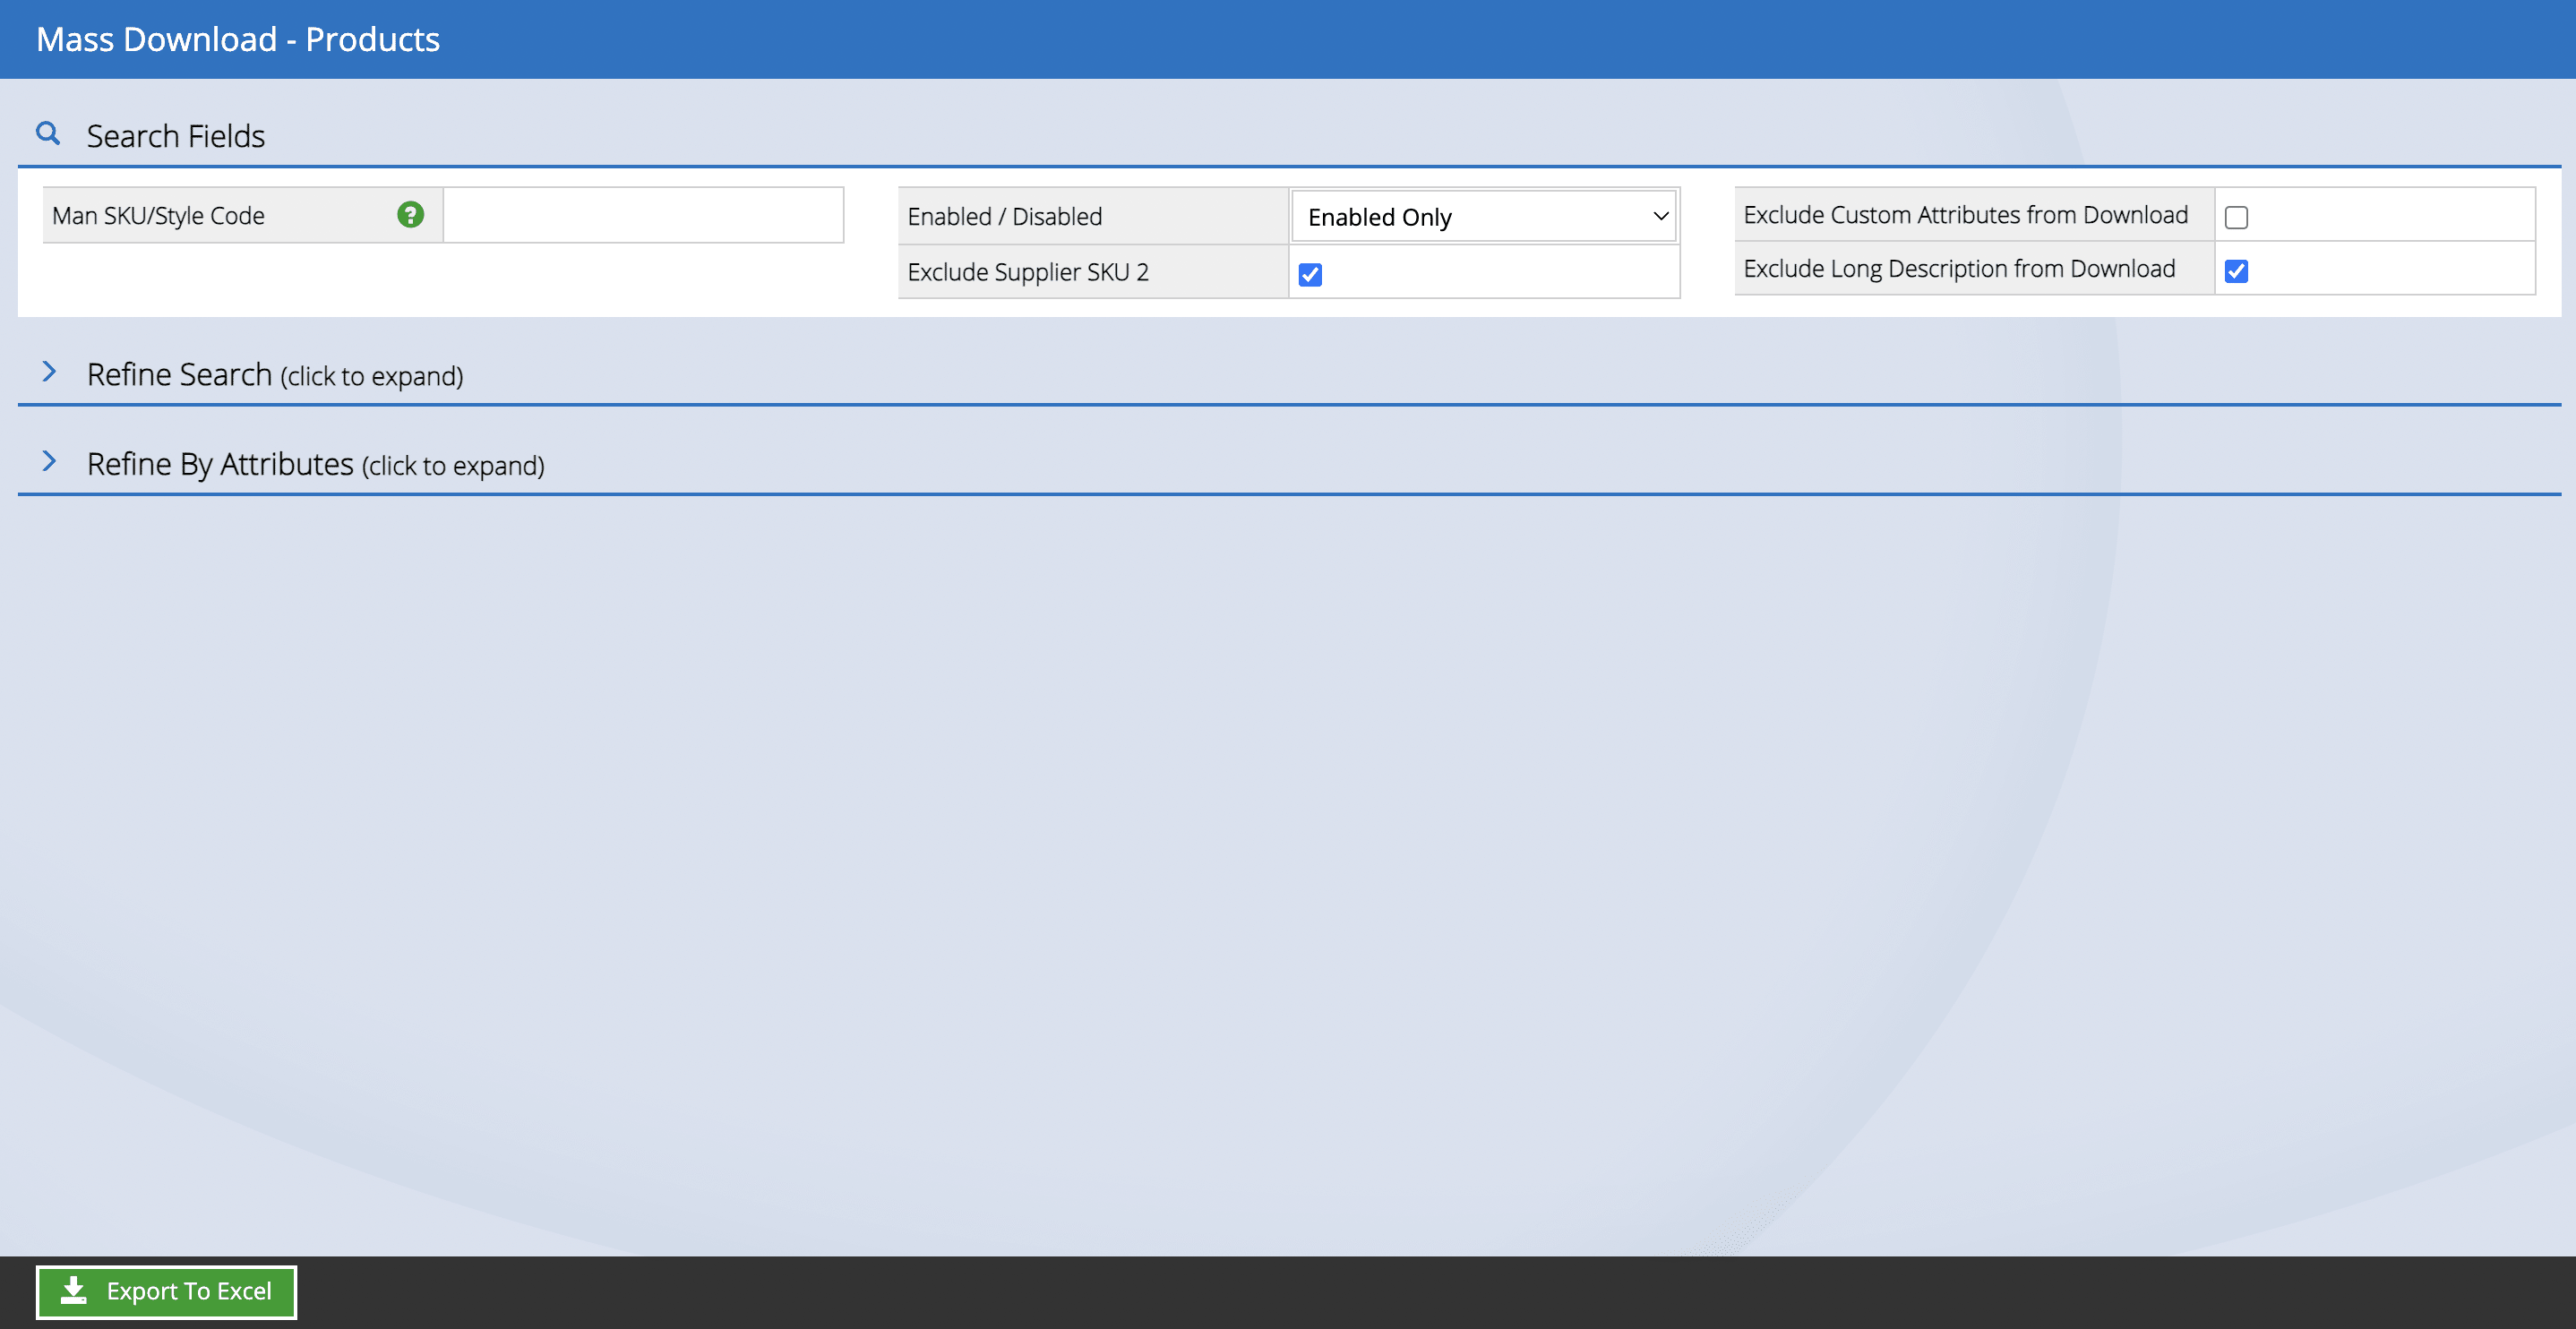
- Navigate to Inventory > Mass Download
- Use Enabled/Disabled to select whether you would like to include products as required
- To include Custom Attributes, Supplier SKU 2 or Long Description (legacy field) untick the fields as required
- The File Format field will select the new .xslx file format available in Excel version 2007 or newer; if using an older version you will need to select .xls from the drop-down
- Click Refine Search to target specific products
Use the Outlet filter to include Outlet-specific product data in your export e.g. Outlet-specific buy/sell prices, quantities etc.
- Use Refine By Attributes to filter by product attributes
- Use Man SKU/Style Code search filter to search for products using either the Manufacturer SKU or the Style Code
- Click Export to Excel
- Depending on your browser settings you may be prompted to select a location to save the file, or it will automatically download to your preferred Downloads location
Editing Products using Microsoft Excel
When editing the file in Microsoft Excel there are three actions you can perform:
Update data | Type the new value into the cell to replace the existing data with the new one. e.g. change the product name from "Ladakh Top" to "Summer Top" by entering the new name in the cell

|
No change required | If there is no change required to the data you can either leave it as-is or delete the contents (excluding the Product ID - required to indicate which products should be updated |
Remove data | For some product information you can remove the product data altogether e.g. colour, custom fields etc. To remove data enter "CLEAR DATA" into the cell - this will be identified during the upload and removed from the product In the example below the existing contents of the "Custom1" field will be removed.

|
To edit the products in Excel:
- Open the file downloaded in the previous step
Save a copy of the file as a backup
- If prompted click Enable Editing
-

- Update the product as required using the Actions described above
If modifying an attribute you will need to ensure the attribute exists in Retail Express first e.g. Product Type
- To create a new product at the same time as editing existing products you will need to enter
- Supplier SKU
- Short Description
- BuyPriceEx (Weighted Average Buy Price)
- POS Price (the price you will be selling the product for)
- ProductType
- Supplier (the Supplier Code as per the Supplier Settings) - To edit Outlet-Specific information (e.g. promotional prices) click the tab with the name of the Outlet
- Update the Outlet fields as required
The only mandatory field required on the Outlet tab is the Supplier SKU field
- Save the file
Upload changes made using Mass Download
To apply the changes to the file you will need to use the Mass Download feature:
- Navigate to Inventory > Mass Upload
- Click the Mass Upload tab
-
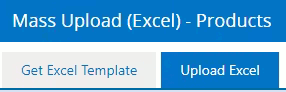
- Click Browse for File
- Locate the file saved previously
- Tick Update the Supplier SKU using the Product Id option if you have made changes to the Supplier SKU for any of the products
- To update product quantities tick the option Update Inventory
- To update existing product Buy Ex/Direct Cost values, tick the checkbox Updated Costs.
- Click Upload
For more information on using Mass Upload, including upload errors, refer to the Using Mass Upload article.