You can configure Retail Express to print labels on standard A4 label sheets like Avery products using regular office printers, providing cost-effective labeling for retailers without dedicated label printers. This helps optimize your retail operations by enabling product labeling with existing equipment, reducing hardware investment, and providing flexibility for occasional labeling needs.
Using Retail Express you can print A4 labels for your products using a standard printer and A4 Label sheets sold in all common stationery stores. These labels can be used for easily scanning products in POS or during a stocktake, and fulfilling sales to send to customers.
You can create multiple different layouts within Retail Express, so you can have multiple labels of varying sizes for different product ranges.
The article below will explain how to configure your Internet Explorer print margins ready for label printing.
Configure Margins
To configure your printer you will need to do the following:
- Install the Printer following the instructions provided by your manufacturer (typically this is provided on a CD with the printer, although most providers also have installation files and drivers on their website)
- Set the printer's margin settings to the lowest possible width (you may need to refer to your Manufacturer's support material for information on how to achieve this)
The browser margins ensure the A4 label prints appropriately on the labels. In addition to the labels, this can affect any A4 printouts from Retail Express, including Purchase Orders, Transfers and Invoices.
Browser margins are configured differently for each browser. To configure your margins, click the link for the appropriate browser below.
For information on supported browsers please refer to the Hardware & Software Requirements.
- Press Ctrl+P or click the three dots in the upper right corner and select Print

- Click More settings
- From the Margins drop-down select "Custom"
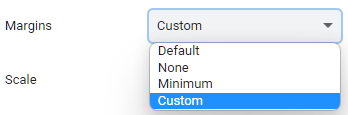
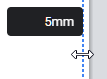
- Click and drag the dotted lines in the preview to the required margin
- Press Ctrl+P or click the three dots in the upper right corner and select Print

- Click More Settings
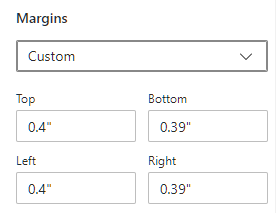
- From the Margins drop-down select "Custom"
- Enter the margin amounts as required
- Click Print
- Press Ctrl+P and click the Menu and click Print
- Click More Settings
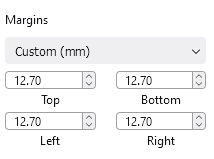
- From the Margins drop-down select "Custom"
- Enter the margins as required
- Click the File menu and click Print
- Click the Show Details icon
- In the Paper Size drop-down select "Manage Custom Sizes"
- Click the + symbol to add a margin setting
- Click OK
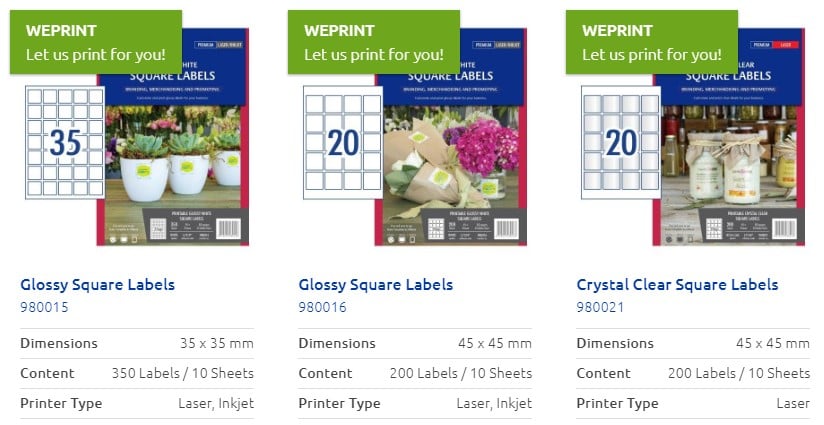
Choose an A4 Label Sheet
Your business requirements will determine what type of A4 label sheet you require - for example:
- Size (height & width)
- Shape (Square, rectangle etc)
- If it's compatible with your printer (depending on whether you're using an Inkjet or Laser Printer you may only be able to use specific types of labels)
Retail Express allows you to create multiple label types, so you may wish to switch between different styles depending on the products
You will be able to purchase your labels from any common stationery provider.
Choose a Label template
Retail Express provides several presets already configured to match two of the more common Avery A4 sheet styles. These can be selected for use if they match the label that you're going to be using.
To select a preset template:
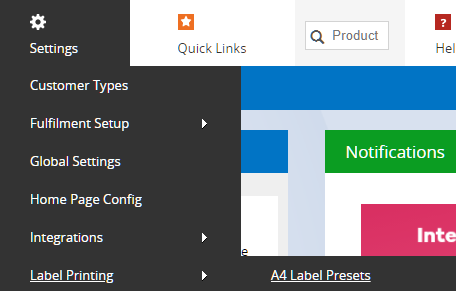
- Navigate to Settings > Label Printing > A4 Label Presets
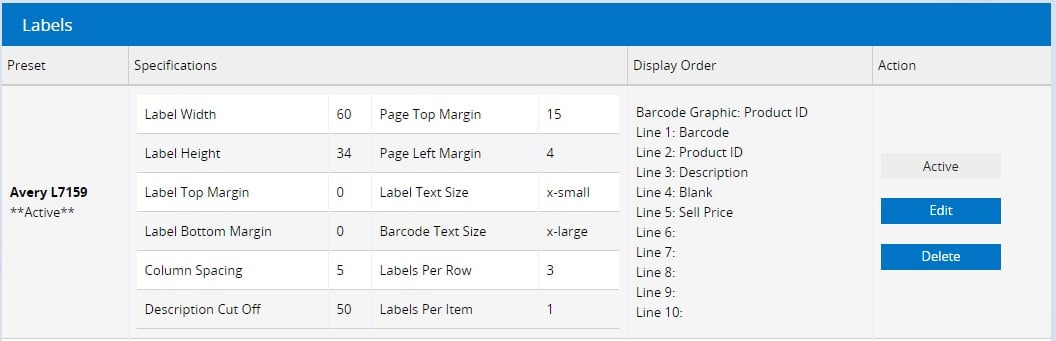
- Review the Specifications column to determine if one of the existing presets will match your labels (if not you can create a custom label covered further in this article)
- In the Actions column click Select to select a label (if the label has already been selected it will display an Active box instead of the Select button)
*Note that all measurements are in millimetres
Column | Description |
Preset | The name of the Label preset (internal purposes only) |
Specifications | Contains information about the physical layout and display of the label for the finished product - see below for additional information |
Display Order | The order of the fields that are displayed on a label (note that not all lines must have a value) |
Action | Action buttons associated with the label |
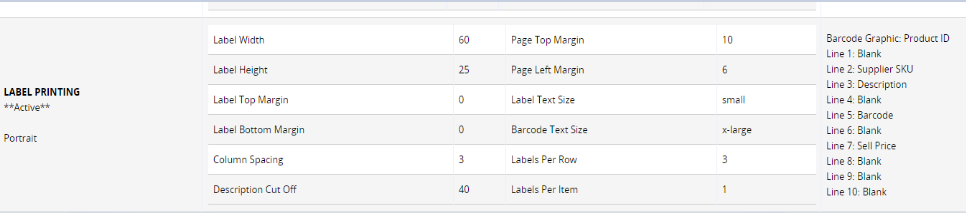
Specifications
Specification | Description |
Label width | The width of an individual label |
Label Height | The height of an individual label |
Label Top Margin | The distance between the top of the label and the bottom of the label above it |
Label Bottom Margin | The distance between the bottom of the label and the top of the next label |
Column Spacing | The distance of the columns between each label |
Description Cut Off | The number of characters that are displayed before the text is hidden |
Page Top Margin | The distance between the top of the page and the first row of labels |
Page Left Margin | The distance between the left side of the page and the first column of labels |
Label Text Size | The size of the font to be printed on the label |
Barcode Text Size | The size of the barcode graphic |
Labels per row | How many labels appear in a single row on the sheet of labels |
Labels per item | How many labels should be printed per item e.g. if printing product labels and you require 2 labels for each product this value should be 2 |
Using a preconfigured preset may still require testing and some custom configuration to match the individual computer/printer requirements
Configure a custom label preset
If the default presets are not appropriate for your labels you can choose to set up a Custom Label Preset instead. There is no limit to the number of presets, so if required, you can create multiple different presets to serve individual purposes.
To ensure the most accurate printing it's recommended to use a rule. Any inaccurate measurements will become more pronounced further down the page, and labels will become misaligned.
To configure a custom A4 label preset:
- Navigate to Settings > Label Printing > A4 Label Presets
- Click Create New Label in the bottom left-hand corner of the screen
- Enter the information as required
- Click Save Changes
General section
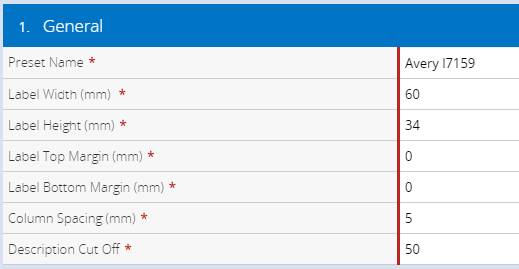
Field | Description |
Preset Name | Custom name for the preset Label (internal purposes only) |
Label Width (mm) | The width of your label |
Label Height (mm) | The height of your label |
Label Top Margin (mm) | The distance between the top of the label and the content inside |
Label Bottom Margin (mm) | The distance between the bottom of the label and the content inside |
Column Spacing (mm) | The distance between each label on the left/right |
Description cut off | The number of characters the description will be cut off at |
Numbers can be as a whole value only, decimals are not permitted.
Design section
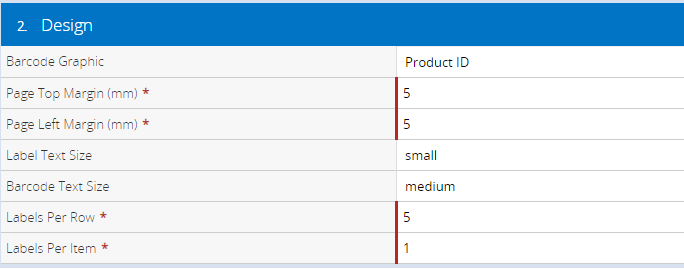
Field | Description |
Barcode Graphic | The barcode image when scanned will represent the field selected. The most common ones are Product ID or Supplier SKU, the unique product ID codes, enabling the system to immediately find the product when the barcode is scanned into the PLU field in either Back Office or POS |
Page Top Margin (mm) | The distance between your labels in the first row and the very top of the page |
Page Left Margin (mm) | The distance between your labels in the first column and the left-hand side of the page |
Label Text Size | The font size for the text |
Barcode Text Size | The size of the barcode graphic |
Labels Per Row | The number of labels on each row of the sheet (horizontal) |
Labels Per Item | How many labels should be printed per item being printed e.g. if printing product labels and you require 3 labels, 3 should be selected |
Page Layout
The Page layout is the direction of the paper with the labels, Portrait or Landscape.

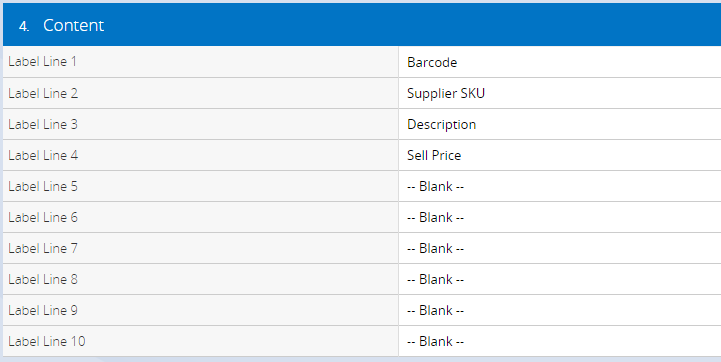
Content
Used to select the content to be displayed on the label. Each field has its own individual row. Note that not all rows need to be populated.
Print test labels
Now that you have configured Retail Express, set up your printer and purchased a label sheet to suit your needs - you're ready to test.
To test your labels:
You can test print on blank A4 paper and hold it up to the labels to compare the position for accuracy; this is cheaper than printing (and possibly wasting) several label sheets.
- Load a few sheets of blank A4 paper into the printer
- Open the Edit Product screen by entering a product code into the lookup box in the top right-hand corner, or using Product Search & Management

- Click the Label Printing tab
- Click A4 Label Print button
- A web browser Print Preview page will be displayed with the labels
You can adjust the print margins on this page, however for permanent settings you should refer to the first section of this article for adjusting all margins, including the Browser margins
- Press Ctrl+P to print
- Readjust the labels if required using the steps earlier in this article.
Printing your finished Labels
Now that your labels have been configured you are ready to print labels. To print labels:
- Navigate to Inventory > Label Printing
- Use the Search Filters to generate a list of products to print labels for
- Click Search
- On the Results tab the Qty to Print field will automatically update the field based on the number in stock. To override this click in the field and enter a value
- Click A4 Label Print
- A web browser Print Preview page will be displayed with the labels
You can adjust the print margins on this page, however for permanent settings you should refer to the first section of this article for adjusting all margins, including the Browser margins
- The labels will print accordingly
There are multiple ways to print labels directly from Retail Express, including from a Purchase Order when receiving new stock. Refer to the Label Printing - How to print labels for more information.
Frequently Asked Questions
Configuration Examples
A4 Label - 65 Sheet

A4 Label - 33 Sheet
The barcode prints as numbers instead of the barcode graphic
If the barcode doesn't print a normal barcode graphic (as seen in the image below) and instead displays a series of numbers it typically means the font Retail Express uses is either not installed or has become corrupt.
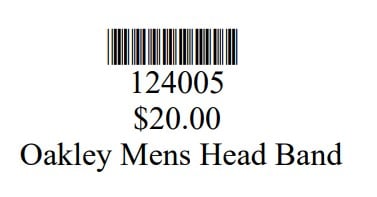
The font is called "Code39QuarterInch-Regular Normal" and is installed when the Retail Express Drivers are installed. Follow the instructions in the Hardware - Installing the Retail Express Drivers article to resolve the issue.