You can maintain accurate financial records in Retail Express by backdating invoices when needed to reflect actual transaction dates, helping your retail operations ensure proper accounting and reporting alignment. This capability allows authorized staff to adjust invoice dates for legitimate business reasons, which helps maintain financial accuracy while supporting proper end-of-period reconciliation and tax reporting.
Setting up proper backdating controls enables your retail operations to correct timing discrepancies while maintaining audit trails and security, helping optimize financial compliance and reporting accuracy. This helps retail businesses ensure their sales records accurately reflect when transactions occurred, which is particularly valuable during period-end closings and financial audits.
This feature allows businesses to maintain precise records, especially for reconciliations or compliance purposes. In this article, you'll find a simple guide on how to backdate an invoice while ensuring proper documentation and data accuracy.
On occasion, you may need to change the date of sale, for example, if entering historical sales. This can be done directly within POS.
Before you Begin
- Users must have sufficient POS Security Features enabled to allow access to this feature
- Sales can be backdated when creating the sale, or after the sale has been finalised
- Payments need to be backdated separately - refer to the Backdating Payments article for instructions
Changing the date on an Invoice
To backdate a payment:
- Log into POS
- Create a new sale or open an existing one
- Click the Outlet/Sales Person name in the bottom left-hand corner
- The Sale Order information is displayed:
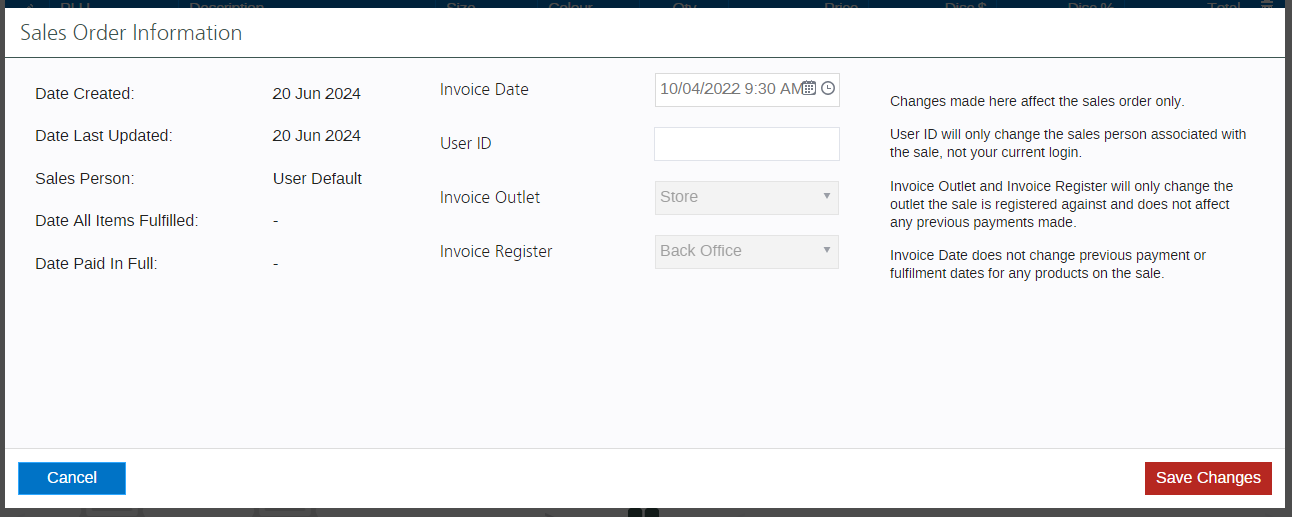
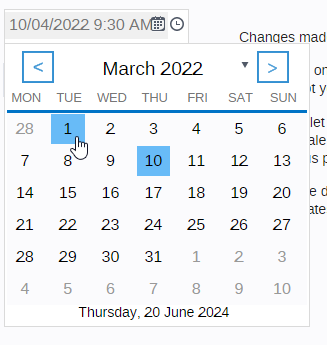
- Click into the Invoice Date
- Select the required date/time
-
- Click Save Changes.
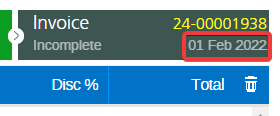
- You will be returned to the sales screen. The Invoice tab has been updated to reflect the edited date.
- Finalise or update the sale as normal.
Return to Top