You can process account customer payments to reduce outstanding balances and maintain healthy cash flow, helping ensure timely payment collection and accurate account reconciliation. This improves your retail operations by providing systematic payment recording, with properly configured payment processing typically enabling better cash flow management and reduced accounts receivable aging.
Understanding payment processing involves recognizing payment allocation methods, multiple invoice application, and receipt documentation to help retail operators focus on the right payment collection workflows, ensuring your retail strategy consistently drives better cash flow and account accuracy outcomes.
The Customer Account Payments feature allows you to search and view account customers with (or without) a balance owing, and apply payments to one or more invoices. For information on creating Account Customers refer to the Customers - Creating Account Customers article.
Before you Begin
- All payments will be recorded against the Cash Up/End Of Day of the system-generated Back Office register for the selected Outlet
- Once an End of Day has been submitted the data is immutable i.e. cannot be changed (for accounting reconciliation purposes). Backdating payments will not retrospectively change submitted cash-ups for this reason.
- Credit Notes are available to pay for invoices via this page; other Voucher Types must be redeemed at POS
Add an Account Customer Payment:
To make a Customer Account Payment:
- Navigate to Reports > Customer Reports > Account Payments

- Enter data into the filters as required (you can leave these blank to search all customers)
- Click Search
- The results will be displayed on the Results tab

- To view Address details for the customer click on the arrow in the left column to expand the details
- To make a Payment click the $ icon in the Actions column
- The Customer Account Make Payment window will open
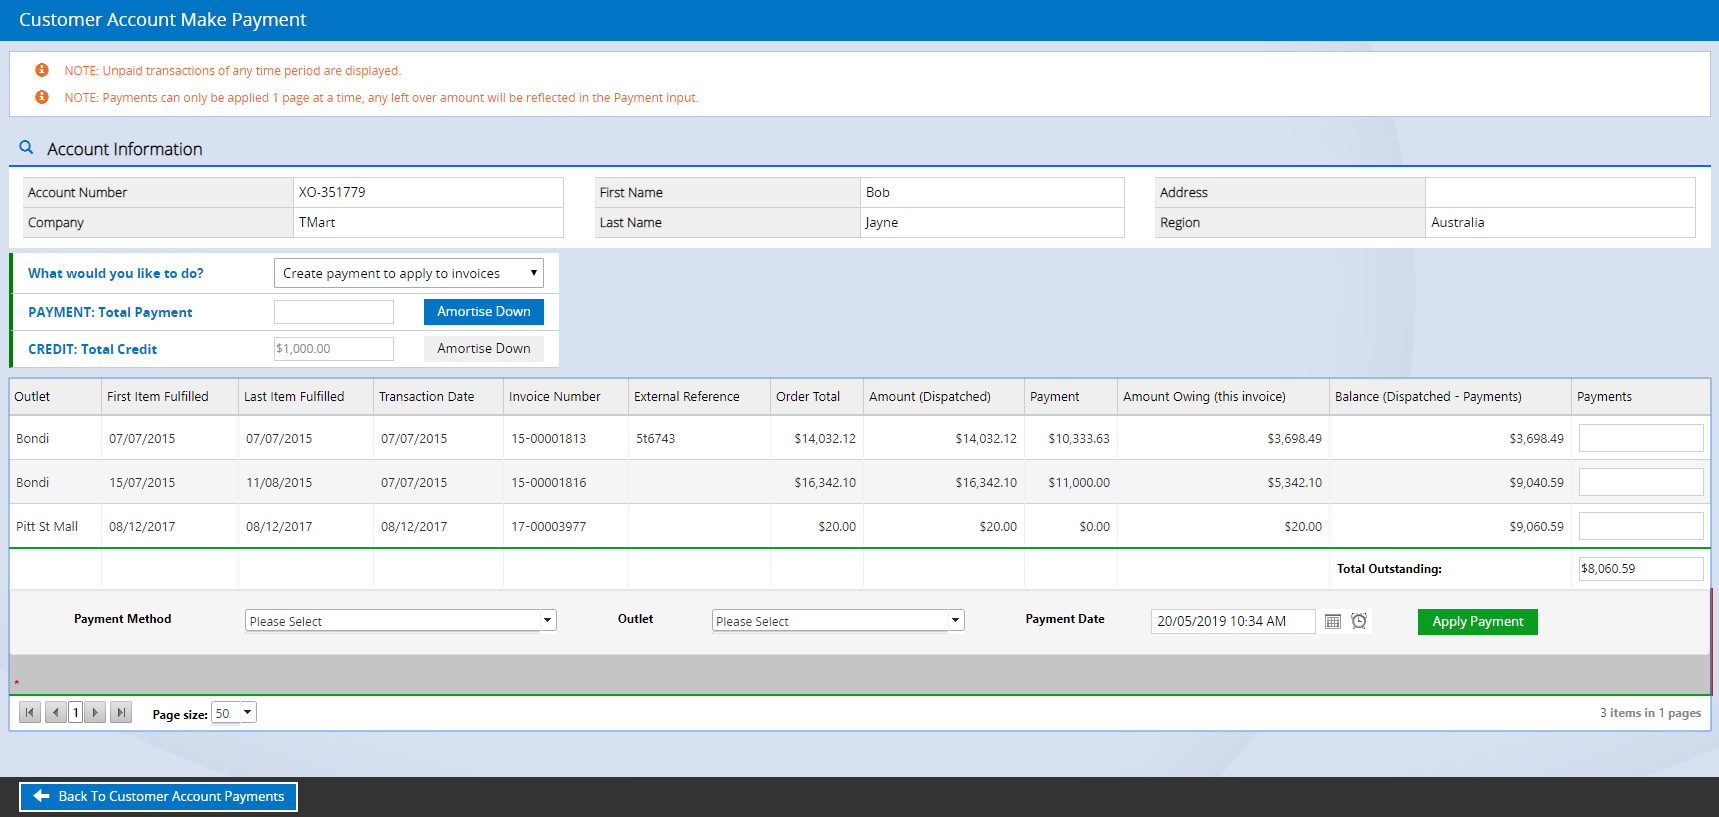
- Select from the What would you like to do? field to select between adding a payment against invoices or to use an existing credit
Each option is explained in further detail below. Note that if the credit option doesn't appear there's no existing credit for the selected customer.
- Enter the payments/credit
- Select a Payment Method
- Select the Outlet to be associated with the Payment
The payment will be applied against the Back Office register.
- The Payment Date will be automatically populated with the current date/time however can be backdated to match your bank statement at this point
- Click Apply Payment
Payment Options
To pay invoices outstanding against an account you can either enter a customer payment or apply a credit note.
When entering payments against invoices there are two options to choose from:
- Add payments manually against each invoice
- Use the "Amortise Down" feature to automatically allocate payment (oldest invoices have payments applied first)
Click on the headings below to read more detail about each process.
Payments are not applied to invoices until you click the Apply Payment button.
Add payments individually per invoice
To enter a payment individually against an invoice:

- Select Create payment to apply to invoices from the What would you like to do? drop-down
- Use the Invoice Number column to locate the Invoice to be paid
The External Reference column can also be helpful for locating invoices - this displays Order Numbers from external systems (e.g. integrated Shopify stores) or if manually entered in POS
- Enter the payment amount in the Payments field
- Add any additional payments to other Invoices as required
- Follow the remaining steps above to finalise the payment
Use the Amortise Down feature to allocate payments automaticallyto allocate payments automatically
The Amortise Down feature allows you to enter a lump sum against Payment or use an existing Credit sum, and have it divide and apply automatically across outstanding invoices. The oldest invoices will have payments applied first.
After amortising, you can overwrite any specific invoices by editing the values in the payments boxes.
- Enter the total amount to be paid in the Payment: Total Payment field
- Click Amortise Down
- The payment will be automatically added to the Payments field for each invoice, starting with the oldest invoice, until the total value of the payment has been used
The payments are not applied until you click the Apply Payment button as per the instructions above.
- Follow the remaining steps above to finalise the payment

If your account customer has Credit Notes available, these can be applied to outstanding invoices using the Amortise Down feature.
The Amortise Down feature allows you to enter a lump sum against Payment or use an existing Credit sum, and have it divide and apply automatically across outstanding invoices. The oldest invoices will have payments applied first.
Only Credit Notes are available here to be used for payment. If you wish to use alternate Voucher Types (Gift Voucher, Goodwill and Promotional) they will need to be redeemed via POS.
To redeem a Credit Note:
- Select Apply existing credit to invoices from the What would you like to do? field
- The total value of outstanding credits for the customer will be displayed in the Credit: Total Credit field
- Click Amortise Down
After amortising, you can overwrite any specific invoices by editing the values in the payments boxes.
- Follow the remaining steps above to finalise the payment
Frequently Asked Questions
How do I Cash Up Back Office Customer Account Payments?
As noted in the Considerations at the top of this article, all payments made via the Customer Account Payments page will be recorded against the Cash Up/EOD of the system-generated Back Office register for the selected Outlet
If you usually log into POS using a different Register name, you will need to complete the EOD Cash Up for both your standard register AND the Back Office register.
To complete a Cash Up of the Back Office Register:
- Logout completely from POS
- Login in again, selecting the Back Office Register
- Complete Cash Up.
For assistance completing a Cash Up, please refer toHow do I complete a Cash Up/End of Day at POS?
You can use the Income Report to reconcile these payments, via Reports > Finance Reports > Income Report. Select to filter by Outlet, then select the Back Office Register.