You can create inter-store transfers efficiently through the Product Search method in Retail Express Back Office, enabling systematic stock movement between locations with full control over transfer quantities and dispatch status. This transfer creation approach helps retail operators coordinate inventory distribution across their store network, with the ability to create multiple transfers simultaneously supporting efficient multi-location stock replenishment.
The Product Search transfer method in Retail Express provides Australian retail operators with flexible filtering options and immediate transfer processing capabilities, helping streamline inventory distribution and maintain optimal stock levels across outlets and warehouses. This systematic transfer workflow helps ensure your retail operations can quickly respond to stock imbalances while maintaining accurate tracking through printed transfer slips and comprehensive transfer reporting.
A Transfer is used to move stock from one location to another location, tracking the status of stock through each phase. Retail Express offers both Simple and Advanced options (depending on the level of detail required), and the ability to transfer to multiple different locations at the same time.
To create a Transfer:
- Navigate to Inventory > Transfer Management > Create
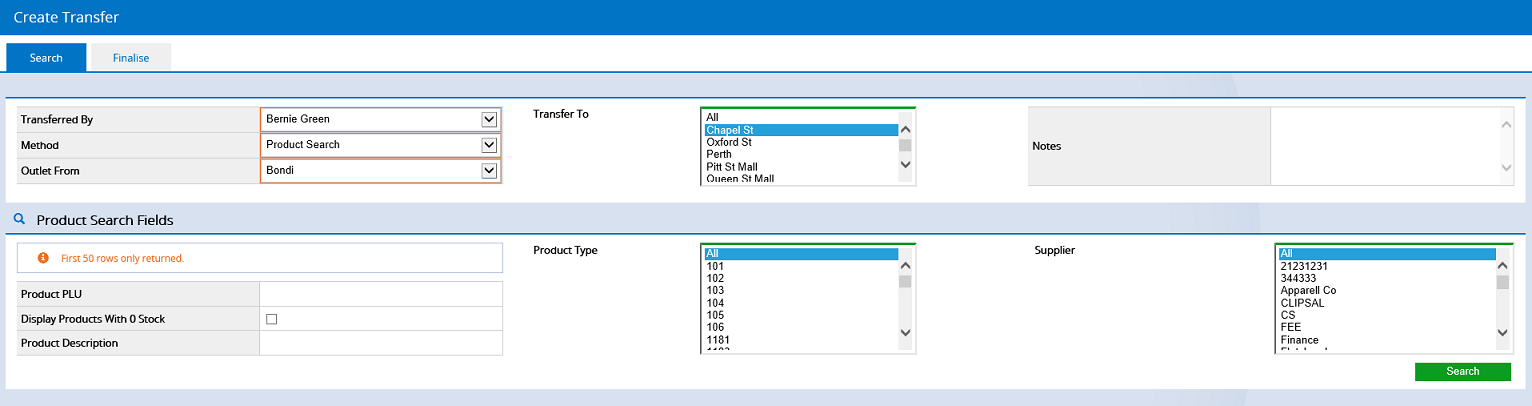
- Choose the Transferred By name (name of the staff member creating the Transfer)
- Select the Transfer Method "Product Search"
- Choose the Outlet From location (the location where the stock is being taken from)
- Select the Outlet To location (the store/warehouse where the stock is to be transferred to)
Tip: Hold the Ctrl button on the keyboard to select multiple locations - this will create multiple transfers
- Use the filters in the Product Search Fields
- Click Search
- Enter the amount to be transferred in the Tfr column
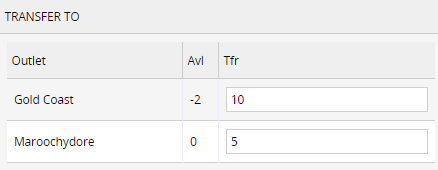
- Click Add to Transfer at the bottom of the screen

- The product will be displayed on the Finalise tab
- Click the Search tab and repeat the steps to add additional products
- To complete the transfer click the Finalise tab
- To instantly process the Transfer select the Dispatch status of either Dispatch or Make Available
Tip:
Click here For more information on the Advanced method and Transfer Stages
- Click Create Transfers
- The Transfers Report will be displayed showing the newly created Transfers

- Click the Print button next to the Transfer to print the Transfer Slip

- Click the Pencil icon to edit the Transfer

Back to top
Related Articles
Inventory Management:
- Understanding Transfers - Learn transfer workflow options and multi-store distribution strategies
- Stock List - View current stock levels across all outlets for informed transfer decisions
- Inventory Movement Log - Track detailed stock movement records for audit and reconciliation
Purchase Orders & Suppliers: