You can manage supplier information including contact details, payment terms, and ordering preferences to maintain accurate supplier relationships and streamline procurement processes. This improves your retail operations efficiency by centralizing supplier data for purchasing decisions, with properly configured supplier management typically enabling better ordering accuracy and improved supplier communication.
Understanding supplier management involves recognizing supplier profile fields, payment term configuration, and contact information maintenance to help retail operators focus on the right supplier relationship workflows, ensuring your retail strategy consistently drives better procurement coordination and supplier partnership outcomes.
When creating Purchase Orders in Retail Express you will need to list a supplier against the order. Products also have default Suppliers, although they can be ordered from any supplier as necessary. There are several dedicated supplier reports, as well as the Supplier filter on other reports e.g. Sales Report.
Create a Supplier
Suppliers can be created either individually, or multiple at a time using the Upload to Excel functionality.
Individually
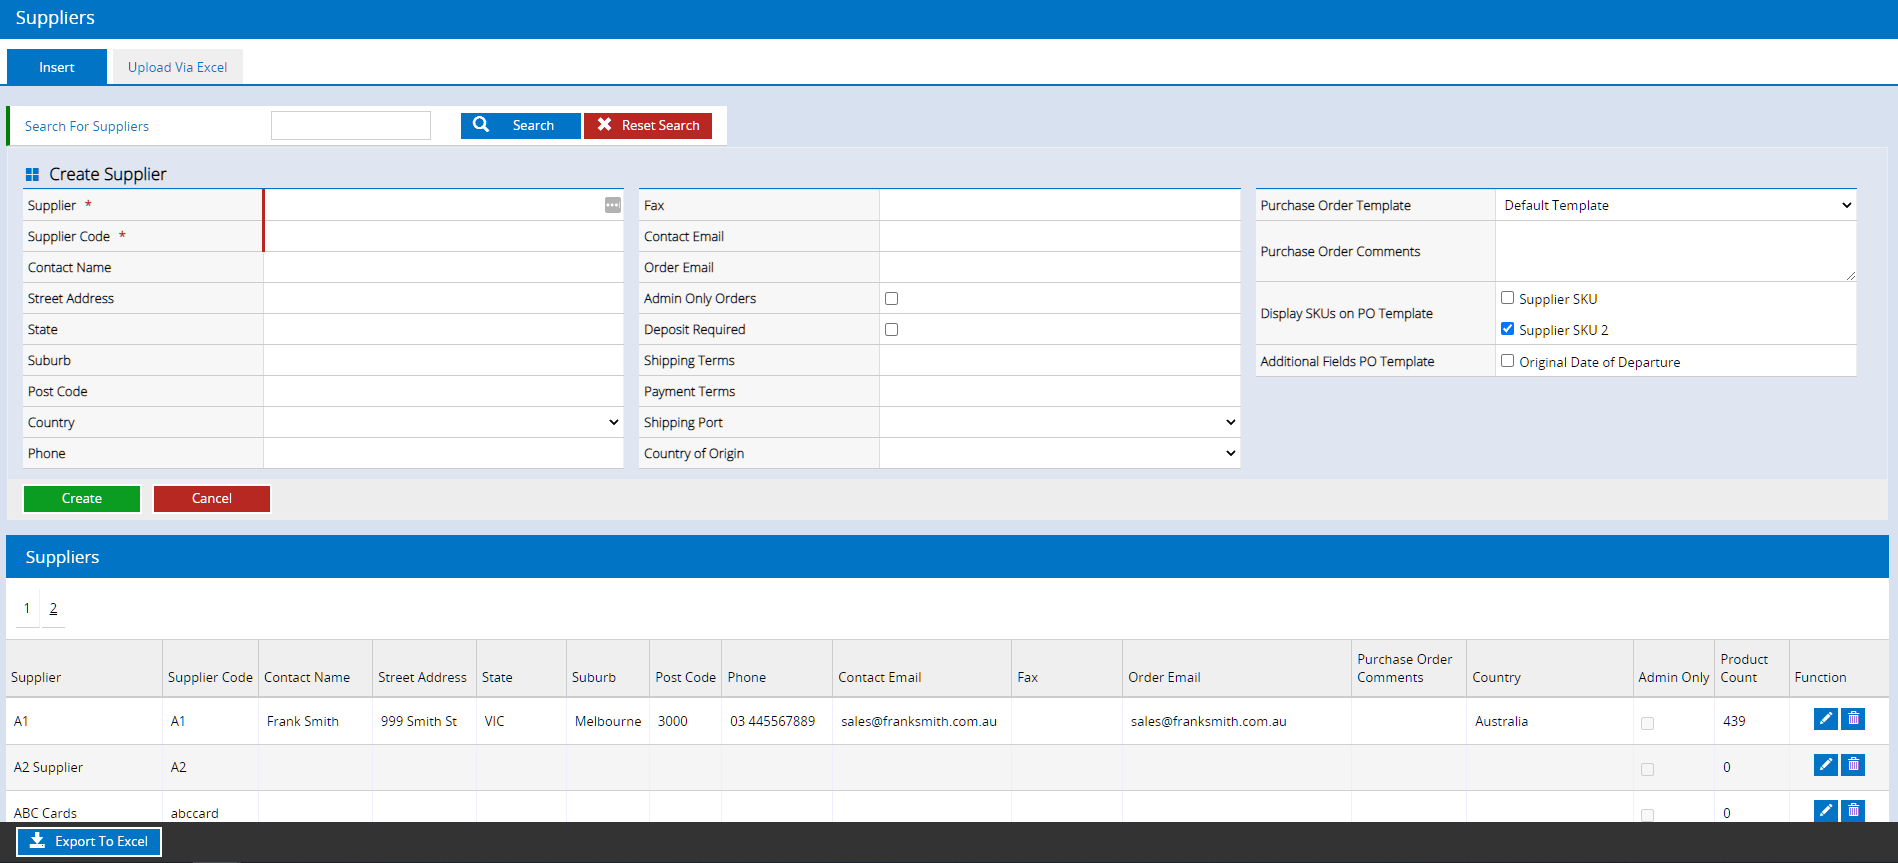
- Navigate to Settings > Suppliers
- Enter the details into the Insert/Edit Supplier fields (see below for detailed information)
- Click Insert
Back to top
Multiple (Mass Upload functionality)
- Navigate to Settings > Suppliers
- Click on the Upload Via Excel tab
- Click the link Click here to download template in Step 1 to download the template
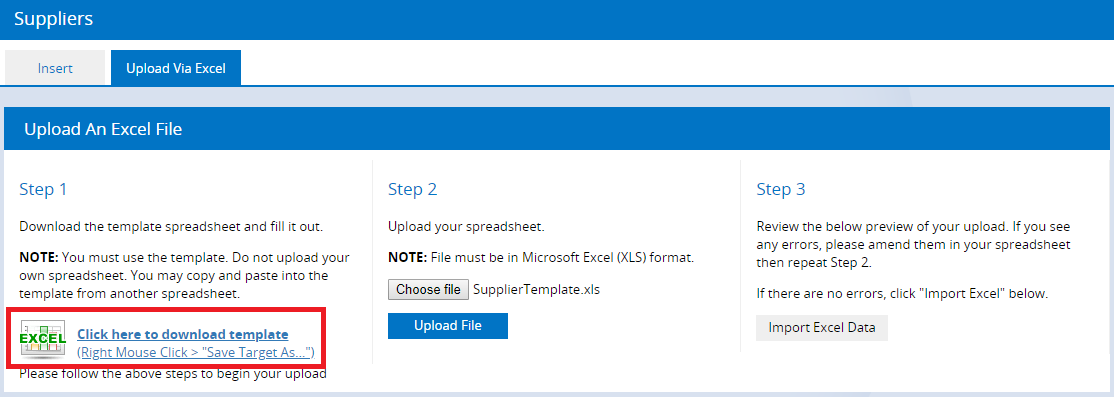
- Open the downloaded Excel spreadsheet
- Enter the details as required (see below for detailed information)
- Save the file to your computer
📋 Note: The file must be in a .xls format.
- Open the Retail Express Suppliers Upload Via Excel page
- Click Choose File in Step 2
- Navigate to where you saved the file and click Open
- Click Upload
- Once uploaded a preview of the contents will be displayed below. If there are any errors they will need to be corrected before re-uploading the file
- Click Import Excel Data to import the data into Retail Express
📋 Note: The data is not imported into the system until this is clicked.
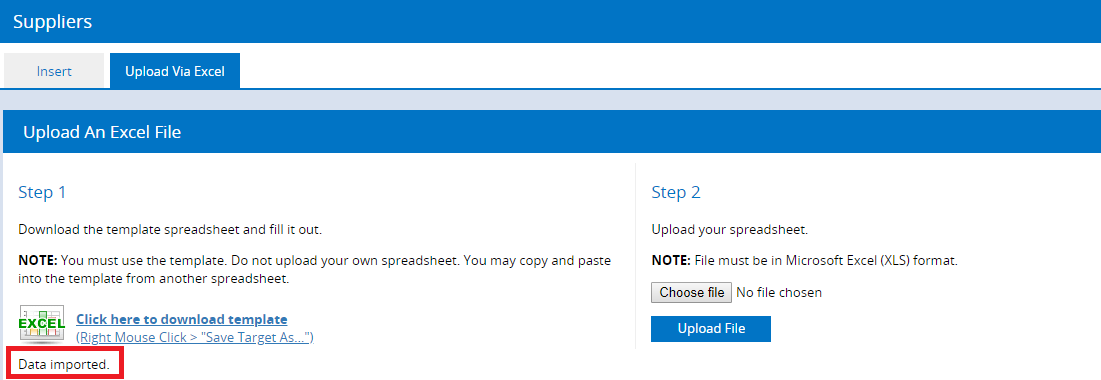
- Once complete a Data Imported message will be displayed under Step 1
Return to top
Editing a Supplier
To edit a supplier:
- Navigate to Settings > Suppliers
- Enter the search terms into the Search for Suppliers field (if you don't want to search for a supplier or don't know the terms skip to step 4)
- Click Search
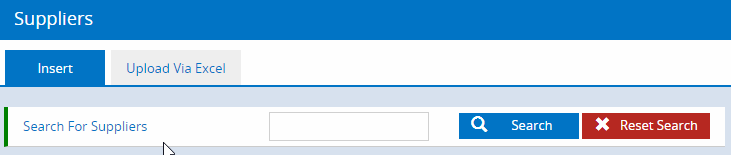
- The list of suppliers will be at the bottom of the page
- Click on the Pencil icon to edit the supplier
- The fields at the top of the page will refresh with the details for the supplier
- Modify the fields as required
- Click Update to save the changes (or Reset to cancel)
Return to top
Deleting a Supplier
We don't recommend deleting a supplier for historical reporting purposes, however, this functionality can be used if the supplier doesn't have any products or Purchase Orders assigned to them.
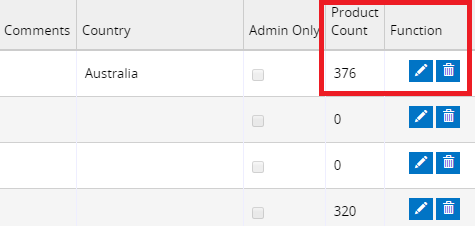
Suppliers can be deleted by clicking the Trash Can icon next to the supplier's name.
📋 Note: Products must be unassigned from the supplier before the Supplier can be removed (including disabled products). The number of products still associated with the Supplier is displayed in the Product Count column.
The easiest way to unassign products is to use the Mass Download/Mass Upload process to filter and update these products in bulk. Replace the supplier with the details of another supplier in the Excel spreadsheet and upload it back into Retail Express to update the products. Once that has been done you should be able to delete the supplier successfully.
📋 Note: Users can set Suppliers as Enabled/Disabled in Settings > Suppliers to retain the supplier details and the assigned product status while still indicating that the supplier has been discontinued. All Suppliers would be Active/enabled by default.
Return to top
Supplier data fields

When editing a supplier there is a range of fields to enter your data into. These fields are as follows:
| Field | Details |
| Supplier* | The Company name of the supplier (mandatory) |
| Supplier Code | The supplier code, a simple code used internally to easily refer to the supplier e.g. within Reports, search filters etc. (Mandatory field) |
| Contact Name | The details of a staff member within the business e.g. your Account Manager |
| Street Address | The street address details for the supplier |
| State | The state for the supplier |
| Suburb | The suburb of the supplier |
| Post Code | The postcode for the supplier |
| Country | The country where the supplier is based |
| Phone | Contact phone number |
| Fax | A fax number for the supplier |
| Contact Email | The email address used to contact the supplier for enquiries and general correspondence |
| Order Email | The email address used to send Purchase Orders |
| Admin Only Orders | Ticking this option restricts orders to this supplier to be only placed by users with Admin privileges (this setting is on a user basis rather than a particular Security Profile; refer to the User Accounts article for more information) |
| Deposit Required | Used to indicate if the supplier requires a deposit before the stock is dispatched (for reference only; not displayed on the Purchase Order) |
| Shipping Terms | Details of the terms of shipping from the supplier e.g. 30 days. New Purchase Orders will display this information when the Supplier is selected. |
| Payment Terms | Payment terms for the invoices for the supplier e.g. 30 days. New Purchase Orders will display this information when the Supplier is selected. |
| Shipping Port | The default Shipping Port for the supplier (the options displayed are configured in the Shipping Ports settings area; refer to the Shipping Ports article for more information). New Purchase Orders will display this information when the Supplier is selected. |
| Country of Origin | The country of manufacture for the products. New Purchase Orders will display this information when the Supplier is selected. |
| Purchase Order Template |
Used to select a default template to be used when ordering from the Supplier:
- Default Template - a standard template listing each product on a separate line
- Matrix Template with Packages Exploded - a more detailed template typically used when you have packages (a variety of products available to purchase together) or products in a matrix (the same style of products sharing the same Manufacturer SKU but in varying sizes and/or colours).
|
| Comments | Comments entered here are displayed on Purchase Orders for the supplier to see when processing the order e.g. Please advise if stock is not available upon receiving this order. |
| Display SKUs on PO Template | Used to select whether to include the Supplier SKU and/or Supplier SKU2 on the Purchase Order printed/emailed to the supplier |
| Additional Fields PO Template | Tick to include the Original Date of Departure (entered on a Purchase Order) on the Purchase Order printed/emailed to the supplier the |
Related Articles
Inventory Management: