Introducing Maropost Identity
Maropost Identity refers to the unified login experience that comes in two parts – a unified login experience and access to the Identity portal.
Unified Login Experience
The first part is the all-access login experience that provides you access to various Maropost products and services through Single Sign-On (SSO).
Some of its key features include:
- Unified login experience that provides access to various Maropost products and services through a Single Sign-On (SSO)
- A more secure and faster login experience
- Ability to set up a single account that gives a user access across Maropost, saving time and making onboarding simpler
- Supports social login (Sign in with Google, Sign in with Microsoft) and continues to support multi-factor authentication
Identity Portal Access
The second part is the Identity portal that provides you with a single platform to manage your user profile and account security settings across multiple Maropost products.
Accessing Identity Portal
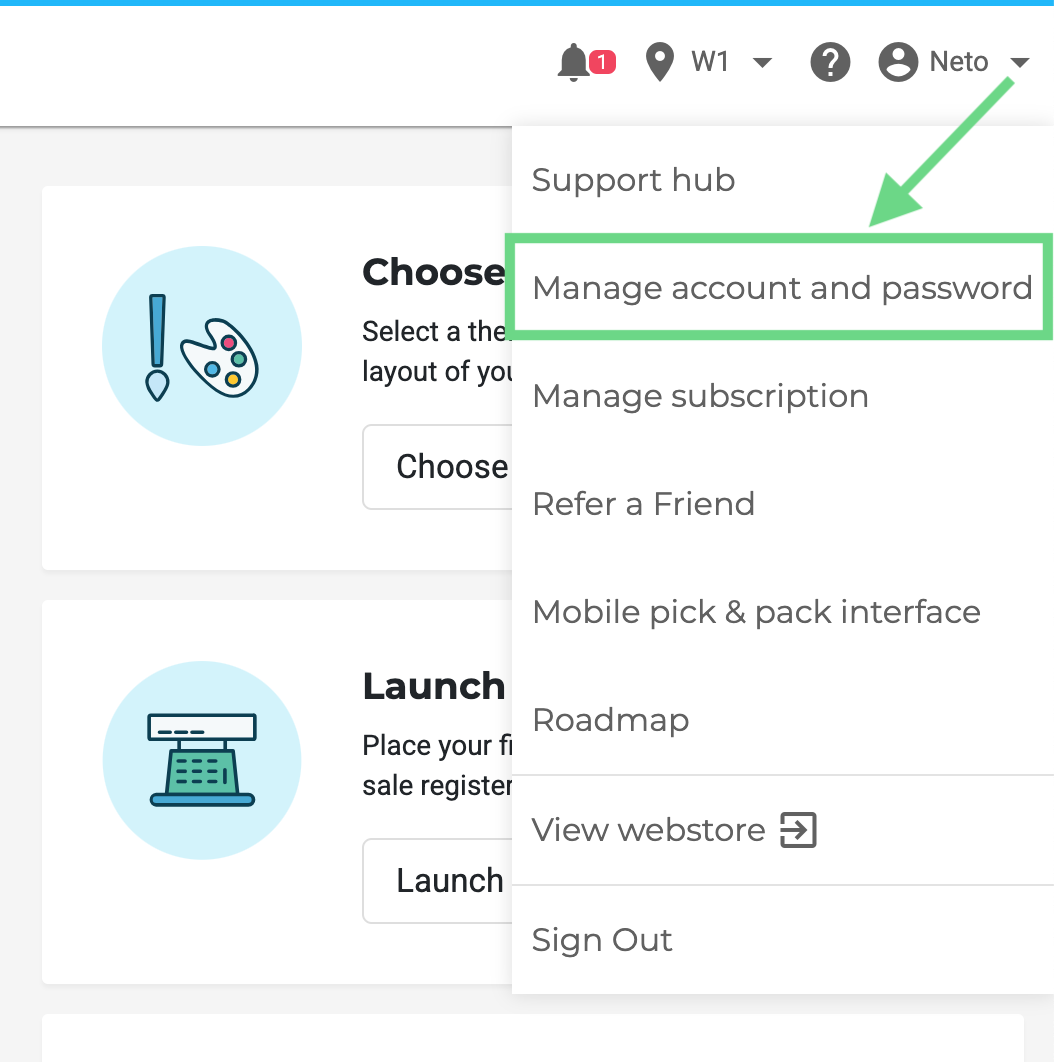
You can access the Identity portal directly at https://id.maropost.com. To access the portal from your Neto control panel, click your username at the top-right corner, and select Manage account and password.
New User Sign Up
Note: You can link your Neto account access to an existing Maropost Identity account even if the email address is different. The new email address will then be used as your login credential as well as for any communication from Maropost.
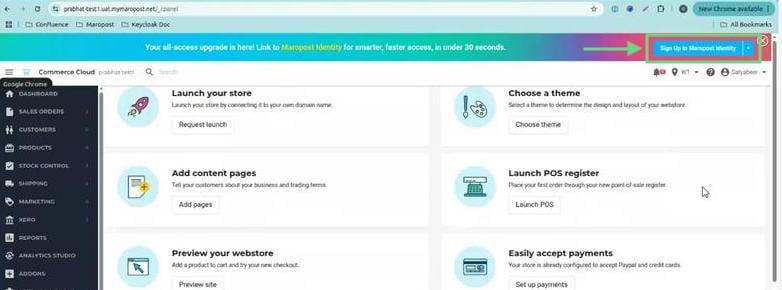
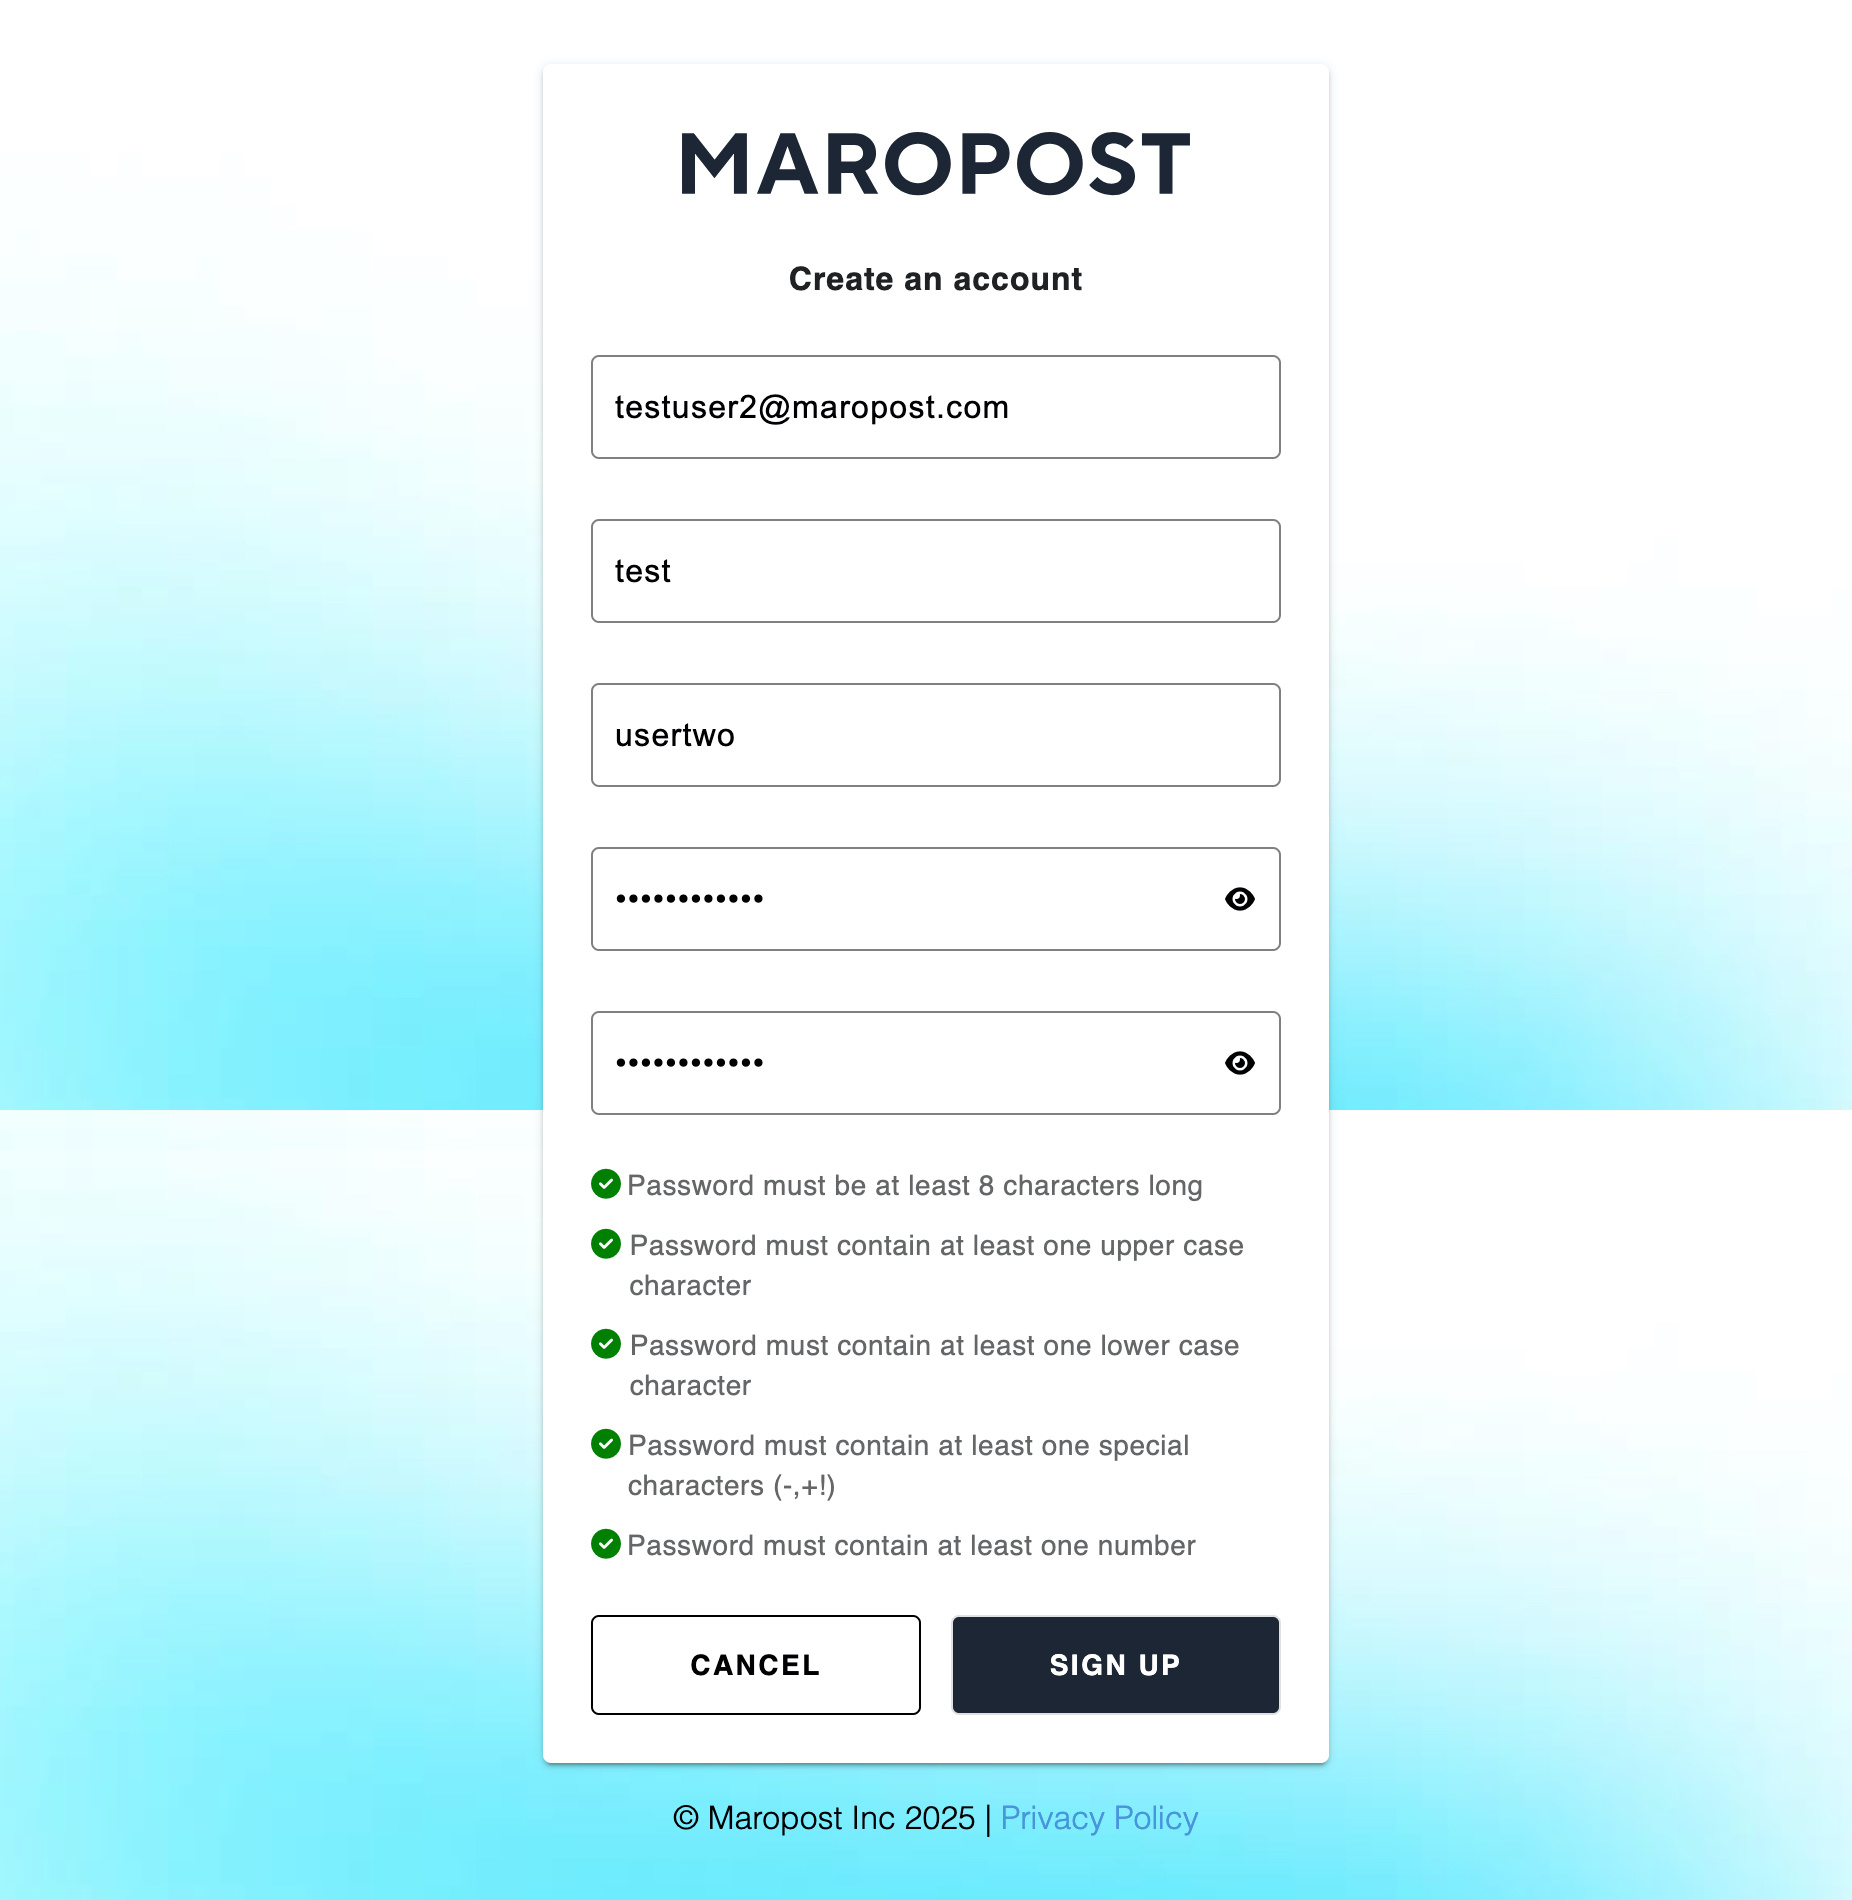
To sign up for a new Identity account, do the following:
- Log in to your Neto Control Panel using your current login credentials.
- Click the Sign Up to Maropost Identity button on the banner.
- Read and agree to the consent message, and then click Okay to proceed.
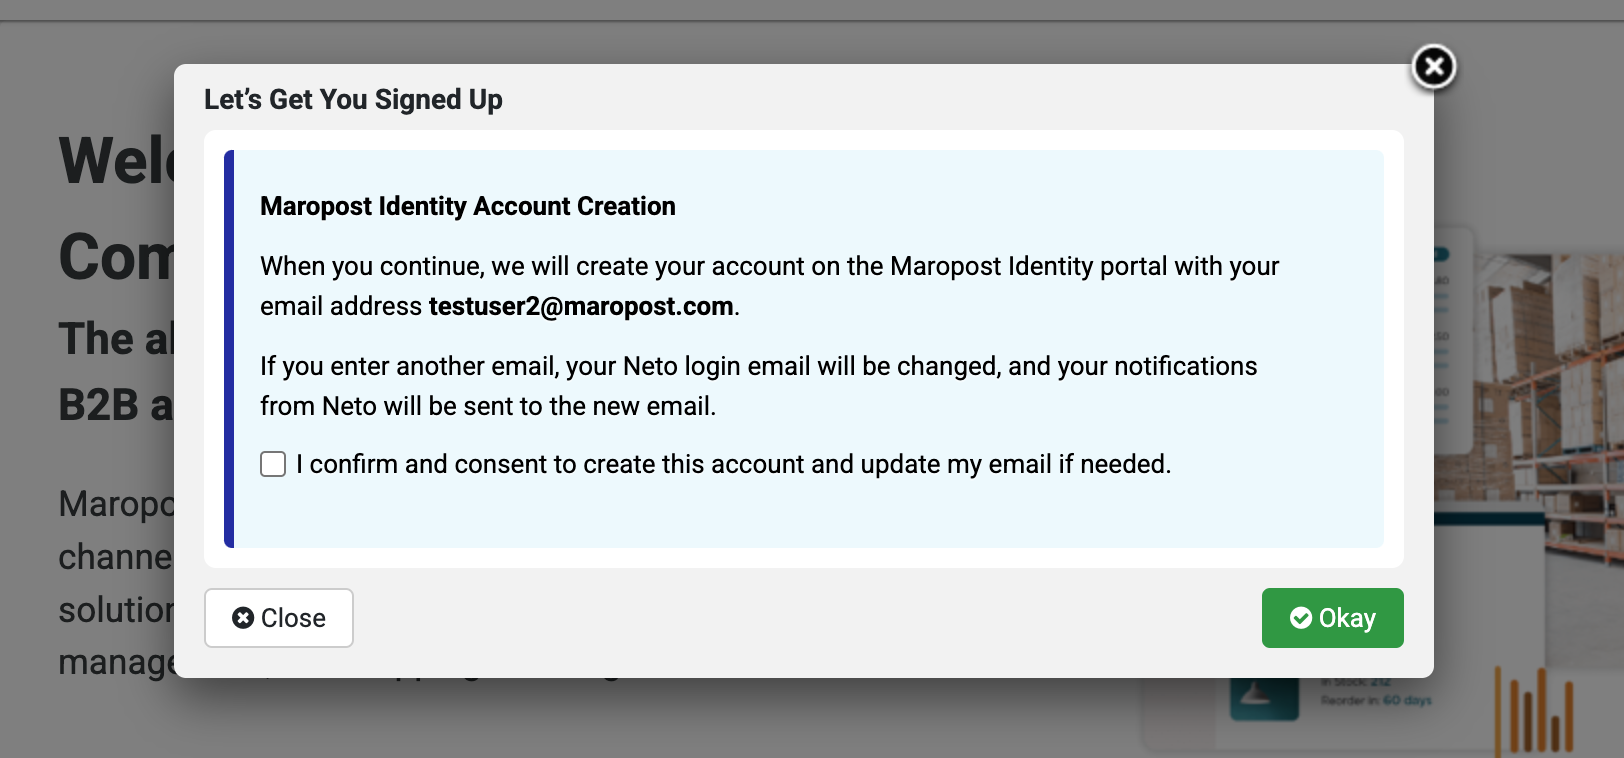
- On the account creation page, the email, first name, and last name fields are pre-populated. You can update them as required. Enter the password you want to set for your account and click Sign Up.
Note: If you enter a different email address than the existing one, your email address will be updated to the new one.
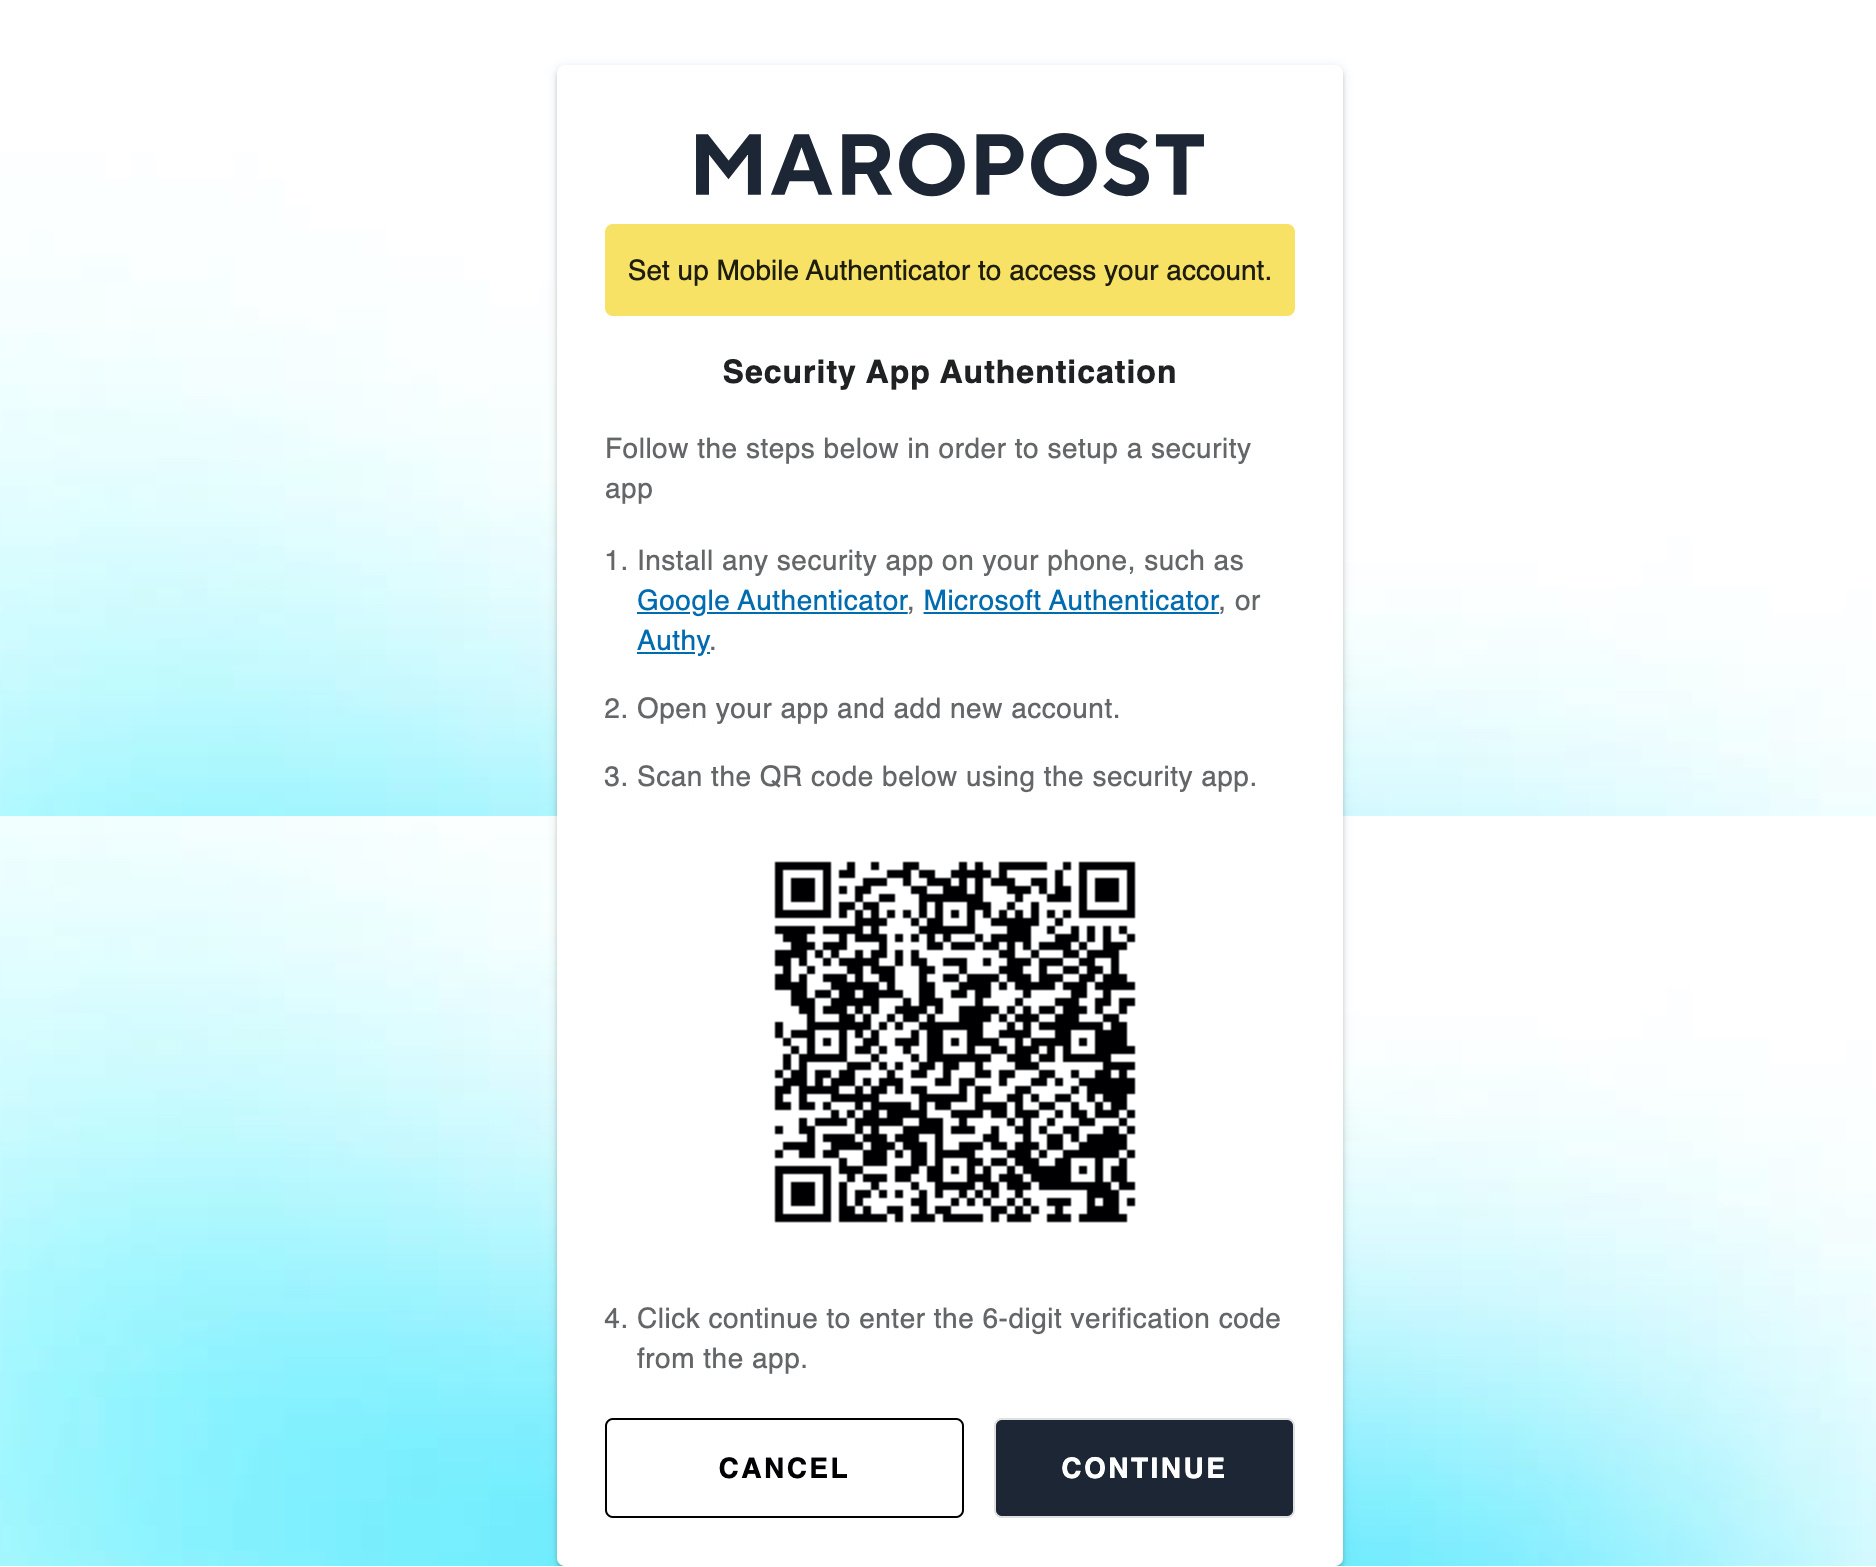
- You’ll be redirected to set up multi-factor Authentication (MFA). To learn about MFA, see Multi-Factor Authentication in Neto.
Note: Remember to save your recovery codes.
- You’ll see a confirmation message indicating successful account creation. Click Done.
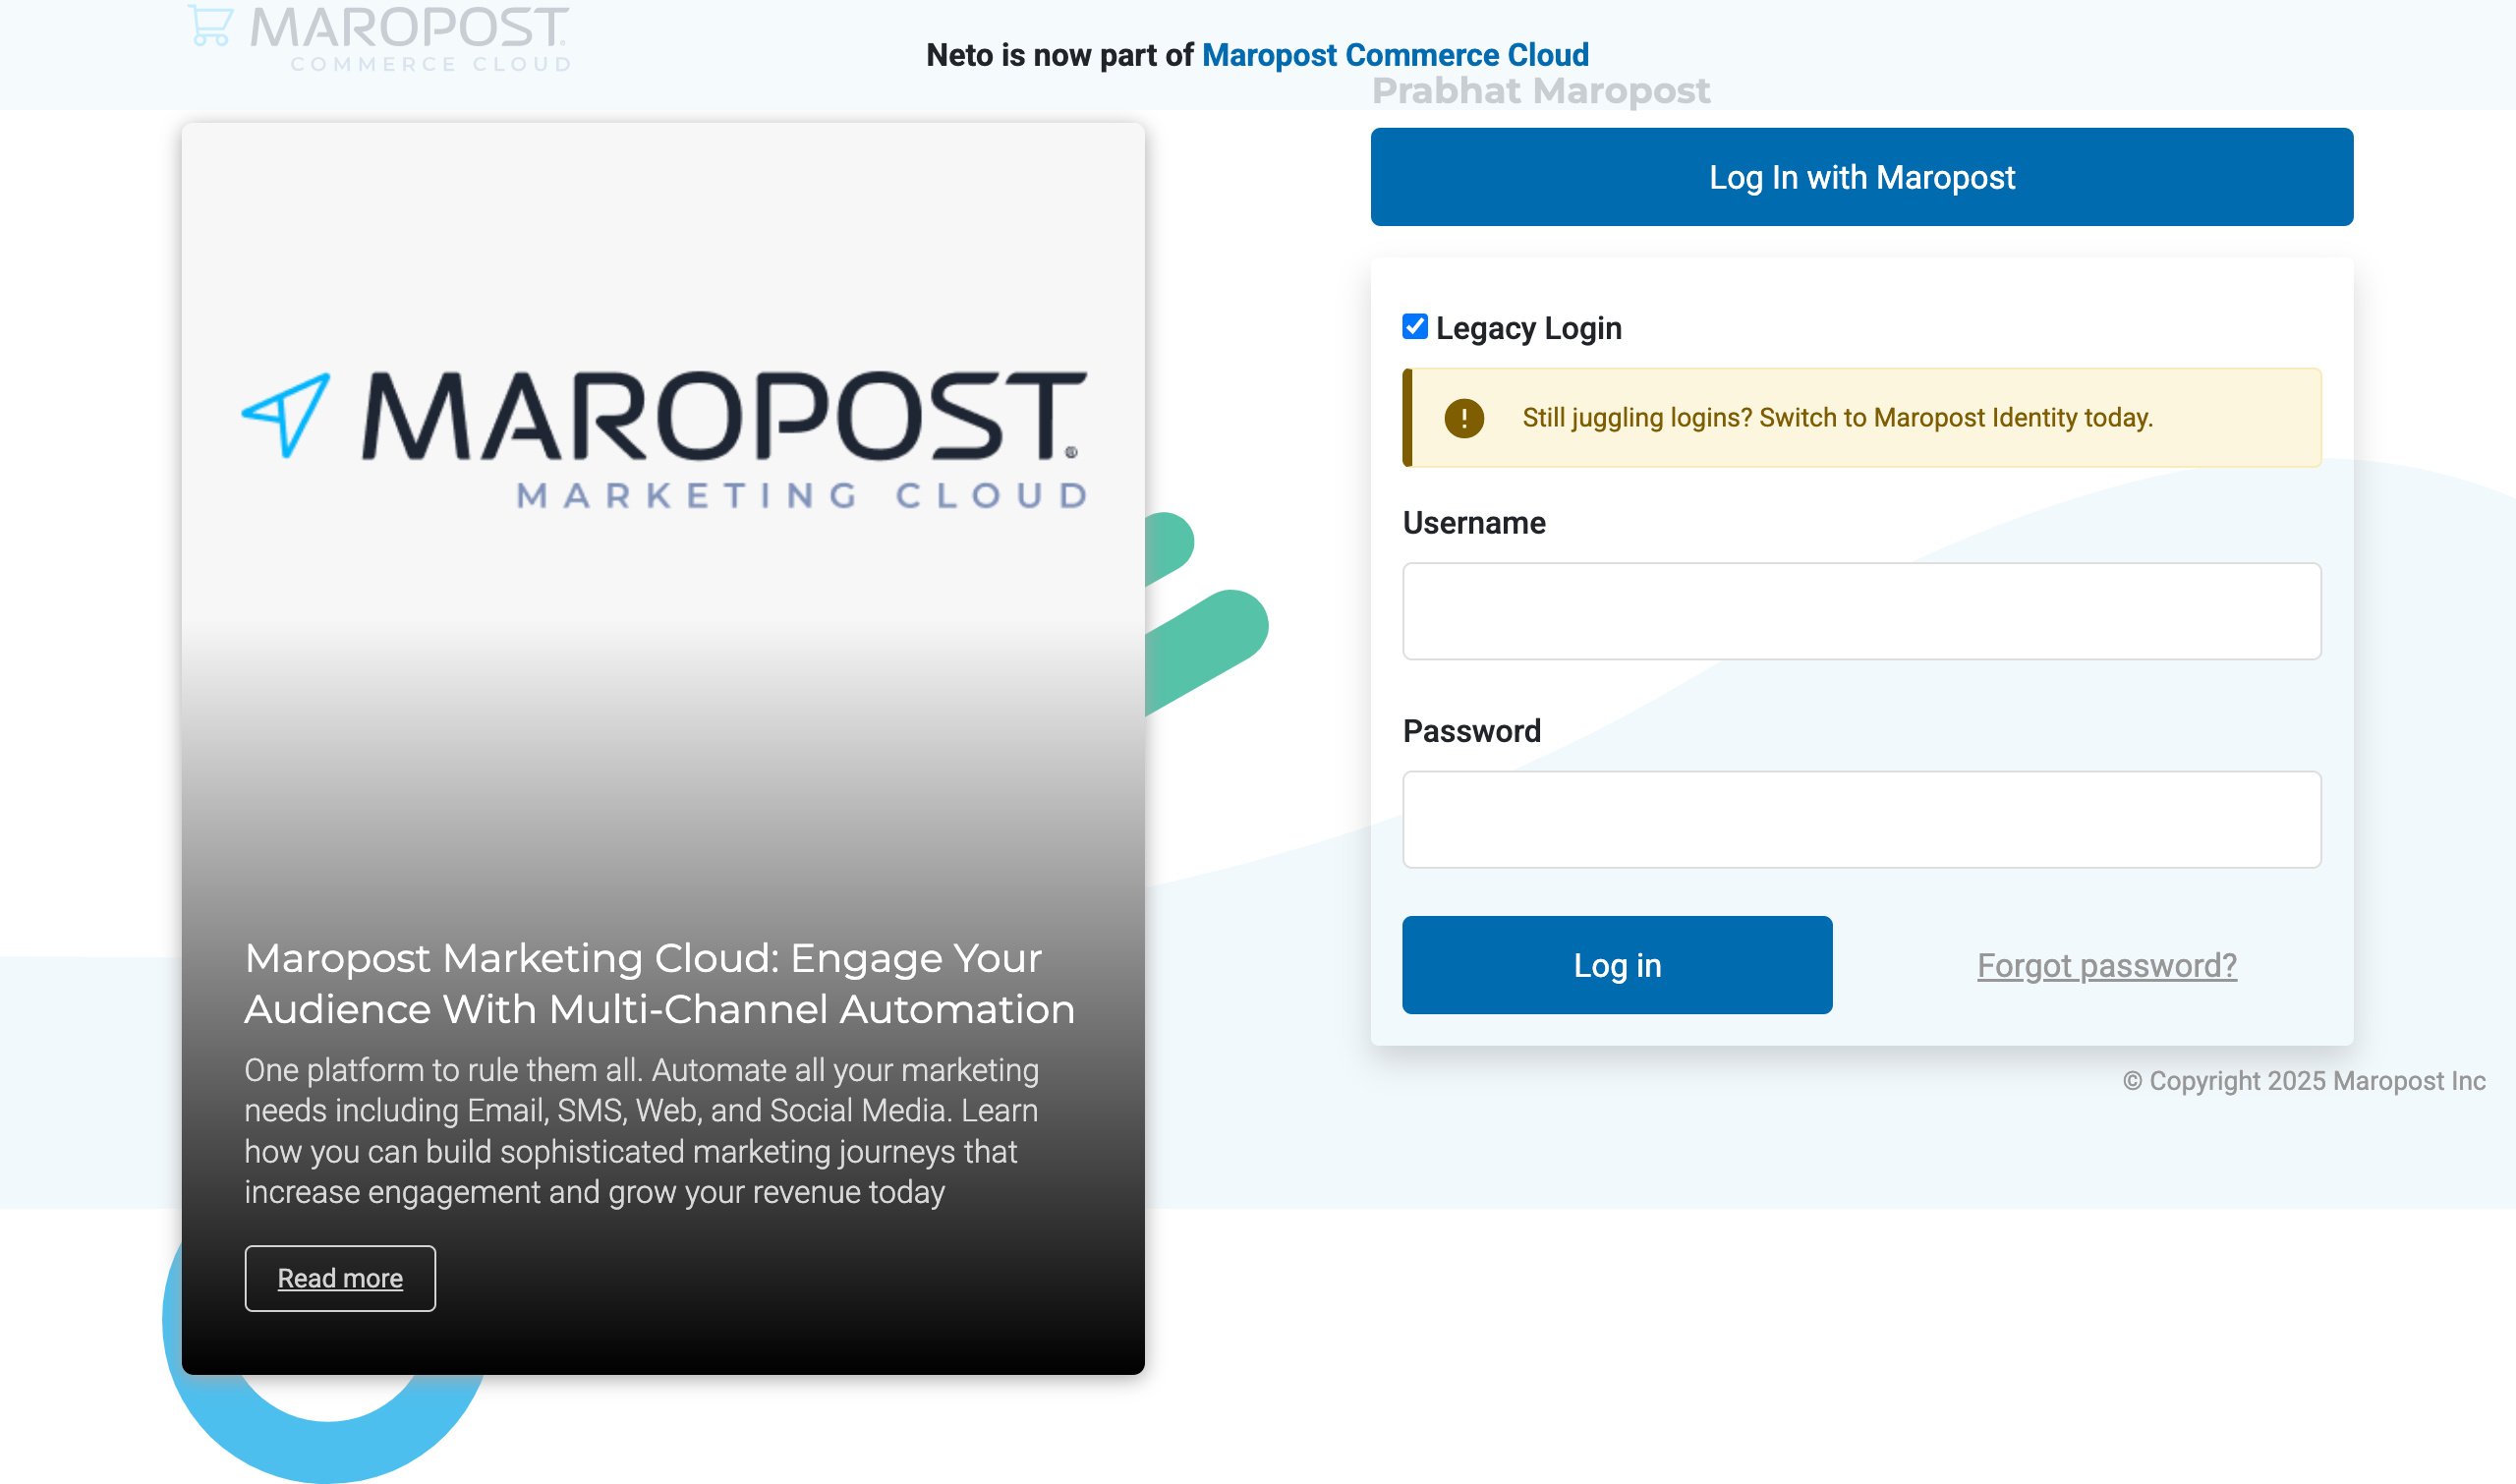
Log in to Neto with Identity Account Credentials
Follow the steps below to log in with your Maropost Identity credentials:
- On the Login page, enter your Maropost Identity credentials, which include your registered email address and password.
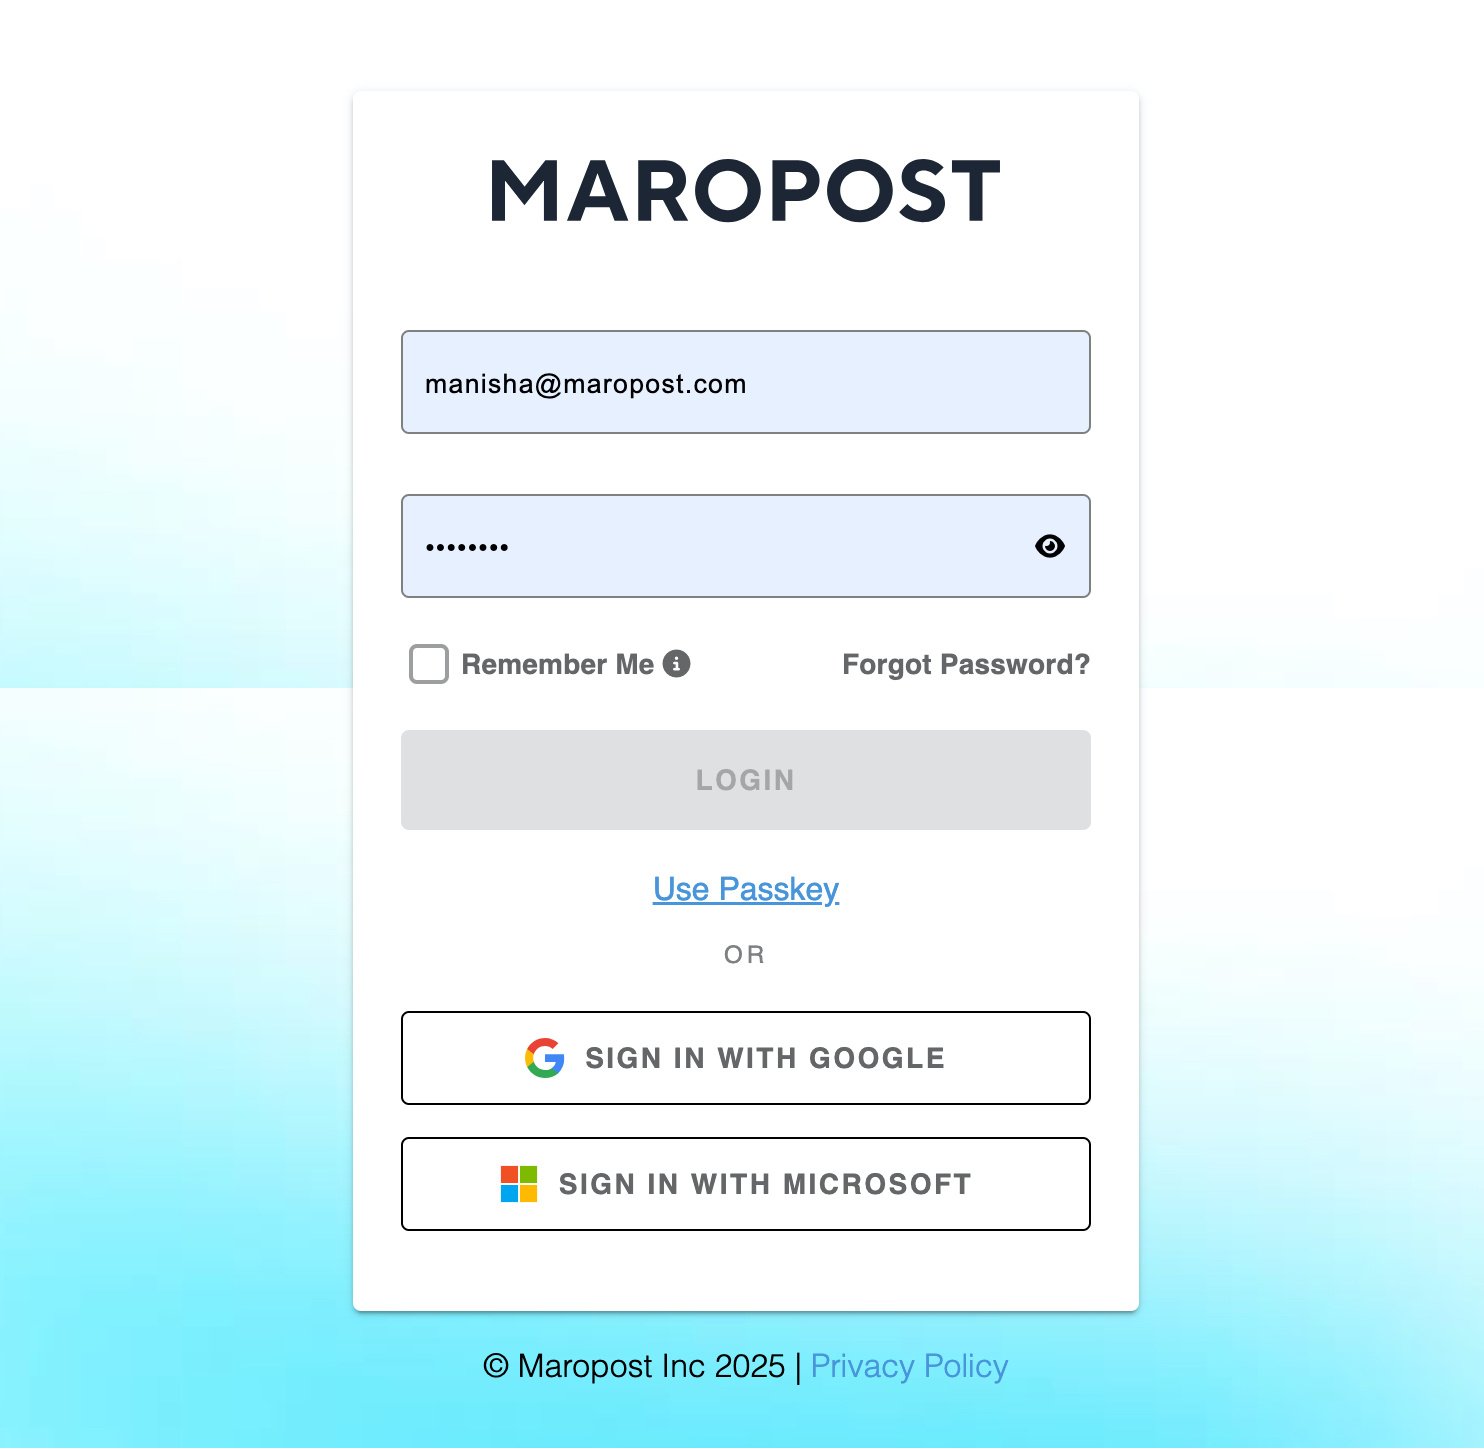
- Select the Remember Me checkbox to maintain your user session. When selected, it allows you to skip entering Maropost Identity credentials and OTP for up to 30 days, except in the case of manual sign-out.
- Click Login. You’ll be redirected to the Multi-Factor Authentication (MFA) page. To learn about setting up MFA, see Multi-Factor Authentication in Neto.
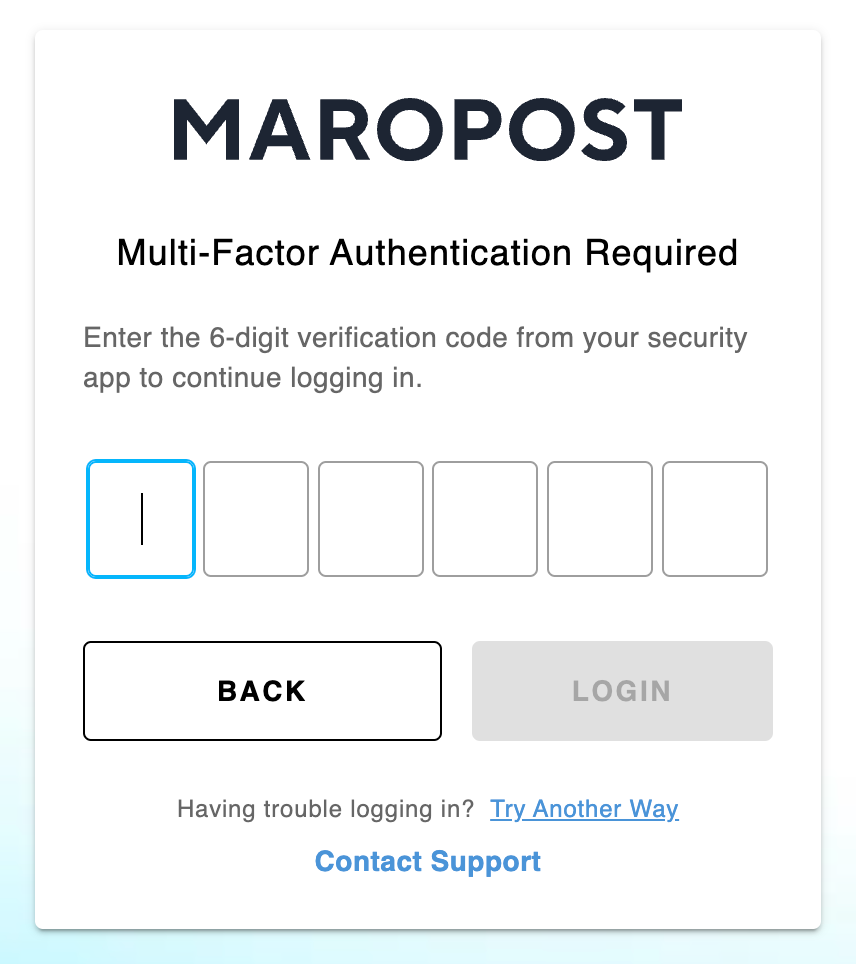
- Here, enter the six-digit One-Time Password (OTP) from your mobile authenticator app and then click Login.
On successful authentication, you’ll be redirected to Neto.
Note: You can also use a passkey, which is a secure passwordless option, to log in without the need for a password or authentication OTPs. To learn how you can set up and use passkeys, see Passkeys for Neto Login on Windows and Passkeys for Neto Login on macOS.
Manage Account Settings on Identity Portal
The identity portal acts as a centralized location where you can update your user profile information and configure your account security settings.
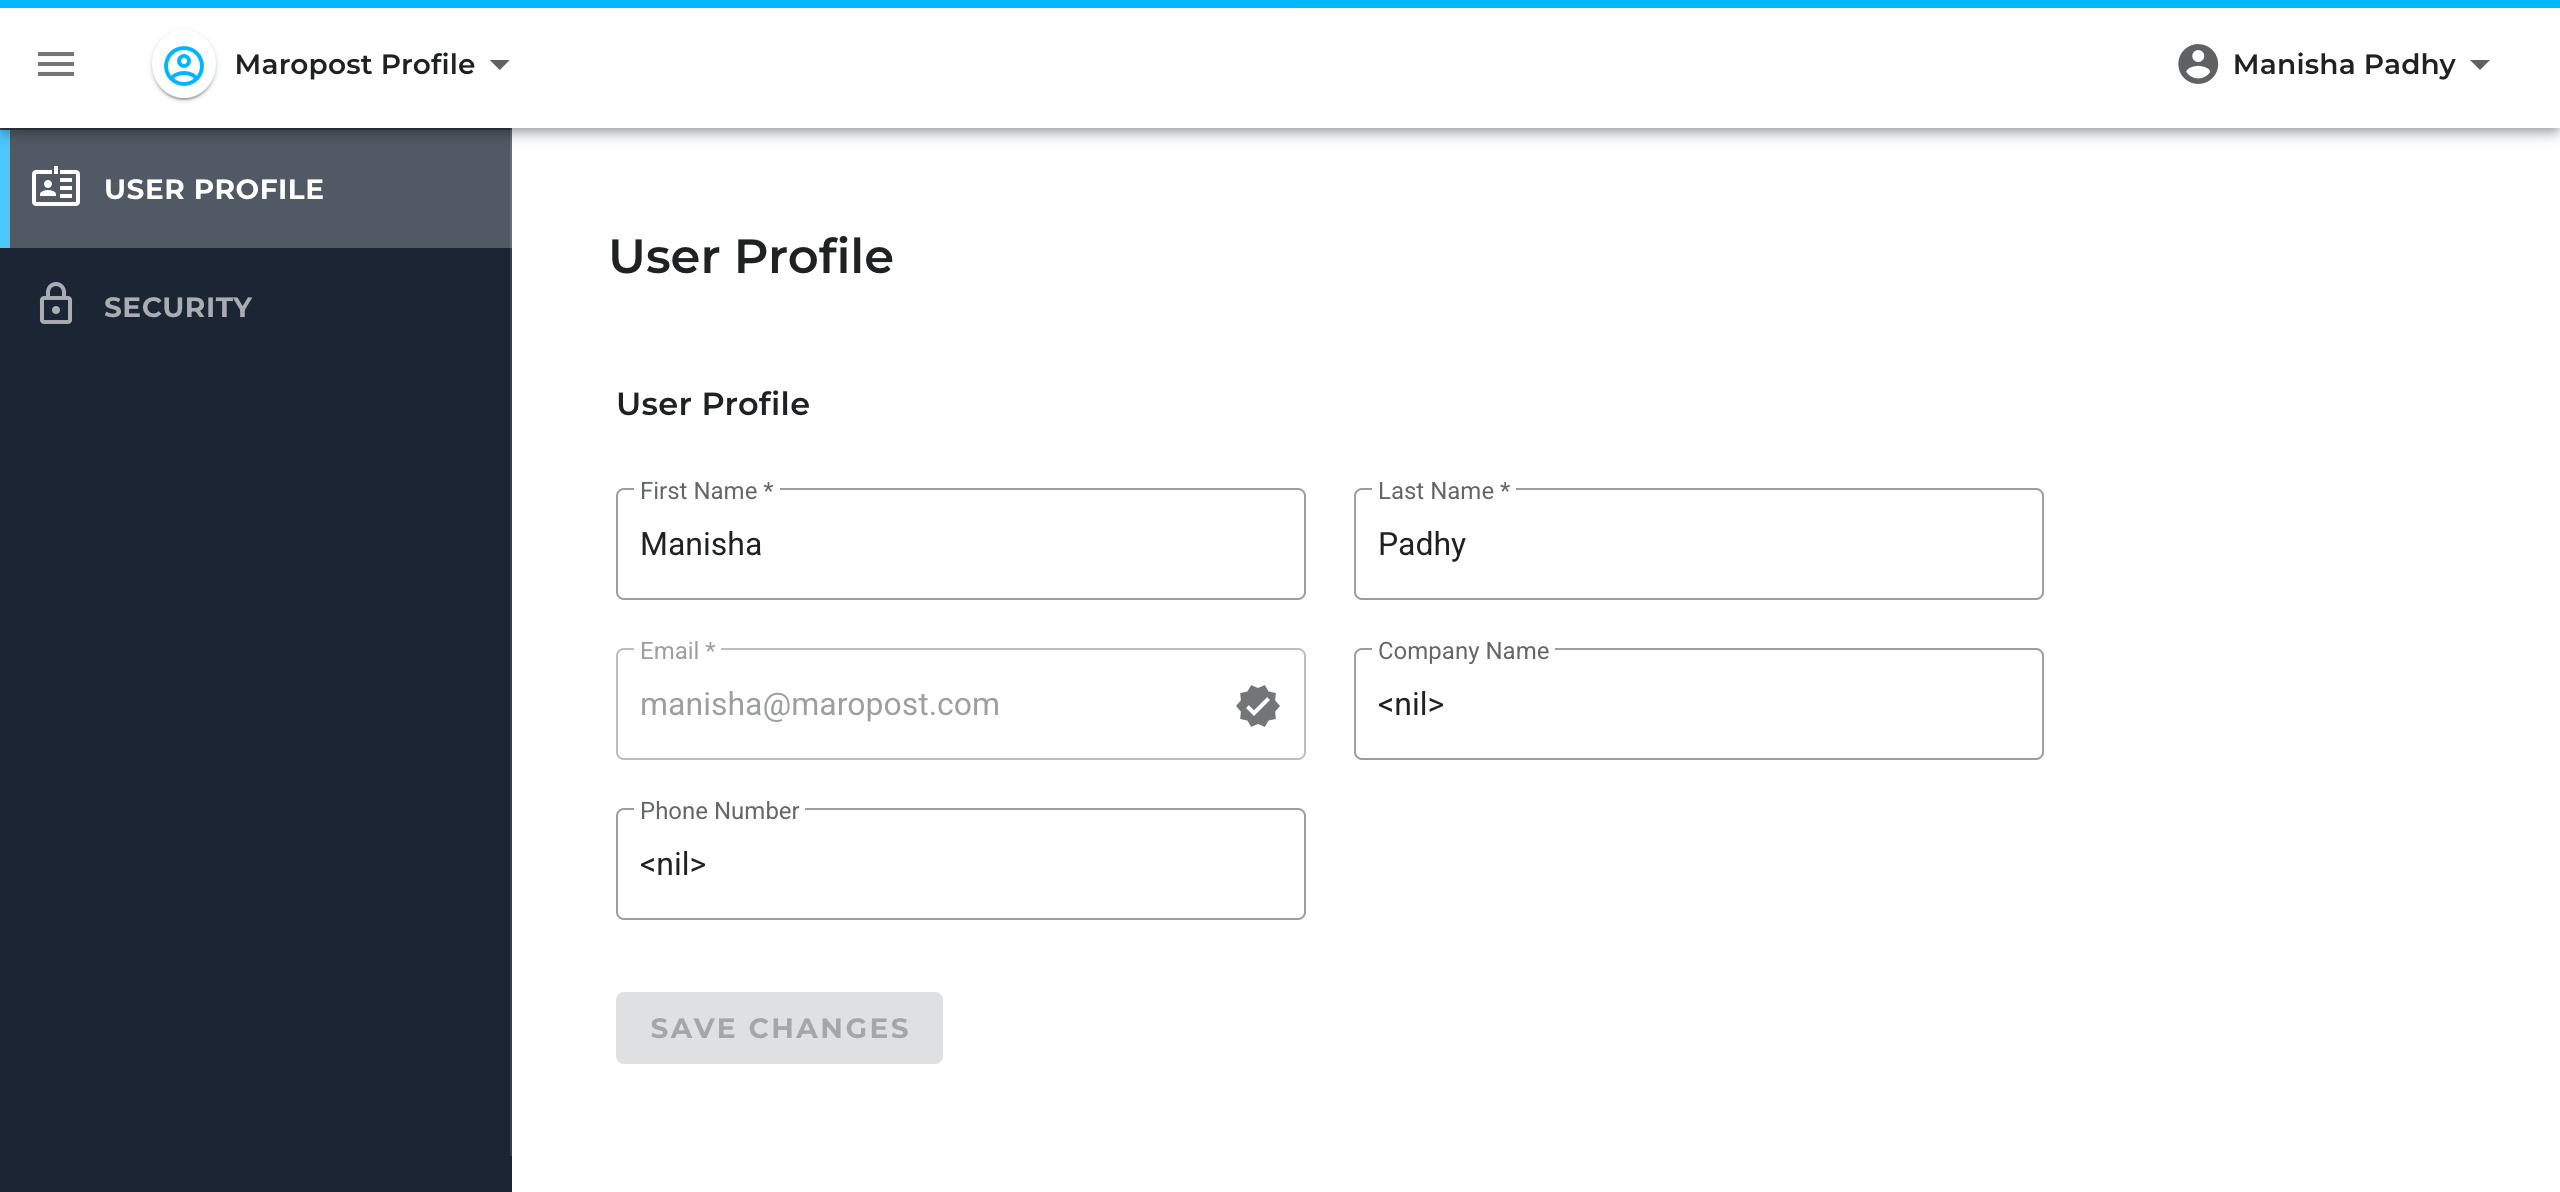
Managing Your User Profile
In the User Profile section, you can update your profile information, such as your first and last name, company name, and phone number.
Managing Your Account Security Options
In the Security section, you can set up and update your login password, MFA (OPT setup and recovery codes, and passkeys.

Categorized as three sections, the Security page contains the following:
Basic Authentication
In this section, you can reset your password.
Two-Factor Authentication
In this section, you can reconfigure your MFA setup. It includes the following options:
- OTP: Enables you to reconfigure your MFA setup by replacing the existing OTP method with a new one.
- Recovery Codes: Enables you to generate a new set of recovery codes if you have misplaced the existing recovery codes. Note that recovery codes are generated during MFA setup and can be used in cases where you cannot use your authenticator apps or aren’t receiving any OTP.
To learn about MFA, see Multi-Factor Authentication in Neto.
Passwordless
In this section, you can set up and manage your passkeys. Passkey is a secure login option without the need for a password or authentication OTPs. Here, the system prompts you to sign in with a passkey either via your main device, a smartphone or tablet, or with the help of a USB security key.
To learn about passkeys, see Passkeys for Neto Login on Windows and Passkeys for Neto Login on macOS.