Menus allow customers to navigate products and pages on your website. All menus can be created and managed in your Neto control panel.
Add a Link to a Menu
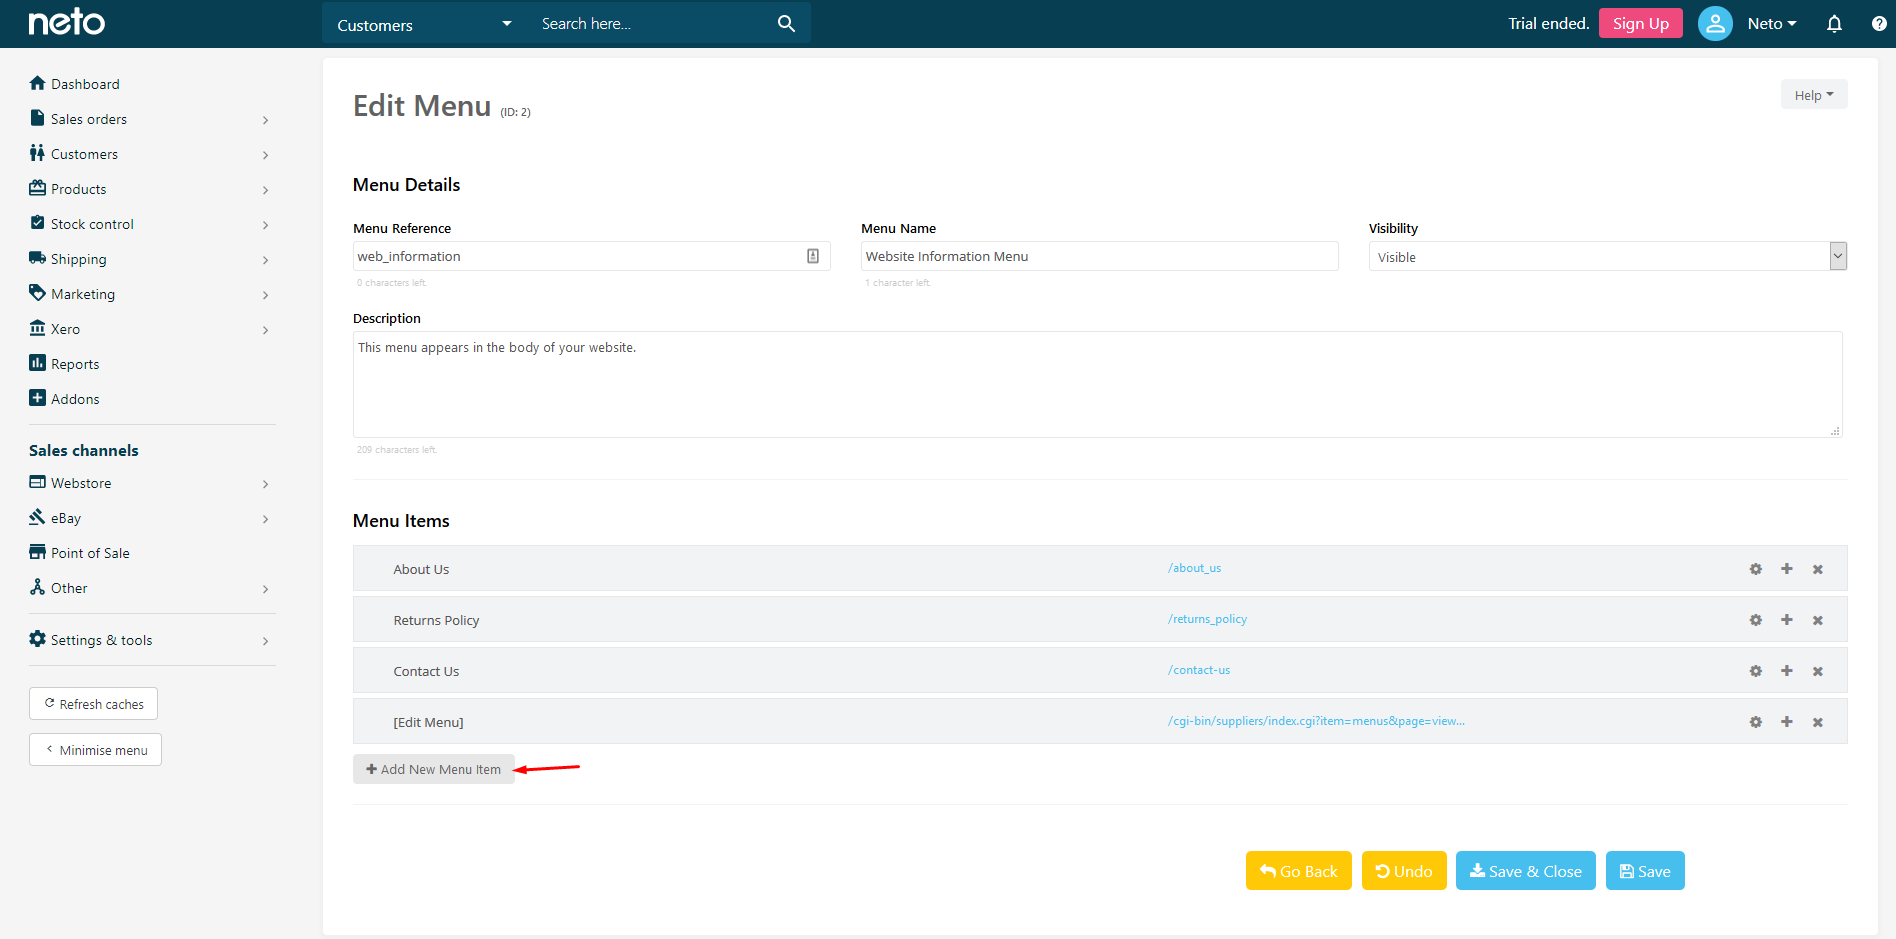
- In your Neto control panel navigate to Webstore > Menus.
- Select the menu that you want to edit by clicking on the ID or reference name for the menu you want to edit.
Reference | Description |
|---|
web_header | This menu appears at the top of every page on your website. |
web_information | This menu appears in the body of your website. |
web_footer | This menu appears at the bottom of every page on your website. |
- To add a link to an existing menu, simply click the Add New Menu Item at the bottom of the menu list.
- Click on the cog icon to add links for this menu option. A pop-up window will appear.
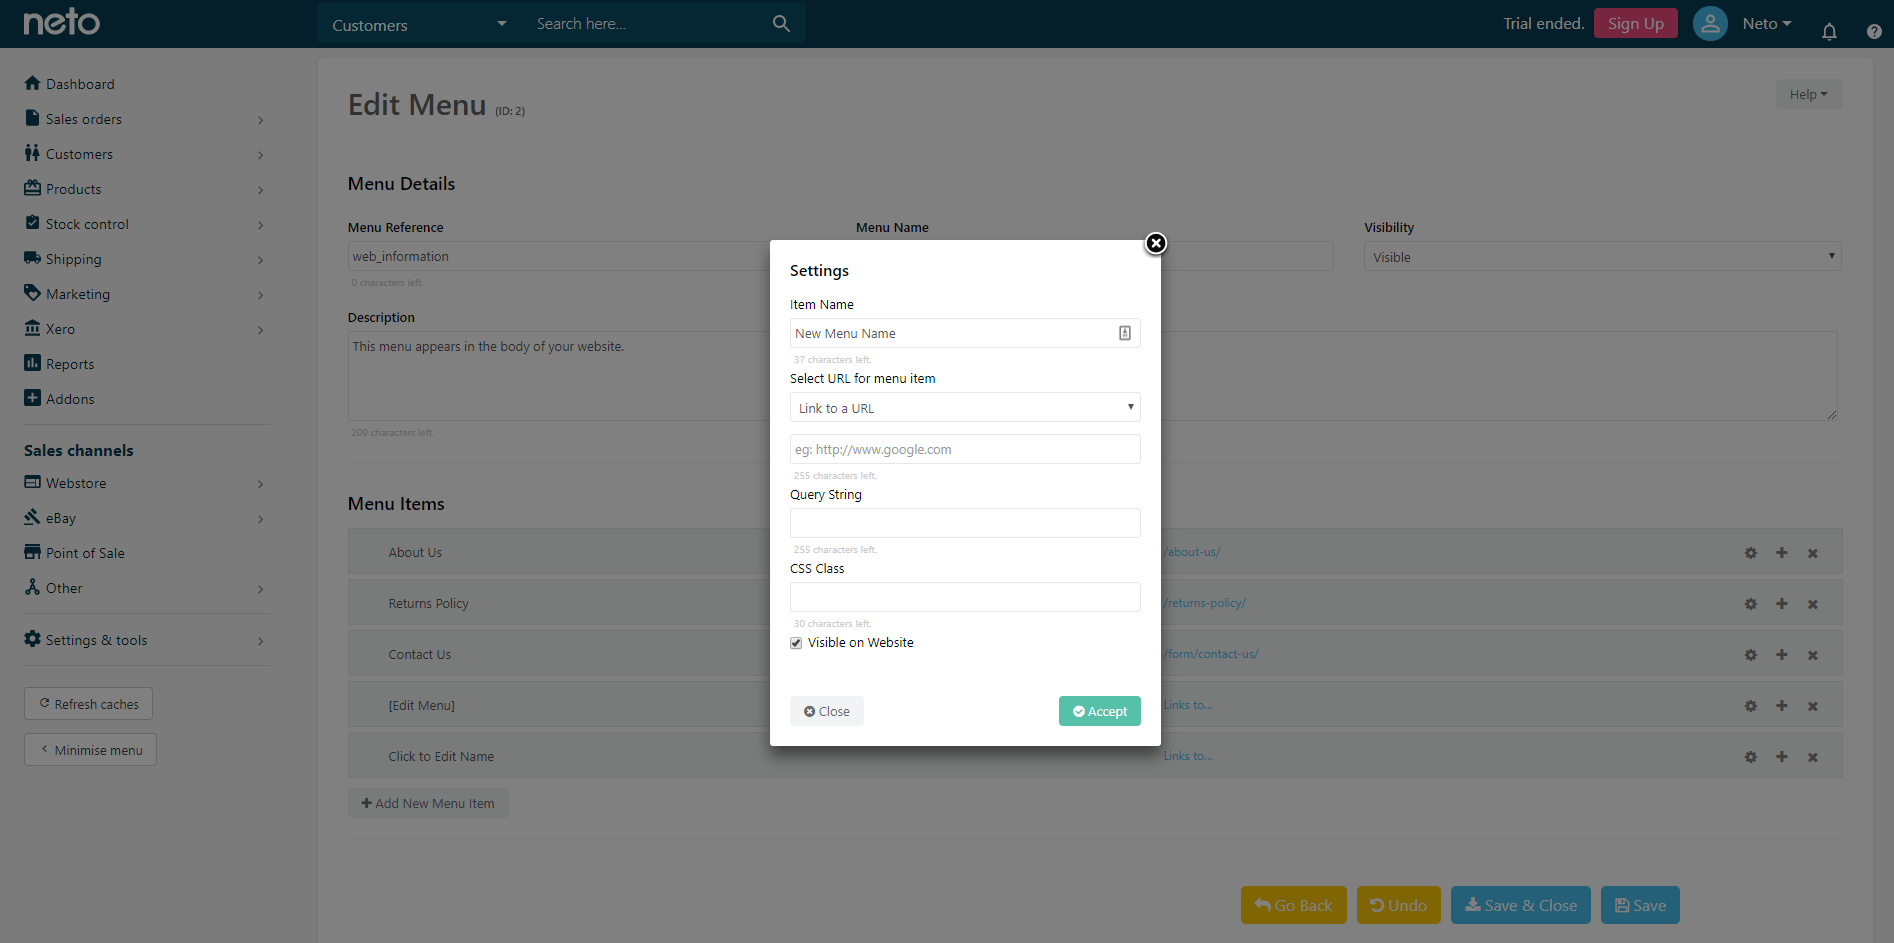
- Enter the name of the new menu option under Item Name.
- Link to a URL - to enter a web address for an external website. Paste the web address in the field below.
- Link to an existing product - link to product page. Enter the product's SKU in the field below.
- Link to an existing stockist - links to a stockist or store location. Select store from the drop down list below.
- Blog Post, Brand, Buying Guide, Form, Information Page or Product Category - links to a page with that content type. Select page from the drop down menu below.
- The Query String is an advanced feature. Use it to add parameters to the menu web address. If unsure, leave this blank.
- The CSS Class is an advanced feature. This can be used by web designers to change the way the menu option looks on the web page. If unsure, leave this blank.
- You can hide a menu option by unchecking Visible on Website.
Under Select URL for menu item select:
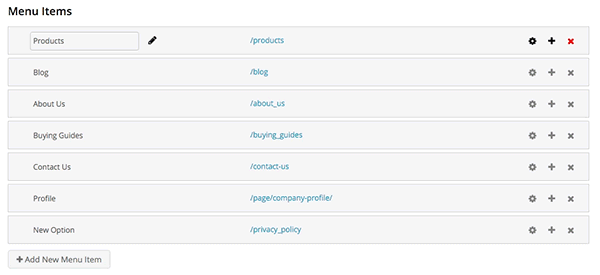
- To add a sub-menu option, click on the plus.
- To remove a menu option, click on the cross.
Click on Accept to save the option settings.
To change the order of the menu options, click and drag the menu option up or down. Let go of the mouse button when it's in the correct position. To create a sub-menu option, drag the option to the right so it is indented.
- Click on the Save button to confirm your changes.
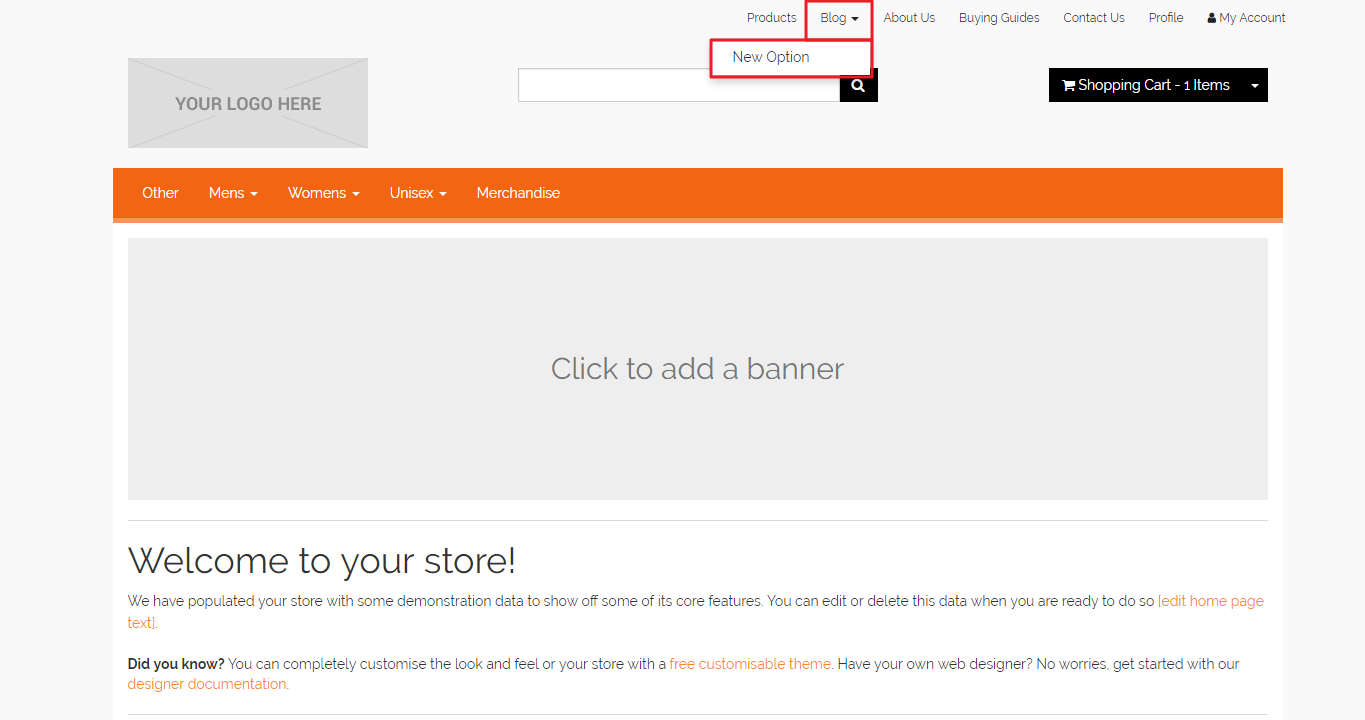
You can now check your website to see how the menu looks.
Edit a Product Category Menu
On most themes, category menus are automatically generated based on your category tree. Some themes may limit the amount of categories that display.
To edit your product category menu in your Neto control panel, navigate to Products > Categories.
If you've updated your categories and the menu has still not updated, it could be a result of caching. In the left hand navigation menu, click the Refresh Caches link at the bottom.