Clear Website & Browser Cache
Your website and web browser use a technology called caching to speed up the time it takes to view a web page. Caching saves a copy of the data both on web servers around the world and in your web browser.
For example, when you view a page containing an image, the web browser uses the image stored on your computer rather than downloading the image from your website. Images can be cached for months.
For the image to show in your web browser, you need to clear the cache both for your website and in your web browser.
Clear Website Cache
To clear the cache on your website, simply click the Refresh caches link in the bottom left-hand side of your Neto control panel.
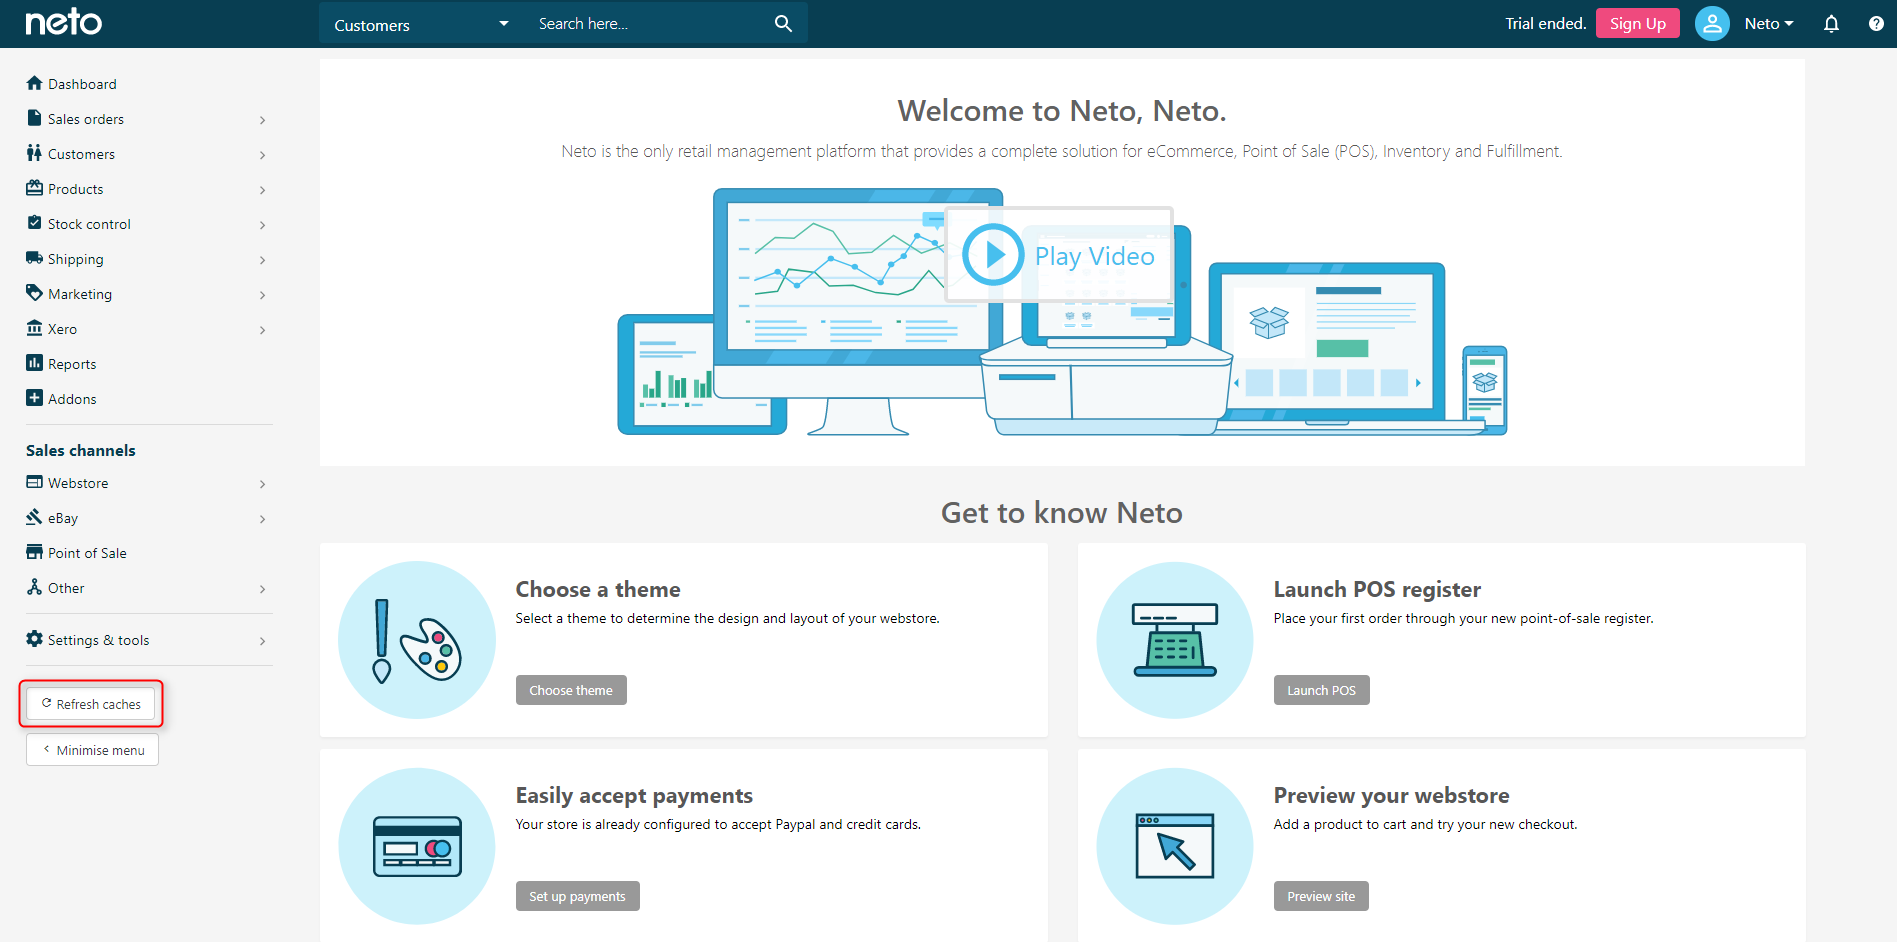
Your website cache is automatically purged every two hours. You only need to purge the cache if you want to see the changes before the automatic purge.
Clear Web Browser
Clearing the cache in your web browser is a two-step process:
- Delete the cached files.
- Refresh the web page that contains the image.
This article will give you step-by-step instructions to delete the file cache in your web browser:
http://www.wikihow.com/Clear-Your-Browser's-Cache
Once the file cache is deleted, you need to refresh the page that contains the image in your web browser. In Windows and Linux press F5 and on the Mac, press Command-R.
A quick way to view the change images without clearing your browser's file cache is to open a private (also called incognito) window. In Windows press Shift-Control-N and on the Mac press Shift-Command-N. This will open a new window and bypass the browser's file cache.
Process Queue
Processes may take time some time to run depending on the time of day or the number of processes that are currently queued to run (eg. eBay updates, accounting updates, shopping comparison feeds, etc). If updates aren't appearing on your website it may be because the process hasn't started, or is taking too long. To speed this up, you can change the priority of the process:
eBay Processes
- In your Neto control panel navigate to eBay > Pending.
- If you have a Process ID, you can enter it and click on the Apply button. Select the process(es) to modify.
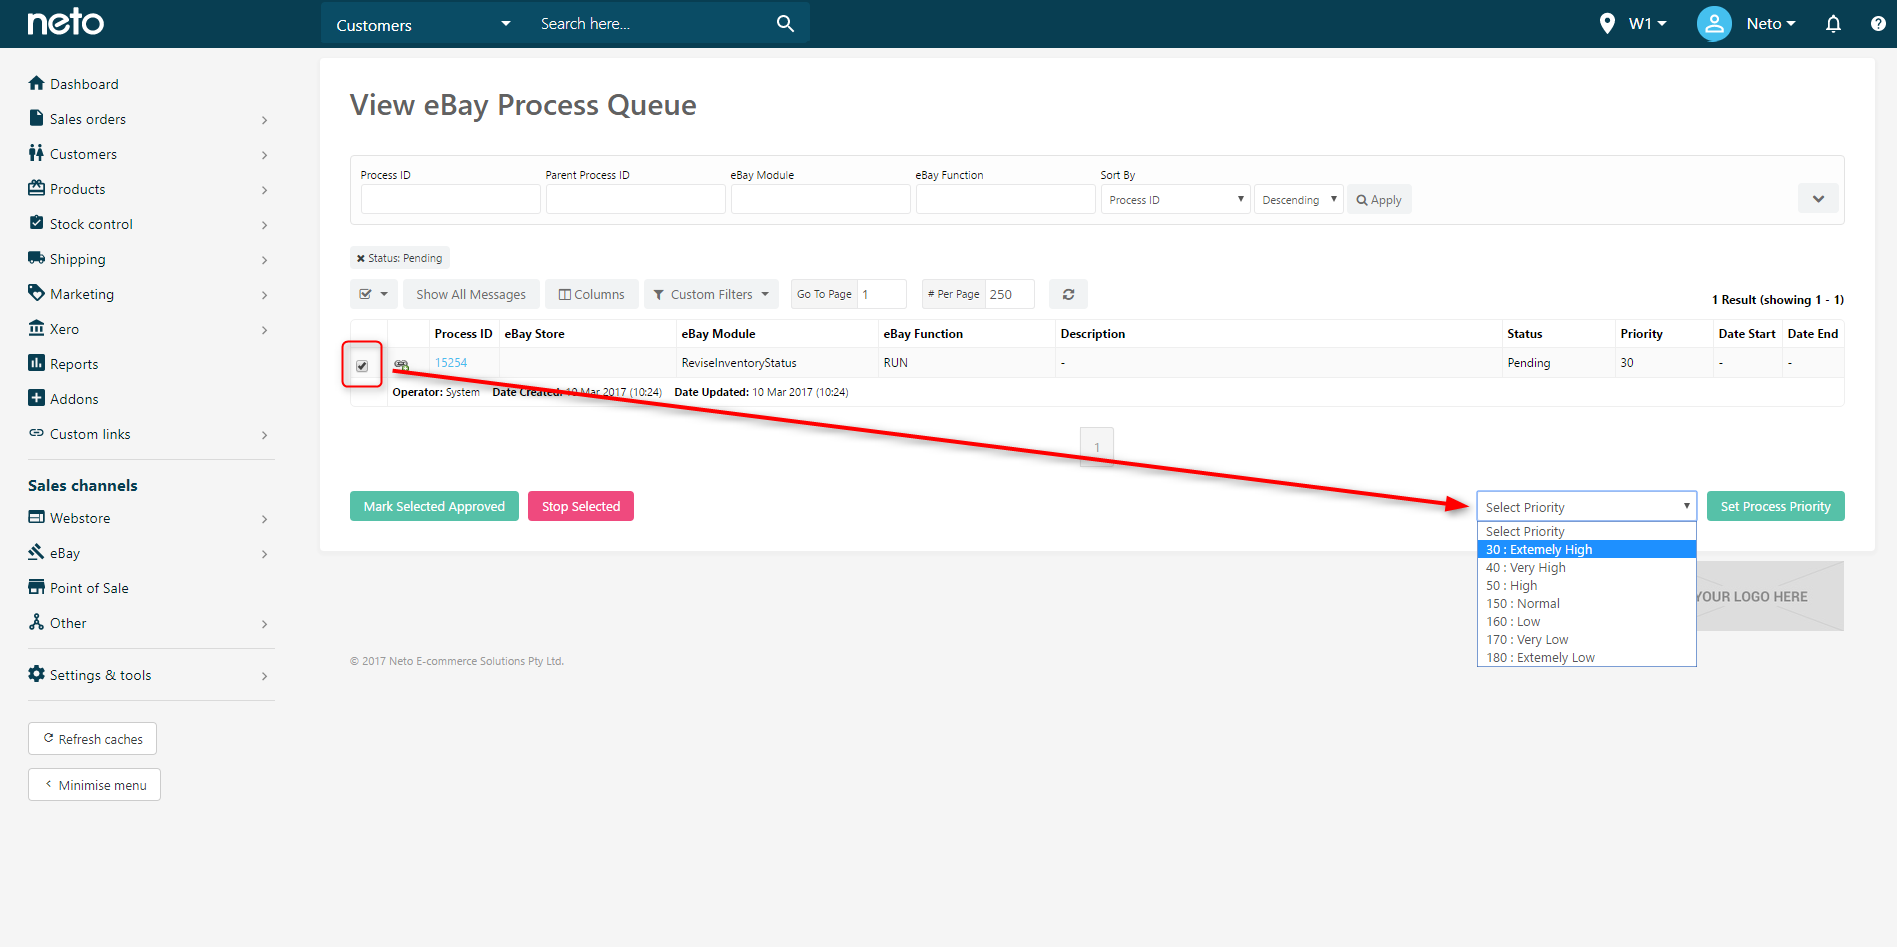
- Select the Priority from the dropdown menu. The lower the number the higher the priority. Then click on Set Process Priority.
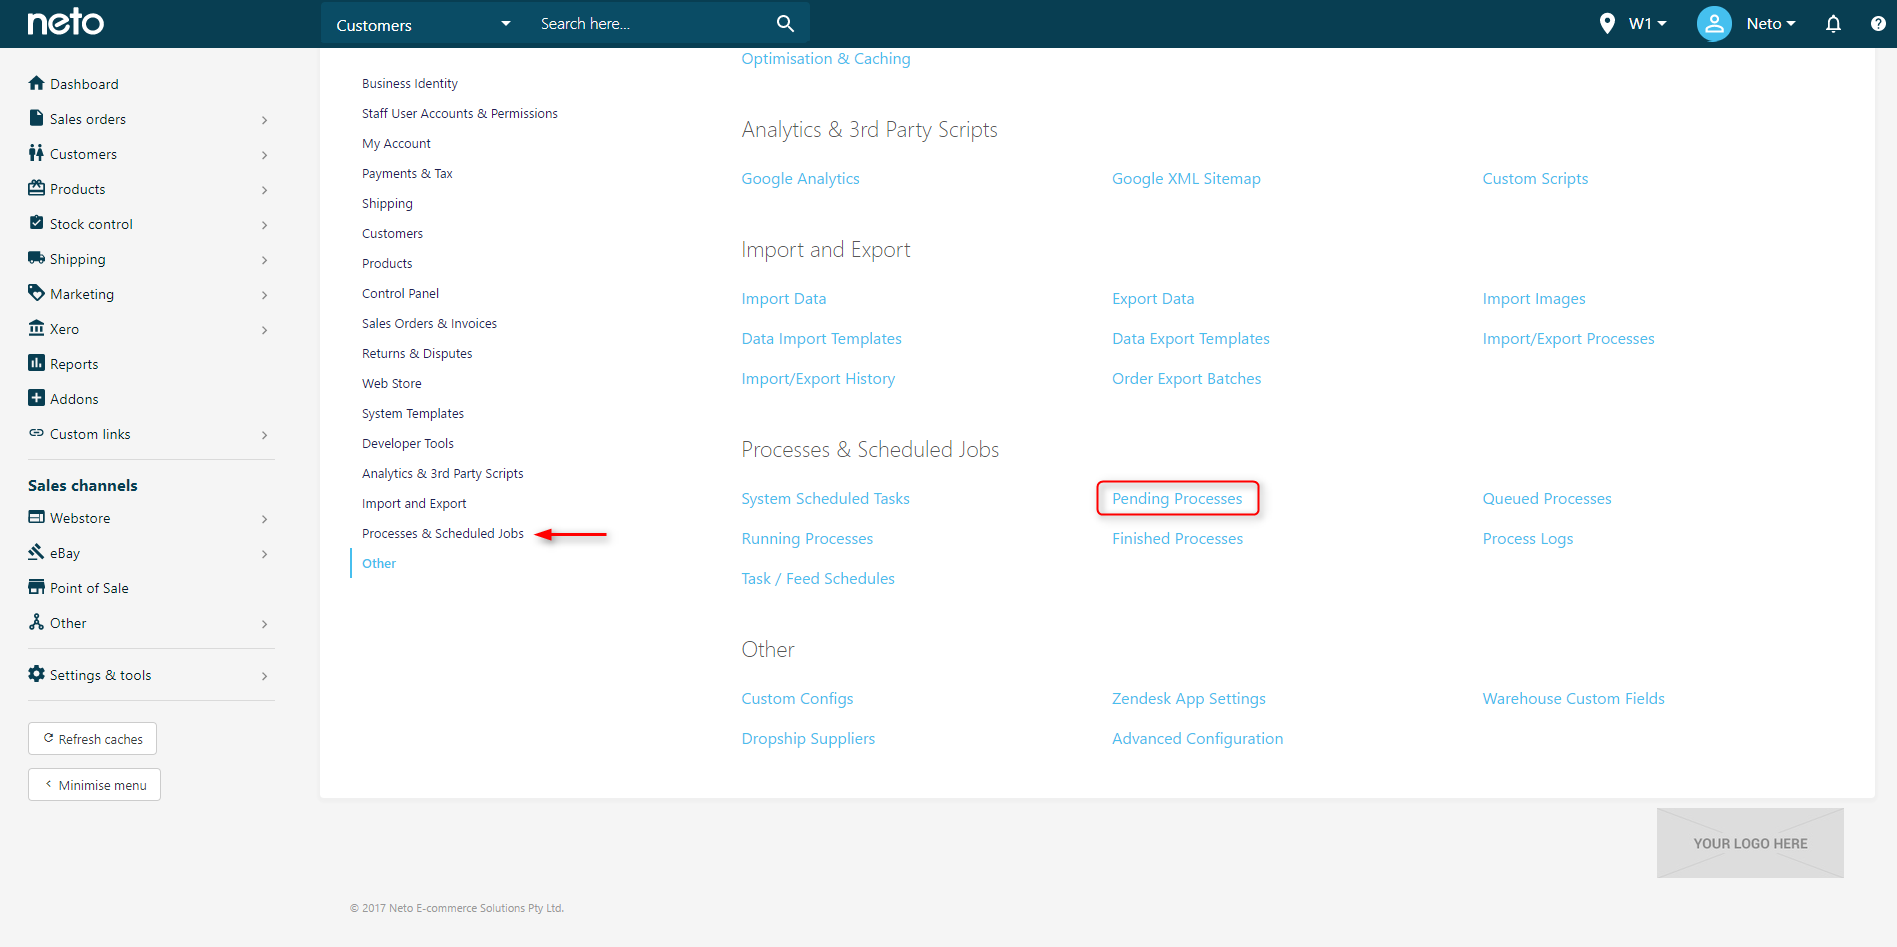
Other Processes
- In your Neto control panel navigate to Settings & Tools > All Settings & Tools.
- From the side menu select Processes & Scheduled Jobs and then choose Pending Processes.
- If you have a Process ID, you can enter it and click on the Apply button. Select the process(es) to modify.
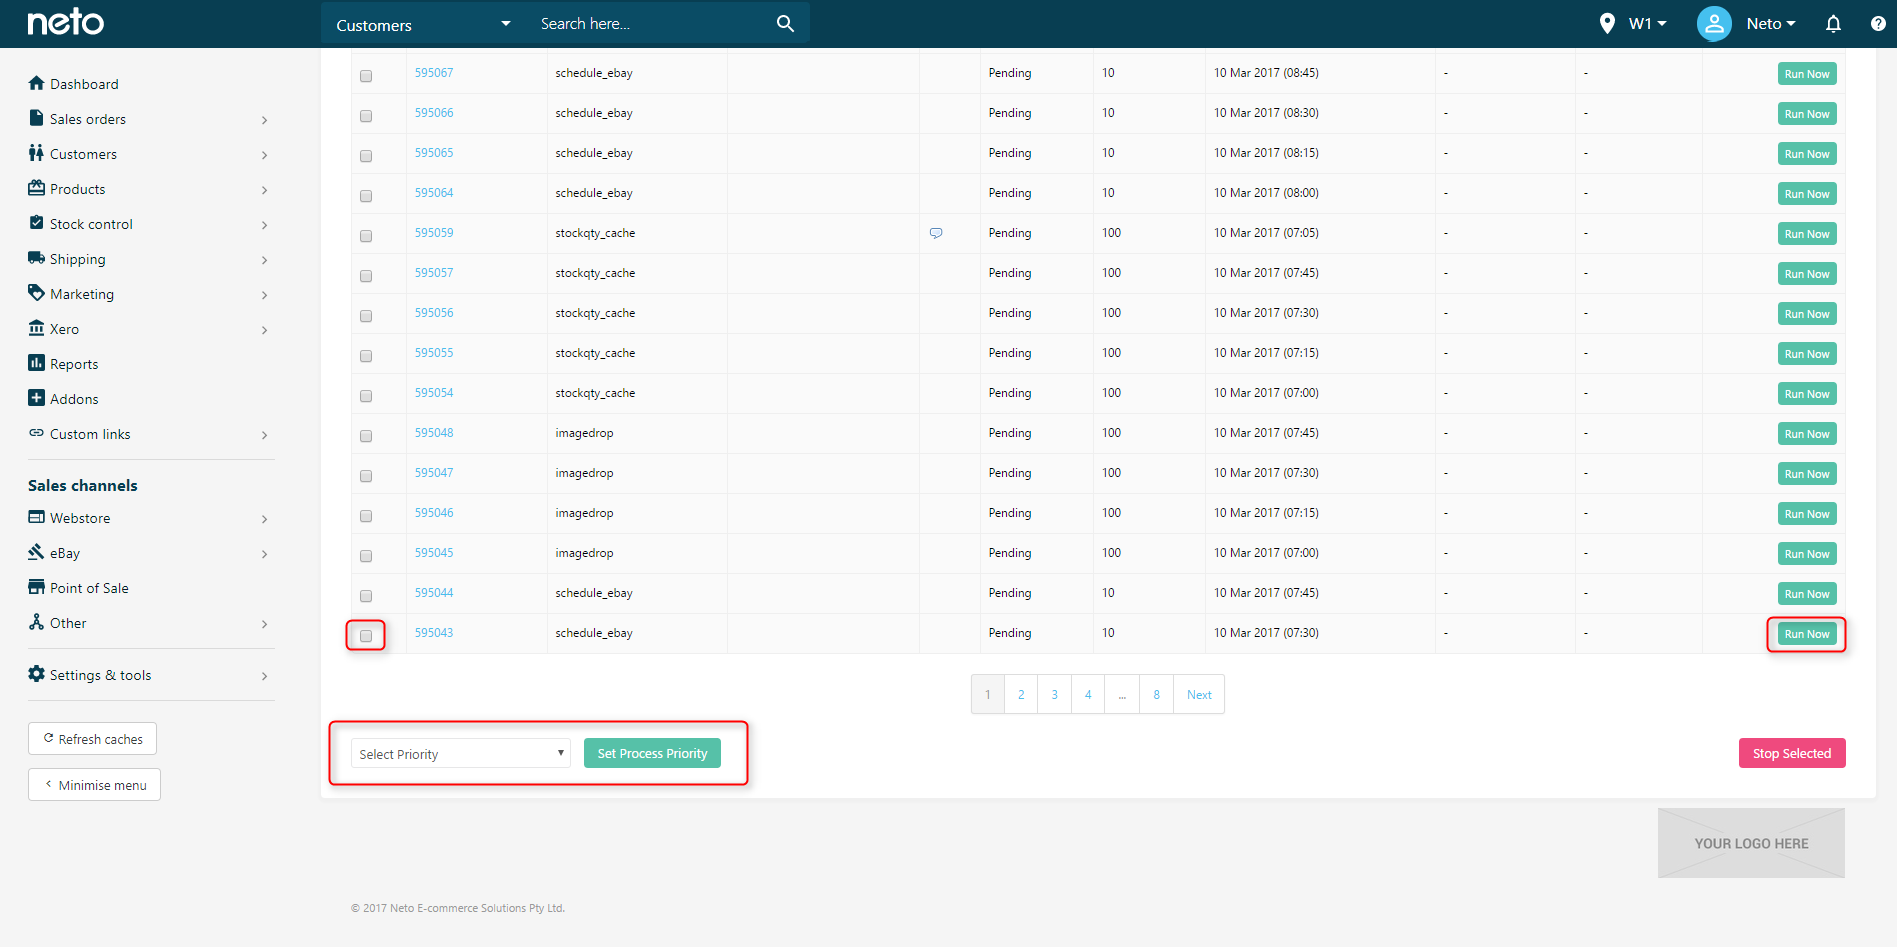
- Select the Priority from the dropdown menu. The lower the number the higher the priority. Then click on Set Process Priority or click Run Now.
Clear DNS Cache
DNS resolves the domain name to IP addresses so people do not have to remember a series of numbers (IP addresses) when trying to visit a website. In order the speed up this process and reduce the traffic on the DNS servers, most computer operating systems will store or cache DNS lookups on your computer locally. At times you may need to clear the cache to see changes. Typically this process is referred to as clearing or flushing the local DNS cache.
In order the speed up this process and reduce the traffic on the DNS servers, most computer operating systems will store or cache DNS lookups on your computer locally. At times, you may need to clear the cache to see changes.
Flush Local DNS Cache in Windows
Open the command line window, and depending on your version of Windows, this can be done in one of the following ways:
Windows 10, 7 and Vista:
- Click on the Start Menu
- Type cmd in the search box
- Right-click on cmd in the program search results and choose Run as Administrator.
Windows 98/NT/2000/XP
- Click on the Start Menu
- Select Run
- Type or select cmd to open the command line window
Once the command line window is open type the following command at the prompt:
ipconfig /flushdns
Press Enter on your keyboard to run the command. After the flushdns is completed, type exit to close the command line window.
Flush Local DNS Cache in MacOS
10.4 and below
- Open a Terminal window
- Type this command and hit return
- lookupd -flushcache
Close the terminal window
10.5 and above
- Open a Terminal window
- Type this command and hit return
- dscacheutil -flushcache
Close the terminal window
Flush Local DNS Cache in Linux
With the various distributions of Linux, you will find that some run a daemon in the background to manage the DNS cache, while others do not. Ubuntu is a good example of a distribution that doesn't run this daemon by default. If you're running Ubuntu and you have not already installed the ncsd daemon, you can install it with this command:
sudo aptitude install nscd
To restart the ncsd deamon in Linux, use this command:
sudo /etc/init.d/networking restart
Web Accelerator
Dramatically improve your website load times with the Neto Web Accelerator.
The Neto Web Accelerator is designed to make your website run faster. It is a combination of Varnish (a popular HTTP accelerator used by the likes of Wikipedia, Facebook and Twitter), Memcached (a high-performance, distributed memory object caching system used by the likes of Youtube, Craigslist and Flickr) and our own bit of magic (used by you).
The web accelerator is on by default, and can be accessed by going to Settings & Tools > Web Accelerator. If you're performing a number of updates to your website, turn the web accelerator off temporarily to see the changes sooner.
A web page must be loaded once (by any user) for that page to be accelerated for future visits. Therefore once a user (bot or human) has visited a web page, any user thereafter will experience the accelerated version of that page.
If you are in the process of developing your website, turn on development mode by going to Settings & Tools > Web Accelerator. Once you have completed development you can turn the web accelerator back on.
We have designed the accelerator in such a way that shopping cart, customer, session and form data is loaded separately, so these pages will not be cached through the accelerator.
You can prevent any part of your website from being cached by the Neto web accelerator by wrapping it in the [%AJAX_LOADER%] function tag.
eg:
[%AJAX_LOADER%]

<div>The Content I don’t want to cache</div>

[%/AJAX_LOADER%]
Learn more about designing Neto websites here.
Product Search Cache
You can refresh your product cache to see the latest products or filters on your web store:
- In your Neto control panel navigate to Products > View Products.
- Click on the grey More button and select Refresh Search Cache.
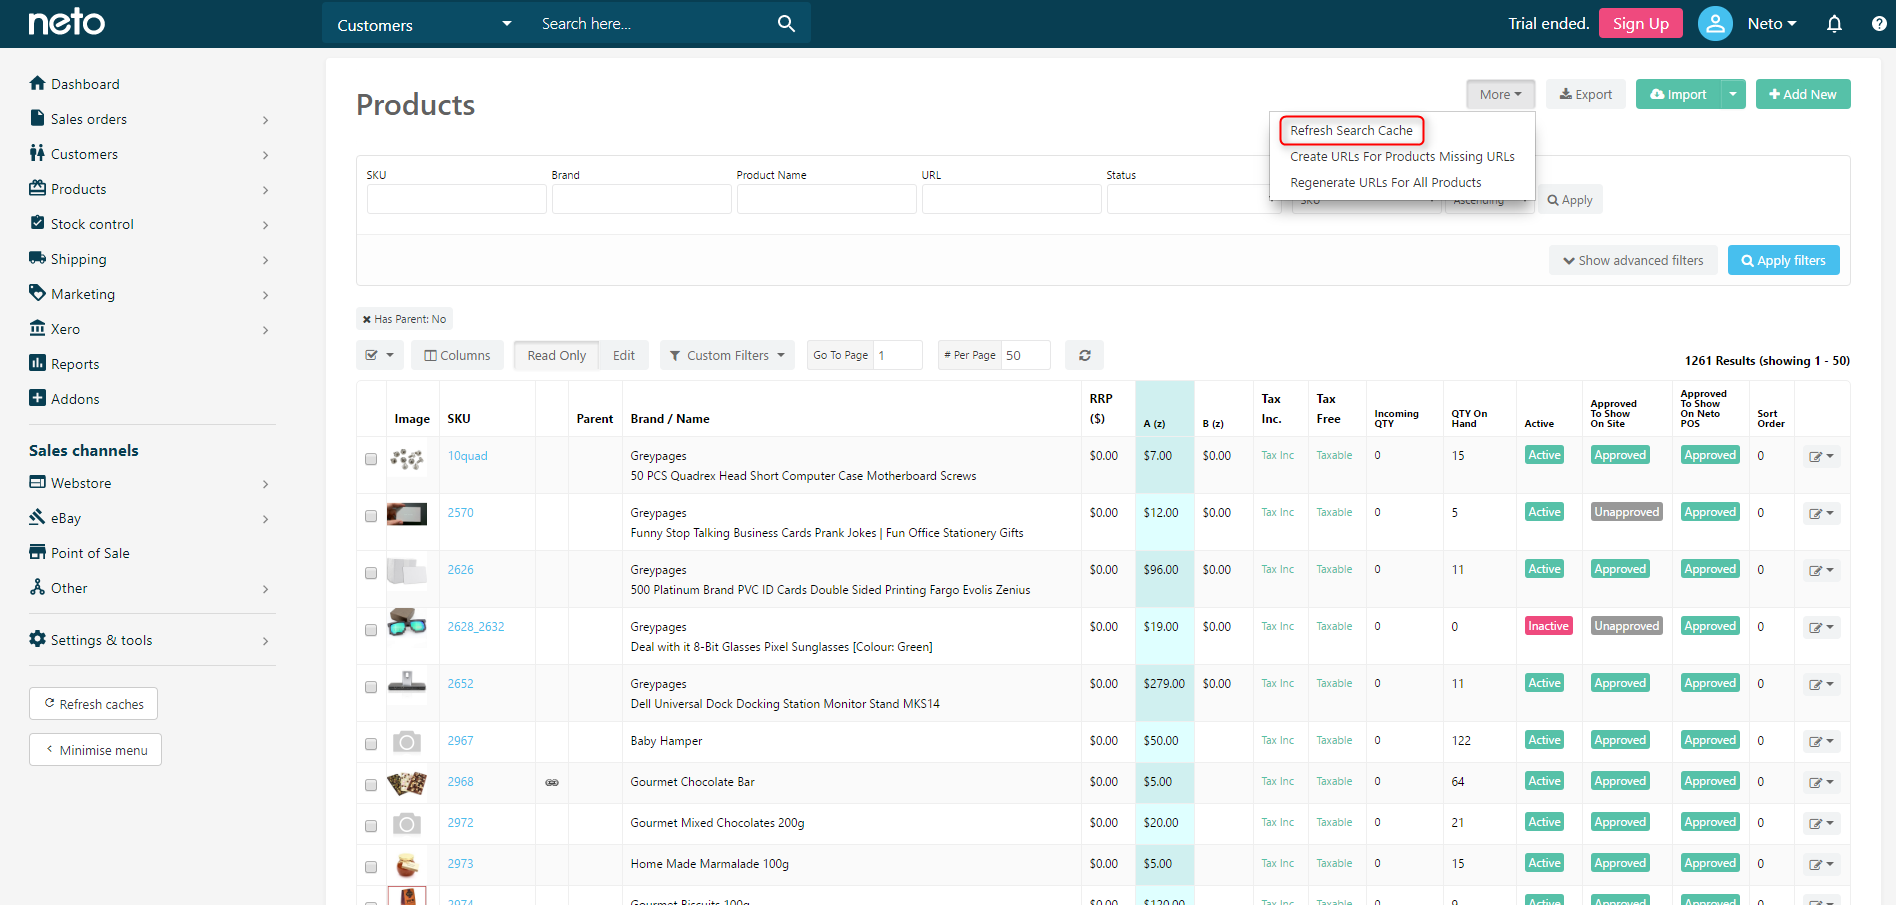
This will run a process that updates your search and filter results. This will take a few minutes to finish.
Back up your Neto Data
There are several key areas of your Neto control panel where data needs to be backed up. To be comprehensive, please follow the steps below:
Request SFTP access
SFTP (secure file transfer protocol) is used to copy all of your website assets, design files, and document templates. To request access, complete this form and a Neto staff member will be in touch with you. Steps for backing up the site data using SFTP can be found towards the end of this article.
Data Exports
The easiest way to make a backup of your products, customers and sales orders is by using the built-in data export function:
Products
- Navigate to Products > View Products.
- Click the Export button at the top right-hand side of the page.
- Choose CSV file with all fields and click the Preview button.
- Click the Export button and your CSV file will be generated.
- Once generated, click the Download button and save the file somewhere secure.
Please Note: Product images are not backed up in this process - follow the steps in the Product Images section below
Customers
- Navigate to Customers > View Customers & Prospects.
- Click the Export button at the top right-hand side of the page.
- Choose CSV file with all fields and click the Preview button.
- Click the Export button and your CSV file will be generated.
- Once generated, click the Download button and save the file somewhere secure.
Sales Orders
- Navigate to Sales Orders > View Orders.
- Click the Export button at the top right-hand side of the page.
- Choose CSV file with all fields and click the Preview button.
- Click the Export button and your CSV file will be generated.
- Once generated, click the Download button and save the file somewhere secure.
Product Images
To back up your product image you first need to export your product image URLs and then use a third-party tool to download them. To export your image URLs:
- In your Neto control panel navigate to Settings & tools > Export data.
- Click the Perform complex export button and then click Start data export wizard.
- Enter a Name for your file (e.g. Product Image URLs) and click the Continue to next step button.
- Click the Add New Field to File button. In the first dropdown menu, select *Product Data, and in the second *SKU.
- Click Add New Field to File again, this time select Image and URLs, and then Image URL.
- Repeat this step, adding Extra Image 01, Extra Image 02 etc until you've added all images you use.
- Click the Continue to Next Step button.
- Add any filters to exclude products from the export, and click the Continue to Next Step button.
- Set the Send Export File to dropdown menu to Local URL. This will save the CSV file on your site files so you can download it.
Select the Save export session as a template box, and enter a name for your template, so that you can run it again easily in future.
- Click the Export Now button.
Your file will go into the queue to be created, and you'll see a link to download the file once processed.
Click the process ID to run the process immediately.
There are lots of free software and browser extensions available to download images from URLs. We recommend using Google Chrome and the Tab Save extension.
- Install the Tab Save extension in Google Chrome.
- Open your CSV file then select and copy the image URLs, one column at a time.
- Click on the Tab Save extension button.
- Click the pencil icon.
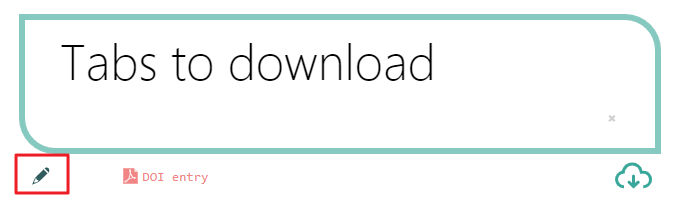
- Paste the URLs into the window, and repeat the copy and paste for any other image URLs in your CSV file.
- Click the download icon.
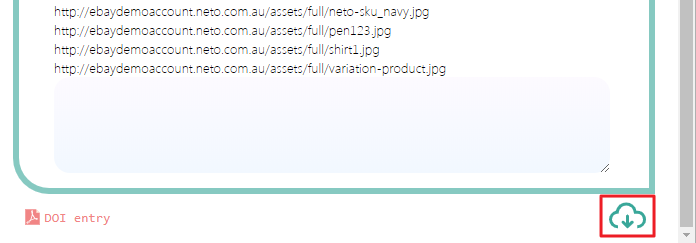
Images will be downloaded to your computer automatically.
Site Files
All of your website theme files, as well as document templates, are stored in the site files, so any customisations you've done can be backed up:
Product images cannot be downloaded through your site files.
- Connect to your site files via SFTP.
- You will see a list of folders on your computer on the left, and folders on your site on the right. Create or open a folder on the left-hand side where you want to save your files.
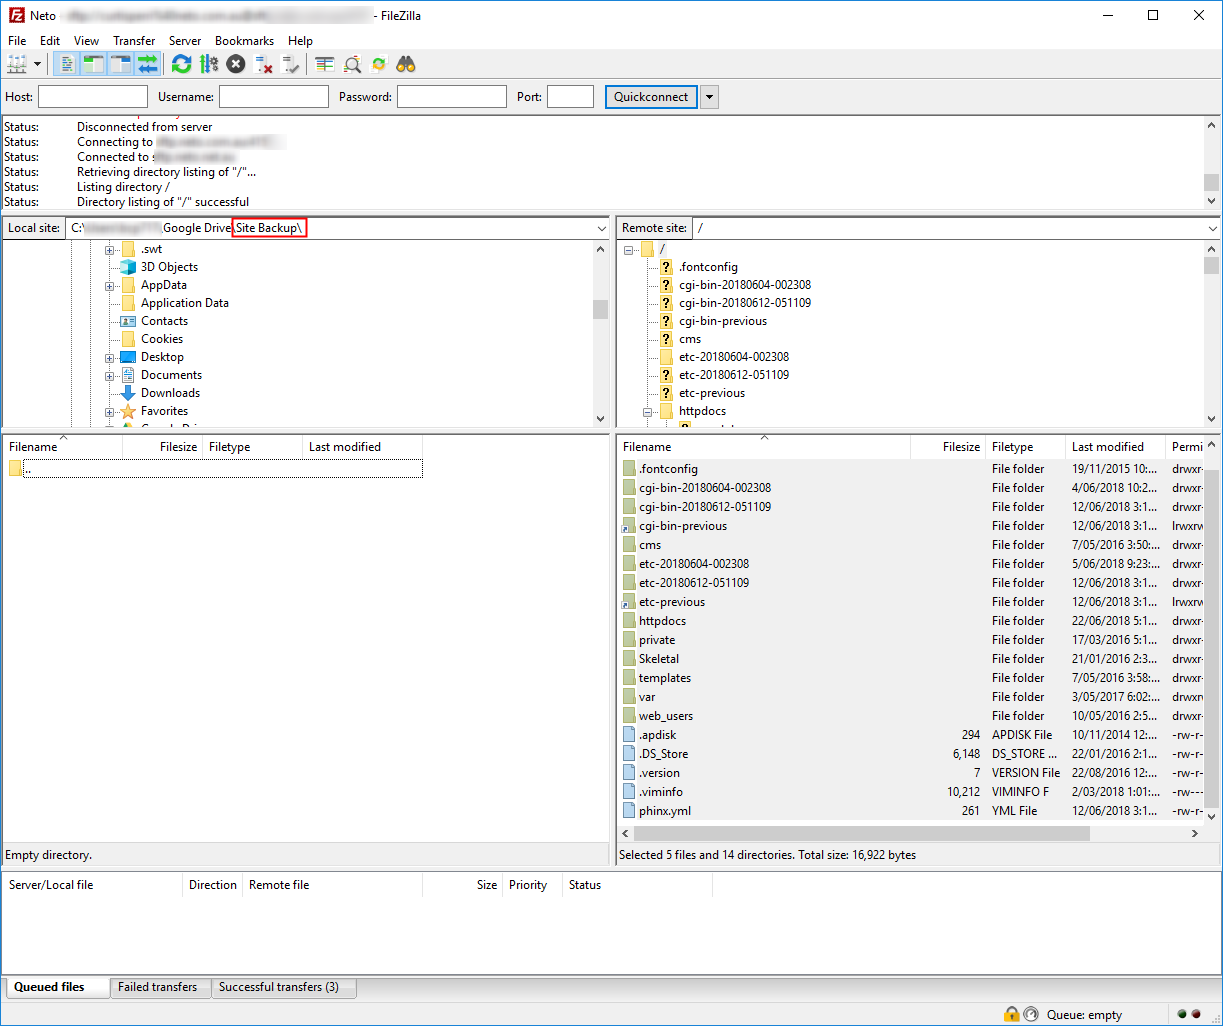
- Select all of the site files on the right, then right-click and select Download. Your site files will be copied across to your selected folder. Depending on the number of images and themes, this may take some time to complete.
Import &Export Templates (Optional)
Import and export templates can be saved and imported into other Neto sites, saving you time and effort to reconfigure them.
Import and export templates are specific to the version of Neto when they're created, and may not work correctly on a future version.
- In your Neto control panel navigate to Settings & Tools > All Settings & Tools.
- In the Import and Export menu, select Data Import Templates.
- Click the icon on the right-hand side of the template you want to download, and choose Download Template Settings File.
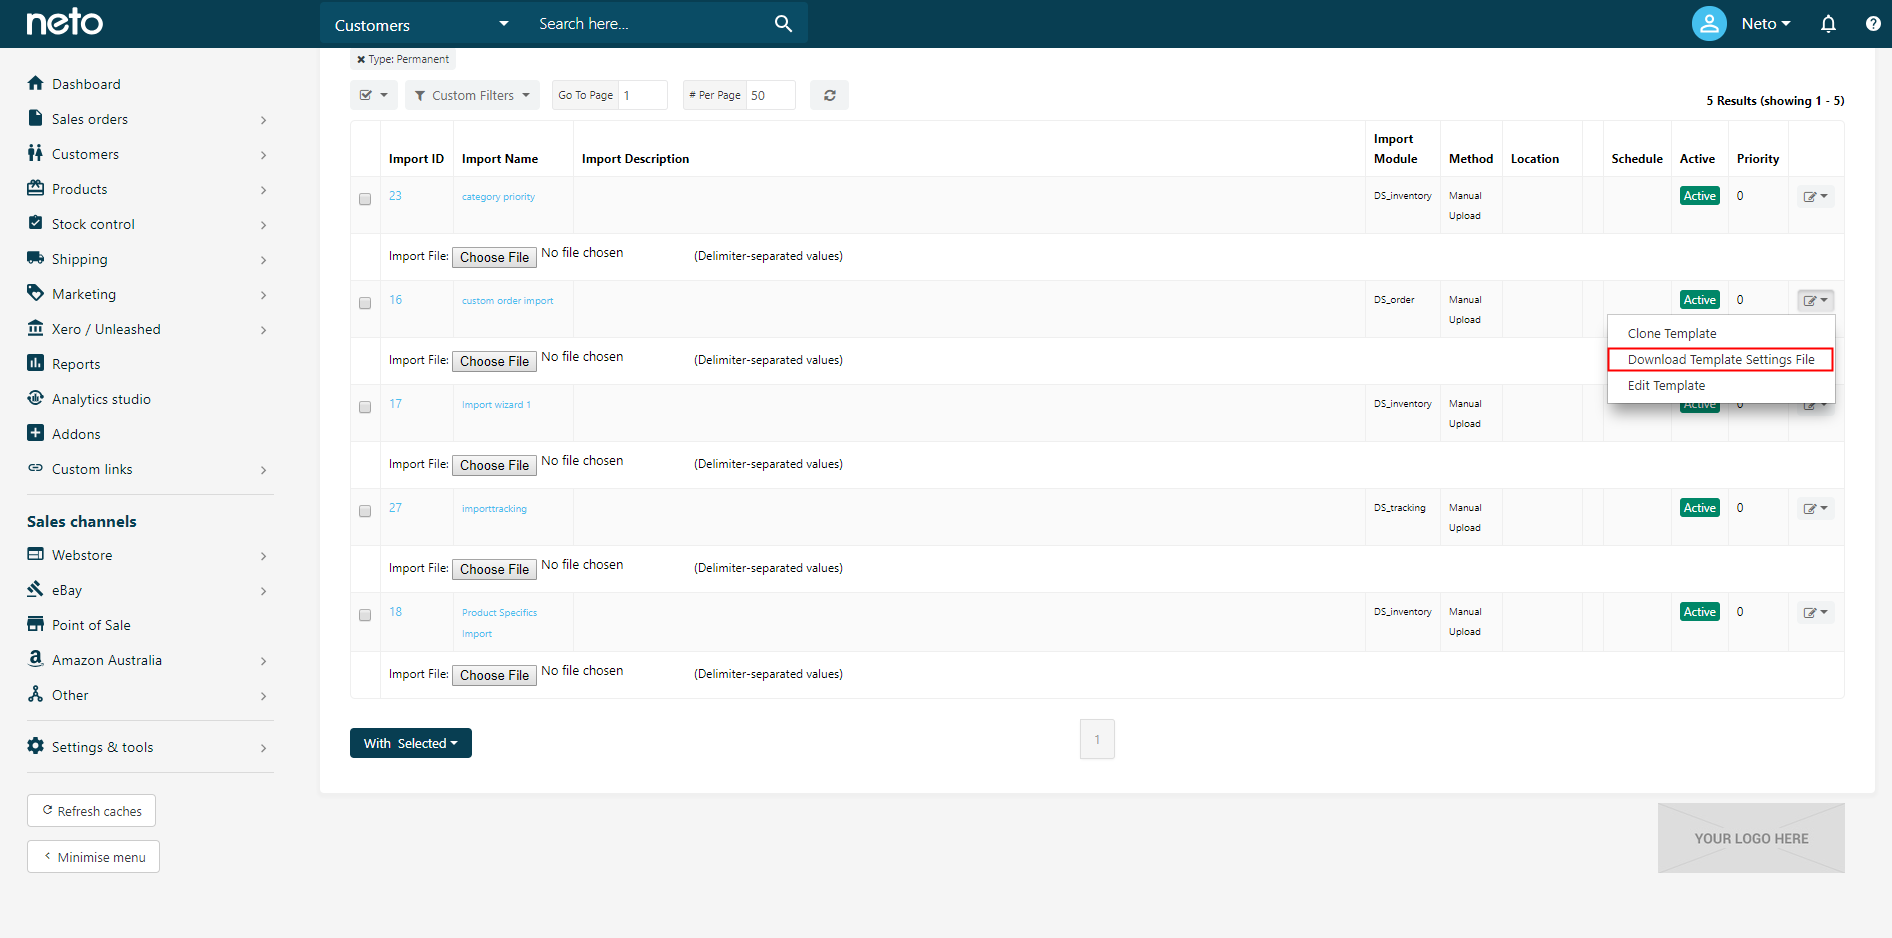
- The file will be saved to your computer. Repeat these steps for any other import templates you want to save, and then do the same with the Data Export Templates.
301 Redirects
If you are moving to Neto from another website platform or shopping cart solution it is important to ensure that 301 redirects are set up in Neto so that your search engine rankings are not affected by the move. 301 redirects transfer a user to a new page, when an old one is no longer active. 301 redirects are set up to ensure that traffic to your old website URLs are directed to your equivalent new website URL on Neto.
Example
Your old website has an about us page at: http://www.mydomain.com/content/pages/about_us.php
On Neto this page may be located at: http://www.mydomain.com/view/about_us
You need to tell the search engines and browsers that this page URL has changed permanently.
You cannot redirect from a page that is still active. Make sure that Active, Visible On Menu and Visible On Sitemap is deselected in Neto, otherwise the redirection will fail.

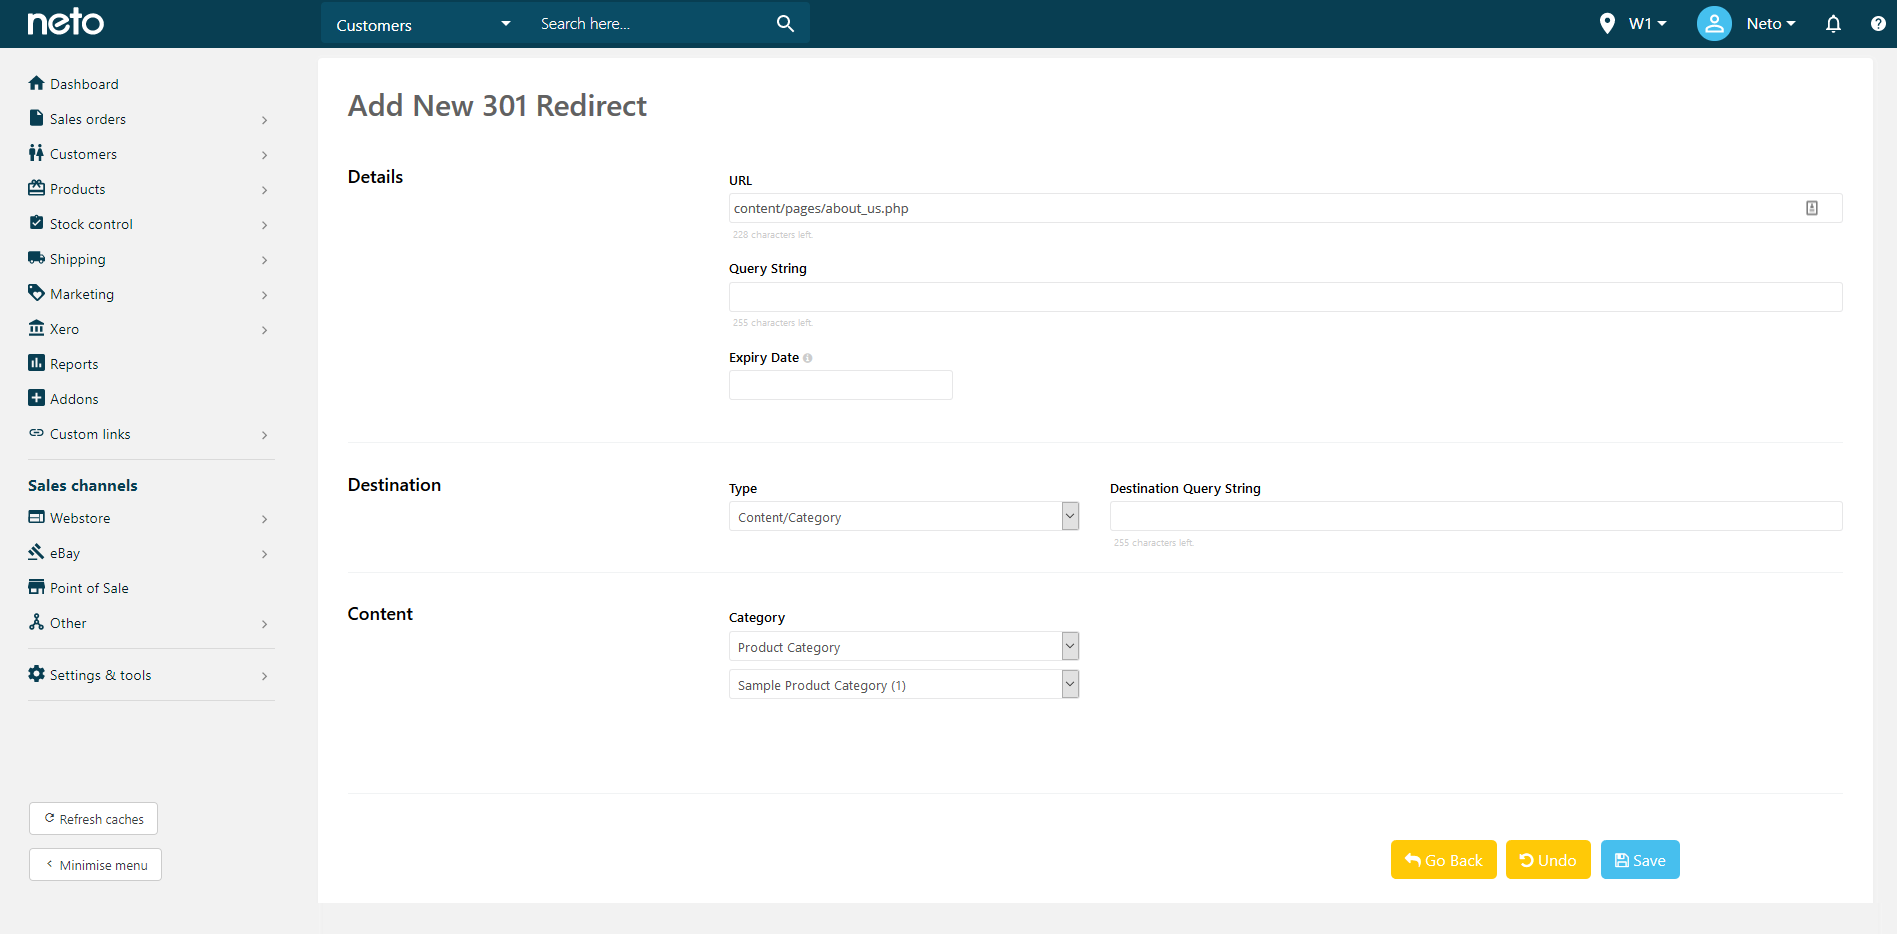
Create a Single Redirect
To create a single 301 redirect:
- In your Neto control panel navigate to Settings & Tools > All Settings & Tools.
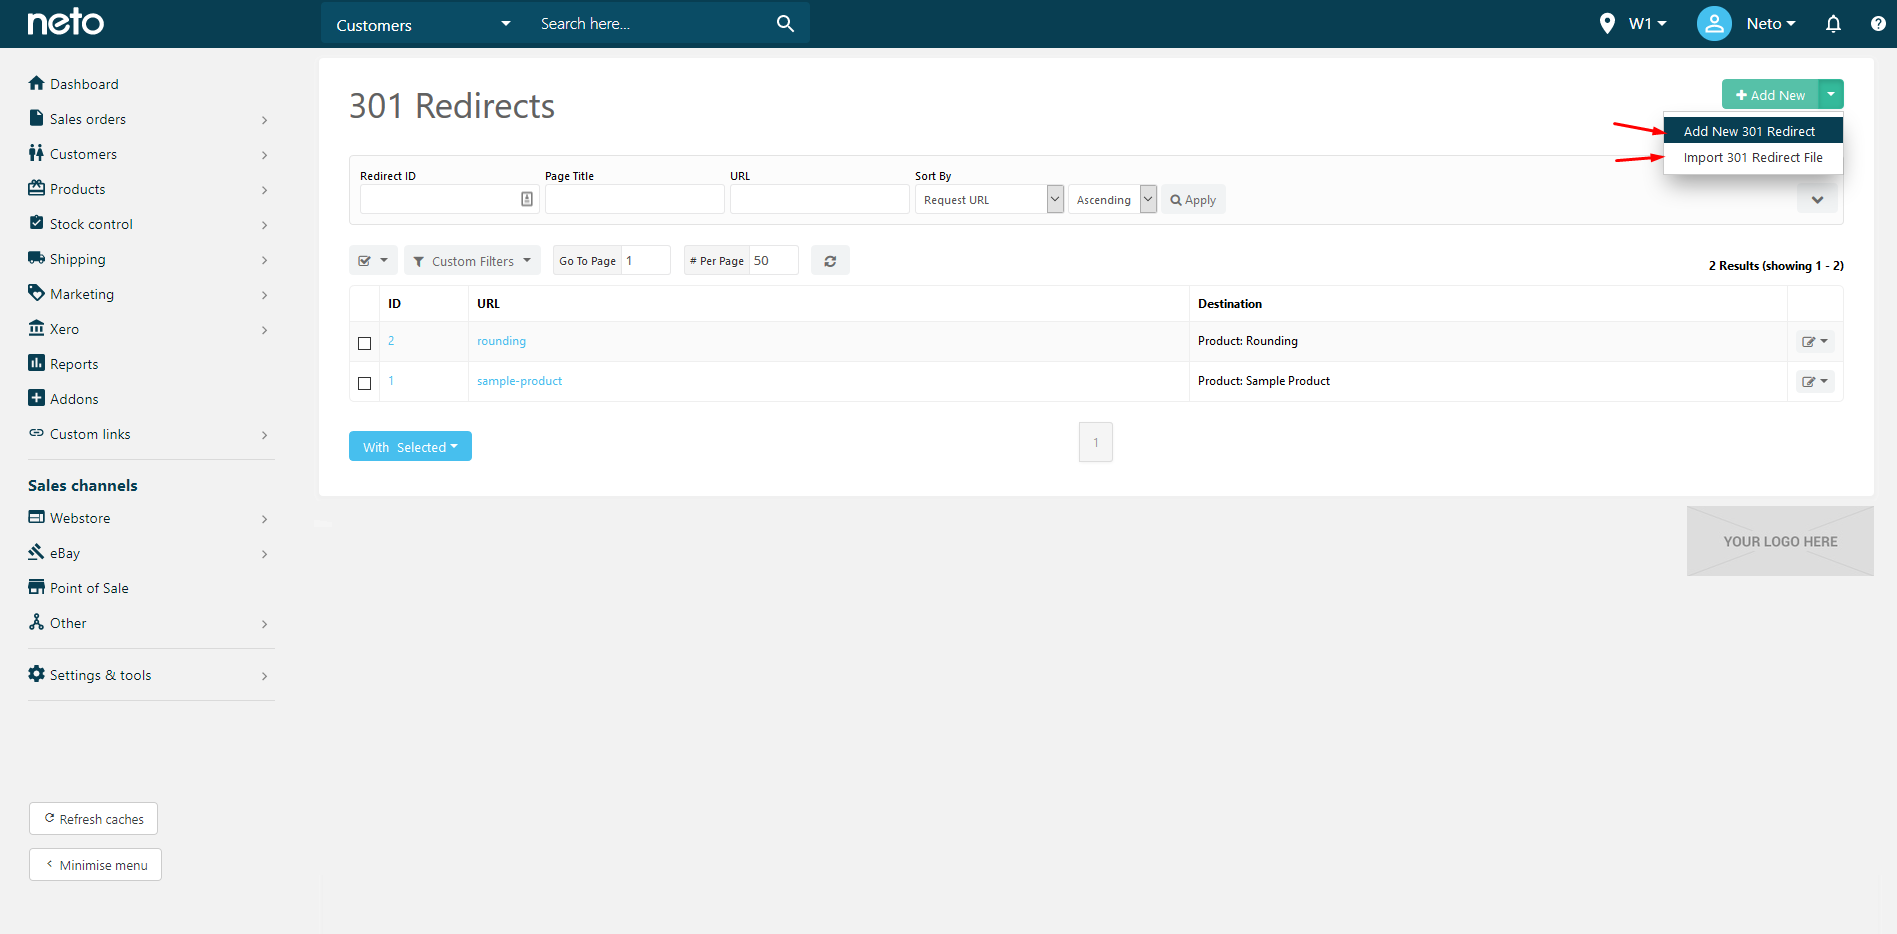
- Under the Web Store heading select 301 Redirects.
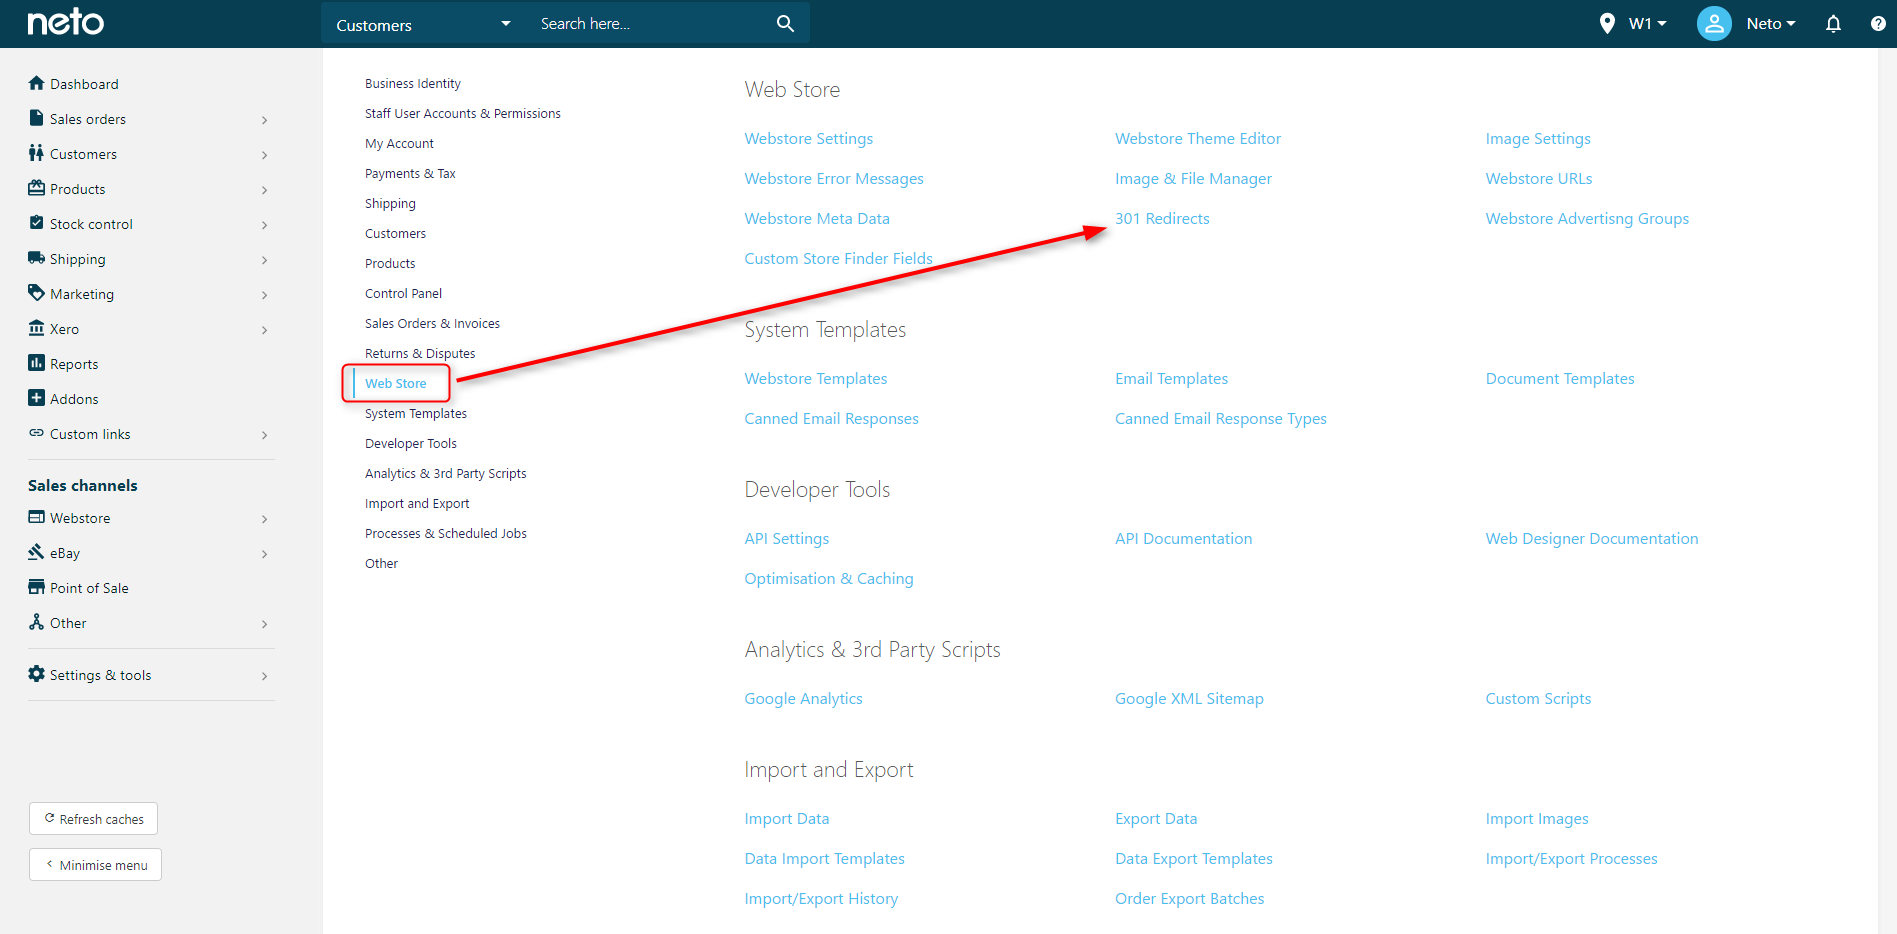
- Select Add New and choose 301 Redirect (or Import 301 Redirect File for bulk changes, explained below).
- Enter the URL of the old page. For example, if it was
www.yourdomain.com.au/content/pages/about_us.php enter content/pages/about_us.php. - Query String: If you had '?' after the above URL, add it here.
- Destination: Choose the content Type and Category where the new page is located.
- Save, and test that the redirect works as expected.
Import 301 Redirects in Bulk
The ID for the destination page is found on the page type it is related to. For example, if you were redirecting a product category, the ID is the category ID found on the category page.
You can test your upload by ticking the Test Upload checkbox during the upload process. If you are satisfied with your upload results select Use Uploaded File to process the file.
To import a CSV file of 301 redirects:
- Follow the first three steps for a single redirect, and click the Import 301 Redirect File button.
- To download the template file, click the 301 Redirect Excel Template File button.
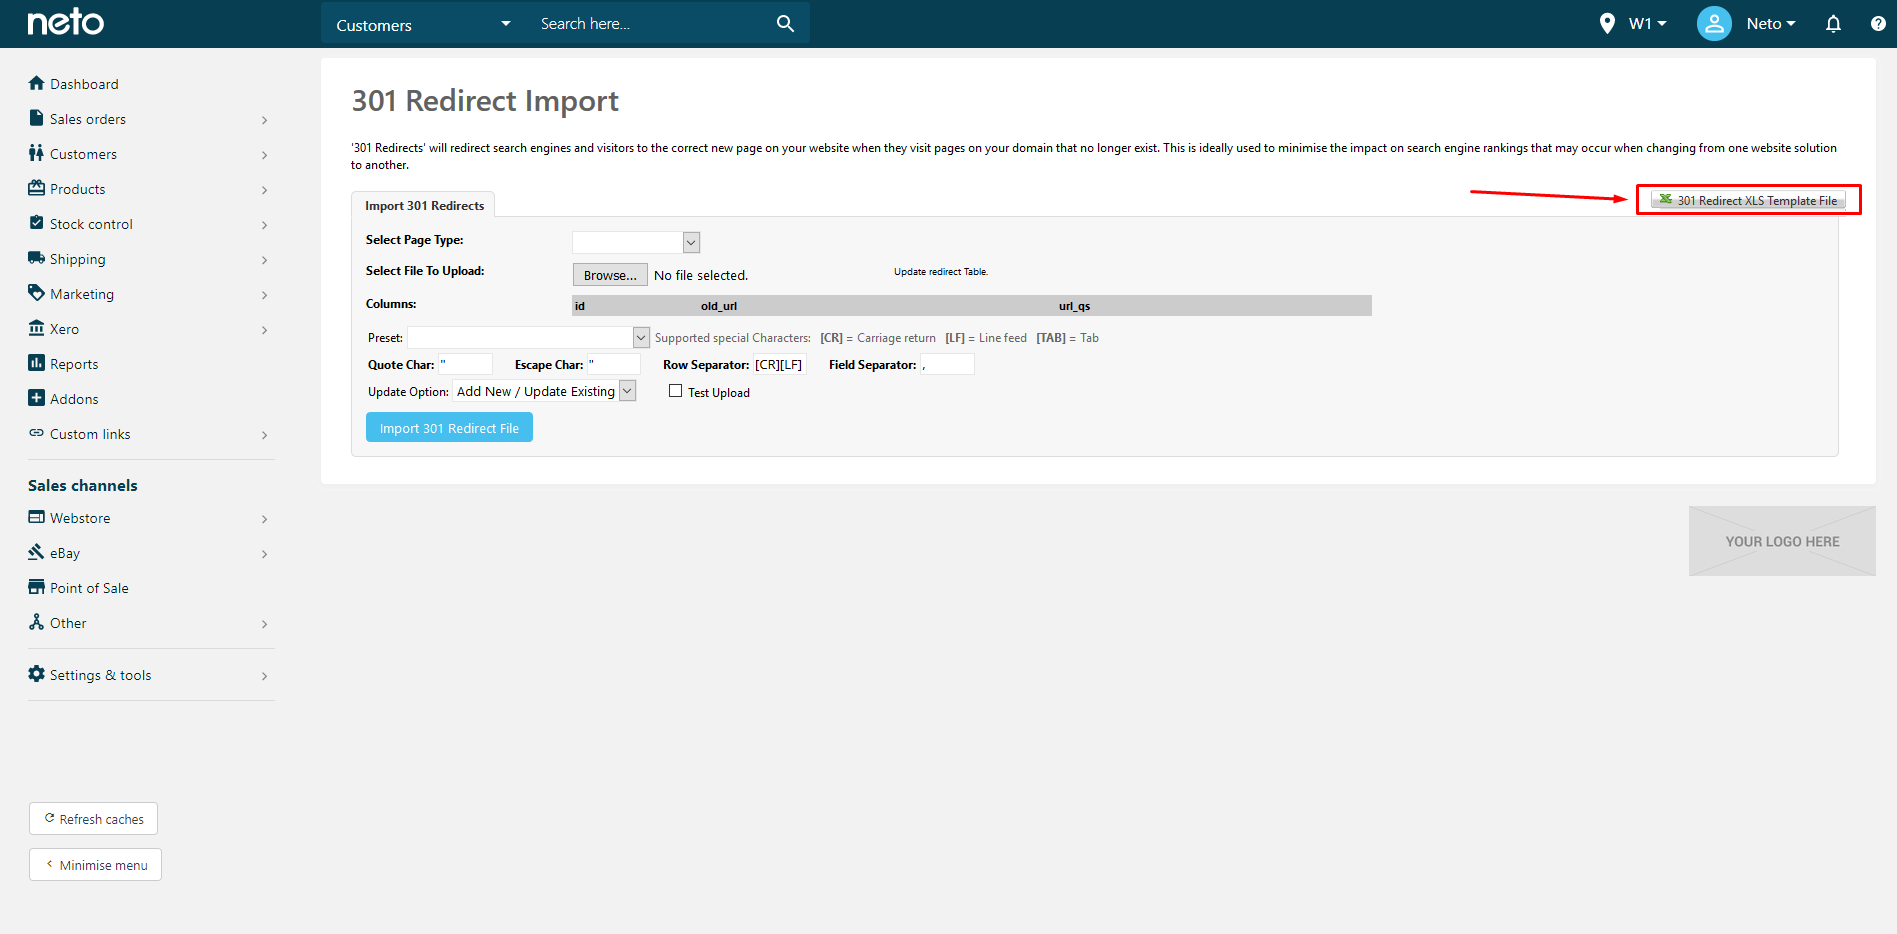
- Open the Excel template file and fill it in as required. Instructions and examples are included in the template file.
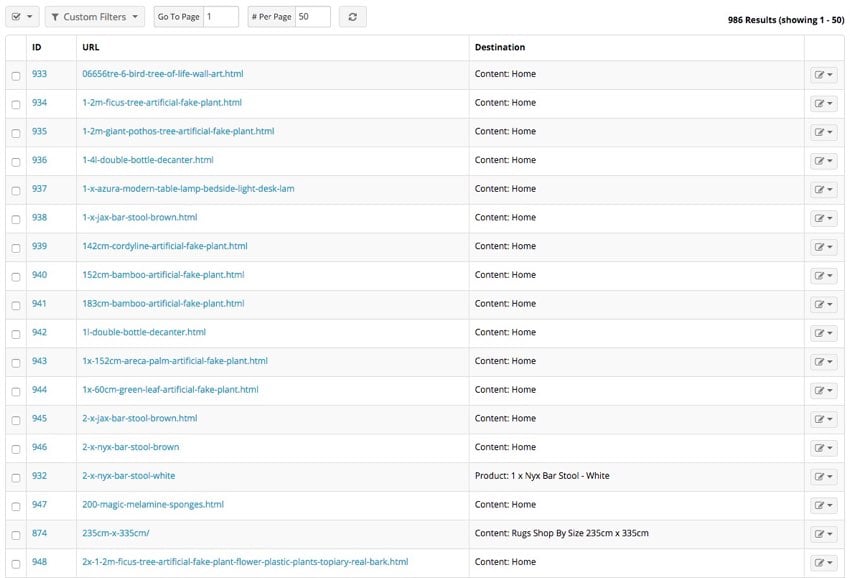
Please Note: the Old URL does not contain the domain name as part of the URL string, only the data after the domain (eg: about_us.html).
- Once complete, delete the instructions from the template and save the file as a .CSV file (MS-DOS) file type.
- Split up the 301 import files down based on type. You should have one file for products, and a separate file for all other page types. You will need to import multiple files.
- Select the file type (products or other page types). Browse and upload the .CSV file from the location you have saved it to on your local computer.
- Once you have successfully uploaded your 301 redirect file your 301 redirect listing page should look something like this: