Webstore Anatomy
Webstores are generally made up of the following pages:
These pages are all present in the default skeletal theme, which all other themes are built from.

Home Page

Home page's can be made up of the following elements:
- Quick links
- Category List
- Slideshow
- Brands
- About Us
- Category List
- Footer
Below is an example of a webstore showing these various elements:

Category page

Category pages can be made up of the following elements:
- Navigation
- Category Description
- Filters
- Sort Options
- Product Thumbnails
- Footer
Below is an example of a webstore showing these various elements:

Product page

Product pages can be made up of the following elements:
- Product Name
- Product Image
- Product Price
- Product Description
- Shipping Calculator
- Footer
Below is an example of a webstore showing these various elements:

Web Design Best Practices
The below list, while not inclusive, contains some best practices which should be adhered to while designing in Neto.
- Design within the parameters of a grid system. We use bootstrap. It is important that your design fits within the parameters of the Bootstrap grid system if you are developing a design that will be implemented by a Neto web designer.
This will help to reduce the time it takes to implement your design, which will ultimately save you or the client money.
- Provide your design files in layered PSD (Photoshop) file format ready for cutting and coding. Also try to keep your layers organised - the easier it is for us to cut up the quicker we can jump in to coding.
- It's a good idea to provide a simple document or wireframe outlining content types and special behaviours throughout your design.
For instance; do you need those up-sell products in the sidebar to be manually controlled, or would you rather have that content automatically generated? Does that image have a special hover effect? Do you need to control the text in that banner via our CMS or is it okay to be a flat image?
- We're open to using different JavaScript or jQuery plugins or snippets. If you're designing an element that will require a specific plugin please send us a link to where we can can download it, or if it's a premium licensed plugin please send us the files.
- Make sure the fonts in your design are standard web safe fonts. Otherwise, for more variety, we can also work with free services such as Google Web Fonts or FontSquirrel, or paid services such as Fonts.com.
- Remember an e-commerce website design often needs to be flexible and adapt along with the dynamic content that it holds. It also needs to be quick and responsive. Elaborate background images and details are fine but keep in mind how customers will actually use the site.
Webstore Templates
Once you are familiar with how Neto works, making changes to templates, or creating your own templates is straight forward for a user with basic HTML and CSS skills, coupled with the help of Neto Design teams Designer Docs.
What is B@SE?
Neto templates use B@SE as its templating language, providing eCommerce functionality and interacting with the database by printing out data via two different types of tags, Function and Data tags.
For example, you can use the[%thumb_list%] B@SE function to print out a list of your products and various details about them.
Data tags are simple, stand-alone tags which print a single value from the database, like the name of a category.
Function tags are more complicated, but offer configurable options via parameters, often outputting more than one value. For example using the [%thumb_list%] function, coupled with the [@name@] tag you can print out all the product names in a category.
Folder Structure
Files on the filesystem are organised into various directories, just like the files on your computer. This folder structure can be overwhelming at first, but it is actually quite simple once you get to know it! You will only need to access a few folders, even when developing a custom theme.
To access the folder structure from the Neto Dashboard, navigate to Settings & Tools > All Settings & Tools. Select System Templates from the side menu and then choose Webstore Templates.
A few examples of regularly edited files are:
THEME/footers/template.html: This file is the primary footer used on every page of your website.THEME/cms/home.template.html: This is the default template for the home page.
Email Template Locations
All print documents are stored on the file server: /private/www/netosuite/SysDoc/printdocs.
They can also be accessed via the Neto Dashboard by navigating to Setup & Tools > All Settings & Tools. Select System Templates from the side menu and then choose Email Templates.
All system emails are stored here. A system email is an outgoing email sent from the Neto software. This includes both emails sent to customers and staff. All system emails are built using HTML.
Email Template Logic
Abandoned Cart Email
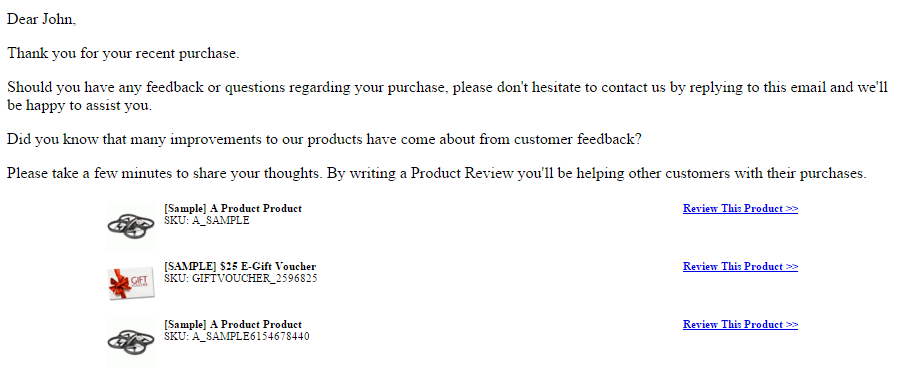
[*EMAIL_SUBJECT*][*EMAIL_FROM*][*EMAIL_TO*][*EMAIL_BCC*][*EMAIL_BCC*]<p>Dear [@ship_first_name@],<br /><p>Thank you for your recent [@send_from_company@] purchase.</p><p>Should you have any feedback or questions regarding your purchase, please don't hesitate tocontact us by replying to this email and we'll be happy to assist you.</p><p>Did you know that many improvements to our products have come about from customerfeedback?</p><p>Please take a few minutes to share your thoughts. By writing a Product Review you'll be helpingother customers with their purchases. </p>[%show_order id:'[@order_id@]' customer:'[@username@]' hidechild:'1'%][%PARAM *header%]<table align="center" border="0" cellpadding="4" cellspacing="0" width="700" style="font-size:11px">[%END PARAM%][%PARAM *body%]<tr><td width="8%" valign="top"><img border="0" src="[$homeurl$]/[%asset_url type:'product' id:'[@SKU@]' thumb:'thumbL'%][%END asset_url%]" alt="[@model@]" width="50px" height="50px"></td><td valign="top" width="86%" nowrap="nowrap"><b>[@model@]</b><br />SKU: [@SKU@]</td><td valign="top" width="10%" nowrap="nowrap"><a href="[$homeurl$]/_myacct/write_review?item=[@SKU@]" target="blank"><b>Review This Product >></b></a></td></tr>[%END PARAM%][%PARAM *footer%]</table>[%END PARAM%][%END show_order%]<br /><br />
The system recognises the base tag: [@ship_first_name@] and replaces it with the relevant information from the order, contained in the database.
So when the above email is sent to the customer, it looks like this:
Optimise Website Images
Quality images are a great way to promote the products on your site. When it comes to downloading a page from your site, images can be that largest part of a web page. This article describes how to reduce the time it takes to download pages on your site by reducing the file size on the images.
There is a balancing act between crisp quality images and the time it takes to download a page on your site.
Covered in this section are:
Advantages of Optimising Images
- Reduce the time it takes for Customers to wait before a page is loaded. Studies show that people will only wait a few seconds for a page to load. One study suggested keeping the page load time under 8 seconds. After 10 seconds, some people go to another web site.
- Search engines like Google give preference to web pages that load faster. So reducing the page load time could improve the position of your site in search results.
- Your Neto hosting plan has a limit for the amount of data going to and from the site in a month. Reducing the file size of the images on your site could save you paying excess data fees.
Image Formats
| JPEG | PNG | GIF |
|---|
Image Compression | good | poor | poor |
Transparent Background | no | yes | yes |
Translucent Background | no | yes | no |
Animation | no | no | yes |
You can upload three image formats on your site - JPEG, PNG and GIF. Each format has its use but JPEG is the best for reducing the file size of images. For example:
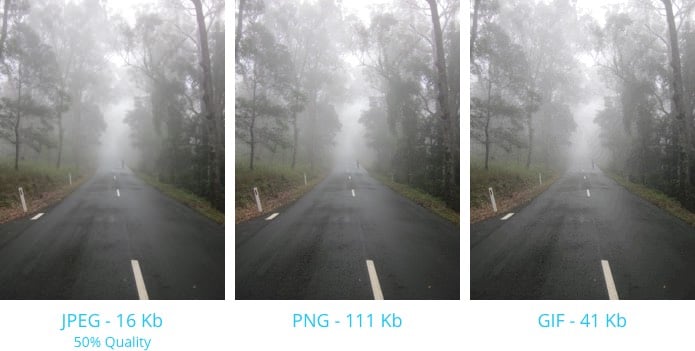
This image was saved in the three image formats. PNG is almost seven times the file size of the JPEG image. When you multiply the savings by the number of images you have on a web page, you can make a huge cut to the file size of all the elements that make of your web page and reduce the time it takes to downlaod.
PNG format to good for company logos or when you want the background of the image to be transparent.
Find Image Dimensions
To work out the best image size we first need to find out what is the width of the image on your web site. If you are using a custom designed theme or one of our free themes, each one can have different optimal image sizes.
What we need to do is to measure the image when it is displayed in you website. We are not looking for the actual width of the image file but the width on the computer screen.
The method described here uses the Google Chrome web browser. If you can't use Chrome, there are other ways to find the image width.
In Chrome, go to Extensions and click on Get more extensions at the bottom of the page. In the Google Web Store. Search for page ruler by wrakky and install it.
Then go to the page on your site and click on the page ruler icon. The cursor will turn into a cross. Click at the top left corner of the image and drag until you draw a box that matches the width and height of the image you want to measure.

Then look at the bar at the top of the page for the width of the image.

In the above example the width is 846 pixels. Just round it up to next multiple of 10. In this example, 850 pixels. This is the width you will need.
Website Logo
The website logo or company logo normally appears at the top of every page in your site.

To find the best with for this image, check out the section on how to find the width of an image. Now you have the image width you need, go to Logos & Branding under the cog icon (top right) in the control panel. Then scroll down to the Website Logo. Click on Choose File and select your logo. The image options will then appear:

If you have a colour or an image on the background of your site, uploading a logo with a transparent background will enhance the look of your site. For this you will need to use the PNG image format. Other formats will be converted to PNG when uploaded.
- Width - If you enter a number the image will be resized to fit that width.
- Height - If you enter a number the image will be resized to fit that height. If you set a width but no height, the height will be calculated.
Product Images
When you add a product image, either on the product page or using an import, the image is resized. Three sizes are created for your site - full, thumb large and thumb. These settings can be adjusted to give you the best results by reducing the file size and preserving the image quality.
You can upload images in three formats - JPEG, PNG and GIF. Each format has it's own benefits but for smaller file sizes, JPEG is the best.
To find out the best size for the images on your site, first measure the width if a product image on a category page. See How to find the width of an image on your site for instructions.
Once you have that figure, change your image settings accordingly.
Alt Image Text
By default the alt image text for your product images will use the product Name field.
This can be changed by modifying the product design template, found in Settings & Tools > All Settings & Tools. Select System Templates from the side menu and then choose Webstore Templates

To customise the alt image text per product, create a custom product field update your templates to reference this field. You can then populate the field with your own text.
Product Categories
Each product category supports two images. The main image for the top level categories are displayed on the products page.

We recommend using the JPEG format for these images. To work out what the width of the category images are, first go to the products page on your site. The web address will be something like www.myshop.com.au/products where www.myshop.com.au is the domain name for your site. Not all sites have a products page. Then check out the section on how to measure images.

Banner Advertising
Advertising banners can be the largest images that appear on your site - both in screen size and file size. So optimising these images can make a huge impact to your speed of your site.
We recommend using the JPEG image format rather than PNG or GIF. Also making sure the image is the right width and height can reduce the file size and download times.
The modern digital cameras can produce images of thousands of pixels in width and file sizes north of 3 MB. If your banner displays across the entire width of a large screen, then a width of 2,000 pixels is all you will need. Most of the themes use banners that are smaller.
To find out what the width of the banner you have on your site, check out our section on measuring the image width. Once you have the width, you can either resize the image using graphics software (recommended) prior to upload in the image or resize the image when uploading it.
If your are using the carousel feature (where images slide from one to another), it is also a good idea to make sure the height of each image is the same. If they are now, you will notice the content under the banners jump up and down as each banner is displayed.
If you want to change the image while uploading, you can enter the settings in the Ad Builder section.

Content Images
This section covers the images added into the WYSIWYG Editor in the product descriptions or content sections on the blog, articles, product categories or other content pages.
Images uploaded in the WYSIWYG Editor are not automatically resized or converted. You will need to optimise the images before uploading for the best results. The width of the image would depend on your website theme. If the image will display the full width of the web page content, set the width to 1,140 pixels. If there is a left or right column, you can measure the width of an existing image or the width of the column. Once you have the width, use graphic editing software to resize the image.
It is also recommend that you save the image in the JPEG format with 50% - 70% quality. This will give you the best image quaility while reducing the file size.