Neto offers a Tweak Library which is maintained by our design team. This section includes a compilation of the most popular modifications, or "tweaks", we make to customer websites. Most of the tweaks are not included in our themes because they are specific to certain industries.
These tweaks are helpfully arranged into categories. Code snippets and screenshots are included with the tweaks to ensure that making any modifications to your storefront remains as painless as possible.
Please Note: This article assumes knowledge of HTML and the Neto B@SE language. If you're unfamiliar with these, you can contact a design partner for a quote. Invoices are issued by Neto the month after the tweaks have been delivered by your design company.
The majority of these tweaks require SFTP access to your site files. You can request SFTP access here.
Tweaks are applied per theme. If you switch themes, the tweaks will not carry across.
Staging and Test Themes
Design tweaks are applied to a copy of your current design and referred to as a staging theme. A staging theme is used in order to work on your site without affecting your customers' shopping experience, as well as providing a way for you to see the changes and offer feedback before it goes live.
A special website URL is used to access the staging theme templates, which only you (and not your customers) will see: www.yoursiteurlhere.com/?nview=stagingthemename.
In order to change your view back to see your live theme, you can visit your site url : www.yoursiteurlhere.com/?nview=. Just replace the yoursiteurlhere with your own Neto site and it'll change to your live theme.
Once you are happy with the work on the staging theme, you can set it live for your customers:
- In your Neto control panel navigate to Settings & tools > All settings & tools
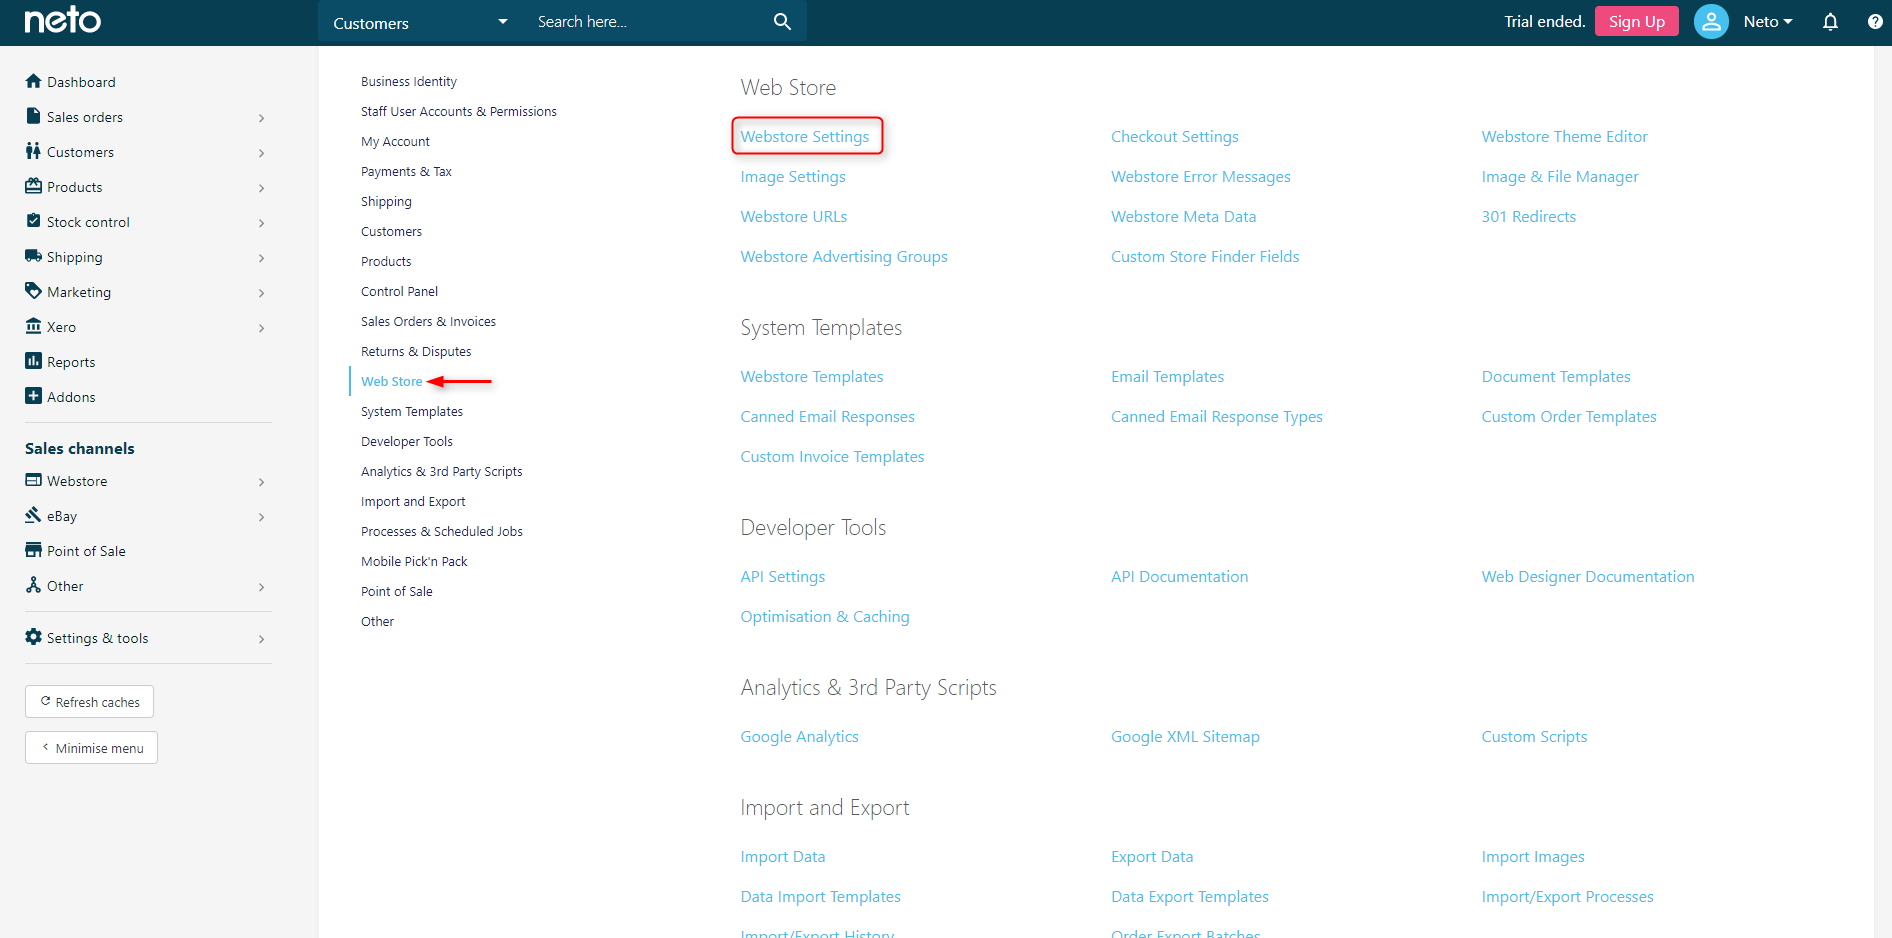
- On the Settings & tools page, select Webstore Settings
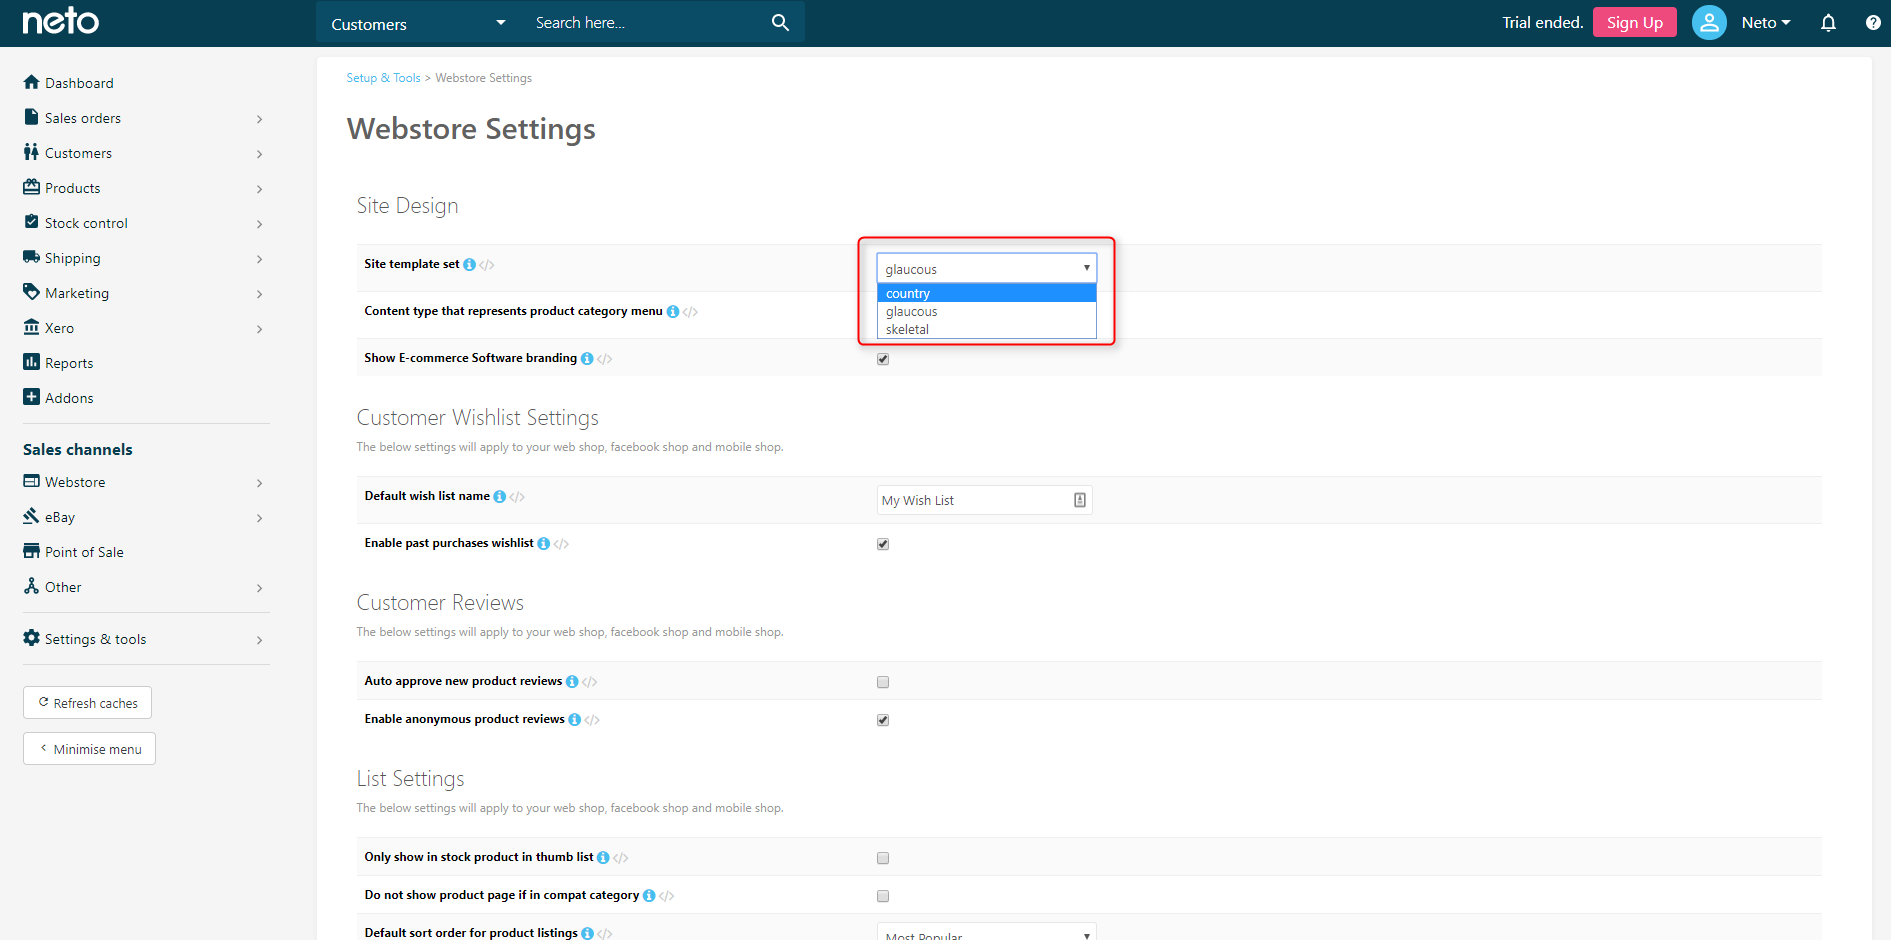
- Change the Site template set to whichever theme has been specified by the designer.
Most design companies will create a staging theme from your current live theme. Before proceeding with a design tweak ensure you don't have any staging themes that are still being worked on. Combining different staging themes is a manual and time-consuming process and may attract additional billable time.
Also avoid having multiple agencies performing design work for you simultaneously. This can cause code conflicts and work to be lost.
Webstore Caching
A web cache (or HTTP cache) is an information technology term for the temporary storage (caching) of web documents, such as HTML pages and images, to reduce bandwidth usage, server load, and perceived lag. Essentially caching is a way of reducing load times.
Due to the nature of how web caching functions, there is a high likelihood of seeing an older, saved version of your webstore. There are two ways you can refresh your cache:
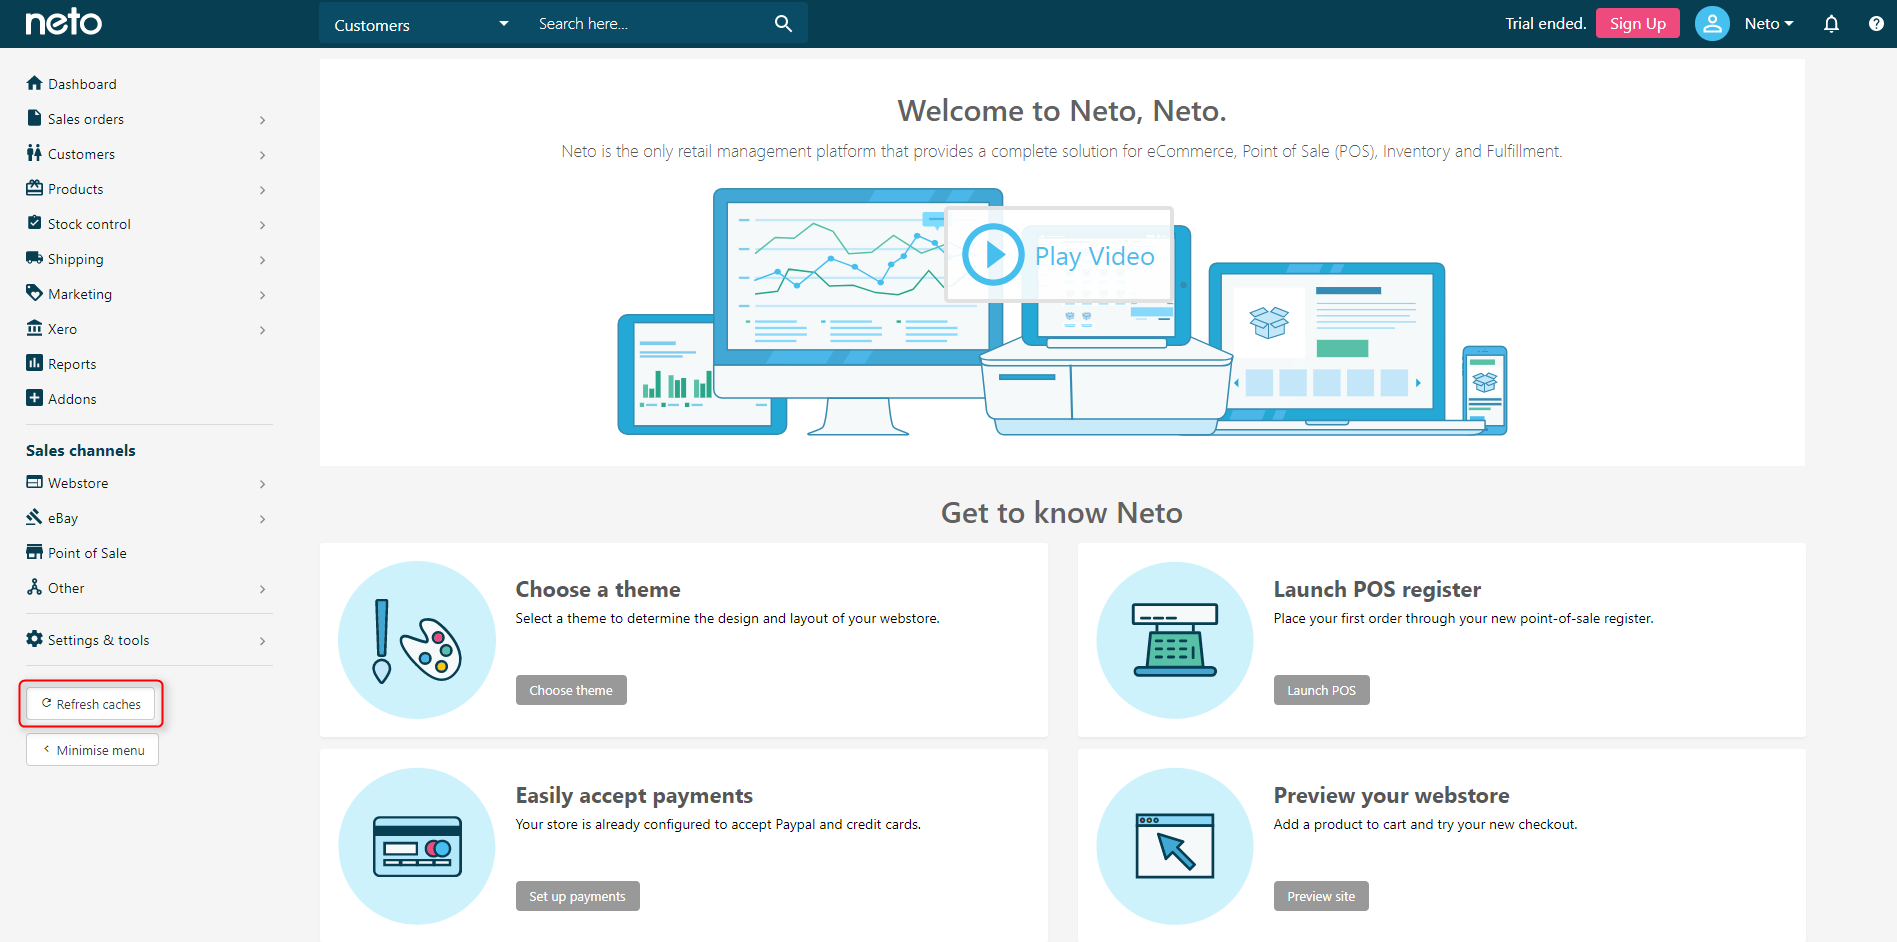
- In your Neto control panel select the Refresh System Now link in the bottom left of the menu.
- You can also refresh the cache that is stored on your web browser you are using. To learn more about refreshing the cache on your browser, click here.
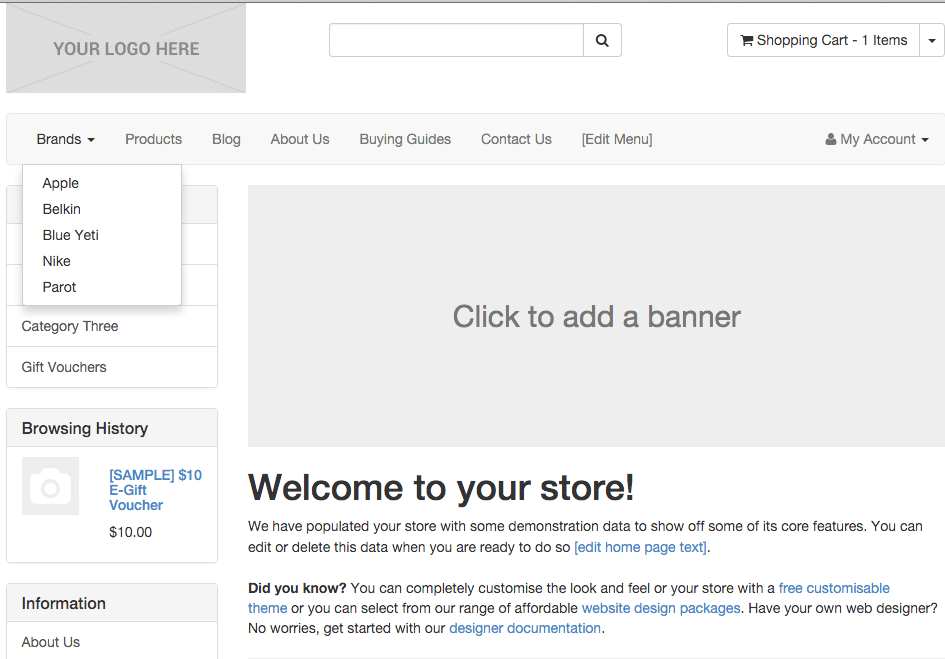
Brands Menu
A list of brands that, when hovered over, provides users with a simple way to find branded products. To add this tweak to you webstore:
- Open up Header template.
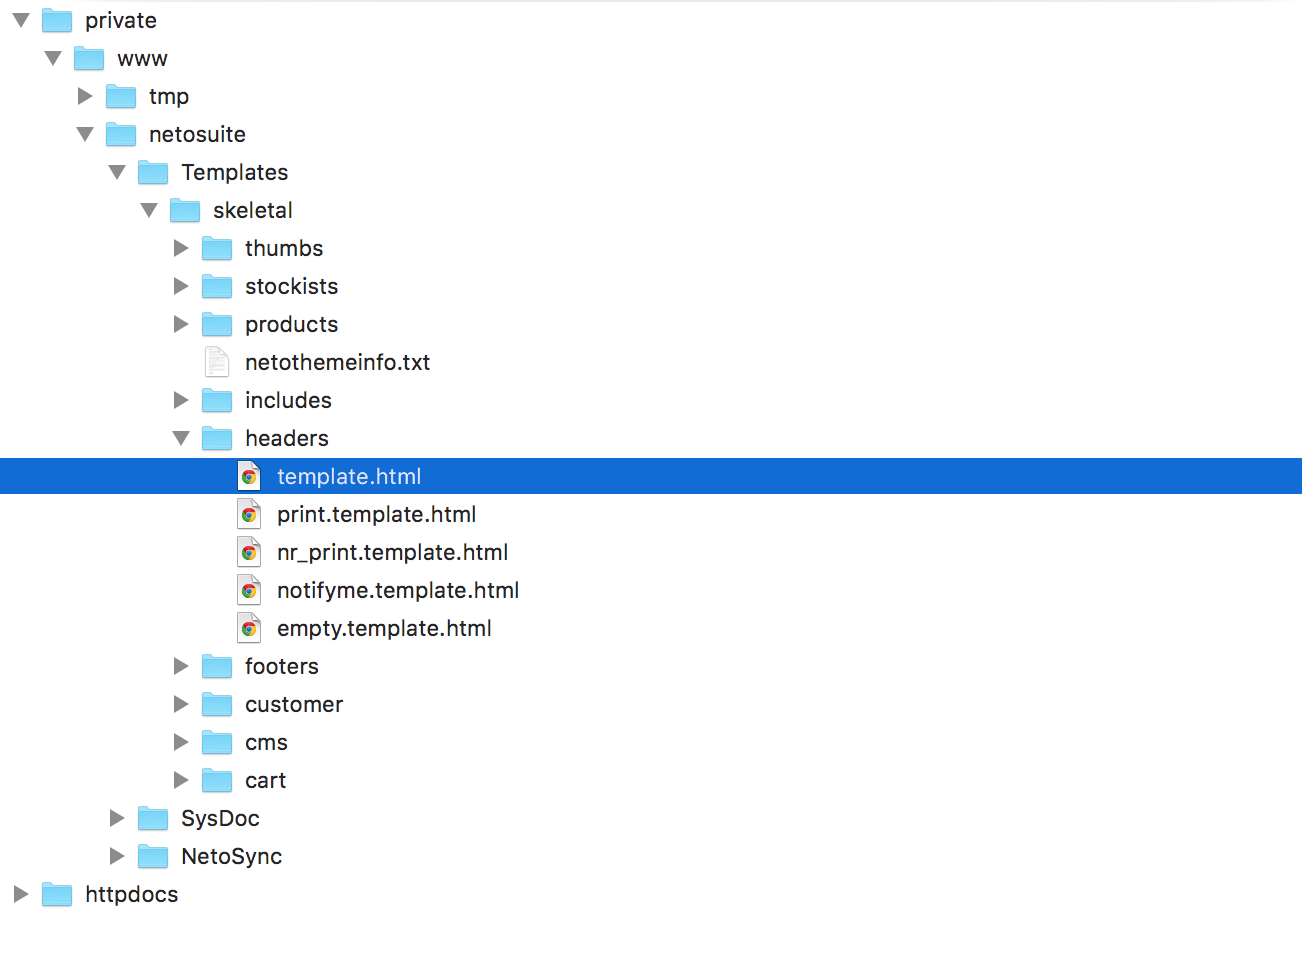
- Locate the header
template.html. This can be found in skeletal (or the name of your theme) > header > template.html.
- Open the template in your text editor. We suggest either Sublime Text or Atom. Add a
[%content_menu%] at line 77 which is after the opening ul with the class na nvabar-nav.

[%content_menu content_type:'brand' sortby:'sortorder, name' limit:'5'%] [%param *header%] <li class="dropdown dropdown-hover"><a >Brands <span class="caret"></span></a> <ul class="dropdown-menu"> [%/param%] [%param *level_1%] <li class=""> <a href="[@url@]">[@name@]</a></li> [%/param%] [%param *footer%] </ul> </li> [%/param%][%/content_menu%]Add the the brands menu code into the template:
The [%content_menu%] dynamically generates a menu based on the content type you define in the parameters. There are the parameters used in this [%content_menu%]:
content_type: The content type targeted for the menu.sortorder: The sort order for the pages in the menu. To set which brands to display give them a sortorder higher then the rest of the brands and they will display instead of the other brands. sortorder is editable on the brand page in your control panel.limit: Sets a limit of items generated in the menu.
Now it will show a list of featured brands at the start of the main navigation in the header of every page.
Header Announcement Area
A clear area to make text-based announcements, for example, closing times over public holidays etc. To add this tweak to you webstore:
<div class="container header-message"> <div class="row"> <div class="col-xs-12"> [%content_zone id:'header_announcement'%][%/content_zone%] </div> </div></div>Open headers/template.html, and add the below code directly beneath the opening body tag:
- Create a new content zone in your control panel with the name
header_announcement, and add the text you'd like displayed.

Replace the Default Product Image

Create and upload the image
- Create the image with a width and height of 500 pixels.
- Save the image as a GIF file with the filename default_product.gif. Save a second copy as na.gif and a third as na_L.gif
- Using your SFTP account, login to your web site and upload the images to the
/httpdocs/assets/ folder. - To check that the image has been installed correctly, visit
https://www.mydomain.com.au/assets/default_product.gif?nocache, where www.mydomain.com.au is your domain name for your site.
Modify the theme templates
You can access the templates by navigating to Settings & Tools > All Settings & Tools.
Select System Templates from the left side menu, and choose Webstore Templates. There are three theme templates that will need to be changed to point to the new default product image.
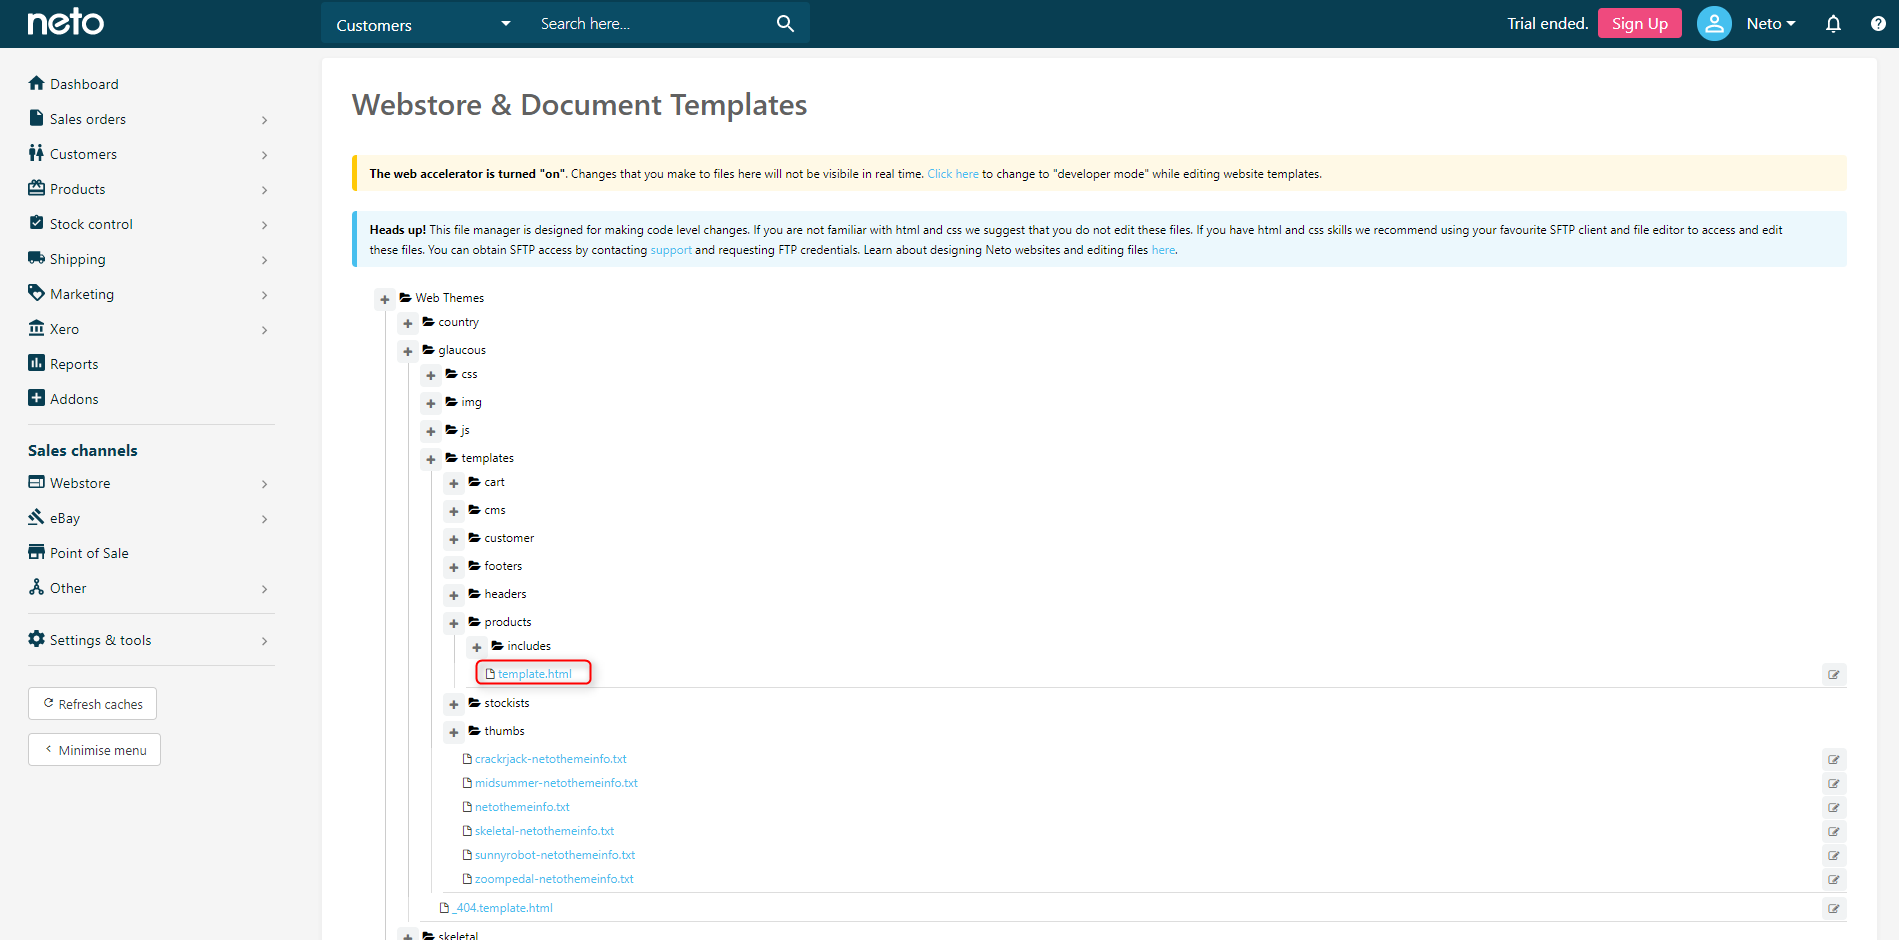
- Web Themes > themename > Templates > Products > Includes > images.template.html
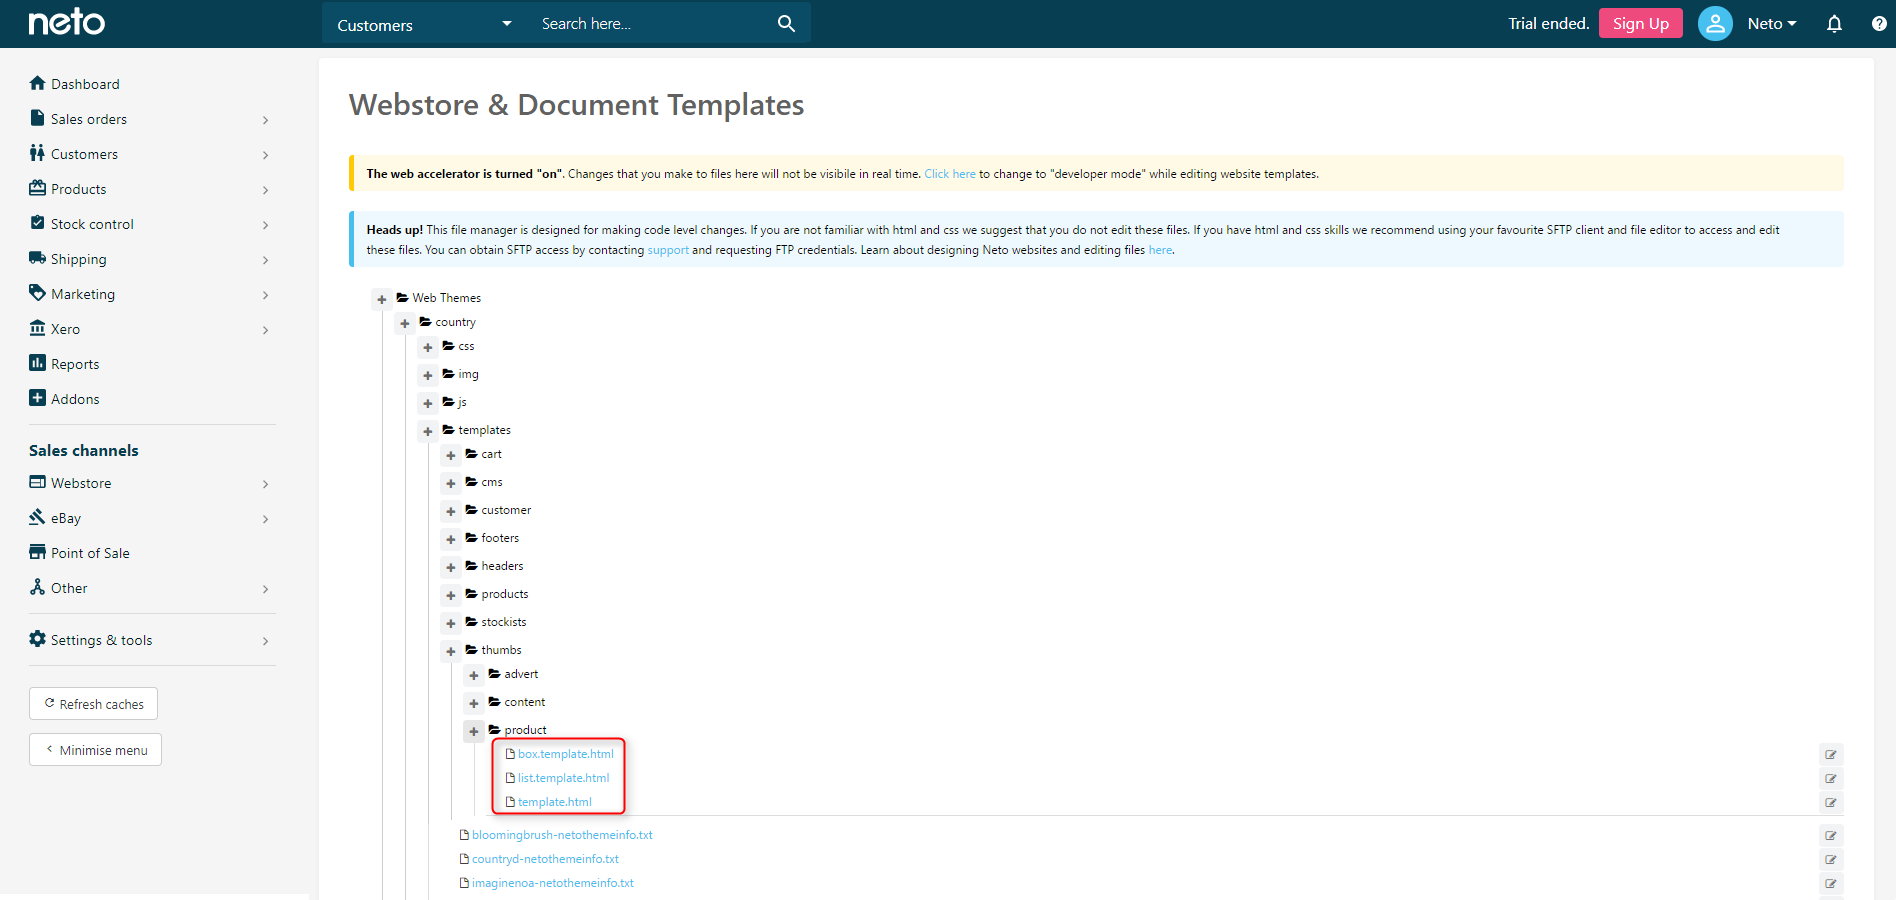
- Web Themes > themename > Templates > Thumbs > Product > template.html
- Web Themes > themename > Templates > Thumbs > Product > list.template.html
- Web Themes > themename > Templates > Thumbs > Product > box.template.html
Where themename is the name of the currently installed theme.
Depending on the theme you need to find this code:
[%param default%][%cdn_asset html:'0' library:'images'%]default_product.gif[%/cdn_asset%][%end param%][%param default%][%NTHEME_ASSET%]img/default_product.gif[%END NTHEME_ASSET%][%end param%]
Replace with the code [%param default%]/assets/default_product.gif[%end param%] and save the template. Repeat for each of the three templates.
After you have made the changes, you will need to refresh your website cache to see the changes.
Webstore Holiday/Maintenance Mode
There's four changes you can make to your website that will let customers know you're not taking orders:
Update your Website Header
Adding a message into your website header is a common practice for websites in holiday mode. It lets you display a custom message to your customers, and appears on all pages of your site.
To achieve this, follow the header tweak steps.
Disable Payment Methods
A guaranteed way to stop orders from being placed while you're away is to turn off your payment methods.
- In your Neto control panel navigate to Settings & Tools > Payment Methods.
- Click the Configure button next to one of your active payment methods to open the edit screen.
- Toggle the Active/Enabled setting to turn the payment method off, and then click Save & Close.
- Repeat these steps for each payment method that is active.
Remember to turn your payment methods back on once you're back at work, and ready to receive orders.
Change Home Page Template
If you want to go more in depth, you can also create temporary landing page for your site by following these steps:
Please Note: To complete this step you will need SFTP access to your website.
- Create a new blank file at
/assets/themes/THEME-NAME/templates/cms/away_landing.template.html <style> .mt { margin-top: 20vh; } </style> <div class="container mt"> <div class="row text-center"> <div class="col-md-4"> <img class="logo" src="[@config:imageurl@]/website_logo.png?[@config:neto_css_version@]" alt="[@config:company_name@] logo"/> </div> <div class="col-md-8"> <h1 class="display-2">Sorry, we're on holidays right now and unable to accept orders</h1> <h2>Check back soon!</h2> </div> </div> </div>Add your HTML to the file. The example code below is a good place to start:
- To assign this template to your homepage, navigate to Webstore > Web Page.
- Select Home to edit the page.
- Body Template:
away_landing - Header Template
empty - Footer Template
empty
Make a note of which templates are being used in the Template & Design section. Then change the templates to those below:
- Click Save.
- Once you're ready to start trading again, change the templates back to what they were previously.
eBay & Amazon Holiday Mode
Both eBay and Amazon have their own holiday mode functionality.
Currency Calculator
You can add a currency calculator to your product or listing pages that will offer your customers a way to view the price in different currencies.
This is an external plugin that can be added by our design team. Two examples of a currency calculator can be seen below:
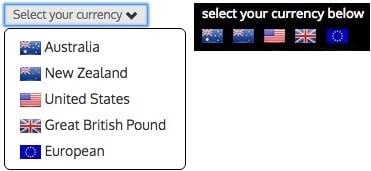
Submit a design tweakto a Neto partner to have this added to your website.
Gallery View Product Name Length
Two changes need to be made:
- Change the theme template to display more characters.
- Change the number of lines needed to display the product name.
Change the number of characters
- First, you will need to know what theme you are using for your website. If you don't know, go to Webstore > Themes and look for the theme name in the top right corner.
- Next, navigate to Settings & Tools > All Settings & Tools.
- Select System Templates from the left side menu, and choose Webstore Templates.
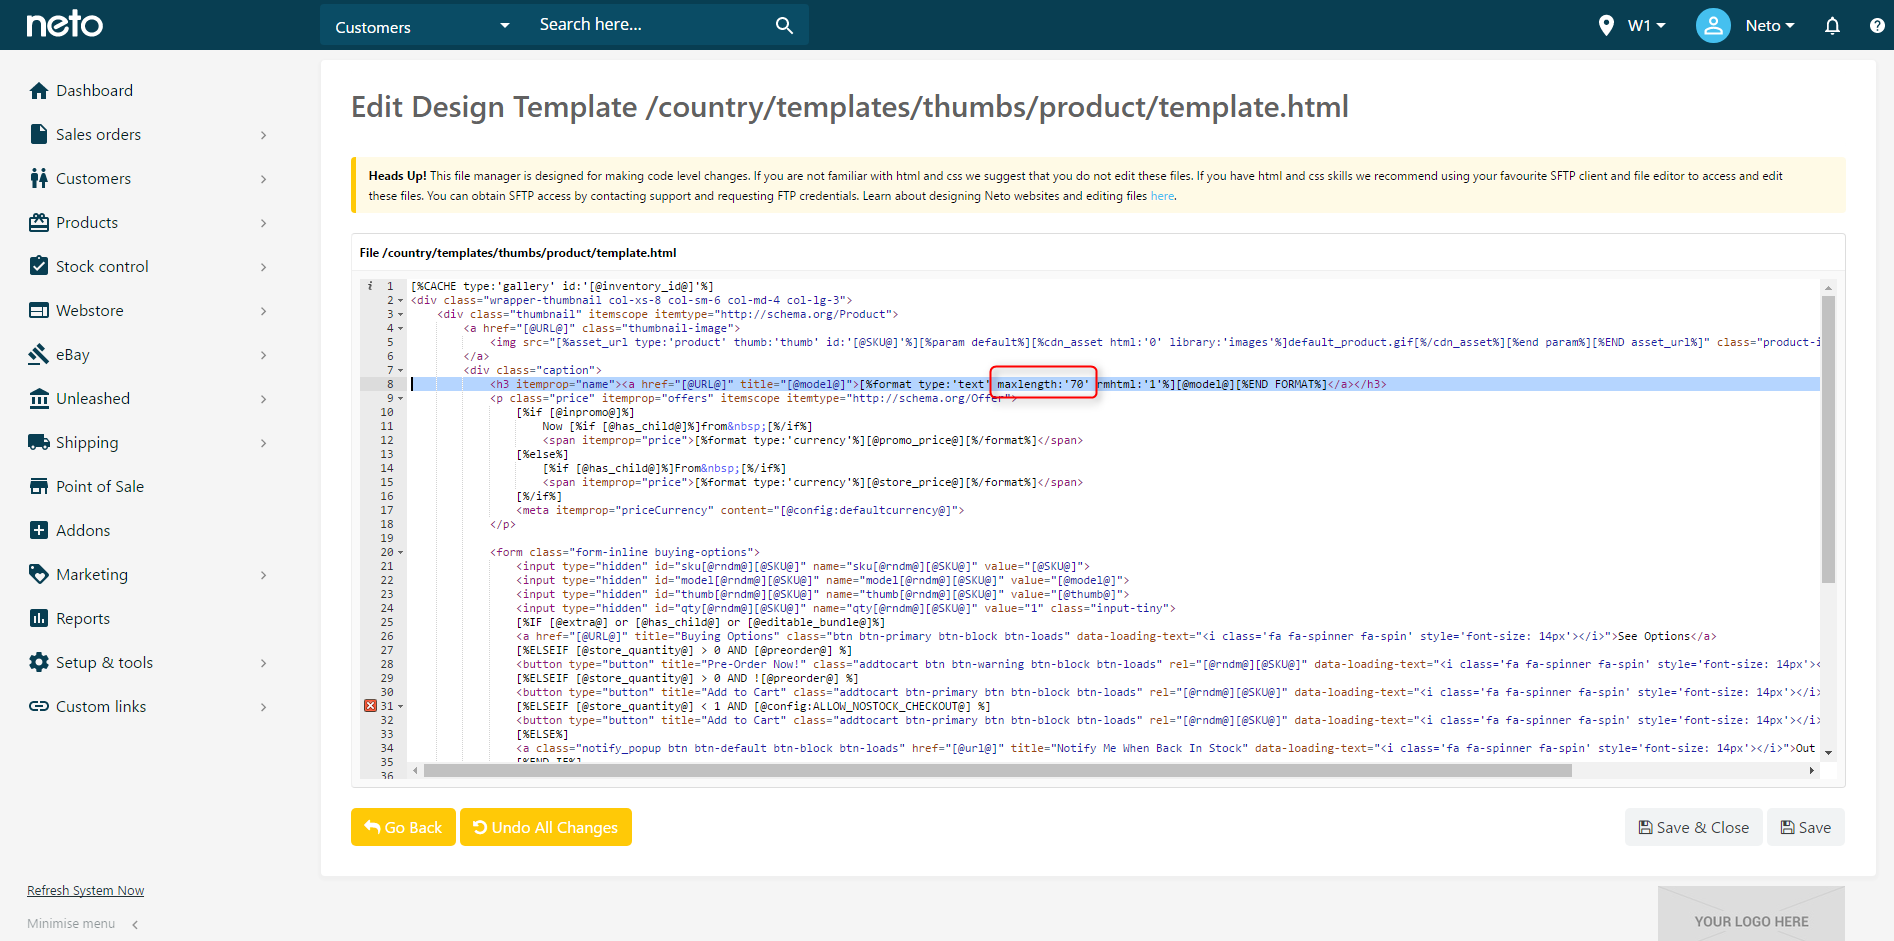
- Under your template name, select Templates > Thumbs > Product > Template.html.
<h3 itemprop="name"><a href="[@URL@]" title="[@model@]">[%format type:'text' maxlength:'50' rmhtml:'1'%][@model@][%END FORMAT%]</a></h3>The template will open up in an HTML editor. Have a look for this line of code:
It will be around line 8 but the line number will be different depending on what theme you are using.
- Change 50 in maxlength:'50' to another number. Then Save & Close the template.
Change the number of lines
After you have changed the template, you may notice that some of the longer product names will overlap the price below the name. To fix this you will need to adjust the number of lines that product name takes up. This change will affect all products in the galley view.
Some shorter product names will have plenty of space between it and the price. You may want to have shorter product names only using one or two lines. If you do this, it will cause issues with the page layout on different sized screens. So the number of lines needs to be the same for each product, no matter what the length of the name. To change the number of lines for the product name:
- Navigate to Settings & Tools > All Settings & Tools.
- Select System Templates from the left side menu, and choose Webstore Templates.
- Under your theme name, select Css > Style.css.
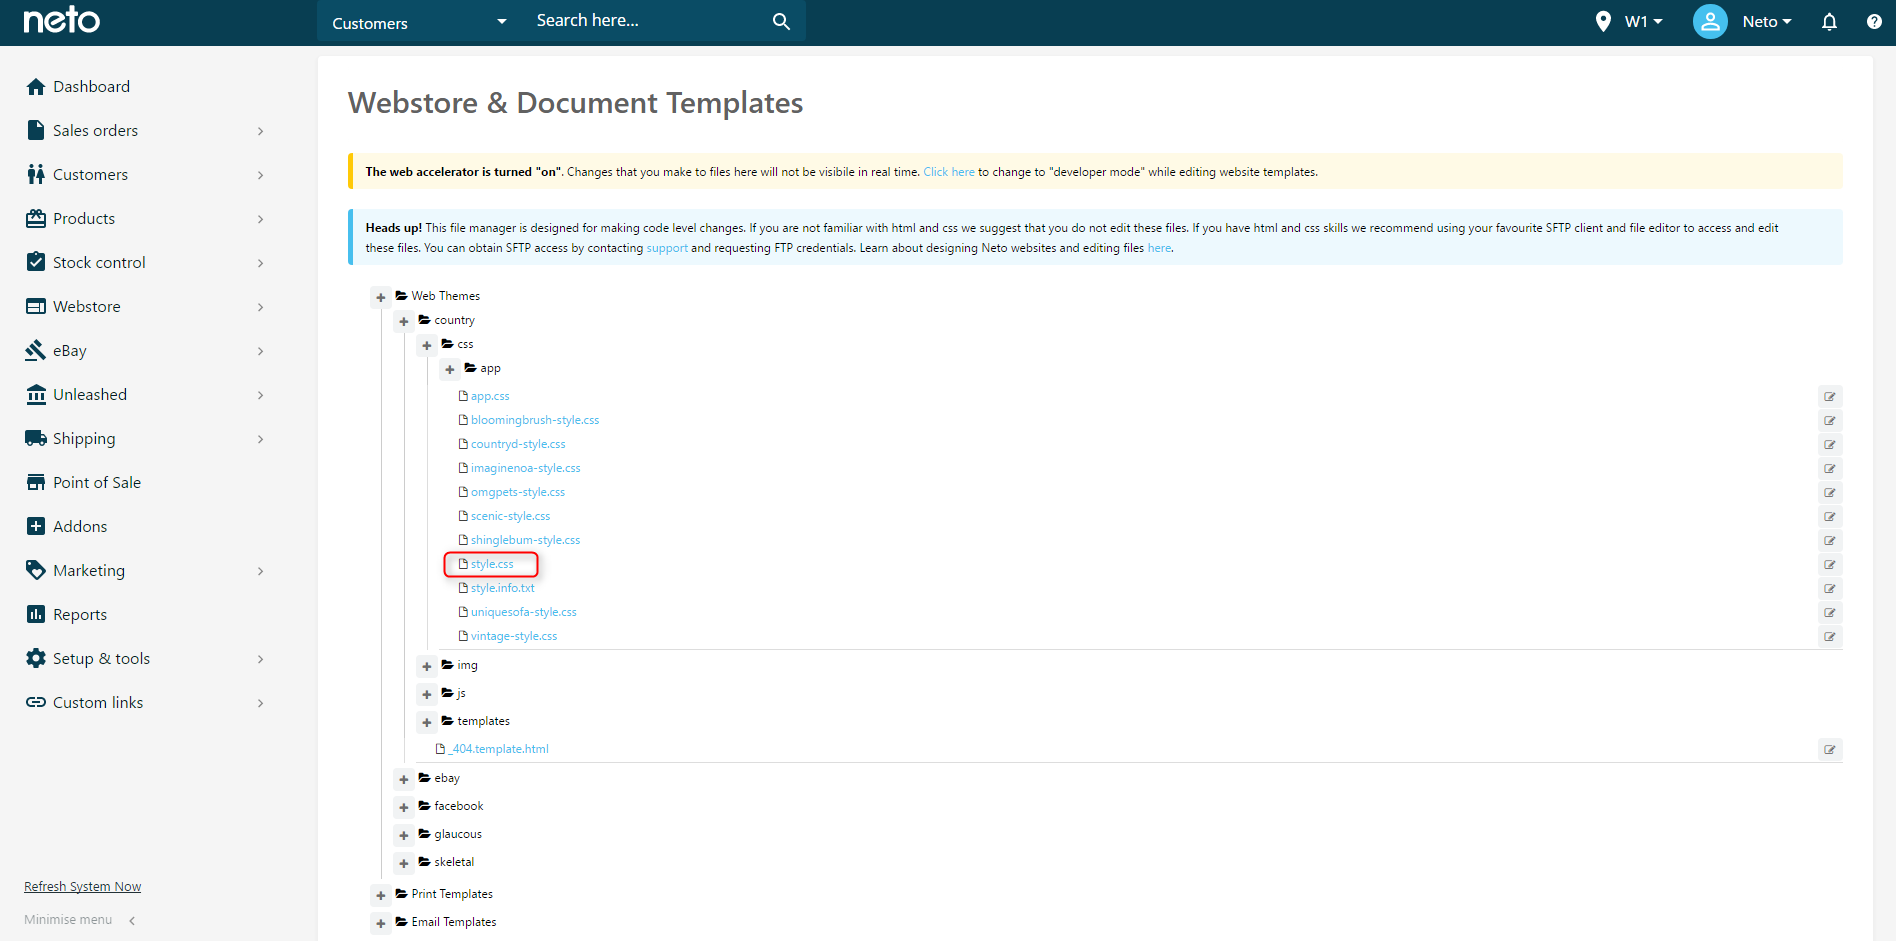
- In the editor, scroll to the very end and add this code:
.thumbnail .caption h3 {
height: 4em;
}
- Change the 4 in height: 4em; to the number of lines you want, and Save. You may need to experiment to find the number of lines that works for you.
To see the changes you will need to refresh the cache on your website and refresh the page in your web browser.
Hide Specifications Details
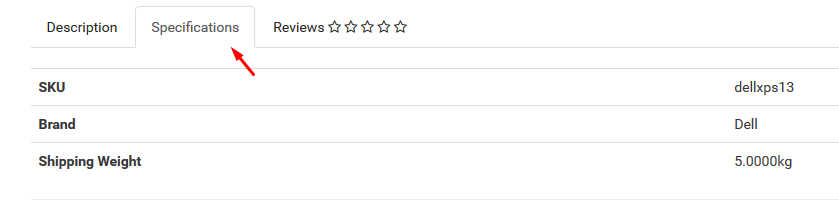
To hide information on the specifications tab:
- Log in with your SFTP details using Filezilla or a similar program.
/httpdocs/assets/themes/your-theme/templates/products/template.htmlNavigate to the directory:
- Download and edit template.html file.
We recommend creating a backup of this file in case you would like to revert your changes in the future.
- Scroll down to this code:
<div class="tab-pane" id="specifications">
You can choose to remove singular specifications by deleting single lines. For example, if you wanted remove Manufacturer Model you would delete the code:
[%if [@manufacturer_model@]%]
<tr>
<td><strong>Model #</strong></td>
<td>[@manufacturer_model@]</td>
</tr>
[%/if%]
Or if you wanted remove the entire tab, delete the code:
 <div class="tab-pane" id="specifications">
                        [%if [@specifications@]%]
                            [@specifications@]
                        [%/if%]
                        <table class="table">
                            <tbody>
                                <tr>
                                    <td><strong>SKU</strong></td>
                                    <td>[@SKU@]</td>
                                </tr>
                                [%if [@manufacturer_model@]%]
                                <tr>
                                    <td><strong>Model #</strong></td>
                                    <td>[@manufacturer_model@]</td>
                                </tr>
                                [%/if%]
                                [%if [@barcode@]%]
                                <tr>
                                    <td><strong>Barcode #</strong></td>
                                    <td>[@barcode@]</td>
                                </tr>
                                [%/if%]
                                [%if [@brand@]%]
                                <tr>
                                    <td><strong>Brand</strong></td>
                                    <td>[@brand@]</td>
                                </tr>
                                [%/if%]
                                [%if [@artist_author@]%]
                                <tr>
                                    <td><strong>Artist / Author</strong></td>
                                    <td>[@artist_author@]</td>
                                </tr>
                                [%/if%]
                                [%if [@weight@] > '0'%]
                                <tr>
                                    <td><strong>Shipping Weight</strong></td>
                                    <td>[@weight@]kg</td>
                                </tr>
                                [%/if%]
                                [%if [@width@] > '0'%]
                                <tr>
                                    <td><strong>Shipping Width</strong></td>
                                    <td>[@width@]m</td>
                                </tr>
                                [%/if%]
                                [%if [@height@] > '0'%]
                                <tr>
                                    <td><strong>Shipping Height</strong></td>
                                    <td>[@height@]m</td>
                                </tr>
                                [%/if%]
                                [%if [@length@] > '0'%]
                                <tr>
                                    <td><strong>Shipping Length</strong></td>
                                    <td>[@length@]m</td>
                                </tr>
                                [%/if%]
                                [%if [@cubic@] > '0'%]
                                <tr>
                                    <td><strong>Shipping Cubic</strong></td>
                                    <td>[@cubic@]m3</td>
                                </tr>
                                [%/if%]
                                [%if [@unit@]%]
                                <tr>
                                    <td><strong>Unit Of Measure</strong></td>
                                    <td>[@unit@]</td>
                                </tr>
                                [%/if%]
                                [%if [@actual_length@] > '0'%]
                                <tr>
                                    <td><strong>Assembled Length</strong></td>
                                    <td>[@actual_length@]m</td>
                                </tr>
                                [%/if%]
                                [%if [@actual_height@] > '0'%]
                                <tr>
                                    <td><strong>Assembled Height</strong></td>
                                    <td>[@actual_height@]m</td>
                                </tr>
                                [%/if%]
                                [%if [@actual_width@] > '0'%]
                                <tr>
                                    <td><strong>Assembled Width</strong></td>
                                    <td>[@actual_width@]m</td>
                                </tr>
                                [%/if%]
                                [%if [@product_type@]%]
                                <tr>
                                    <td><strong>Type</strong></td>
                                    <td>[@product_type@]</td>
                                </tr>
                                [%/if%]
                                [%if [@format@]%]
                                <tr>
                                    <td><strong>Format</strong></td>
                                    <td>[@format@]</td>
                                </tr>
                                [%/if%]
                            </tbody>
                        </table>
                    </div>
- Click the Save button and upload to the relevant directory.
Add a new Webstore Template
All the page in your webstore are displayed based on templates. Some pages, such as products and categories, can have custom templates assigned to them. This lets you display selected products or categories differently based on your own needs. To add a new webstore template:
- Request SFTP access for your Neto control panel here.
- Navigate to the appropriate Products or Categories folder of your current live theme.
- Duplicate the template.html file and add a new name and full stop to the front of the file (such as
New.template.html).
You can now many customisations to your new template, and assign it to your products or categories.