Handling time is used by Amazon to determine the time it takes for a purchase to be marked as dispatched. Handling time is used in combination with transit time (in Seller Central) to calculate the estimated day of delivery for customers, and Amazon use it as a metric to measure merchant's performance.
Total Delivery Time = Handling Time + Transit Time (+ any holidays)
You need to meet or exceed the Handling times you commit to or Amazon may take action on your account.
Neto allows you to set up your handling time one of two ways. The simplest is to set one handling time for all products in Neto. Alternatively, you can enter the handling time on each product, individually or in bulk.
This article contains the following:
Steps
Set the handling time for your Amazon Australia listings
Click the Shipping & Handling section to expand the available settings.
- In your Neto control panel navigate to Amazon AU > Settings.
- Enter the number of days to dispatch an order in the Handling Time field.
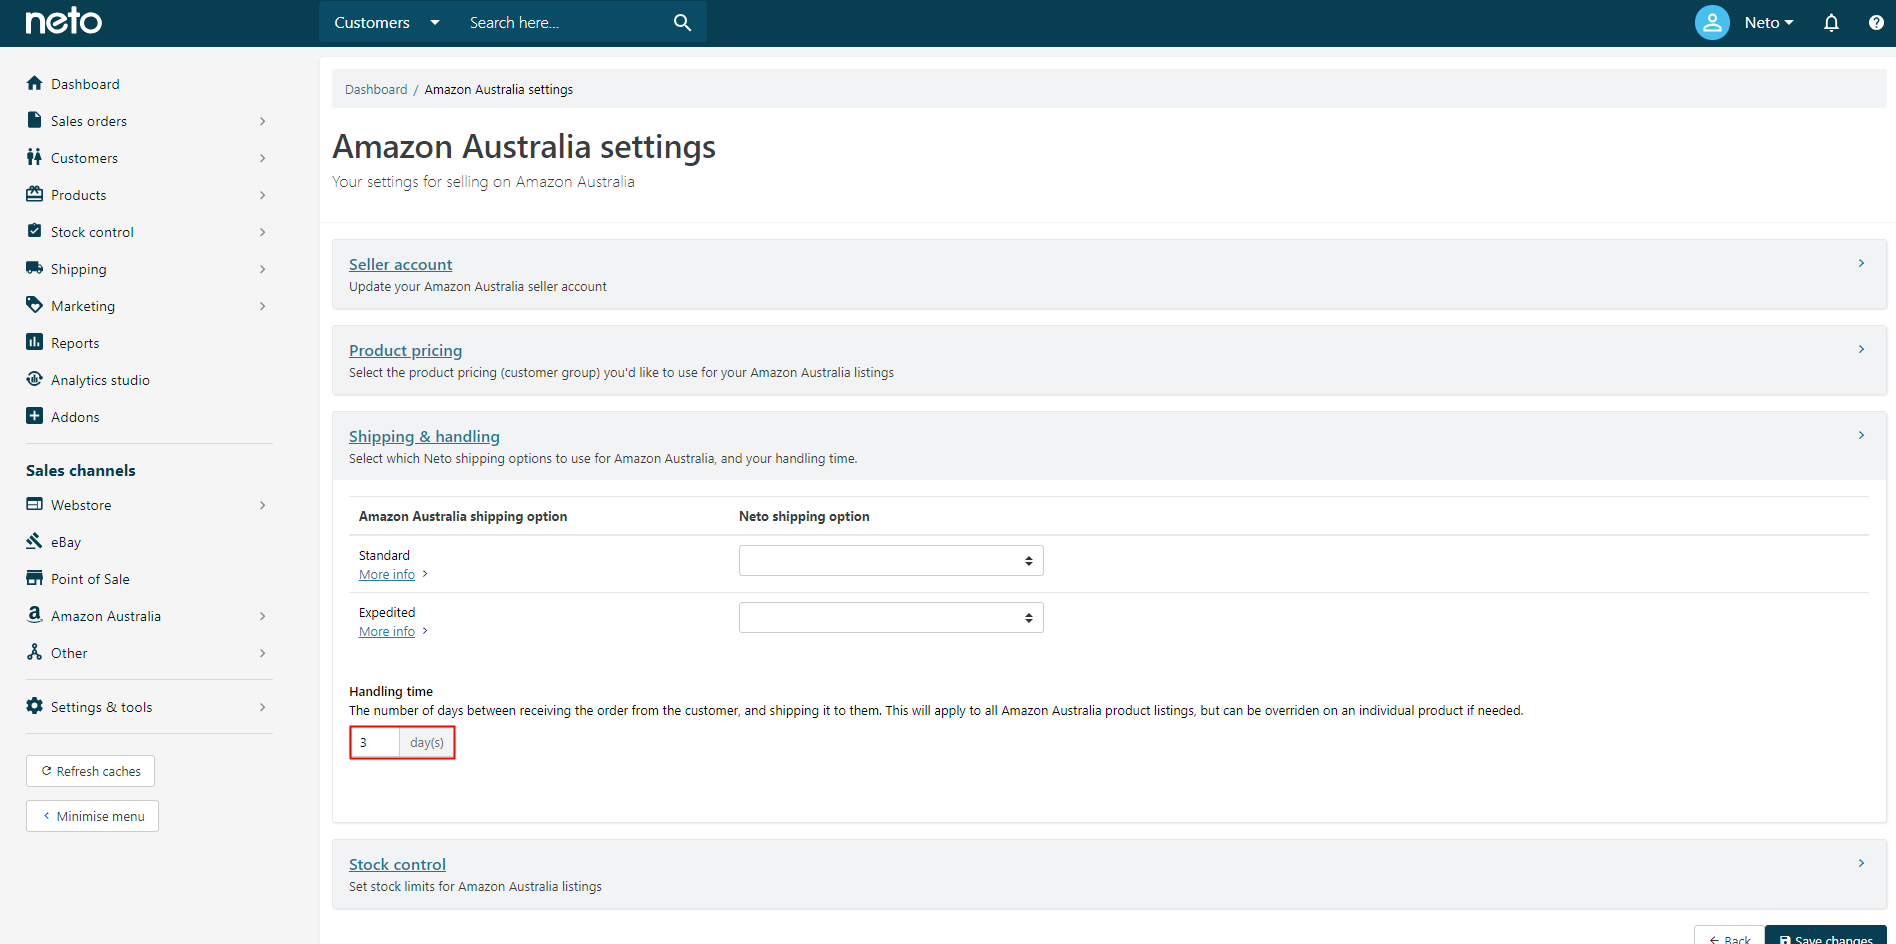
- Click the Save Changes button.
The handling time will now be set for all products. If you have certain products that take longer to dispatch, you can also enter a separate handling time for them which will take precedence over this setting. To do this, follow either of the below methods.
Add Handling Time to Individual Products
- In your Neto control panel navigate Products > Active.
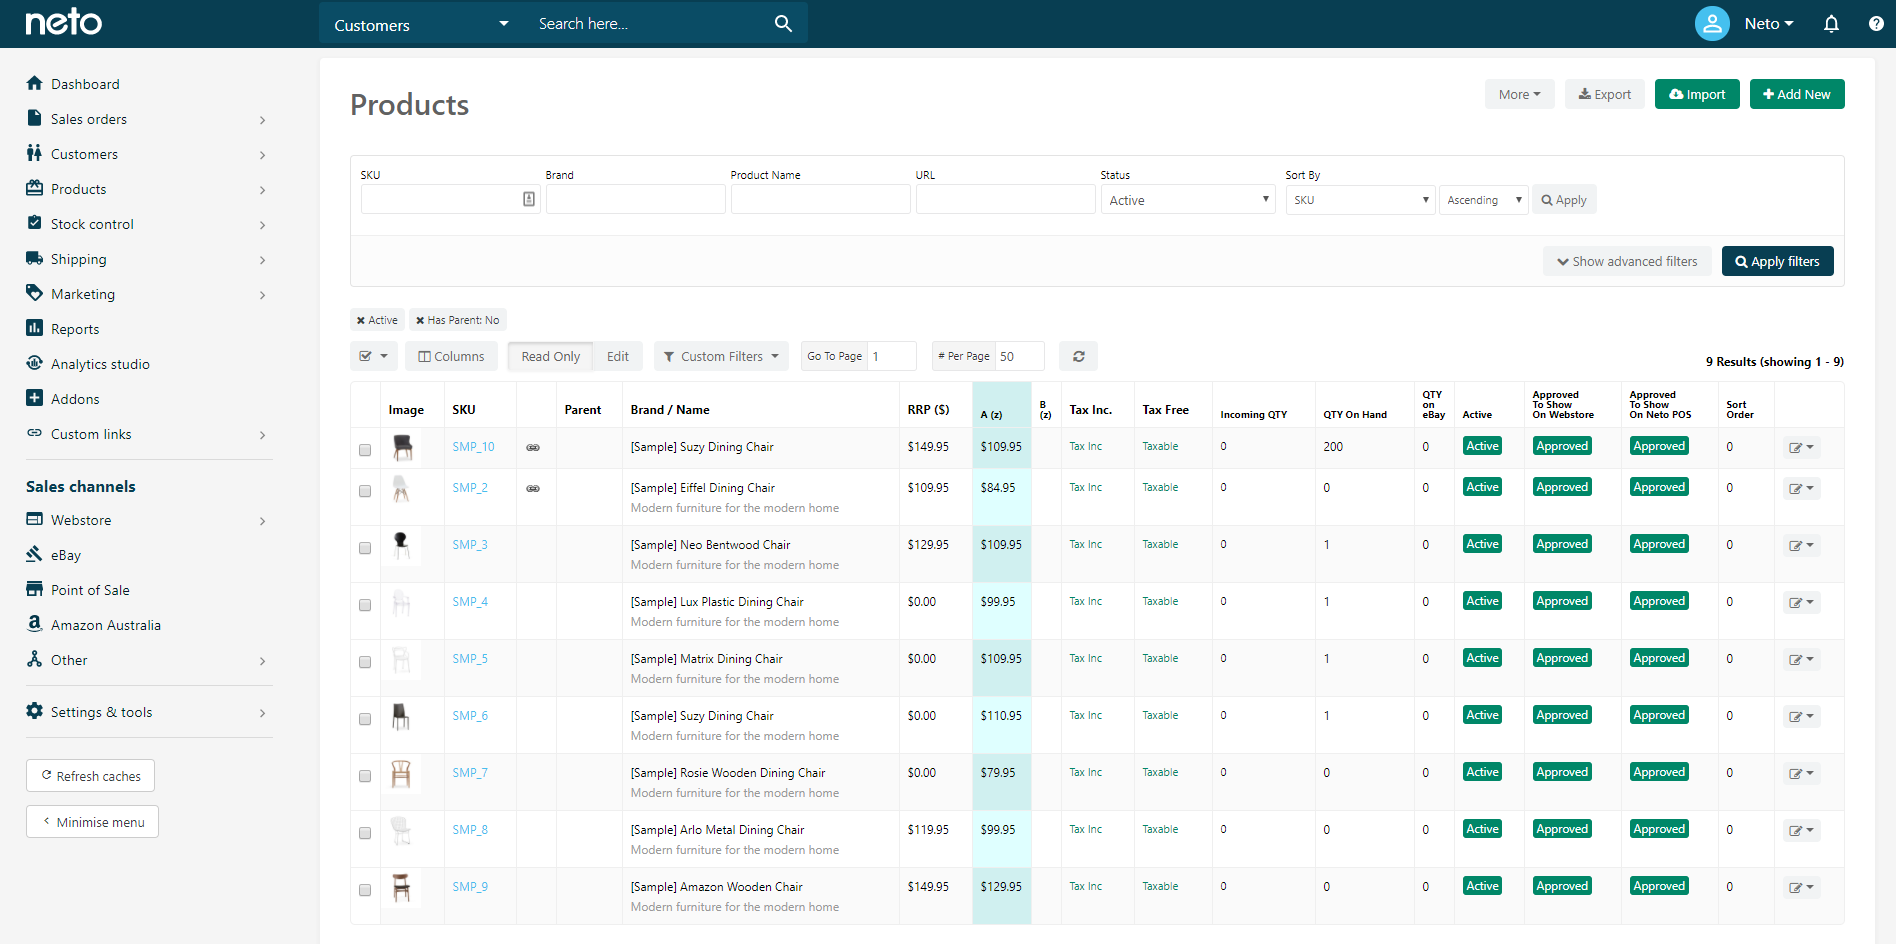
- Click the relevant SKU link to edit the product details.
- Click the Shipping link from the Product menu and enter the number of days in the Handling Time field.
- Click the Save button.
- Repeat these steps to add the handling time for each product.
Add Handling Time to Products in Bulk
- In your Neto control panel navigate Settings & Tools > Export Data.
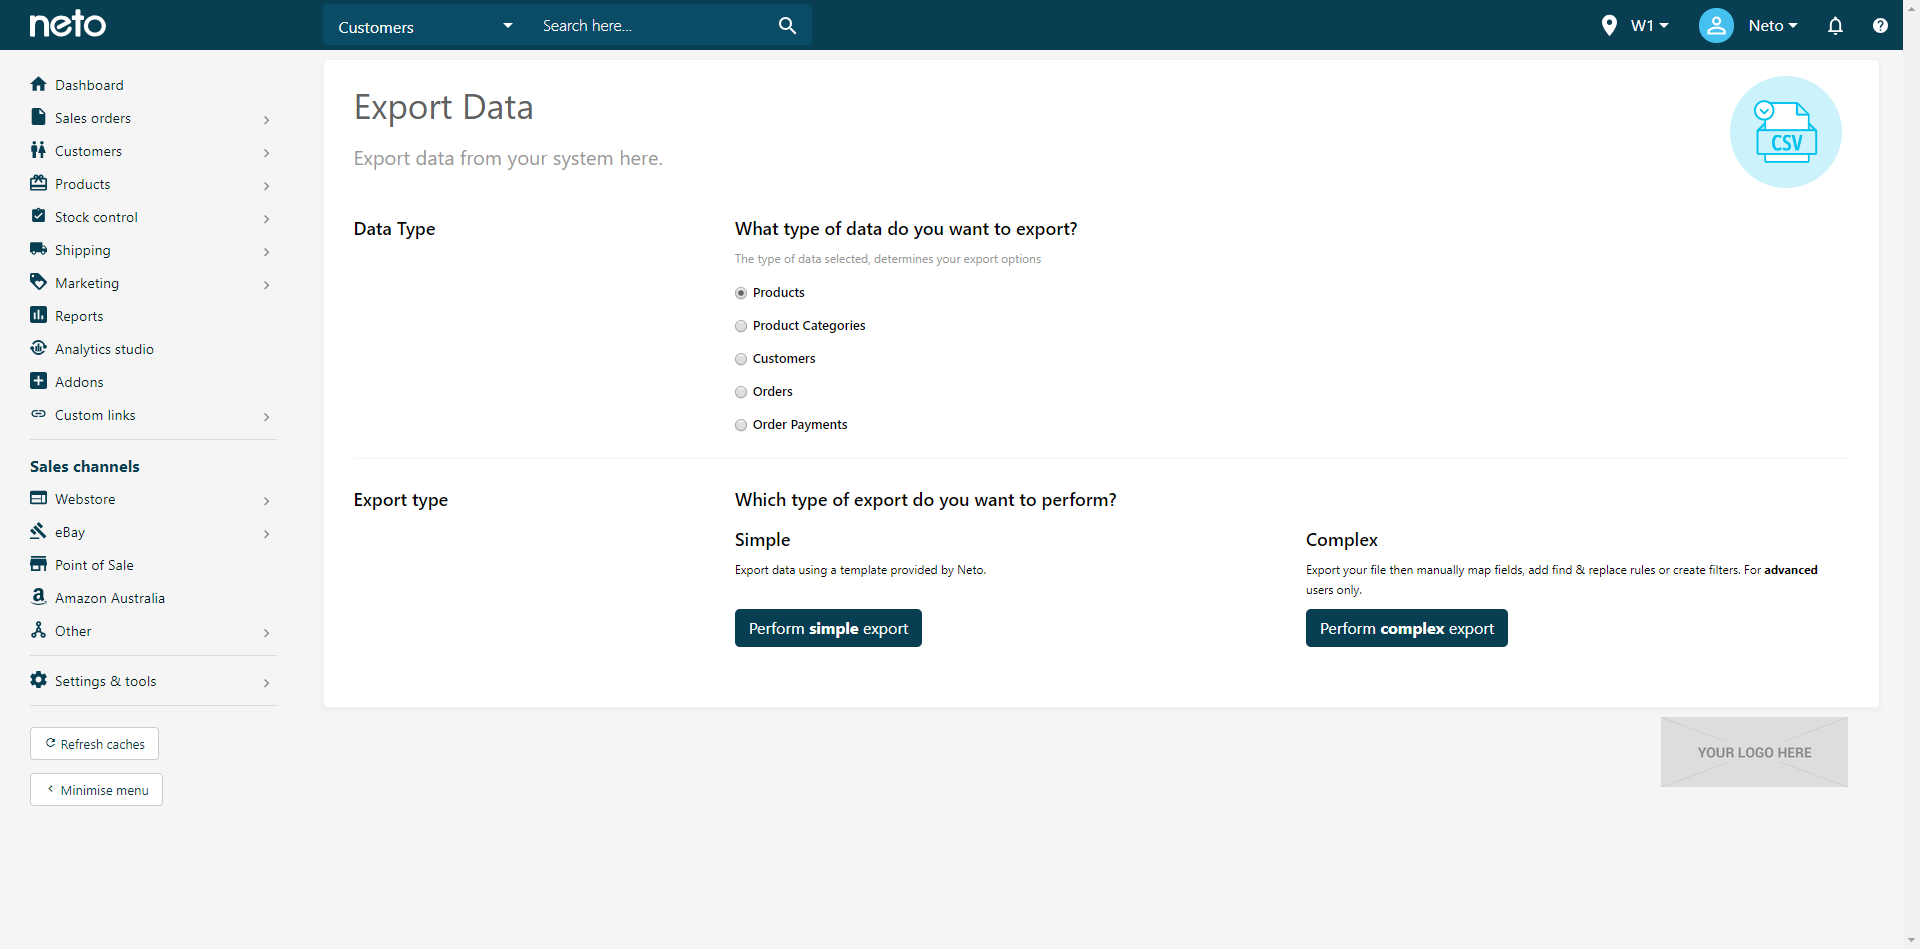
- Click the Perform complex export button.
- Select Start Data Export Wizard from the dropdown.
- From the File Settings tab, enter a name of your file in the Name your file field.
- Click the Continue to Next Step button.
- Click the Add New Field To File button.
- Select Product Data from the dropdown.
- Select SKU* from the second dropdown.
- Click the Add New Field To File button.
- Select Product Data from the dropdown.
- Select Handling Time (days) from the second dropdown.
Add the Product Data > Name field as well to see your product names in the file.
- Click the Continue to Next Step button.
- Enter any Product Filters into the respective fields.
- Click the Continue to Next Step button.
- Select Local URL from the Send Export File to dropdown.
- Click the Export Now button. A page with a link to your file will display. Once your file is created, click the link to download the file.
Click the Export Process link to monitor the status of your export to see when it's complete.
- Open the downloaded file and enter the handling time for each product SKU. Save it when complete.
- In your Neto control panel navigate Settings & Tools > Import Data.
- Click the Perform complex import button.
- Select Start Data Import Wizard from the dropdown.
- Click the Choose File button next to the Upload File button.
- Locate the file to upload and click the Continue to Next Step button.
- The fields should map automatically, so click the Continue to Next Step button.
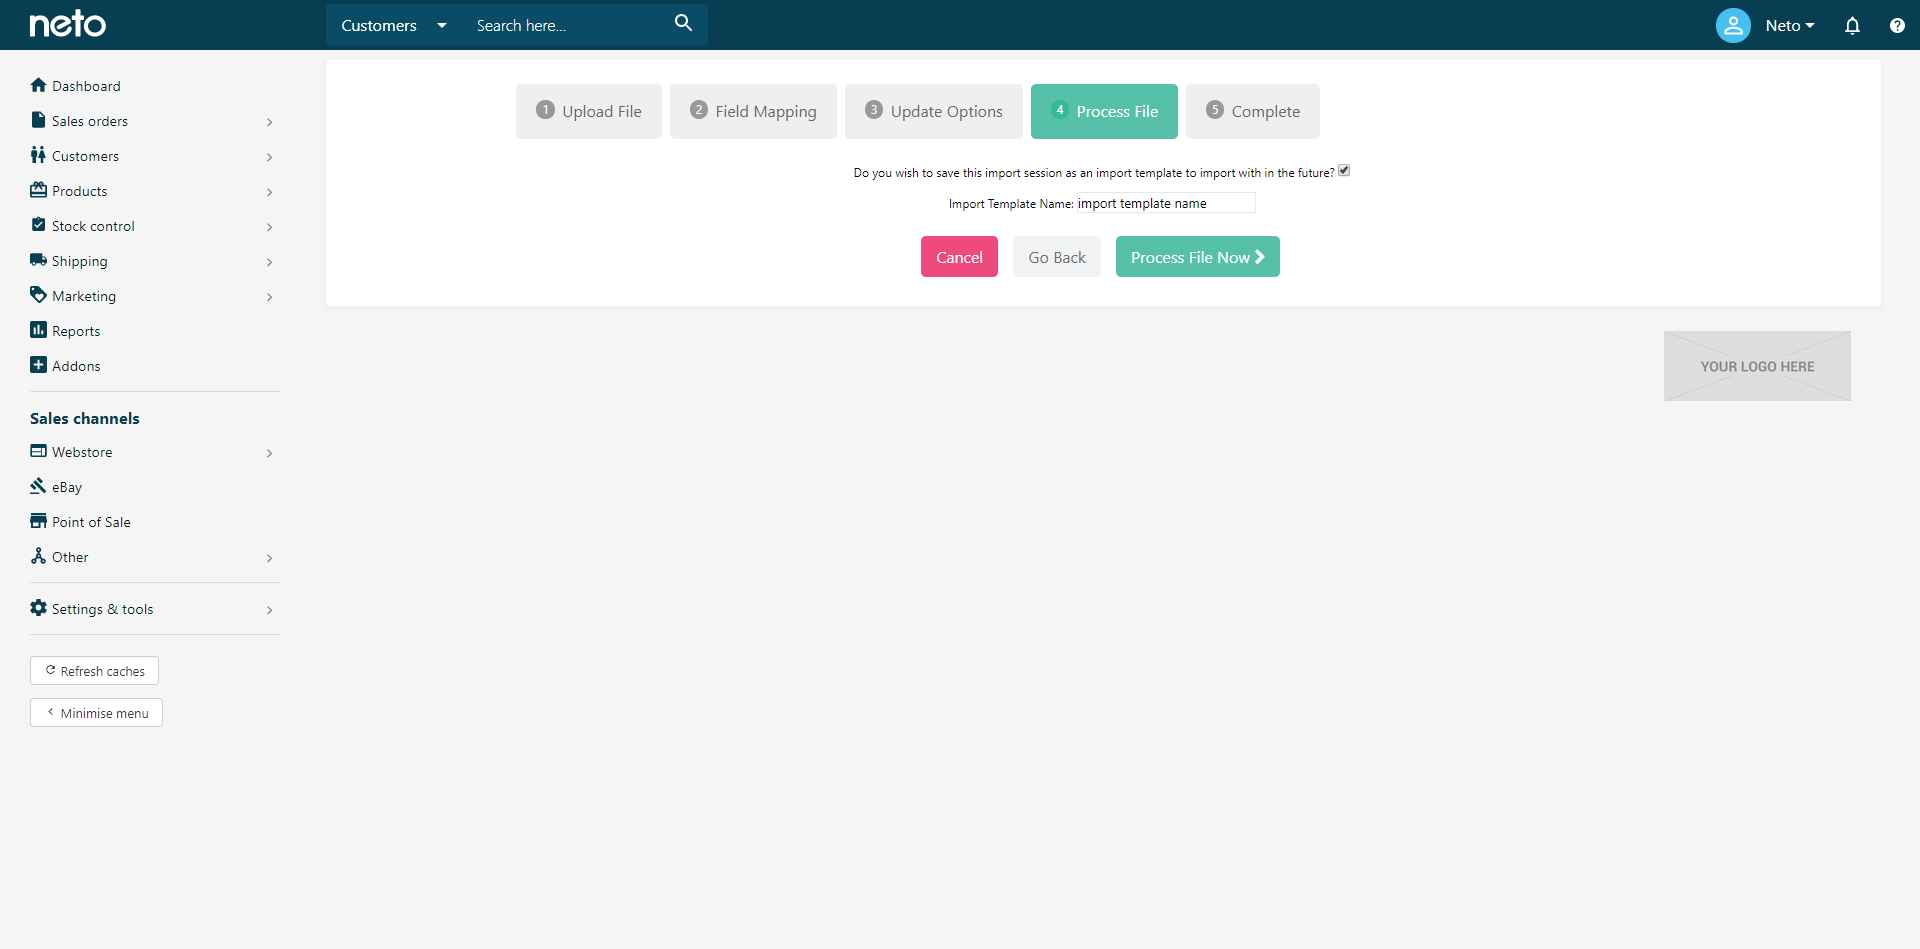
- The update options can stay as they are, so click the Continue to Next Step button.
- Click the Process File Now button. Your file will be processed and the handling time for each product will be added from the file automatically.
You have successfully added handling time to your Amazon listings.