
This add-on was built by Maropost
Add-ons and Integrations built in-house by Maropost are documented and supported by our customer service team. If you're having issues with this integration,let us know!
Please Note: These steps replace the legacy Facebook Shop add-on, as it has limitations on mobile devices.
Create a Facebook account for your business here. Once complete, follow the steps below to set up the feed from Neto.
Install and set up the Add-on
When you install the Facebook Catalogue add-on the export template will be created for you:
- In your Neto control panel click on the Addons menu.
- In the Marketplaces section find the Facebook Catalogue add-on and click the Install button.
- You'll be provided a Facebook Catalogue feed URL. Copy it
- Follow the steps provided by Facebook to set up the catalogue with your feed URL.
Your product feed is now set up and ready for use by Facebook. In the sections below you'll find ways to customise your feed to send additional or dynamic information.
Customise the Data Feed
Click the Edit button on the add-on to view the export template. You can now edit the File Builder to replace product fields you don't want to use, with others you do.
For example, the condition new is hard coded into the file body. If you sell used and /or refurbished products as well, you may want to create a custom product field to store this data against your products, and export it to Facebook.
To replace a field, find the one you want to use in the Insert Data Tag drop down boxes. Then highlight the field you want to replace, and click the Insert Data Tag Button.
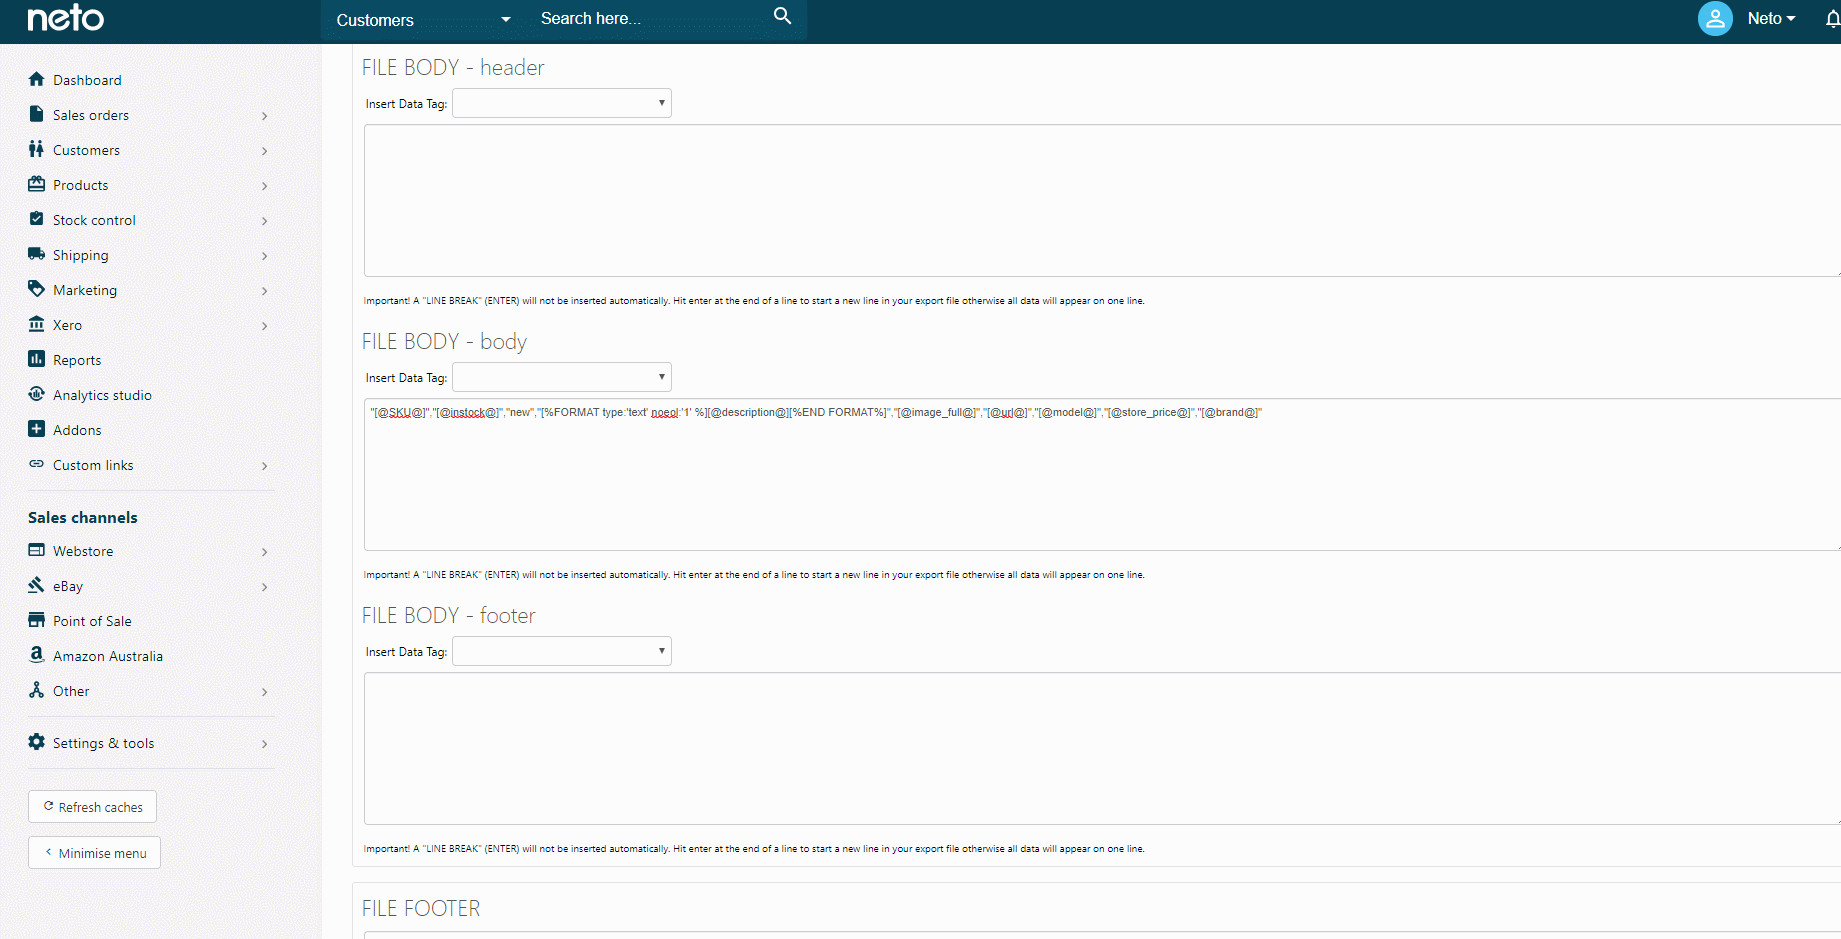
Other fields you may want to replace include:
Field Name | Replacement | Notes |
|---|
[@brand@]
| [@upc@]
| Facebook requires only one of the different types of identifiers (brand, upc, ean, gtin, isbn). Be sure to change the file header column name to match. |
[@store_price@]
| [@current_price_1@]
| This will change the price in your file to your price A or promo price A (if in a promotion date range). |
in stock
| [@instock@]
| Change the hard coded in stock value for each product to display out of stock products on Facebook. This will require a find and replace in template, explained below. |
[@store_price@]
| "[%calc [@store_price@] * 1.1 /%]"
| Facebook requires all prices to include tax. This change will add 10% to your store price to account for GST, if your product prices don't include tax. |
Product Filters
Click on the Filter tab. On this page you will see ways to exclude certain products from being included in the product file. We recommend that you only send Active products in the data file.
If you have copied the File Body code above, you will need to ensure that only products that are in stock are sent to Facebook. In the Store Quantity filter, set the From value to 1 to do this.
Find and Replace Data
Click on the Find & Replace tab. This page allows you to find certain data that is generated in the file, and replace it.
If you use the [@in_stock@] field to add out of stock products to the file, it will only output a y or n in the file. Facebook won't read this correctly, so you need to configure find and replace functions to insert values Facebook can read.
Click the Add Find And Replace button three times. Enter the values for each field as in the table below.
Find | Replace | Exact Match | Case Sensitive | Template | Tag |
|---|
n
| out of stock
| yes | yes | Content Body Only | *Product Data >
In Stock |
y
| in stock
| yes | yes | Content Body Only | *Product Data >
In Stock |
" | "" | yes | yes | Content Body Only | |
- Scroll to the bottom of the page and click Save Changes.
Add Google Product Categories
Google product categories are not required for all sellers, but can make your products easier to find.
- To import Google product categories and assign them to your products follow the steps in this article.
- You can now edit the template to include the Google product category. Add
"google_product_category" to the end of the FILE HEADER field of your template. - In the FILE BODY - body section, place your cursor at the end of the line and enter
,". - In the Insert Data Tag drop-down menus, select Category Table (Google Product Categories) and then Google Product Categories Full Path List. These names may be different if you set up the Google categories with an alternative name.
- Click the Insert button and the data tag will be added to your template.
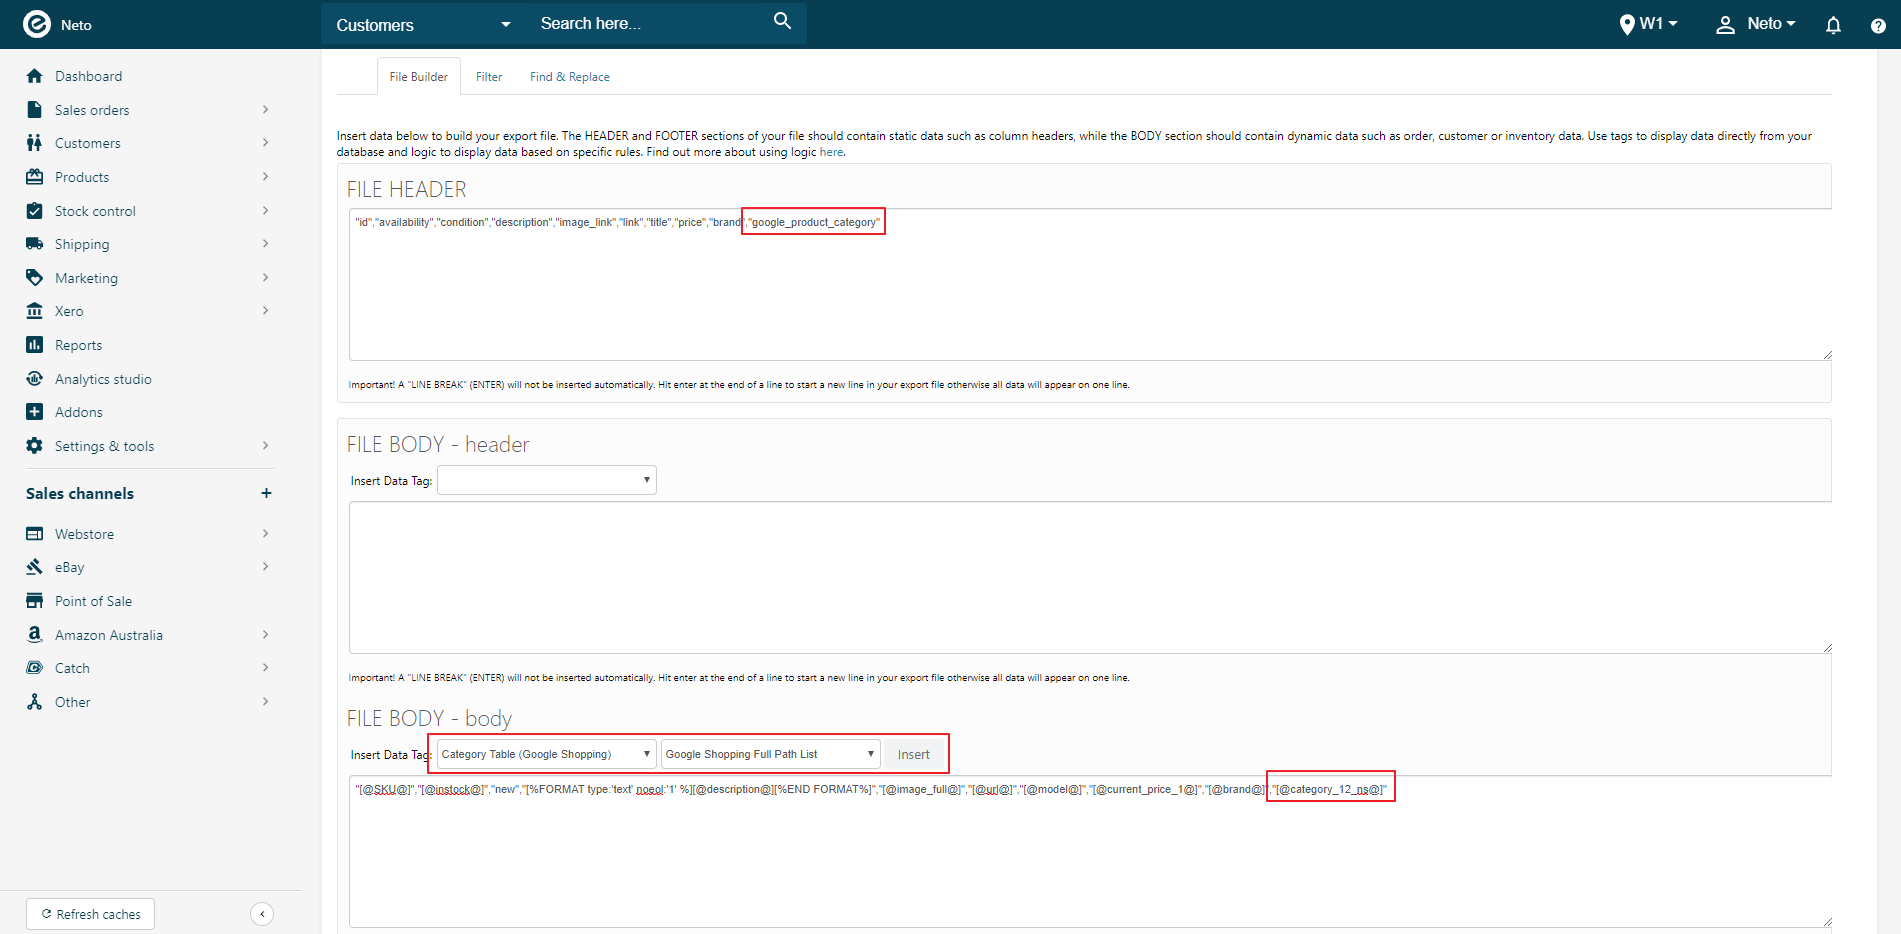
- After the Google category data tag enter
" to complete the format. - Click the Save Changes button.
Your product data feed to Facebook will now include the Google product category assigned to your products. You can now set up a Facebook shop by following the steps here.
Alternatively, connect it to Facebook Pixel. There are two parts to this process, part 1 andpart 2.