Google Search Console is a free service offered by Google that helps you monitor and maintain your site's presence in Google Search results. You don't have to sign up for Search Console for your site to be included in Google's search results, but doing so can help you understand how Google views your site and optimise its performance in search results.
Benefits
Monitor your site's performance in Google Search results:
- Make sure that Google can access your content.
- Submit new content for crawling and remove content you don't want shown in search results.
- Create and monitor content that delivers visually engaging search results.
- Maintain your site with minimal disruption to search performance.
- Monitor and resolve malware or spam issues so your site stays clean.
Discover how Google Search-and the world-sees your site:
- Which queries caused your site to appear in search results?.
- Did some queries result in more traffic to your site than others?.
- Are your product prices, company contact info, or events highlighted in rich search results?.
- Which sites are linking to your website?.
- Is your mobile site performing well for visitors searching on mobile?.
This guide will help you get set up with Google Search Console, verify your ownership, and submit your sitemap to help Google find all of your content.
Create a Google Search Console Account
Create a free Google Search Console account by following the steps here:https://www.google.com/webmasters/tools/
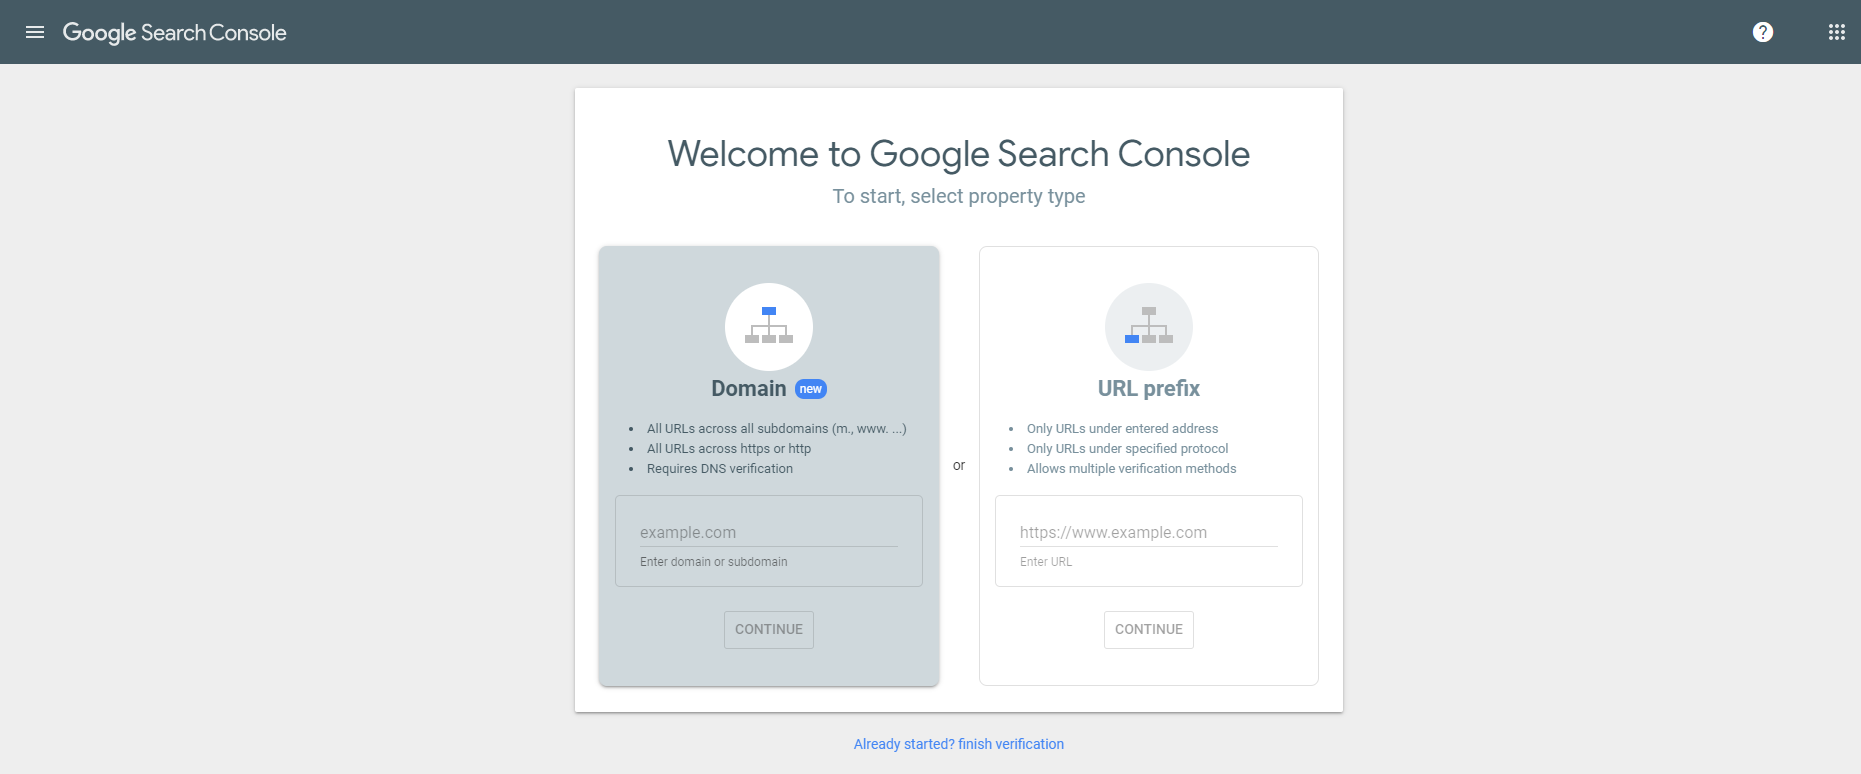
After creating an account, add the web address for your website in the provided box and click on Continue.
Verify Site Ownership with Google Search Console
Once your website has been added to your account you will be asked to verify ownership of the site.
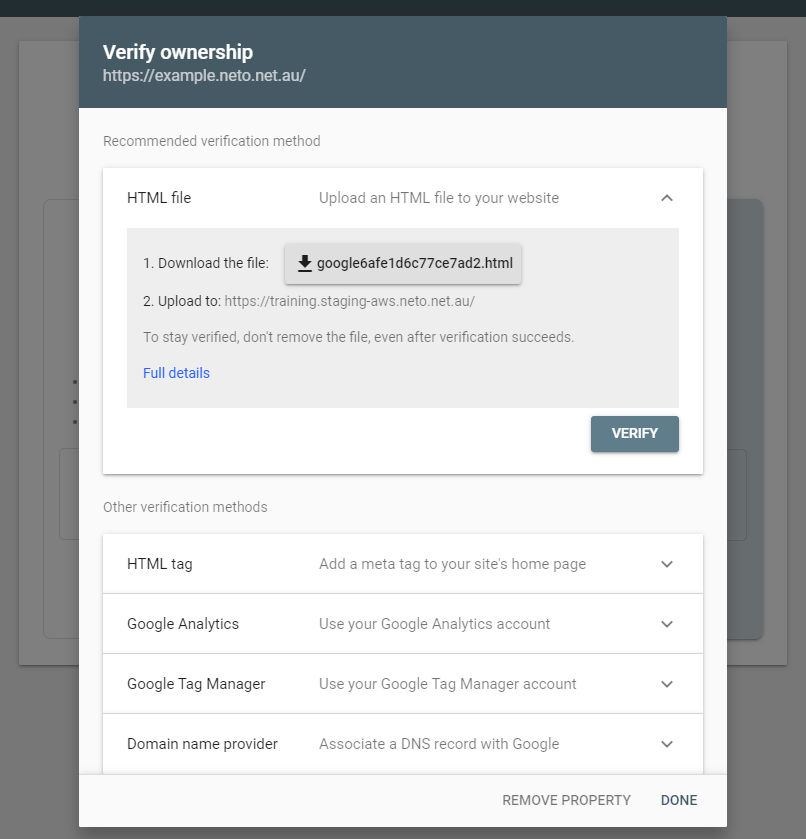
Now choose how you wish to verify, and follow the relevant steps below.
Verify Via Domain Name Provider
Your domain name provider is the company you purchased your domain name from or where your website is hosted (this is not always the same company). This verification method can be done for a site that hasn't gone live yet.
If you don't see the domain name provider option listed under Recommended Method, look under the Alternate Method tab.
You will then be asked to choose your provider from a list of popular domain name used providers. If your provider is not listed, select Other to get instructions to add a TXT record to the DNS for your domain name. You will also have the option of adding a CNAME record instead if required.
Verify With an HTML Tag
- In the other verification methods section select HTML tag from the option list.

- Copy the meta tag script and go to a separate browser window, and login to your Neto control panel.
- In your Neto control panel go to Settings & Tools > All Settings & Tools.
- Click on the Analytics & 3rd Party Scripts tab and click Custom Scripts.

- Click the Add New button.

- Name the script Google Site Verification and scroll down to the tabulated Scripts section. In the Page Header section, paste the meta tag script and click Save as per the example below.
Please Note: Changes to a custom script require you to authenticate your access. Click the Send Token Now button and an email will be sent to you with a security token. Copy the token and paste it into the verification field. Click the Verify Token button and your changes can be saved. The token will last two hours in case you need to change multiple scripts.

- Go back to the Google search console page you were on previously and click the Verify button to complete the process.
Set up XML sitemaps For Google
A sitemap is a file that lists the pages of your website so that you can tell Google and other search engies how your site is organised. Submitting a sitemap to Google can help ensure all pages are discovered and indexed properly, particularly if your site is large or new.
The sitemap URL for Neto websites uses the following format: https://www.YOURDOMAIN.com.au/sitemap_index.xml.gz
Generate a Sitemap
Neto administrators will create a sitemap during the process of setting your website live; however, you can turn this on at any time by following the steps below:
- In your Neto control panel, navigate to Settings & Tools > All Settings & Tools.
- Search for System Scheduled Tasks and click on it.
- Look for the process name called Site Map and tick the checkbox next to it. At the bottom of the page click With 1 Selected and choose Mark Selected As Active.
- Once this has saved, generate your site map instantly by clicking on the green Run Now button that corresponds with the Site Map task.
Submit a Sitemap to Google
- On your Google Search Console home page select your website.
- Select Crawl.
- Select Sitemaps.
- Select Add/Test Sitemap and enter
sitemap_index.xml.gz - Select Submit Sitemap.
Why does Neto use 'sitemap_index.xml' instead of 'sitemap.xml'?
Some customers have extremely large websites with large numbers of both products and categories. Most search engines have limits on the size of the sitemap that you can submit to them but they support having multiple sitemap files. The sitemap_index.xml file is an XML file that lists multiple XML sitemap files. By using the sitemap index instead of a single sitemap file you are making sure that you do not have to update your webmaster tools if you outgrow having a single sitemap file.