Introducing Multi-Factor Authentication (MFA)
Multi-Factor Authentication (MFA) is a security procedure that uses more than one form of authentication to verify a user. It provides an additional security layer beyond a username and password, thus reducing the risk of security breaches. Multi-factor authentication has become a standard practice across various online systems, including Net Banking, iCloud, and business-approved CRMs.
When using your Maropost Identity credentials to log in to your Neto account, you must first provide your username (that is, registered email address) and password (1st-factor authentication), followed by a verification code sent to your mobile via an authenticator app (2nd-factor authentication).
Key benefits of MFA are:
- Protects against common threats, like identity theft
- Lowers the risk of passwords being compromised
- Helps prevent unauthorized individuals from accessing a company’s confidential data
- Strengthens a company’s overall IT cloud security
Setting Up MFA
MFA uses an authenticator app on your phone to verify your identity. The authenticator app generates a code during setup, and again when you log in, to ensure that no one else can access your staff user account but you.
Note: MFA is mandatory when signing in using the Maropost Identity login credentials, and therefore must be set up when signing up.
You can reconfigure the MFA on the Security tab of the Identity portal, also accessible from the control panel (click your username at the top-right corner, and select Manage account and password). For more information, see Maropost Identity – Login and Account Management in Neto.
Recommended Authenticator Apps
Some of the popular mobile authenticator apps, available for both iOS and Android, that you can use are: Google Authenticator (Google Play | Apple Store), Microsoft Authenticator, and Authy.
Note: Don’t have access to a mobile device? Not a problem, you can use your PC or laptop’s browser extension, such as the Authenticator for Chrome.
MFA Setup Steps
Follow the steps below to set up the MFA:
Note: This section consists of steps to set up MFA, which is part of the Identity account sign-up process. For instructions on the complete sign-up process, see Maropost Identity – Login and Account Management in Neto.
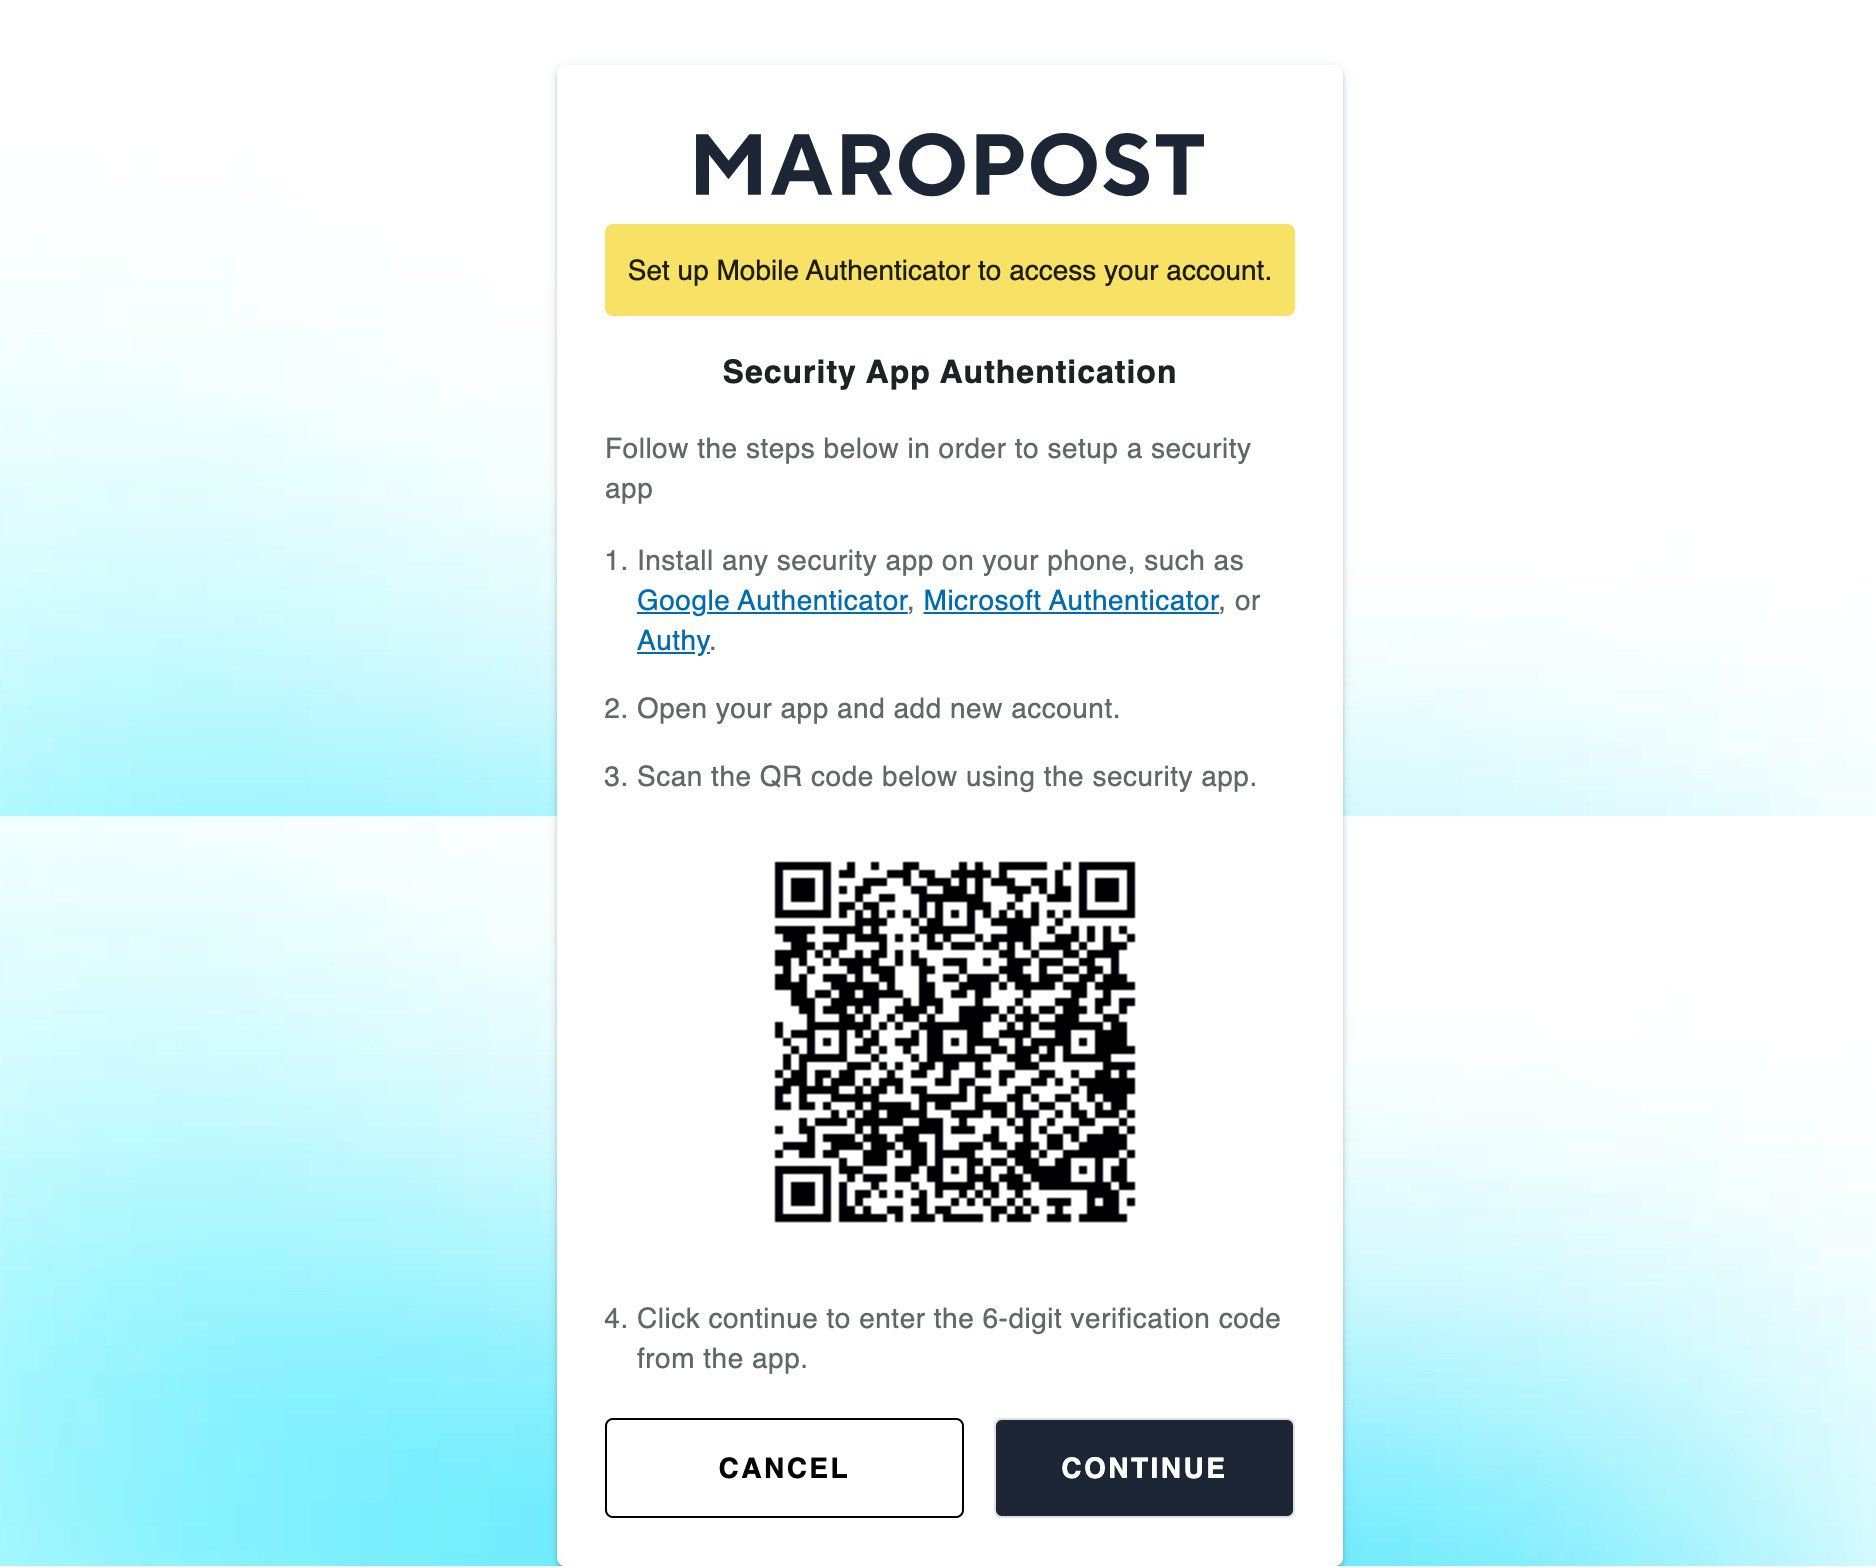
- Once you’ve set up the email and password, you’ll be redirected to the MFA setup page. Follow the instructions on the screen to install an authenticator app and scan the QR code. Then, click Continue.
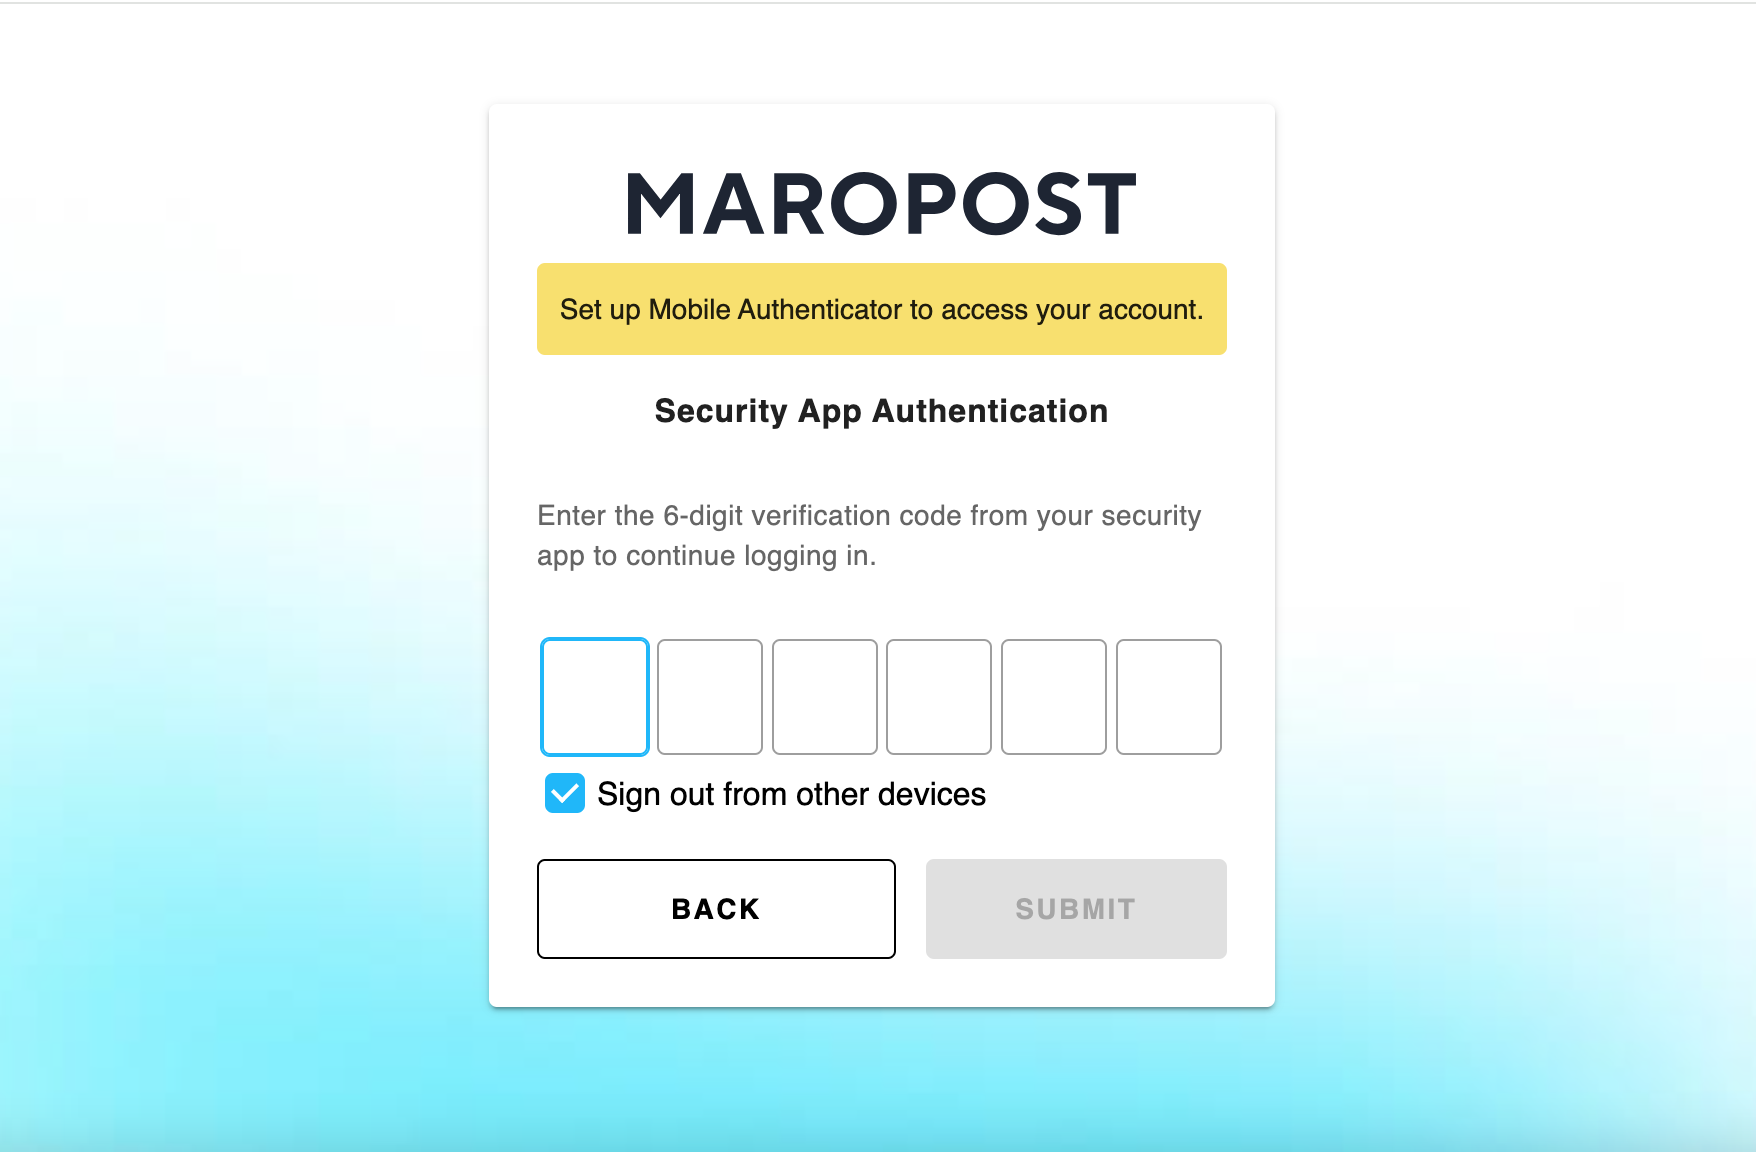
- In the Security App Authentication page, enter the six-digit security code from the authenticator app on your phone. Then, click Submit.
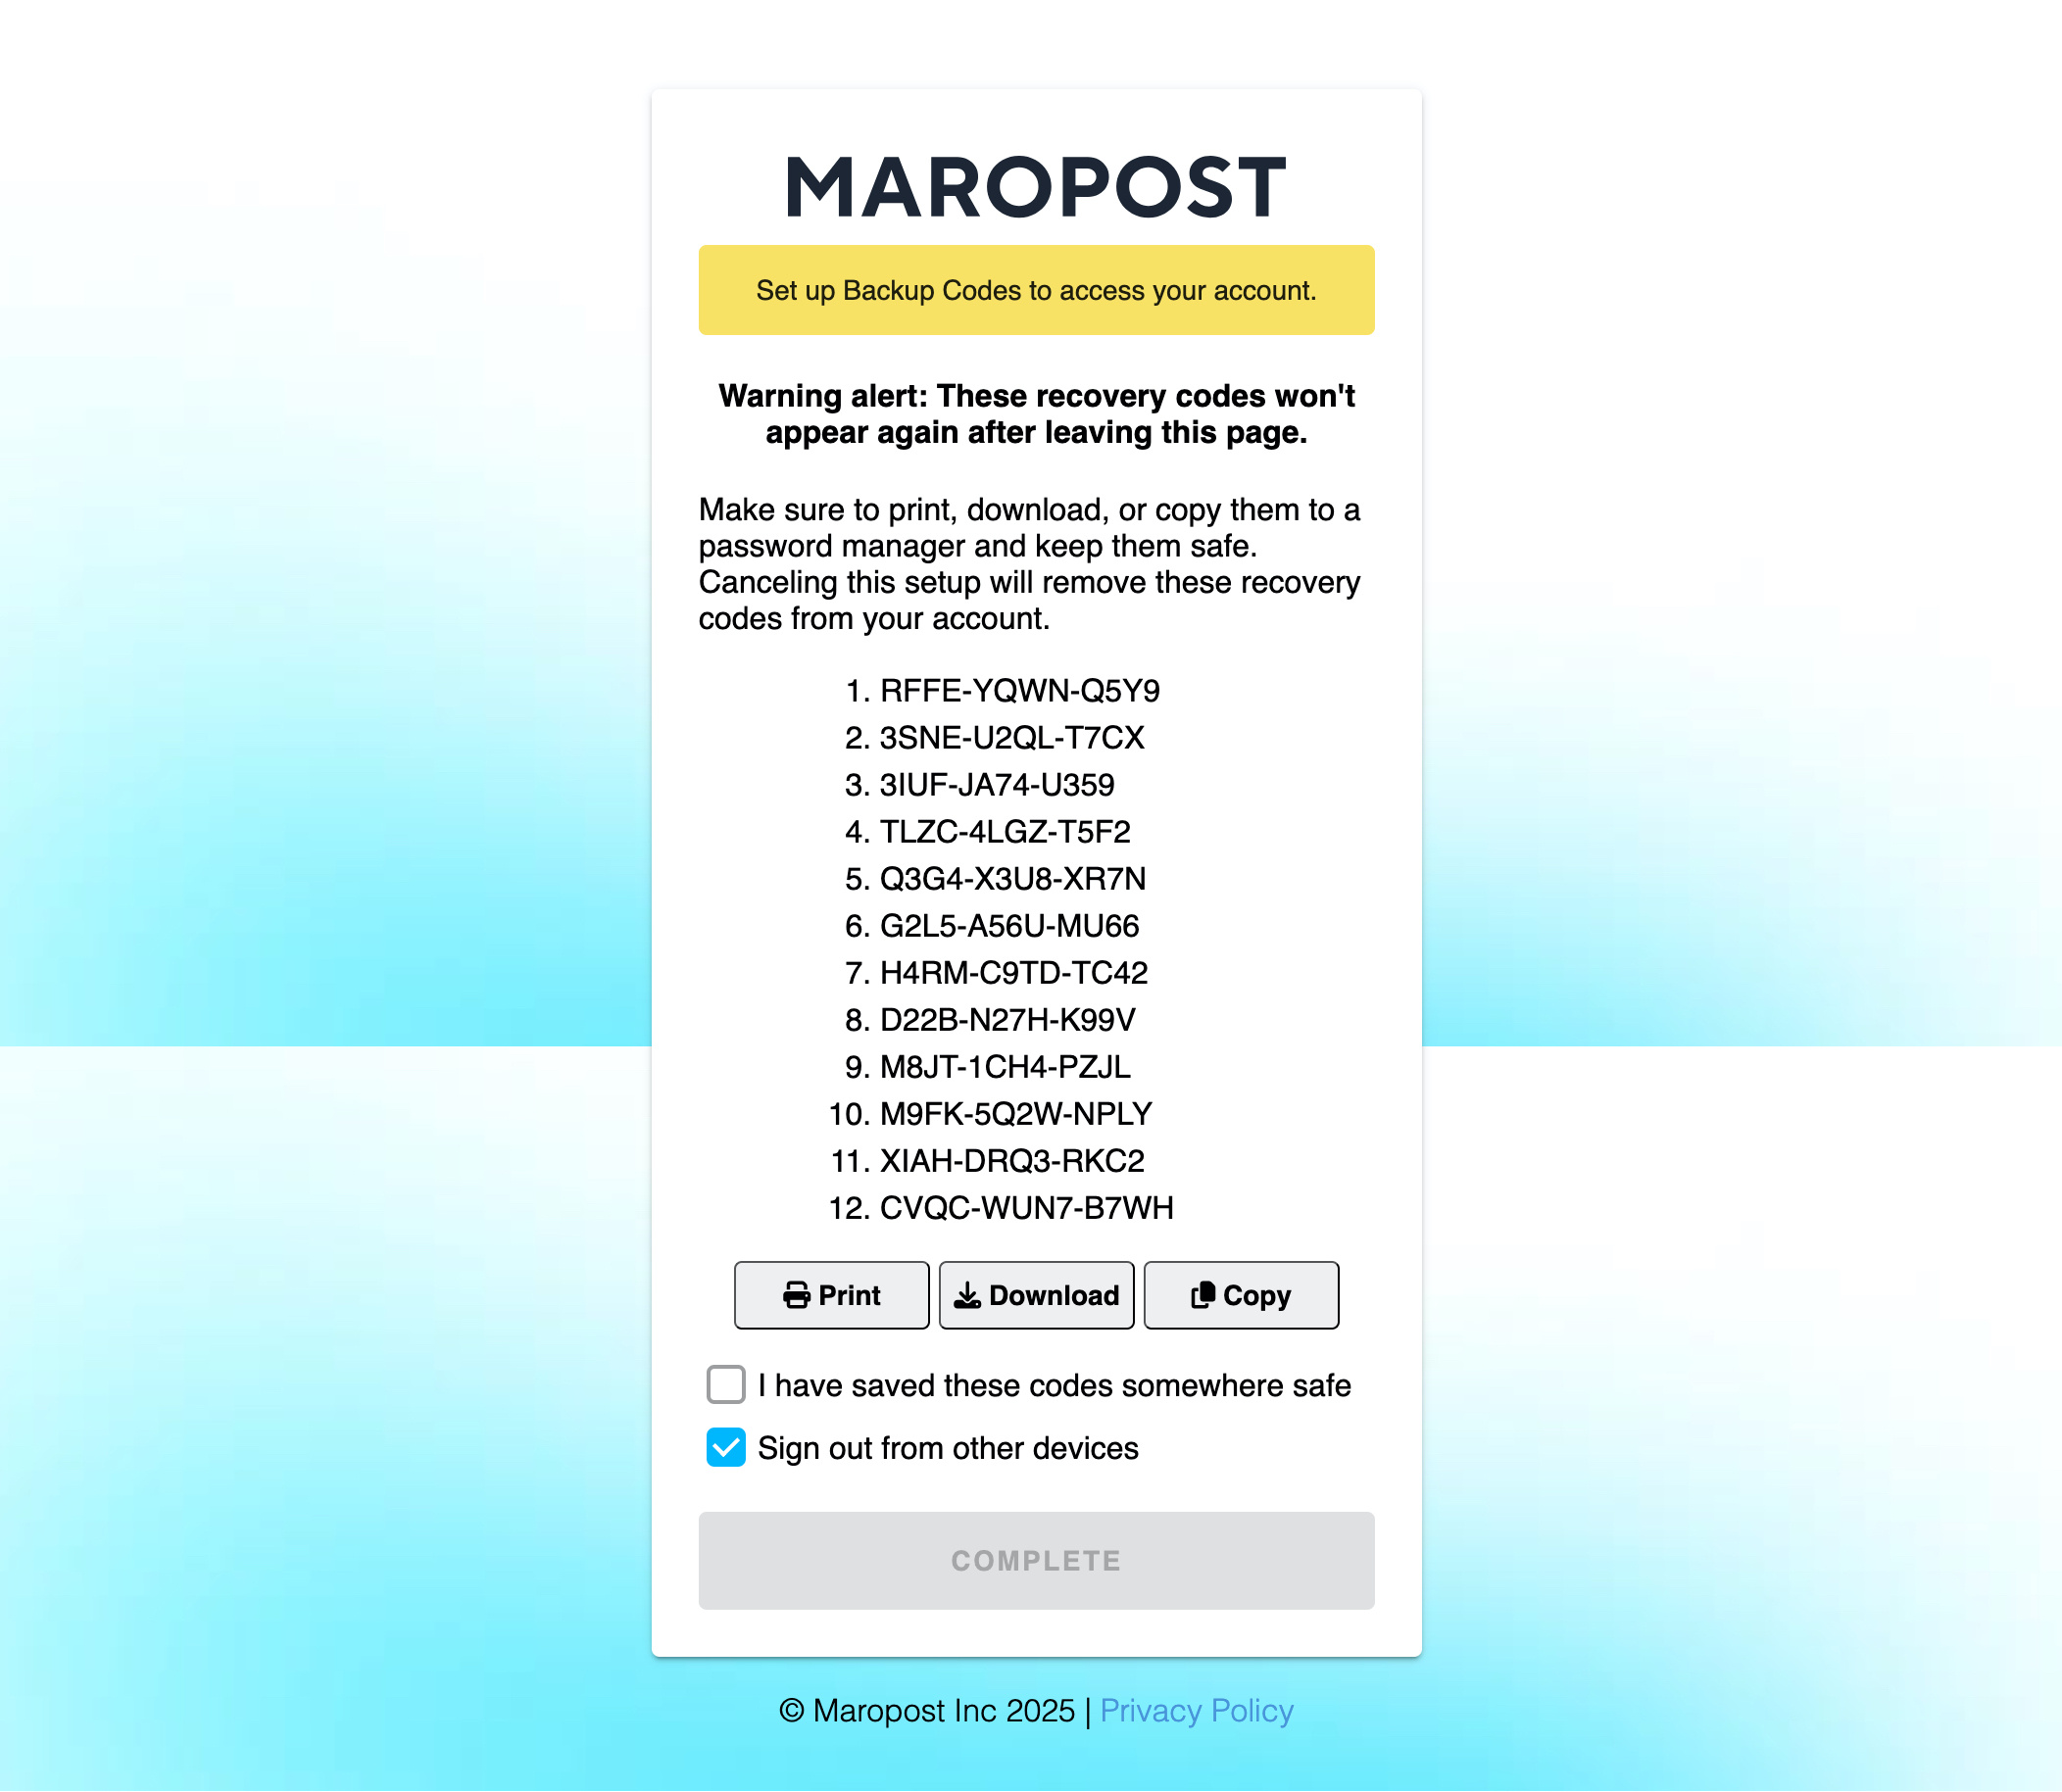
- On the Backup Code page, you’ll find a list of recovery codes that can be used if you ever lose access to your authenticator app. Save the recovery codes safely before you select the checkbox confirming that you have saved the recovery codes.
Note: The recovery codes are only available on this page and cannot be found elsewhere. So, you must save the codes before proceeding to completion.
- Finally, click Complete.