You can configure Hunter Express shipping integration to provide reliable domestic delivery options across Australia with automated rate calculation and shipping label generation. This helps streamline warehouse operations and reduces order processing time, with properly configured carrier integrations typically improving fulfillment accuracy while providing competitive shipping rates for Australian B2B deliveries.
Implementing Hunter Express integration enables efficient order fulfillment by automating shipping calculations based on product weight, dimensions, and delivery zones. This streamlines complex B2B workflows by generating consignment labels automatically, providing tracking information to business customers, and integrating seamlessly with your order management system to improve operational efficiency across your Australian fulfillment operations.
This add-on was built by Maropost
Add-ons and Integrations built in-house by Maropost are documented and supported by our customer service team. If you're having issues with this integration, let us know!
This article assumes a good knowledge of Microsoft Excel and Neto shipping (including zones, rates and options).
To set up a Hunter Express shipping option you need to complete the below steps in order.
Import Shipping Zones
The Hunter Express zones need to be imported so that postcodes in Australia can be grouped into geographic zones.
- Download the Hunter Express - Shipping Zones file and save it to your computer.
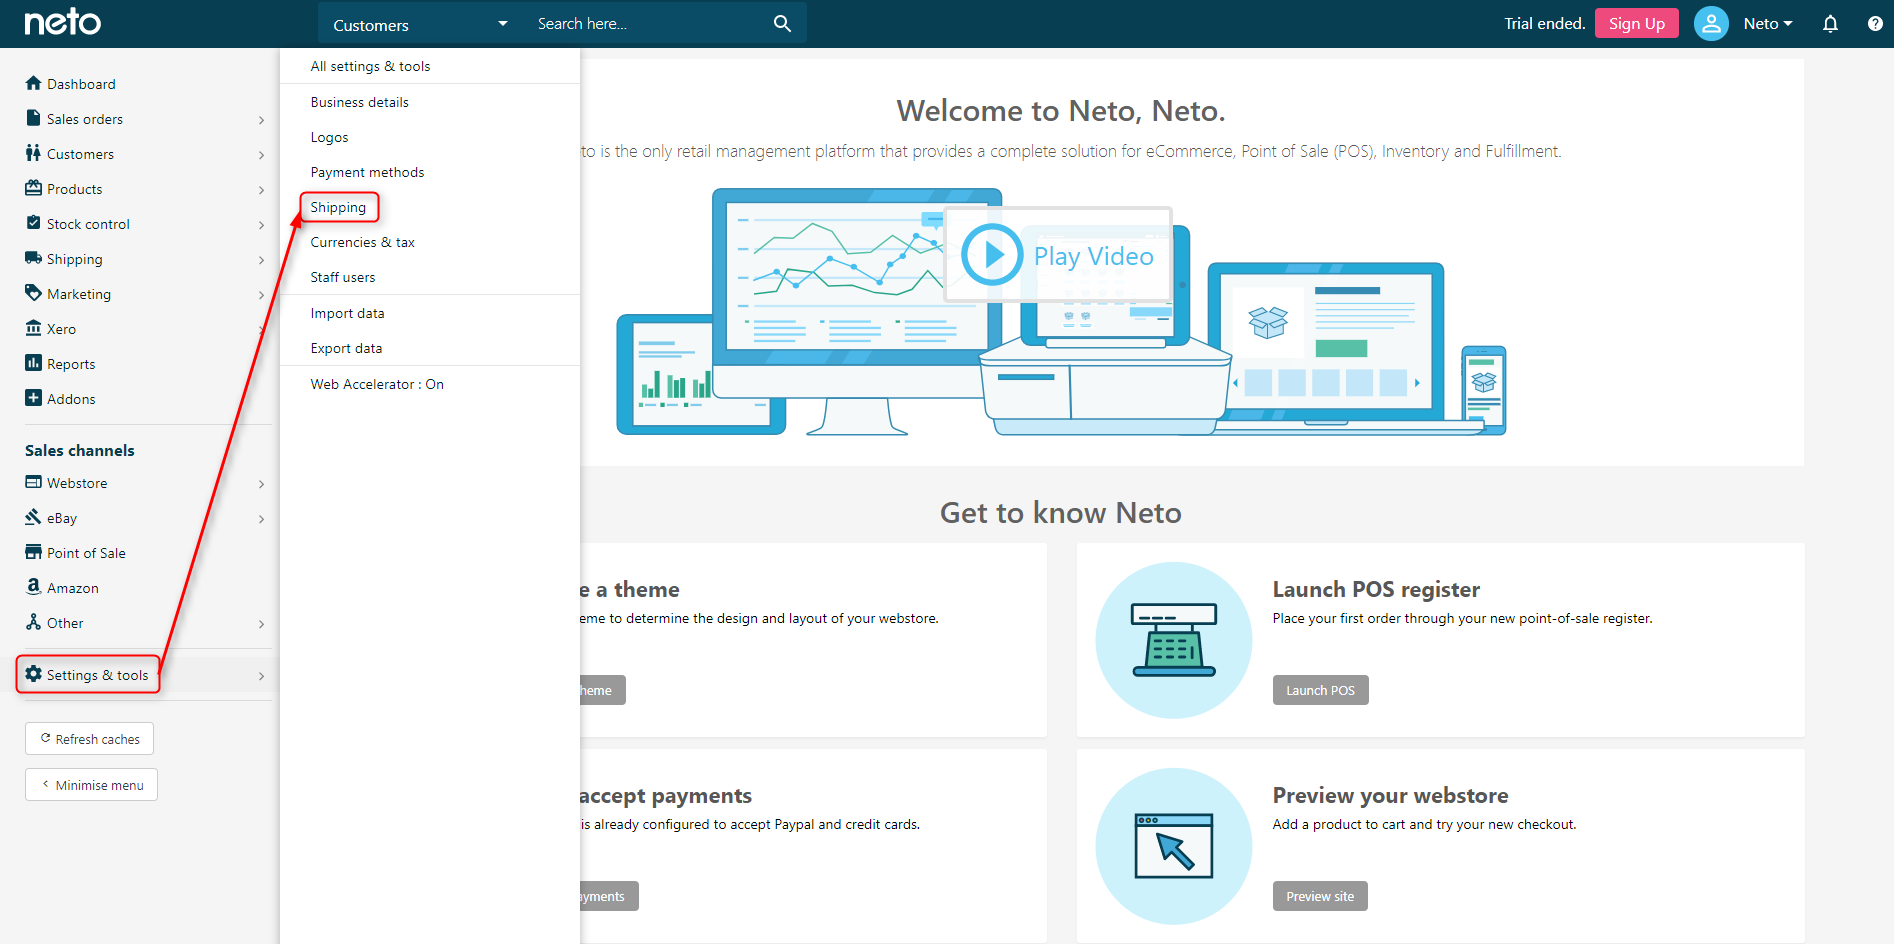
- In your Neto control panel navigate to Settings & Tools > Shipping.
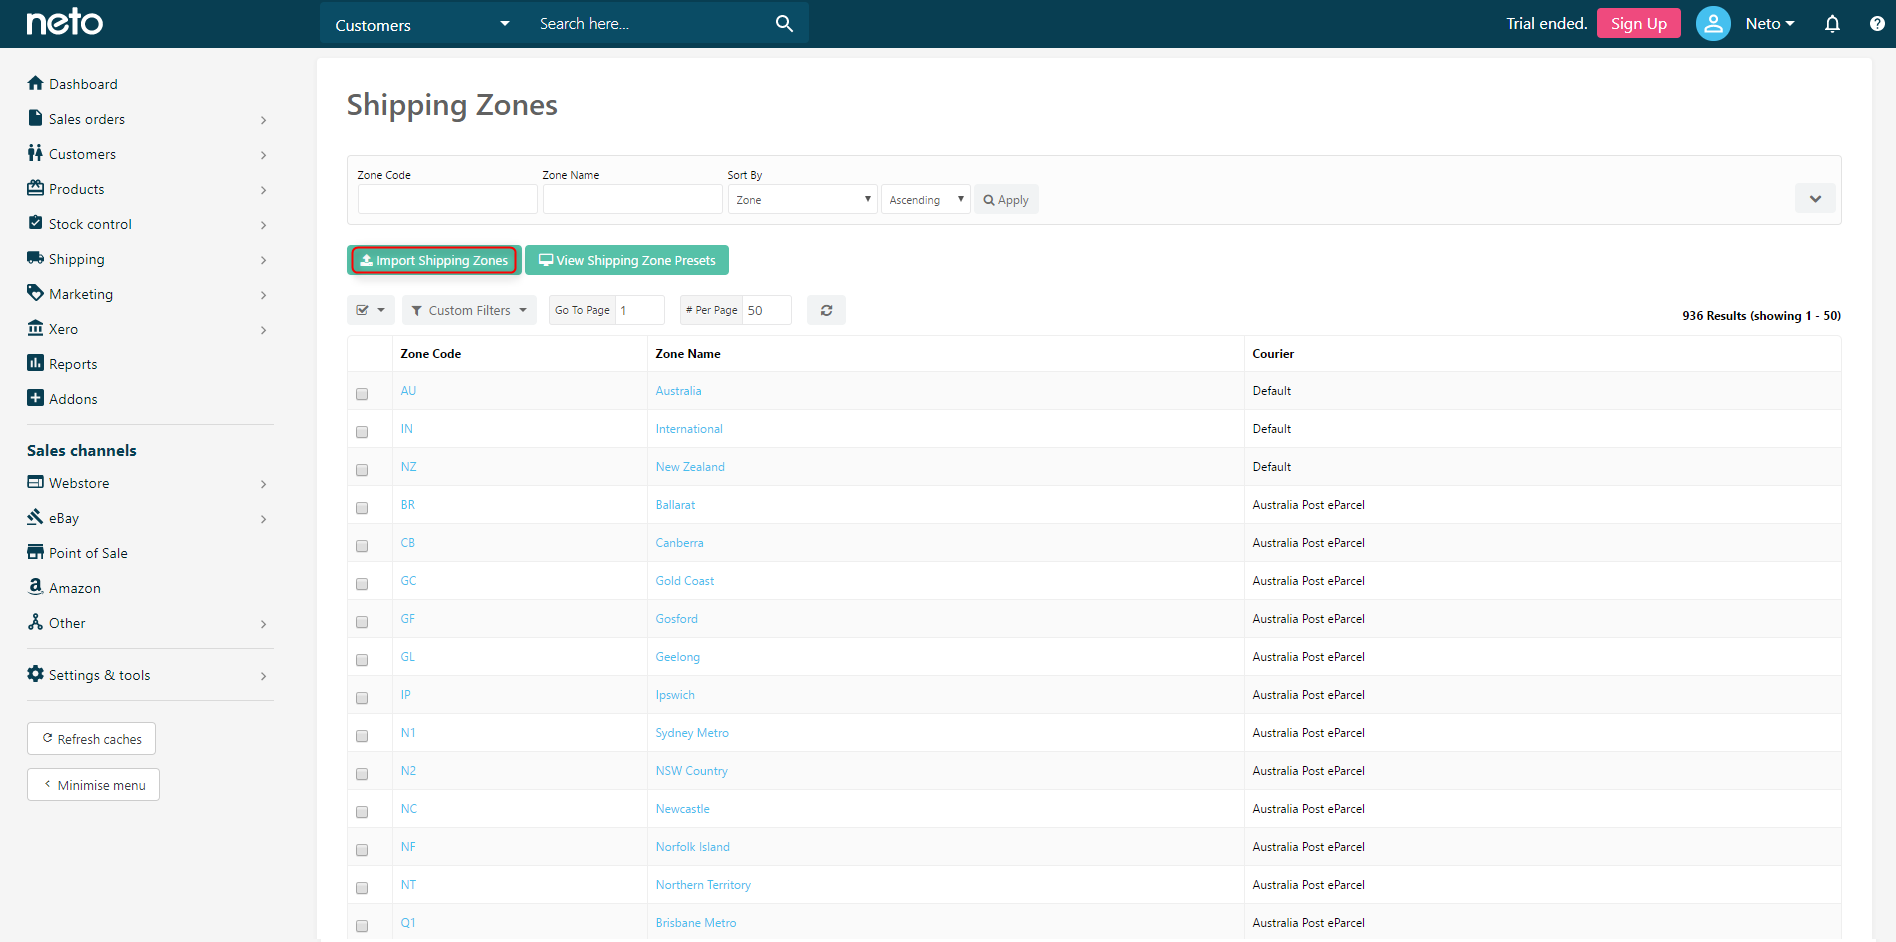
- Click Shipping Zones.
- Click Import Shipping Zones.
- Click Choose File and upload the Hunter Express zones file downloaded in step one.
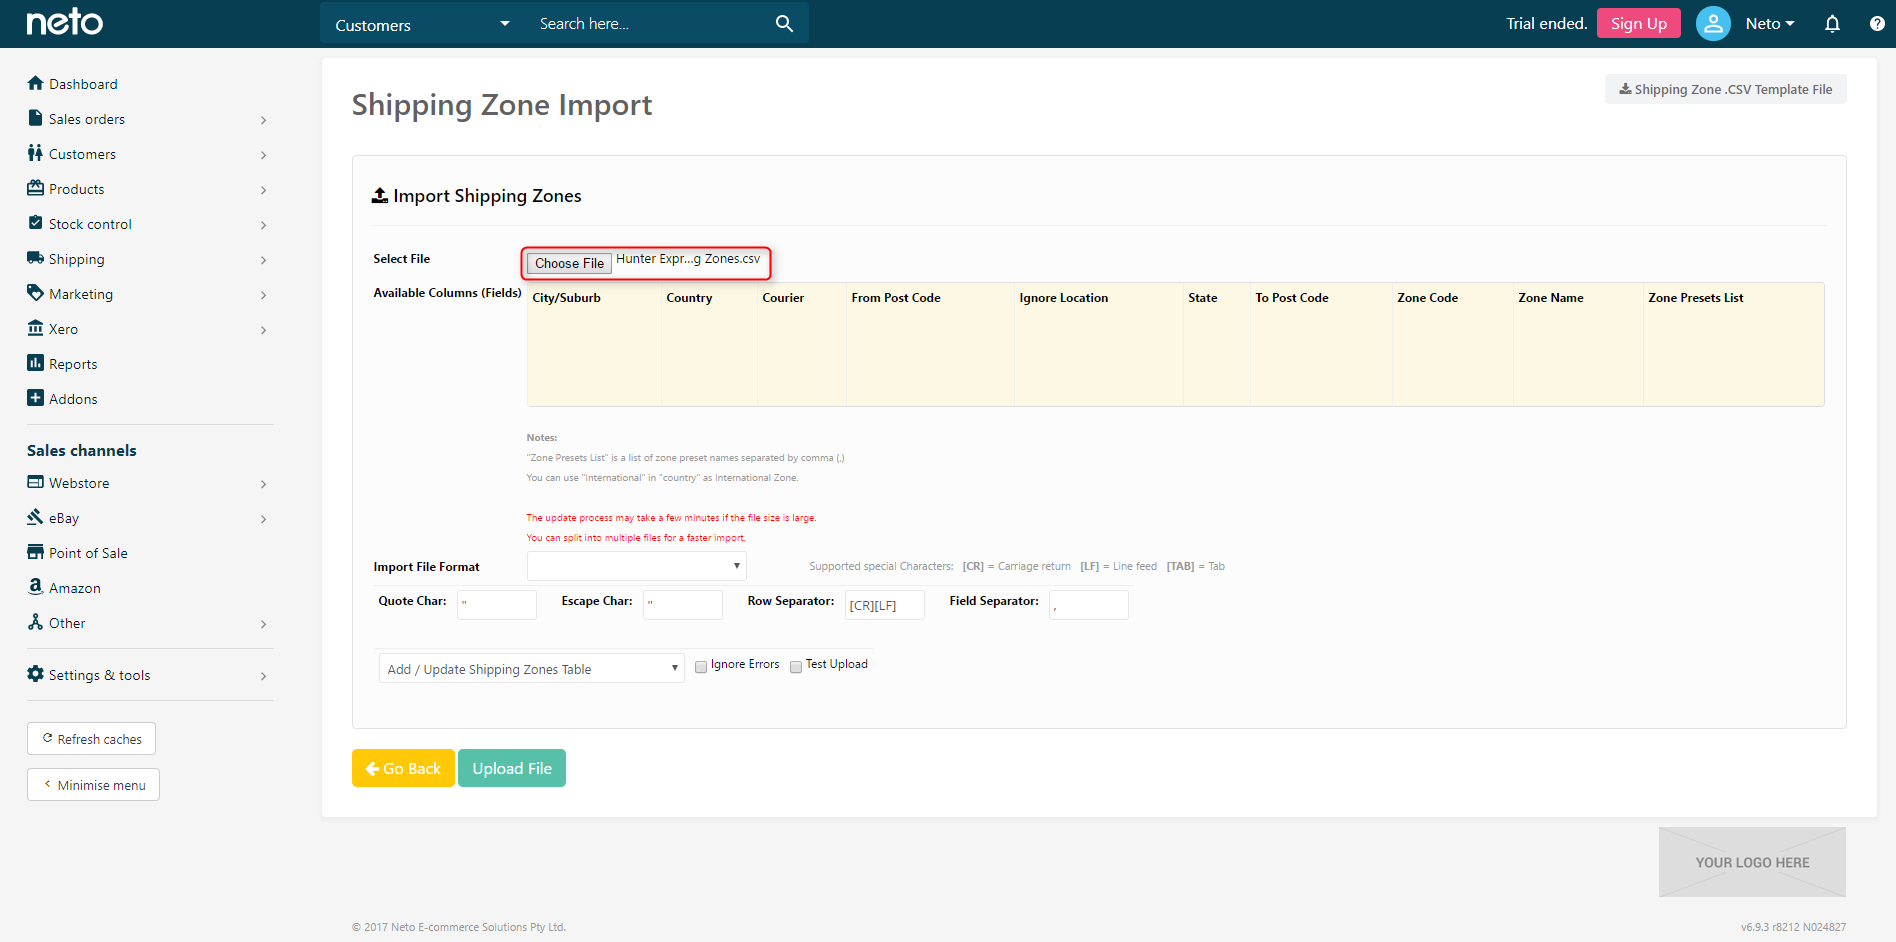
- Click Upload File, and the Hunter Express zones will be imported into Neto.

Prepare your Data
Hunter Express will provide your rates in an excel spreadsheet which isn't importable into Neto as is. The data will need to be transposed into Neto's template for it to be imported.
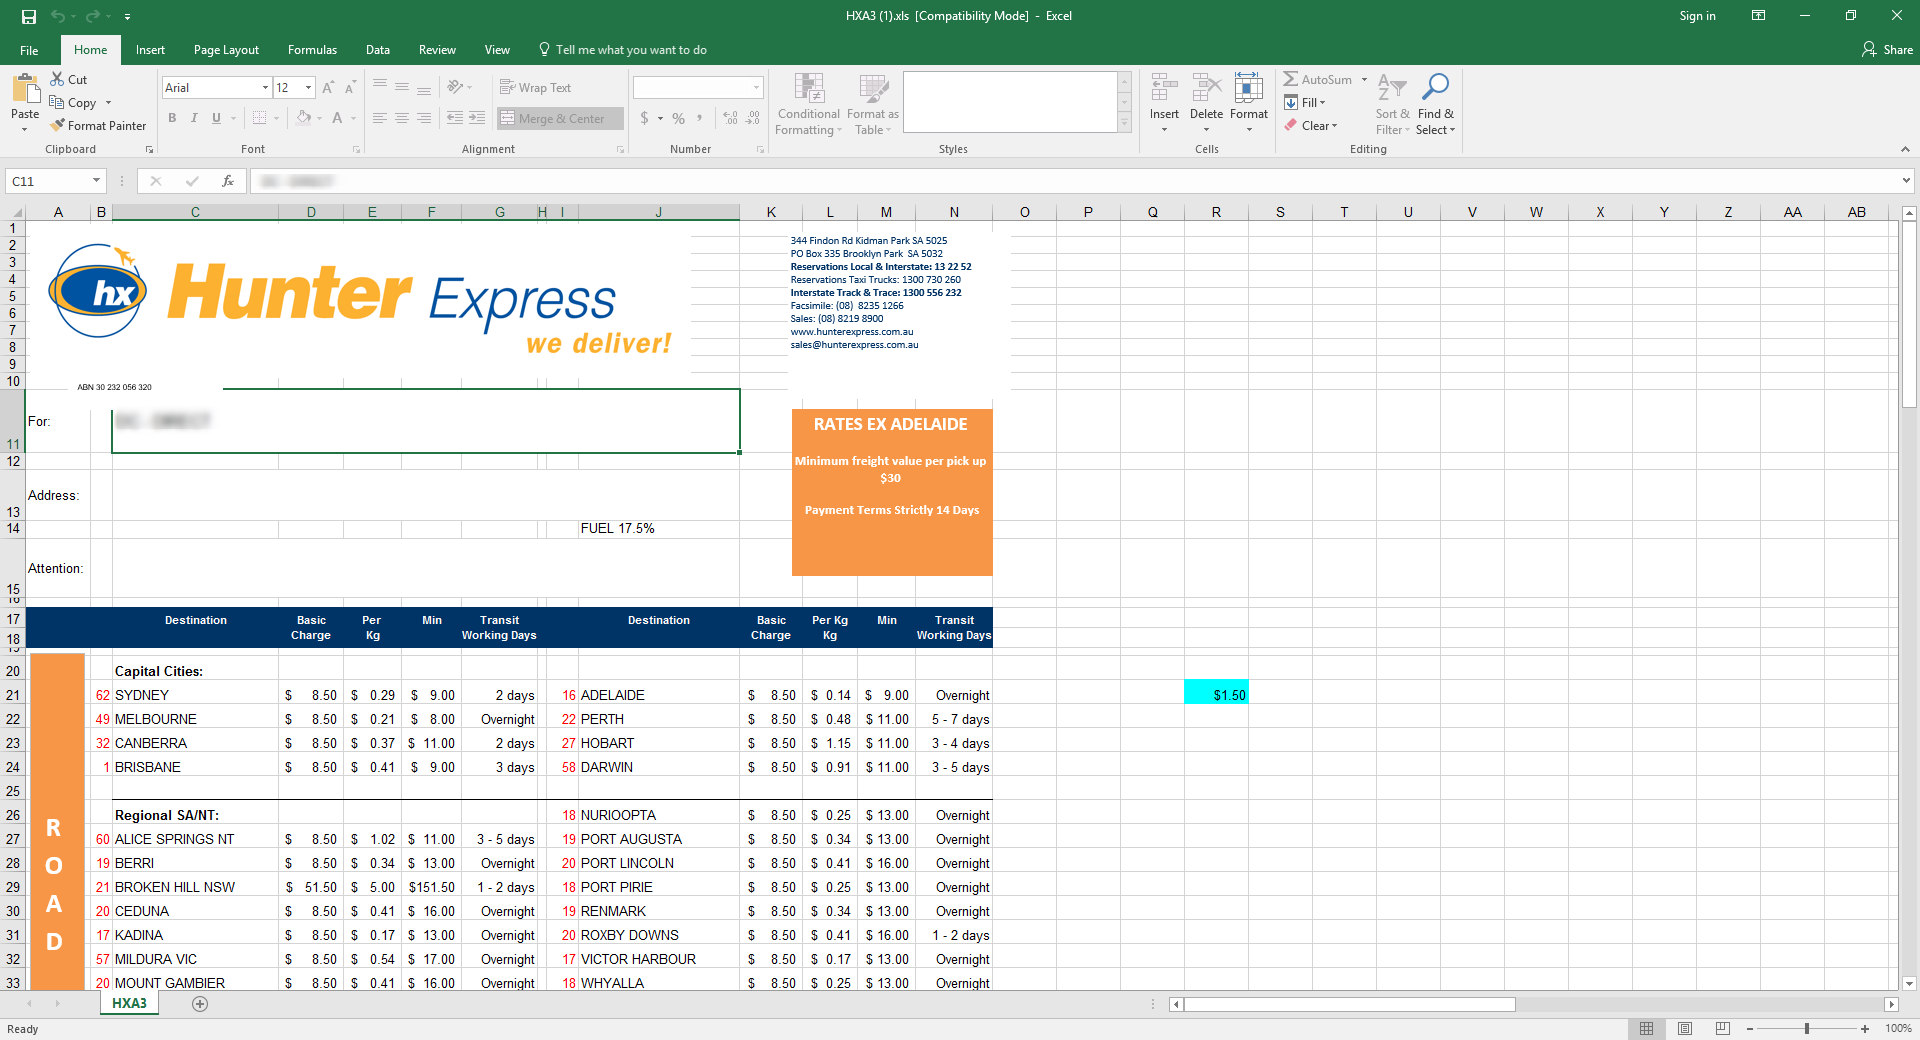
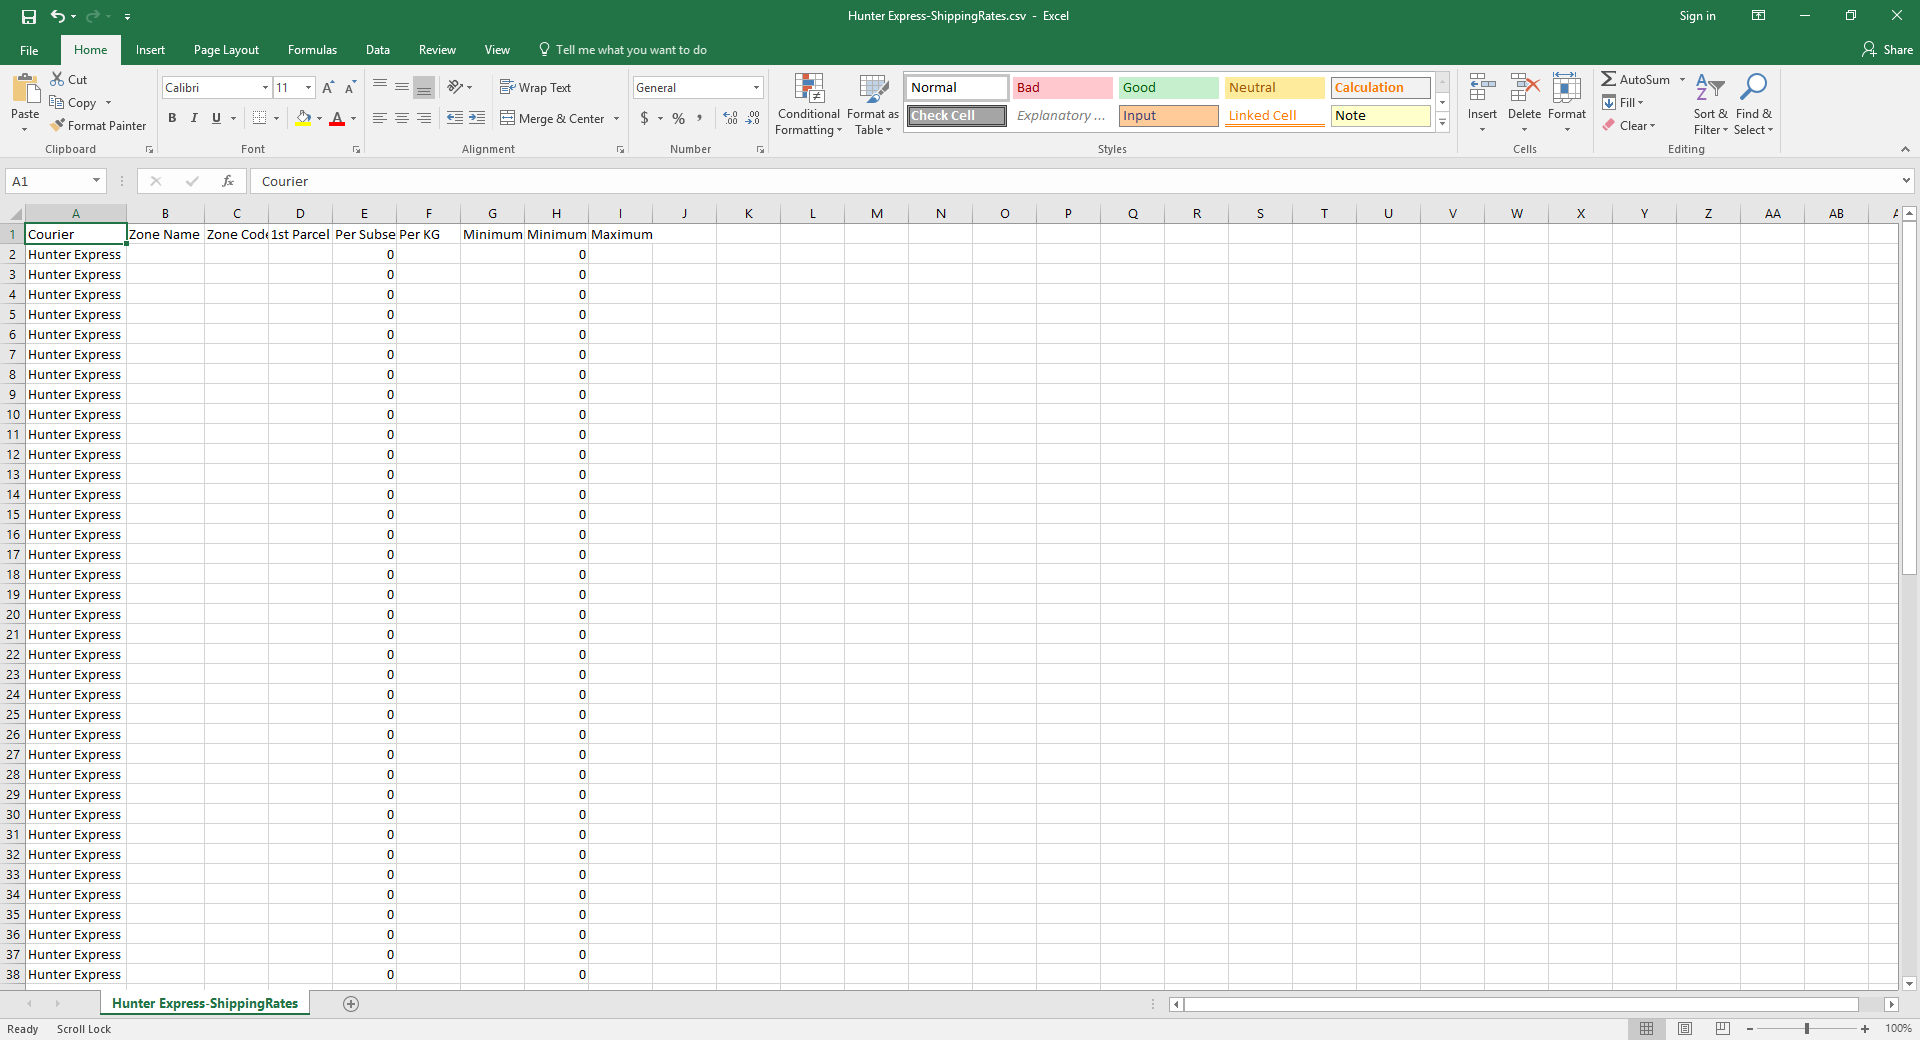
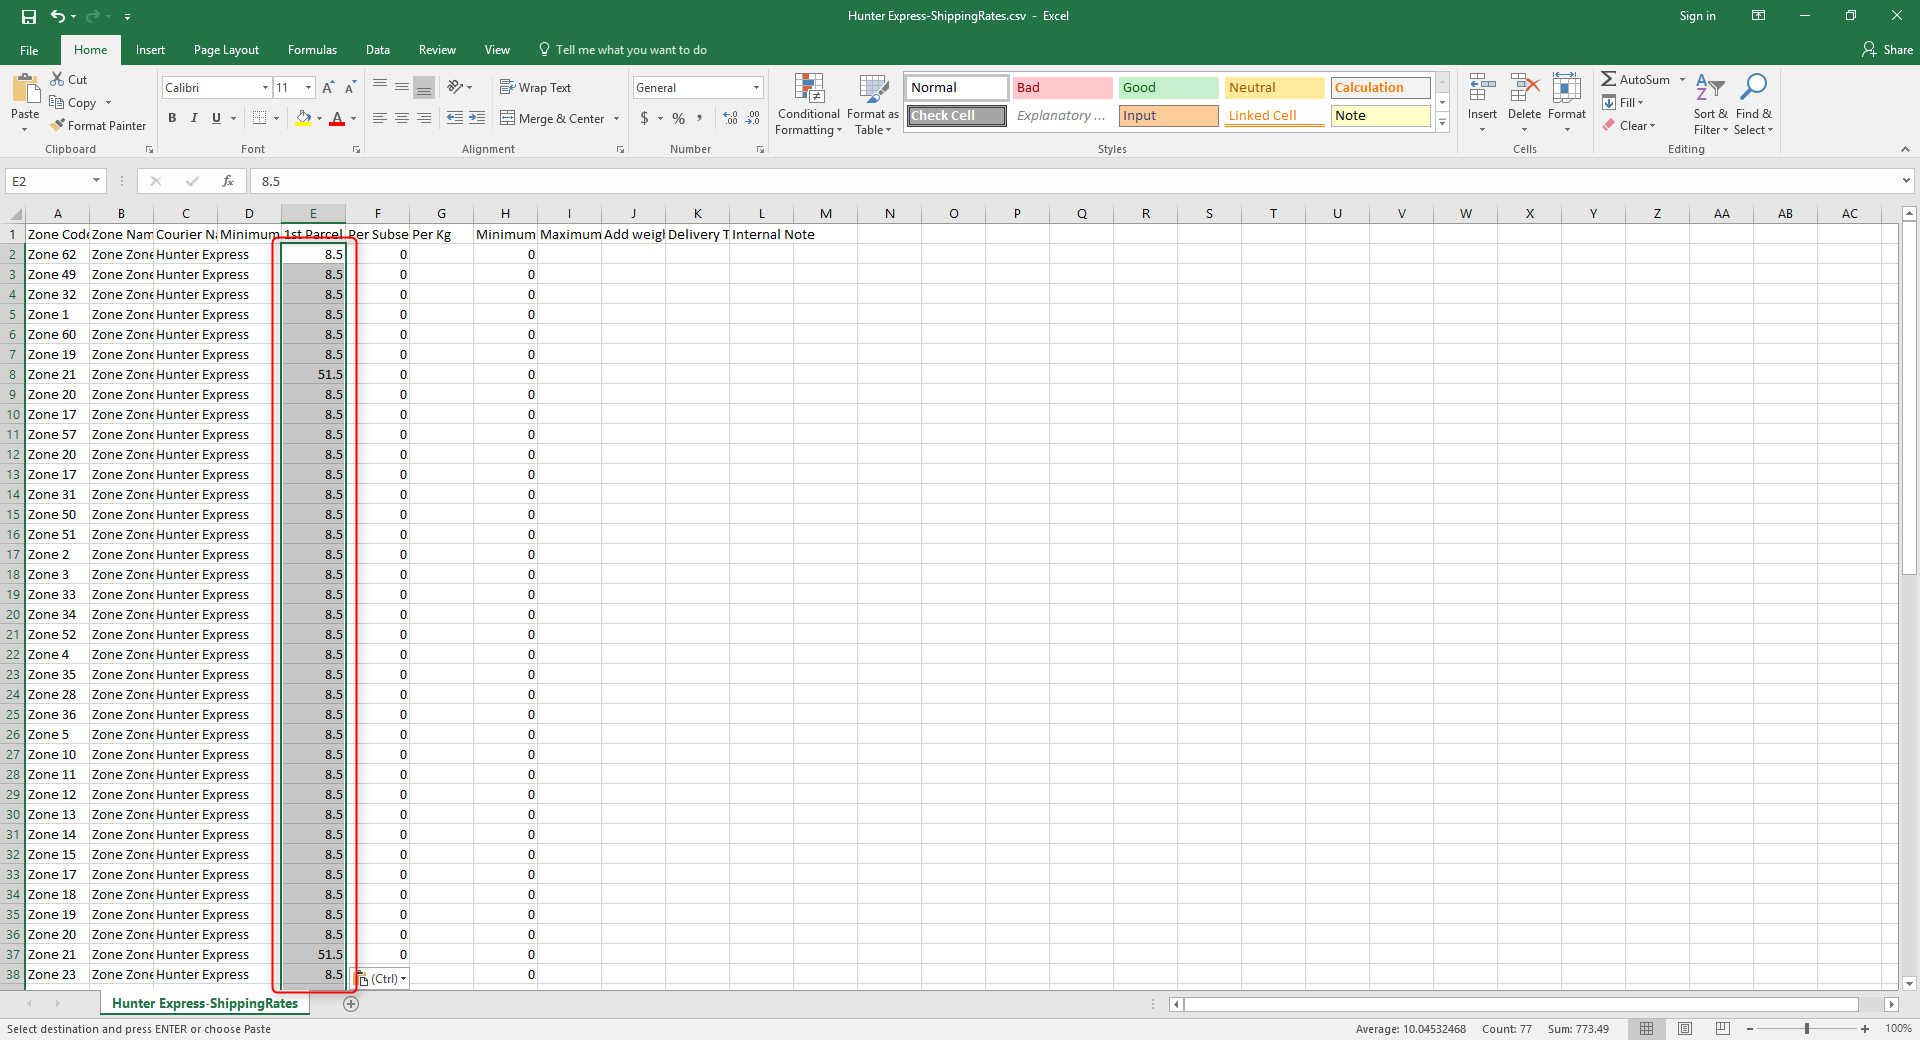
- Open the excel spreadsheet provided by Hunter Express. It should look similar to this.
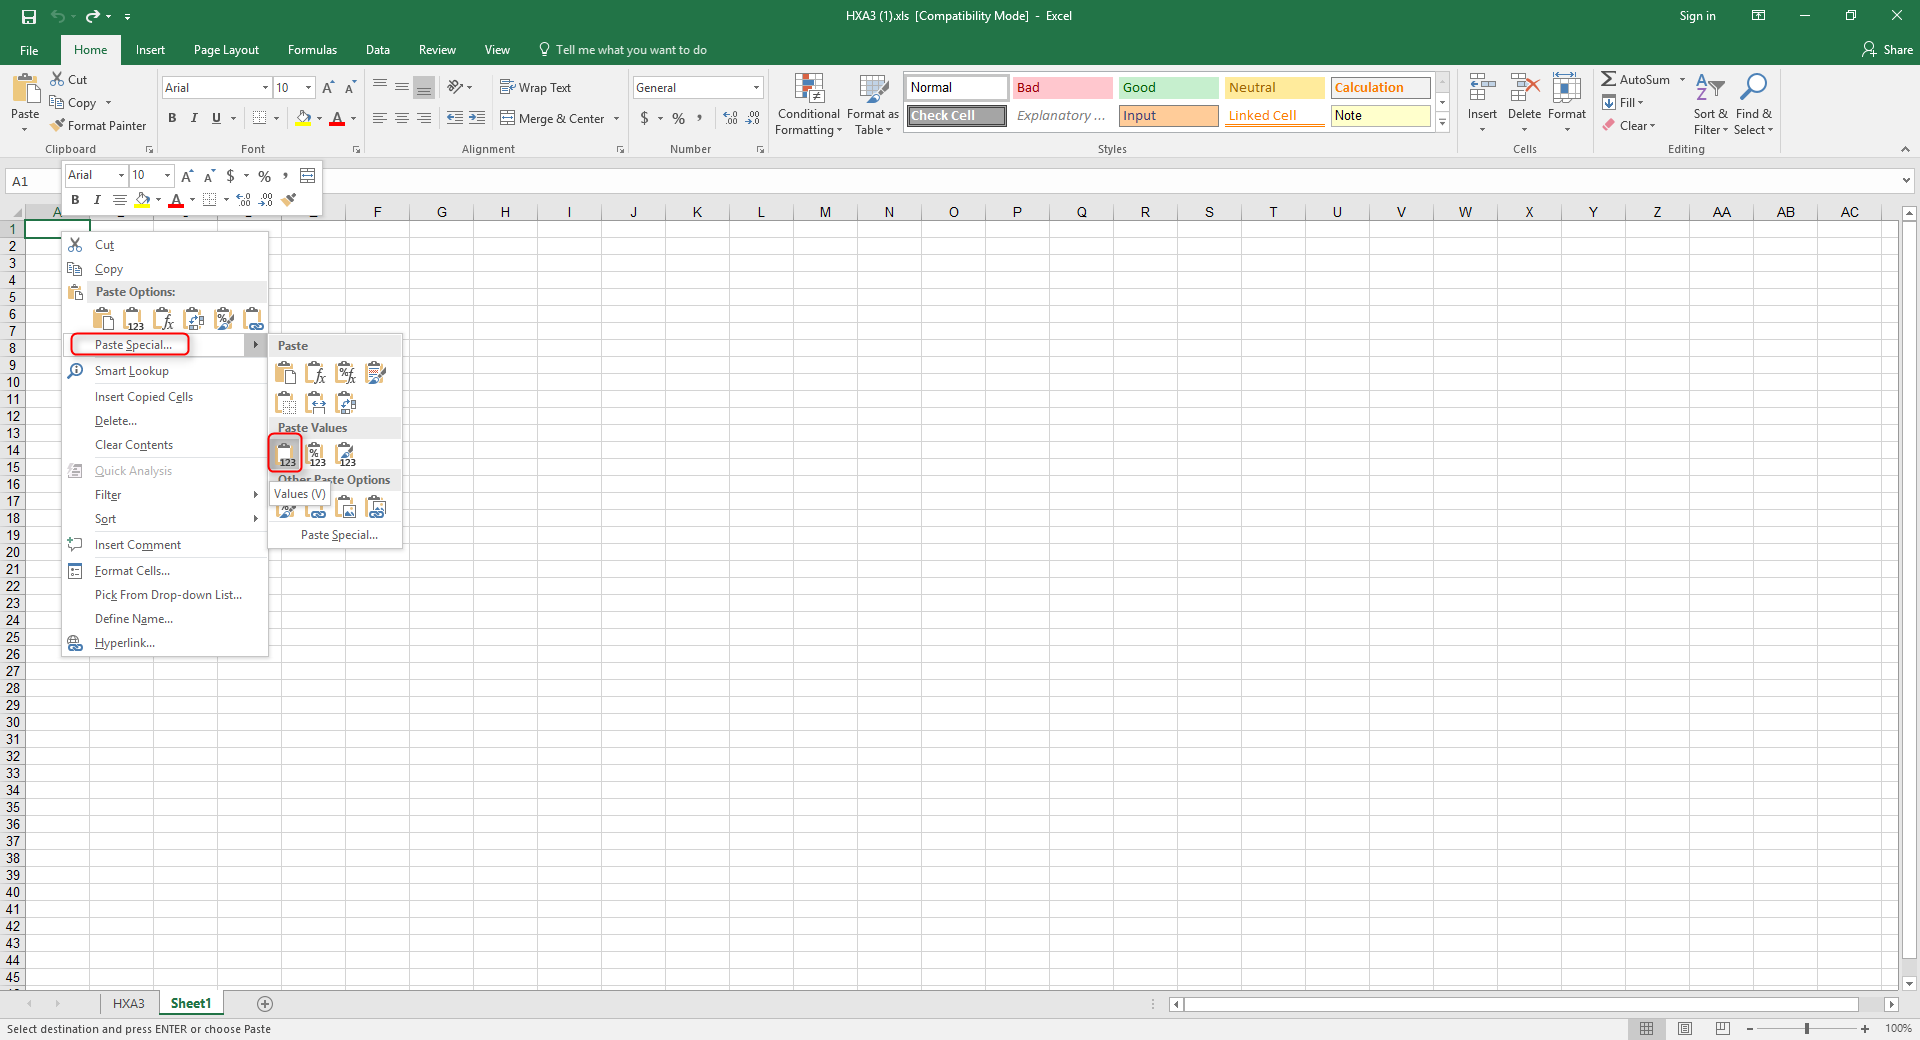
- Select everything on the sheet (Ctrl-A/Cmd-A) and copy it to your clipboard (Ctrl-C/Cmd-C). On a new sheet, paste the values only. You can do this by right clicking the new sheet, selecting, Paste Special and then Values.
- Delete the blank and header rows, but keep the fuel levy, as it will be used later. It may be easier to move it over to the right, so it doesn't get deleted accidentally. There are also some extra rows at the bottom of the sheet that can be deleted also.
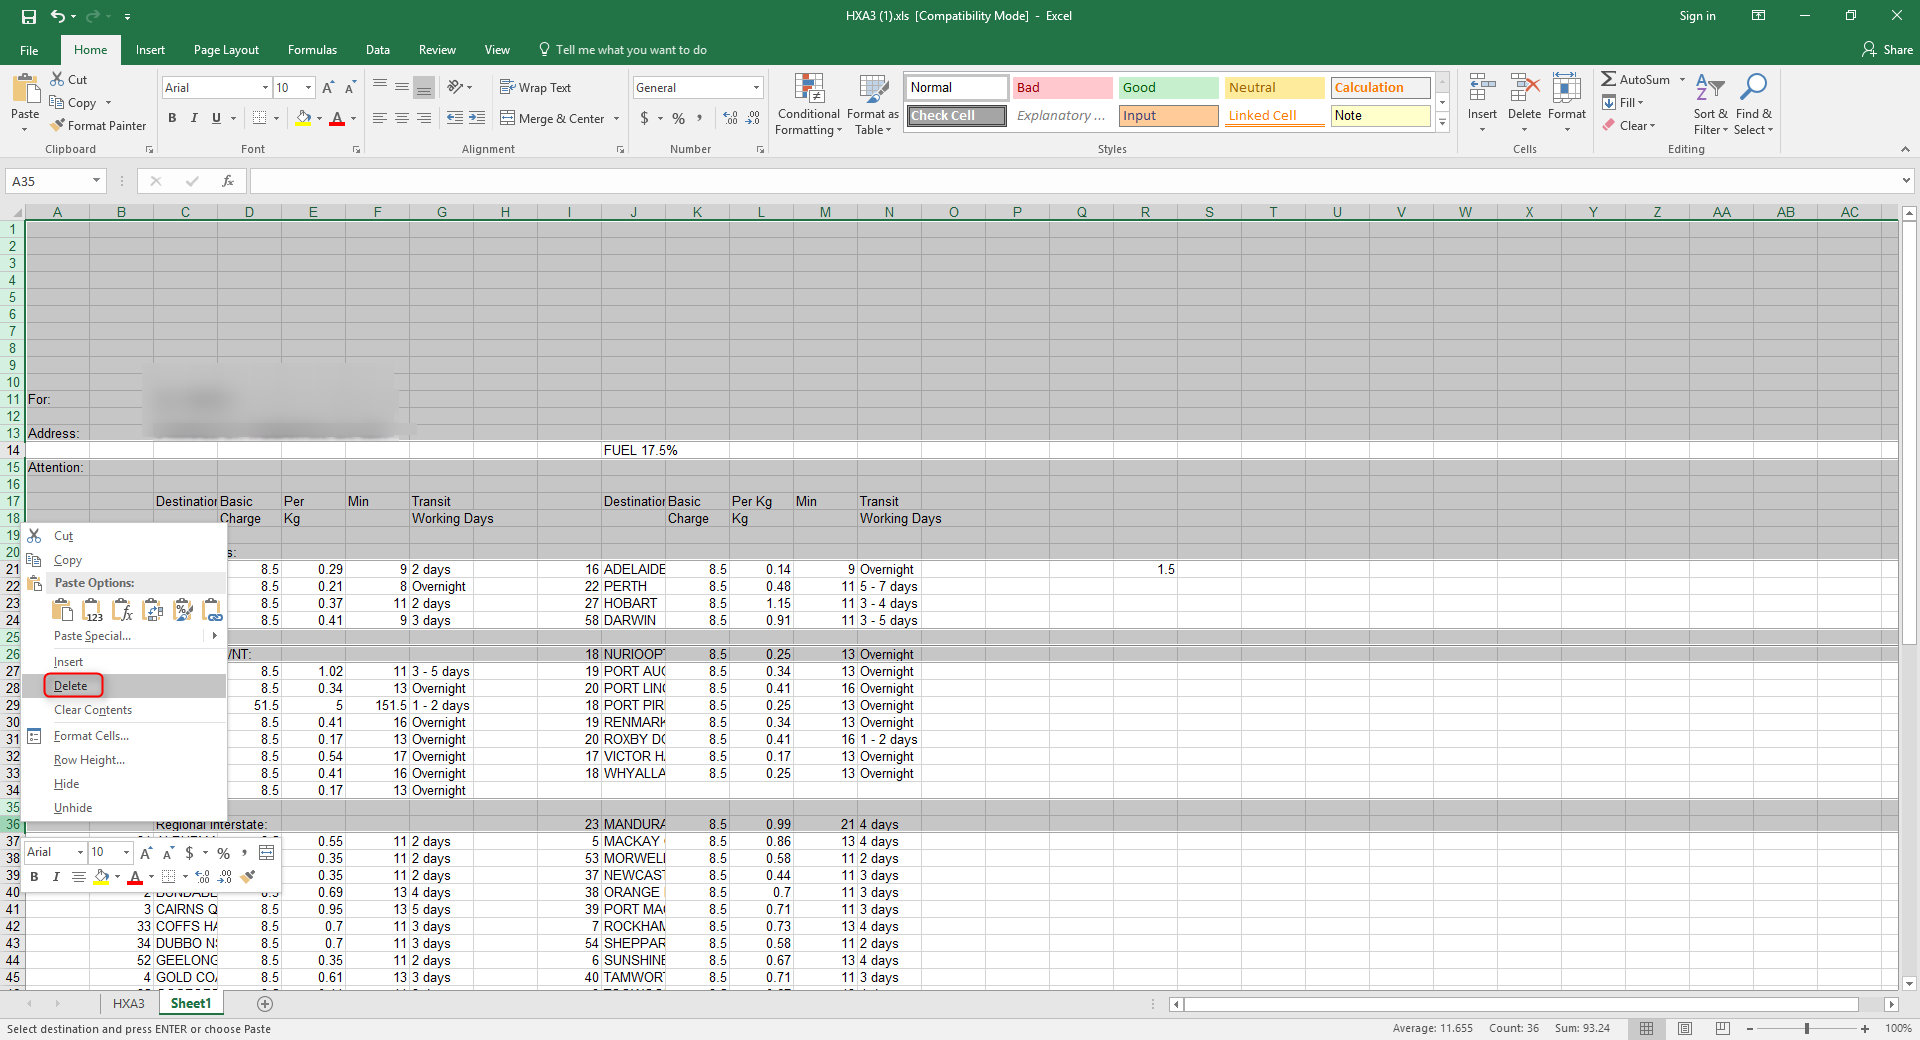
- Move the data on the right-hand side so that all information runs down the page and delete any other blank rows.
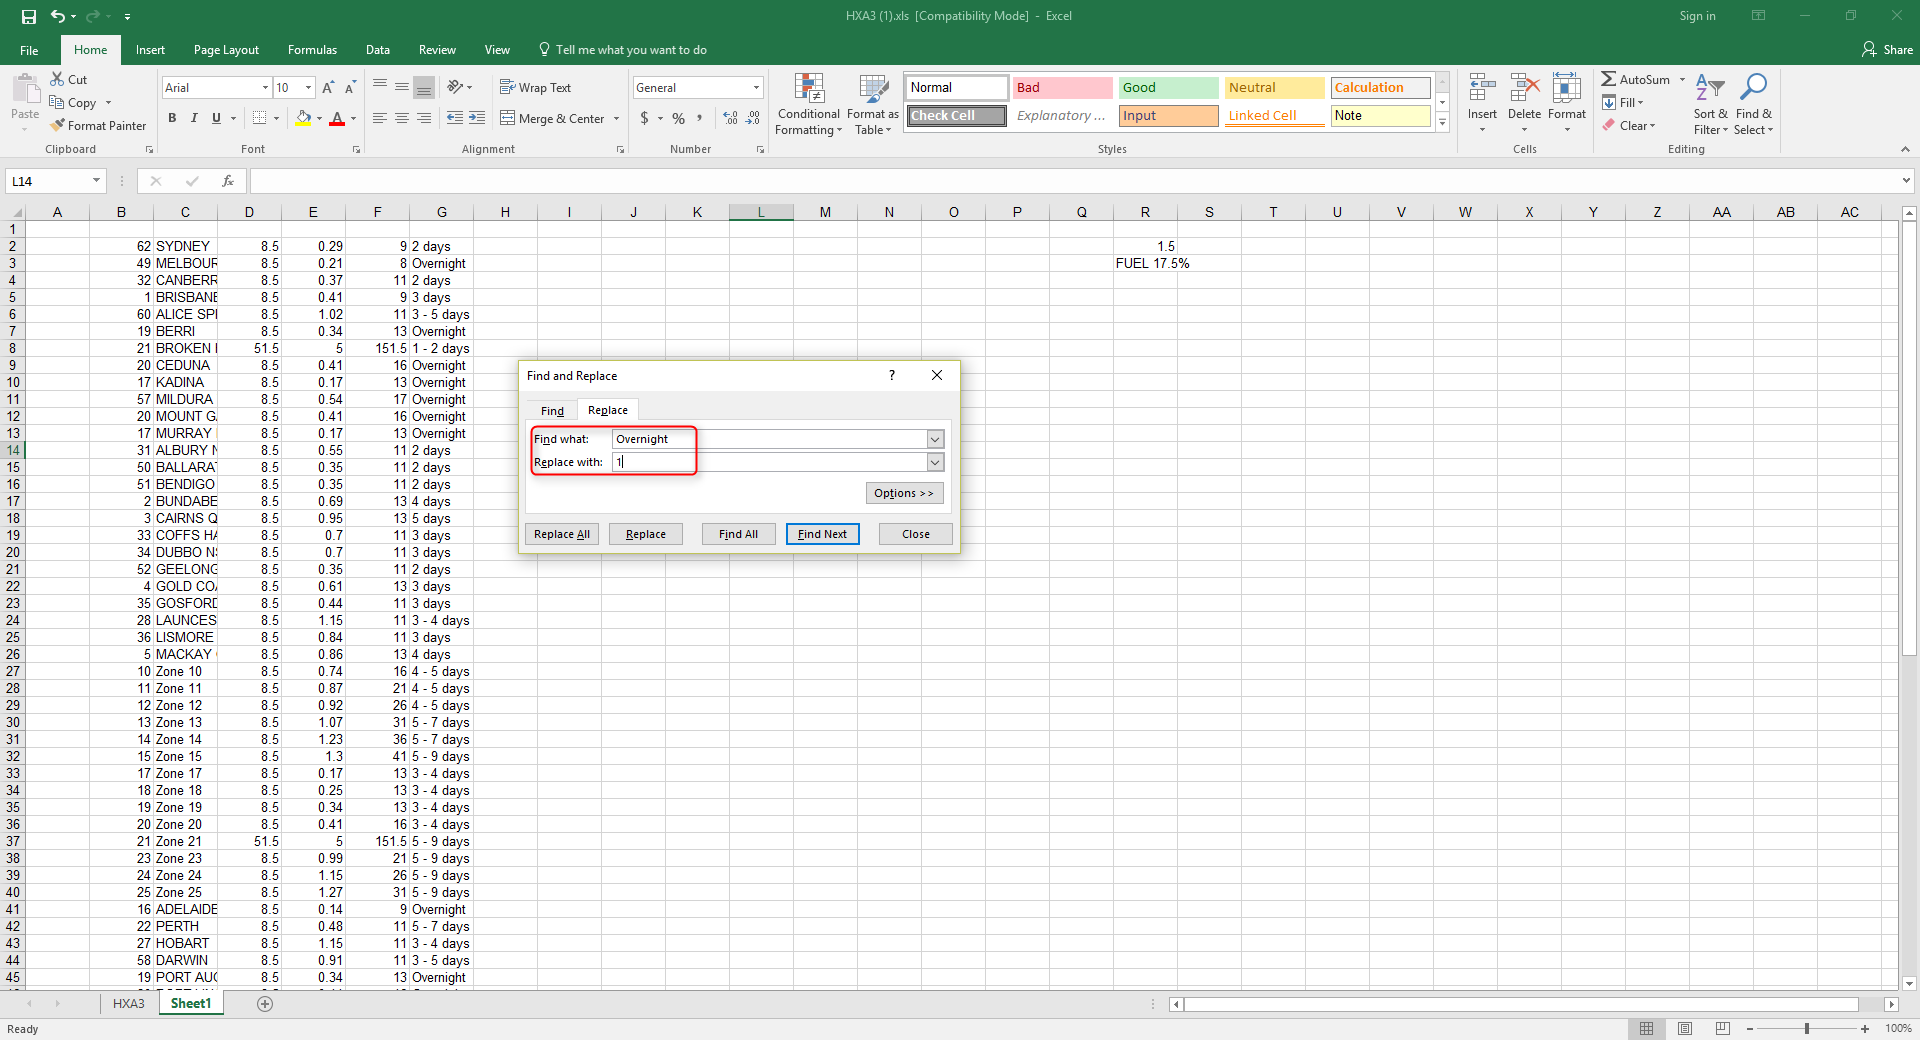
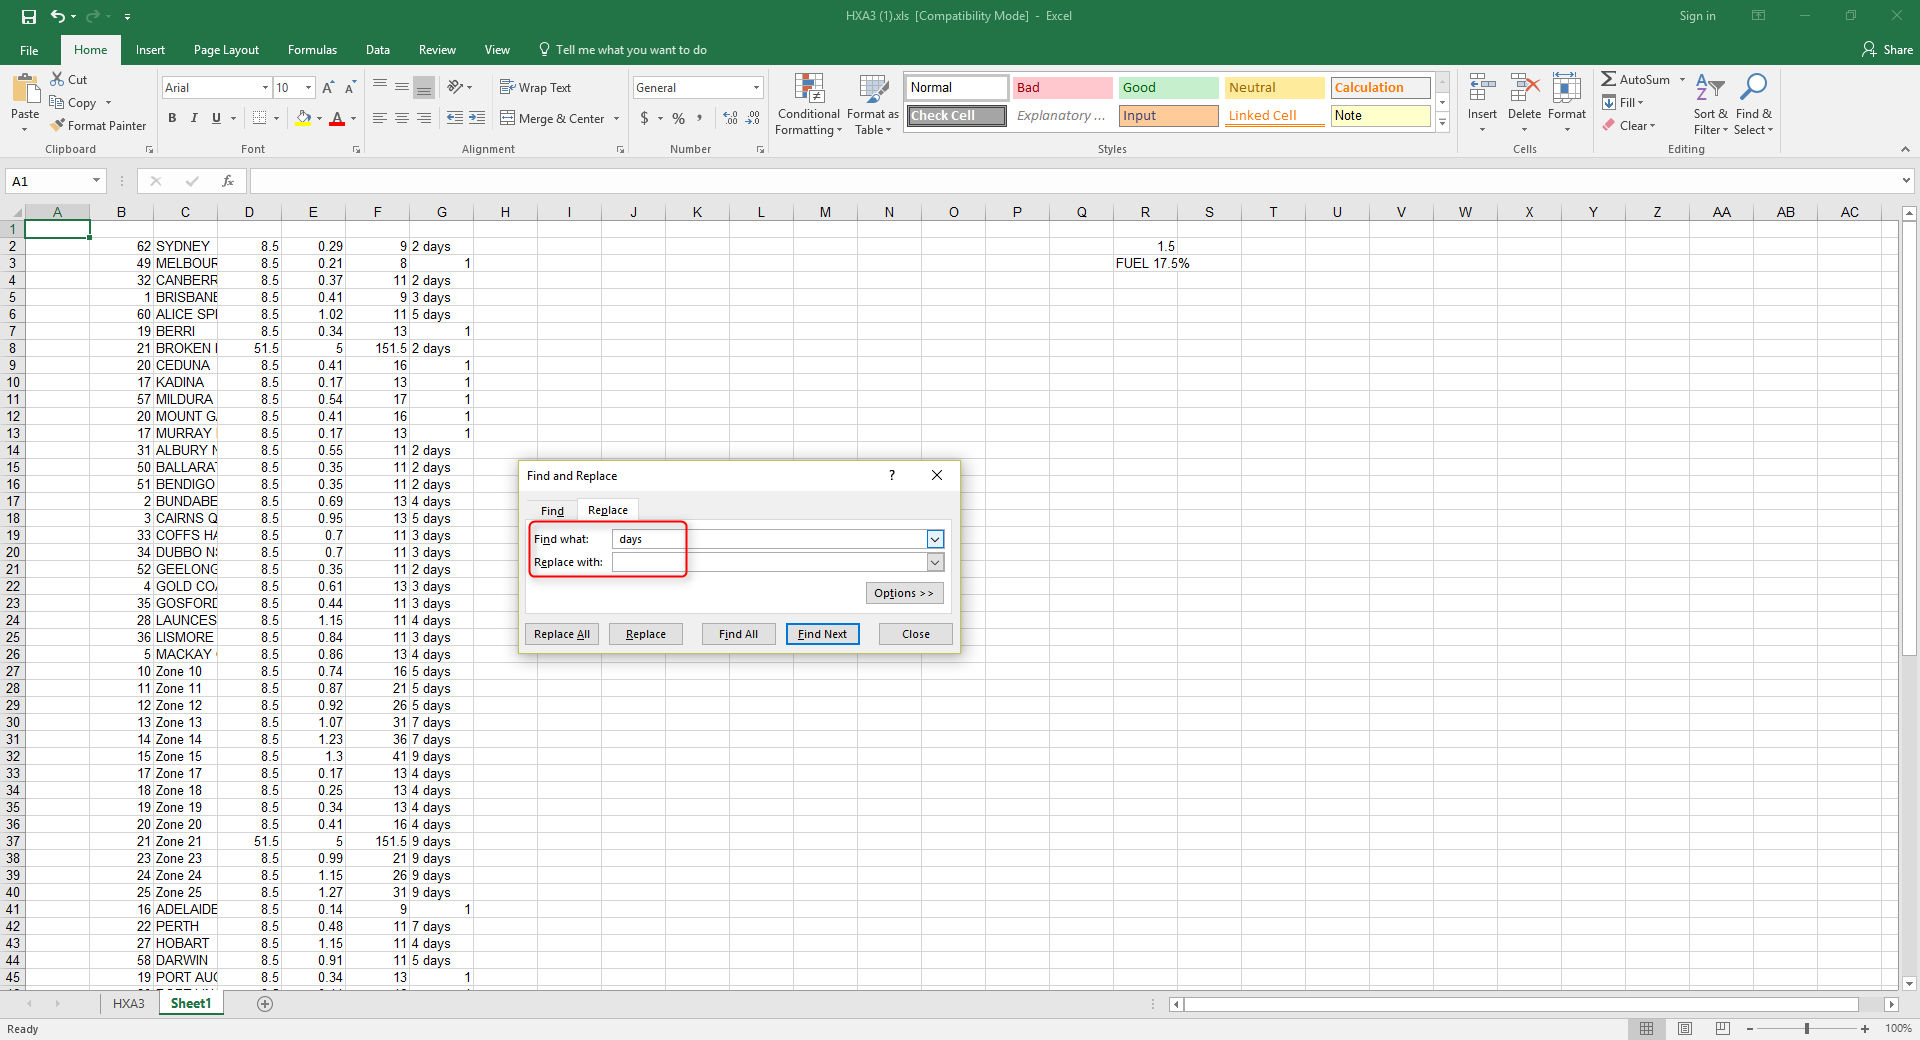
- You'll now need to do a series of find and replace (Ctrl-H/Cmd-H) functions on the data, to change the estimated delivery days. For the first one, replace
Overnight, with 1.
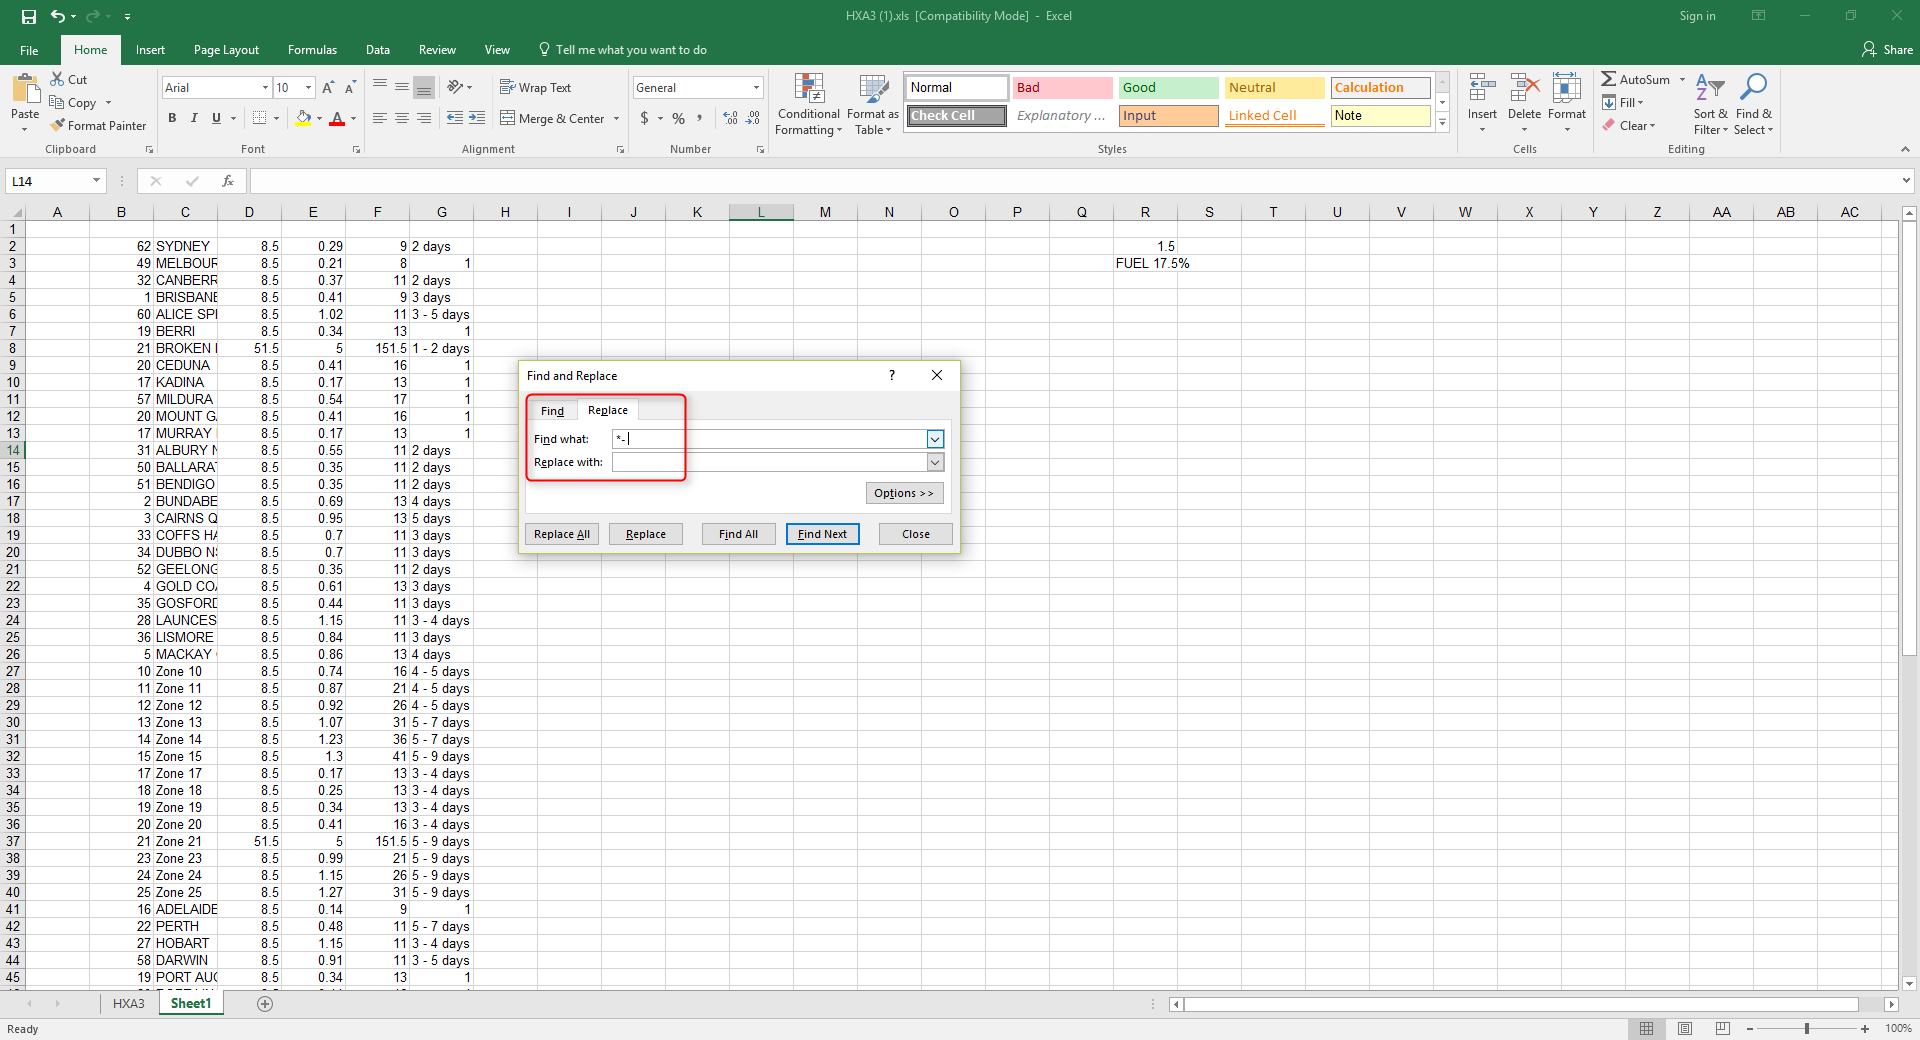
- Next, enter
*- in the Find field (asterisk, hyphen, space), and replace with nothing.
- Replace
days (note the space at the start) with nothing as well.
- Once column will be made up of suburbs and zone numbers. These need to be changed so they have the word Zone and the zone number. Type the formula
=TEXTJOIN(,,"Zone ",B2) where B2 is the first zone number, as in the example below. Then copy this formula for the entire column.
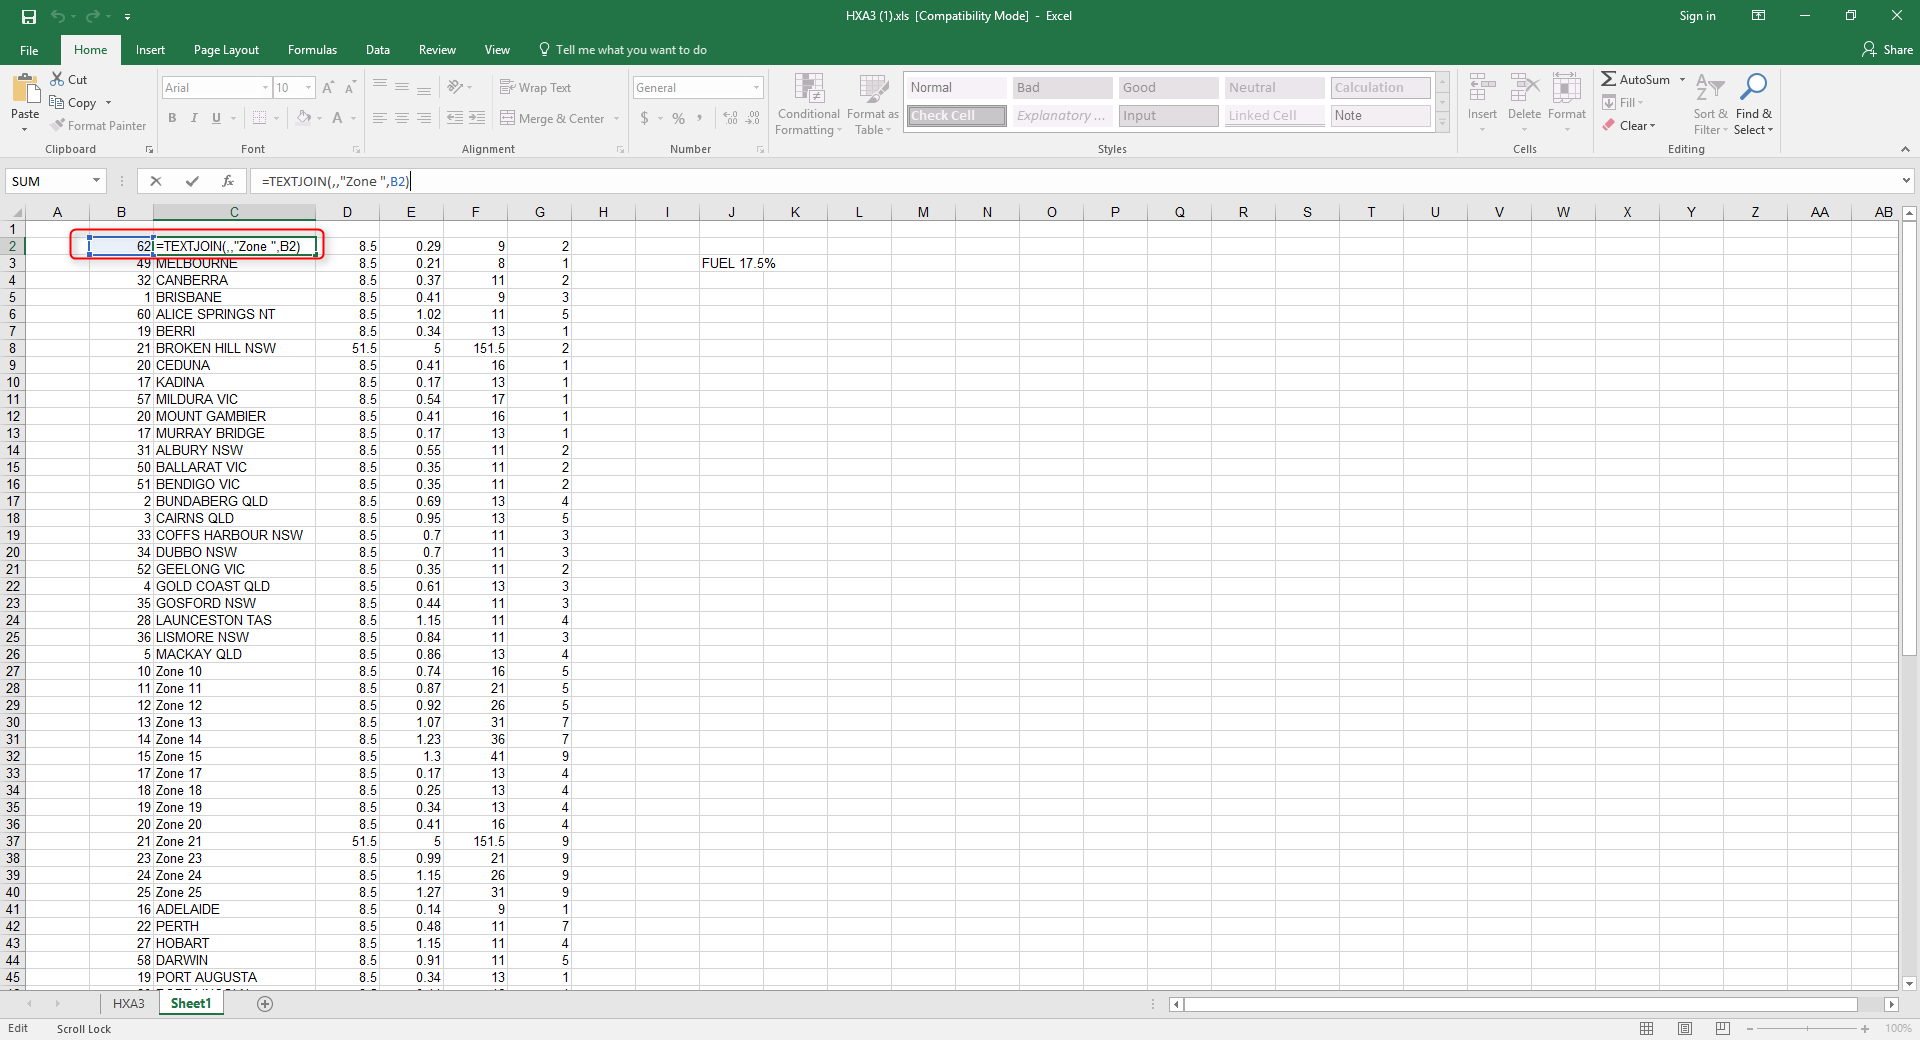
You can now close the find and replace window, and the last column should only have numbers in each row.
- You now need to transpose the data into our rates template. Download the Hunter Express - Shipping Rates template and open the file.
- Copy the Zone # column into the template under Zone Names. Make sure you paste the values only, using the same option in step 2. Paste the same data in Zone Code as well.
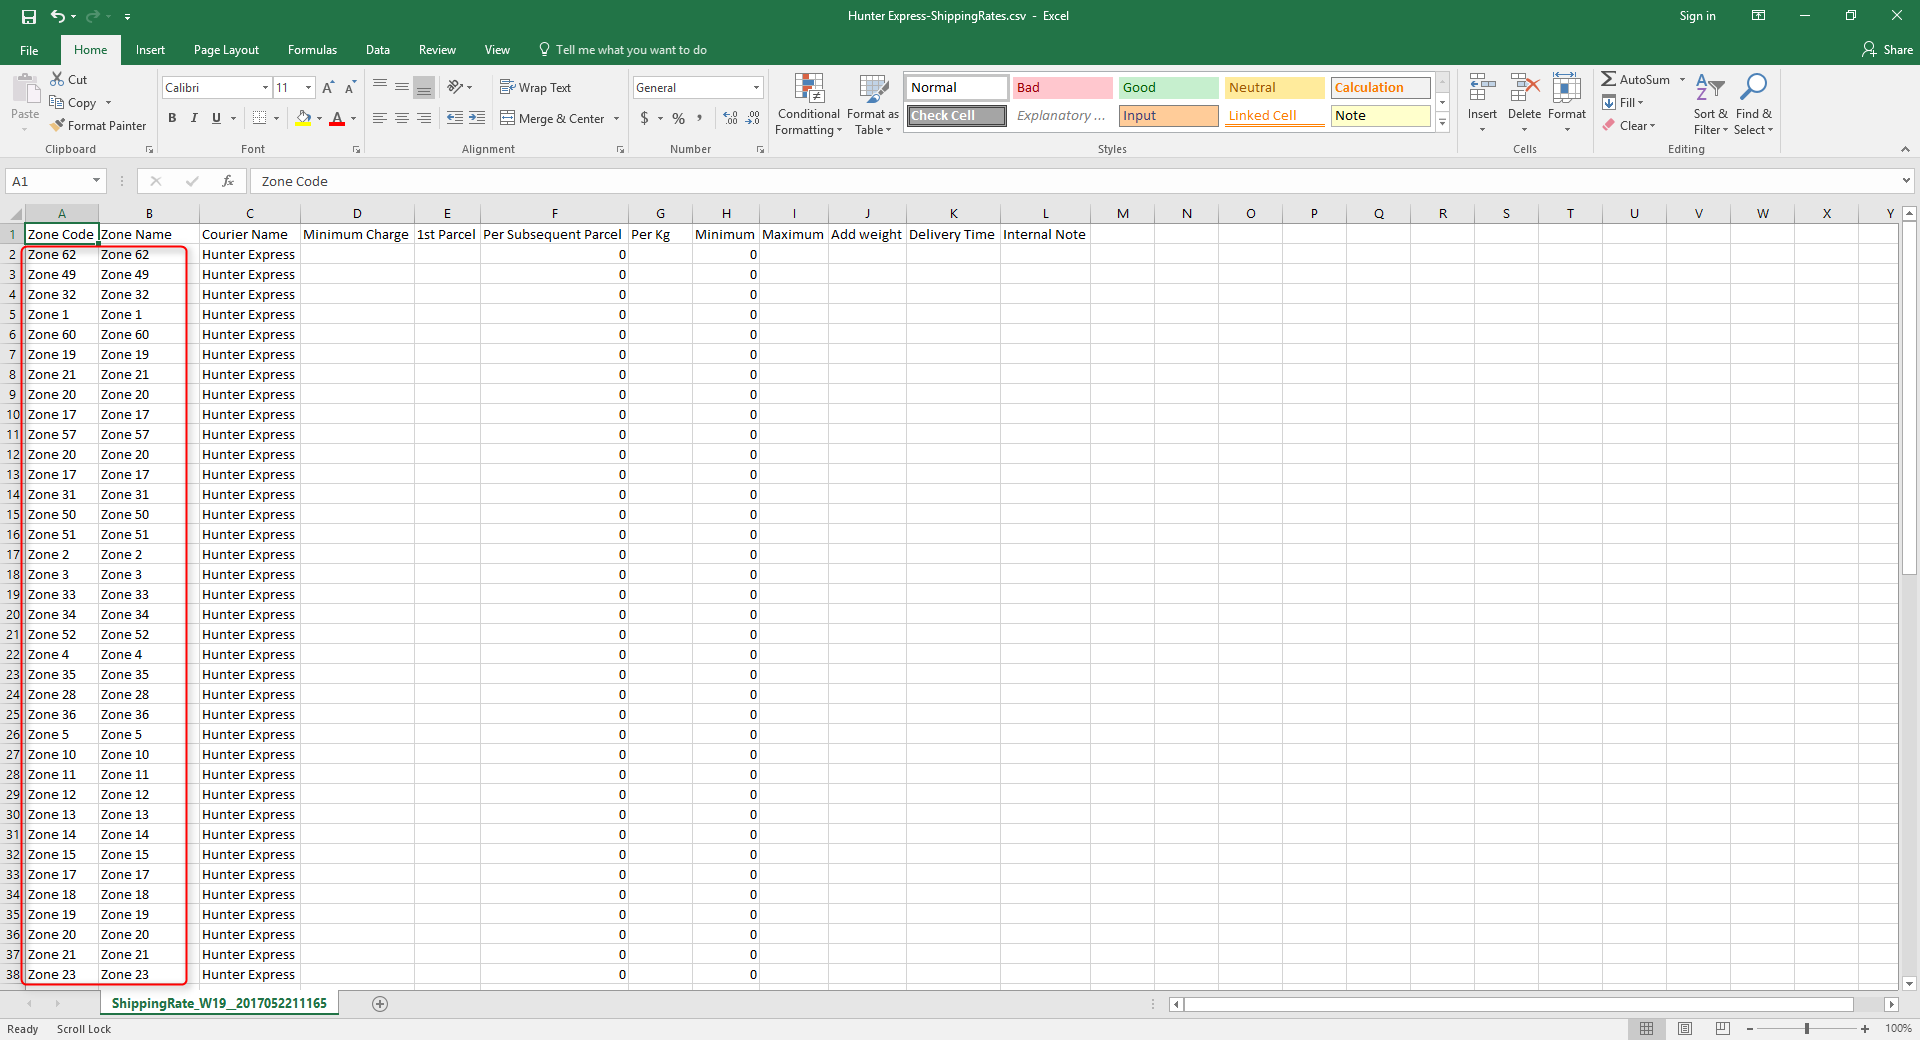
- The next column in the data from Hunter Express is the 1st Parcel charge. Copy and paste it into the rates template.
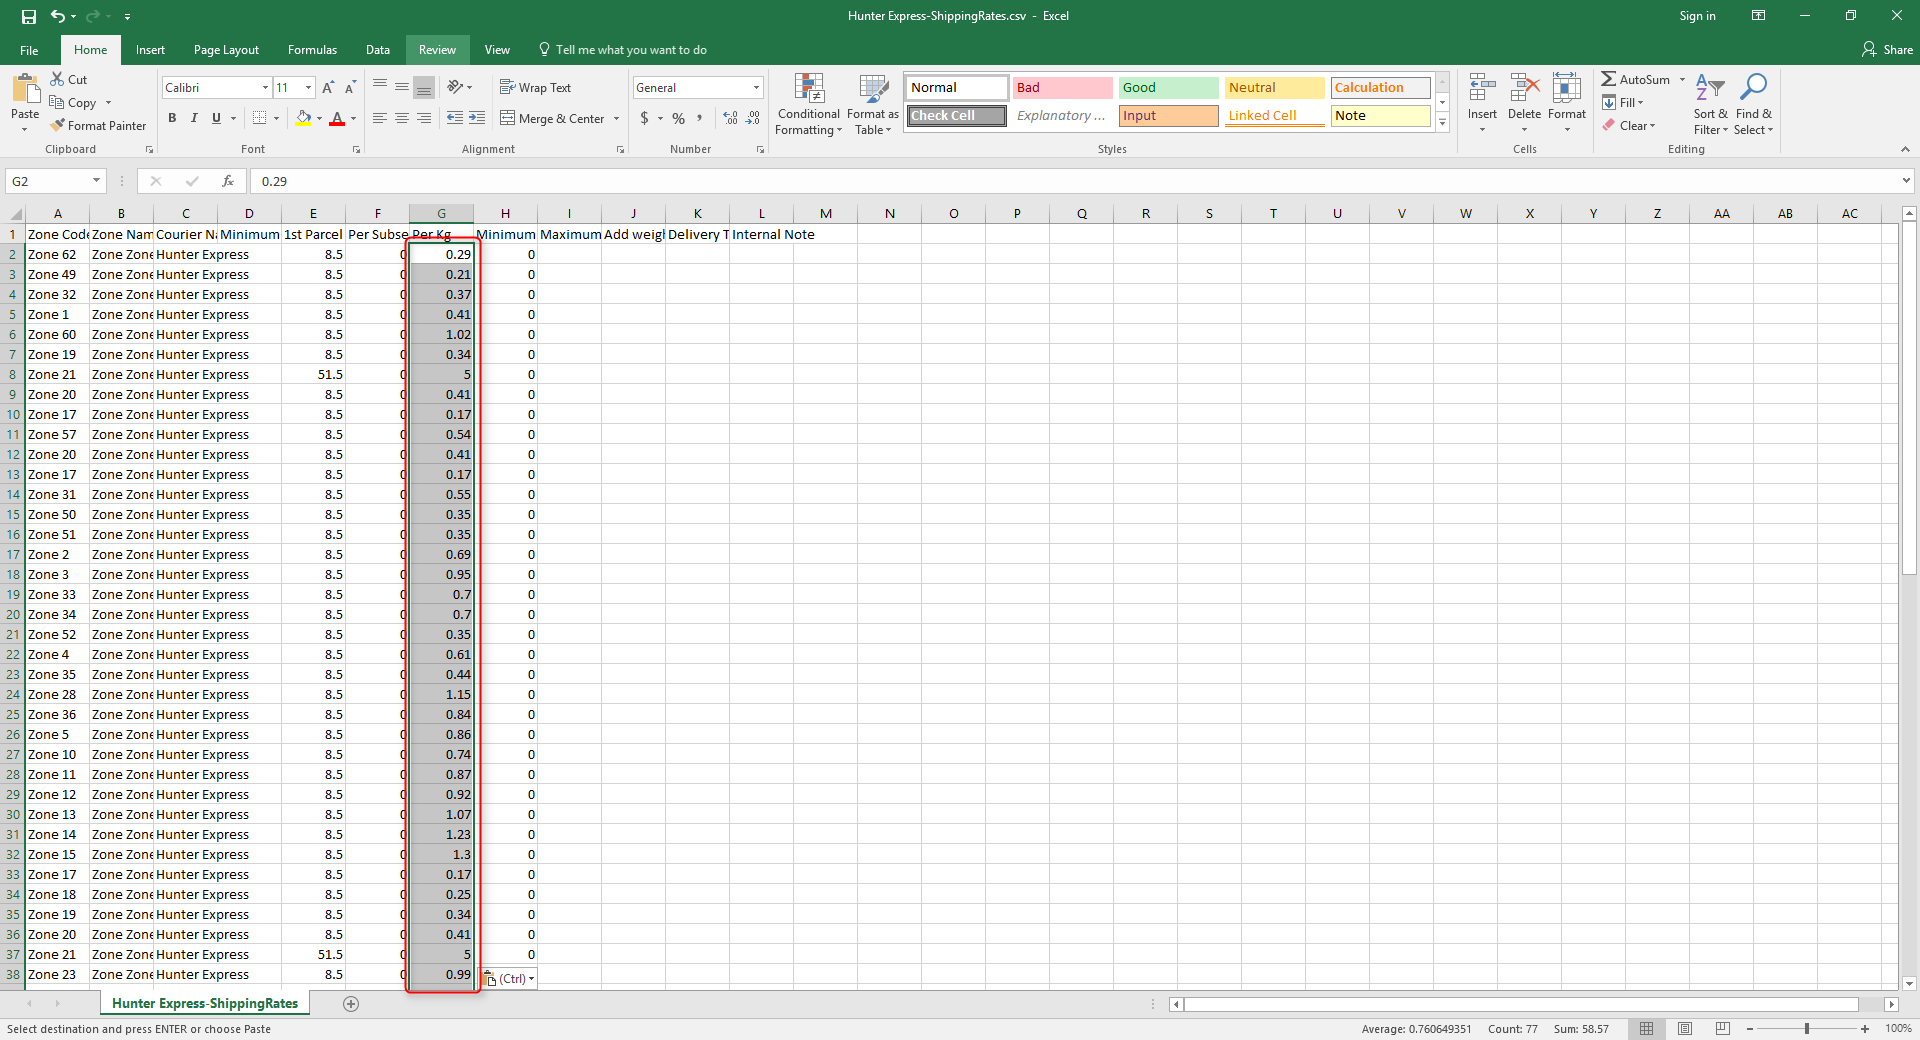
- The next column in the data from Hunter Express is the Per KG rate. Copy and paste it into the rates template.
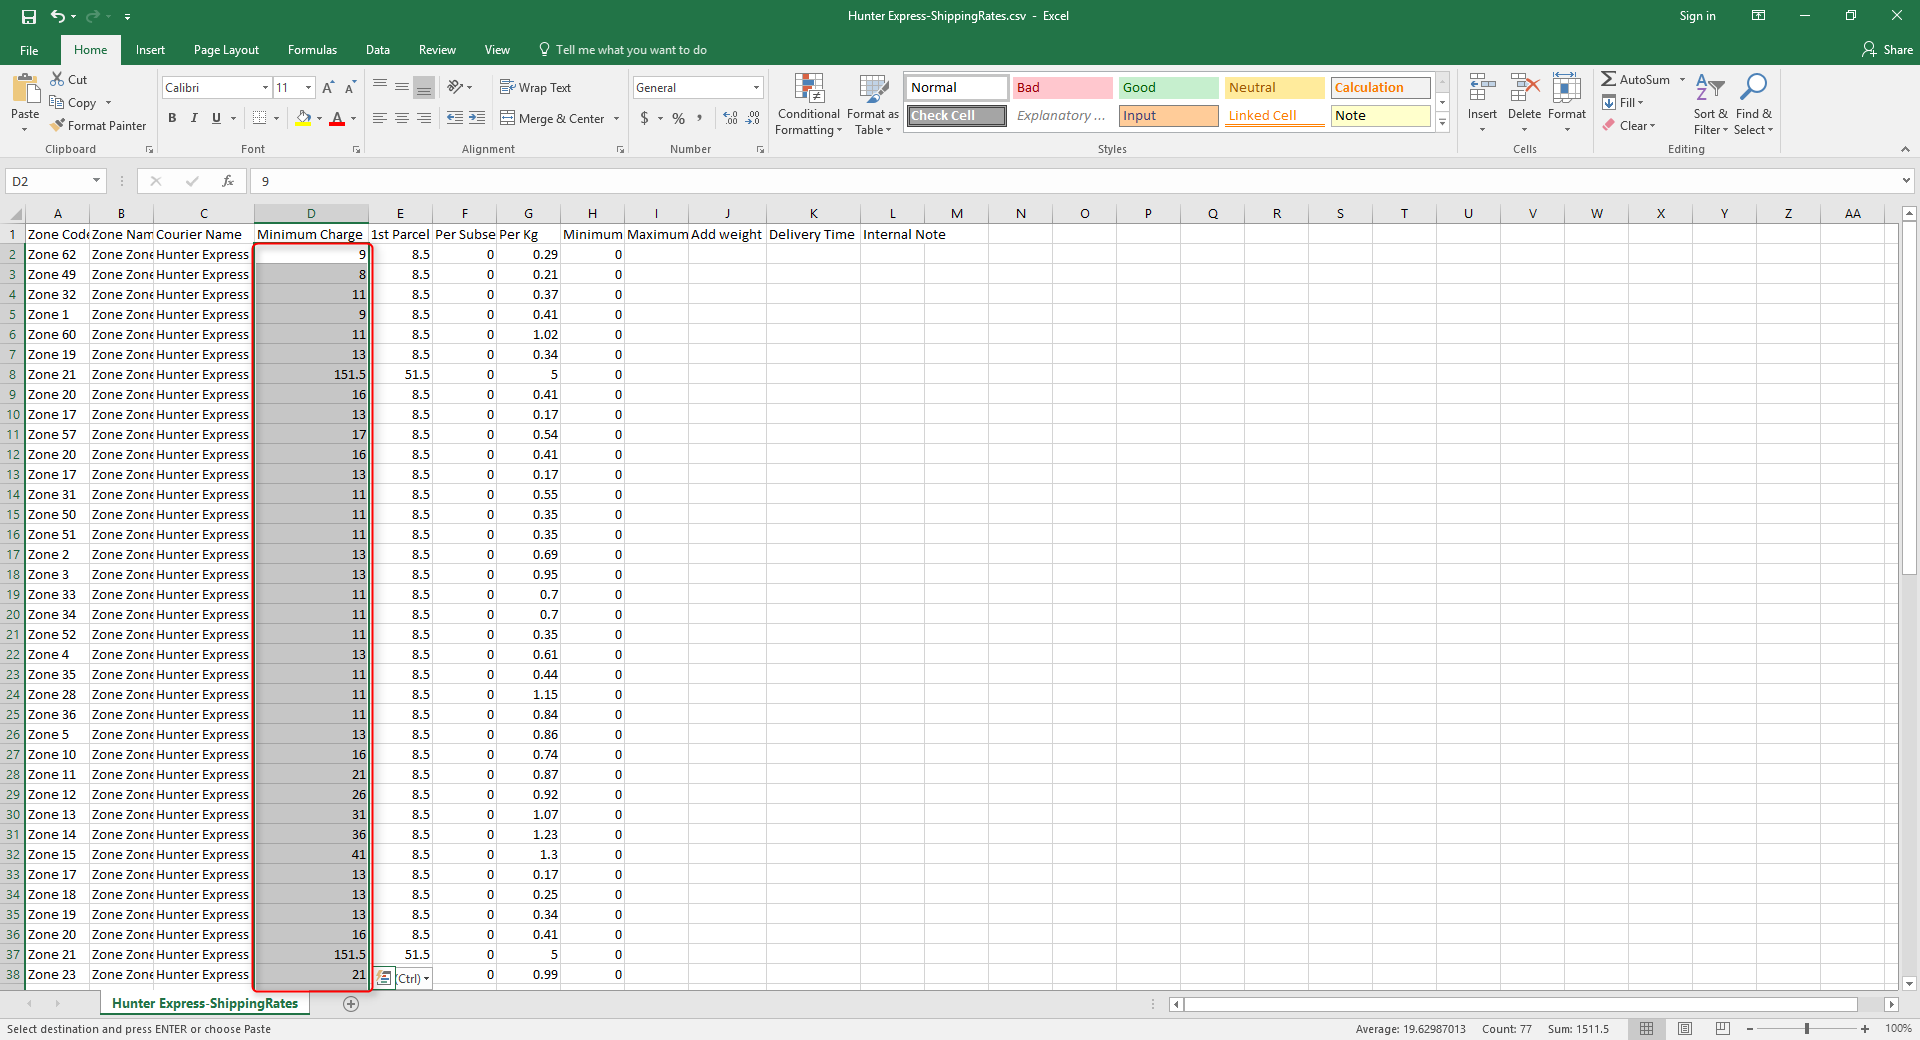
- The next column in the data from Hunter Express is the Minimum Charge amount. Copy and paste it into the rates template (take care not to get this mixed up with the Minimum column, which is pre-populated with 0).
- The last column in the data from Hunter Express is the Delivery Time. Copy and paste it into the rates template and save the template file.

Import your Shipping Rates
Now that the template of rates is complete, it can be imported into Neto.
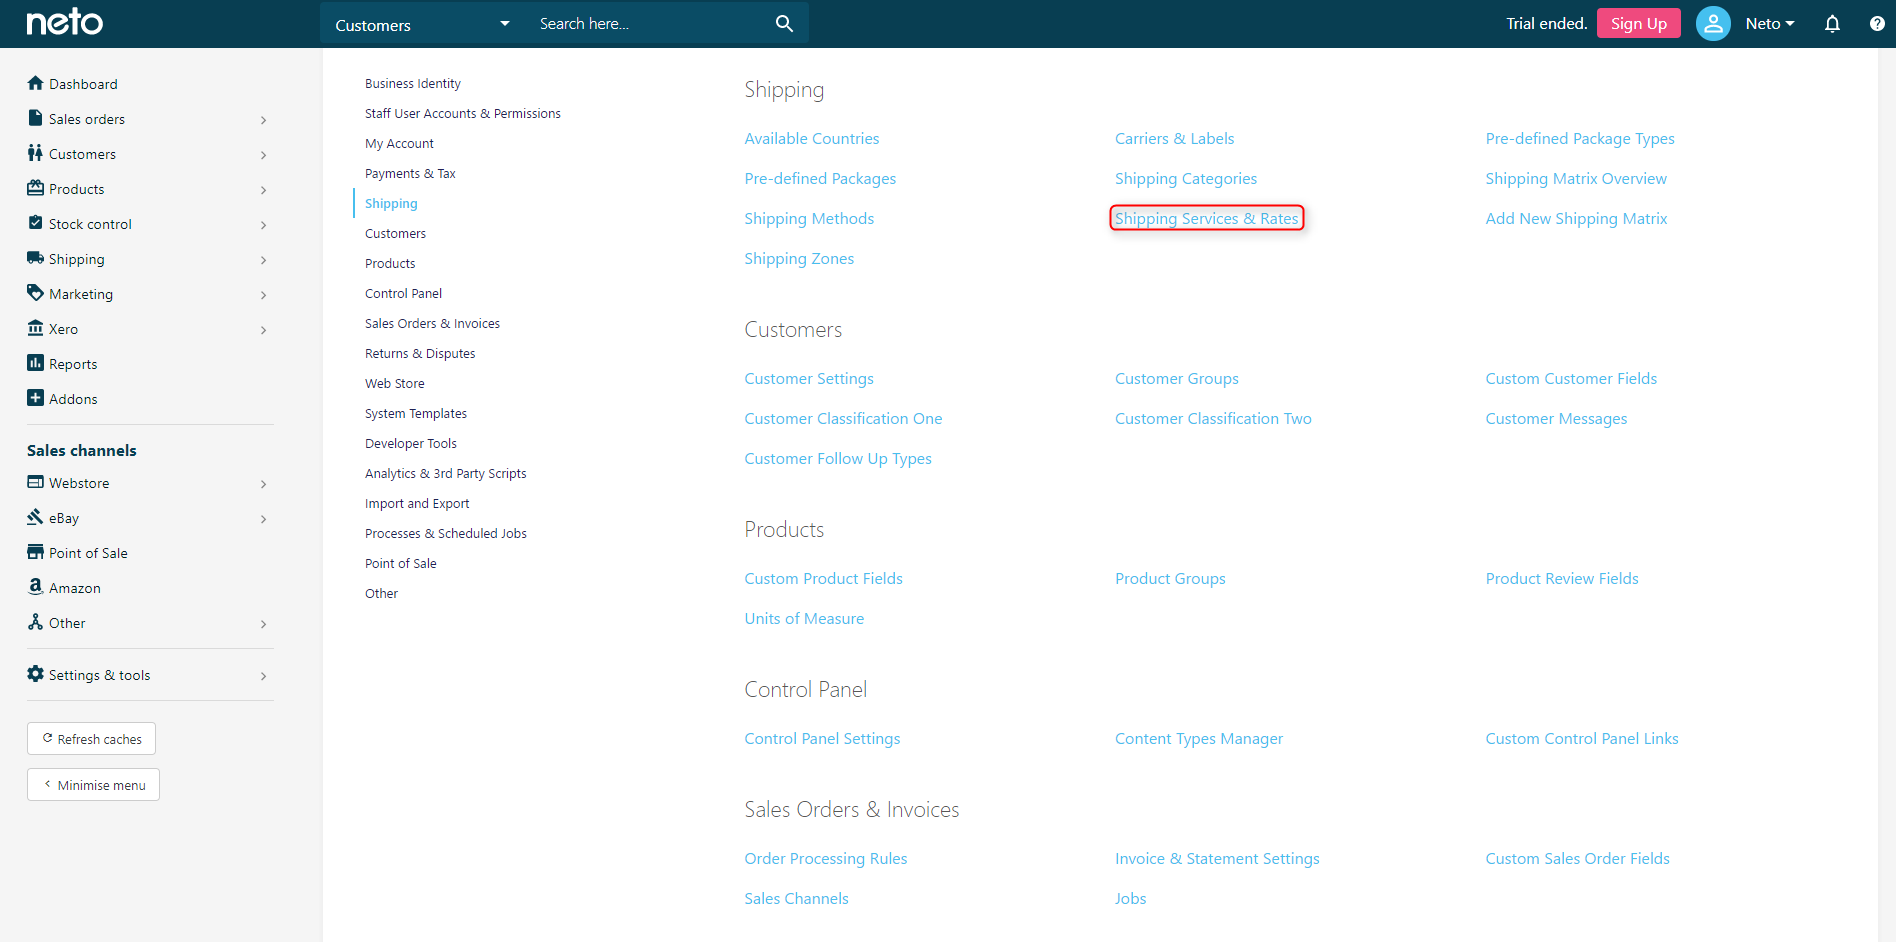
- In your Neto control panel navigate to Settings & Tools > Shipping.

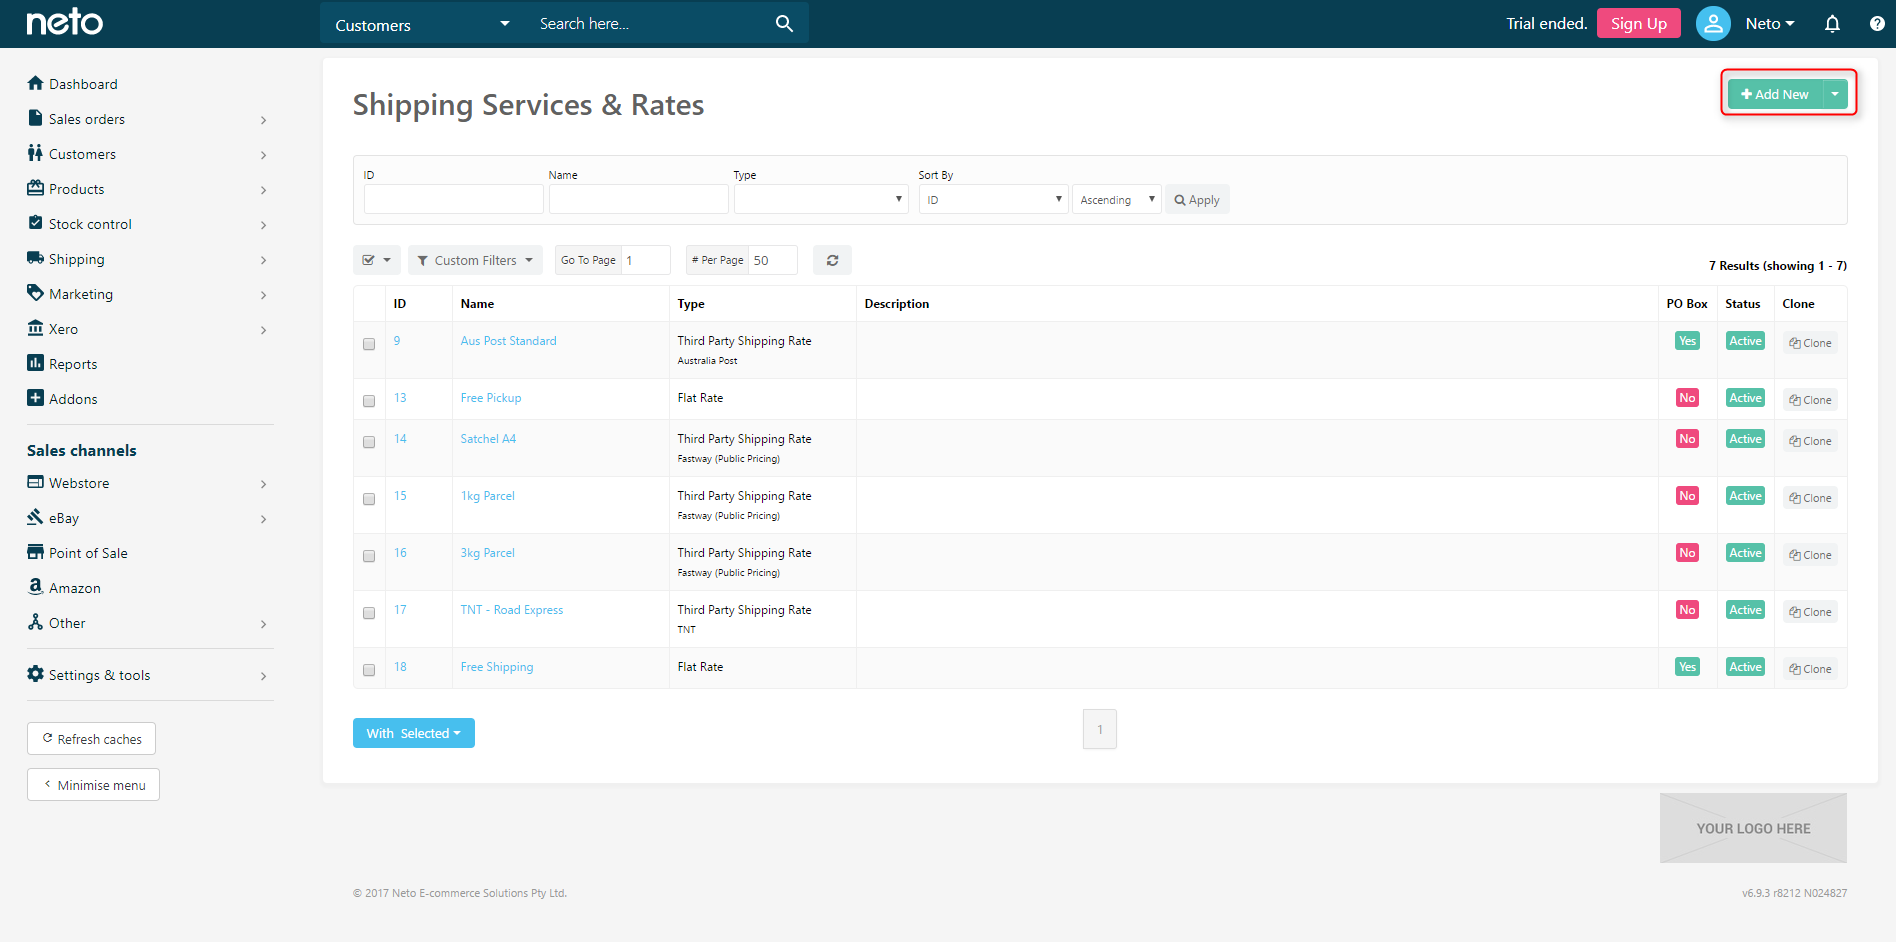
- Select Shipping Services & Rates.
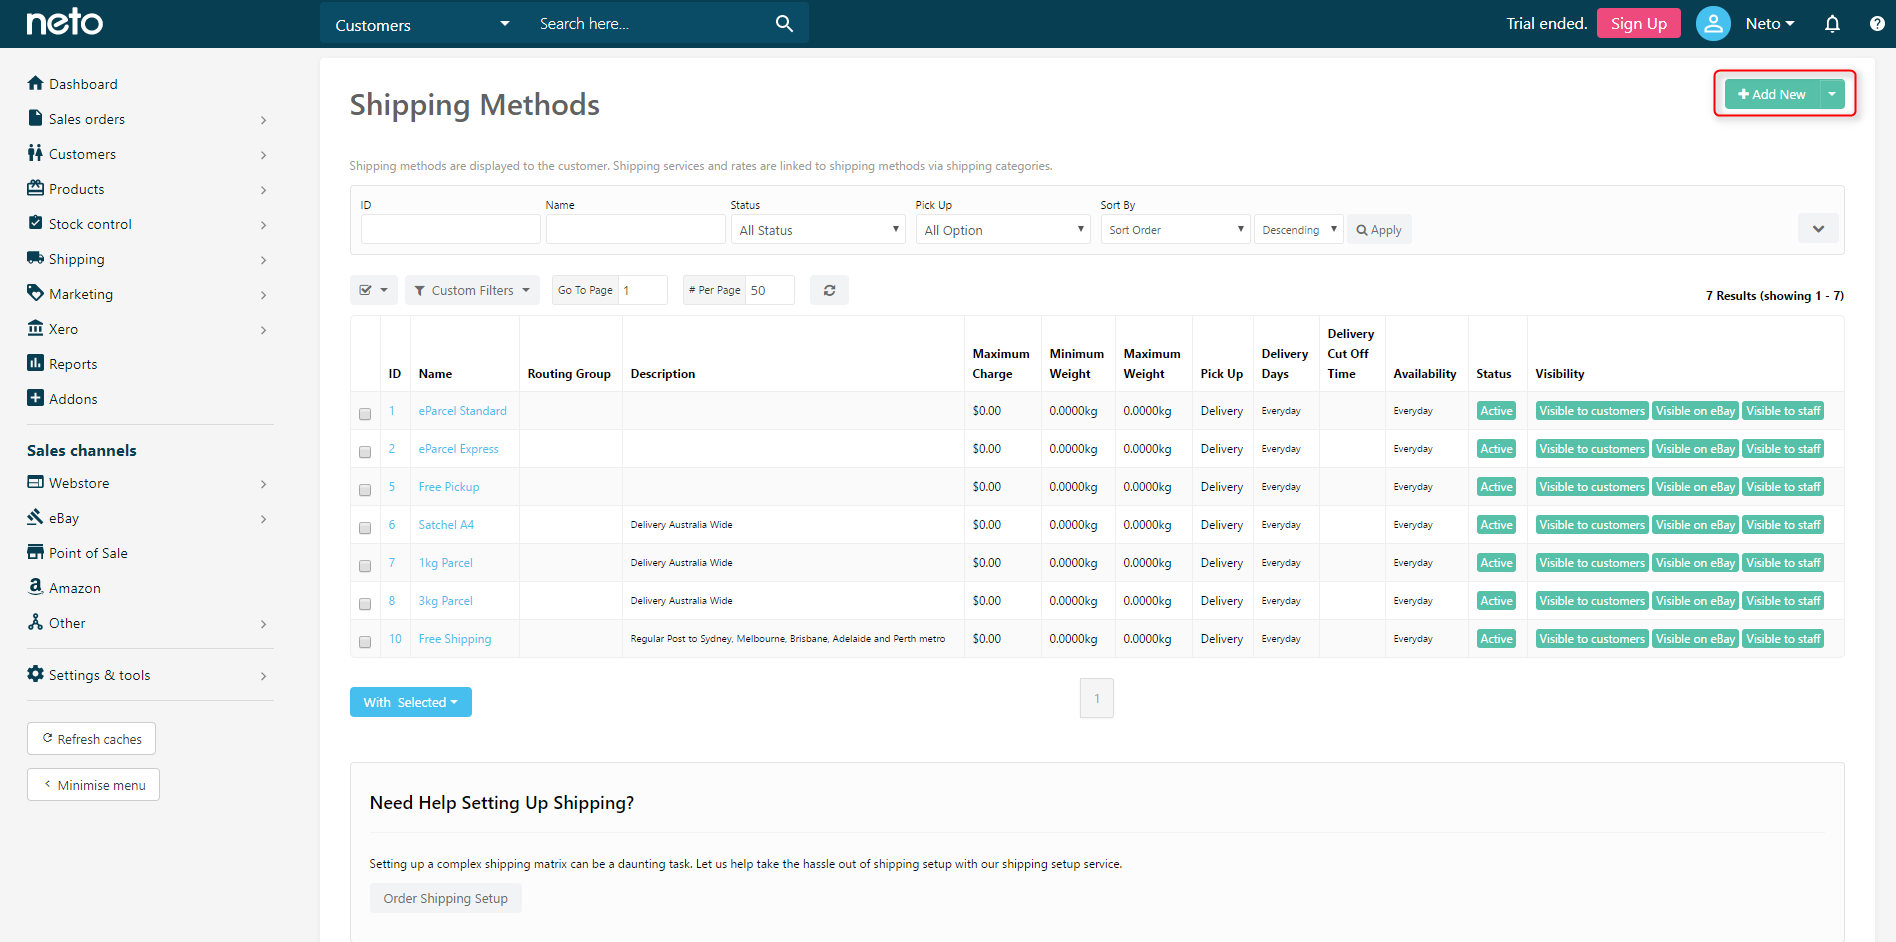
- In the top right corner, select Add New.
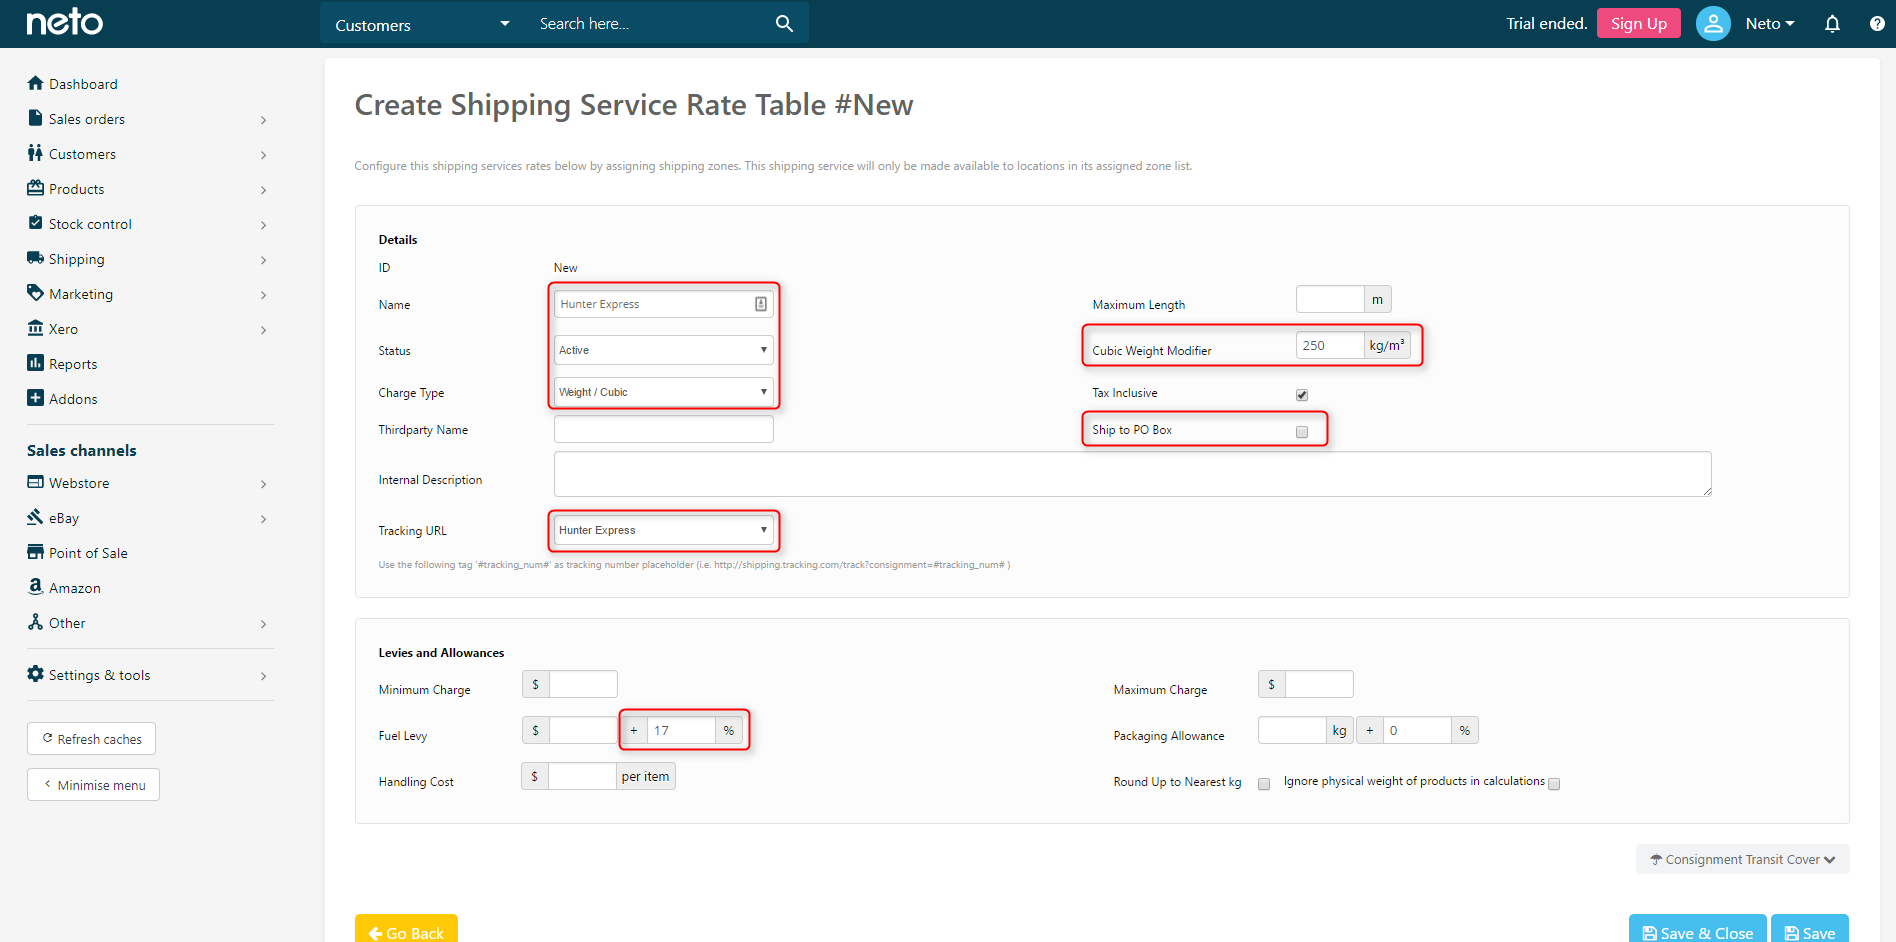
- Enter a Name, set the Status to Active, Charge Type to Weight/Cubic, Cubic Weight Modifier to 250, uncheck Ship to PO Box, set the tracking URL to Hunter Express, and add in your Fuel Levy %. When done, click Save.
- Scroll down the page and select Import Zones and Rates .CSV File [+], then Choose File to upload your rates.
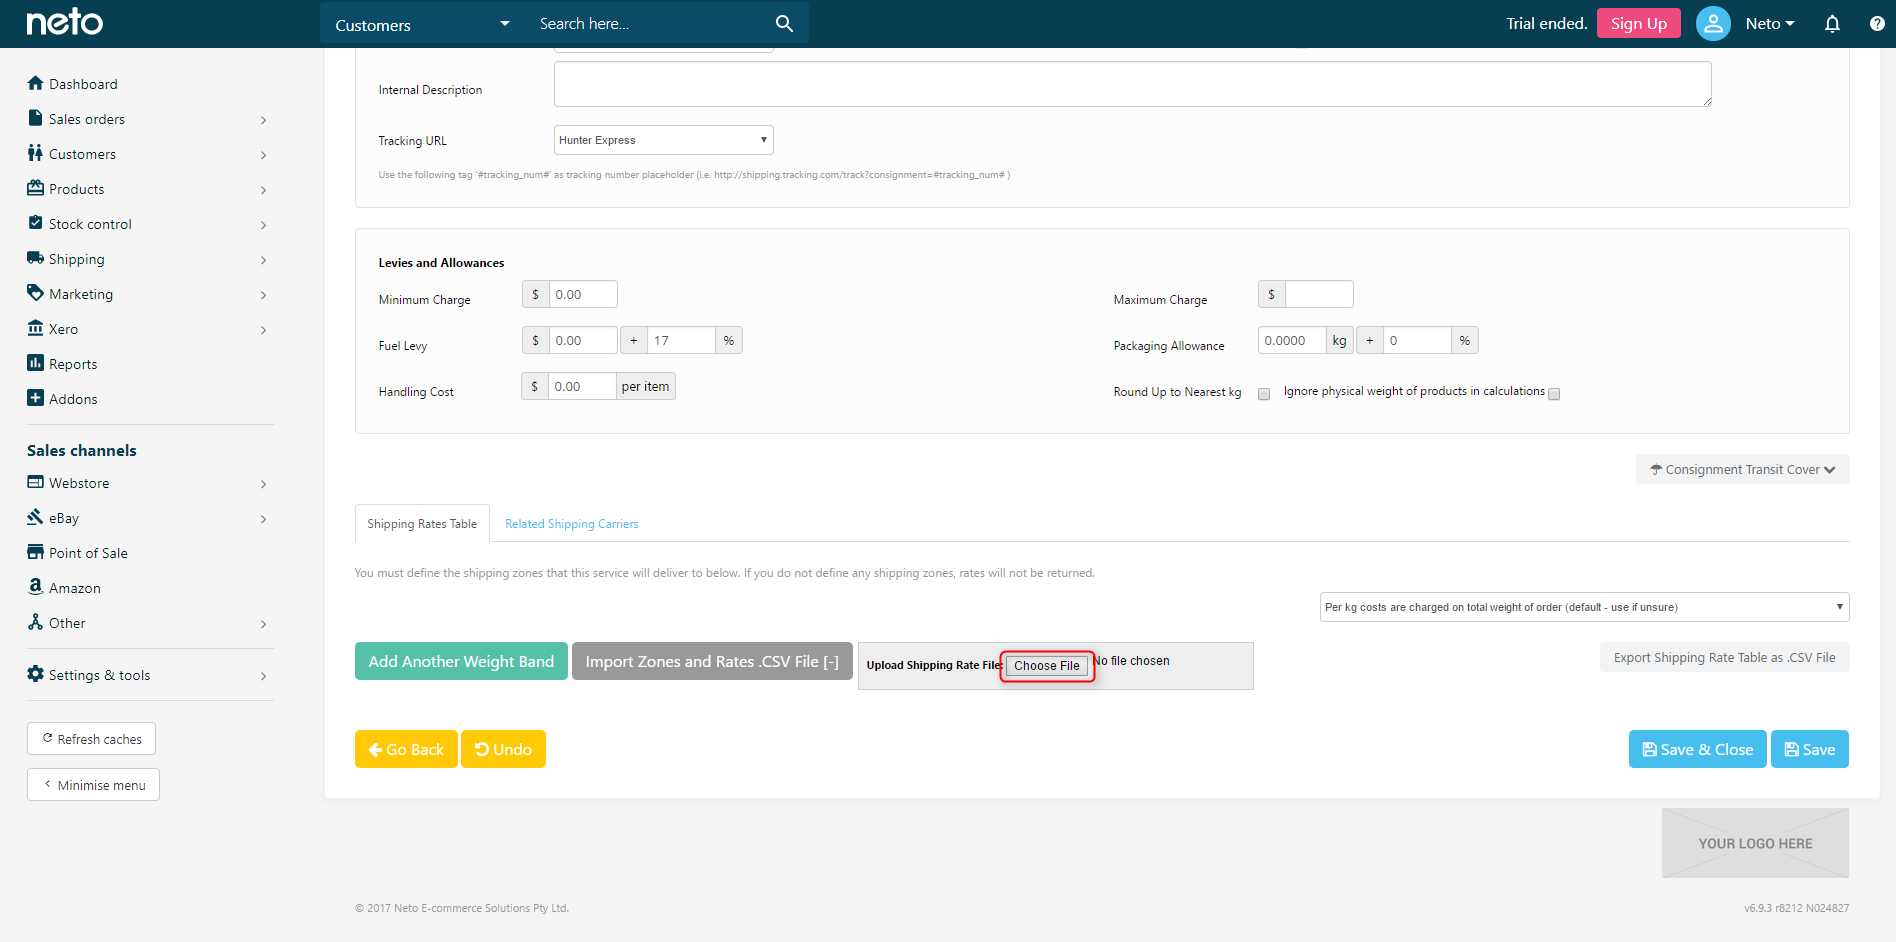
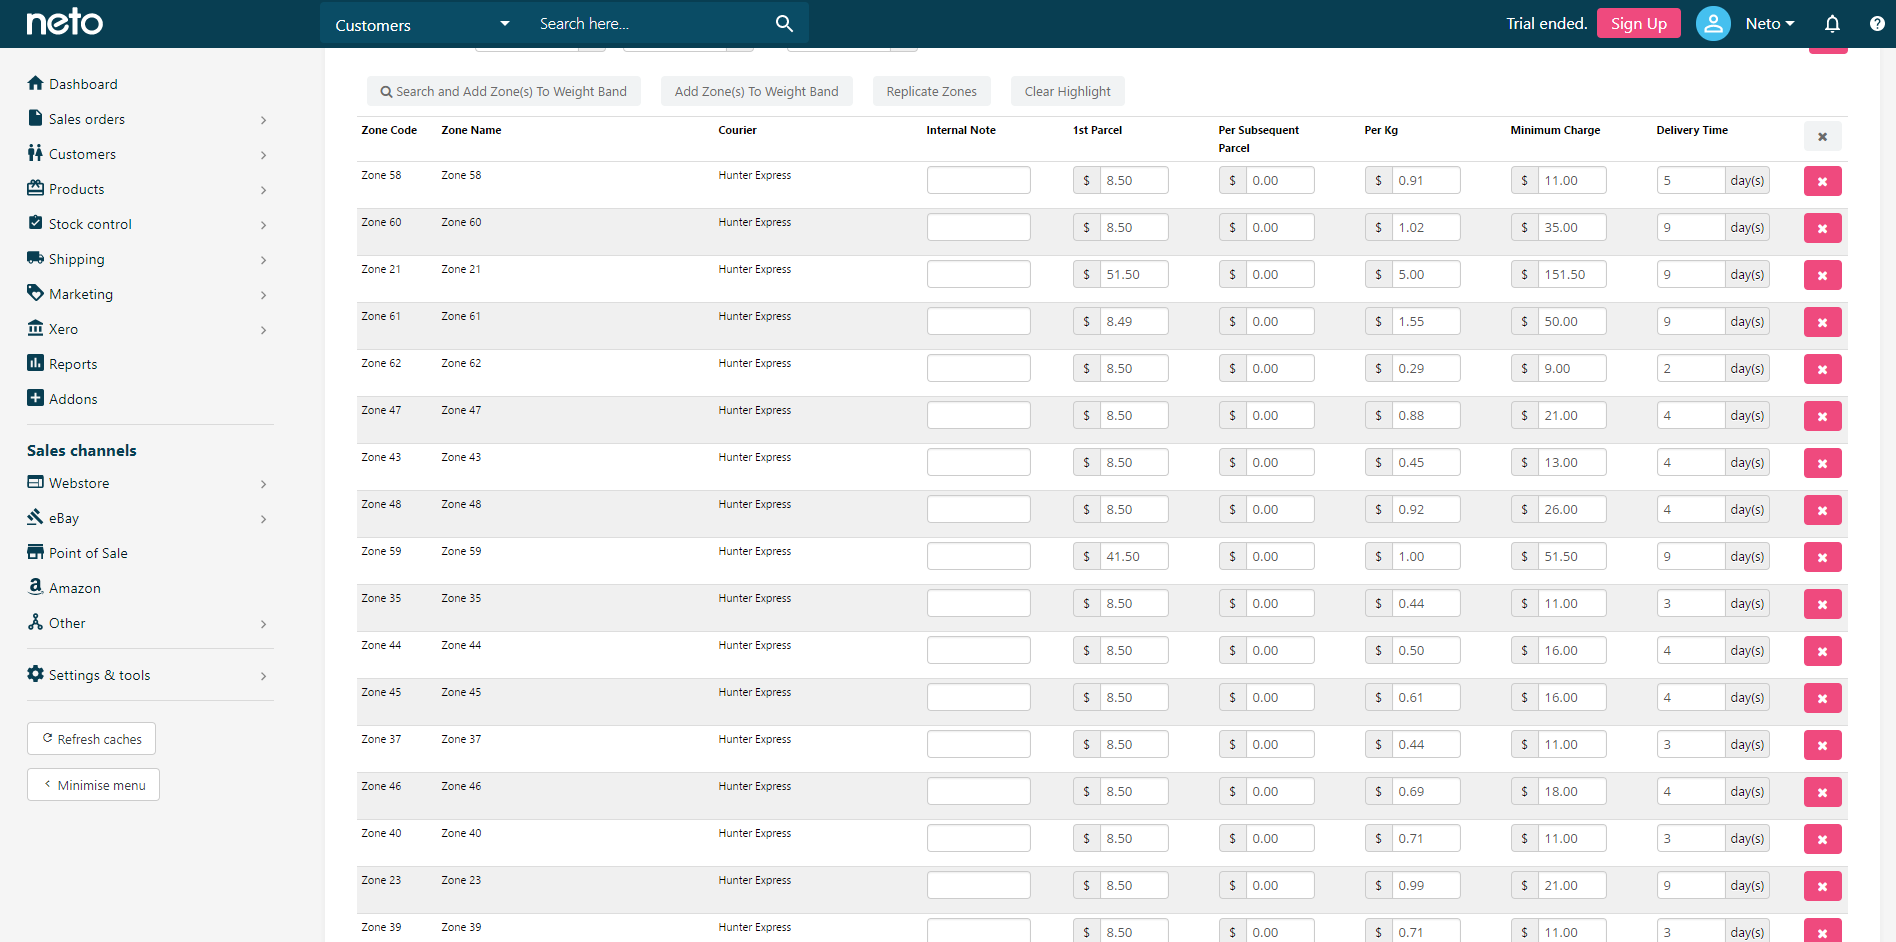
- You'll be given a preview of the rates. Check a few and confirm the data is correct, then Save.
Create your Shipping Option
The shipping option is what displays to customers on the front end of your site. To create a shipping option:
- In your Neto control panel navigate to Settings & Tools > Shipping.
- Select Shipping Options.

- In the top right corner select Add New.
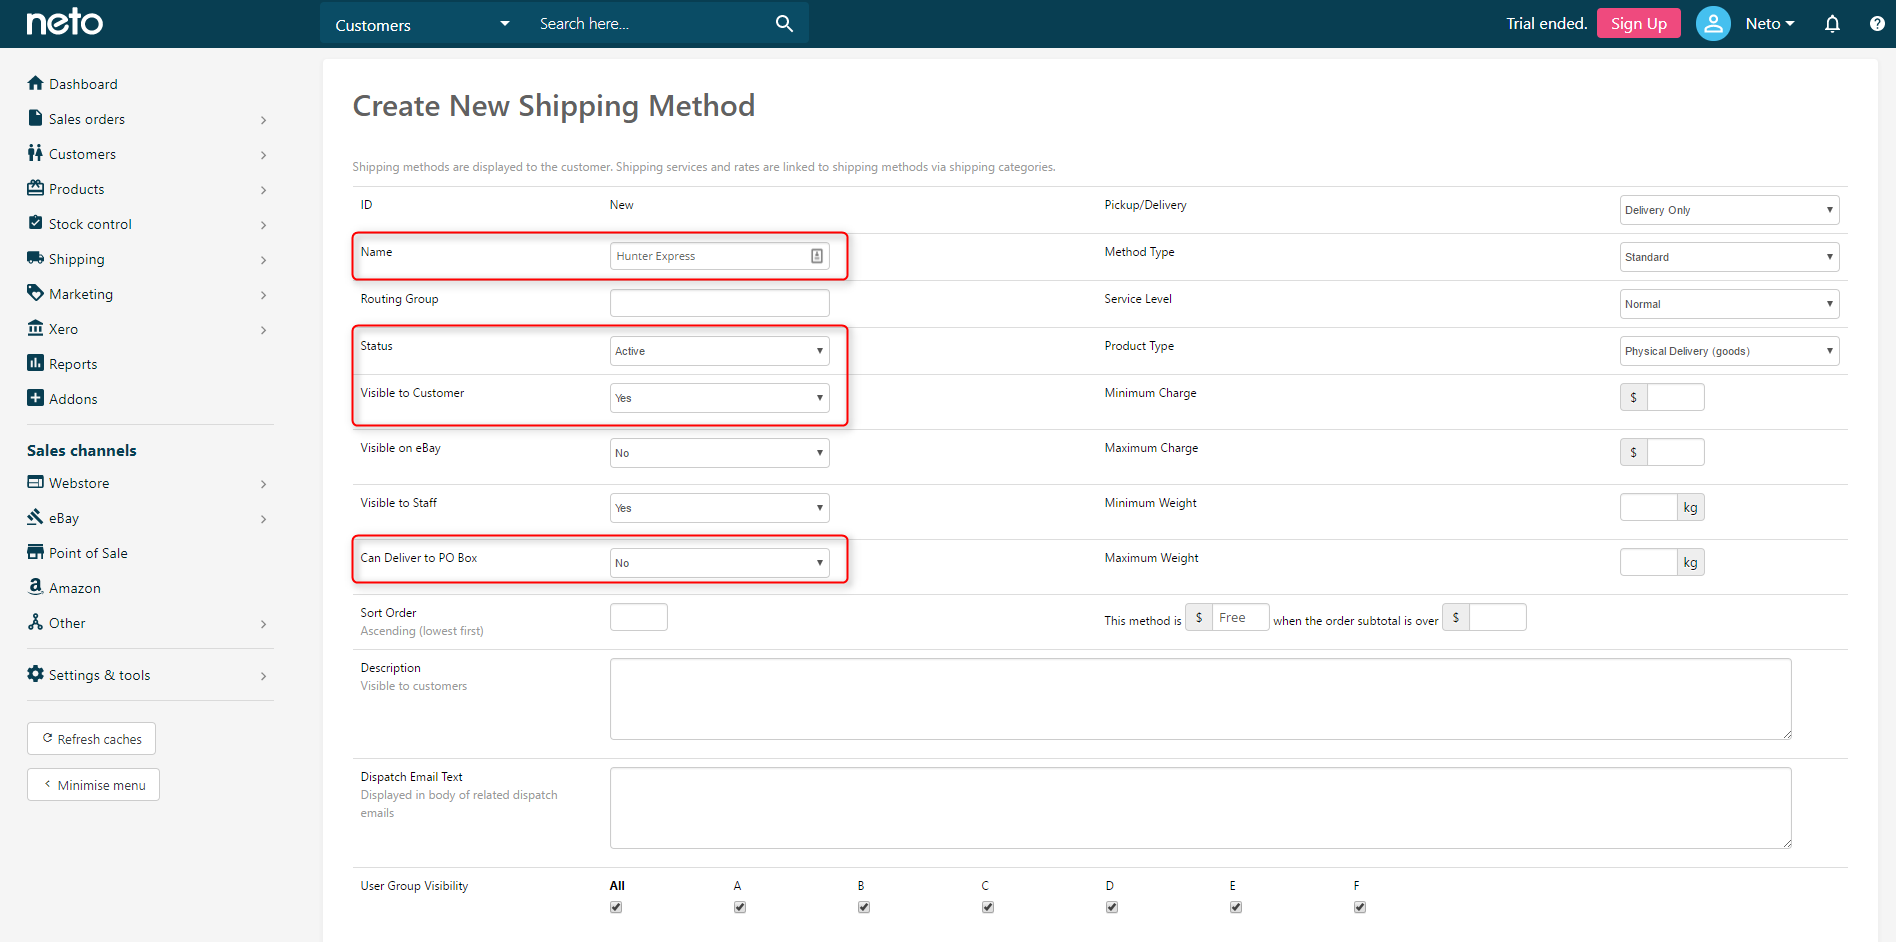
- Enter a Name, set the status to Active, Visible To Customer to Yes, and turn delivery to PO Boxes off, then Save.
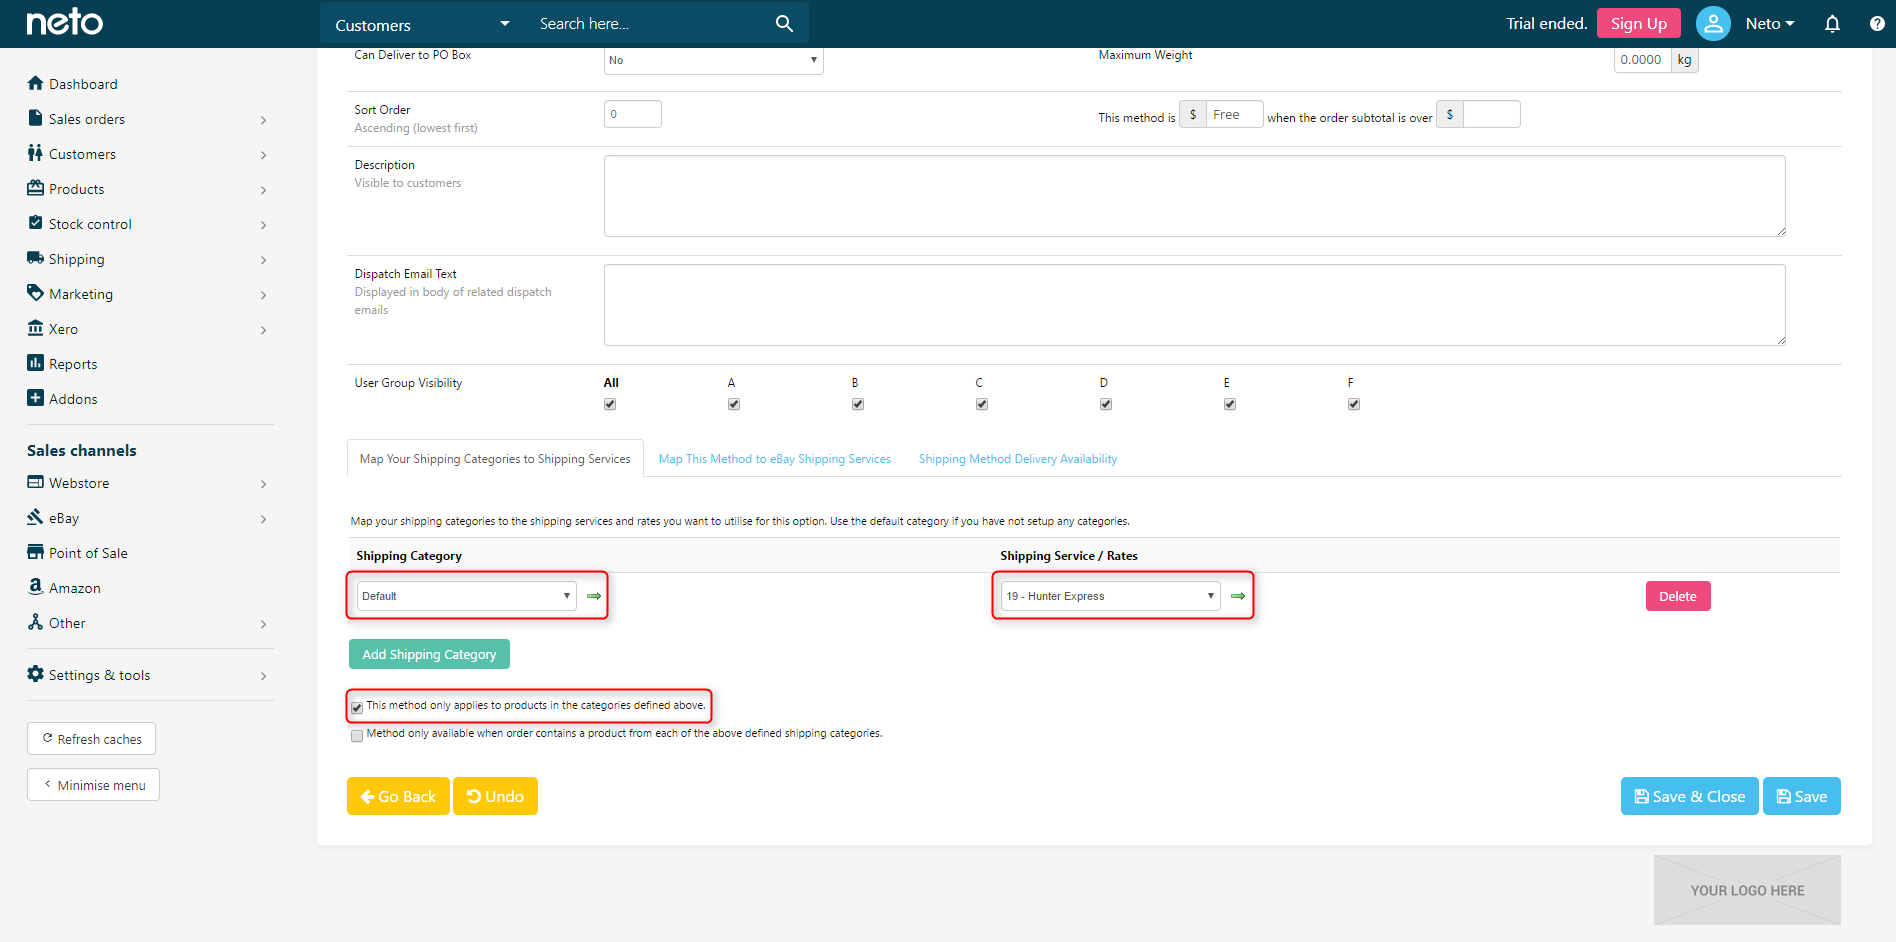
- At the bottom of the page select Add Shipping Category, select the default (or your own defined shipping category), and choose Hunter Express for the rates. Check the indicated checkbox and Save.
Hunter Express Shipping Labels
To set up the Hunter Express labels:
- In your Neto control panel navigate to the Addons menu.
- In the Shipping section locate Hunter Express and click the Install button.
- Fill in the Shipping Carrier Label Setup Form and Neto staff will set up the shipping labels for you for free.