Please Note: This support article requires the Neto Commerce Ship add-on.
eParcel International services can also use your live rates provided by Australia Post. Follow the steps in this article to add international shipping using your eParcel account details.
Shipping Zones
Zones for eParcel International come pre-installed in Neto. They are under the name AP International, and the rates provided to you will match these zones accordingly.
Prepare your Data
eParcel International will provide your rates in a PDF which isn't able to be imported into Neto. Rather than transpose it into a spreadsheet and import, it is quicker to populate the rates through the shipping wizard.
Add the Shipping Option
eParcel International shipping is best created through the shipping wizard.:
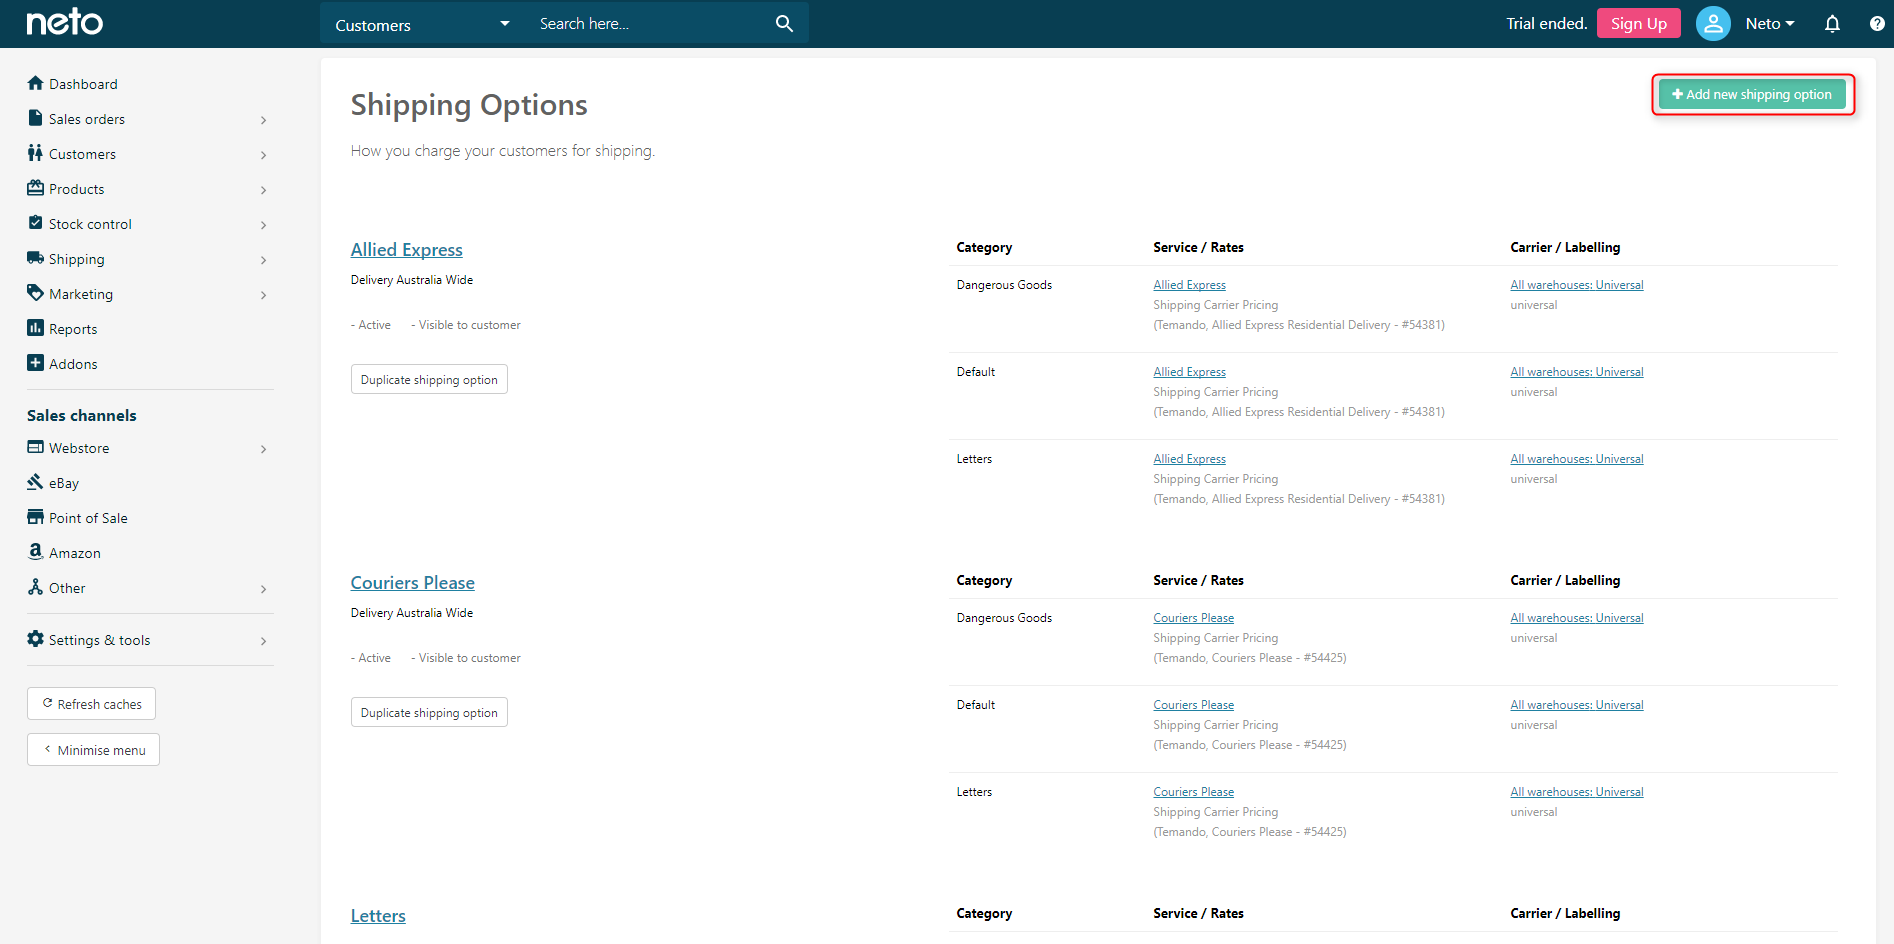
- In your Neto control panel navigate to Shipping > Shipping Options.
- Select Add New Shipping Option.
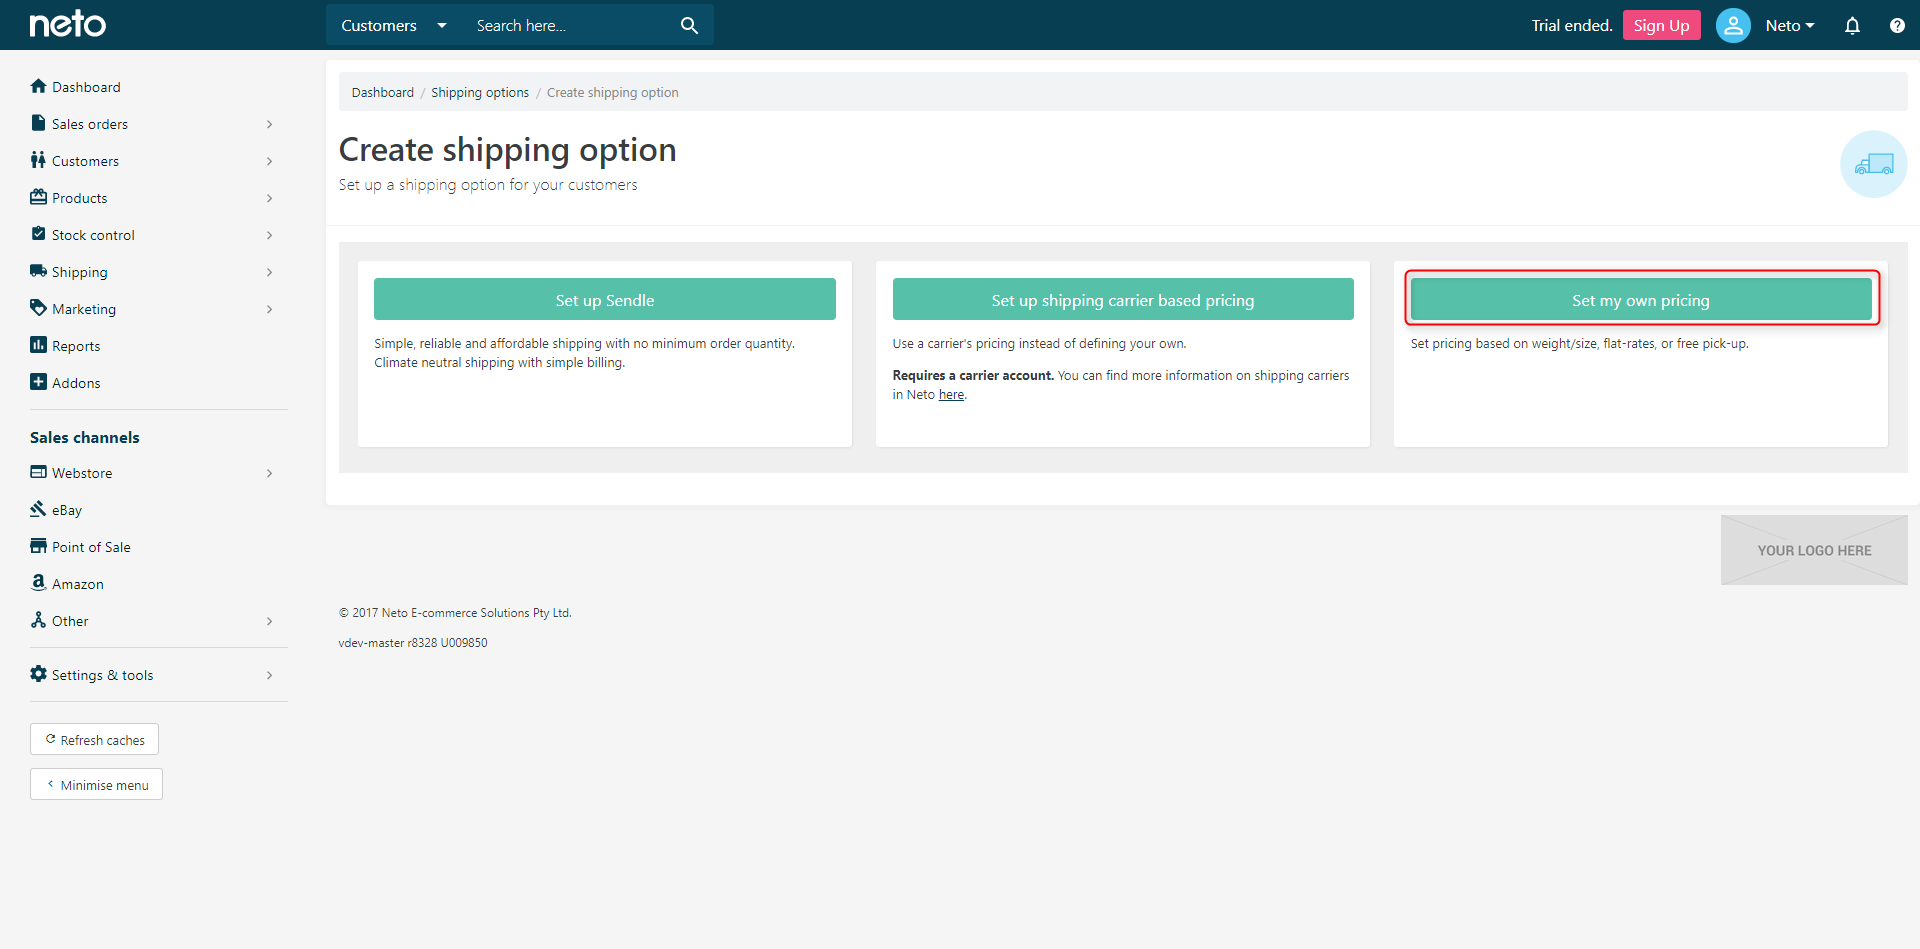
- Choose Set My Own Pricing.
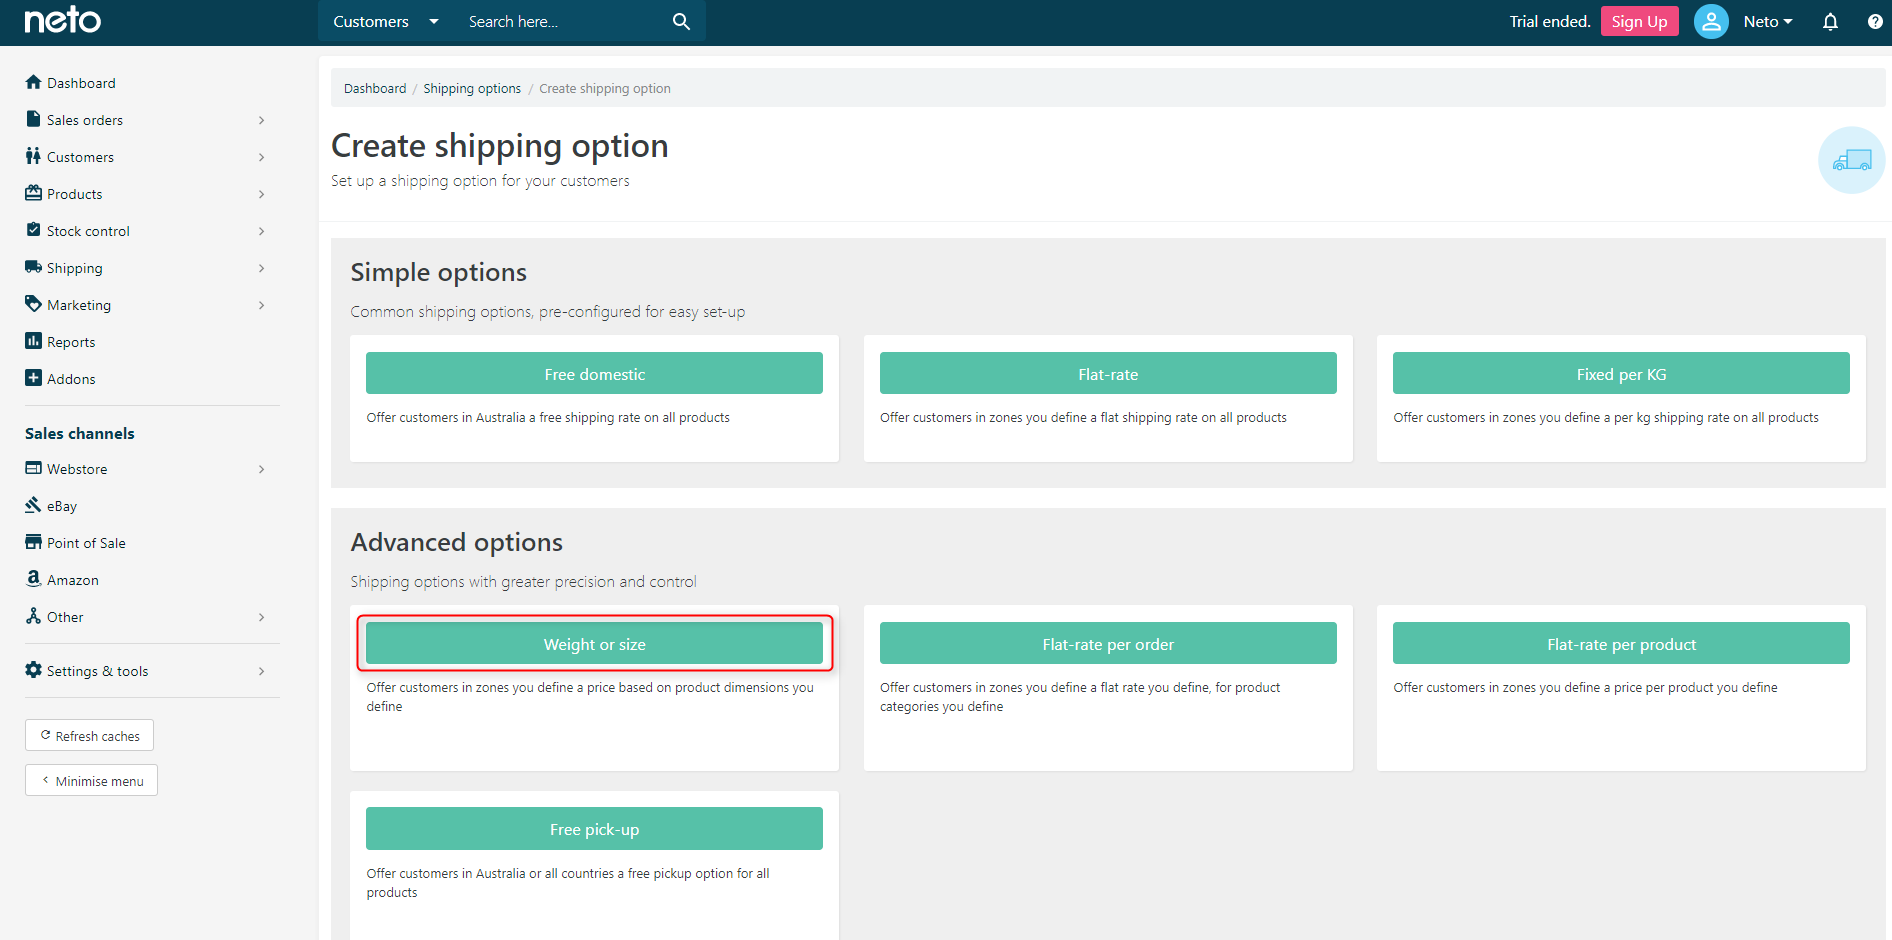
- In the advanced options click Weight Or Size.
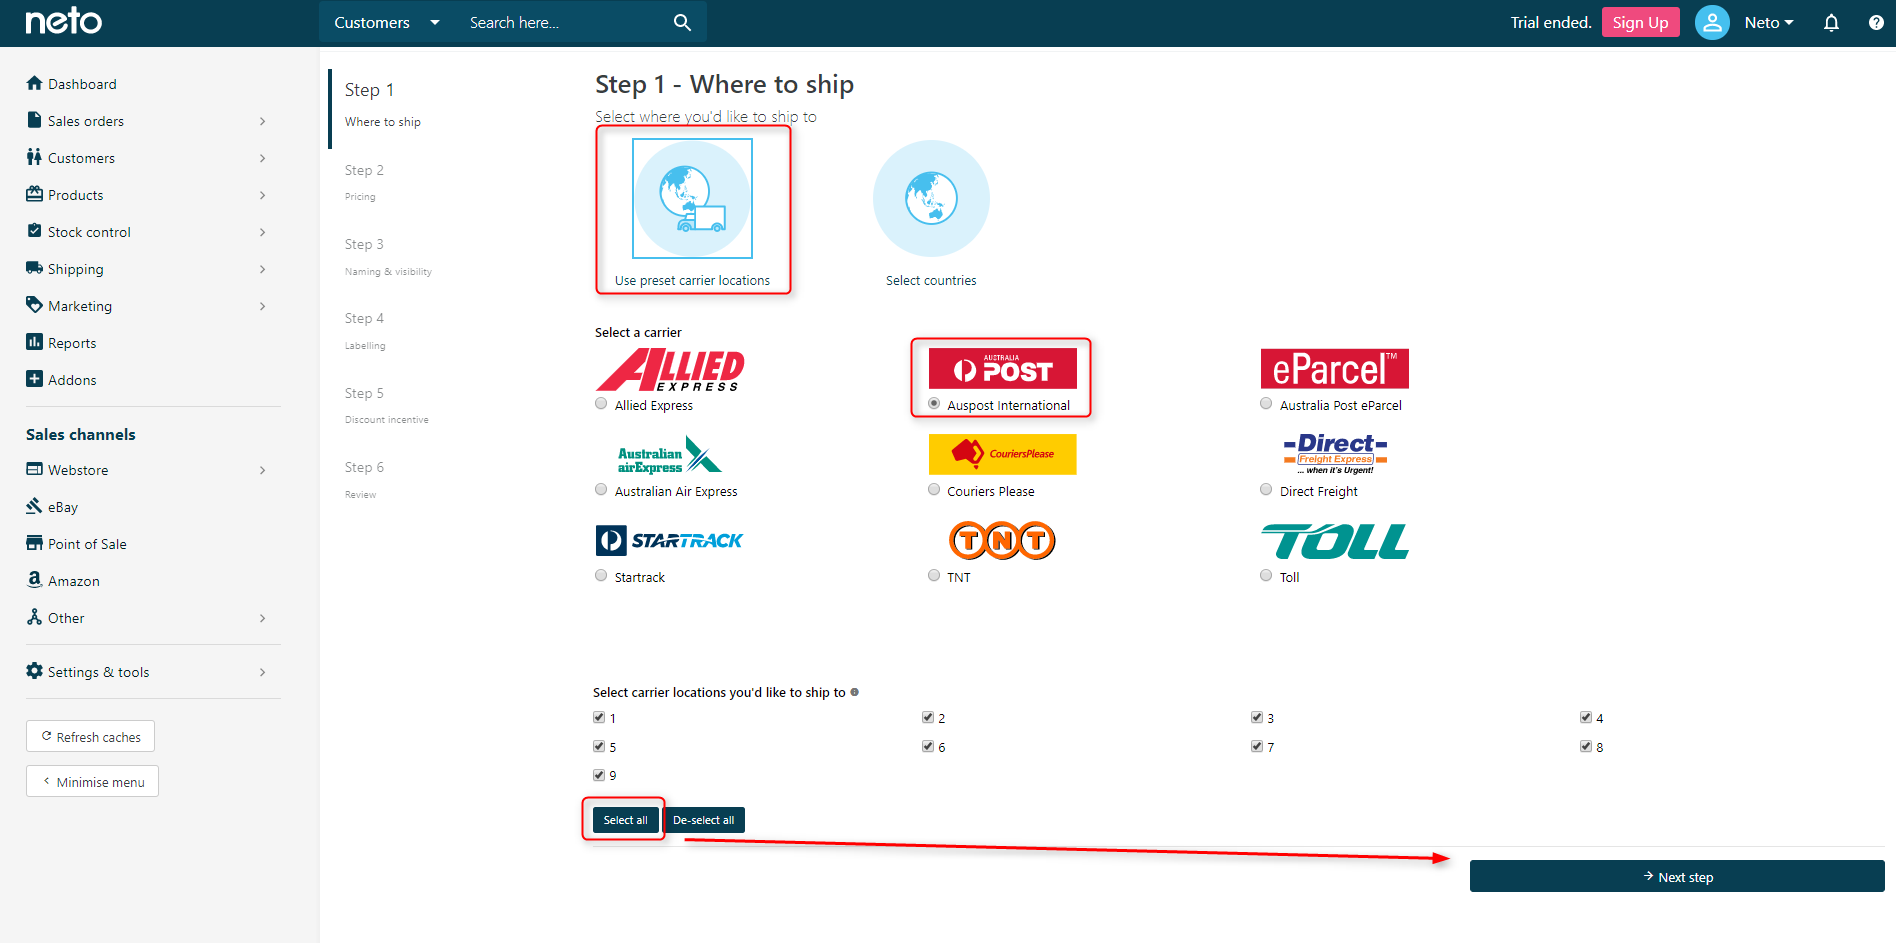
- Select Preset Carrier Locations, pick Auspost International and Select All locations, then click Next Step.
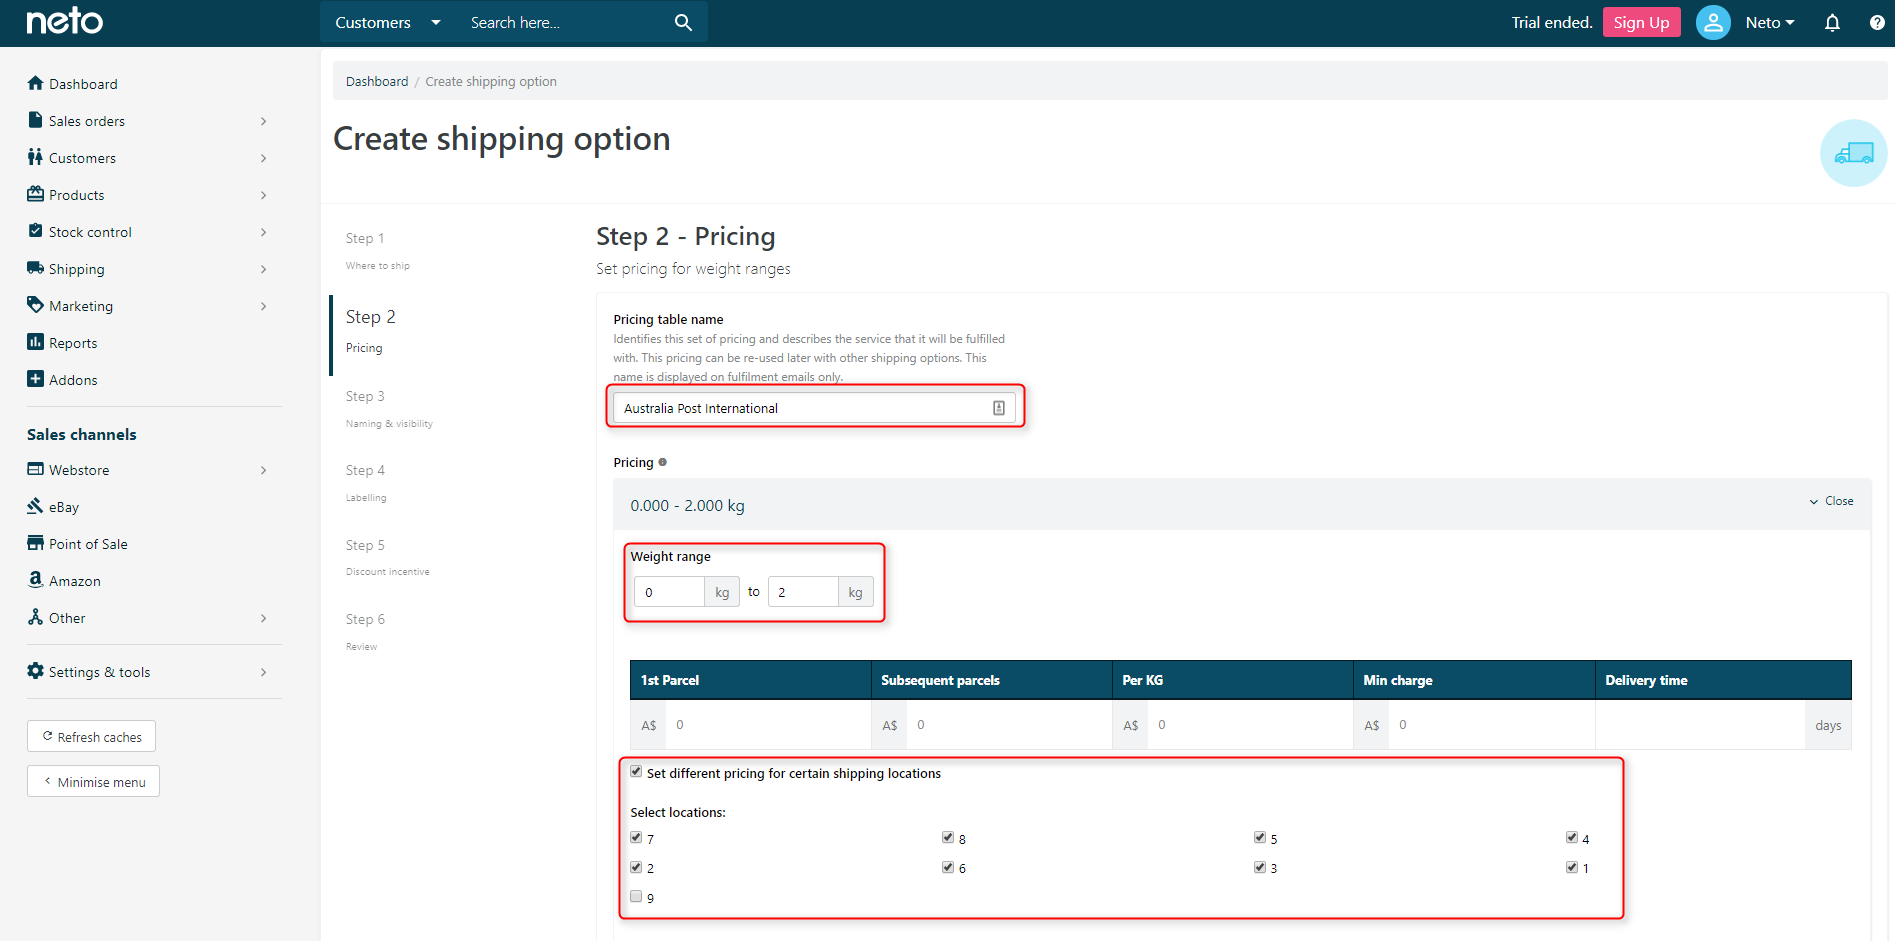
- You now need to transpose the pricing data from the spreadsheet into the fields provided, depending on which service you're setting up. In this example, we're setting up Airmail.
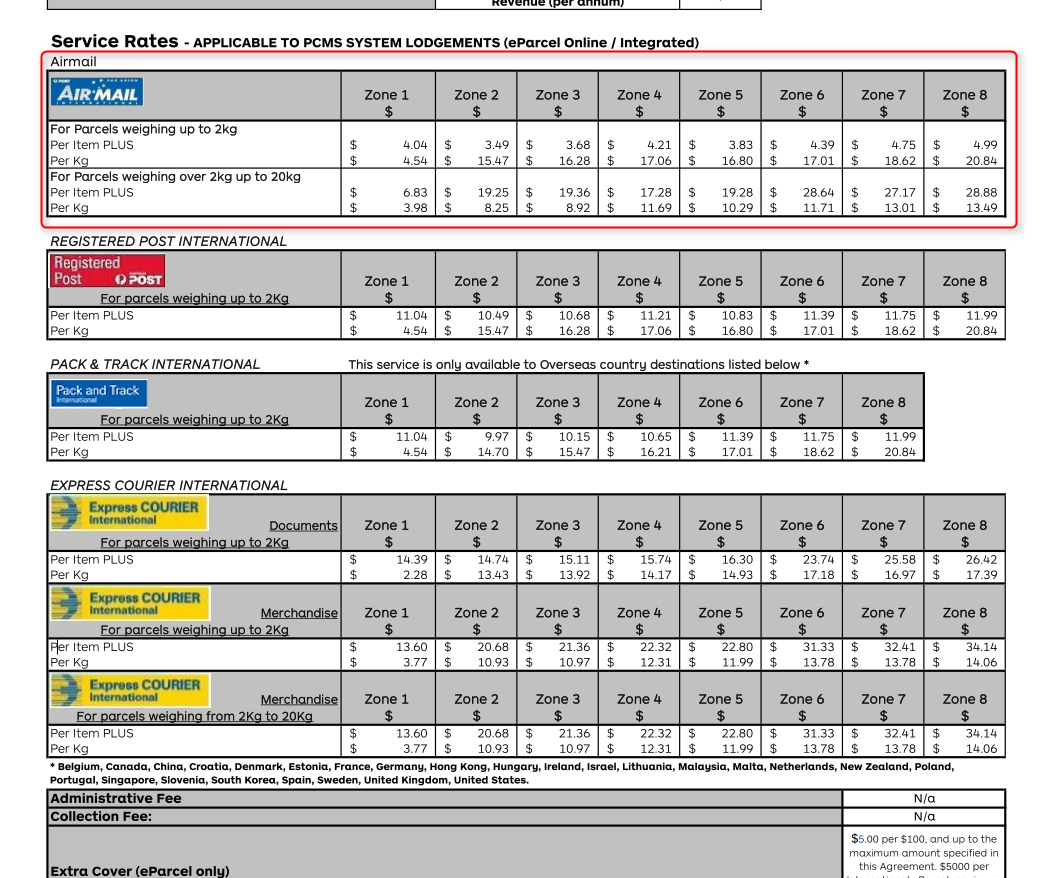
- eParcel International has weight limits on its services. With Airmail, there's two bands of rates, for packages under 2kg, and packages over 2kg up to 20kg. Enter a Name, and check the Set Different Pricing For Certain Shipping Locations box and check all locations you have pricing information for .
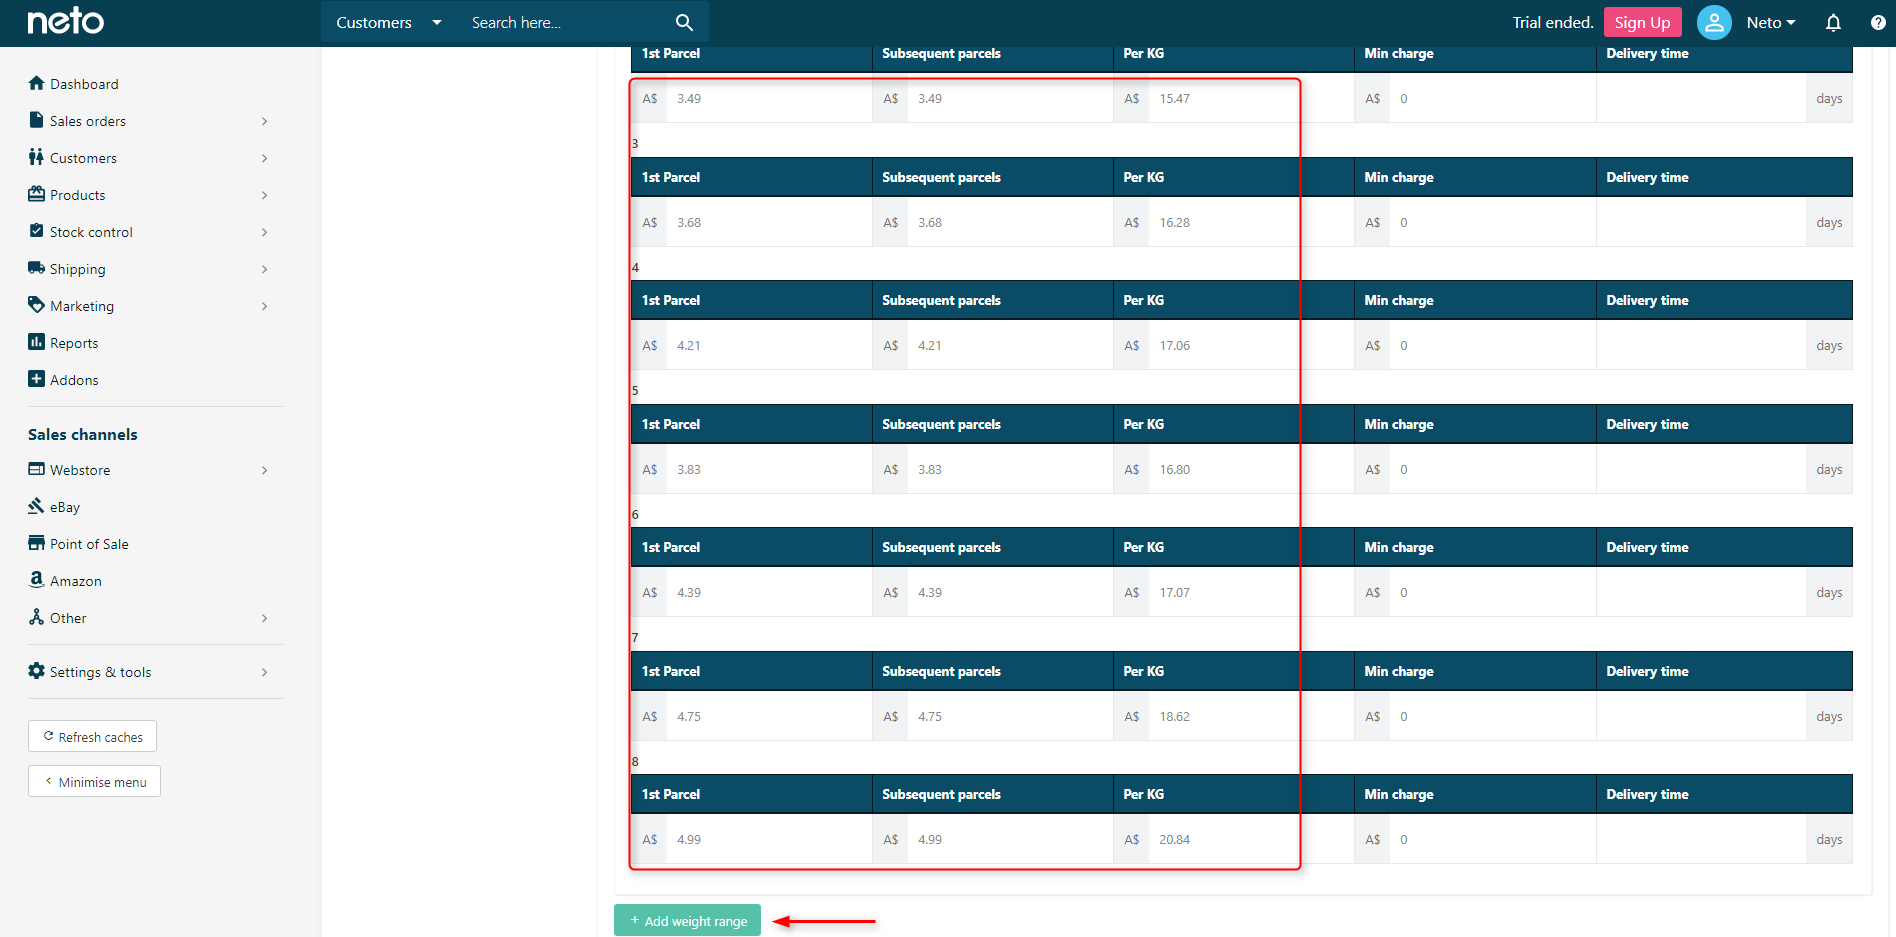
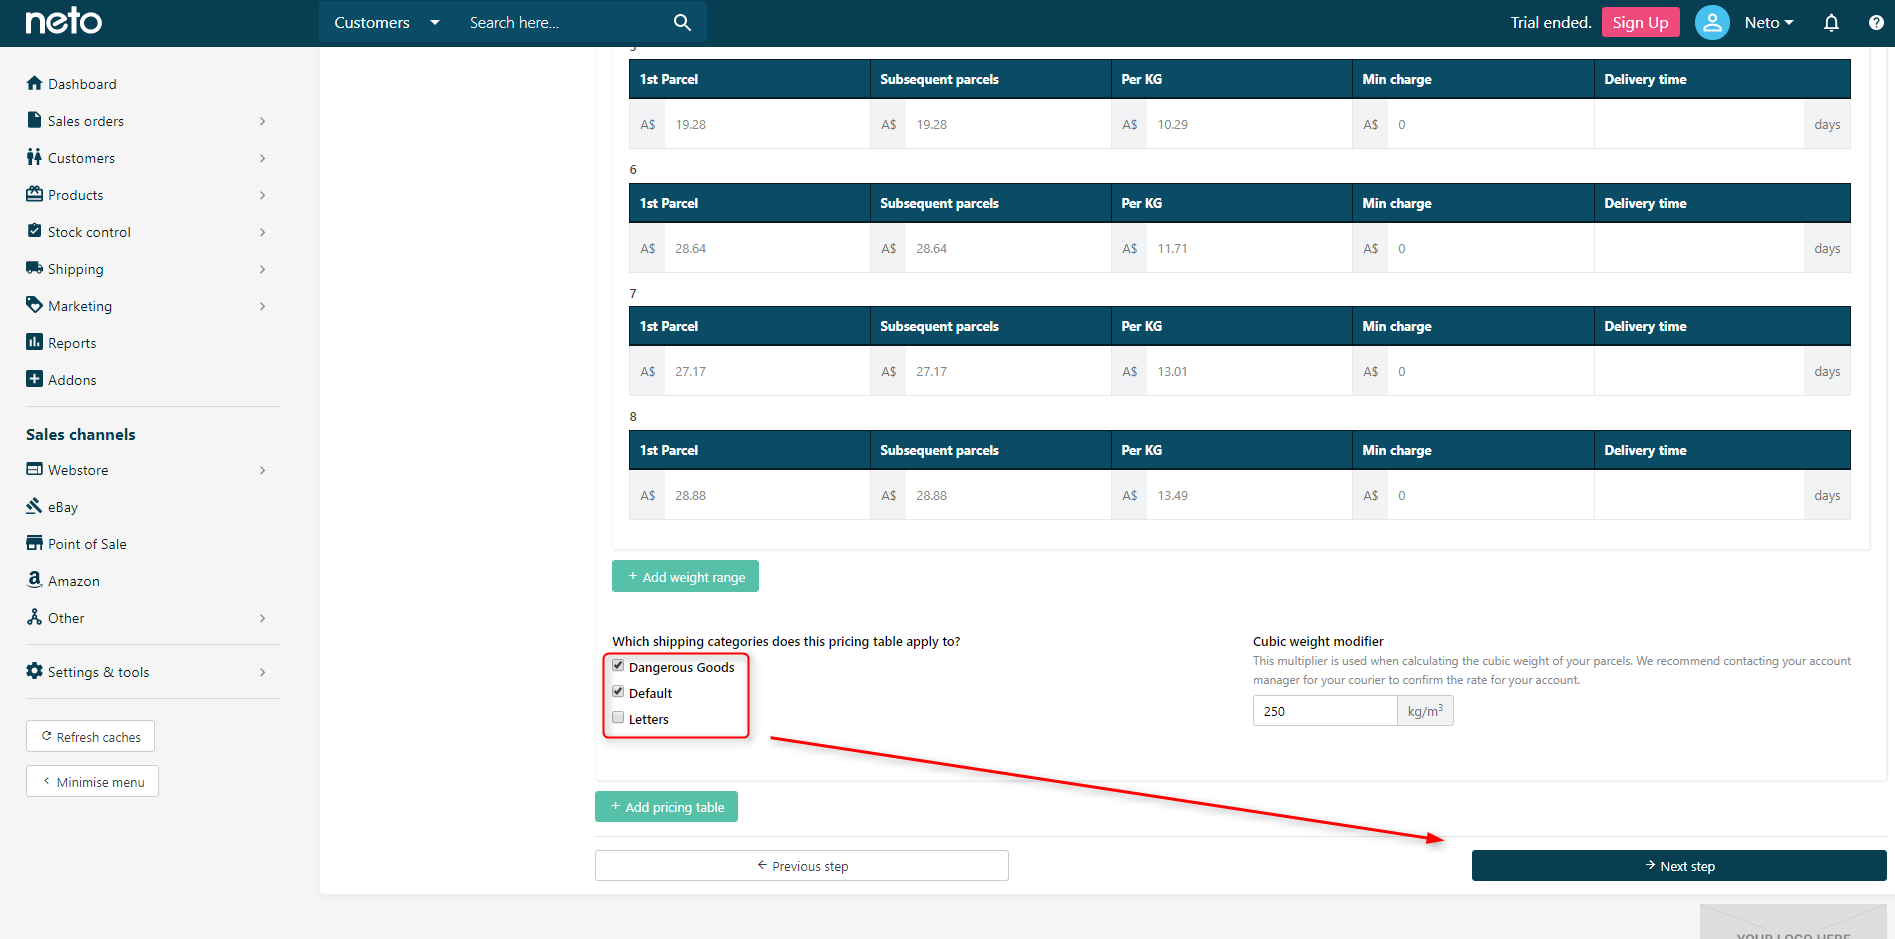
- Enter the pricing information provided by Australia Post into the fields, adding a new band for the 2kg to 20kg rates. The Per Item Plus charge needs to go into the 1st Parcel Override and Per Subsequent Parcel Override. Enter the Per KG rate into the Per Kg Override
- Check the shipping categories this option will apply to, and then click Next Step.
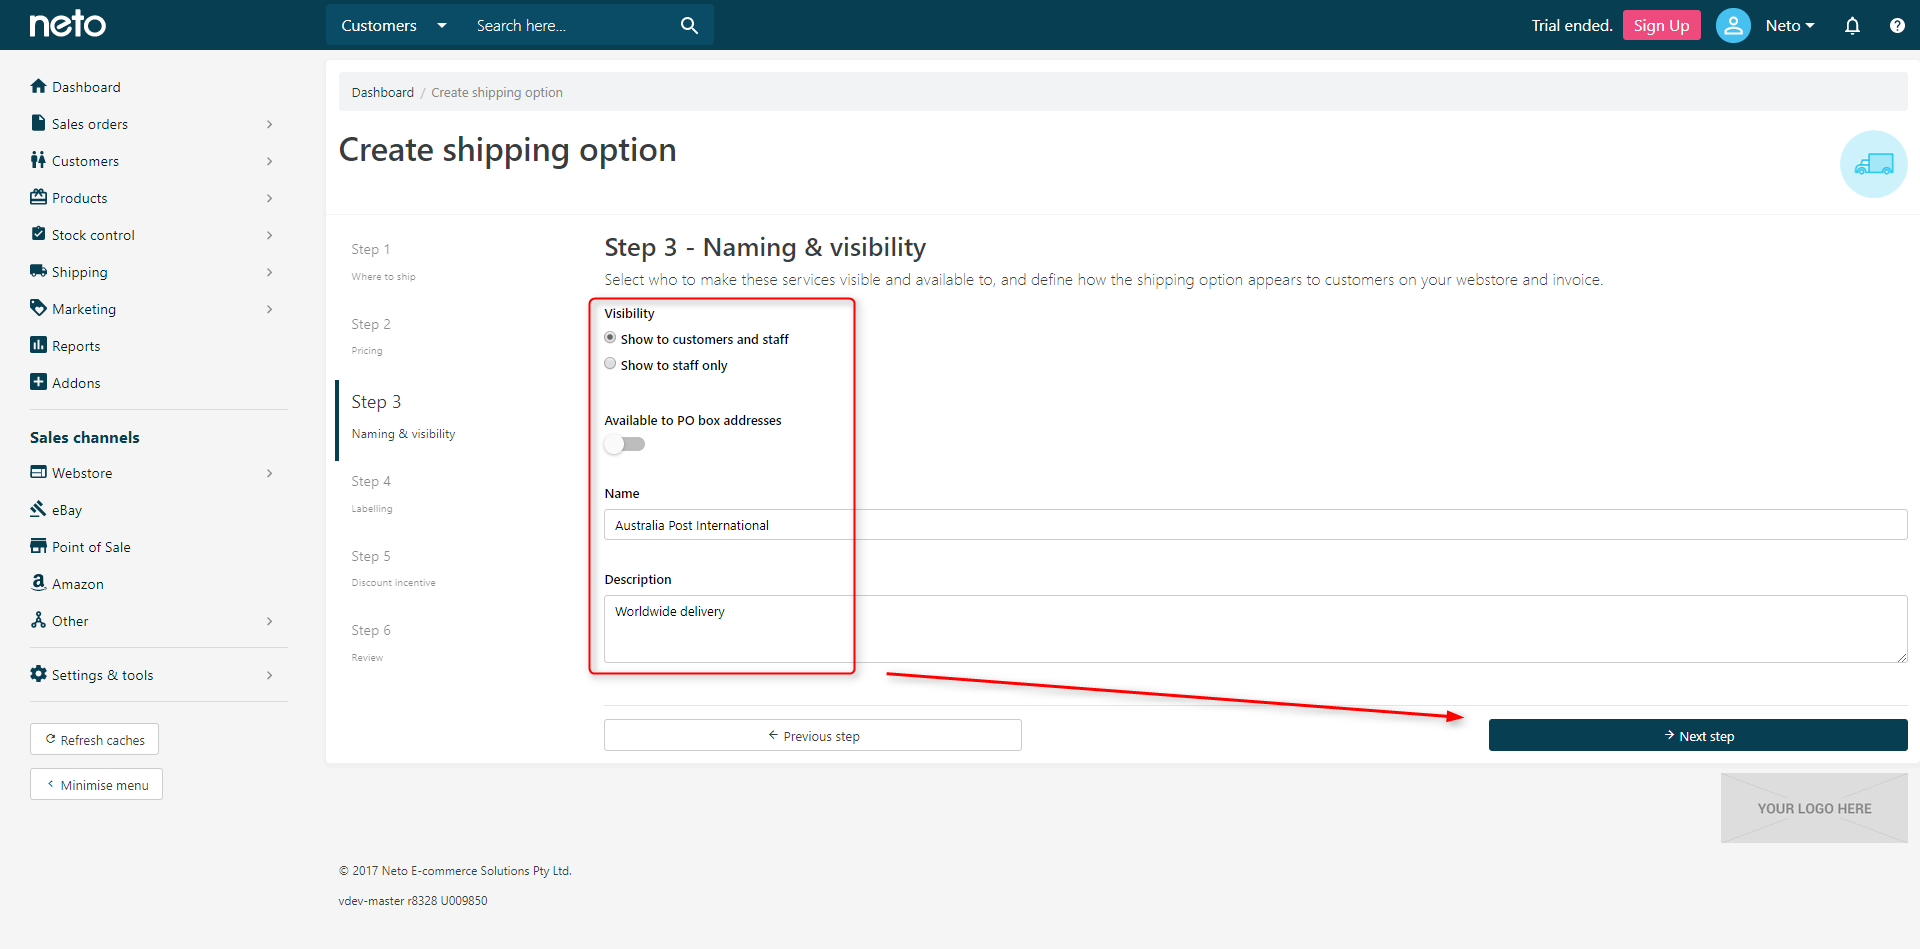
- Enter a Name and Description for the shipping option, and set the Visibility and PO Box setting.
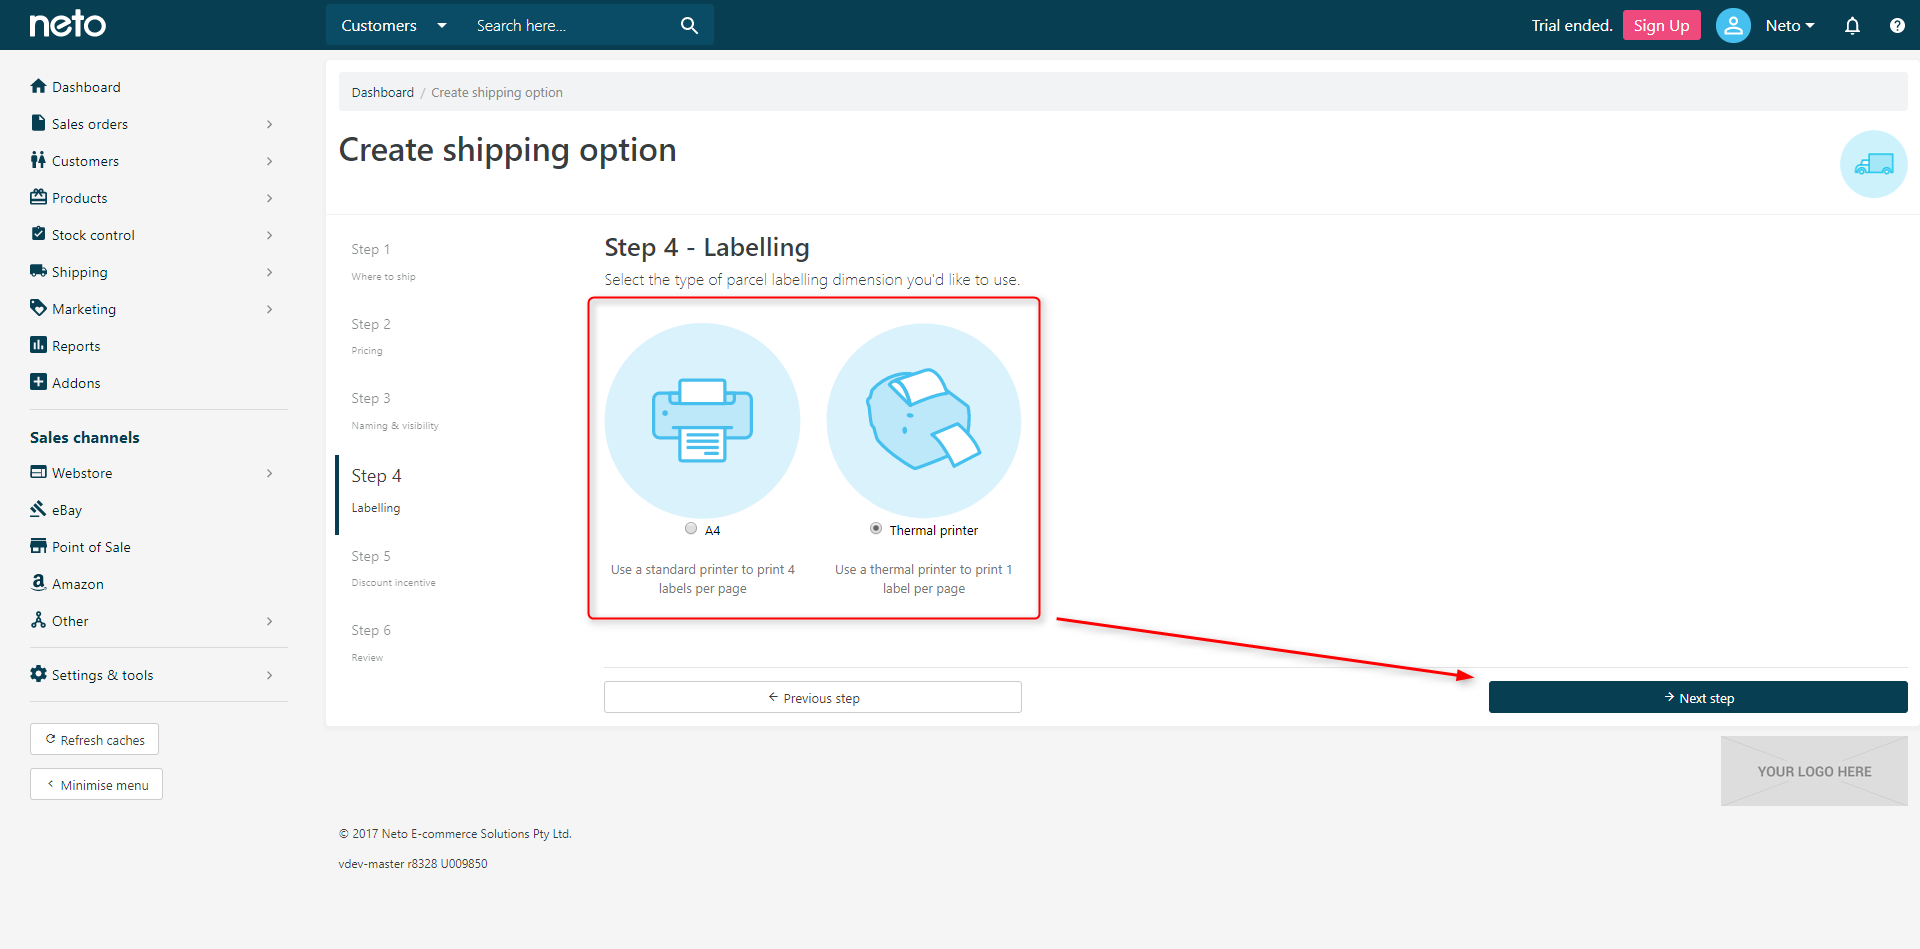
- Choose how you will print labels and move on to the Next Step.
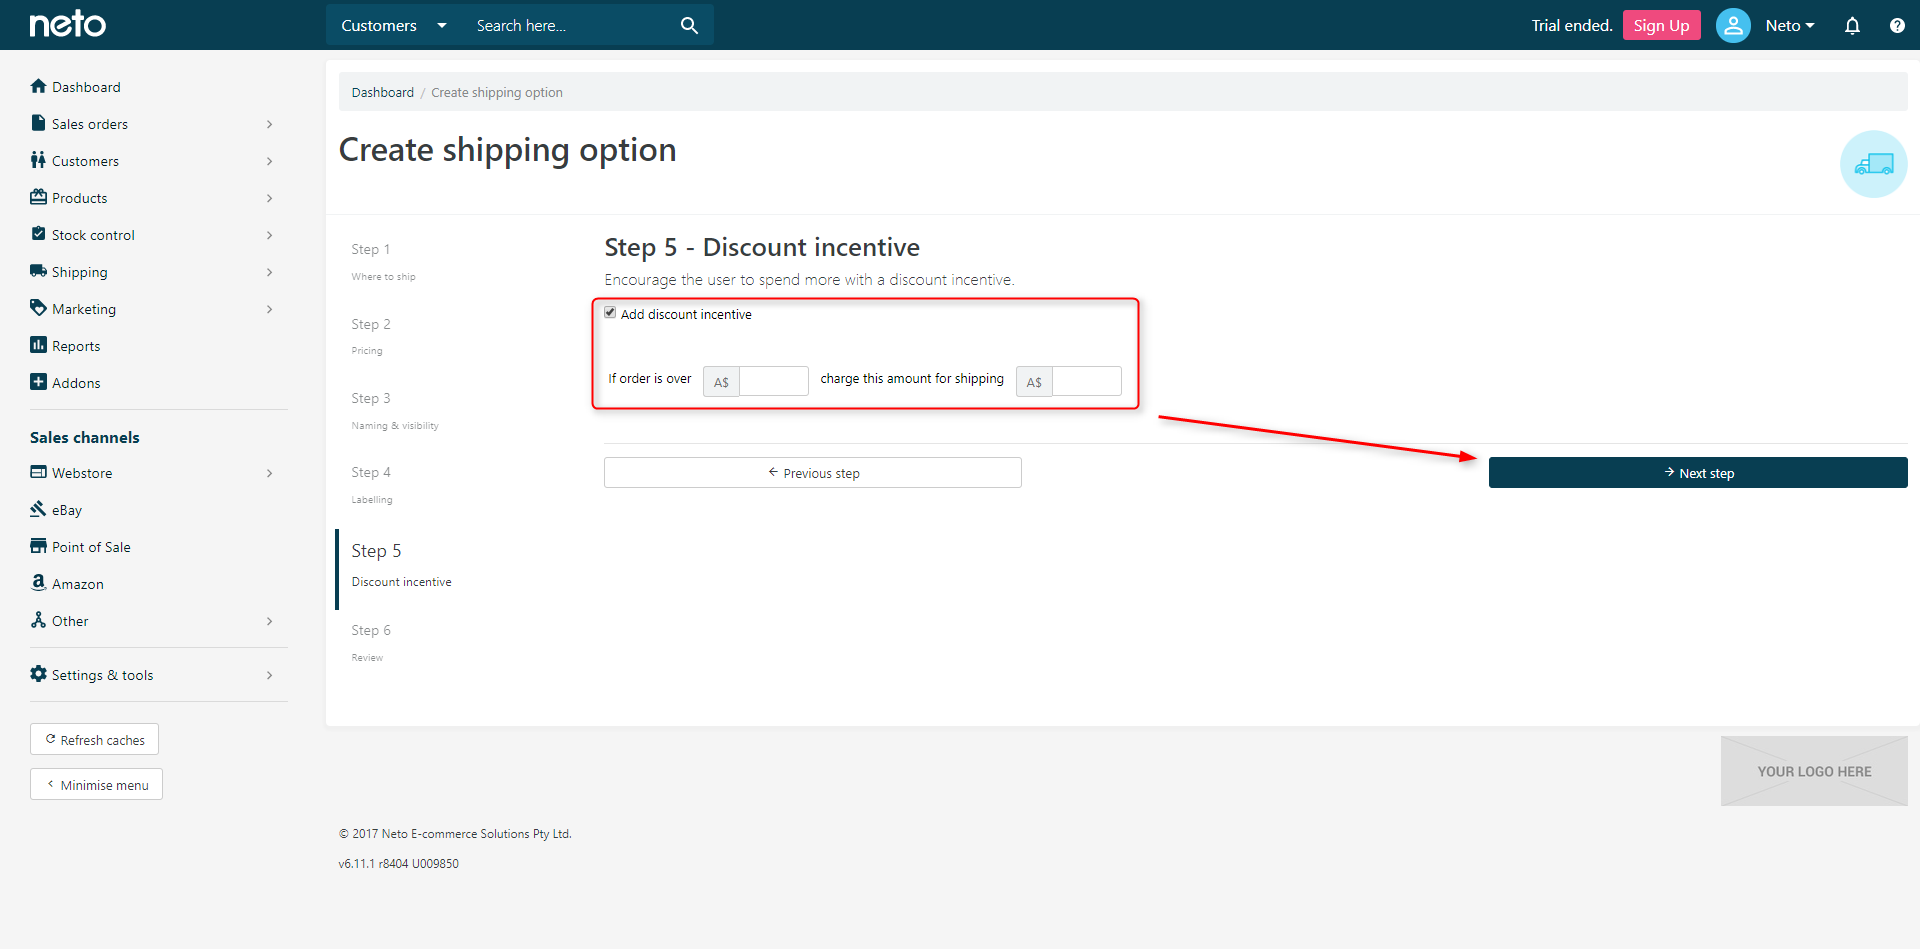
- Configure pricing discounts based on the order total if desired (optional) and move on the Next Step.
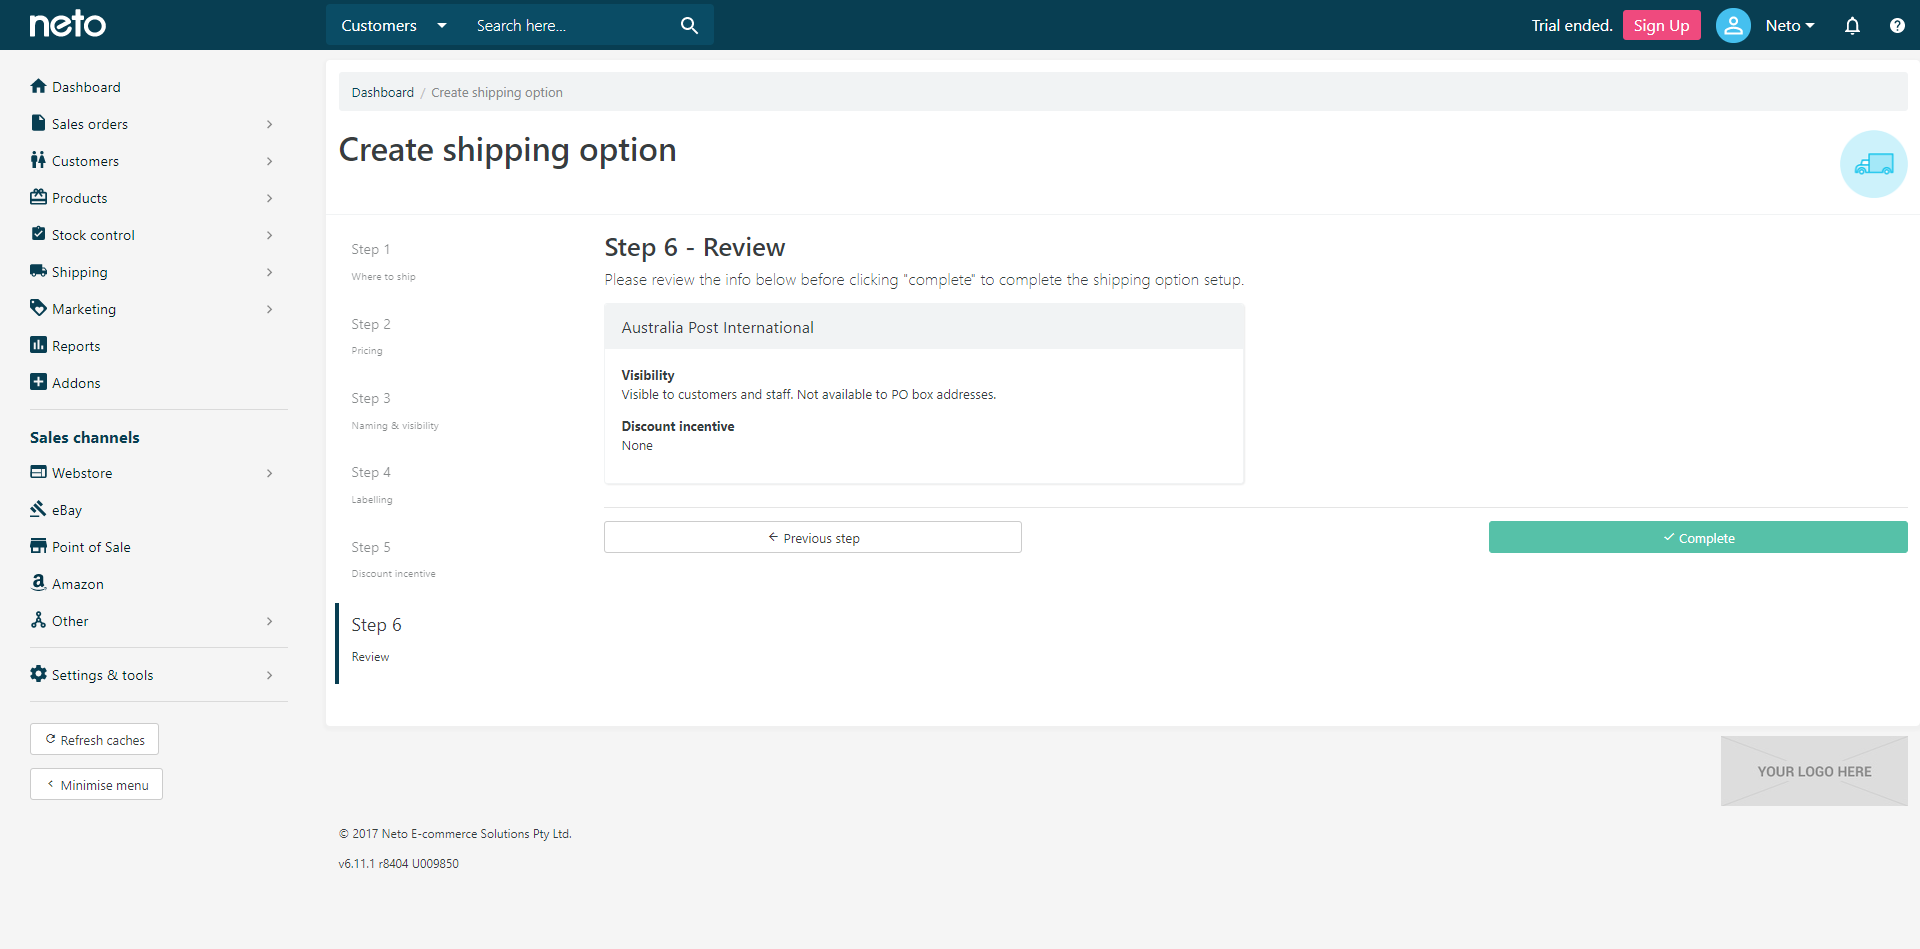
- Review the details and Complete Setup. At this stage it is highly recommended that you test the shipping option to ensure accurate costs are returned.
- Complete the Shipping Carrier Label Setup form and Neto staff will configure your labels as a free service.