In this Article
Install the DYMO Label Printer for Windows
The DYMO printer requires special printing drivers in order to print.
-
Download the software from DYMO’s website (select the Support tab and download the relevant drivers for your system)
-
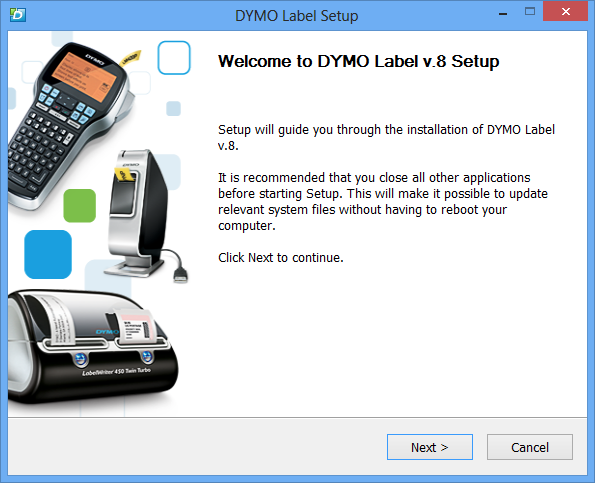
Open the downloaded software, and follow the DYMO Setup Wizard to install the software.

-
Connect your DYMO label Printer directly to your computer via the USB cable provided.
-
Load your labels into your printer. For instructions on how to do this, please check your DYMO 450 Turbo instruction manual.
Set the Print Preferences in Windows
-
Open the Start menu and and navigate to the Control Panel.
-
Locate the Devices and Printers icon and open this.
-
Right click on the DYMO printer and select Printer Properties.

-
In the Printer Properties window, click Preferences at the bottom and then Advanced on the right.
-
This will open a window that shows the below settings. This allows you to verify that the paper is set to the same type of label you loaded earlier.

Update your label template in Maropost Commerce Cloud
-
Navigate to the Print Doc templates: Settings & tools > All settings & tools
-
Select System Templates from the left hand navigation menu and then select Document Templates
-
Locate the Barcode Template: SysDoc/printdocs/product/barcode/template.html

-
Update the existing template by replacing it with the code below, and click Save.
Tip: We recommend backing-up all print docs before making modifications.
<code class="hljs ruby"><center style=<span class="hljs-string">"padding-top: 15px; padding-right:45px;"</span>><img align=<span class="hljs-string">"center"</span> src=<span class="hljs-string">"[%BARCODE_URL fn:'' height:'32px' sku:'[@SKU@]' upc:'[@upc@]' scale:'3'%][%END BARCODE_URL%]"</span> width=<span class="hljs-string">"75%"</span> border=<span class="hljs-string">"0"</span>/><br>[%product <span class="hljs-symbol">sku:</span><span class="hljs-string">'[@sku@]'</span>%] [%param *body%] <div style=<span class="hljs-string">"font-size:12px; padding:0px 4px 2px 4px;"</span>>[%format <span class="hljs-symbol">type:</span><span class="hljs-string">'text'</span> <span class="hljs-symbol">maxlength:</span><span class="hljs-string">'70'</span>%][<span class="hljs-variable">@name</span>@][<span class="hljs-string">%/format%]</</span>div> <div style=<span class="hljs-string">"font-size:16px;"</span>>[%format <span class="hljs-symbol">type:</span><span class="hljs-string">'currency'</span>%][<span class="hljs-variable">@price</span>@][<span class="hljs-string">%/format%]</</span>div> [<span class="hljs-string">%/param%][%/</span>product%]<<span class="hljs-regexp">/center></span>
Print barcode labels in Maropost Commerce Cloud
-
In your Maropost control panel navigate to Products > View All Products.
-
Select the products you want to print barcodes for.
-
Scroll down to the bottom of the page.
-
Click on the Print Barcode for Selected button.

Chrome print settings
-
Set the paper size to 30336.
-
Set all margins to none, or Custom and set them all to zero.
-
Change layout to Landscape.
Dymo 450 Label Printer Setup - Mac
Follow the below instructions to get your printer set up and ready to start printing barcode labels with Maropost.
-
Install the DYMO Label Printer
-
Set the print preferences in Mac
-
Update your label template in Maropost
-
Print barcode labels in Maropost
Install the DYMO Label Printer
-
Connect the printer to your computer.
-
Download the software from DYMO’s website (select the Support tab and download the relevant drivers for your system)
-
Open System preferences > Printers and Scanners and click on the “+” button to add the printer.

-
Search for DYMO and select the DYMO Label Printer. Click Add.

Set the print preferences in Mac
-
Open Chrome or Safari and type in the address bar: http://localhost:631/printers/

Can’t see the Printer settings? Try enabling CUPS for your computer.
Go to the Finder and select 'Applications' from the 'Go' menu.
Double-click on the 'Utilities' folder and launch 'Terminal'.
Enter 'cupsctl WebInterface=yes' and press enter.
Go to the Chrome web browser and go to the address http://localhost:631/printers/
-
Click on the Dymo printer and choose Set Default Options.
-
On the next page put your Label size code in the ‘Media Size’ box.
Media Size: 30334
Continuous Paper: Disabled
Output Resolution: 300 DPI
Halftoning: Error Difusion
Print Density: Normal
Print Quality: Text Only
Tip: Paper size 30334 equates to approximately 53.97 mm x 28.57mm. If you're using a different paper size adjust your settings accordingly.
Update your label template in Maropost
-
Navigate to the Print Doc templates: Settings & tools > All settings & tools
-
Select System Templates from the left hand navigation menu and then select Document Templates
-
Locate the Barcode Template: SysDoc/printdocs/product/barcode/template.html

-
Delete the code from line 2 onward, and add the below code and click Save.
We recommend backing-up all print docs before making modifications.
<center style=<span class="hljs-string">"padding-top: 15px; padding-right:45px;"</span>>
<img align=<span class="hljs-string">"center"</span> src=<span class="hljs-string">"[%BARCODE_URL fn:'' height:'32px' sku:'[@SKU@]' upc:'[@upc@]' scale:'3'%][%END BARCODE_URL%]"</span> width=<span class="hljs-string">"75%"</span> border=<span class="hljs-string">"0"</span>/>
<br>
[%product <span class="hljs-symbol">sku:</span><span class="hljs-string">'[@sku@]'</span>%]
[%param *body%]
<div style=<span class="hljs-string">"font-size:12px; padding:0px 4px 2px 4px;"</span>>[%format <span class="hljs-symbol">type:</span><span class="hljs-string">'text'</span> <span class="hljs-symbol">maxlength:</span><span class="hljs-string">'70'</span>%][<span class="hljs-variable">@name</span>@][<span class="hljs-string">%/format%]</</span>div>
<div style=<span class="hljs-string">"font-size:16px;"</span>>[%format <span class="hljs-symbol">type:</span><span class="hljs-string">'currency'</span>%][<span class="hljs-variable">@price</span>@][<span class="hljs-string">%/format%]</</span>div>
[<span class="hljs-string">%/param%]
[%/</span>product%]
<<span class="hljs-regexp">/center></span>
Print barcode labels in Maropost
-
In your Maropost control panel select Products > View All Products.
-
Select the products you want to print barcodes for.
-
Scroll down to the bottom of the page.
-
Click on the Print Barcode for Selected button.

Chrome print settings
-
Set the paper size to 30336.
-
Set all margins to none, or Custom and set them all to zero.
-
Change layout to Landscape.