This add-on was built by Maropost
Add-ons and Integrations built in-house by Maropost are documented and supported by our customer service team. If you're having issues with this integration, let us know!
Overview
Classify your customers into different groups so that you can target products, prices and other content to customise their experience on your website. With customer groups you can:
- Show different pricing to customers (i.e. retail / wholesale / VIP) and sales channels (i.e. eBay / webstore / Catch)
- Restrict products, product categories and other content pages based on the Customer User Group assigned to the customer
- Select which payment method are available to each Customer User Group.
- Set a minimum total amount for orders placed by a customer.
- Use the Customer User Group to trigger discounts or free products.
- Send monthly statements based on their User Group.
Benefits & Features
- Offer different payment methods to different customers.
- Hide specific shipping options to customers.
- Hide certain products or product categories from certain customers
- Price products differently in marketplaces such as eBay and Amazon
- Create discounts for specific customers as incentives or rewards.
Set up Instructions
To install the customer groups add-on:
- In your Neto control panel navigate to Addons and scroll down to Customer User Groups.
- Click on the Install button, and confirm installation.
A number of pages in your control panel will now have the customers groups options available:
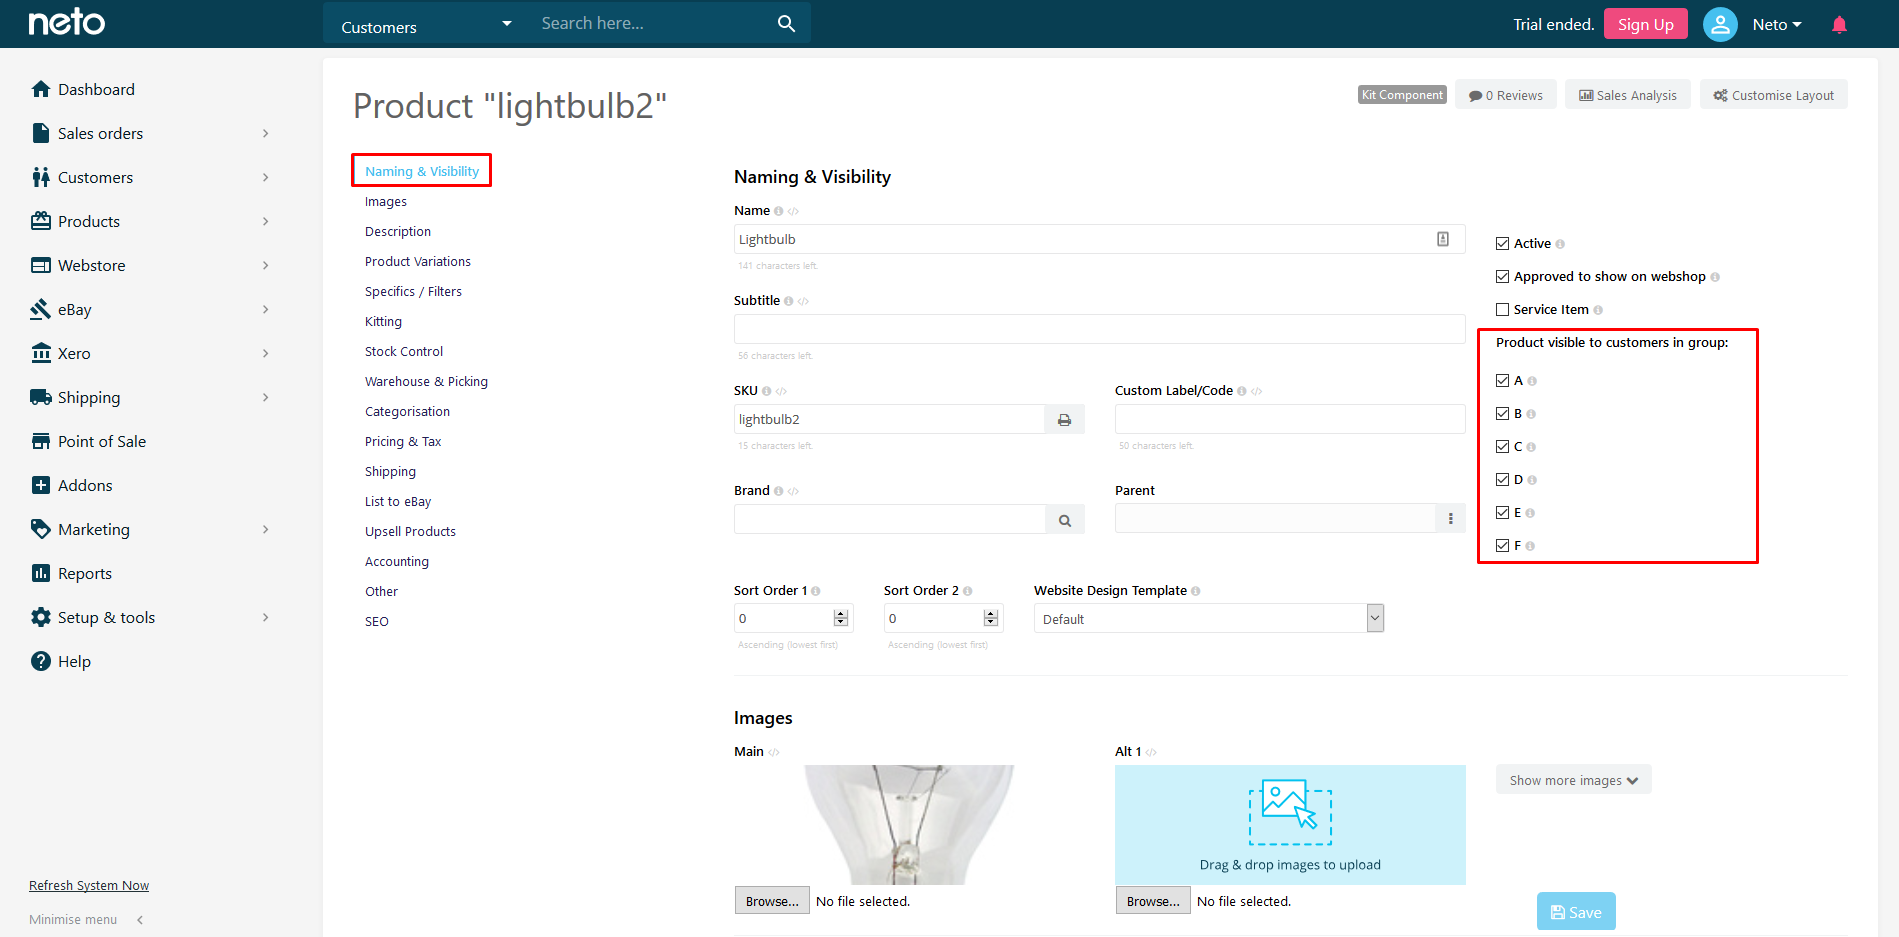
- The Product visible to customers in group option will appear in the Naming & Visibility section of the product page in the control panel. Only the selected customer user groups will see the product.
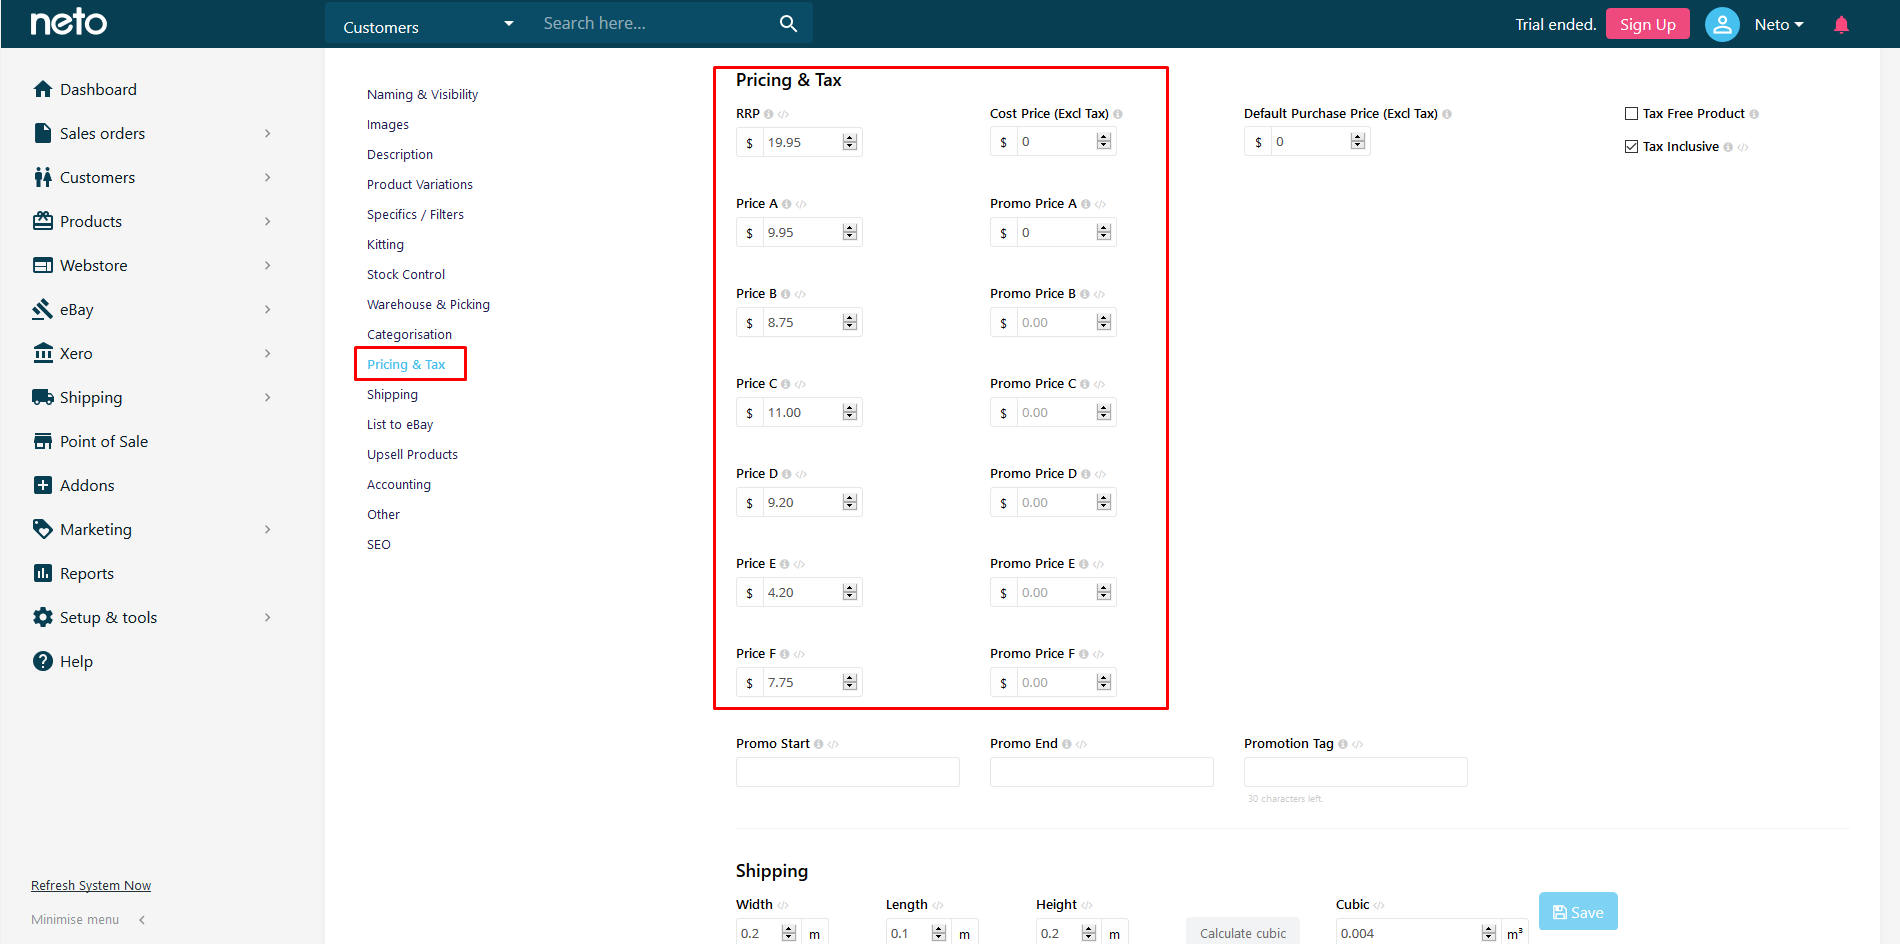
- In the Pricing & Tax section you can enter prices for different groups. Customers will see the price of the group they're associated with on your webstore. You can also use a specific price for your sales channels.
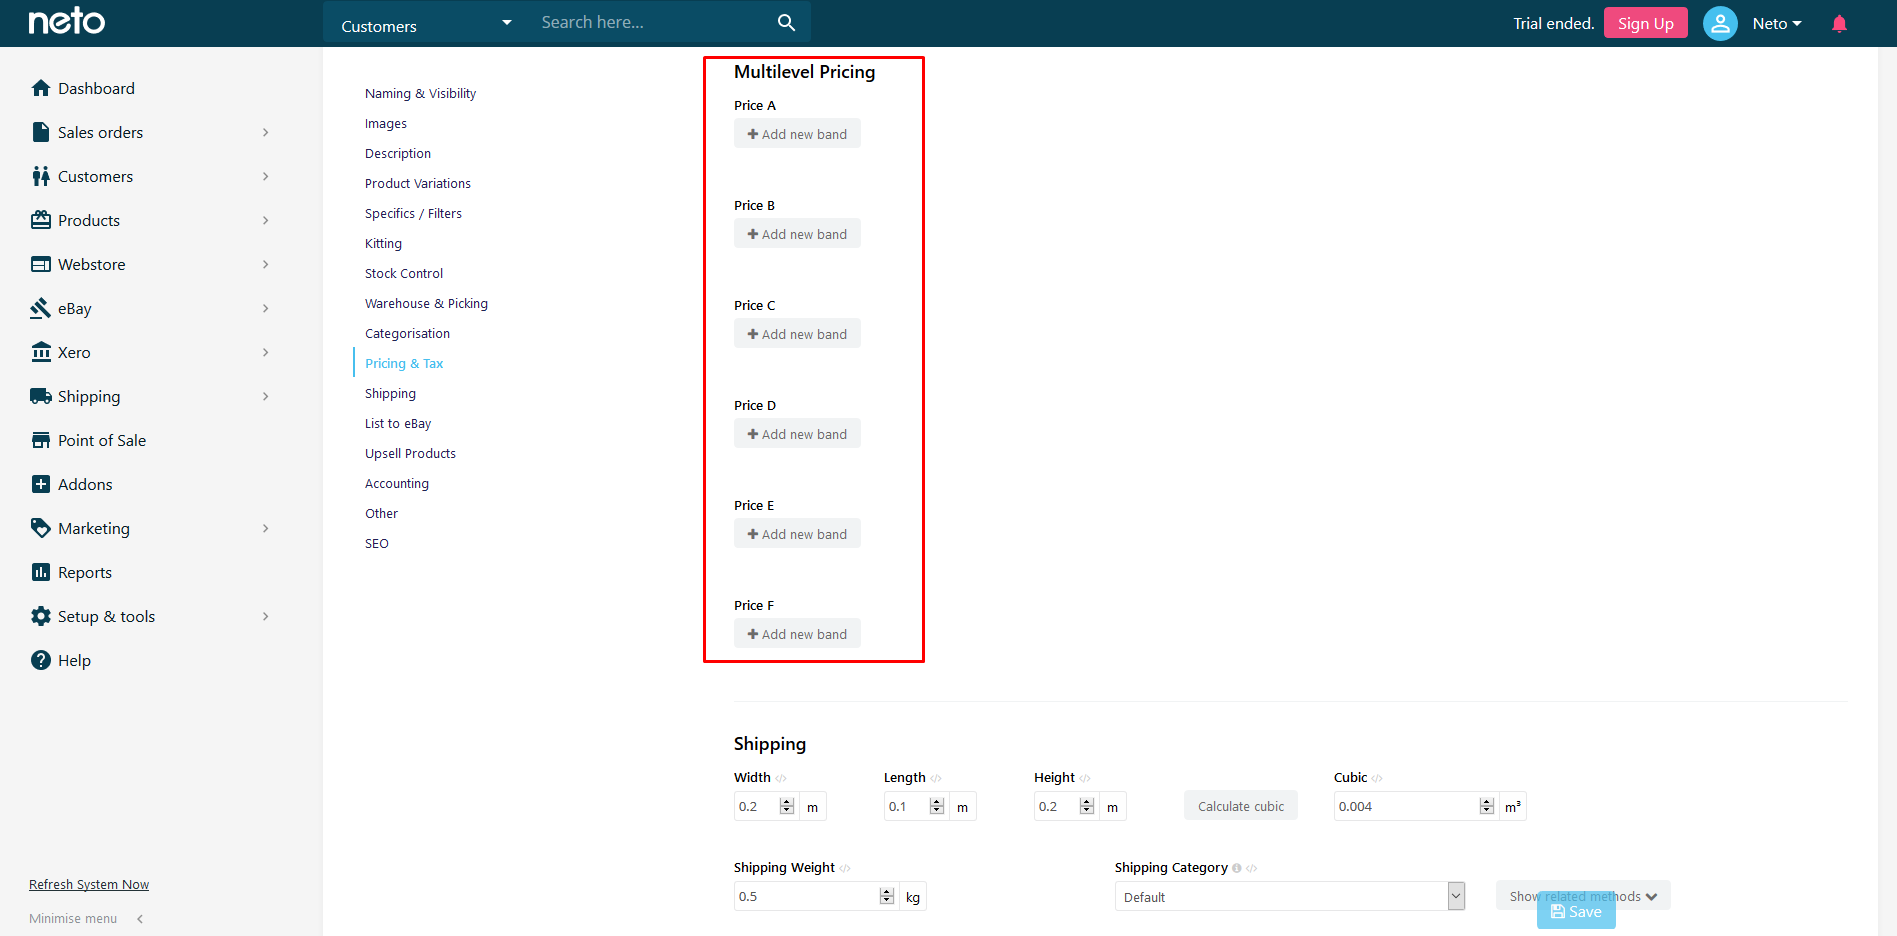
- Combined with the Multilevel Pricing Addon you can enter Multilevel Pricing for each group.
- On the Blog Post, Brands, Forms, Information Pages, Product Categories and other custom content types, you can select which Customer User Group can view the page:

You can now assign your customers into their groups.
Please Note: Customer groups can't be deleted, but can be renamed and re-purposed.
By default there are six different groups for customers - A, B, C, D, E and F. You can change the names of each group and add new groups (up to a maximum of 64 groups). Once customer group are created, the codes cannot be changed or repurposed for any existing groups, only names can be repurposed, so if you feel that you may want to repurpose customer group names at some point, it's best to name the codes with generic lettering or numbering.
Add or Edit Customer Groups
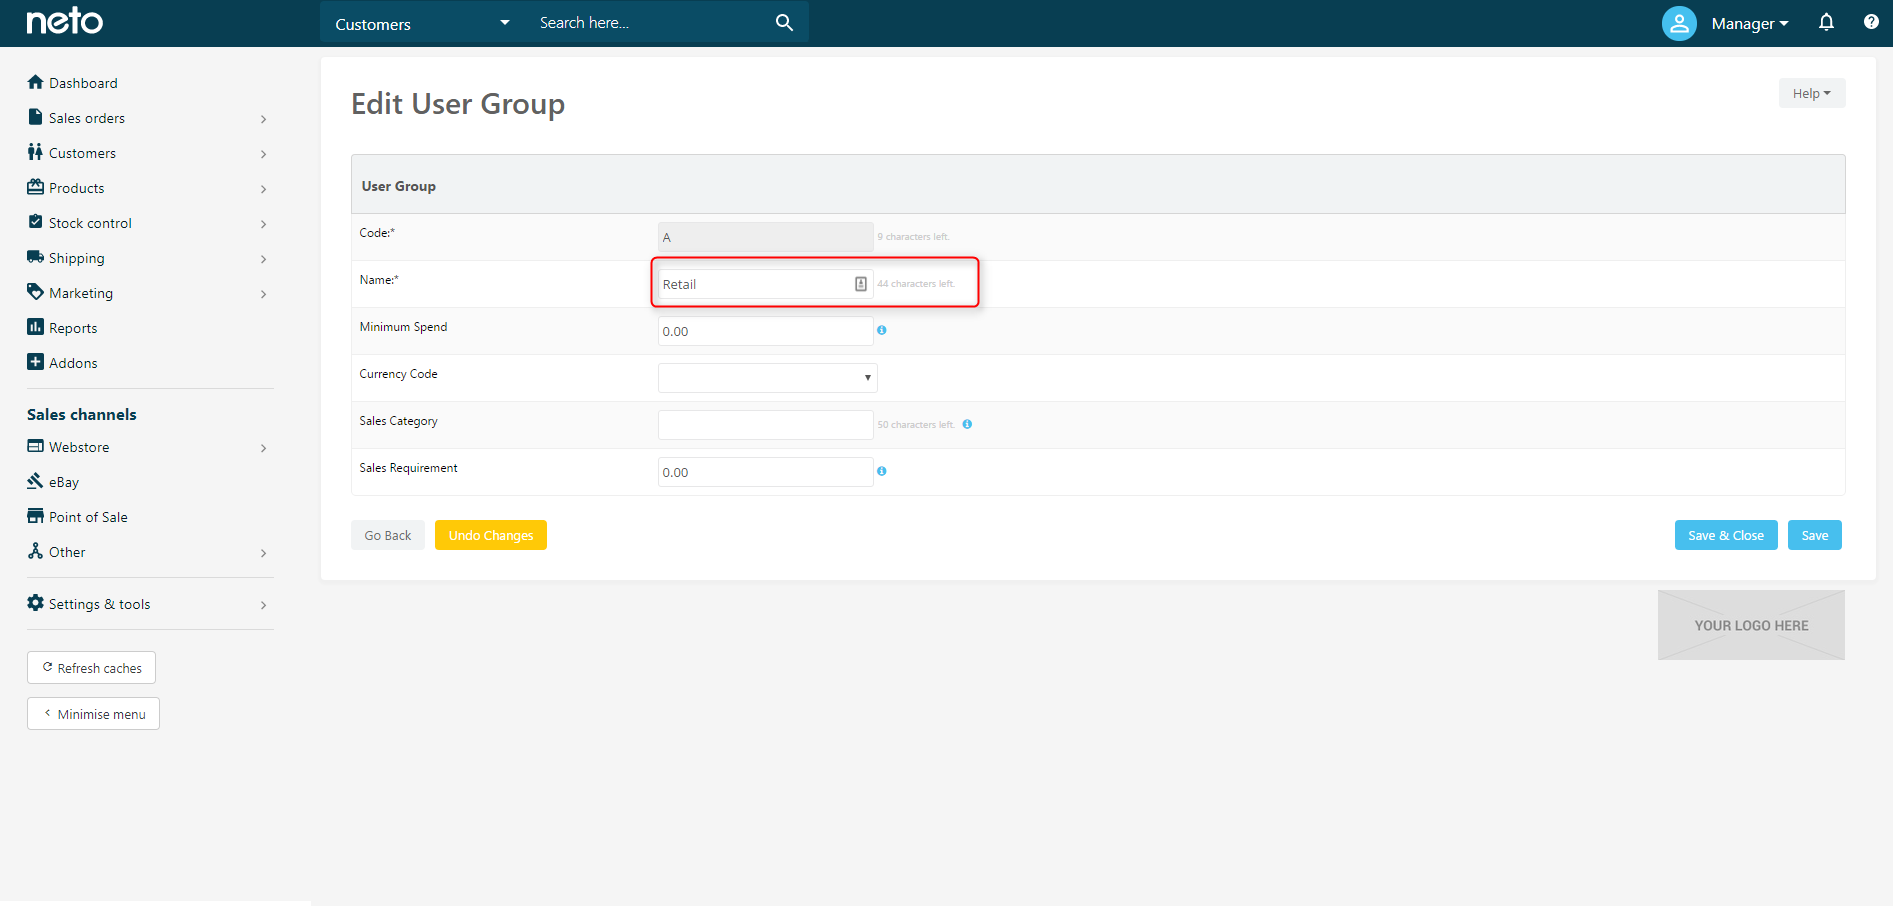
To create a new group, or edit the name of an existing customer group:
- In your Neto control panel navigate to Settings & Tools > All settings & tools
- Select Customers from the side menu and click on Customer Groups.
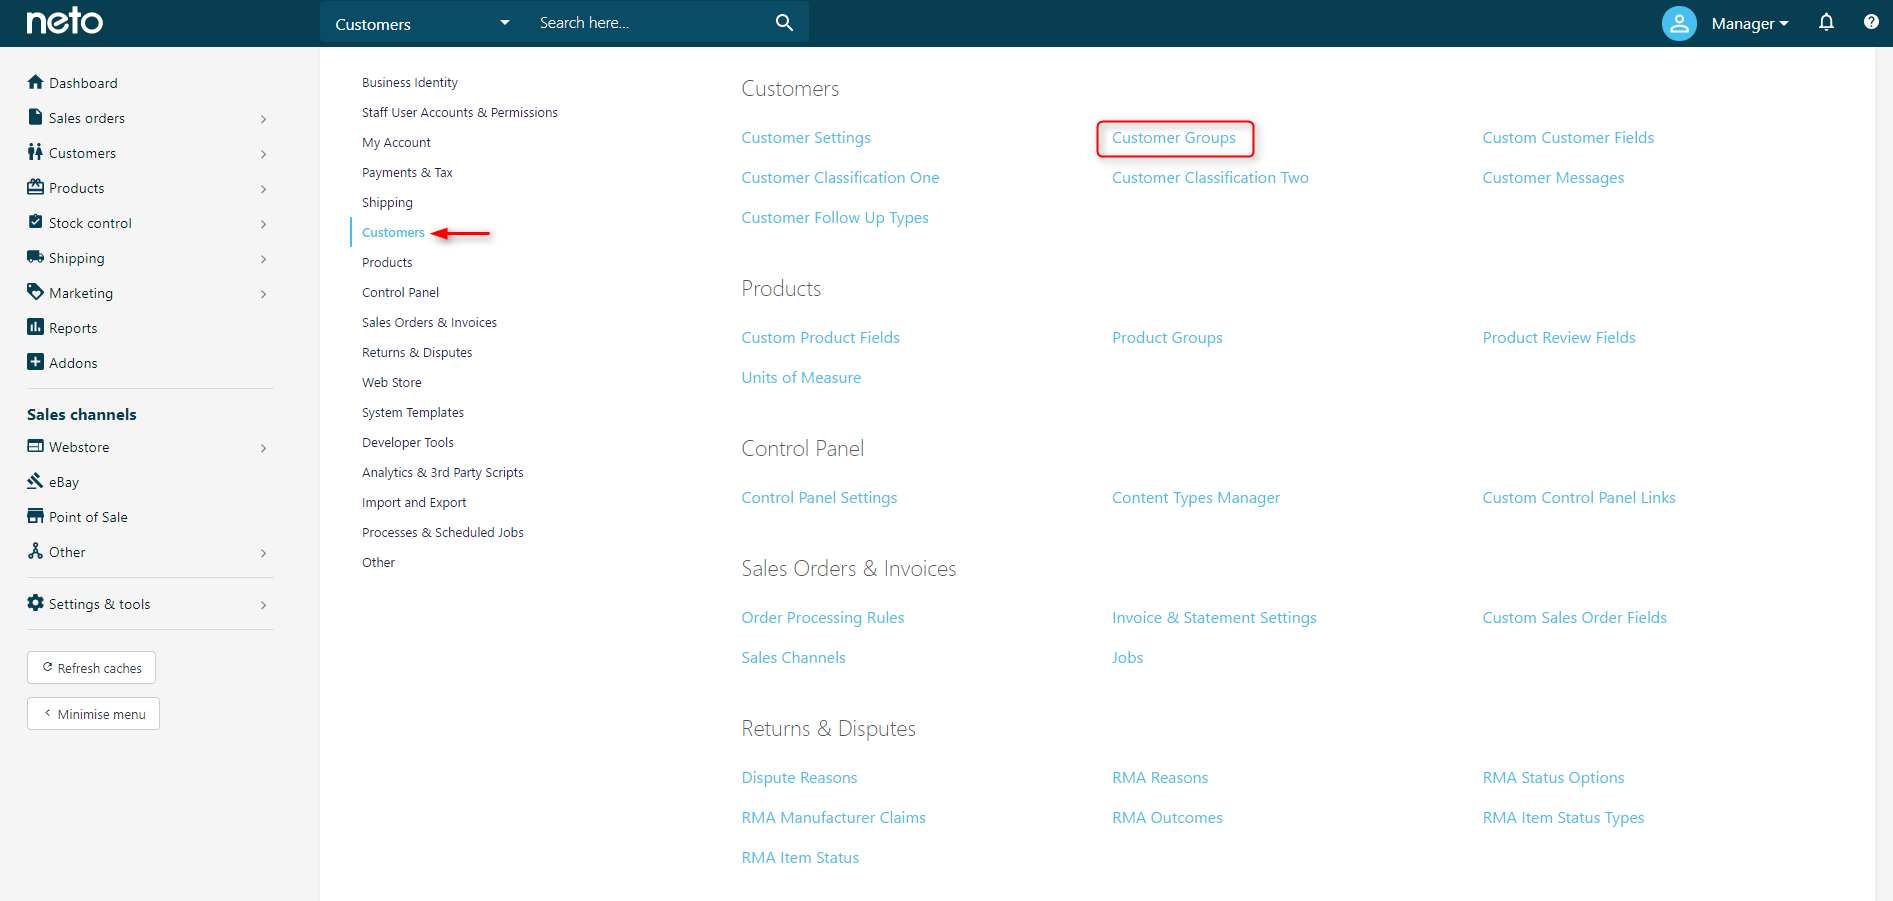
- Select a Customer Group by clicking the ID, Code or Name. You can also create a new group by selecting Add New.
- Change the Name configure the settings as desired, then Save & Close.
Assign Customers to a Group
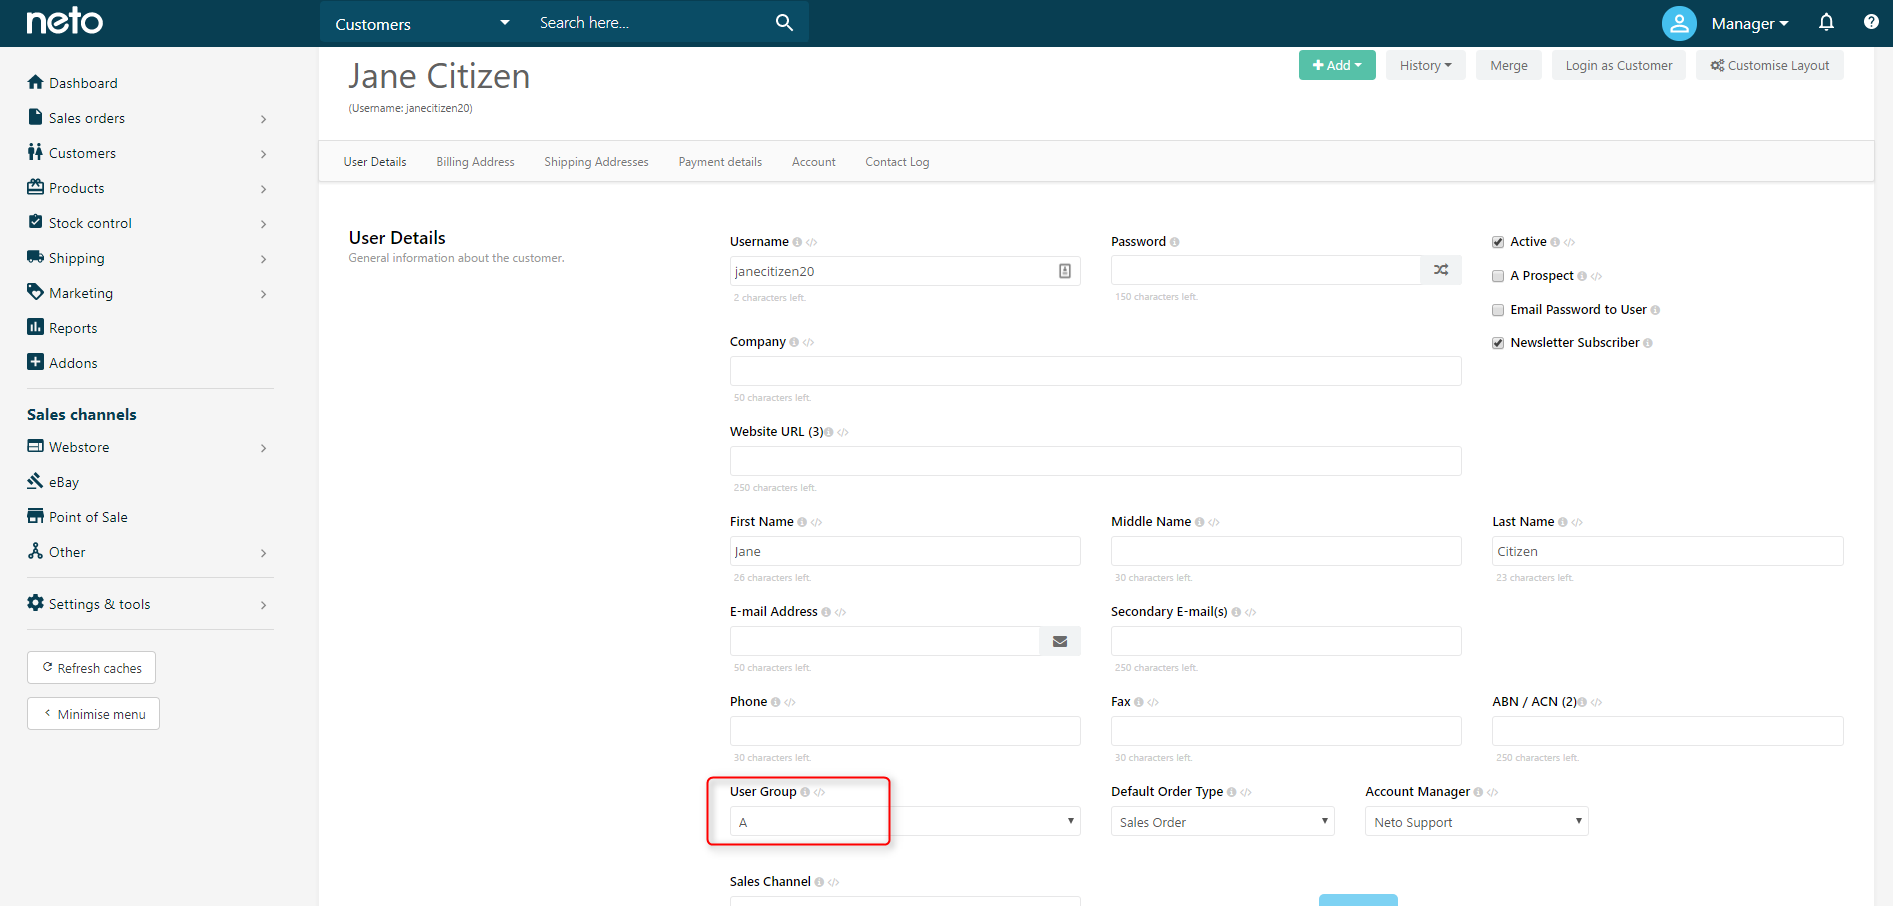
By default, all customers are assigned to group A. To change a customer's group:
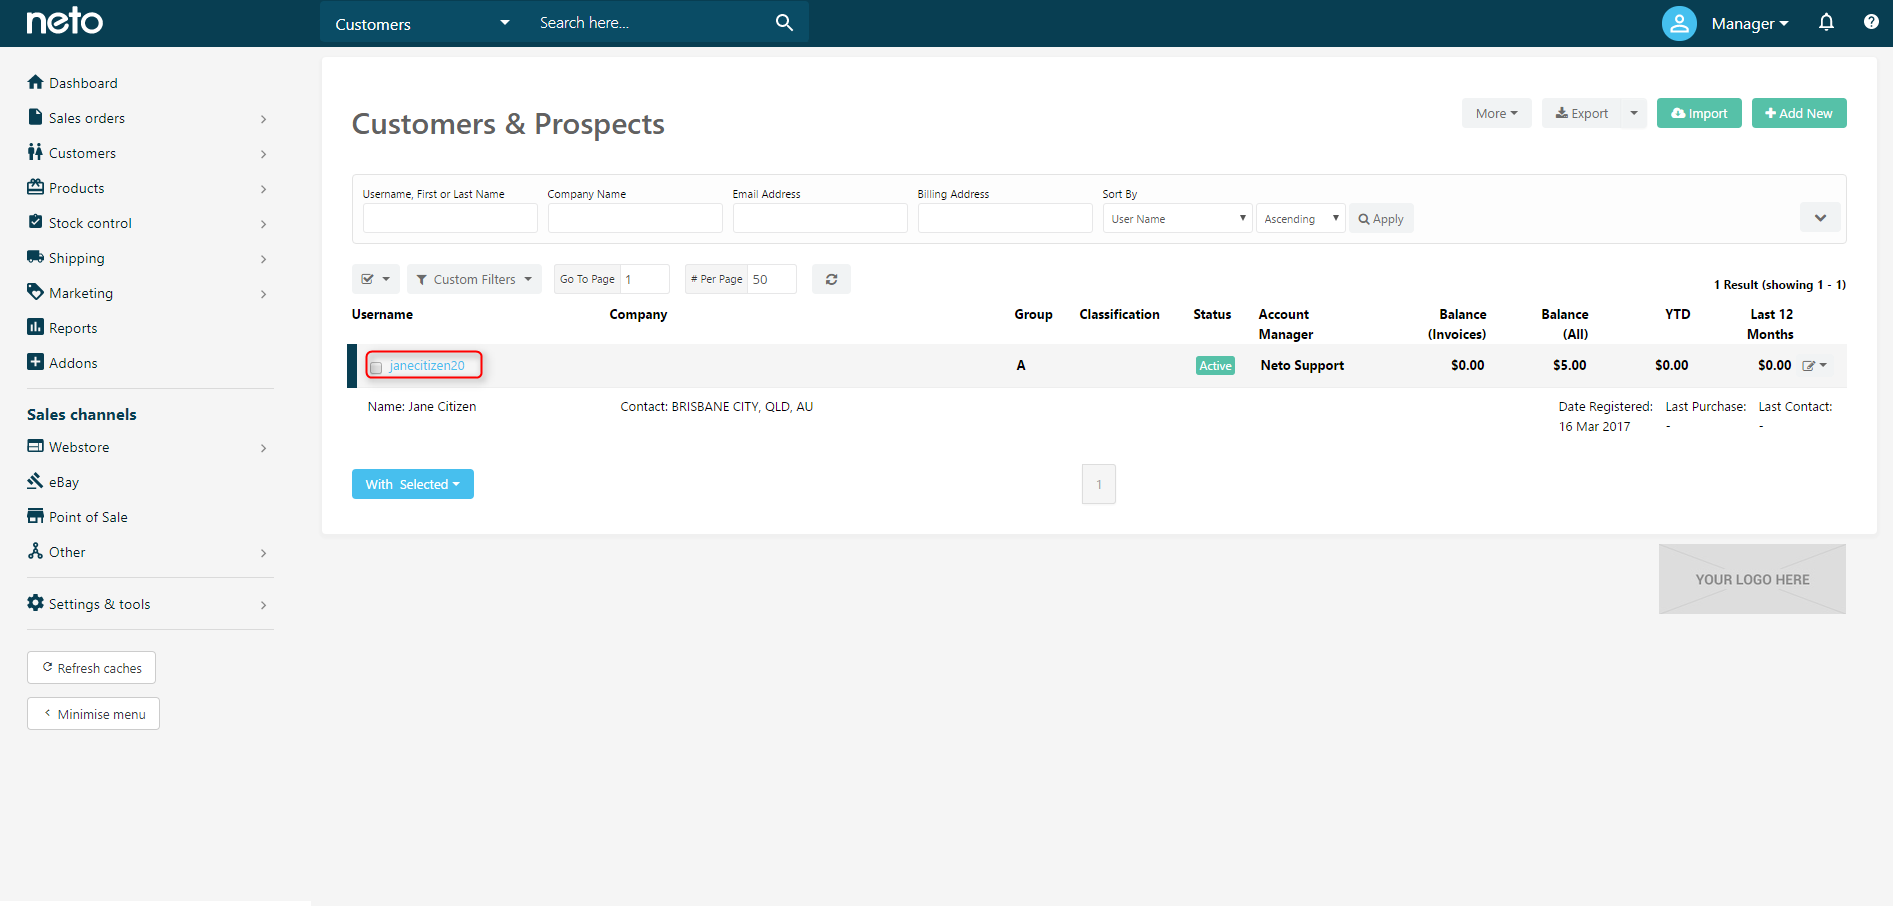
- In your Neto control panel go to Customers > View Customers & Prospects.
- Click on the Username of a customer.
- In the User Details section, select the new group under User Group and Save.
Customer groups can also be assigned in bulk through the export & import wizard.
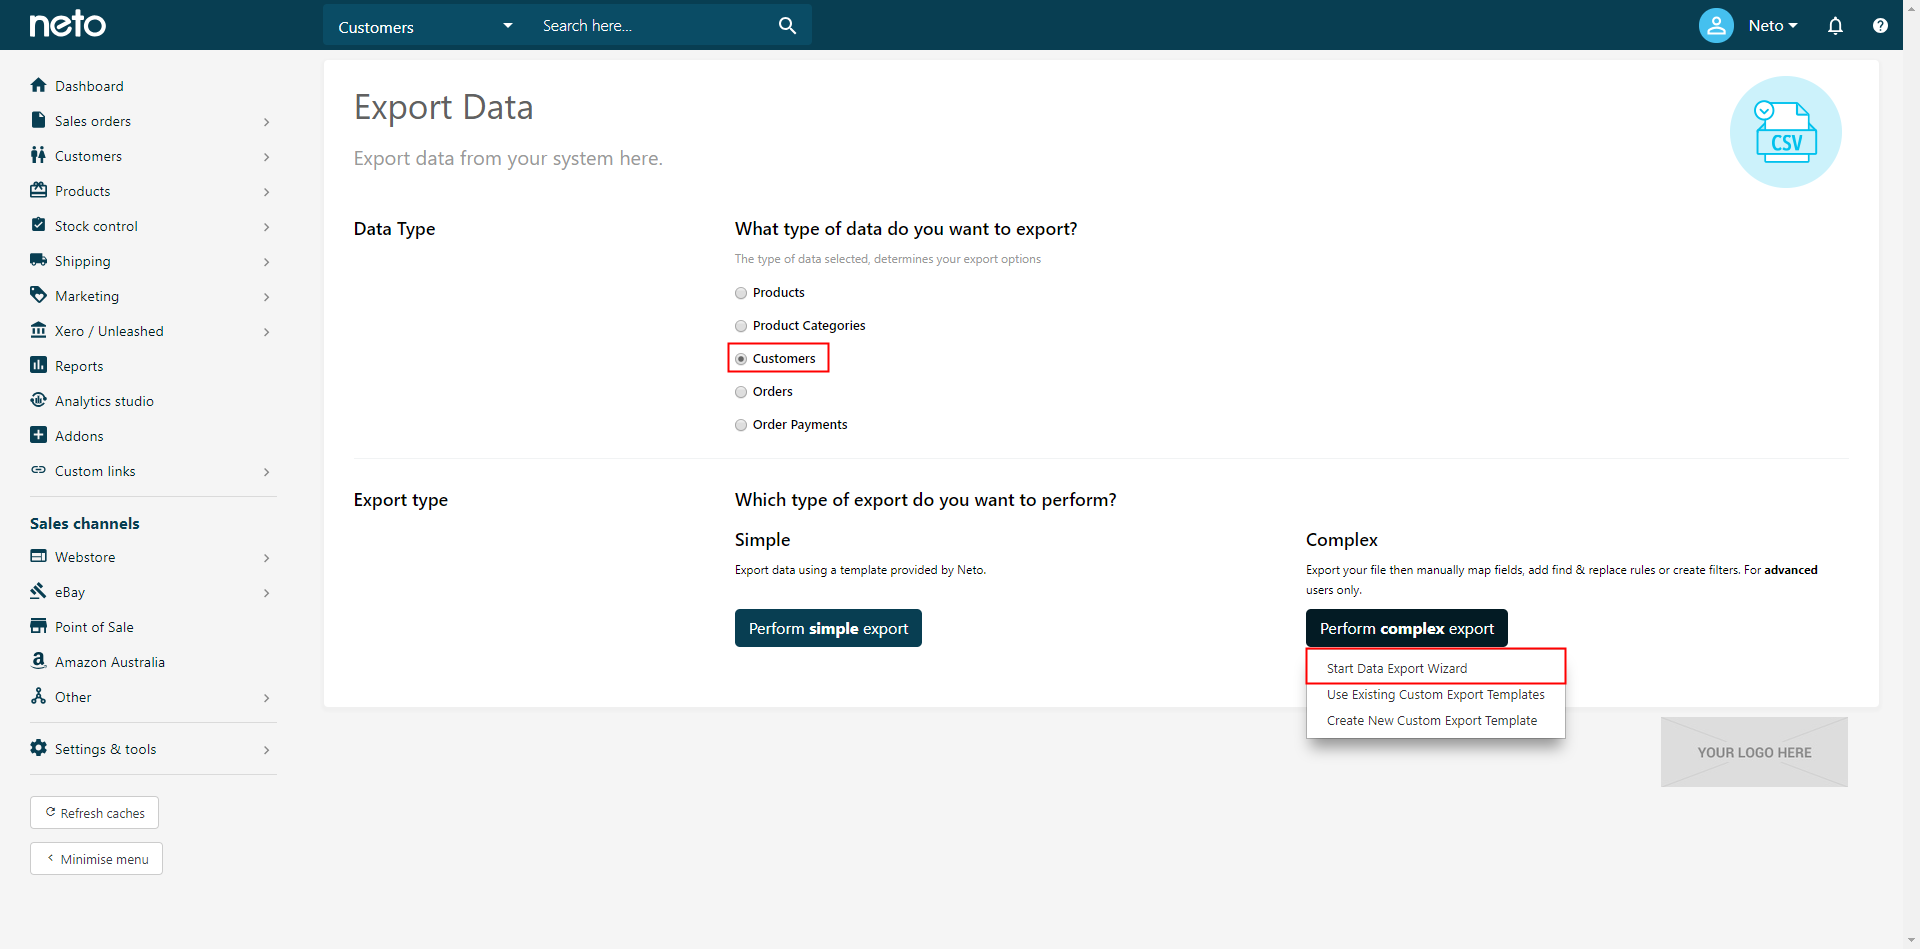
- In your Neto control panel navigate to Settings & Tools > Export Data.
- In the Data Type section choose Customers. Then click the Perfrom Complex Export button and choose Start Data Export Wizard.
- Enter a Name for your file, and click Continue to Next Step.
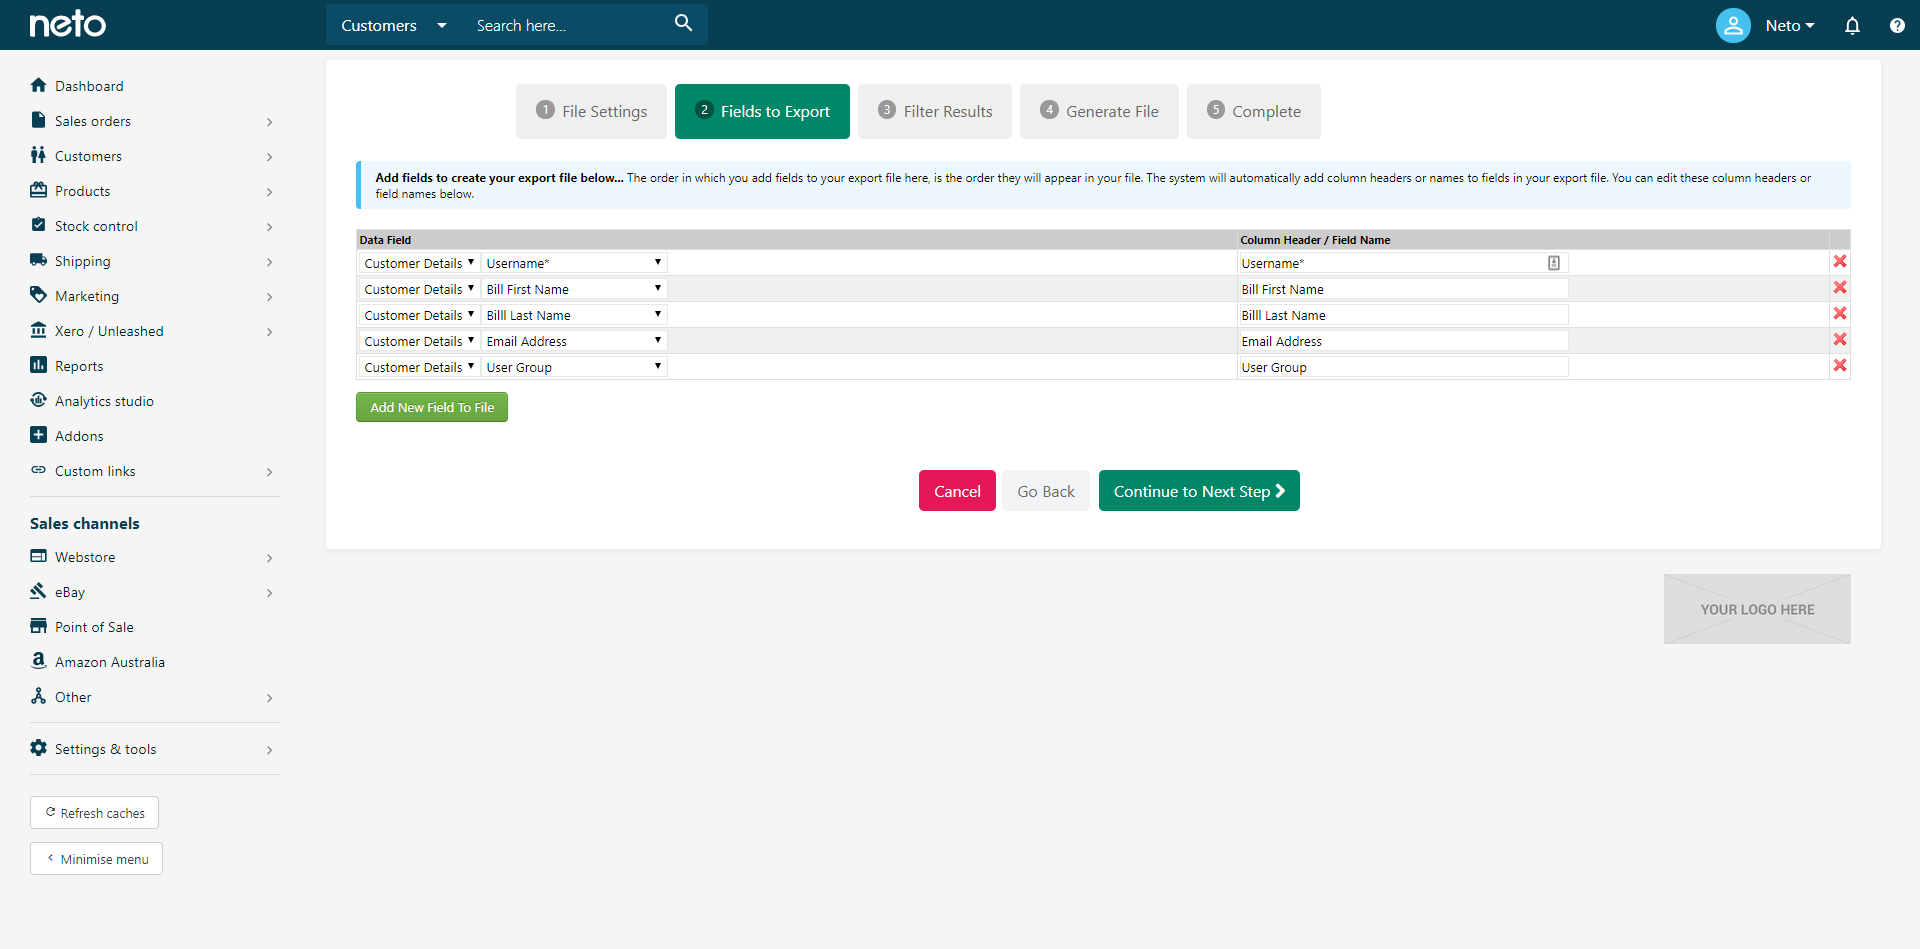
- Click the Continue to Next Step button.
Click the Add New Field to File button five times, and add the following fields.
Field Type | Field Name |
|---|
Customer Details | Username* |
Customer Details | Bill First Name |
Customer Details | Bill last Name |
Customer Details | Email Address |
Customer Details | User Group |
- On the filter results page, click the Continue to Next Step button.
- Change the Send Export File To dropdown box to Local URL, and click Export Now.
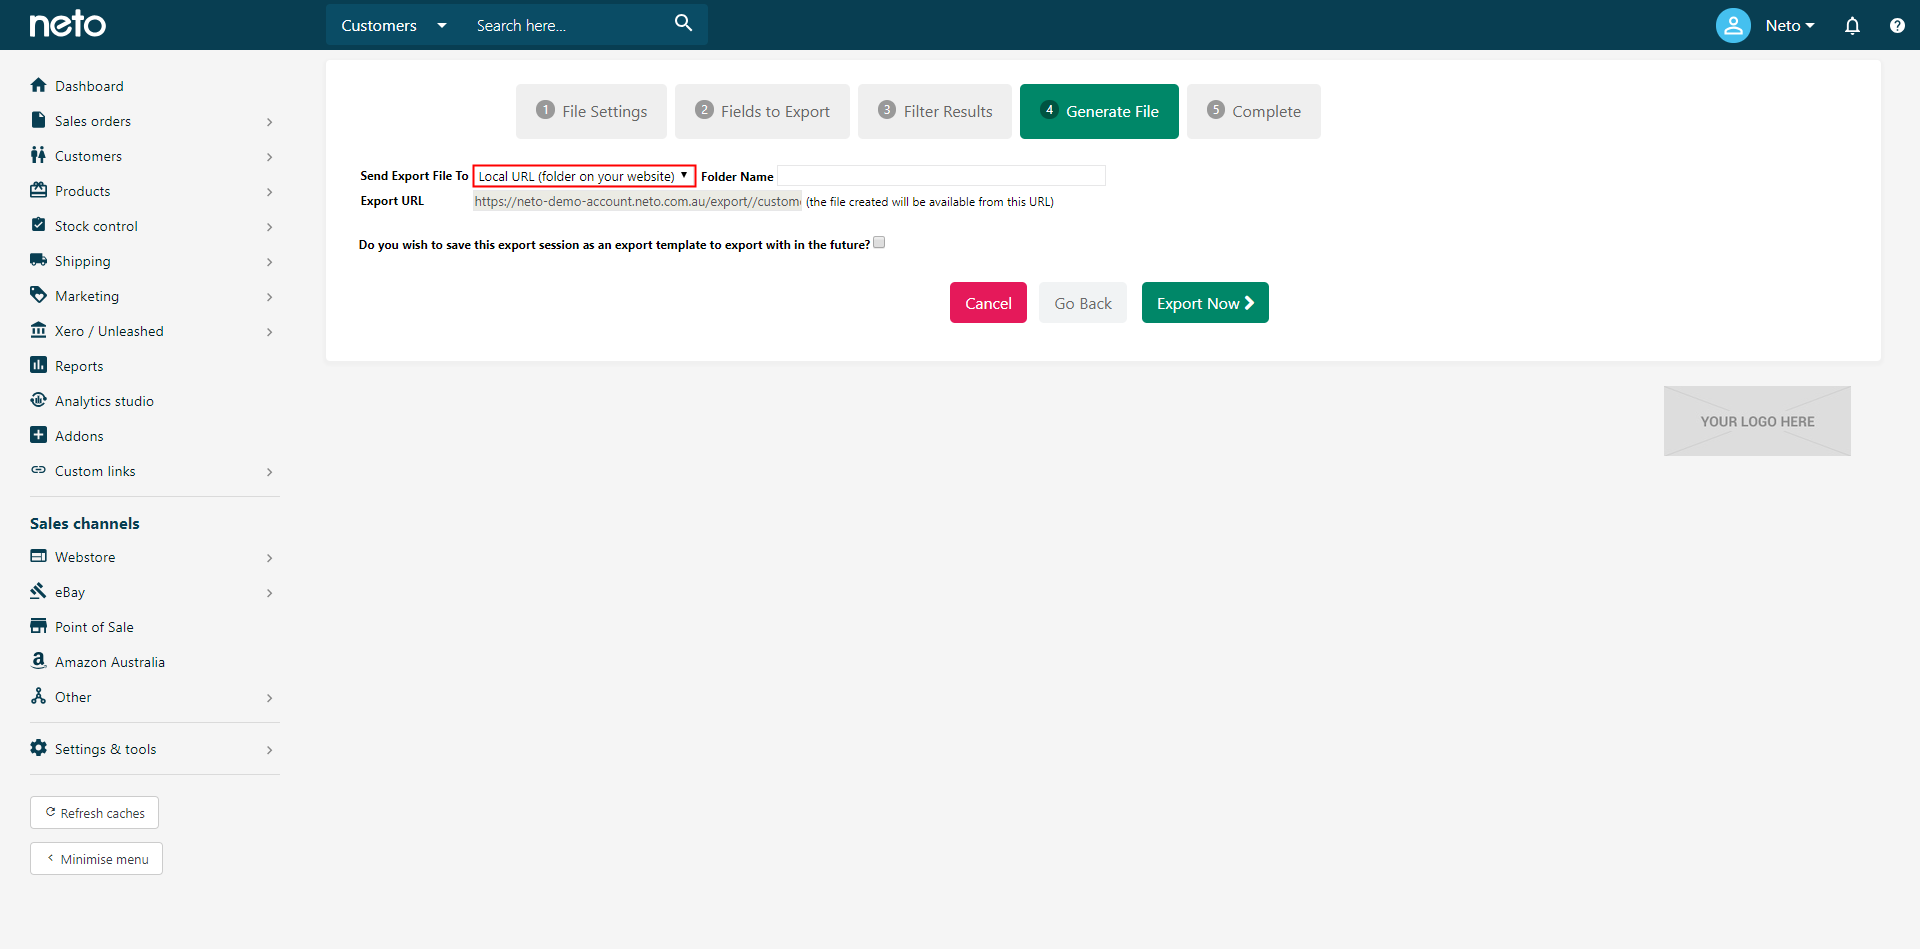
The file will now be generated automatically, and available to download from the URL on the confirmation page.
To monitor the export status, click on the Export Process# link to see when it is done.
- Once the file is generated, download and open it. In the user group field, enter the group code (A, B, C, D etc) for each customer, and save your file once complete.
- In your Neto control panel navigate to Settings & Tools > Import Data.
- In the Data Type section choose Customers. Then click the Perform Complex Import button and choose Start Data Import Wizard.
- Click the Browse button and select your file. Click the Continue to Next Step button.
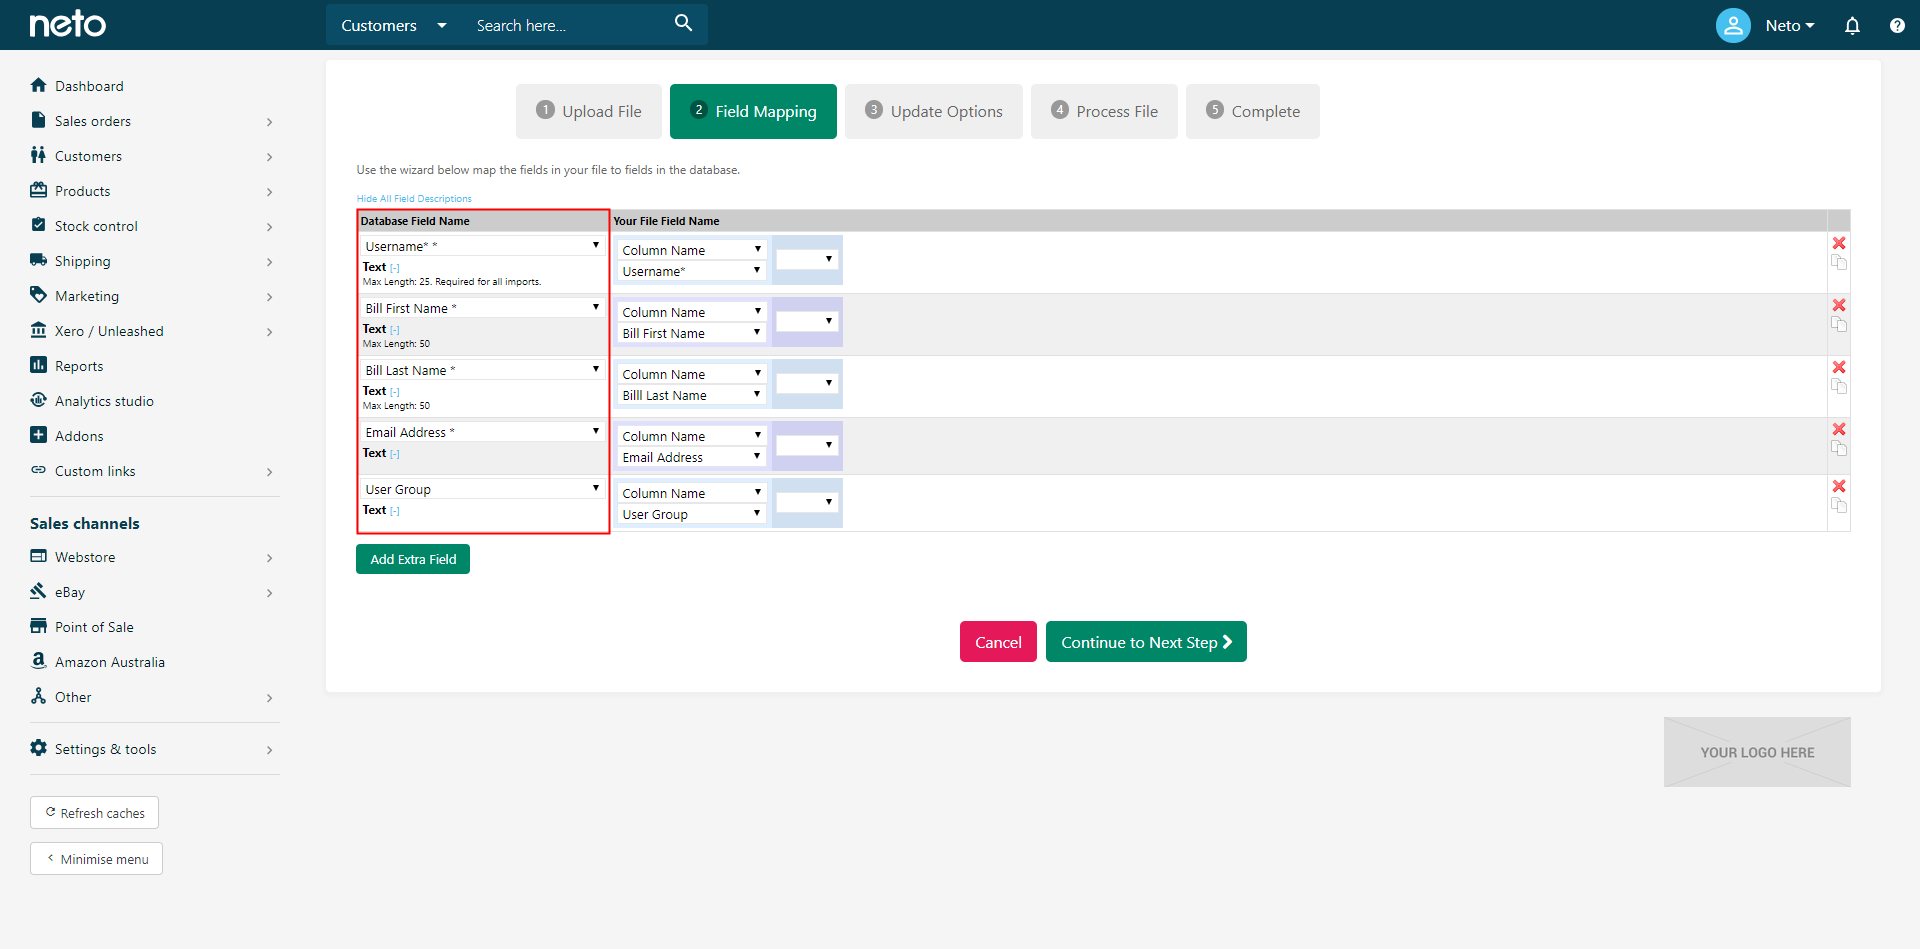
- Match the database fields to the fields in your file. Most, if not all should match up automatically. Then click the Continue to Next Step button.
- The update option can be left as they are, so click the Continue to Next Step button.
- Click the Process File Now button, and your file will be processed automatically to update your customers.