https://www.youtube.com/embed/dVU3JlYQZWM
The shipping wizard walks you through all the steps required to configure your carrier rates. To set up your shipping options using the wizard:
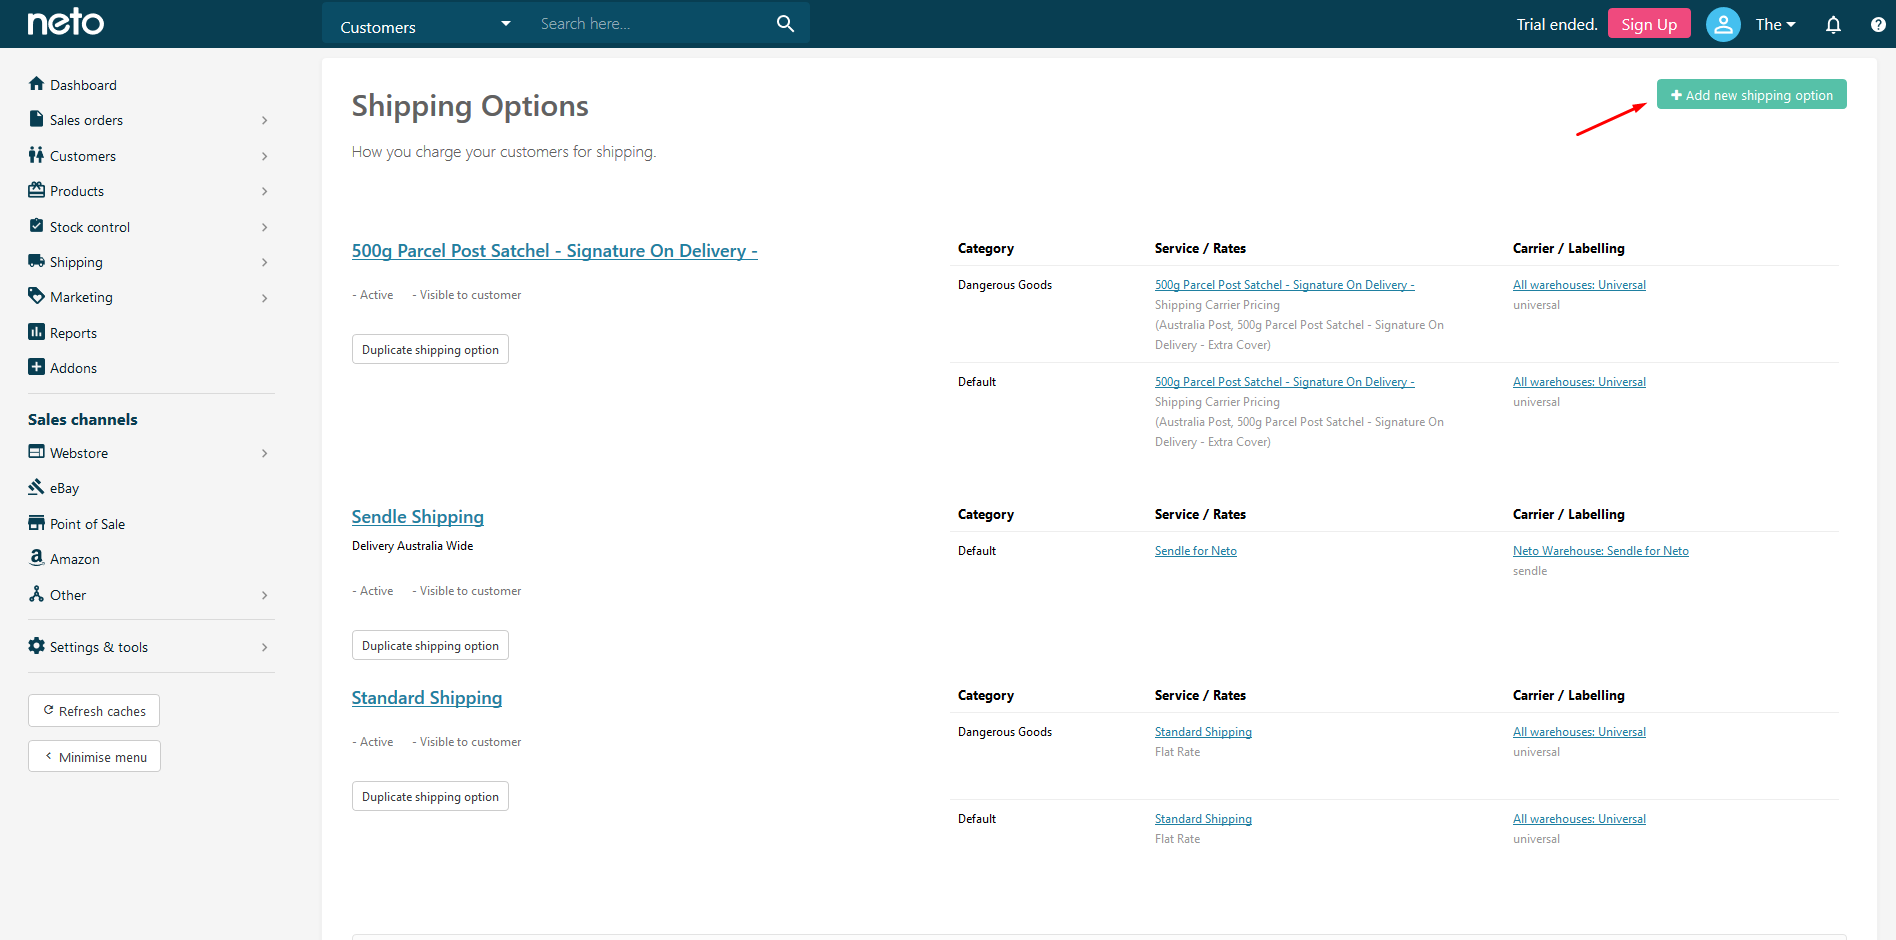
- In your Neto control panel navigate to Shipping > Shipping Options.
- Click on the green Add new shipping option button from the top right hand side.
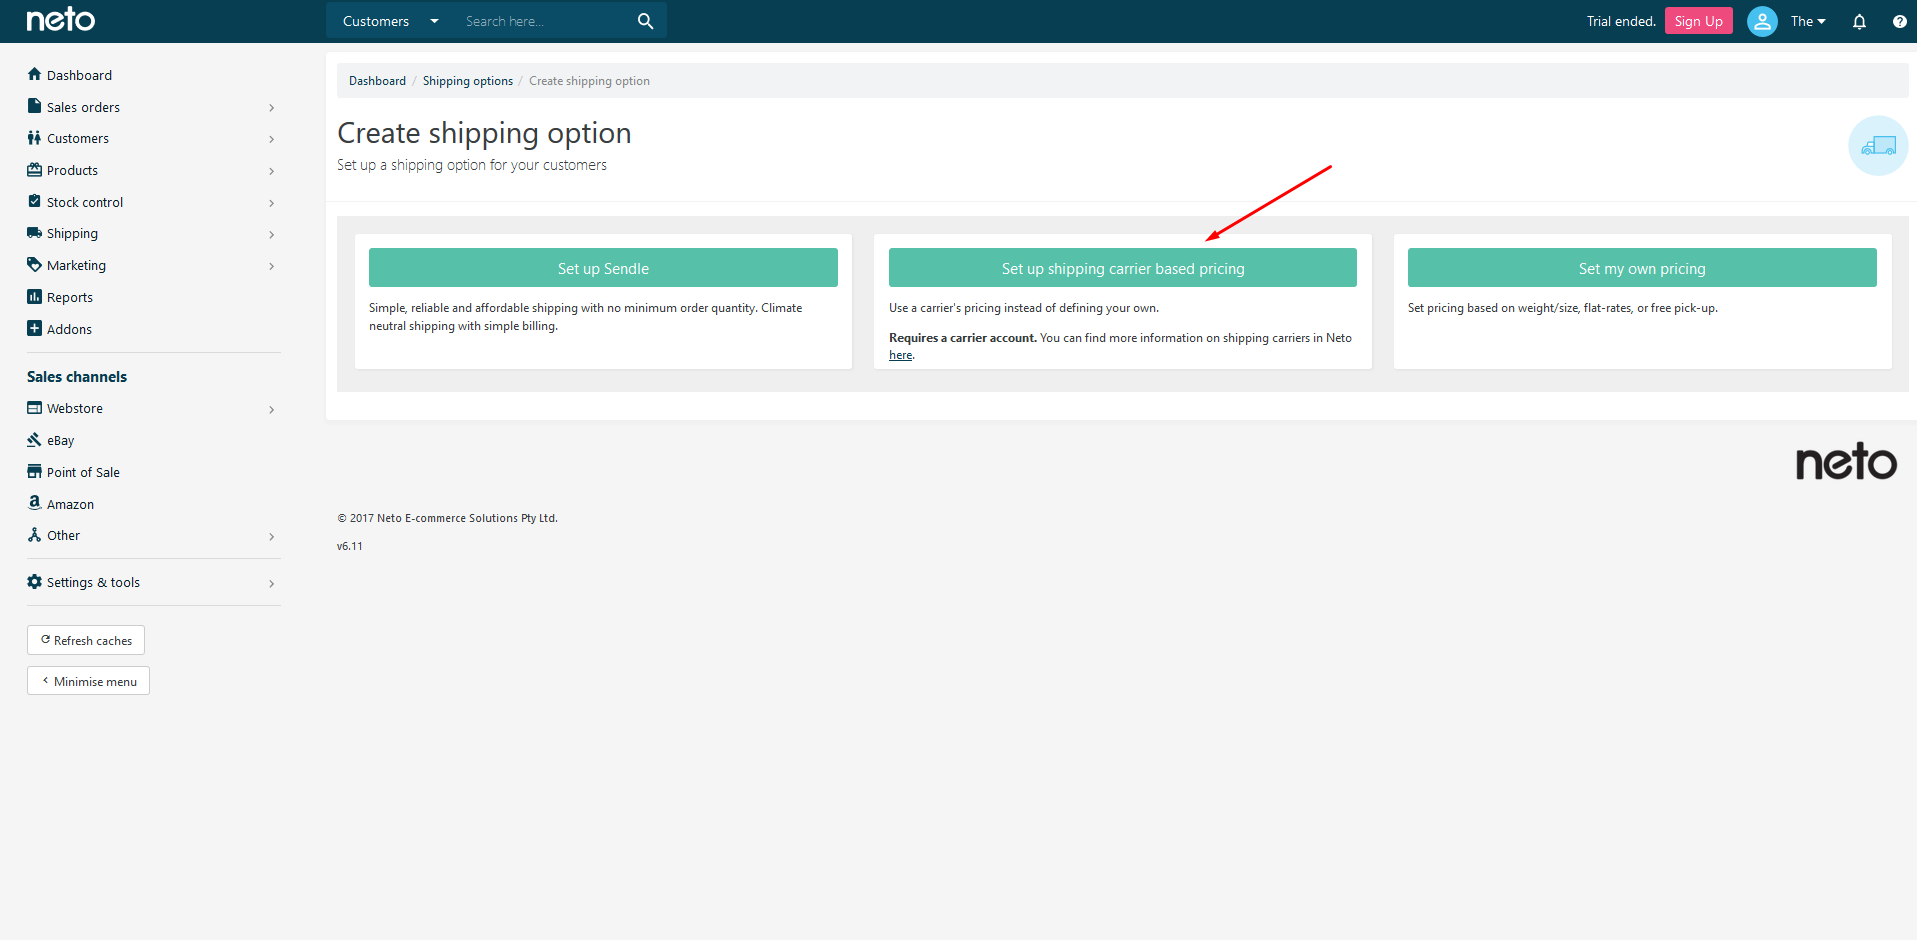
- Click Set up shipping carrier based pricing.
- Make sure you have your API credentials handy and click the Continue button.
- You'll now be in Step 2. Enter the required account details. The details required change slightly with every carrier, but most include and API key or, username, and password. Once complete, click the Next Step button.
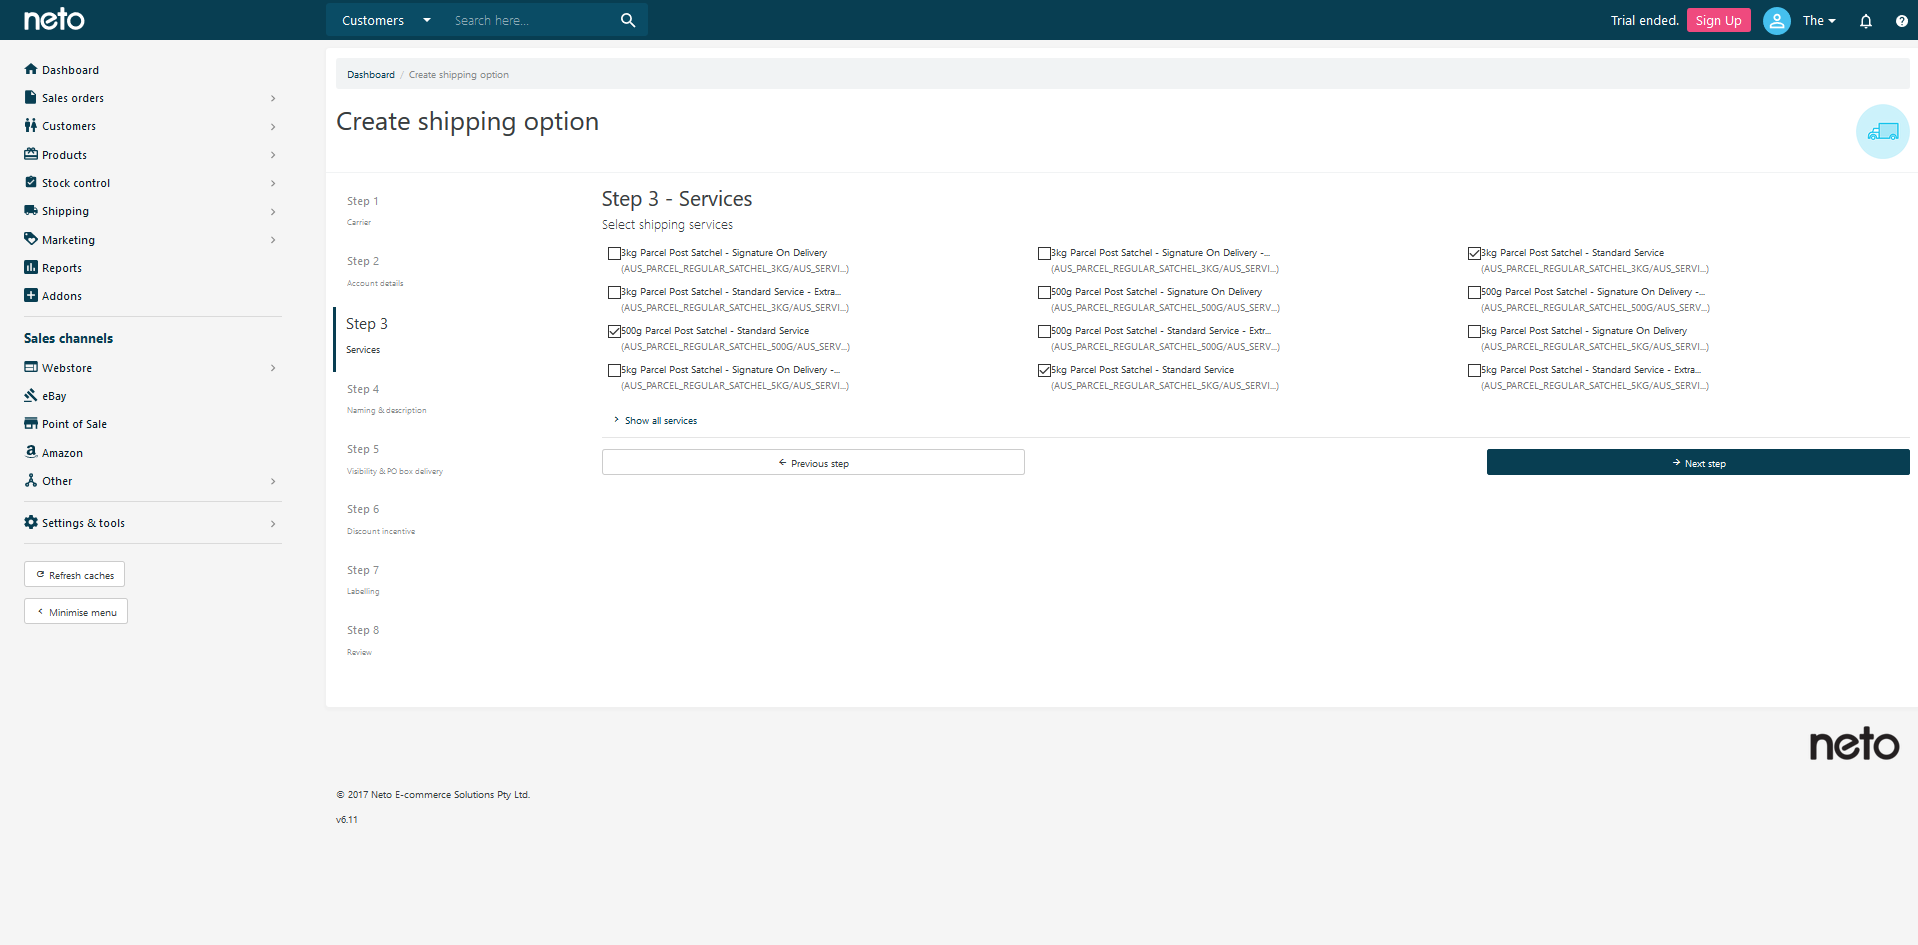
- You'll now be in Step 3. Select the services you wish to provide to your customers. Once select, click Next Step.
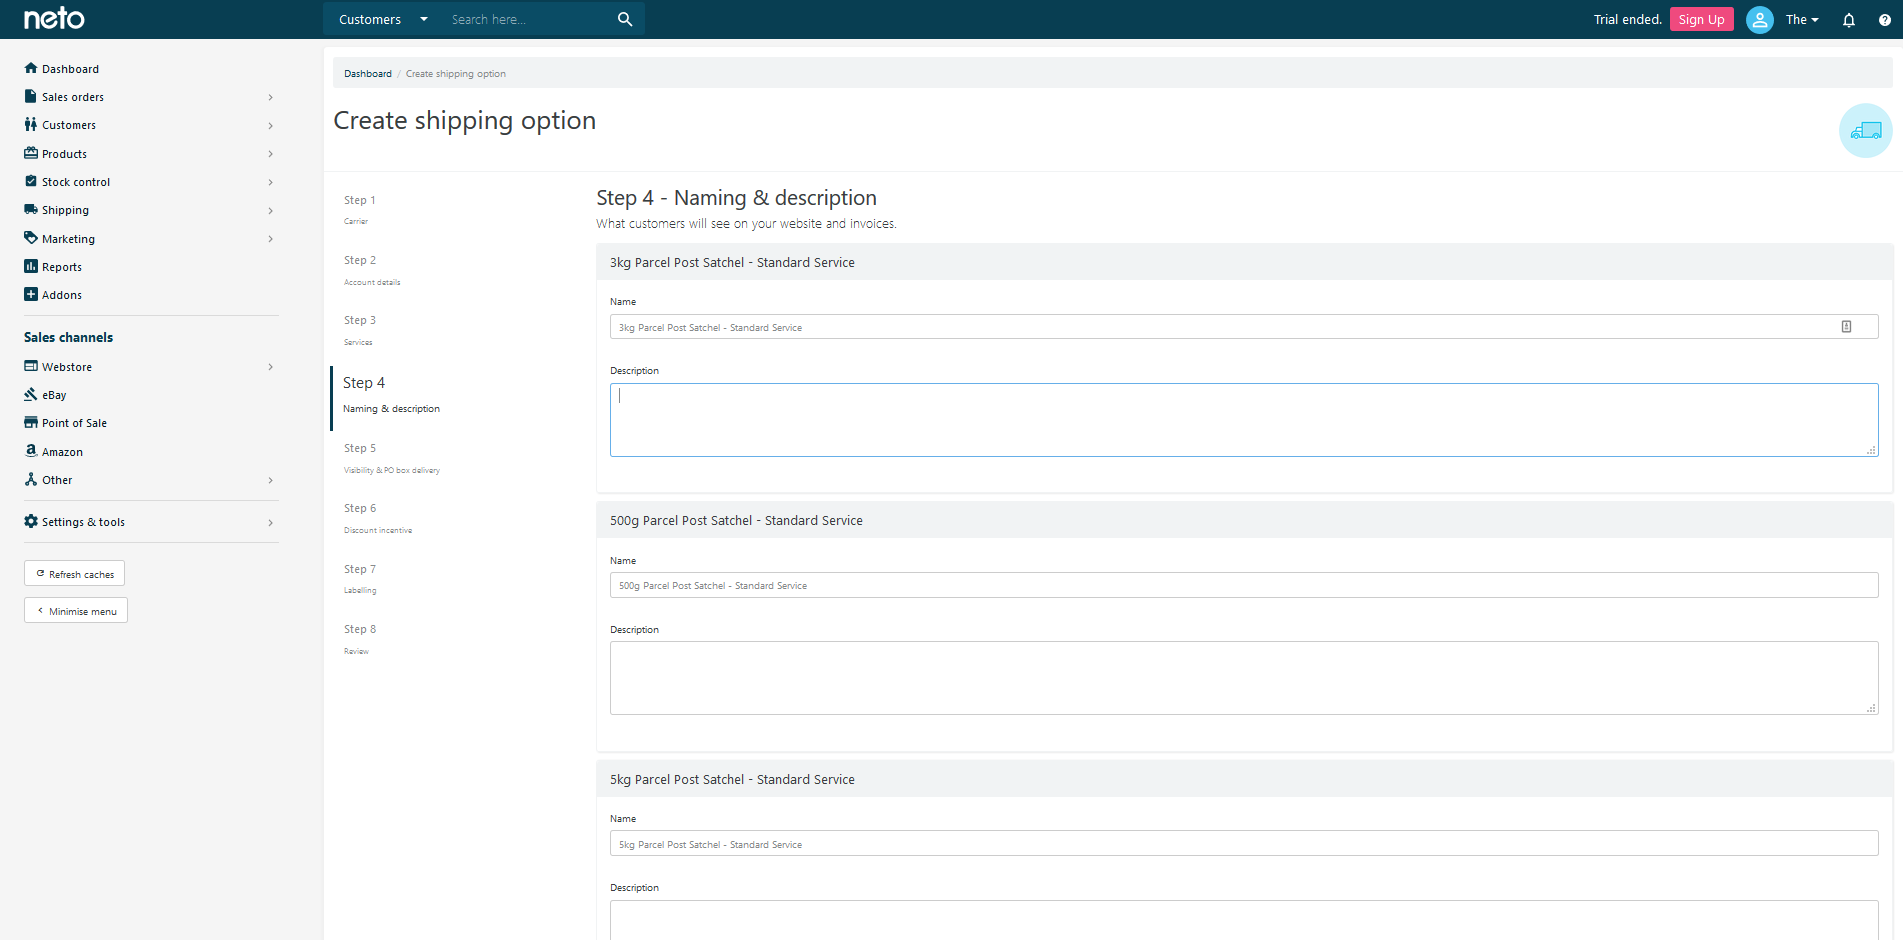
- You'll now be in Step 4. Here you can optionally rename the services and add a description. Once complete, click Next Step.
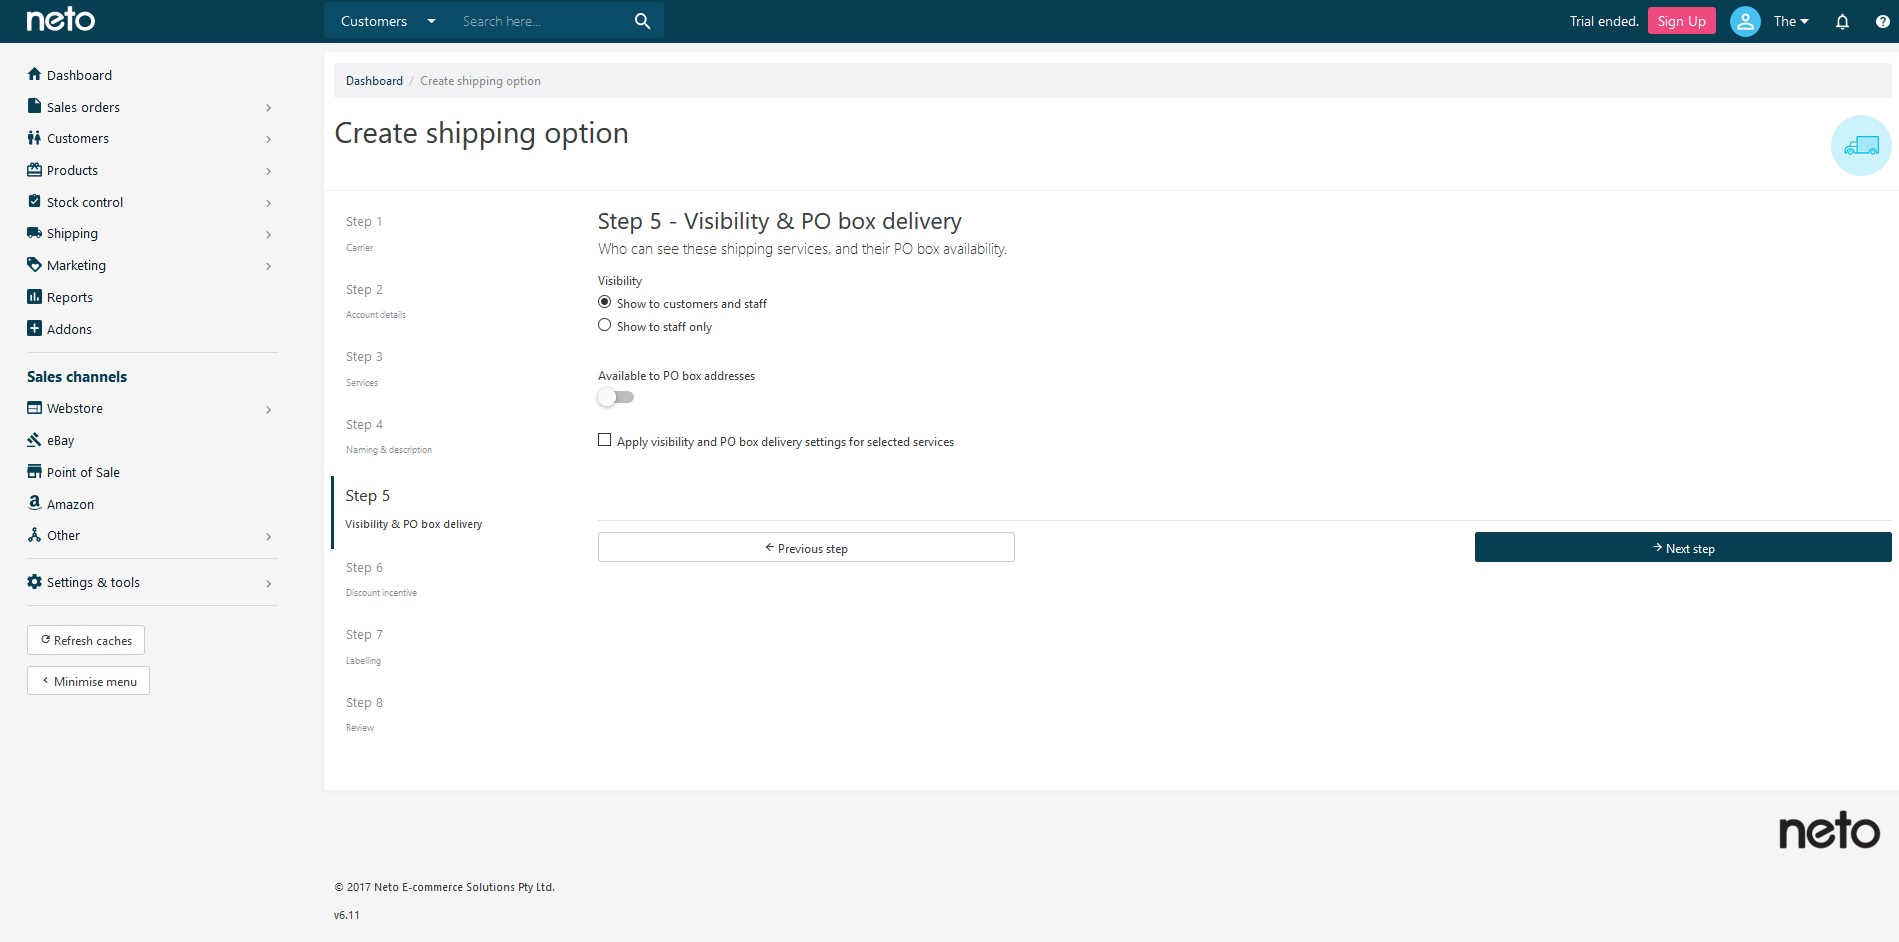
- You'll now be in Step 5. Here you can toggle the option to show visibility to customers and staff and set PO BOX availability. Once complete, click Next Step.
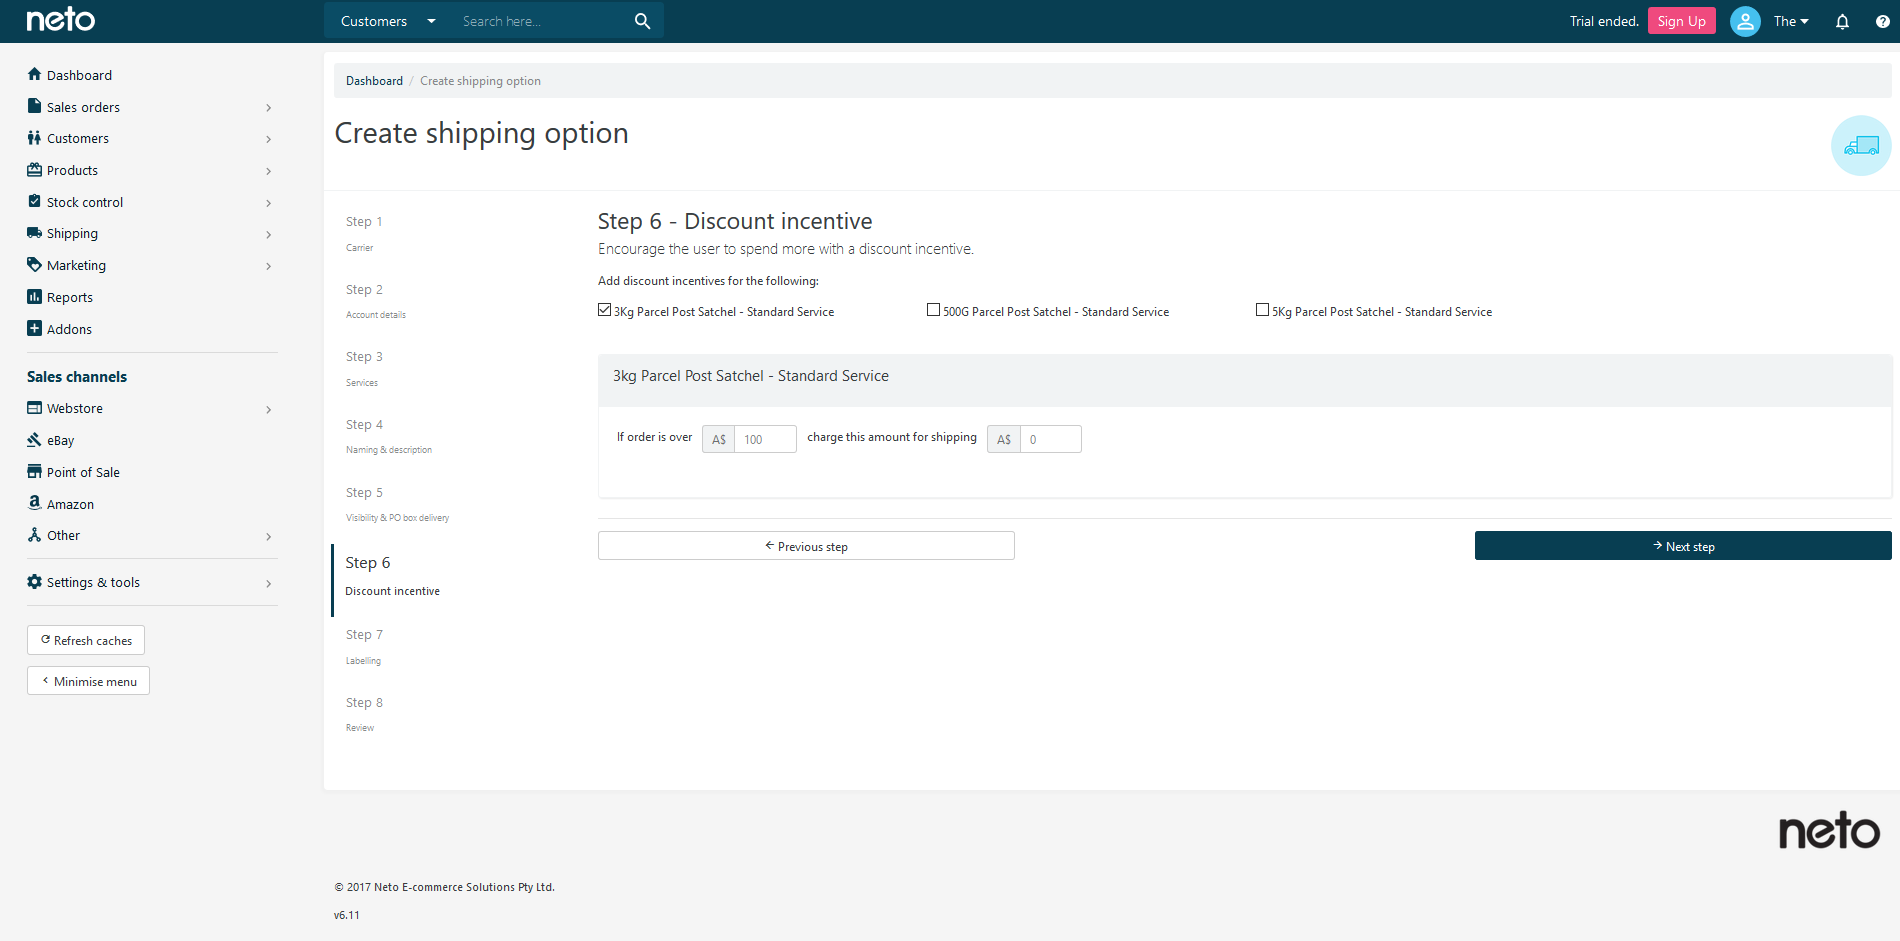
- You'll now be in Step 6. Here you can optionally provide a discount based on the customers overall spend amount, eg. If a customer spends over $100, they get free shipping. Once complete, click Next Step.
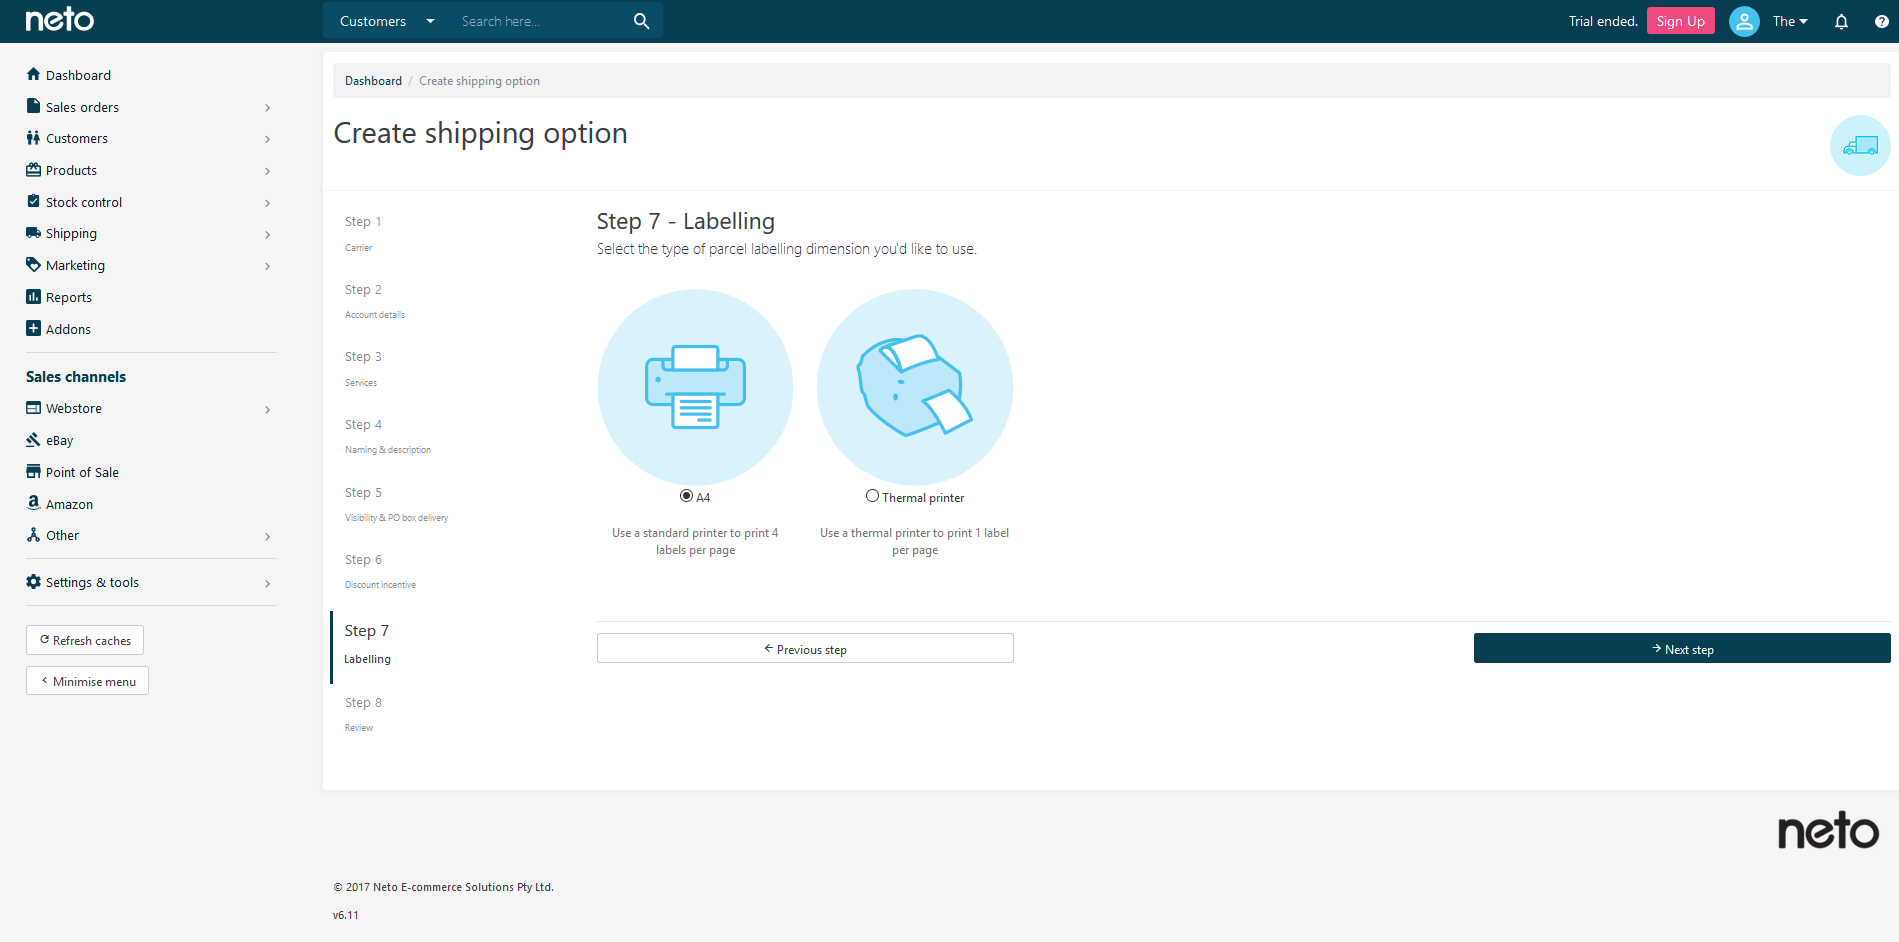
- You'll now be in Step 7. Choose whether you'll be using a standard printer to print consignment labels or a thermal printer. Once complete, click Next Step.
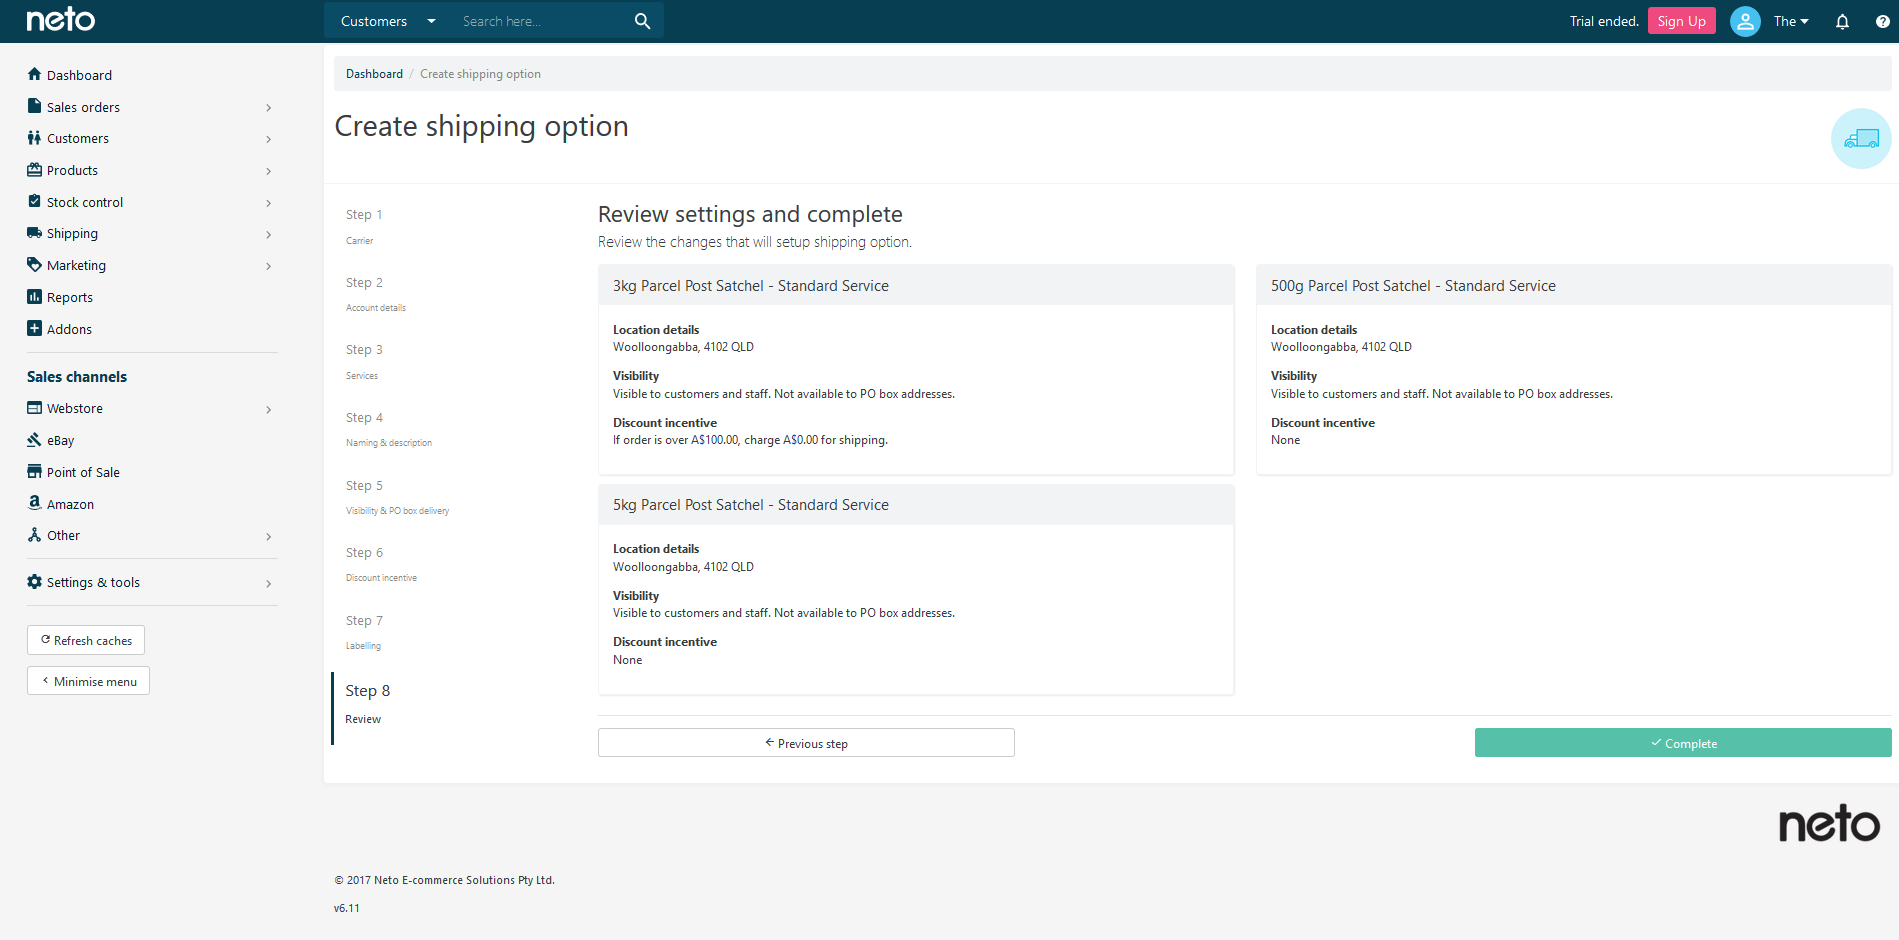
- You'll now be in Step 8. Review your final shipping setup. If you need to make any changes, click on the Previous Step button, alternatively click Complete to activate your new shipping option.
Your shipping option is now set up. We recommend you test it on your webstore with different postcodes to ensure it works as expected.