There are two steps required to complete this process:
Add Condition to Products
Each item you upload to Google will need its condition specified. If you don't already have this data entered, the best way to go about it is to add a custom field.
- Follow the steps in this article to create a custom field. Give it a relevant name, like Condition so it's easy to locate later.
- You now need to populate this field on all of your products. Navigate to the Products > Active page.
- Open a product by clicking on the SKU.
- Enter the condition into the custom fieldyou created.
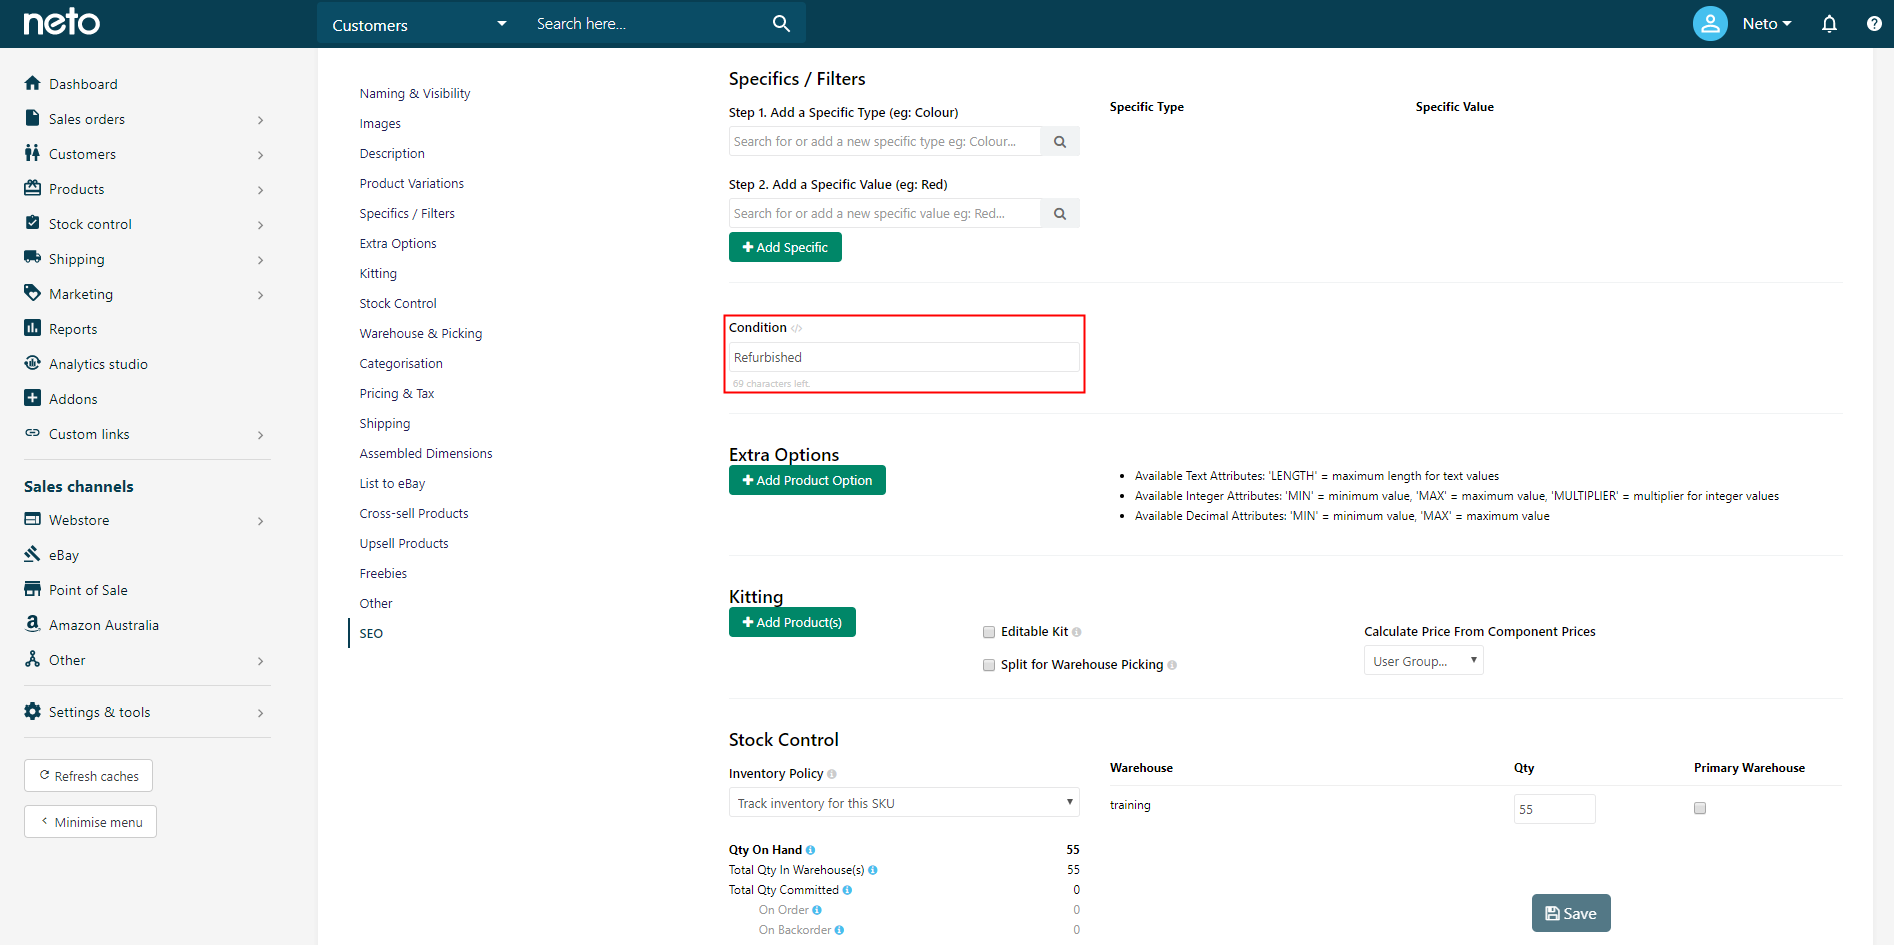
- Click Save, and repeat these steps for all of the products you upload to Google.
You can also update products in bulk by using the export and import wizards.
Add Condition to the Google Shopping Export
The field that contains the condition information needs to be added to the product file that is exported to Google.
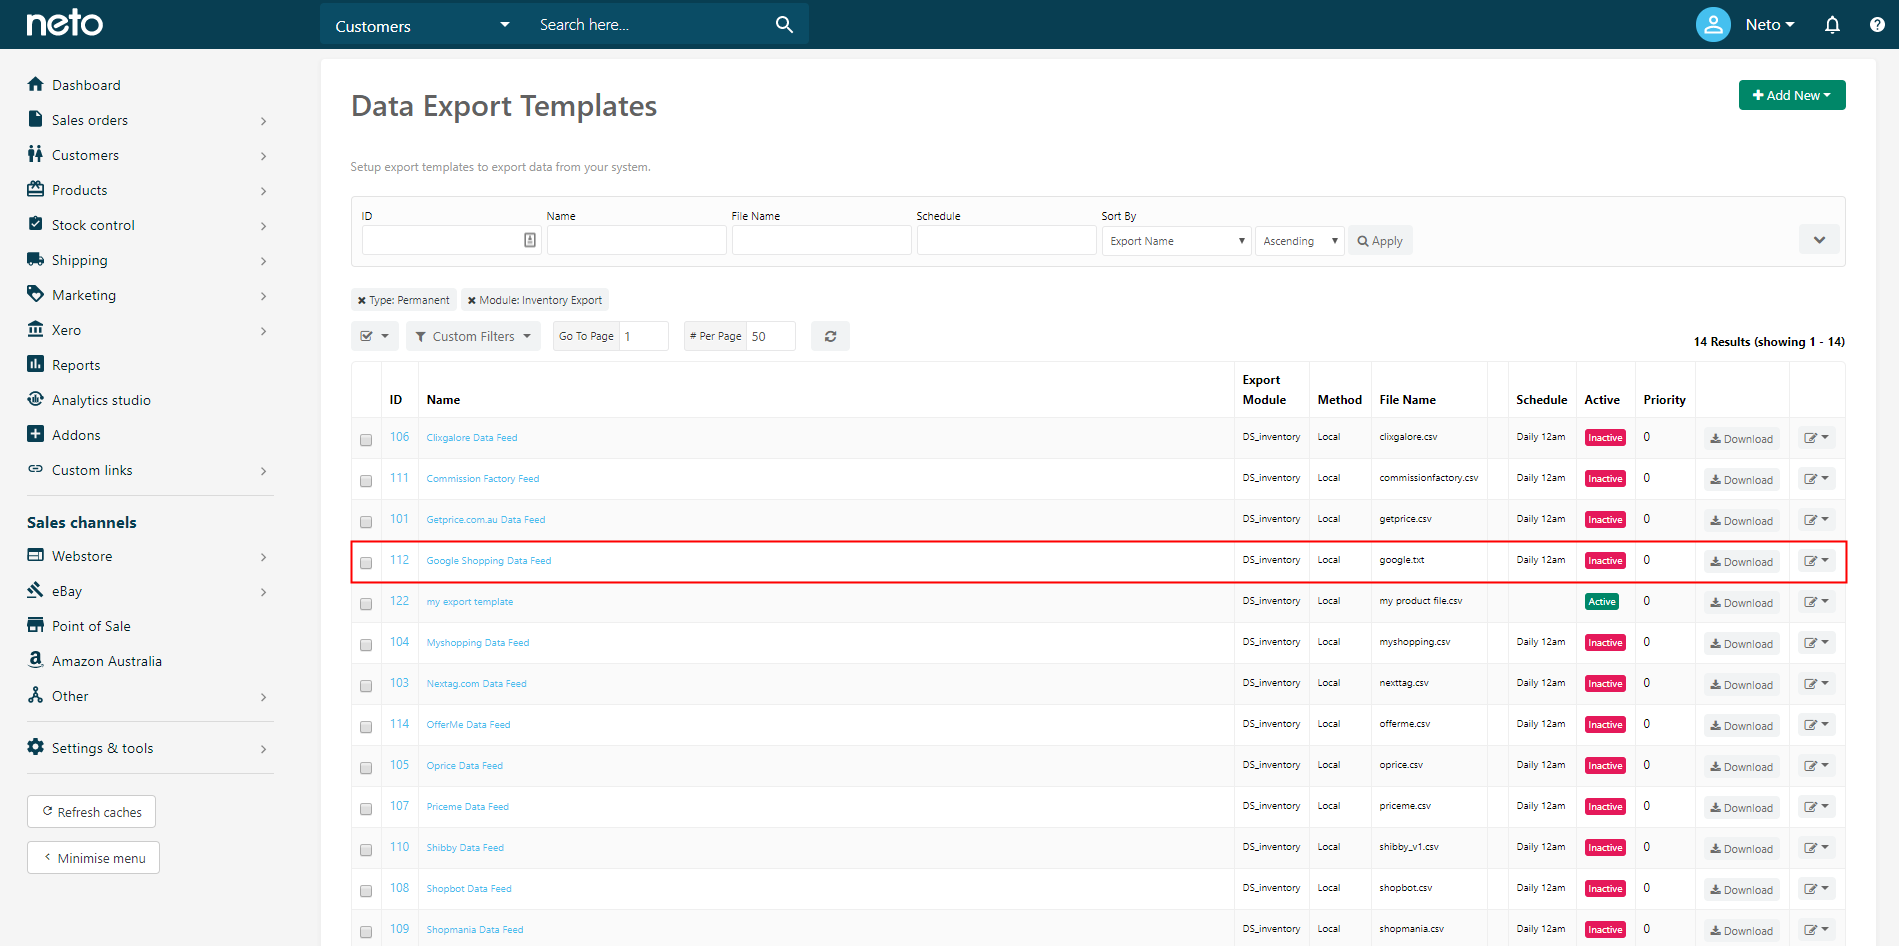
- In your Neto control panel navigate to Settings & Tools > Export Data.
- Click Perform Complex Export and choose Use Existing Custom Export Templates.
- Click on the Google Shopping Data Feed to edit its format.
- Scroll down the page, and you will see the File Builder tab is selected. In the File Body - Body section the condition has been hardcoded as
new.
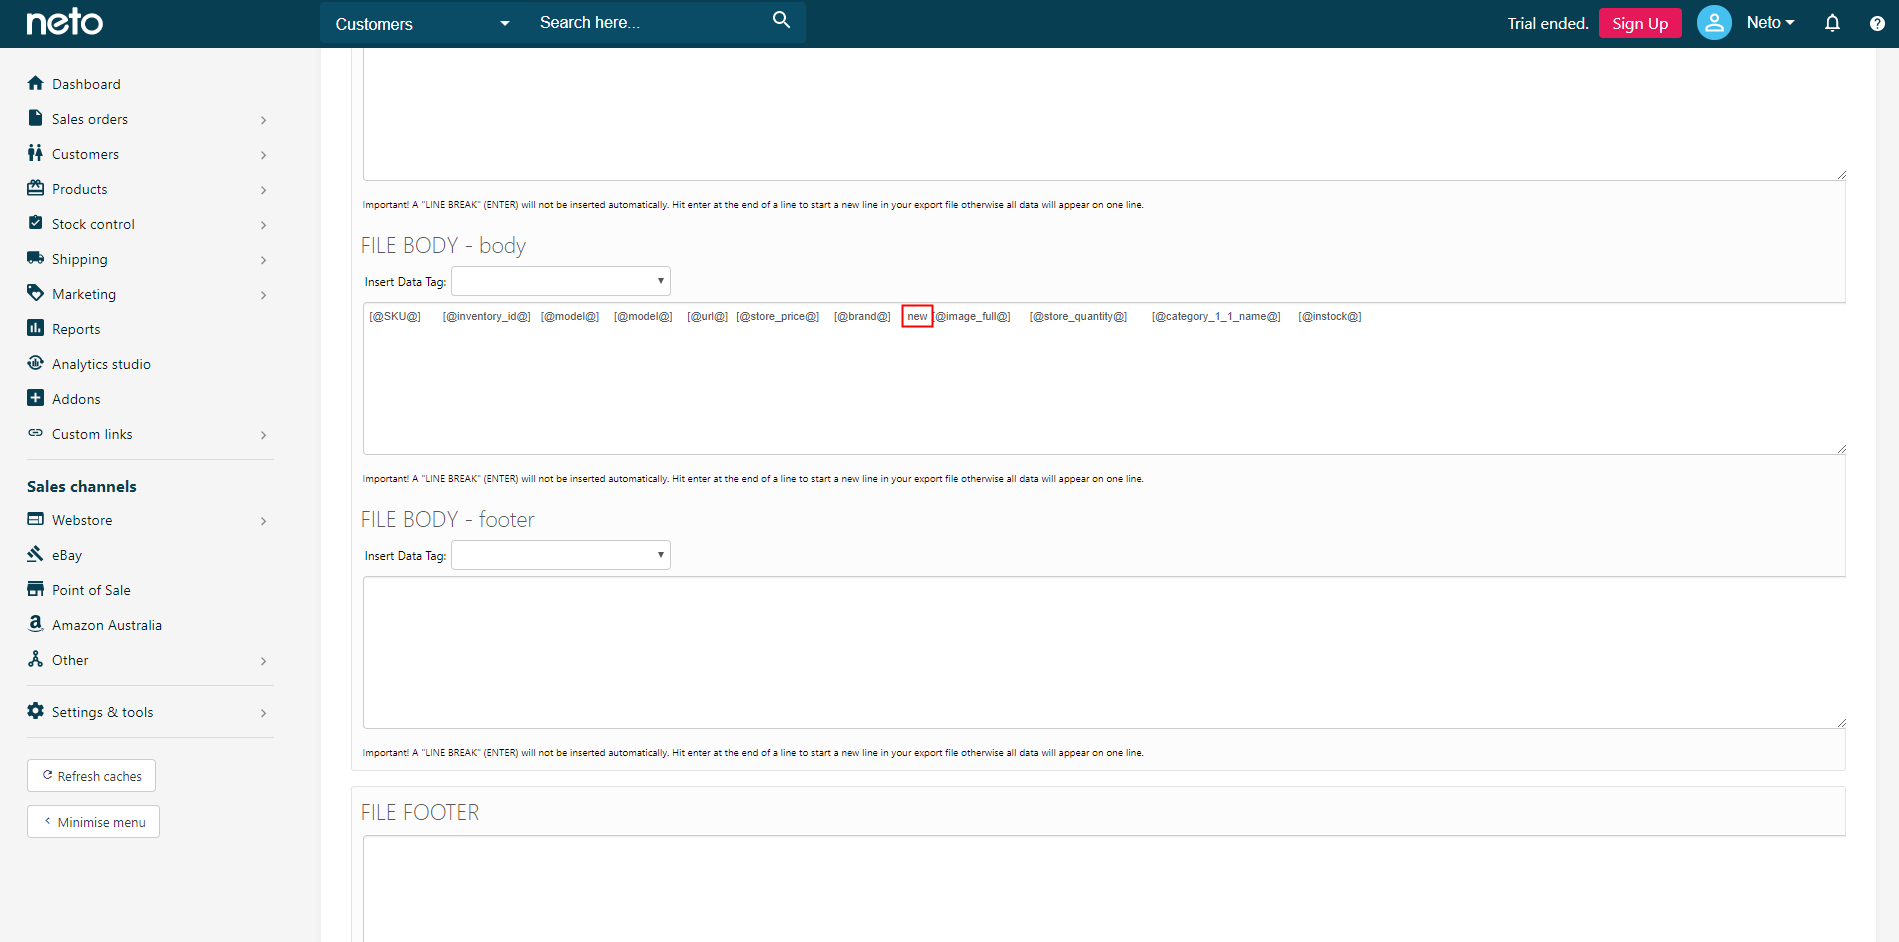
This needs to be replaced with the custom field that holds the condition information on the product.
- Click the Insert Data Dag drop down box and select Custom Fields. A new drop down box will appear to the right.
- Select the custom field you created from this second drop down box (in this example, Condition). A button will appear to the right.
- The custom field needs to replace the word
new in the file body. Highlight new, and then click Insert.Be sure to only highlight the word new, and not the spaces before or after.
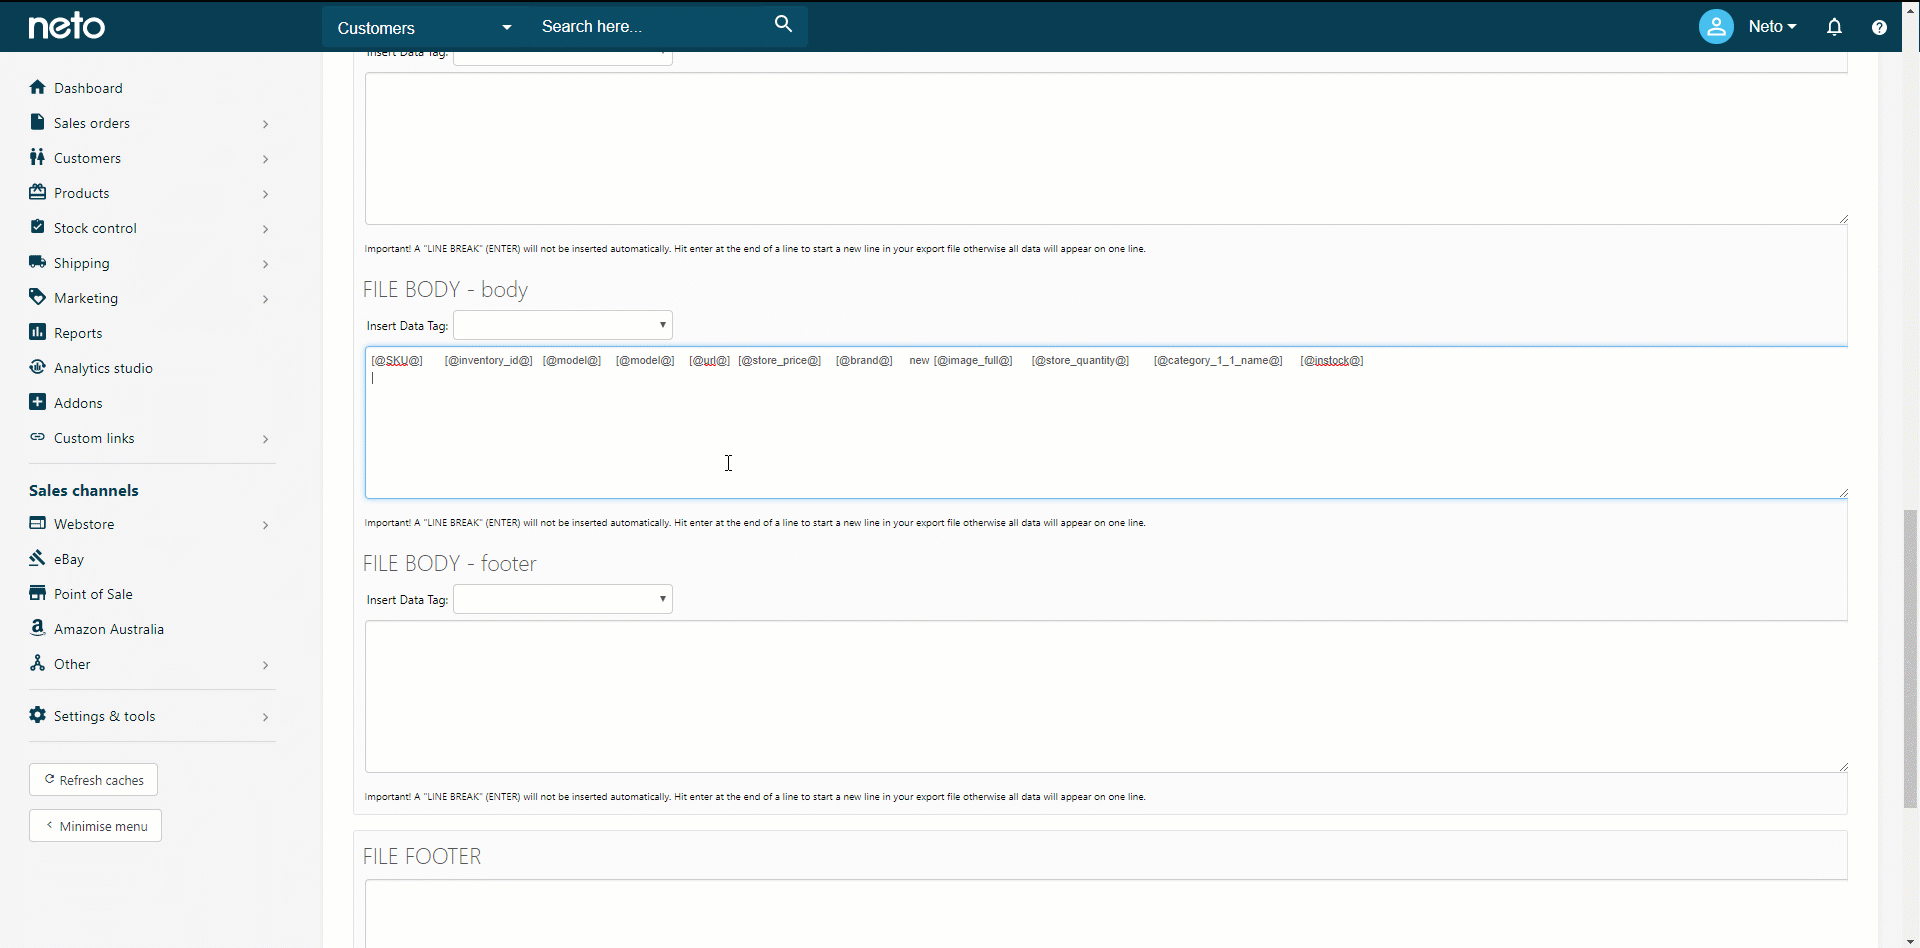
- Your custom field will appear in the body of the file. Scroll down to the bottom of the page and click Save Changes.