Both eParcel regular post and eParcel express post will need to be set up individually. Services, rates and shipping options must be separate to account for the two services. Naming conventions should be kept the same throughout the setup to avoid confusion. Additionally, if it is unknown if there is an existing eParcel service in place, add an asterisk in the name so the new service can be easily identified (eg. eParcel*).
Benefits & Limitations
- Shipping quotes are faster using a manual setup as it's not relying on the API to return shipping rates.
- No downtime for customers in receiving shipping quotes if the carrier is experiencing technical difficulties or downtime.
- Shipping Rates and zones will not automatically update when the carrier makes updates. These will need to be updated manually in Neto.
Prepare eParcel Zone File
eParcel zones are provided in PDF format from your eParcel account manager. As eParcel regularly update their zones it is important to convert and import the zones before you setup the rates to ensure the zones are accurate.
- Open your eParcel zones file and copy the entire contents including the destination, zones and postcodes into a spreadsheet (e.g. MS Excel/Google Sheets). Alternatively, convert the eParcel Zones from PDF to Excel using a converter (e.g. https://smallpdf.com/pdf-to-excel).
- Download the Neto shipping zone template file, or create a new excel sheet with the following column names:
Zone Name, Zone code, From Post Code, To Post Code, Courier and Country. - Copy the data from the eParcel zone file into the correct fields in the CSV file. Use the following table to assist in placing the data into the correct fields.
Column Name | Definition | Data Formatting Required |
|---|
Zone Name | Name for the zone eg. Sydney Metro, SA Country etc. | Zone Name needs to display for every line item |
Zone Code | Code for the zone eg. Q1, T0, N3 etc | Zone Code needs to display for every line item |
From Post Code | The first post code int he zone | Where there are postcodes with only 3 numbers for example Northern Territory post codes place a ‘0’ in front of the post code. |
To Post Code | The last post code in the zone | Where there is a from post code but no to post code, this is where the range only covers that single post code. Enter the From post code into the to post code field. |
Courier | Name of the courier e.g. eParcel | Courier name needs to display for every line item. |
Country | Code of the Country e.g. AU | Country code needs to display for every line item. |
- Once complete, save it as a CSV file so it can imported into Neto.
Prepare eParcel Rate Files
Like zones, rates will be provided to you by your eParcel account manager, in a PDF. As such, the process is similar.
- Open the eParcel Shipping Rates Table.
- Copy the regular post rates into a spreadsheet (e.g. MS Excel/Google Sheets). Alternatively, convert the eParcel Zones from PDF to Excel using a converter (e.g. https://smallpdf.com/pdf-to-excel).
- Download the Neto rates file, or create a new excel sheet with the following column names:
Courier Name, Zone Name, Zone Code, 1st Parcel, Per Subsequent Parcel, Per KG, Minimum and Maximum. - Copy the data from the eParcel rates table into the correct fields in the CSV file. Use the following table to assist in placing the data into the correct fields.
Column Name | Definition | Data Formatting Required |
|---|
Zone Name | Destination Zone (eg. Sydney Metro) | This column is the Zone Name column in your shipping zones table. Zone Name and Zone Code can be the same for ease. Zone Name needs to display for every line item. |
Zone Code | Destination Zone (eg. N0) | Destination Zone is the Zone code in your Shipping Zones table. Destination Zone needs to display for every line item. |
Per Subsequent Parcel | Subsequent Charge | Subsequent articles. Keep in mind that eParcel charge per article and not per consignment. |
Per KG | Price per KG | Per Kg price. |
Minimum | Minimum weight for the weight band | eParcel typically have two weight bands. one for up to 500g and one for 501g to 22kg. Minimum weight should be either: 0 or 501g. Weight is in KG |
Maximum | Maximum weight for the weight band | eParcel typically have two weight bands. one for up to 500g and one for 501g to 22kg. Maximum weight should be either: 500g or 22kg. Weight is in KG |
Courier | Name of the courier e.g. eParcel | This column needs to be the same as the courier in your shipping zones table. Courier name needs to display for every line item. |
1st Parcel | Basic Charge | Price for the first article. A price needs to display for every line item. |
- Once complete, save it as a CSV file so it can imported into Neto.
- Repeat these steps for the express rates.
Import Zone File
Once you have the CSV file for the shipping zones, you will need to import this information into Neto. To import the shipping zones:
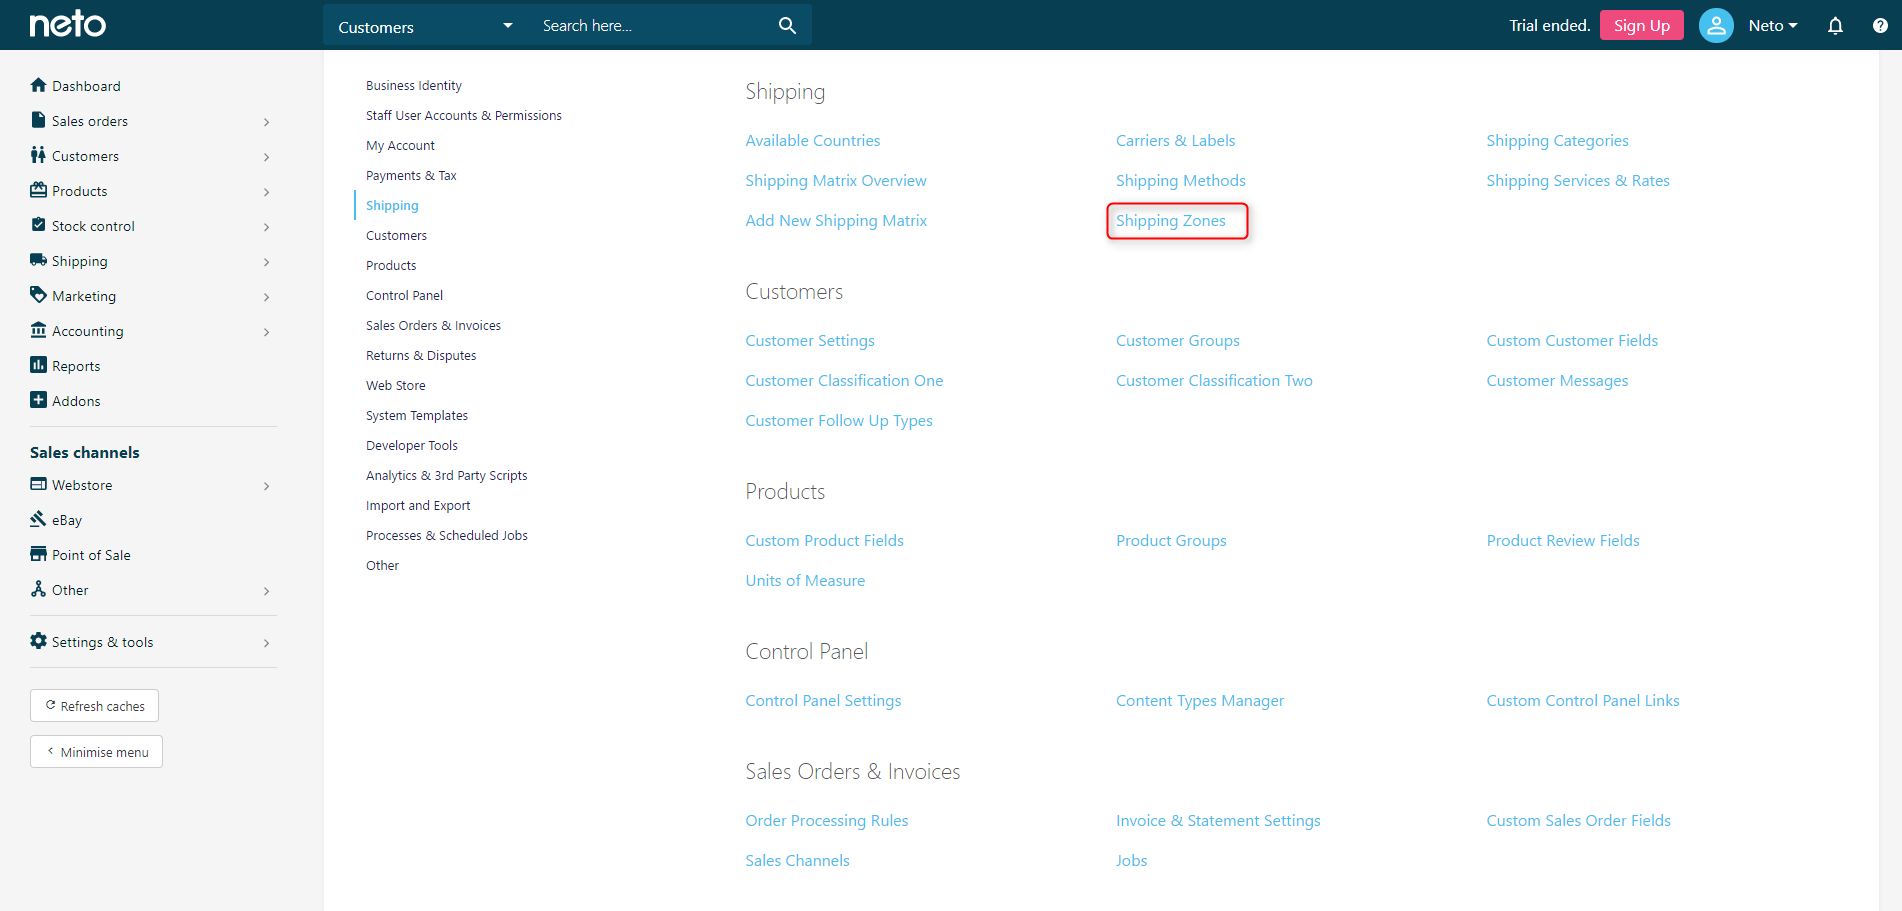
- In your Neto control panel navigate to Settings & Tools > Shipping.
- Select Shipping Zones.
- Click the Import Shipping Zones button.
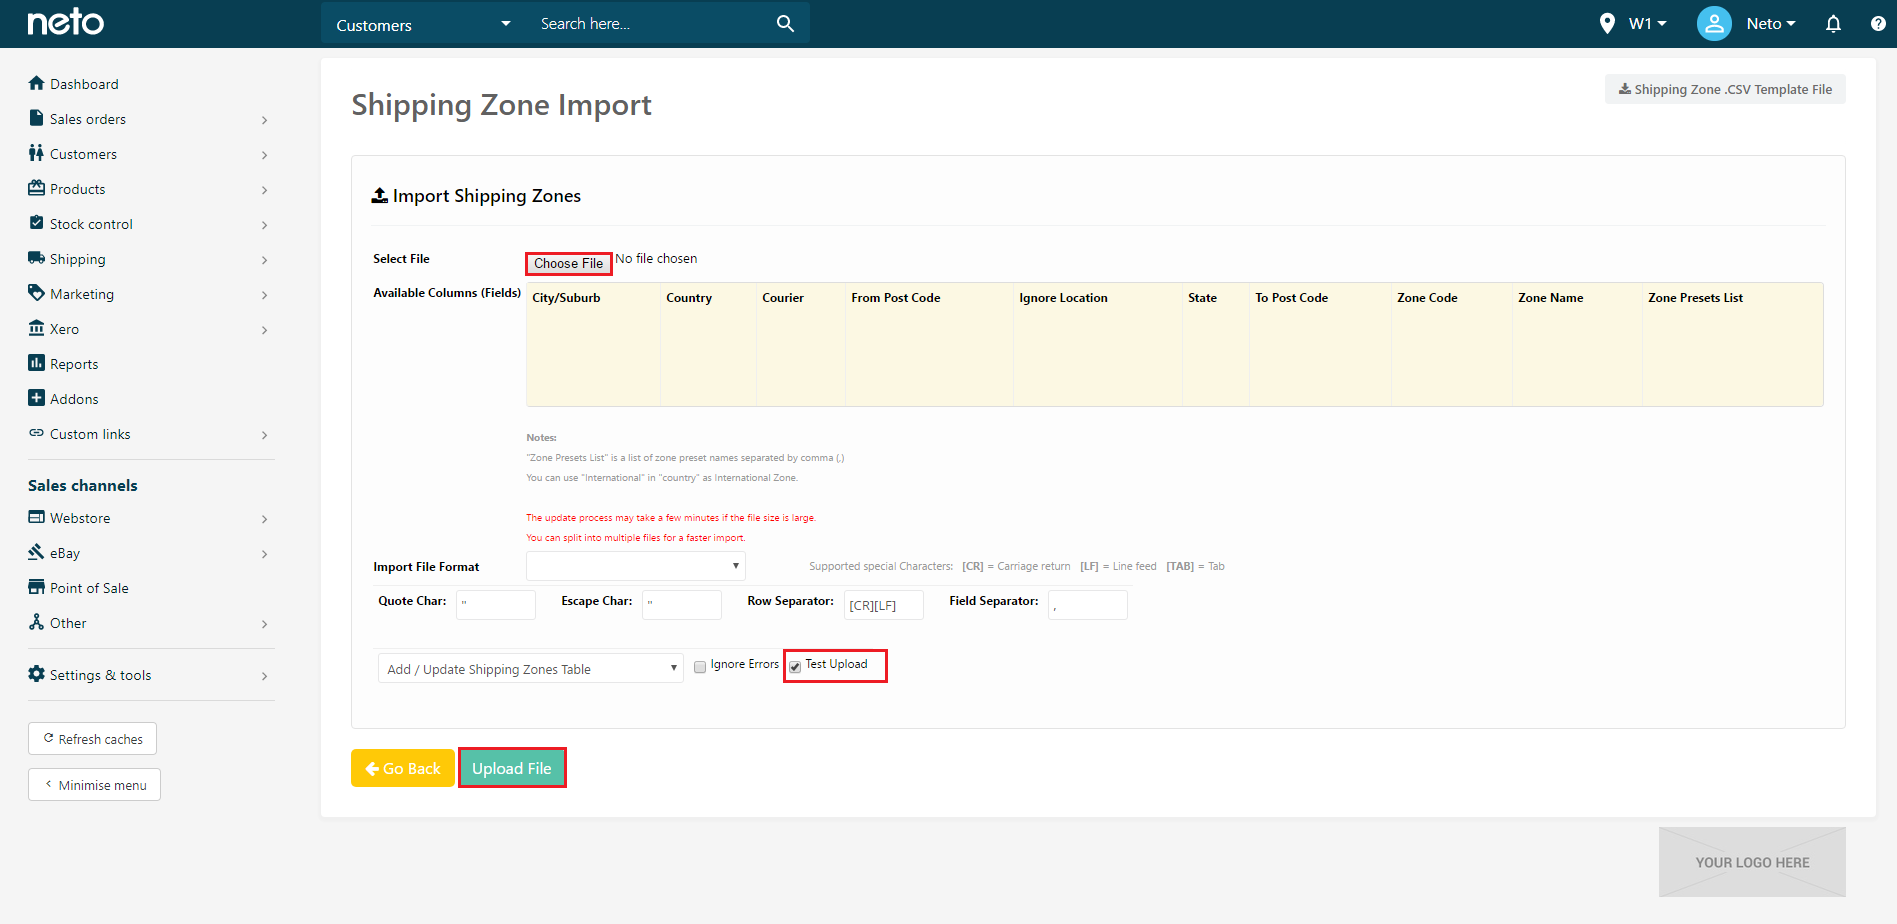
- Click the Choose file button.
- Locate the zone file on your computer, and click Open.
- Check the Test Upload box and click the Upload File.
- A preview of the file will display so that you can ensure there are no errors. If you're happy with the test, uncheck the Test Upload checkbox, and click the Upload File button.
- The shipping zones will now be imported.
Import Rate Files
Once the Shipping Zones have been imported, you will then need to setup the services and rates. To setup the services and rates:
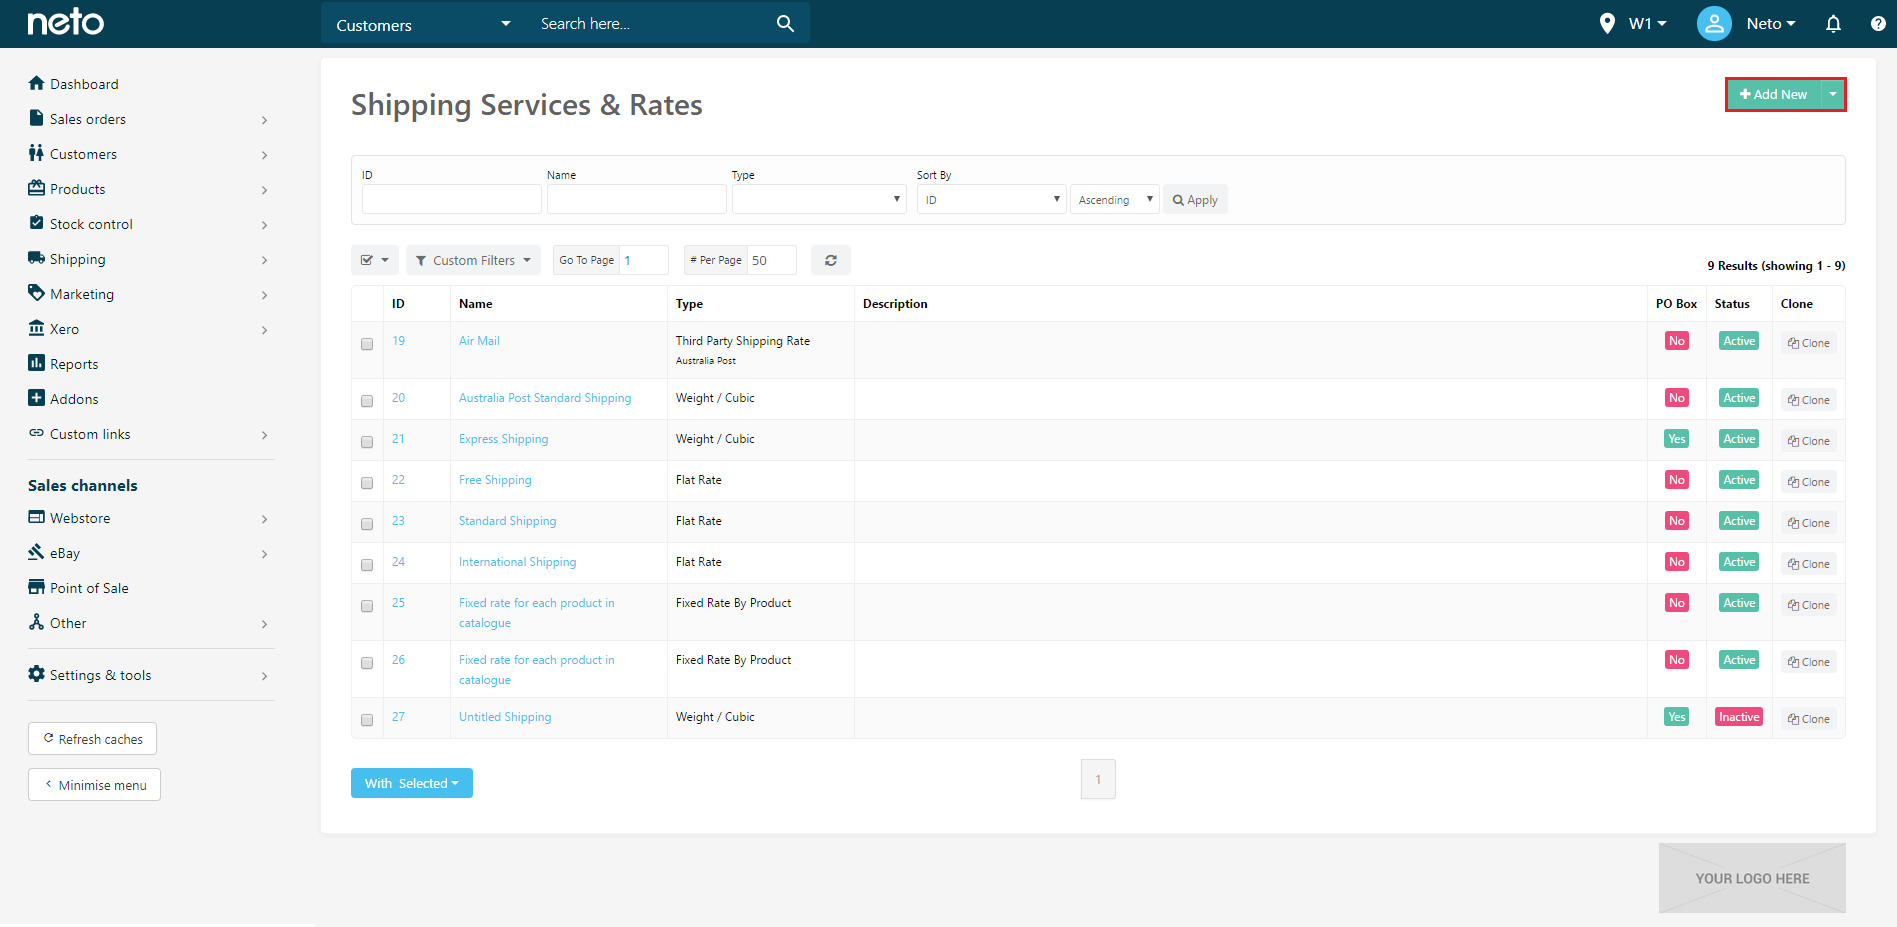
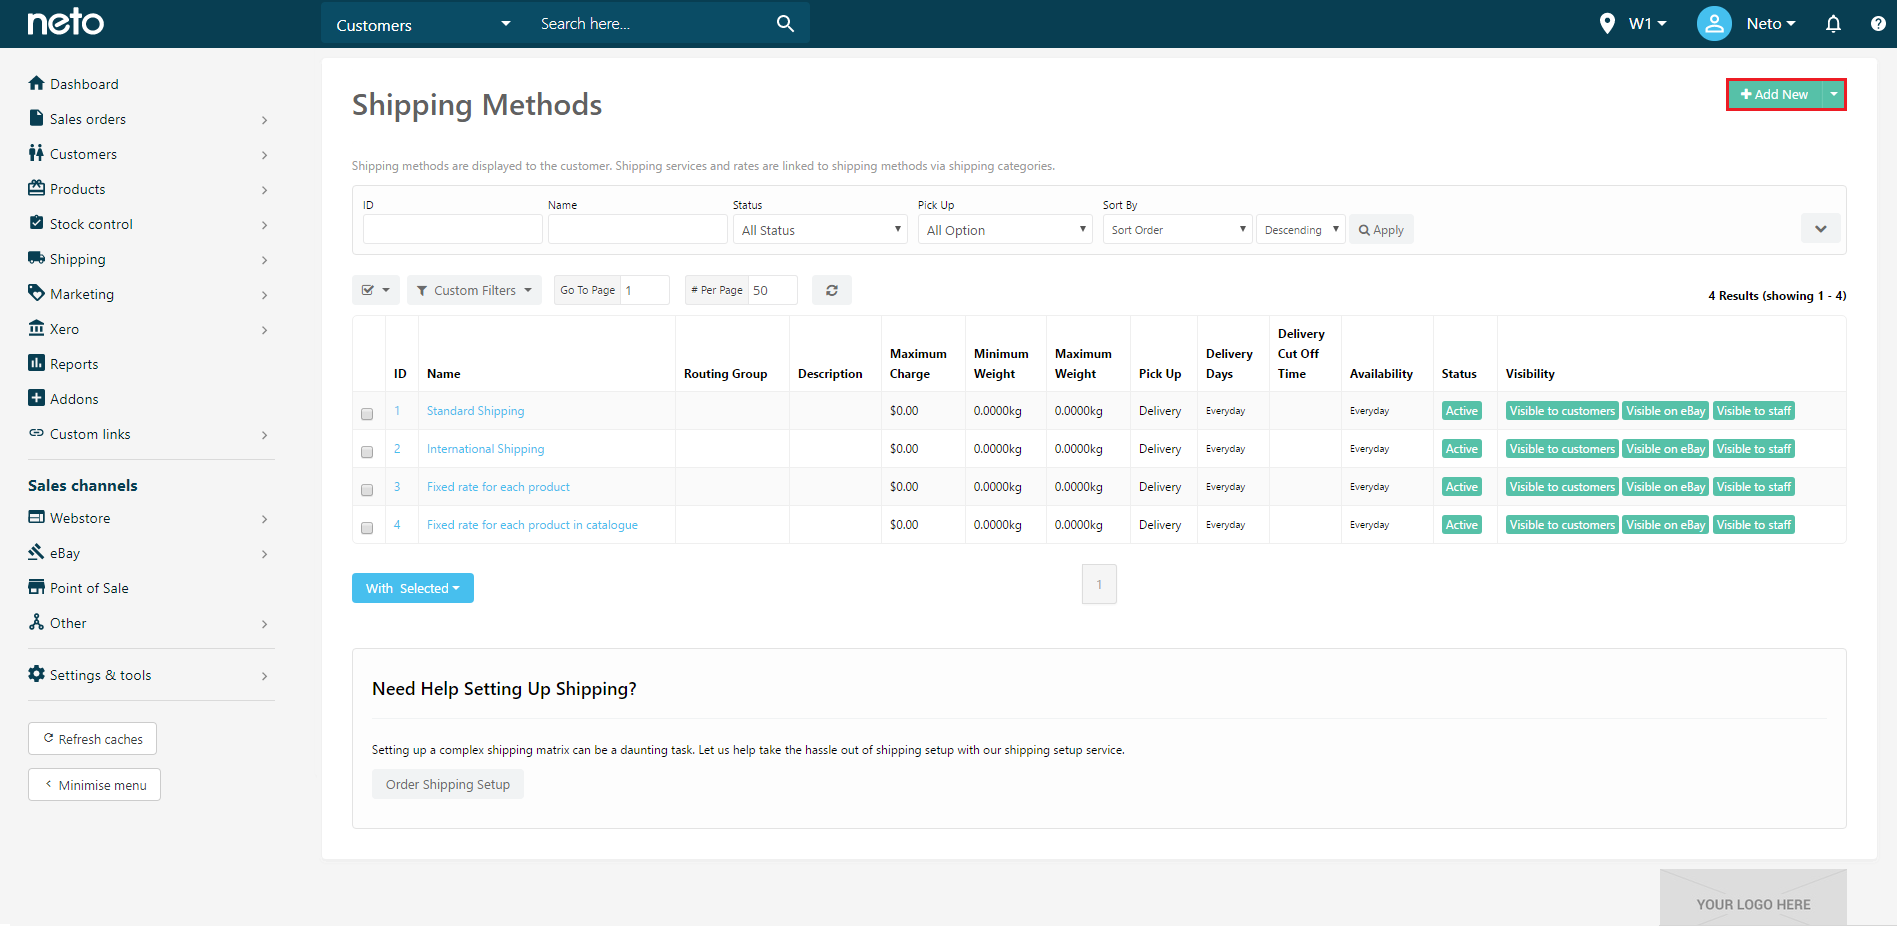
Click the Add New button.
- Hover over Settings & Tools > Shipping.
- Select Shipping Services & Rates.
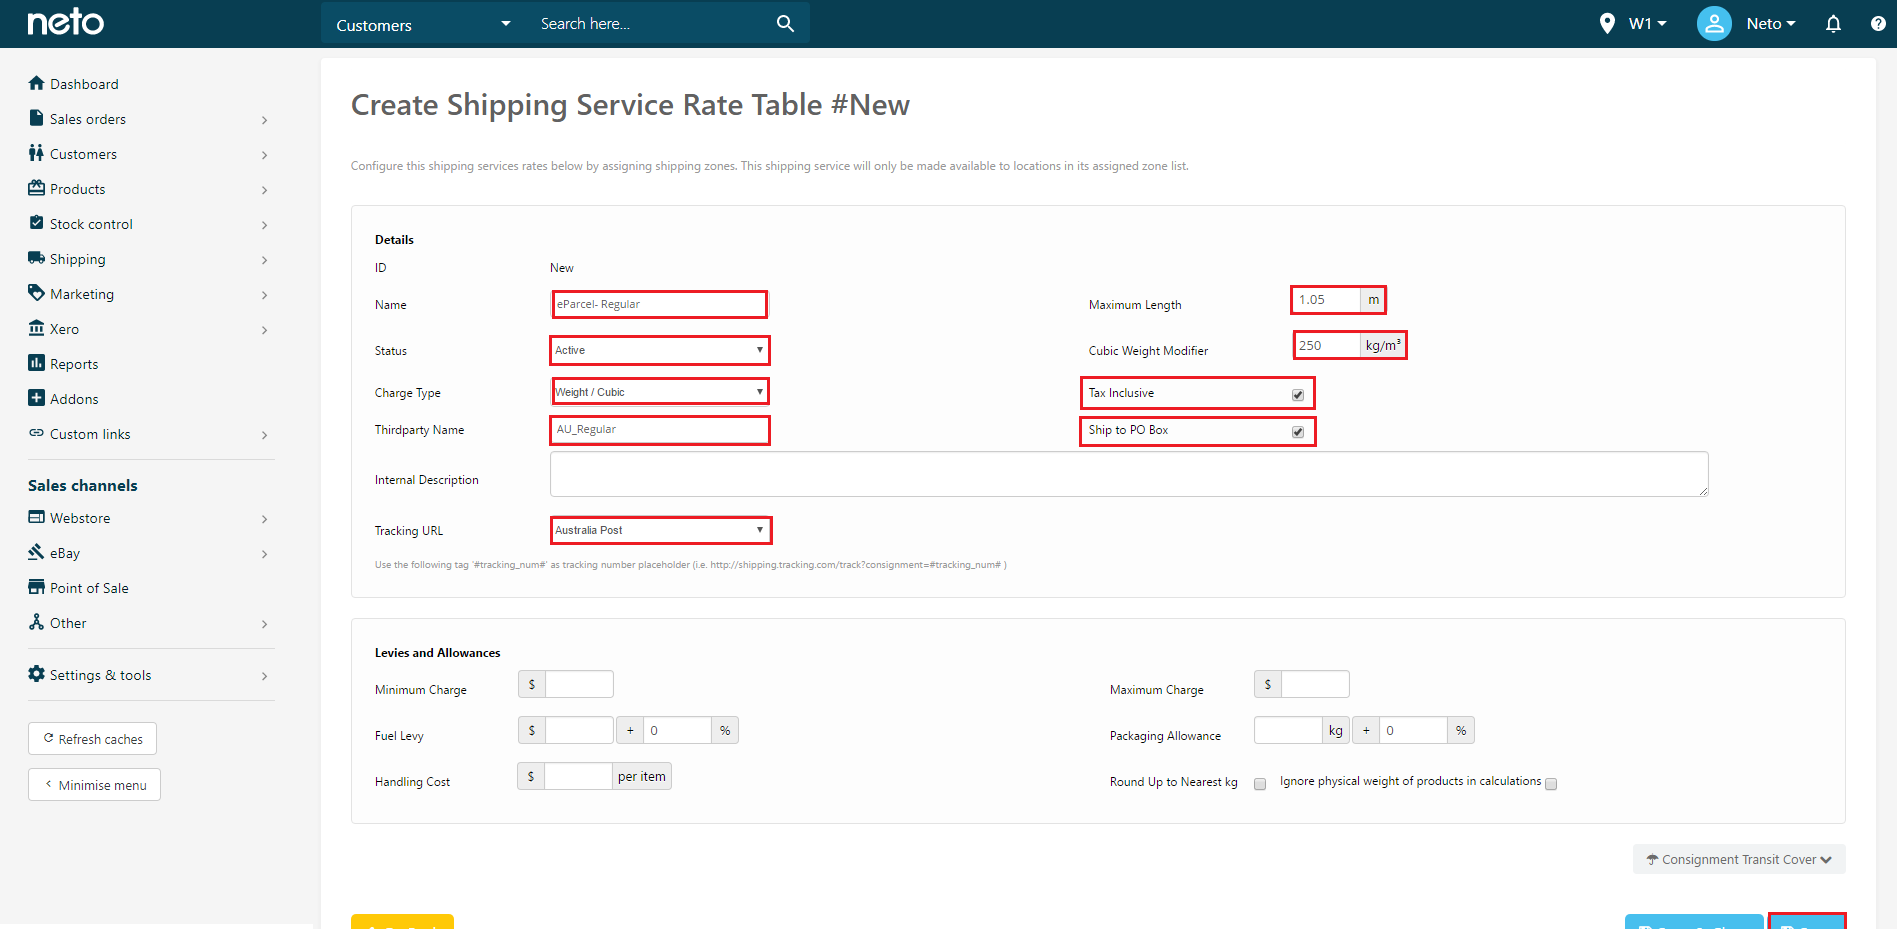
- Enter a Name for your standard rates (e.g. eParcel- Parcel Post).
- Configure the fields as per the table below.
Field Name | Setting |
|---|
Status | Active |
Charge Type | Weight/Cubic |
Weight Cubic Modifier | 250 |
Maximum Length | 1.05 |
Tracking URL | Australia Post |
- Click the Save button.
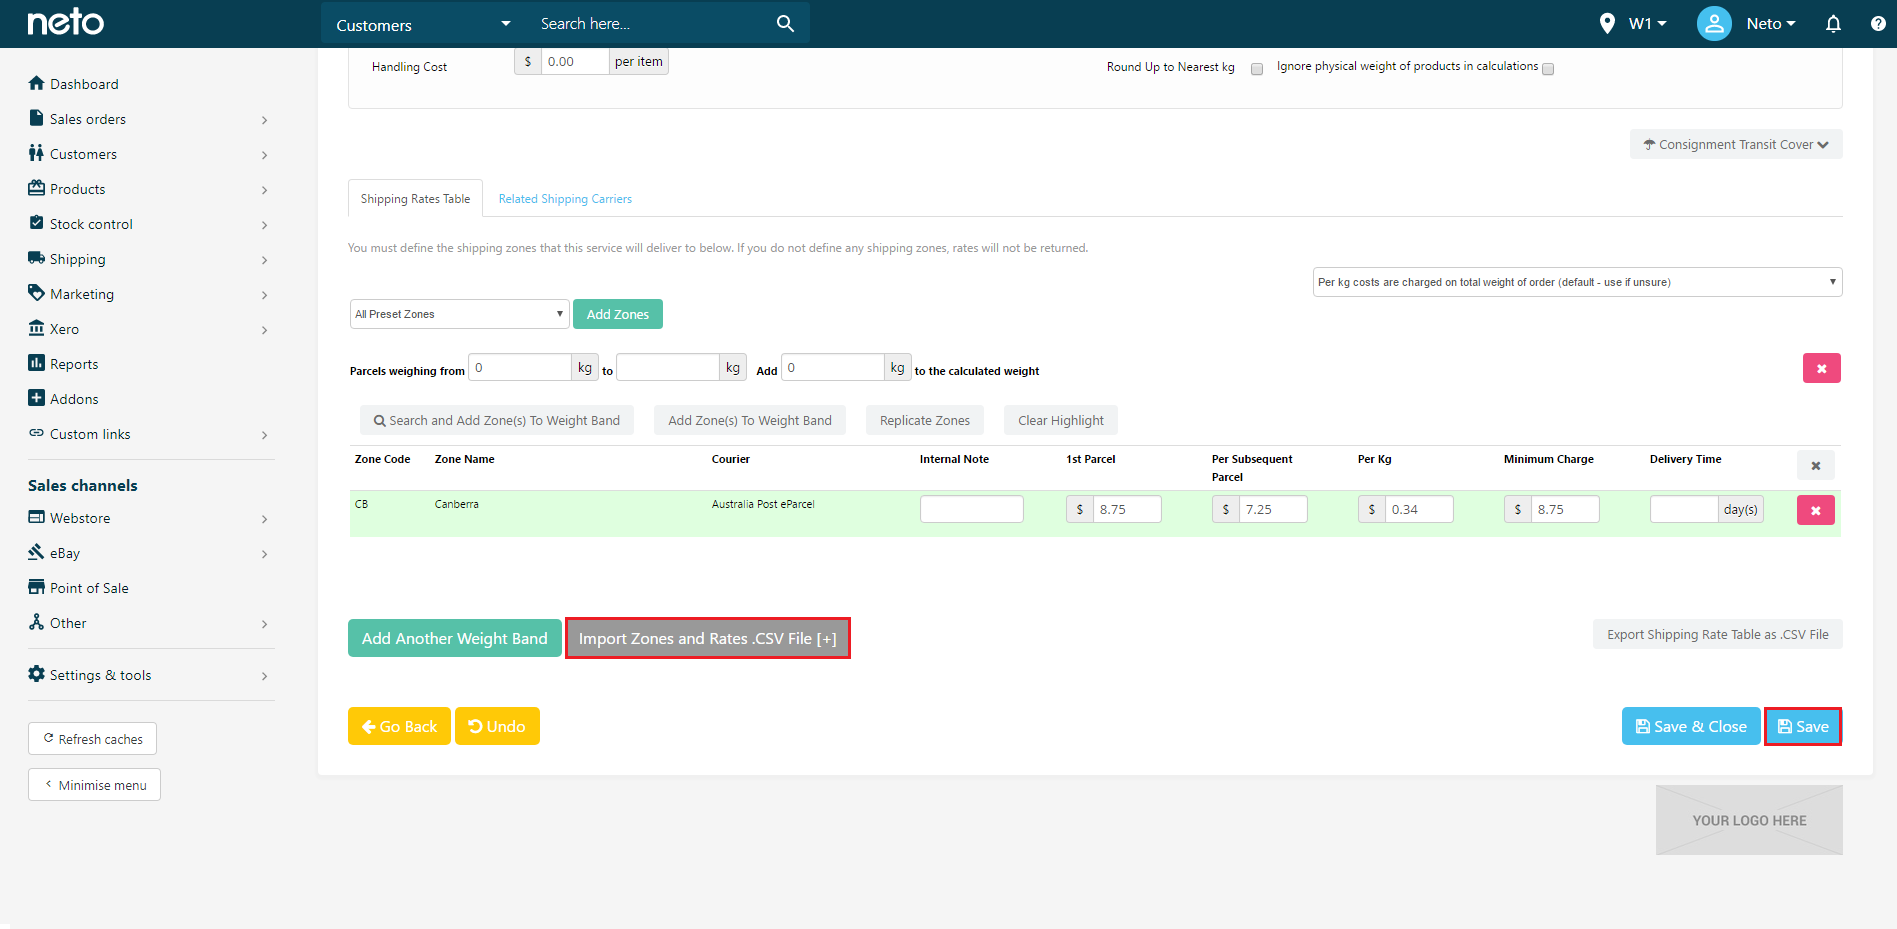
- Click the Import Zones and Rates .CSV File [+] button.
- Click Choose File, locate the standard rates file on your computer, and click Open.
- Click the Upload File button.
- Click the Save button.
- Repeat these steps for the express rates.
Create Shipping Options
Once you have imported your zones and shipping rates, you can create shipping options for standard and express. To create the shipping option:
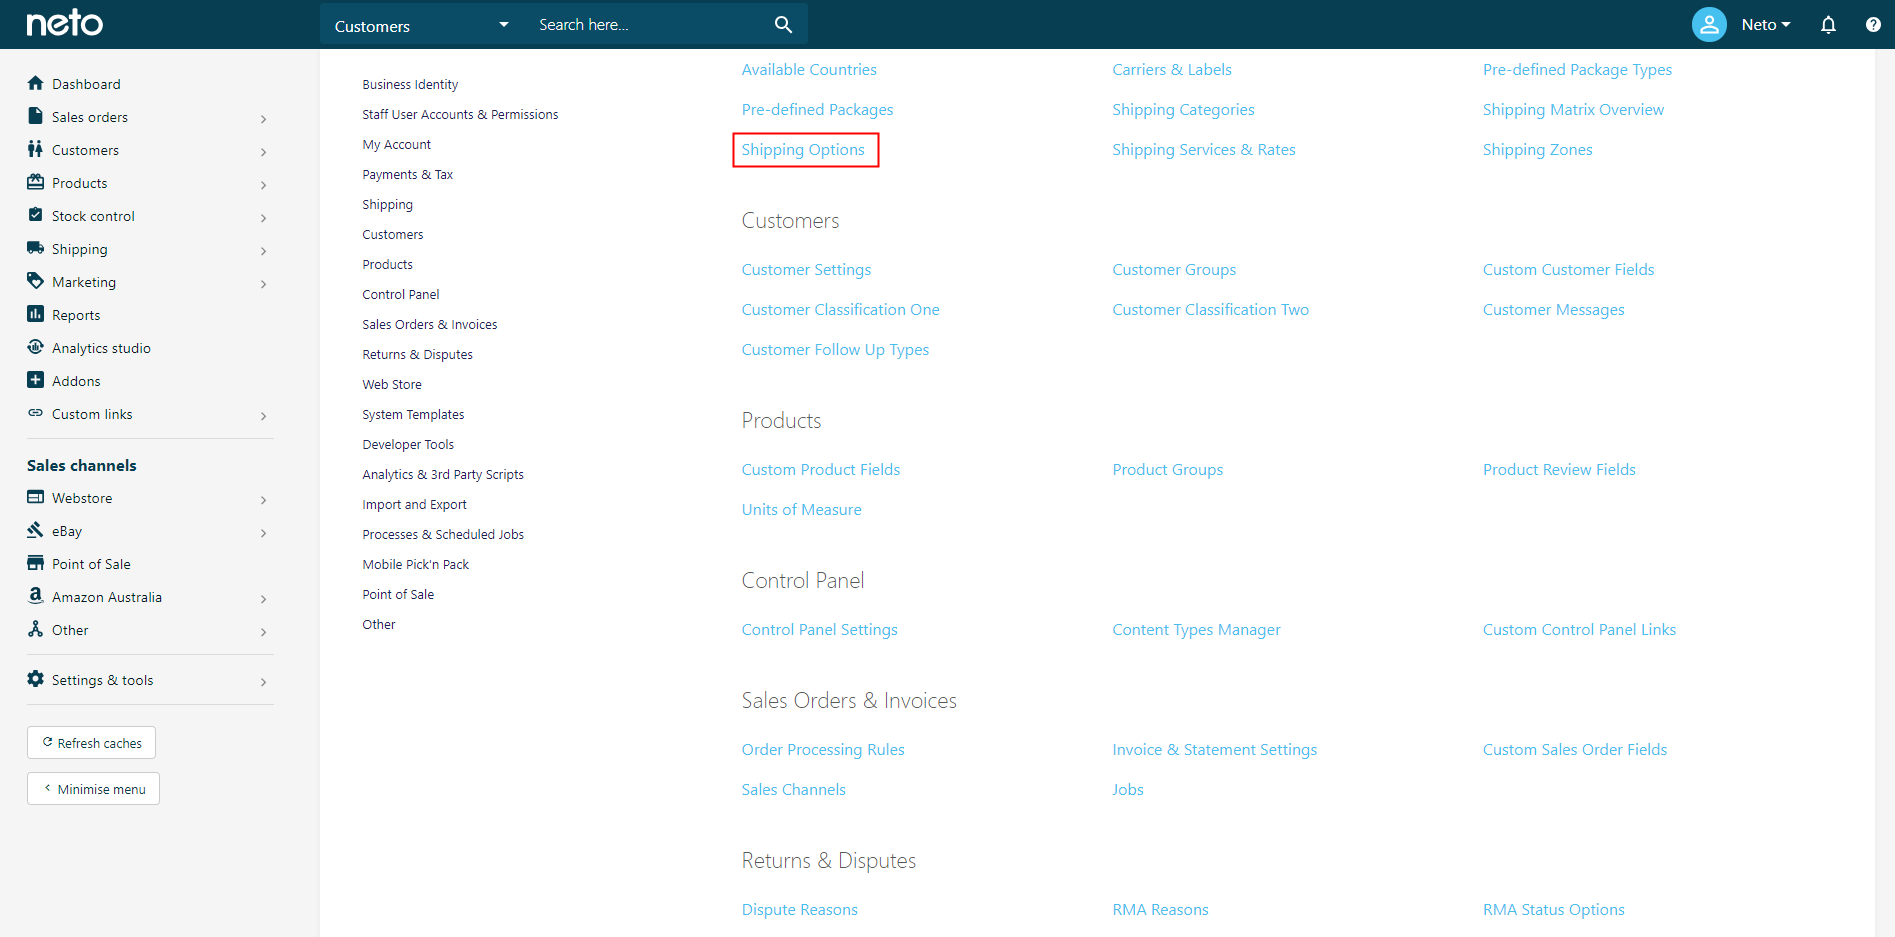
- Navigate to Settings & Tools > Shipping.
- Click Shipping Options.
- Click the Add New button.
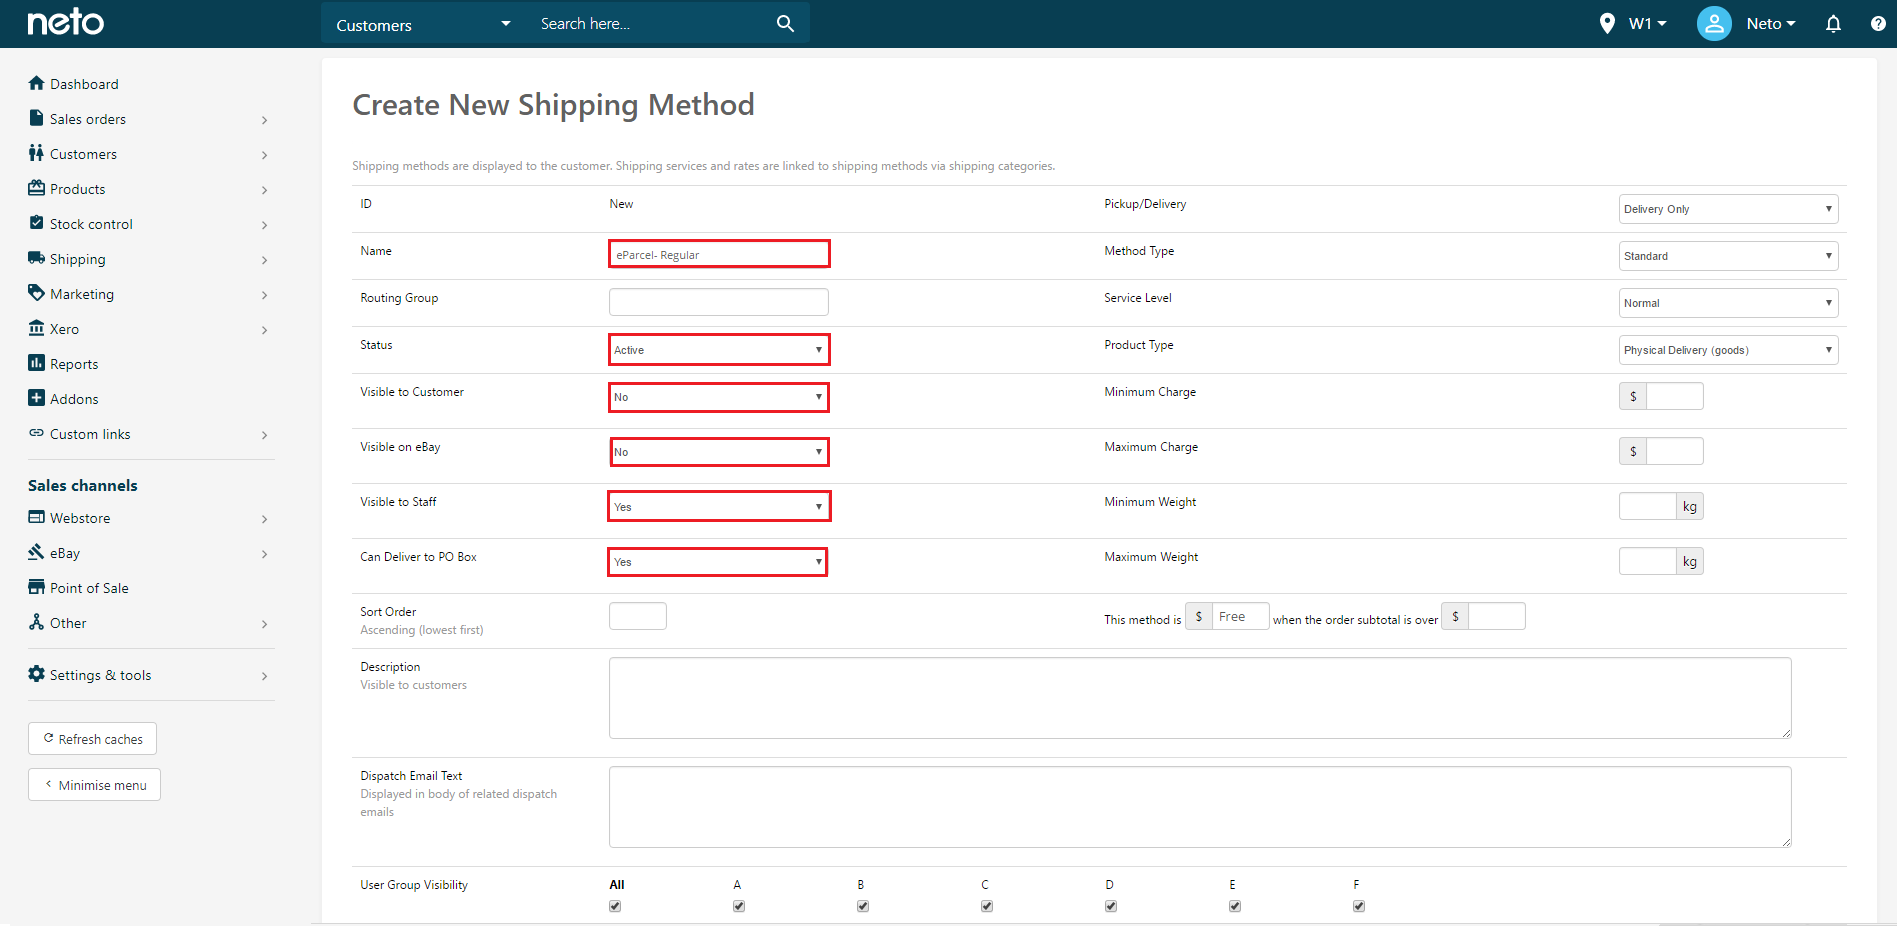
- Enter a Name for the shipping option that will display to your customers (e.g. Parcel Post).
- Configure the shipping option according to the table below. Fields which aren't mentioned can be set to your own requirements.
Field Name | Setting |
|---|
Status | Active |
Visible to Customers | Yes |
Visible to Staff | Yes |
Can Deliver to PO Box | Yes |
Method Type | Standard |
Service Level | Normal |
Product Type | Physical Delivery (goods) |
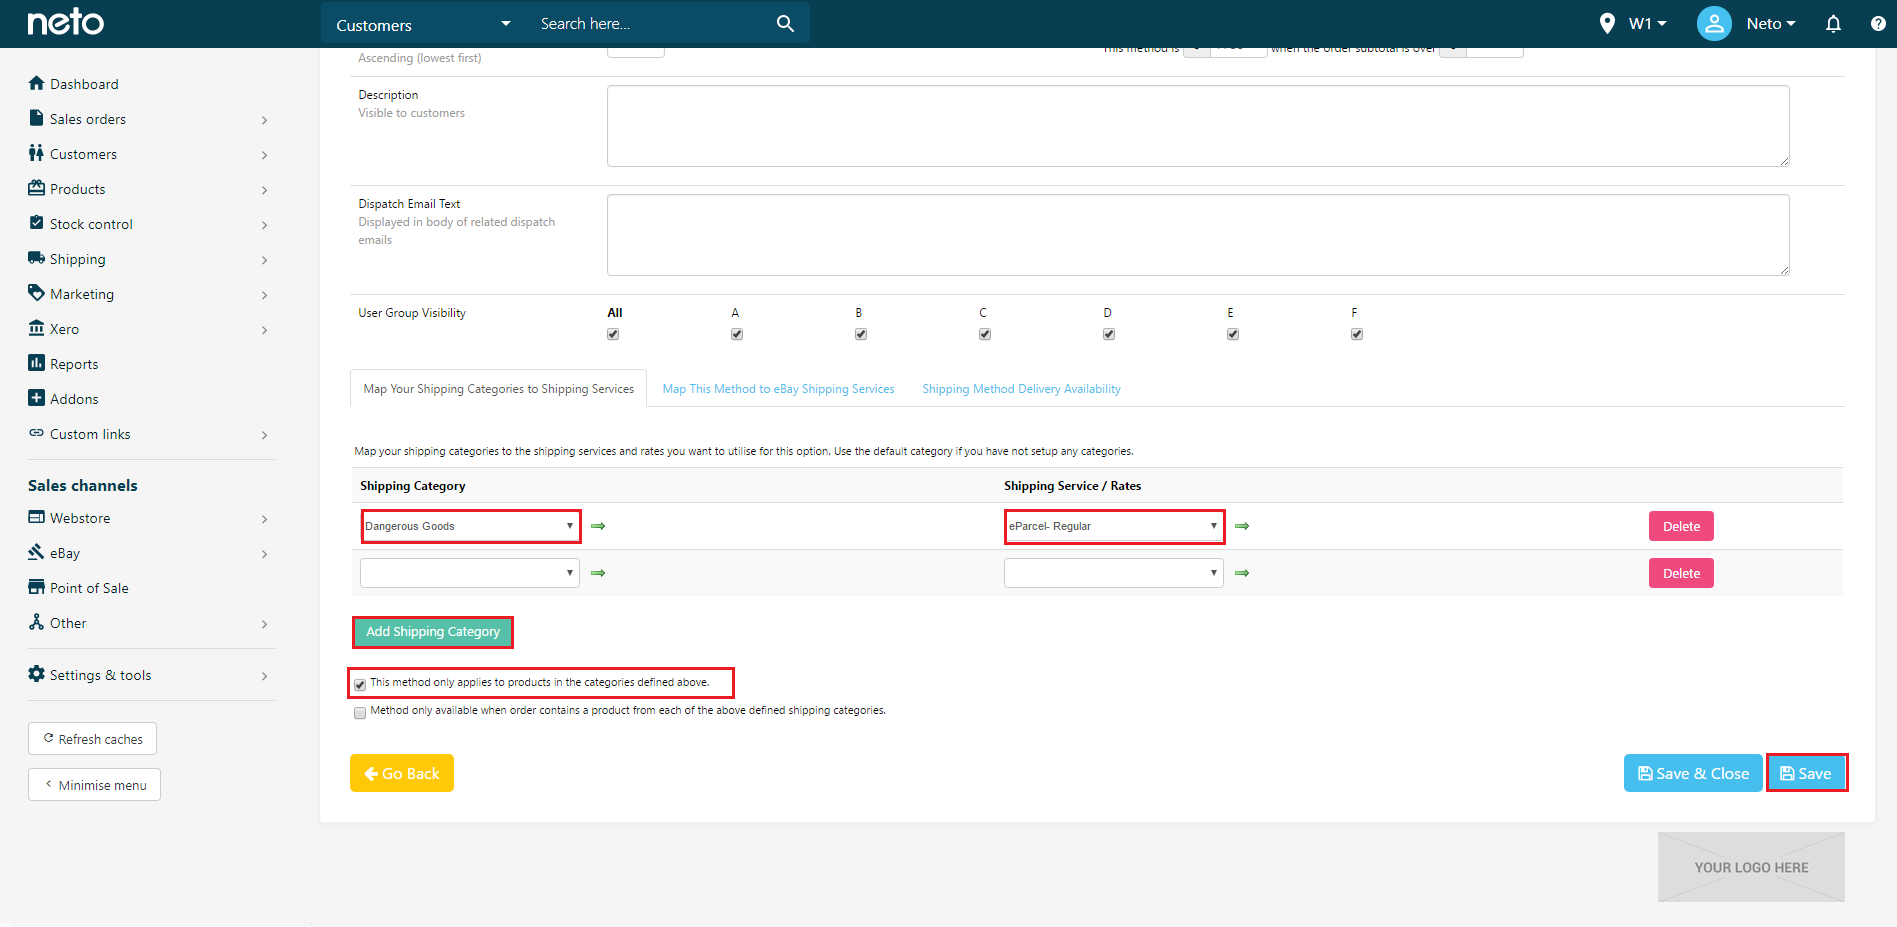
- Click the Add Shipping Category button.
- Select the shipping category from the drop down (e.g. Default).
- Select the service/rates from the drop down that matches your shipping option (e.g. eParcel- Parcel Post).
- Continue to add shipping categories and link to the shipping service and rates.
- Select the This option only applies to products in the categories defined above checkbox.
- Click the Save button.
- Repeat these steps for the express shipping option.
Label Configuration
If the label already exists:
- Navigate to Settings & Tools > Shipping.
- Select Carriers & Labels and select the label you wish to edit.
- Scroll down to Shipping Services.
- Tick the related shipping services and rates for each of the applicable services.
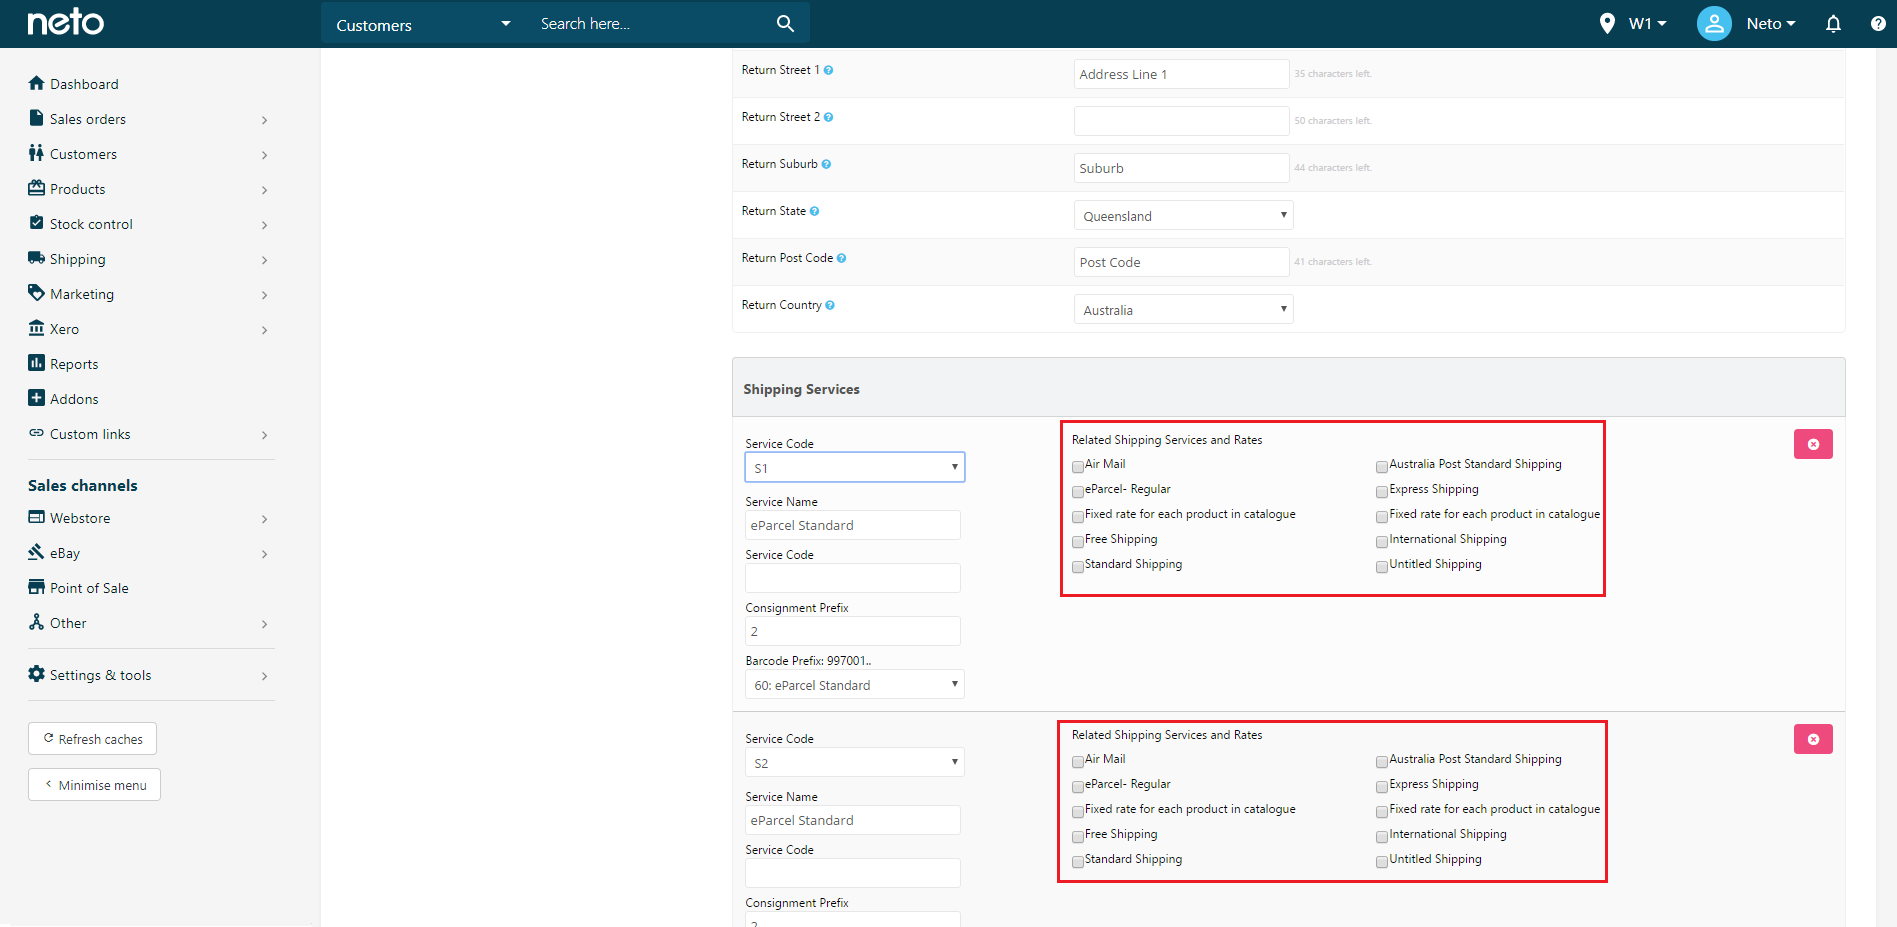
- Click Save.