Sendle is a fully integrated shipping carrier services that can be set up in minutes.
Set up Sendle
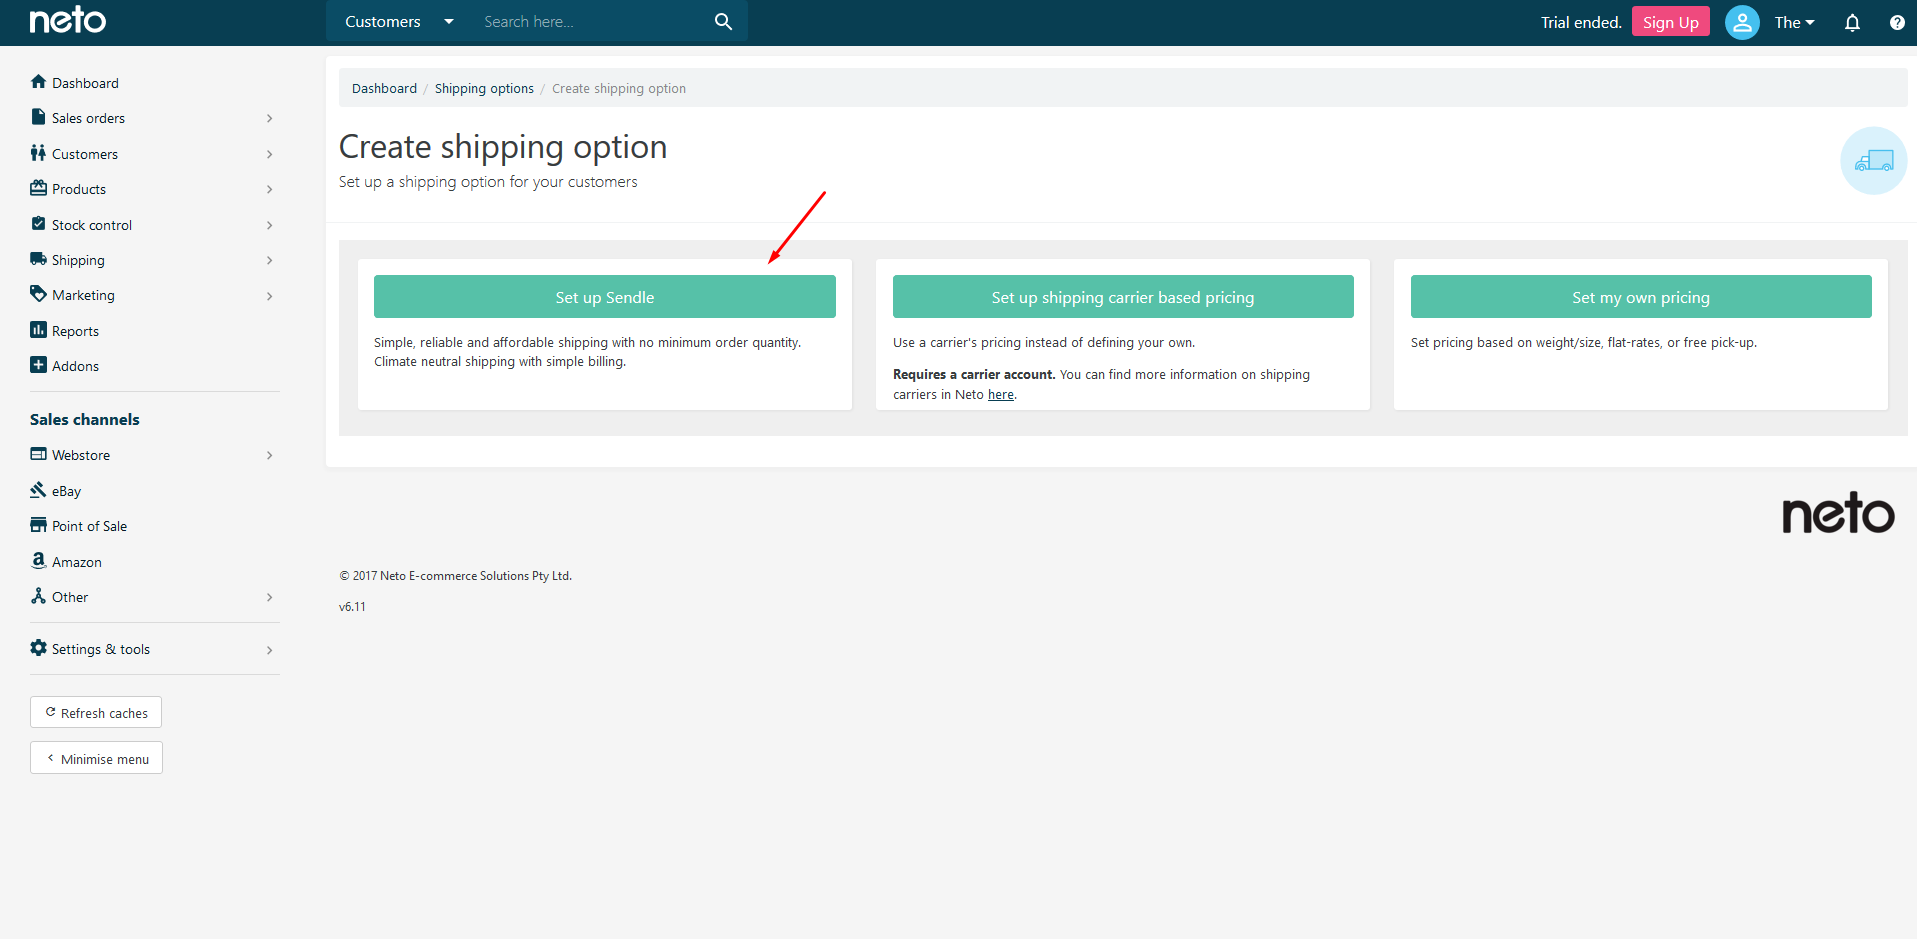
To set up Sendle in Neto:
- In your Neto control panel navigate to Shipping > Shipping Options.
- Click the Add New Shipping Option button.
- Click the Setup Sendle button.
- Select from Sendle Premium Plan or Sendle Pro.
Please Note: There are minimum requirements for Sendle Pro which is approved on a case-by-case basis. If you're sending a significant number of parcels every month, it's worth enquiring about this plan.
- Follow the steps and add your email address and credit card information for weekly billing.
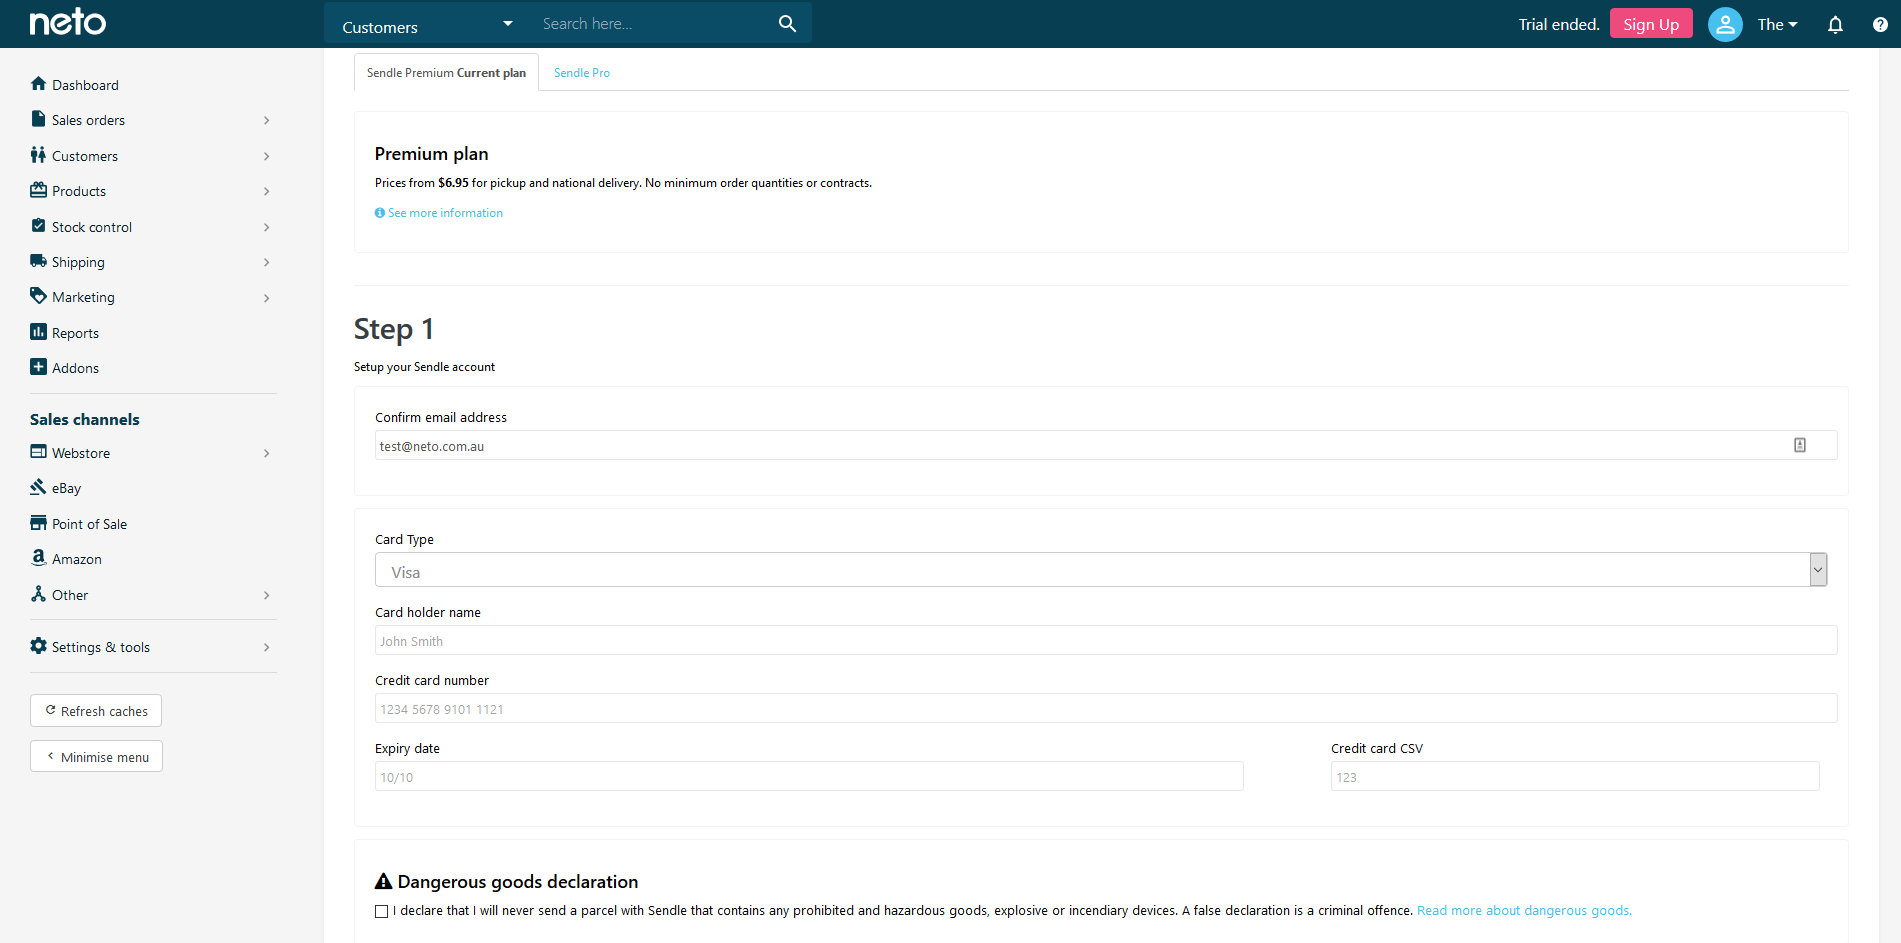
- Agree to the Dangerous goods declaration and terms & conditions.
- Confirm the address and contact details of each warehouse where products will be picked up from.
- Press Complete setup button.
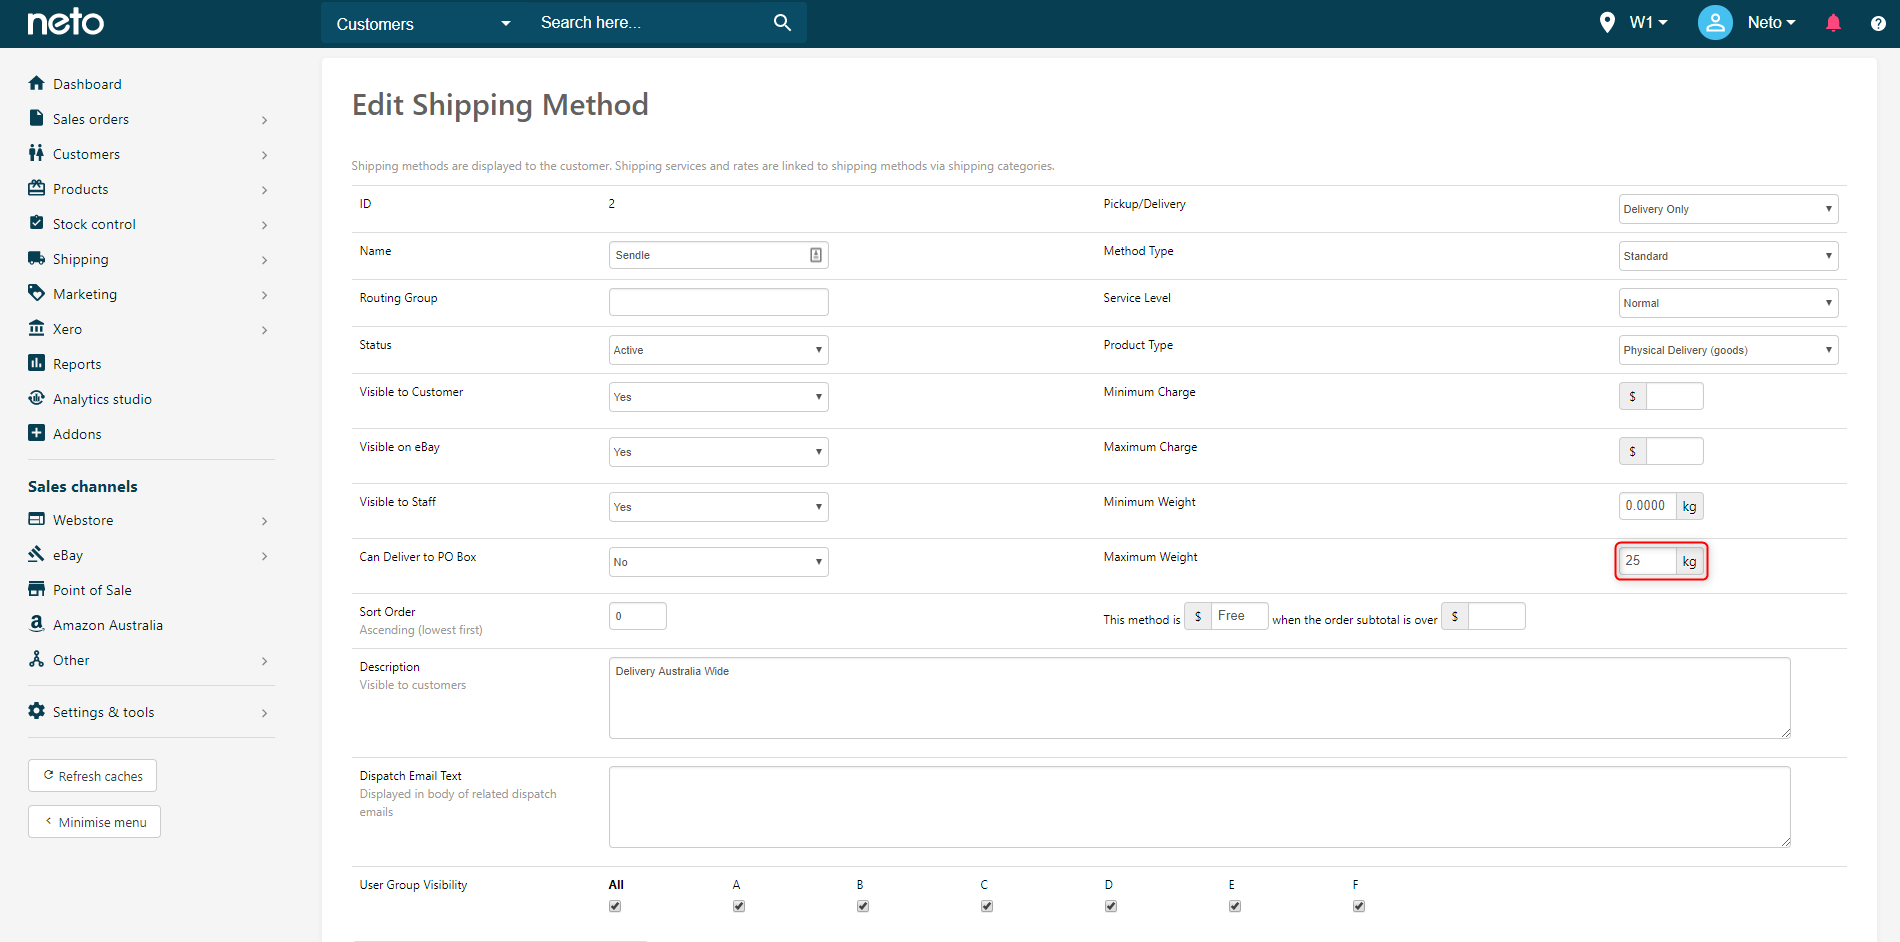
Set the Maximum Weight
Sendle has a maximum weight allowance of 25kg for an order, which needs to be configured after setup.
- Click on the Sendle shipping option.
- Enter 25 into the Maximum Weight field and then click Save.
Change the Default Rate Location
You can change the location Sendle uses to calculate your shipping from which is useful when you move or simply use another warehouse as your primary location. There are two places where the pickup location should be updated.
Sendle Settings
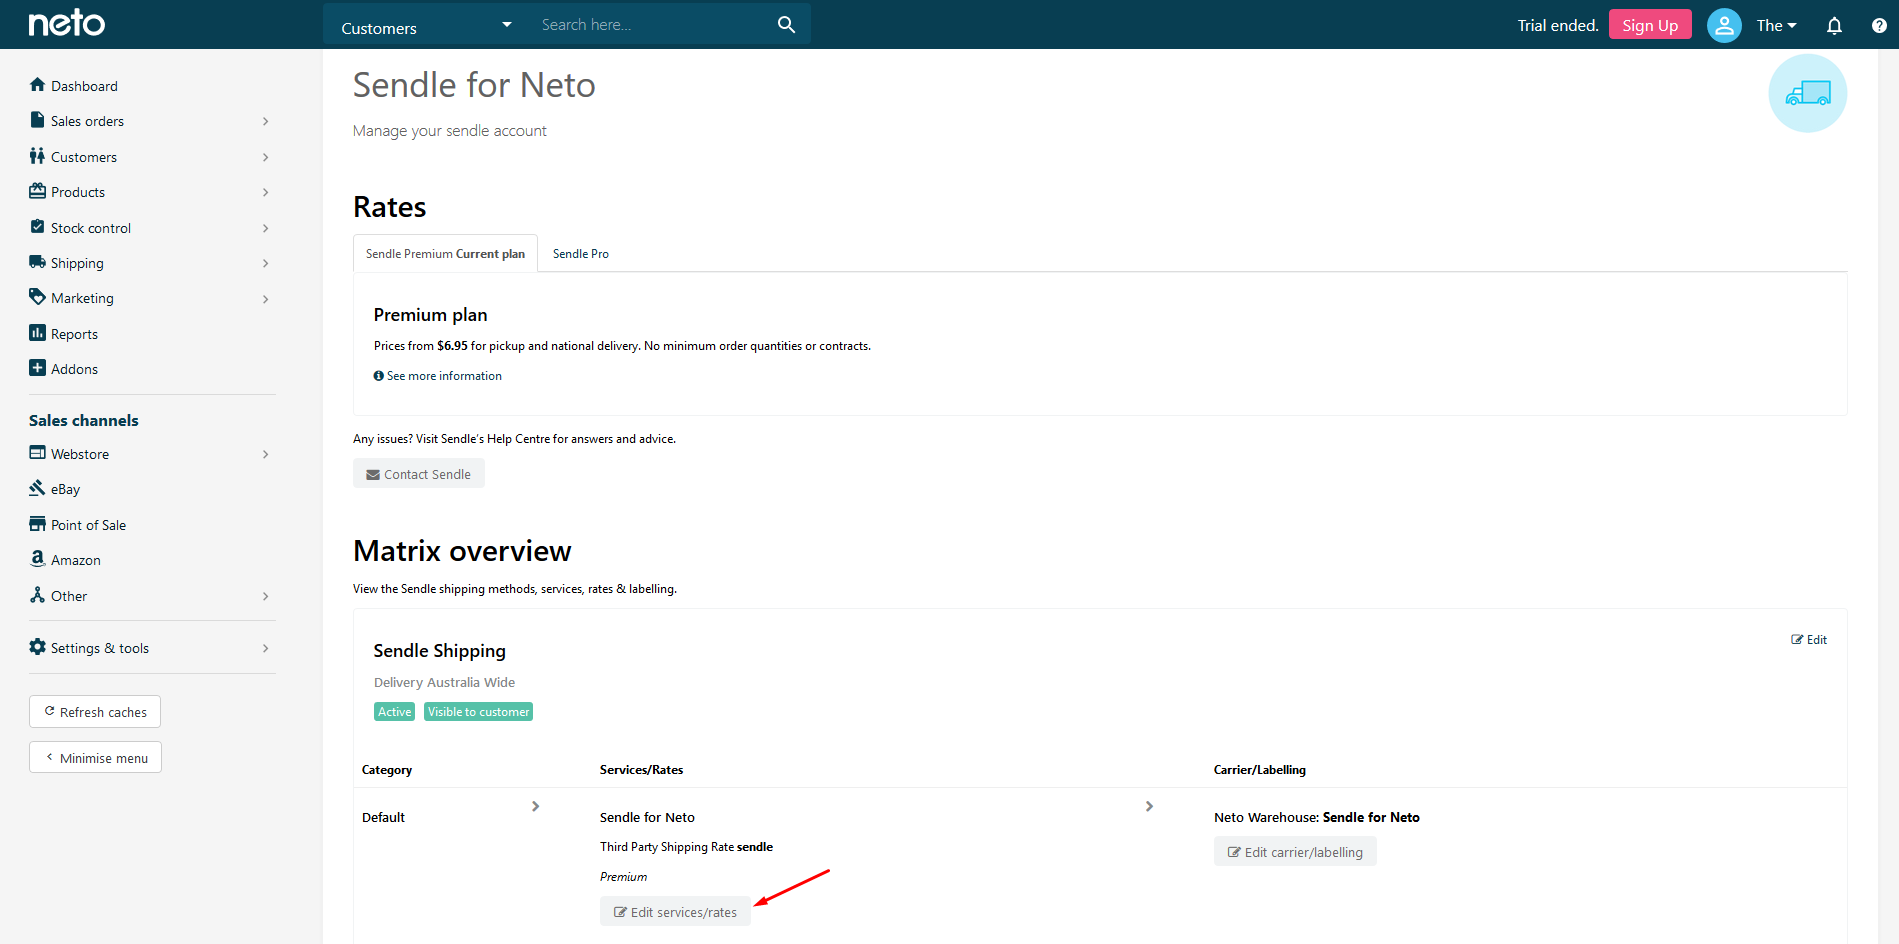
- In your Neto control panel navigate to Shipping > Sendle.
- Click Edit services/rates button.
- Scroll down to 3rd Party Calculators and next to Calculator, click the configure icon.
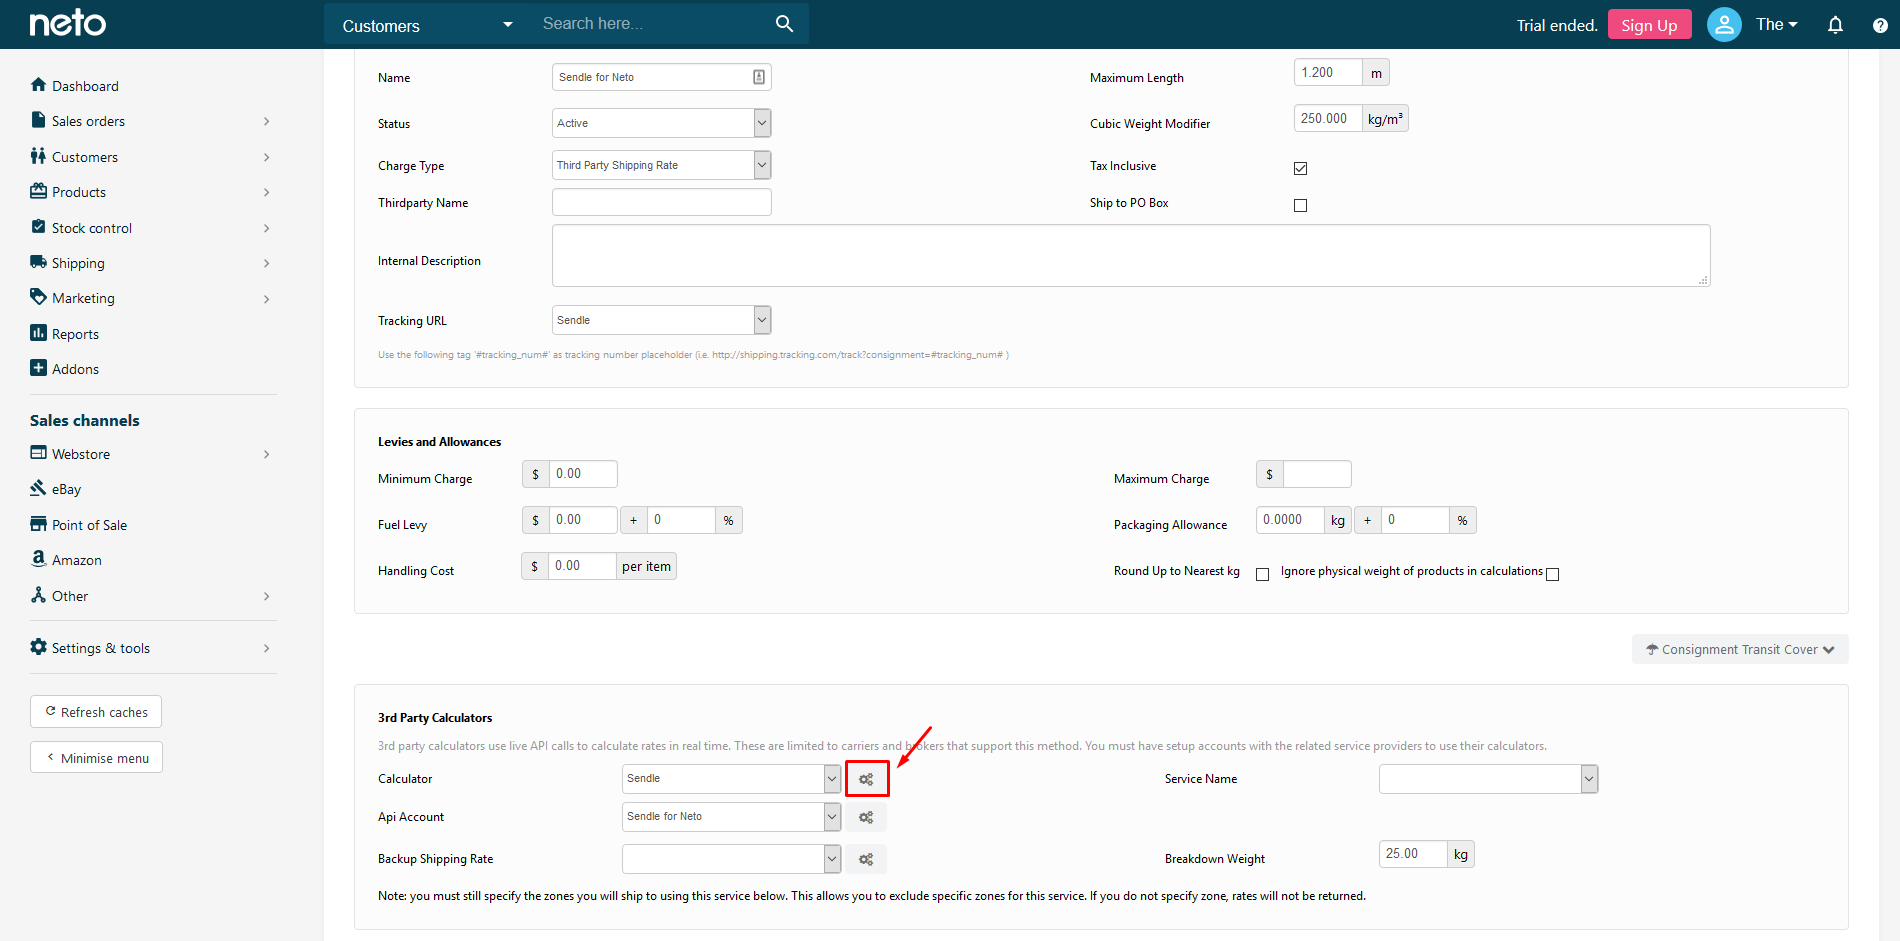
- Scroll down to Sendle and click the edit button.
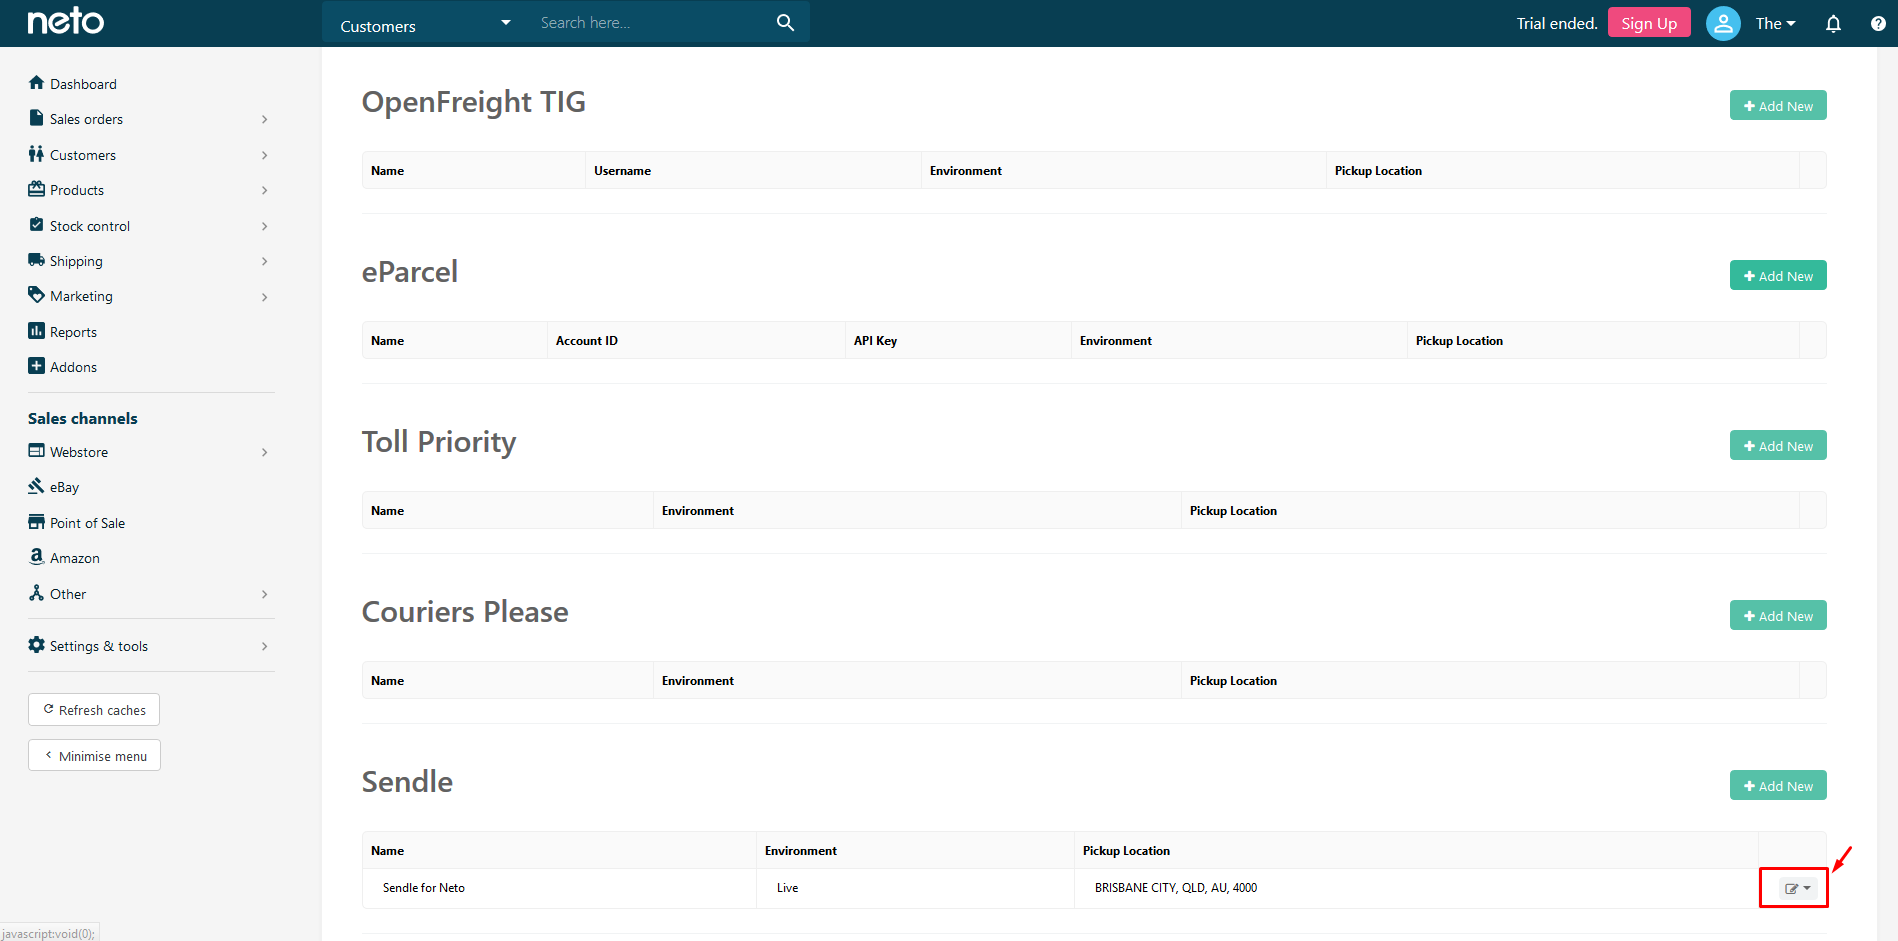
- Add the new suburb and postcode location and click Okay.
Carrier Config Settings
- In your Neto control panel navigate to Settings & Tools > Shipping.
- Select Carriers & Labels.
- Select Sendle for Neto.
- Update the address in the Sender Details section.
- When complete, click the Save & Close button.
Your Sendle integration will now utilise the new postcode for calculating shipping.