Please Note: Neto POS is not available outside of Australia and New Zealand.
Please Note: Payments can only be applied to orders that have been created in Maropost POS. Control panel sales orders do not appear in point of sale.
Apply Payments to a Sale
Set up your POS payment methods by following the steps in this article.
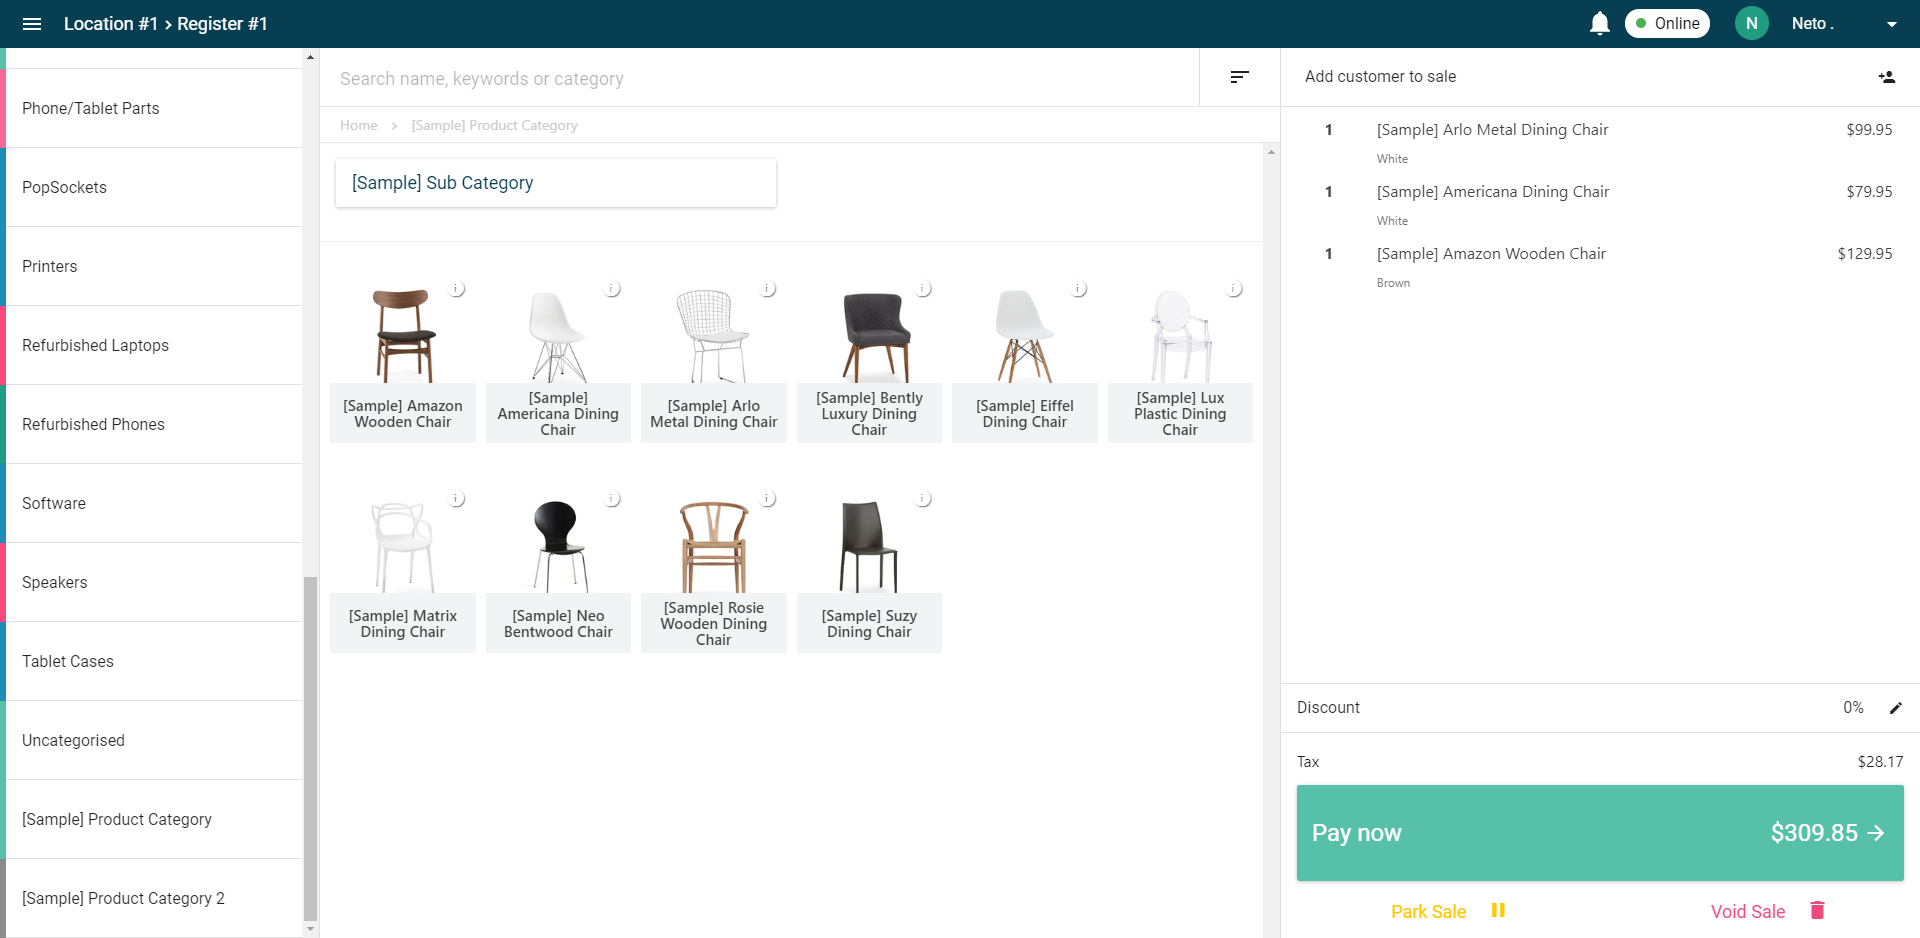
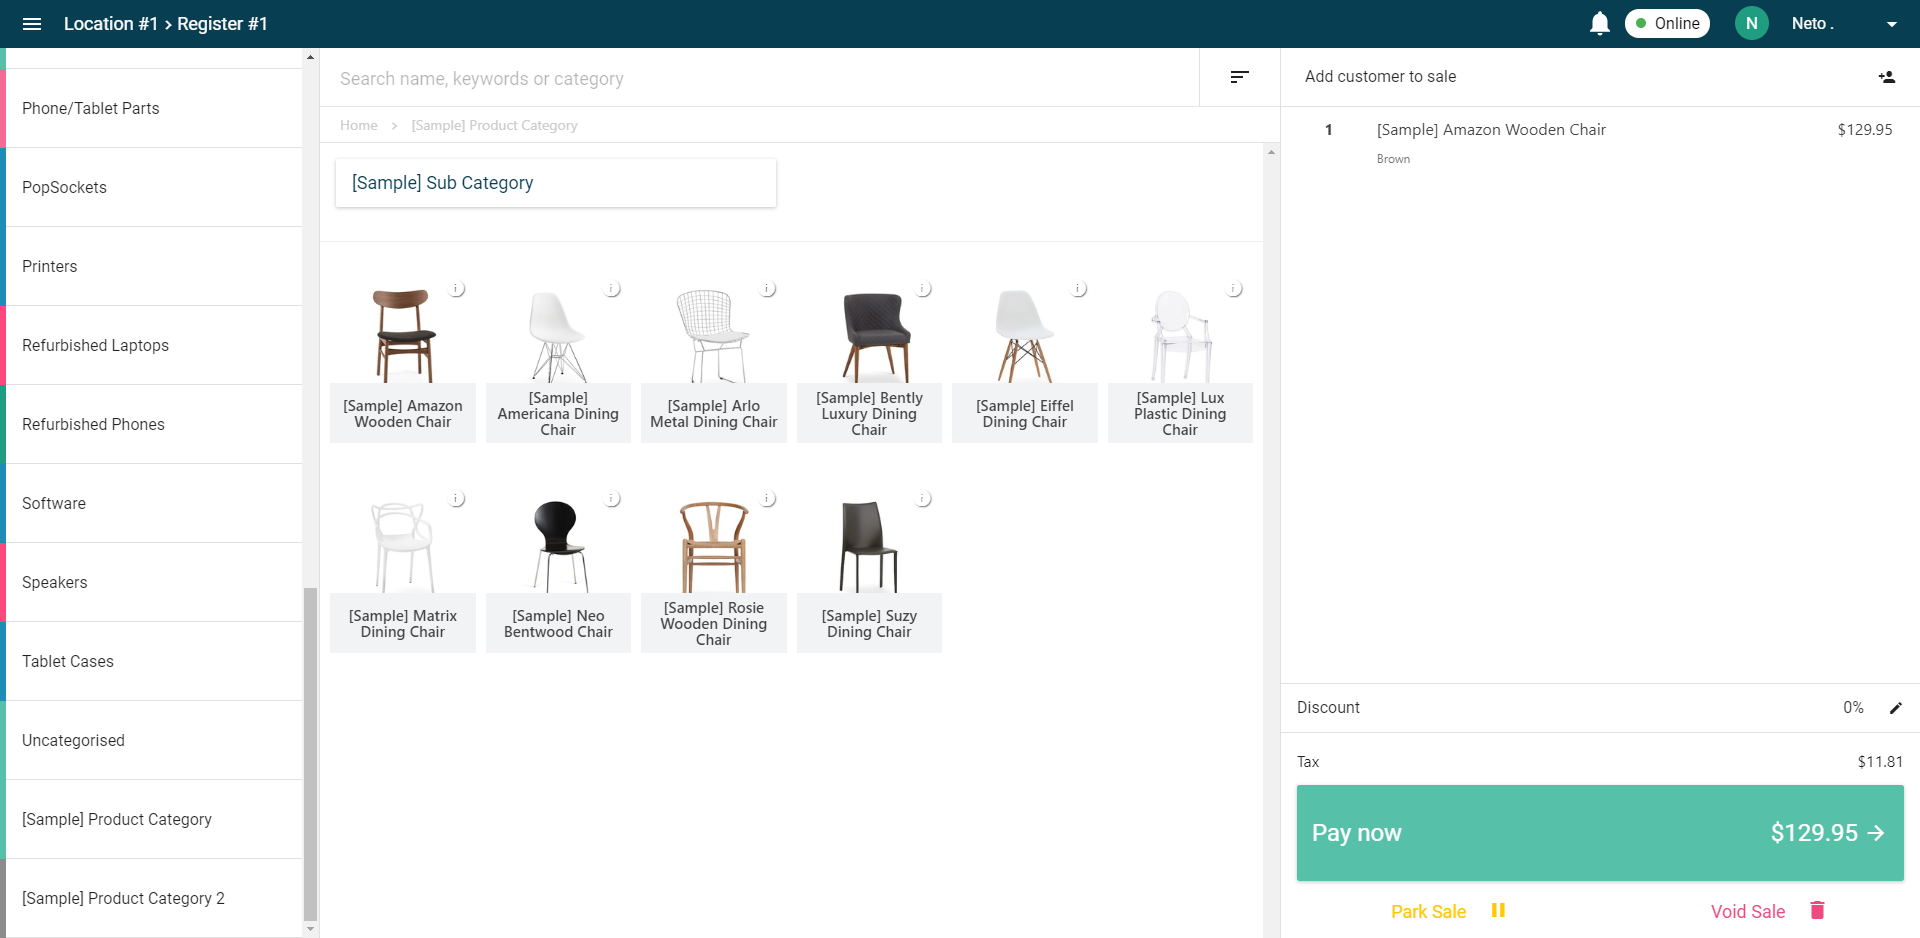
Once you have added products to a sale, you can move on to taking payment. To apply a payment:
- Click/tap Pay Now on the bottom right of the sale screen
- You will now be presented with your list of payment options. Select the customer's chosen payment method from the list of available options
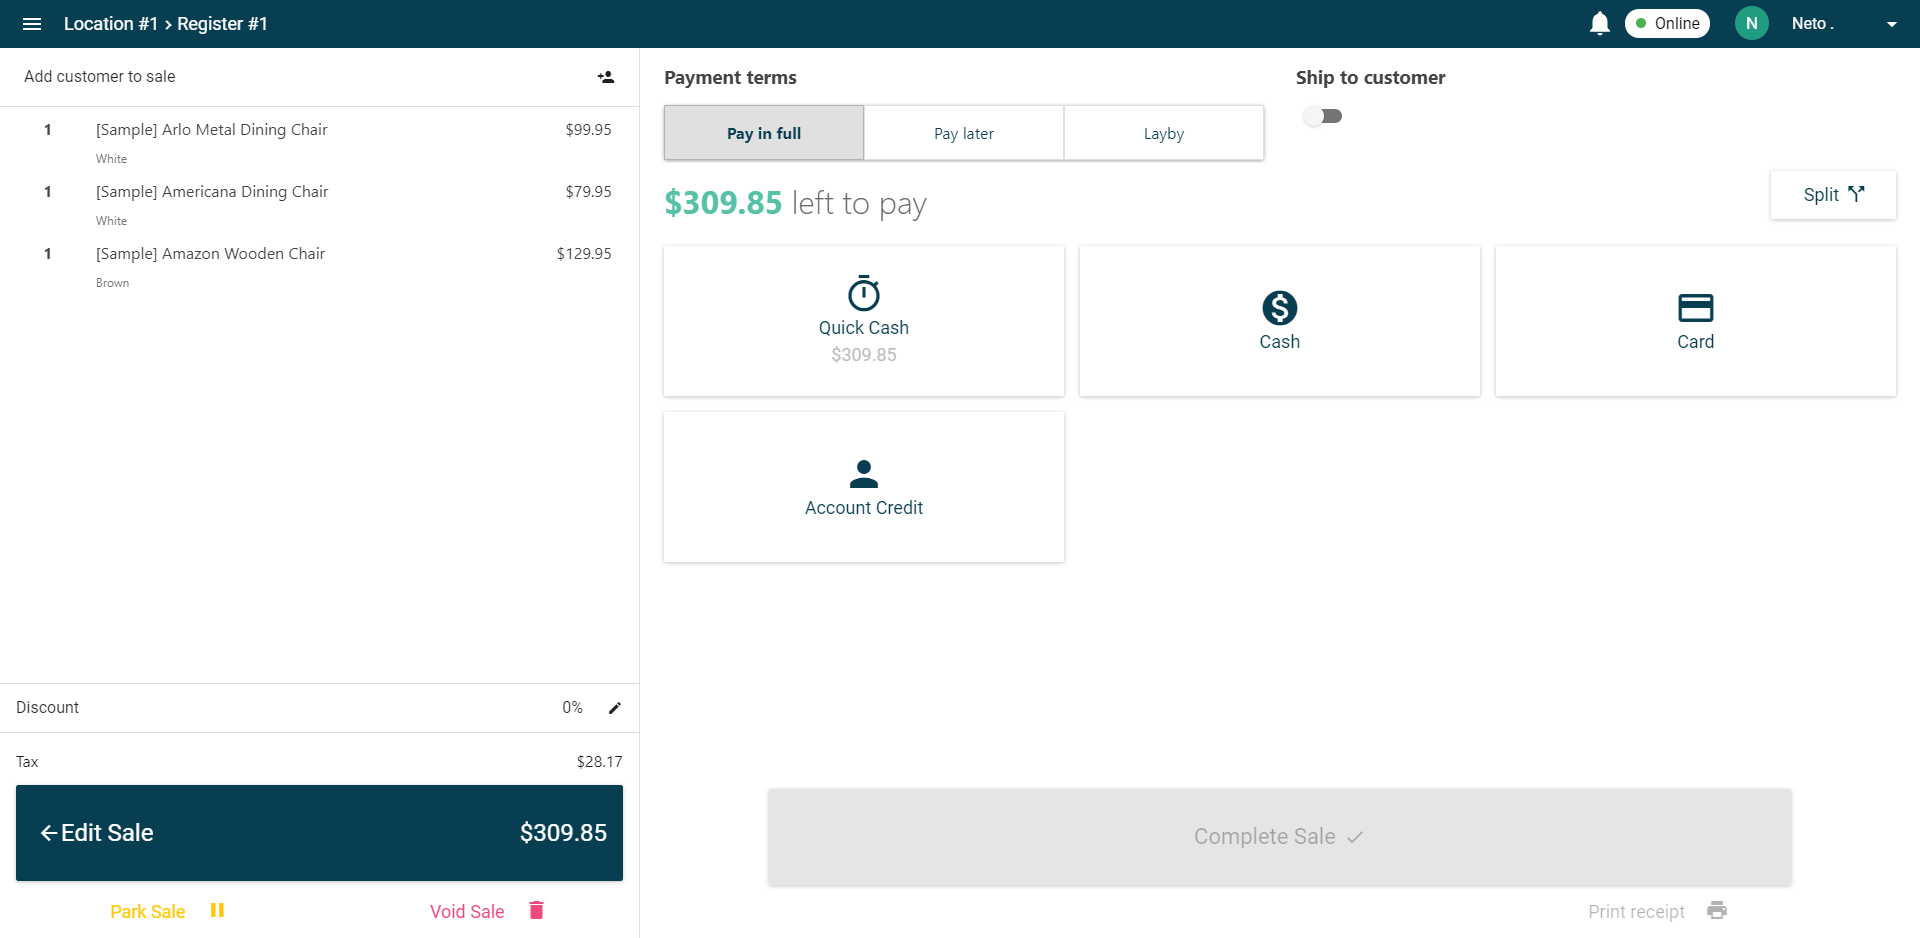
- If you prefer to calculate the change in your head, simply tap the quick cash button. This will leave you to quickly complete the transaction without entering in the exact amount tendered.
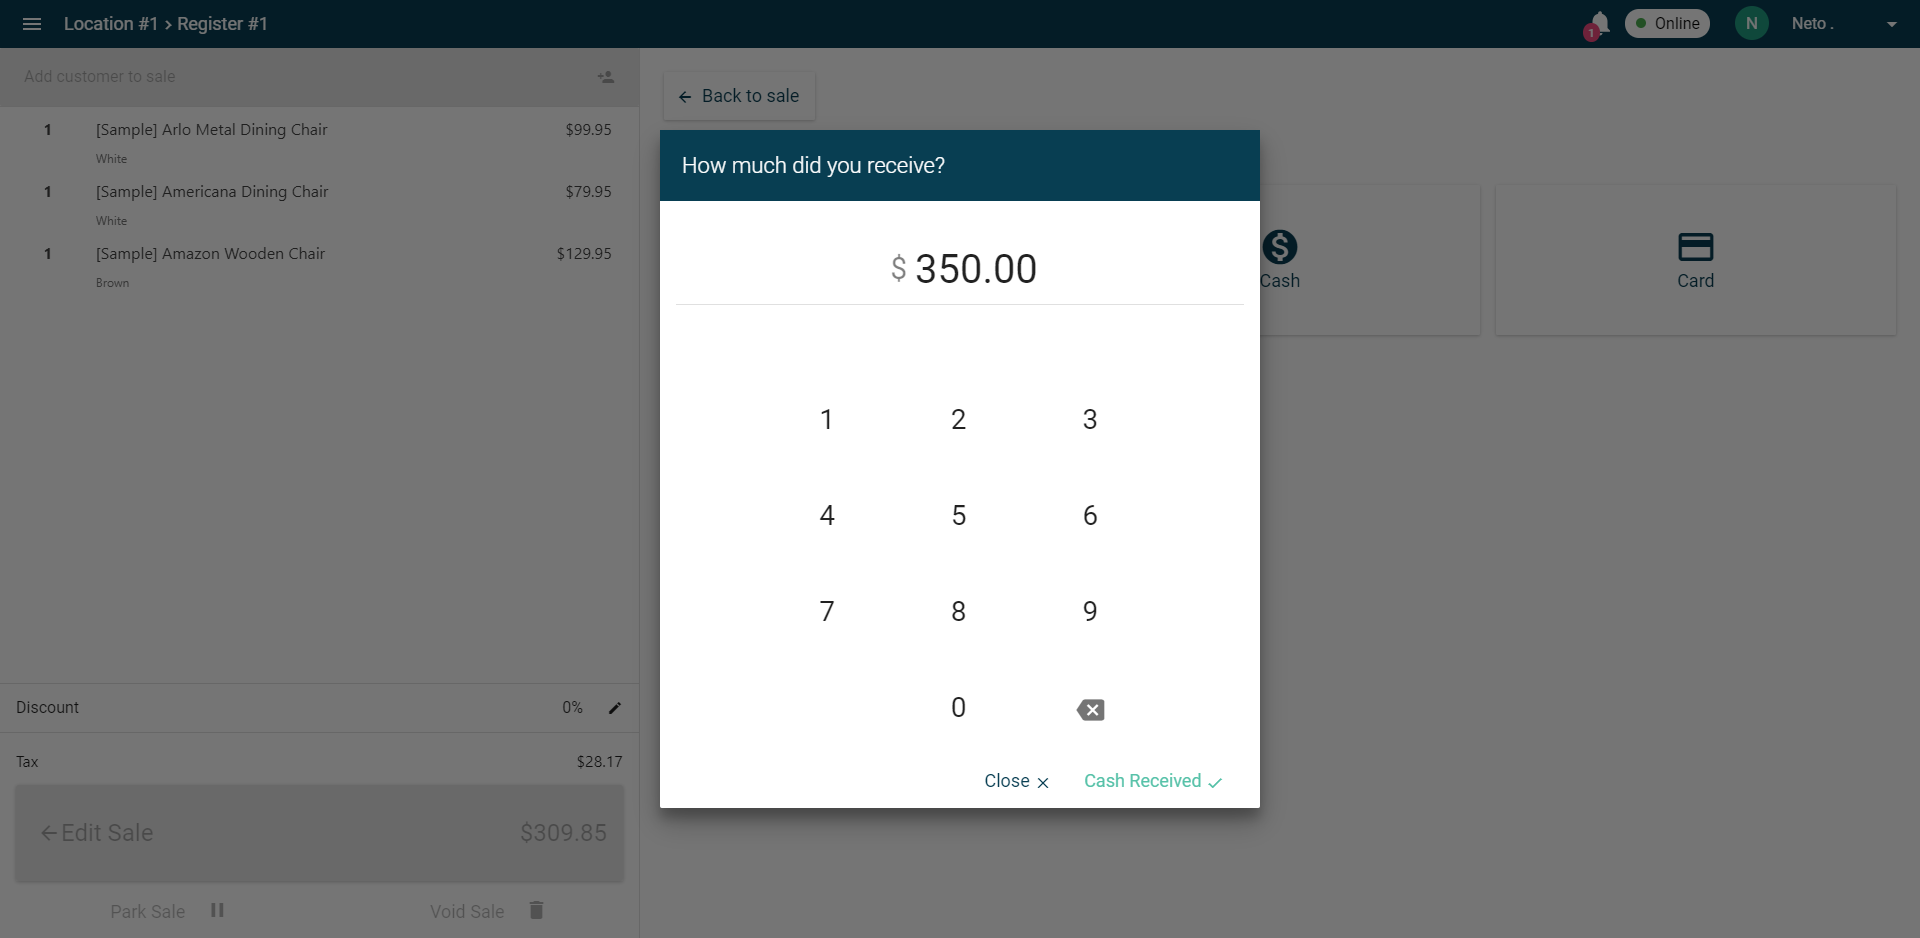
- If your customer is paying by cash and you want to enter the exact amount received, tap on Cash Payment. Enter the amount received, and Maropost POS will calculate the change due.
- If Eftpos / credit card, verify the amount charged on your payment terminal prior to tapping or clicking the Card Payment option.
- Pay Later is a payment option where you can process a sale without having to take payments at the same time. The order gets created with a New status (this can be changed per order) and the order can be completed and paid at a later stage from POS or the Neto control panel. This feature helps merchants or sales to take orders on the go and goods can be shipped at a later stage.
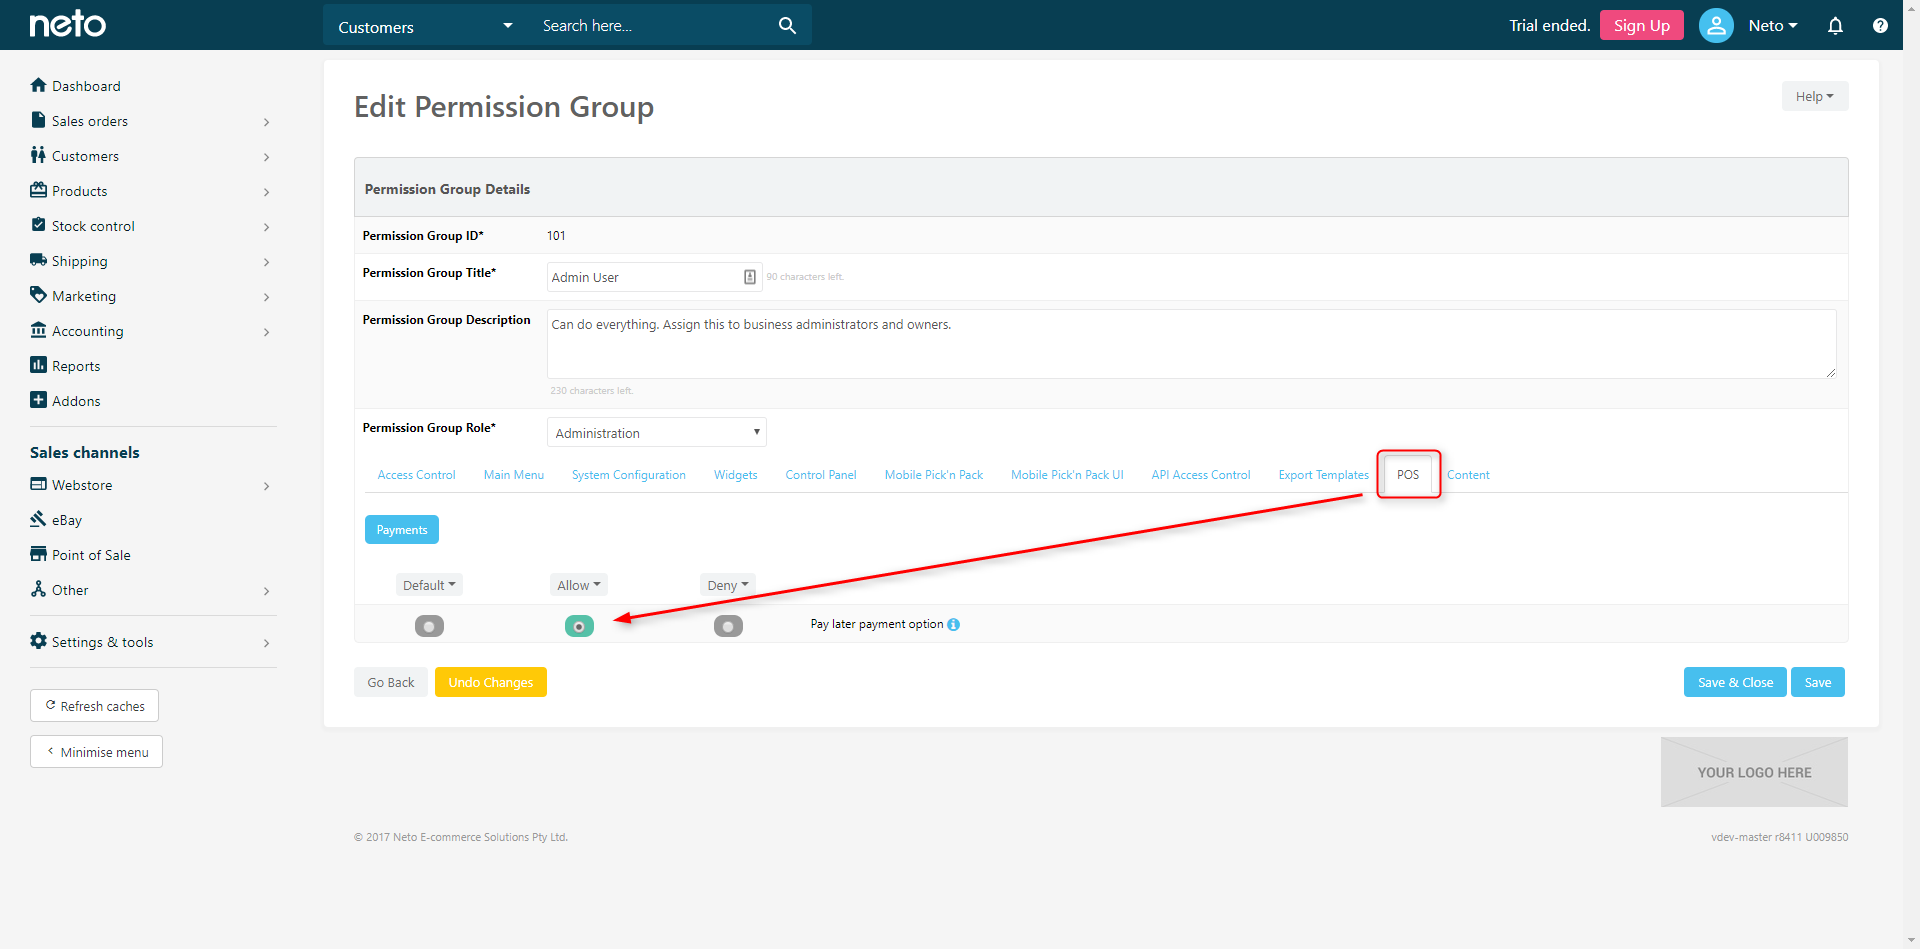
Pay later is limited to admin users by default. You can edit the permission groups to include this functionality from the Neto control panel by navigating to Settings & Tools > All Settings & Tools. Click on Staff User Accounts & Permissions tab and click Staff Permission Groups. Edit the permission group you wish to change, click on the POS tab and change permission to Allow and save changes.
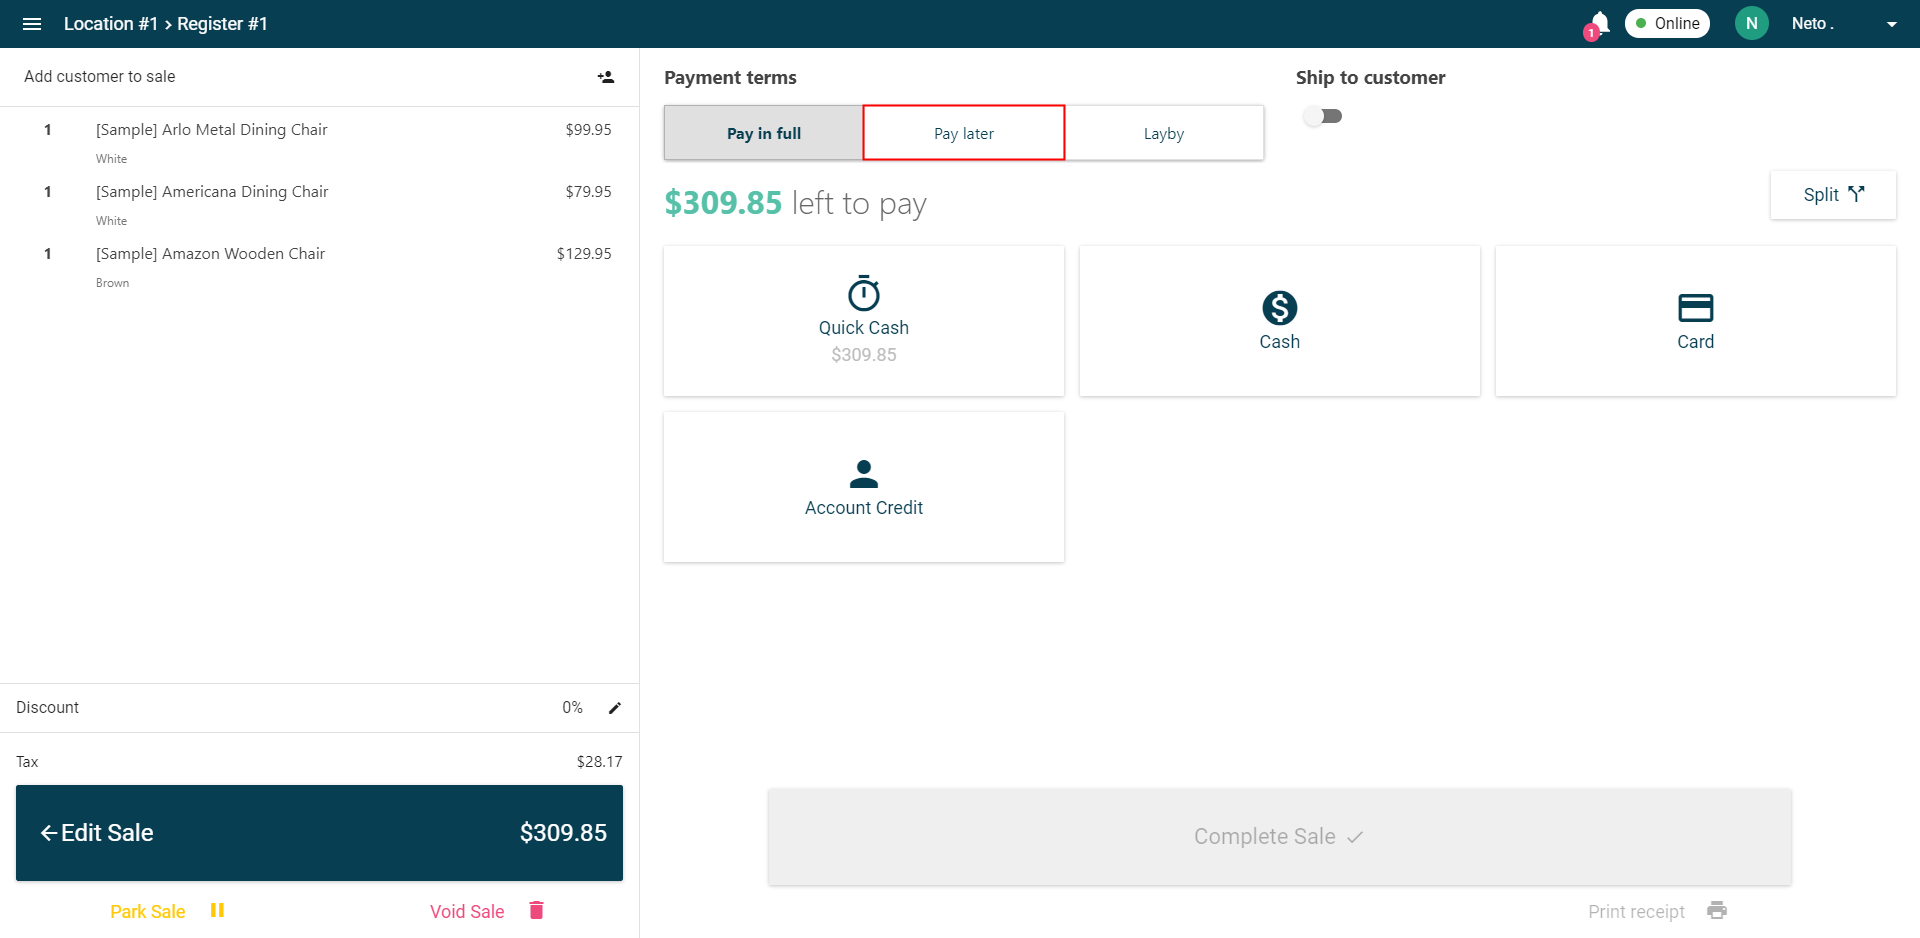
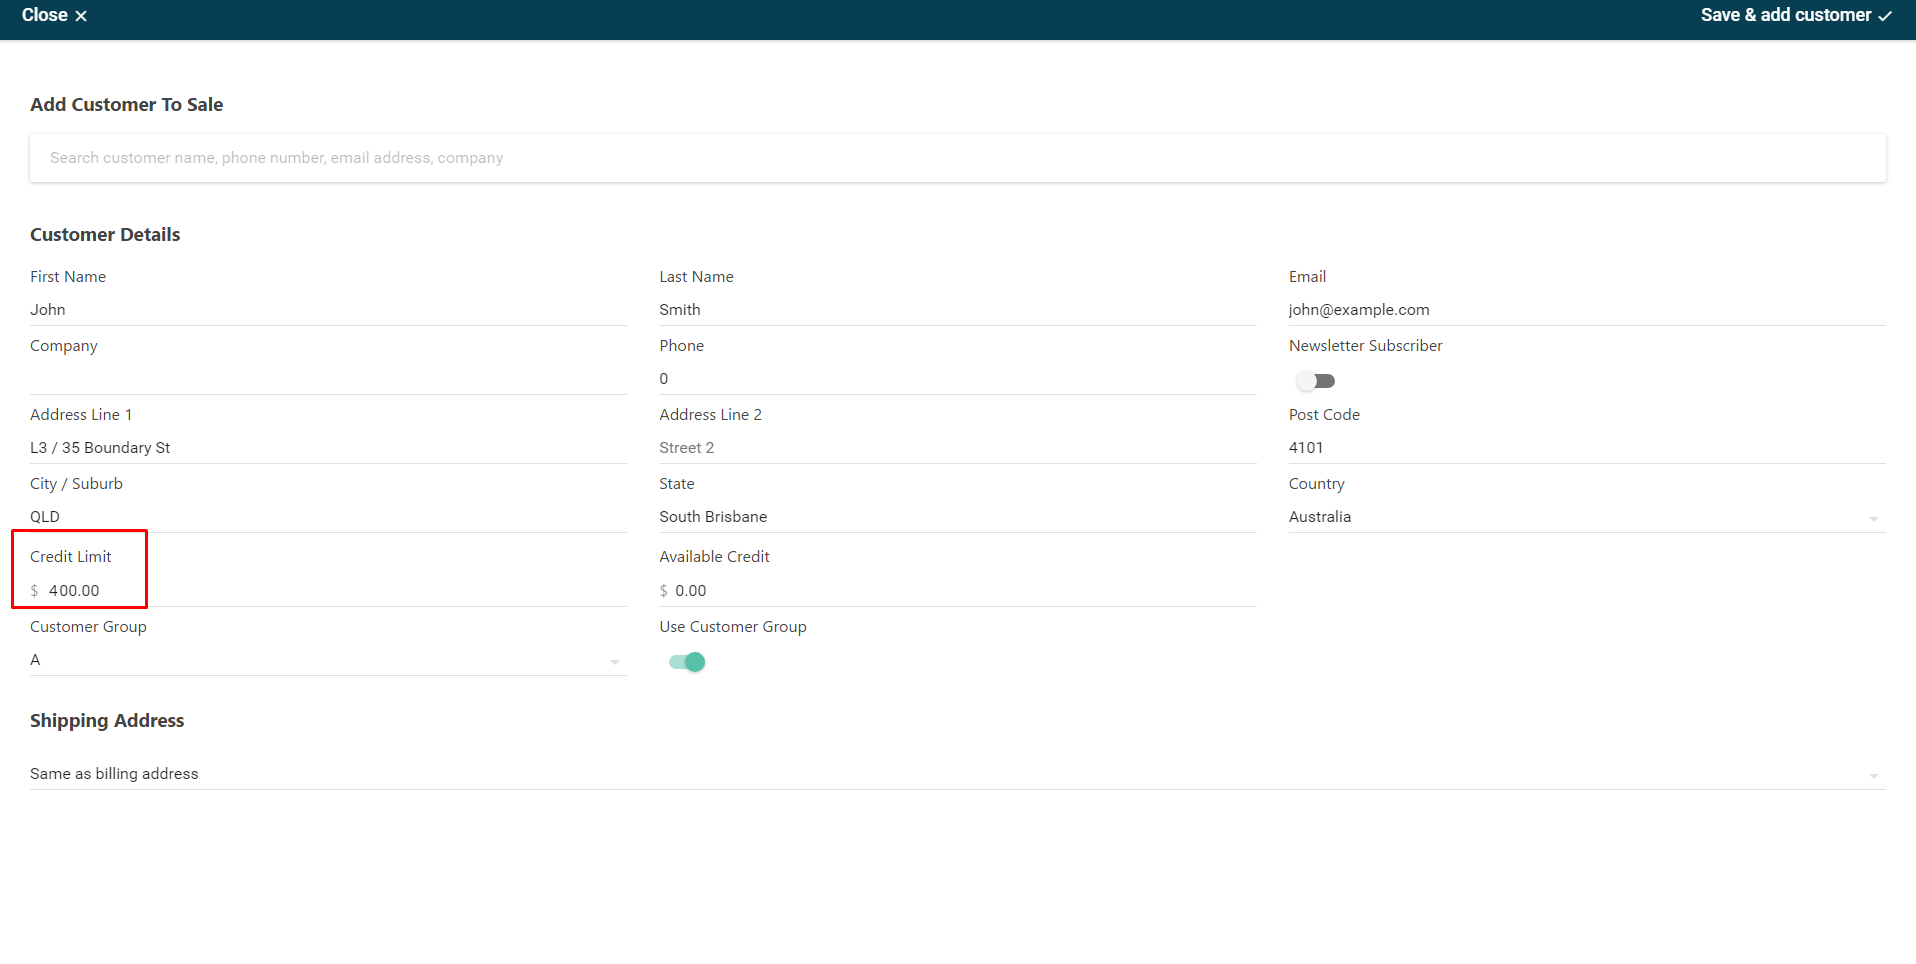
- The Account Credit feature has the ability to push credit limits set on customer accounts into POS when you add the customer to a sale. Now customers have the ability to use their account credit for sale up to the limit set on their account, by selecting Account Credit when processing their payment. The credit limits can only be set in your Neto control panel.
- From the transaction complete screen, you are able to print or email a receipt for your customer and for your own records, or return back to the sale if necessary to make adjustments.
Once you are ready, tap on the Complete Sale button to finalise the transaction.
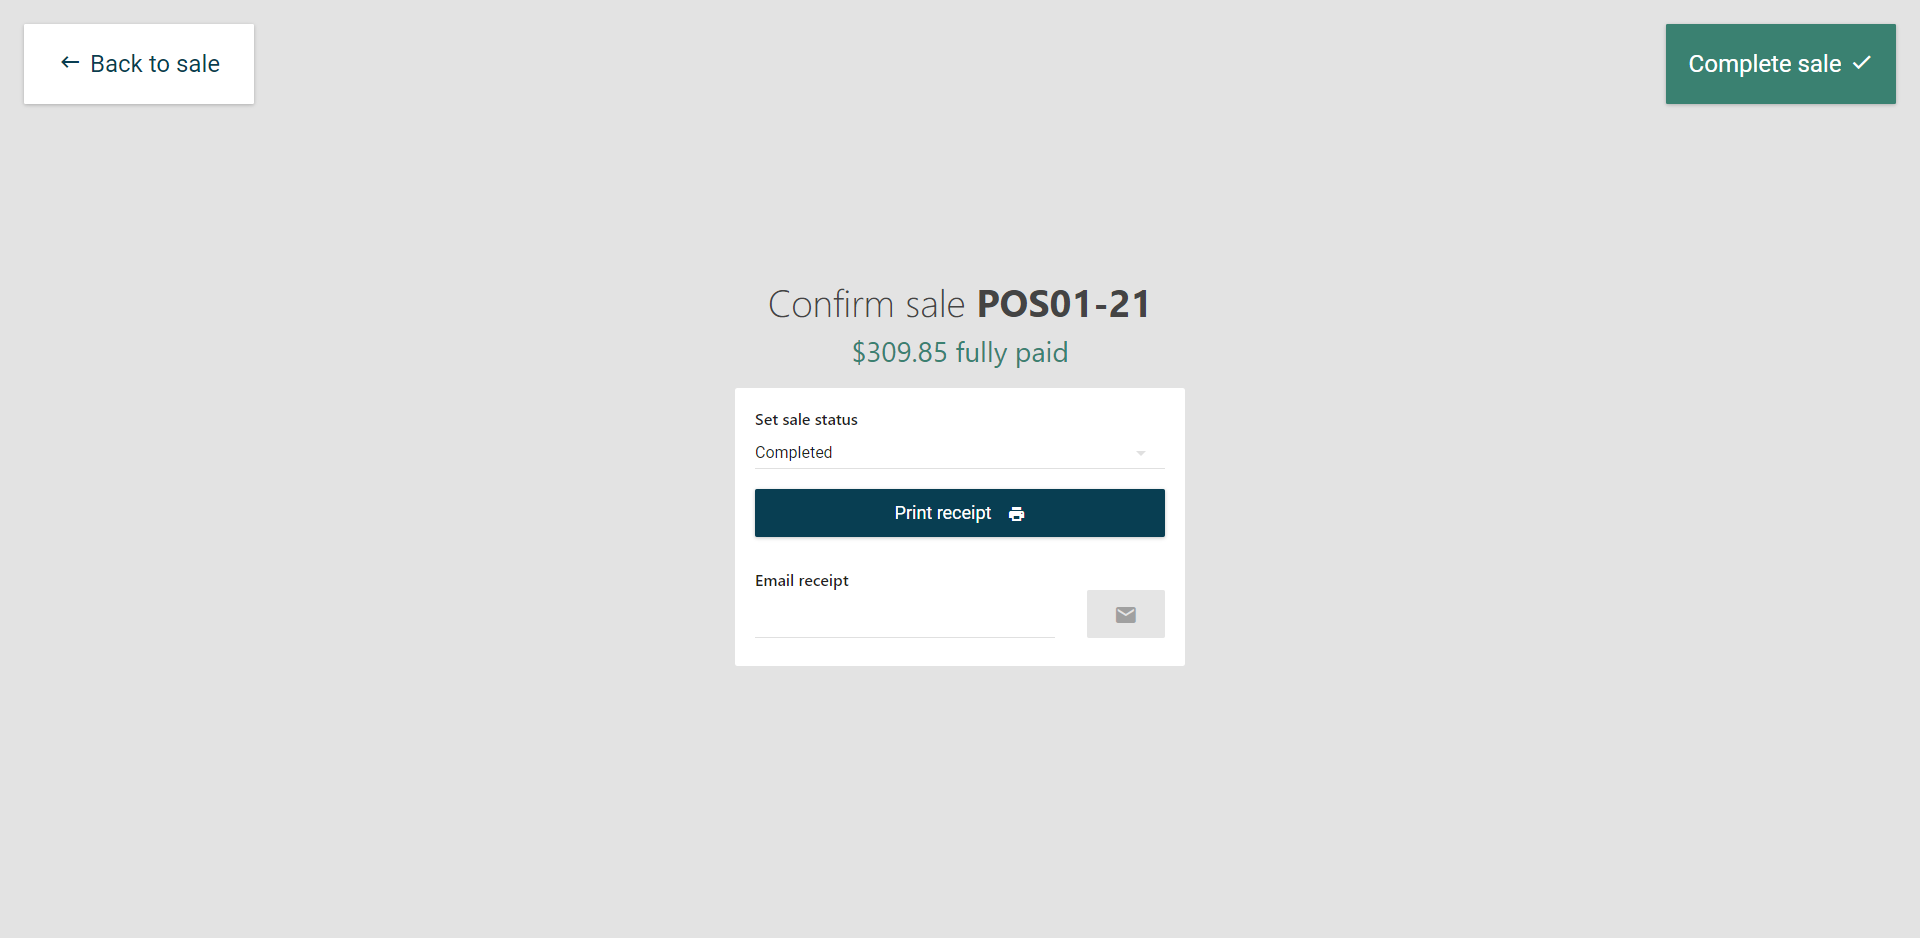
Your transaction is now complete.
Split a Payment
Maropost POS supports the ability to receipt multiple payments against a single order. This allows your customers to split the order total across a variety of payment methods. This is especially handy if a customer would like to pay for part of the order in cash and the remainder via Credit Card or EFTPOS.
Once you have completed adding products to a sale, you can apply payments to the sale.
- Click/tap Pay Now on the bottom right of the sale screen.
- You will now be presented with your list of payment options and the ability to split the payment. Select the Split button.
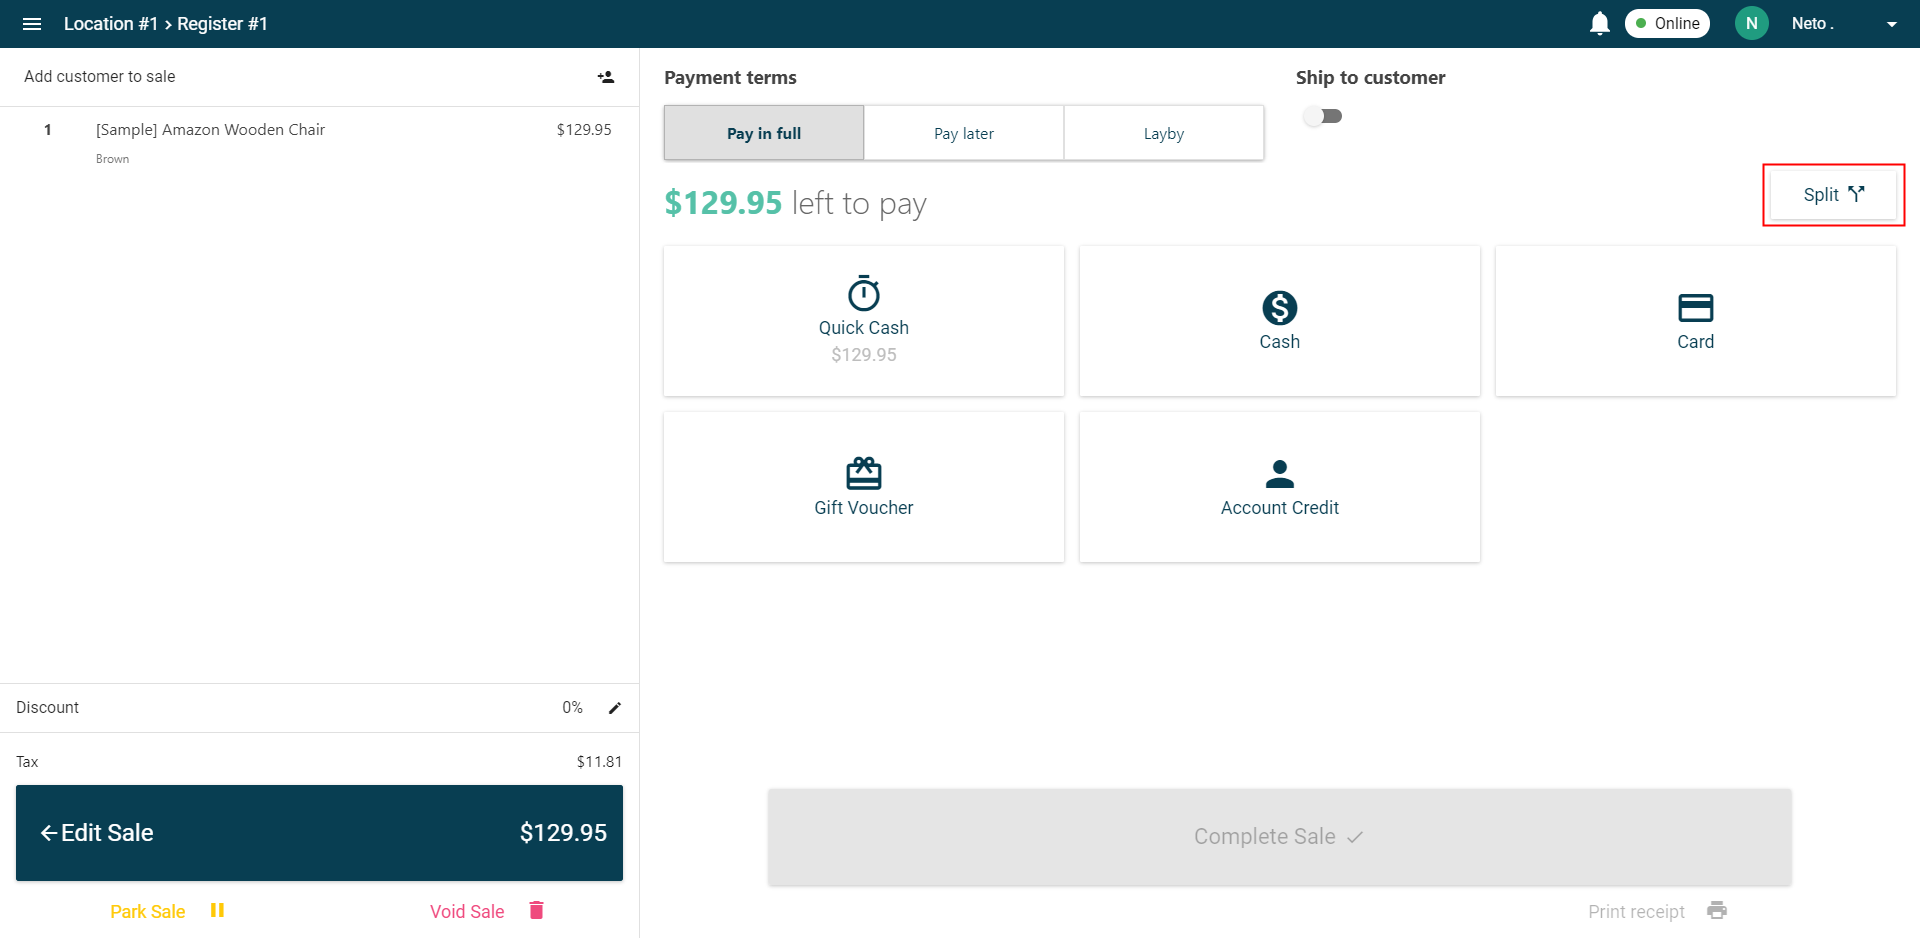
- The payment will be automatically split into 2 equal payments. Pressing the split payment button will split the payment into 3 equal parts. You can do this as many times as you would like.
- If required, you can edit the amounts by selecting the pencil tool and entering the value of that payment line. The remaining lines will automatically calculate the remaining balance evenly.
- When you are ready to complete a payment, select Pay now against the relevant payment line. You will then be presented with payment options to complete the payment.
- After each payment, you can print a receipt for just that payment line by selecting the Print Receipt.
Pay with a Gift Voucher
Gift voucherspurchased through your online website or in store can also be redeemed in store so customers can pay for their purchases. To redeem a gift voucher in your Maropost POS terminal:
- In Maropost POS, add products the customer is purchasing to the sale.
- Click/tap the Pay now button.
The options on the POS page update to display a range of payment buttons.
- Click/tap the Gift voucher button.
Please Note: Your POS terminal requires an active Internet connection to redeem gift vouchers.
The Gift voucher pop-up window will now ask you for the Voucher Code and Secret Key.
- Scan the barcode printed on the voucher receipt
- Or enter the Voucher code and Secret key.
When manually entering the Secret key, only the first five characters of the key need to be entered.
To enter gift voucher information either:
- Click the Apply voucher button.
Click/tap the Check voucher balance button to see if the voucher is valid and display its balance, without adding it to the sale.
- Once the voucher is applied, it will appear as a payment on the order. Any outstanding amount can be paid with another payment method or using a different voucher.
Receipts
Print Receipts
You can choose to print or email a receipt from the Sale Complete screen.
Tap or click Print Receipt to print a receipt to your integrated receipt printer.
You can reprint the receipts from previous transactions in your shift easily from the Sales History screen.
- From the side menu, click or tap Sales History
- Click or tap on the transaction you wish to print a receipt for.
Tap Filters in the top right to narrow your search.
- Click or tap on the Reprint Receipt button.
To reprint a receipt from another shift, log into your control panel and go into the POS menu. Open the shift and find the order to reprint the receipt.
Email Receipts
Maropost POS supports emailing receipts directly to a customer at the end of a sale. Once you have applied payments to the sale:
- On the Checkout screen, enter your customers email address. Select the envelope button to send them a copy of their receipt via email. You can enter as many email addresses in succession as you would like to send the receipt to multiple email addresses.
- Your customer will then receive an email with a copy of the receipt when the Complete Sale button is pressed.
Open the Cash Drawer
iPad
If you have a cash drawer connected to your receipt printer, the cash drawer will automatically open at the end of cash sales and refunds.
Windows and OSX
There's two ways the cash drawer can open.
If you find that your cash drawer does not open at the end of a transaction. Be sure to check and make sure that your receipt printer has enough paper, and has not jammed. Most issues related to cash drawers not opening are related to issues with the attached receipt printer.
You can also open the cash drawer in POS by tapping the menu, and selecting Close Register. Tap the button at the bottom of the screen that says Open Cash Drawer, and then Back To Sale.