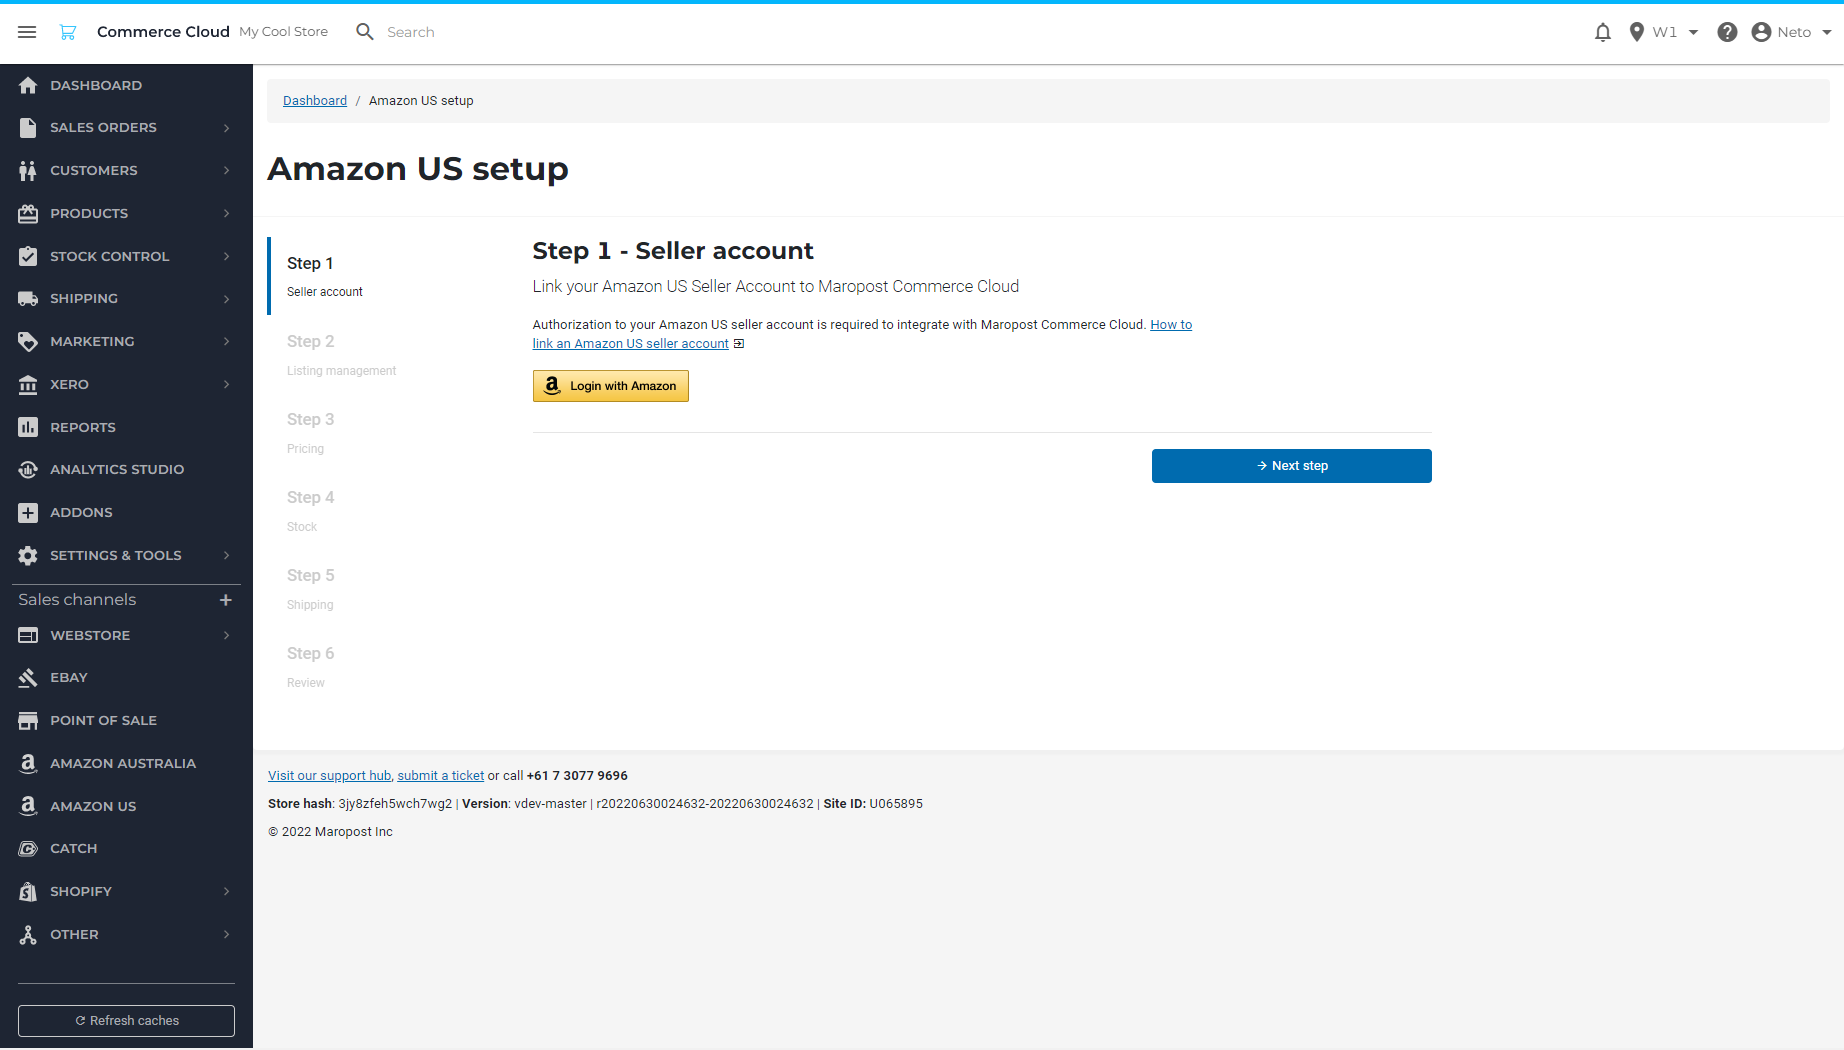
There are seven steps to set up your Amazon US account in your Neto control panel..
Subscription Agreement
Amazon US is a separate sales channel, and may incur an upgrade to your monthly subscription costs. To install the Amazon sales channel:
- In your Neto control panel select Amazon US from the menu.
- Click the Setup Amazon US button.
- Select the I agree to the subscription cost box.
- Click the Next Step button.
Link an Amazon US Seller Account
Please Note: If you have several Seller Central accounts, we recommend ensuring that you are logged out of Seller Central before initiating the authentication process.
To link your Amazon US seller account you will need to retrieve some information for Maropost to gain access:
- Click the Login with Amazon button to open the Amazon Seller Central login page.
- Enter your Seller Central credentials.
Please Note: if the username is prefilled, ensure that it is the correct account that you wish to connect to your Neto store.
- Click the Sign-in button to be redirected to the Authorise Neto page.
- On the Authorise Neto page, check the box labelled direct Amazon to provide Neto access to my Selling Partner account and related data.
- Click the Confirm button to be redirected back to the Neto Amazon US setup wizard page.
- Click the Next step button to confirm and continue to the next step of the wizard.
Listing Management
Neto can list products to Amazon provided they have already been registered in Amazon's catalogue. Products that aren't in the catalogue can be registered directly in Amazon.
To search for a match, Neto uses the data you've entered into the product UPC field. If this UPC is in Amazon's database, your product will be listed for sale.
Decide if you want Neto to try and list products for you by selecting Create and manage from Neto, using the product's UPC and click Next Step.
If you want to let Neto round measurements (height, weight, and length) to two decimal places for you, select the Enable Field Value Rounding checkbox.
Click the Next Step button.
Select Product Pricing
If you have existing listings on Amazon you can continue to use their prices, or you can instead select a price group from your products in Neto:
- Choose if you want to use Neto product pricing or the existing Amazon Seller Central product pricing.
Seller central pricing allows you to manage prices directly in Amazon, or through a third party application.
If you select your Neto product pricing, choose which price group to use on Amazon. Product prices are kept up to date within Amazon based on the price group you select in this screen. If you've created a specific price group for your Amazon listings, select it on this page. The group selected here will also be assigned to customers when orders are created from your Amazon. If not, we recommend selecting your default price group and reviewing your pricing later.
- If you've selected a Neto price group, you can also choose to use your promo prices on Amazon. Select the Use promo (sale) pricing, if set for a product box if you'd like your promotional prices on Amazon.
- Click the Next step button.
Set Stock Controls
Stock levels can be populated from Neto, or managed directly in Amazon (including by third party integrations).
- Select if you want to use the Neto product stock or keep the existing Amazon Seller Central product stock levels.
- If you've chose the Neto product stock, select if you want to list All stock or A limited amount of stock onto Amazon.
- Selecting a limited amount of stock will prompt you to enter a quantity that won't be exceeded for each listing on Amazon.
- Optionally, select the Set a stock buffer which Amazon can't access, but your other sales channels can (this prevents overselling) and enter a Stock buffer quantity to hold an amount of stock that Amazon will not have access to.
For example, you have 10 units of a product in stock. If you set the list amount to '10', your Amazon account will list '10', and your other channels will have 10 available for purchase also.
If you then set the stock buffer to '3', the amount listed on Amazon will change to '7', and 10 units will still be available to be sold through other channels.
- Click the Next step button.
Map Shipping and Handling
Shipping costs and availability are configured through the Amazon Seller Central. Neto is not able to push shipping rates from your Neto shipping options into Amazon, therefore it's important that rates are configured in Amazon as accurately as possible.
- Select standard and expedited shipping options from the dropdown menus to match the Amazon services.
When a customer makes a purchase through Amazon, the order will display the shipping option selected here to process the order. If shipping options are not mapped, all Amazon orders will be placed on-hold and will need to be processed manually.
- Enter a Handling Time for all orders. This is the number of days between receiving the order from the customer, and shipping it to them. This will apply to all Amazon US product listings.
- Click the Next step button.
Review
- Confirm all the settings are correct before completing setup. To change any settings, click on the relevant step and make any changes.
- Click the Complete Amazon US setup button.
Please Note: If you're using an integrated accounting program (e.g. Xero or MYOB), you will need to map the Amazon payment method to an account. To do this, navigate Settings & tools > Payment Methods click the Configure button next to the Amazon Payments method.
You have successfully integrated an Amazon US Seller account with your Neto control panel. You'll now be taken to the Amazon dashboard where you can view listings or approve products to list on Amazon.