Customise Email or Print Templates
You will need knowledge of HTML and the Neto B@SE language to edit system generated email and print templates.
Before you make changes, we recommend you make a copy of the code and save it on your computer as a backup.
Please Note: All styles must be inline. No external or internal style sheets can be referenced.
There are two ways to edit your templates, through your control panel and via SFTP.
Via your Control Panel
To edit the templates in the control panel:
- In your Neto control panel navigate to Settings & Tools > All Settings & Tools.
- Select System Templates.
- Select Document Templates or Email Templates.
- Drill down into the template's filename and click on it to open.
- You can now edit the template code to suit your needs.
Via SFTP (Secure File Transfer Protocol)
- Request SFTP access to your site if you don't have it already.
- Log in through an FTP client (e.g. FileZilla).
- Navigate to
/private/www/netosuite/SysDoc/printdocs/ or /private/www/netosuite/SysDoc/emails/. - Browse through the folders to find the template you want to edit, and open it.
- Edit the template file to suit your needs.
Custom Invoice Template Sets
Please Note: This section requires the Invoice Templates add-on from the Neto add-on store.
Template sets allow you assign specific document templates to different customers. They can include different company logos and contact details specific to the customer, or the branding you're putting forward. For example, you may have a different invoice template for wholesale customers, or you may have multiple eBay stores each with their own branding.
The three templates (quote, invoice and RMA) can be grouped into a set that can be assigned to customers, orders or eBay stores.
SFTP (Secure File Transfer Protocol) is used to duplicate and rename existing templates or to transfer the new temples to your website.
To create a new custom template set:
- In your Neto control panel navigate to Settings & tools > All settings & tools.
- Search for Custom Invoice Templates and click it.
- Click Add New Document Template button
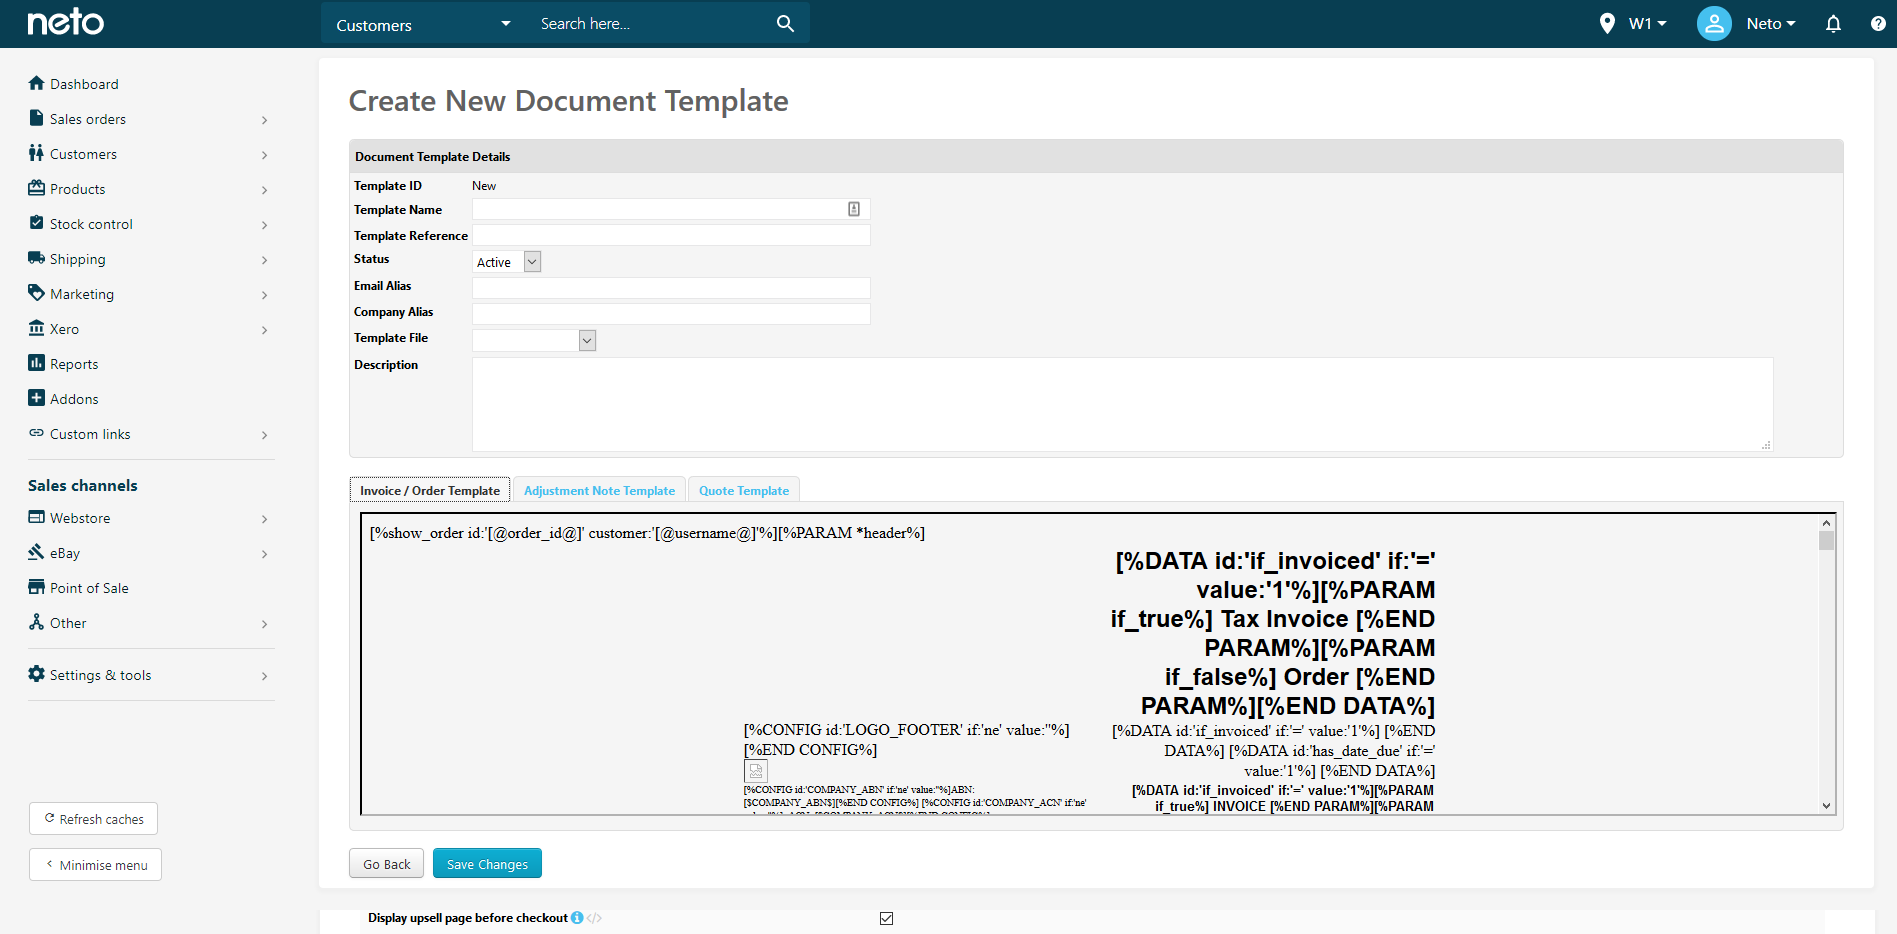
- The template name will appear in the list of template sets on the customer card, order details and eBay store settings.
- The template reference, email alias, company alias and description are for internal reference only.
Enter the details of your template set:
- Select the template filename from the dropdown menu next to the Template File field.
The list in the drop down comes from the list of template files in the Print Templates > Custom > Order folder. They must also have a .template.html extension.
Once selected, a preview of the three templates can be viewed in the tabs at the bottom of the page.
- Click on the Save Changes button.
Assign a Template Set to an eBay Store
Template sets can be assigned to eBay stores to create individual branding and a cohesive experience for your customers. To assign a template set:
- In your Neto control panel navigate to eBay > Setup & Tools.
- Click on Store Manager.
- Select the eBay store you want to assign the template set to.
- In the Document Template drop down box, select the template set for the account.
- Click the Save Changes button.
Emails sent to customers for this eBay account will now use your custom template set.
Canned Responses
Insert a Canned Response
Canned responses are blocks of text that you can insert into emails to send to your customers. You can add a canned responses in emails sent from:
- Sales orders
- Customer cards
- Customer list
- RMAs
To insert a canned response into an email:
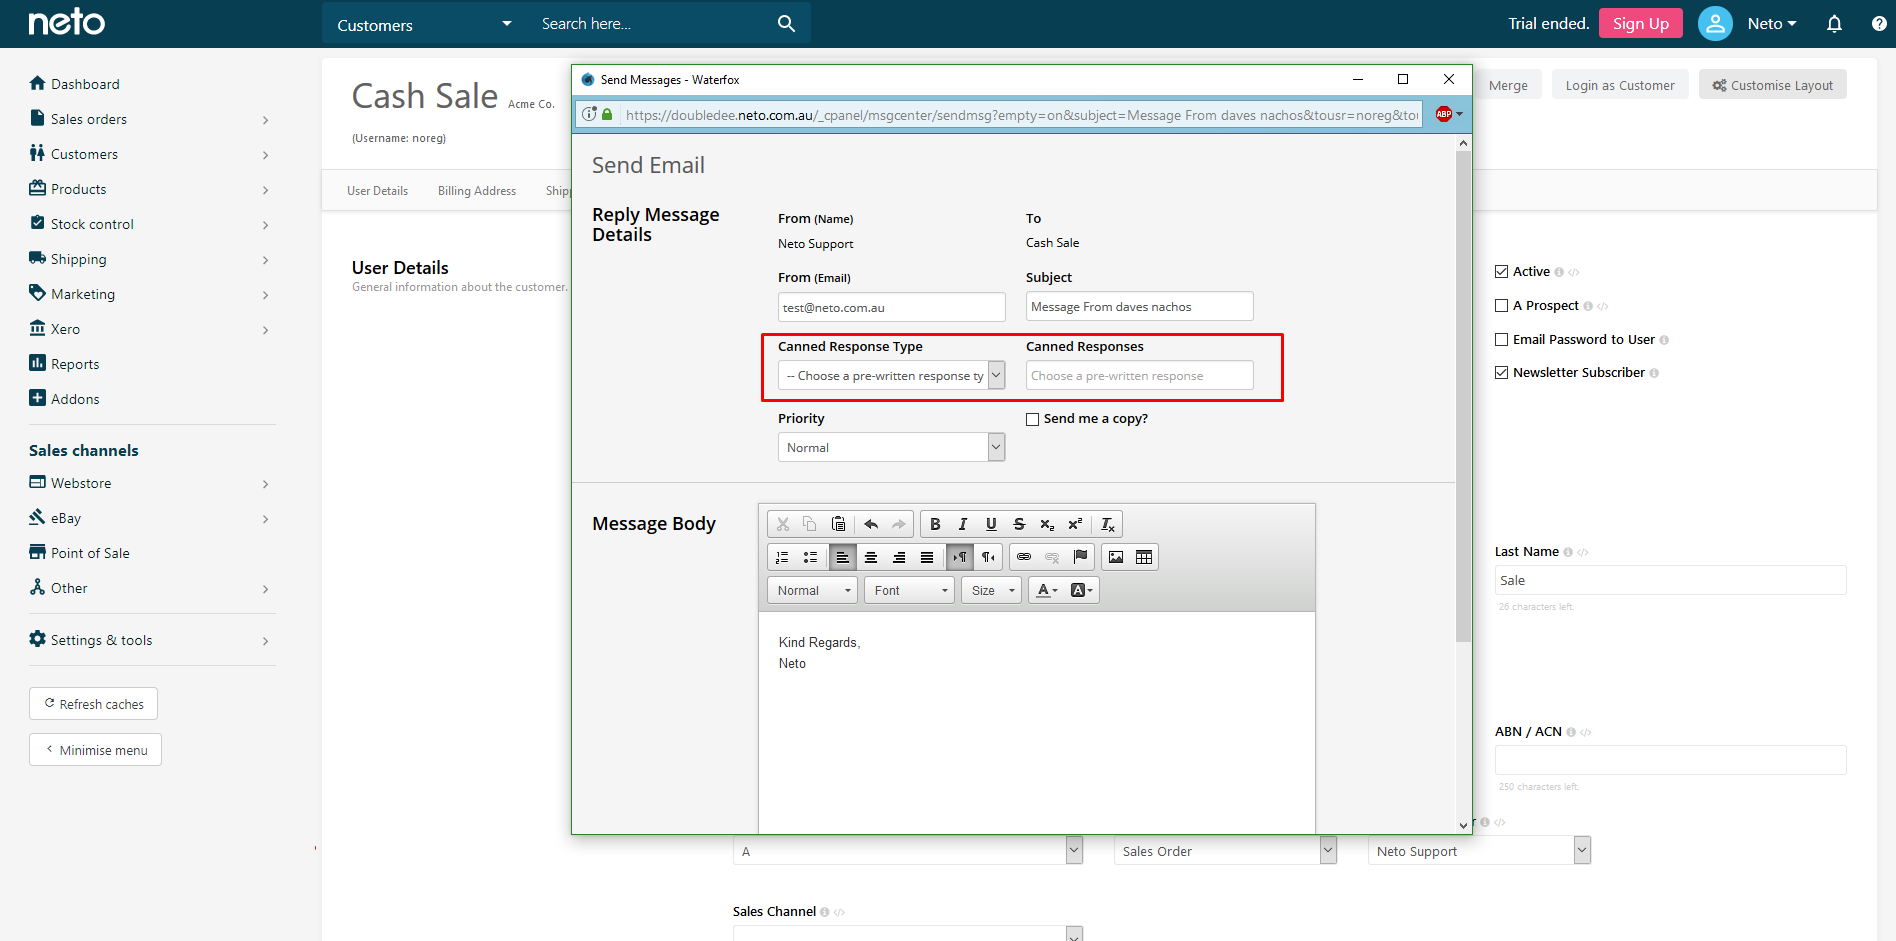
- Select the sales order(s), customer(s) or RMA(s) and click the Email button.
- Click the type of email.
- Select the Canned Response Type from the drop down menu.
- Choose the Canned Response and it will be added to the email automatically.
Add a Canned Email Response
To add a canned email response:
- In your Neto control panel navigate to Settings & Tools > All settings and tools.
- Click on Canned Responses.
- Click the Add New Canned Responses button.
You can also edit existing canned responses by clicking on them in this page.
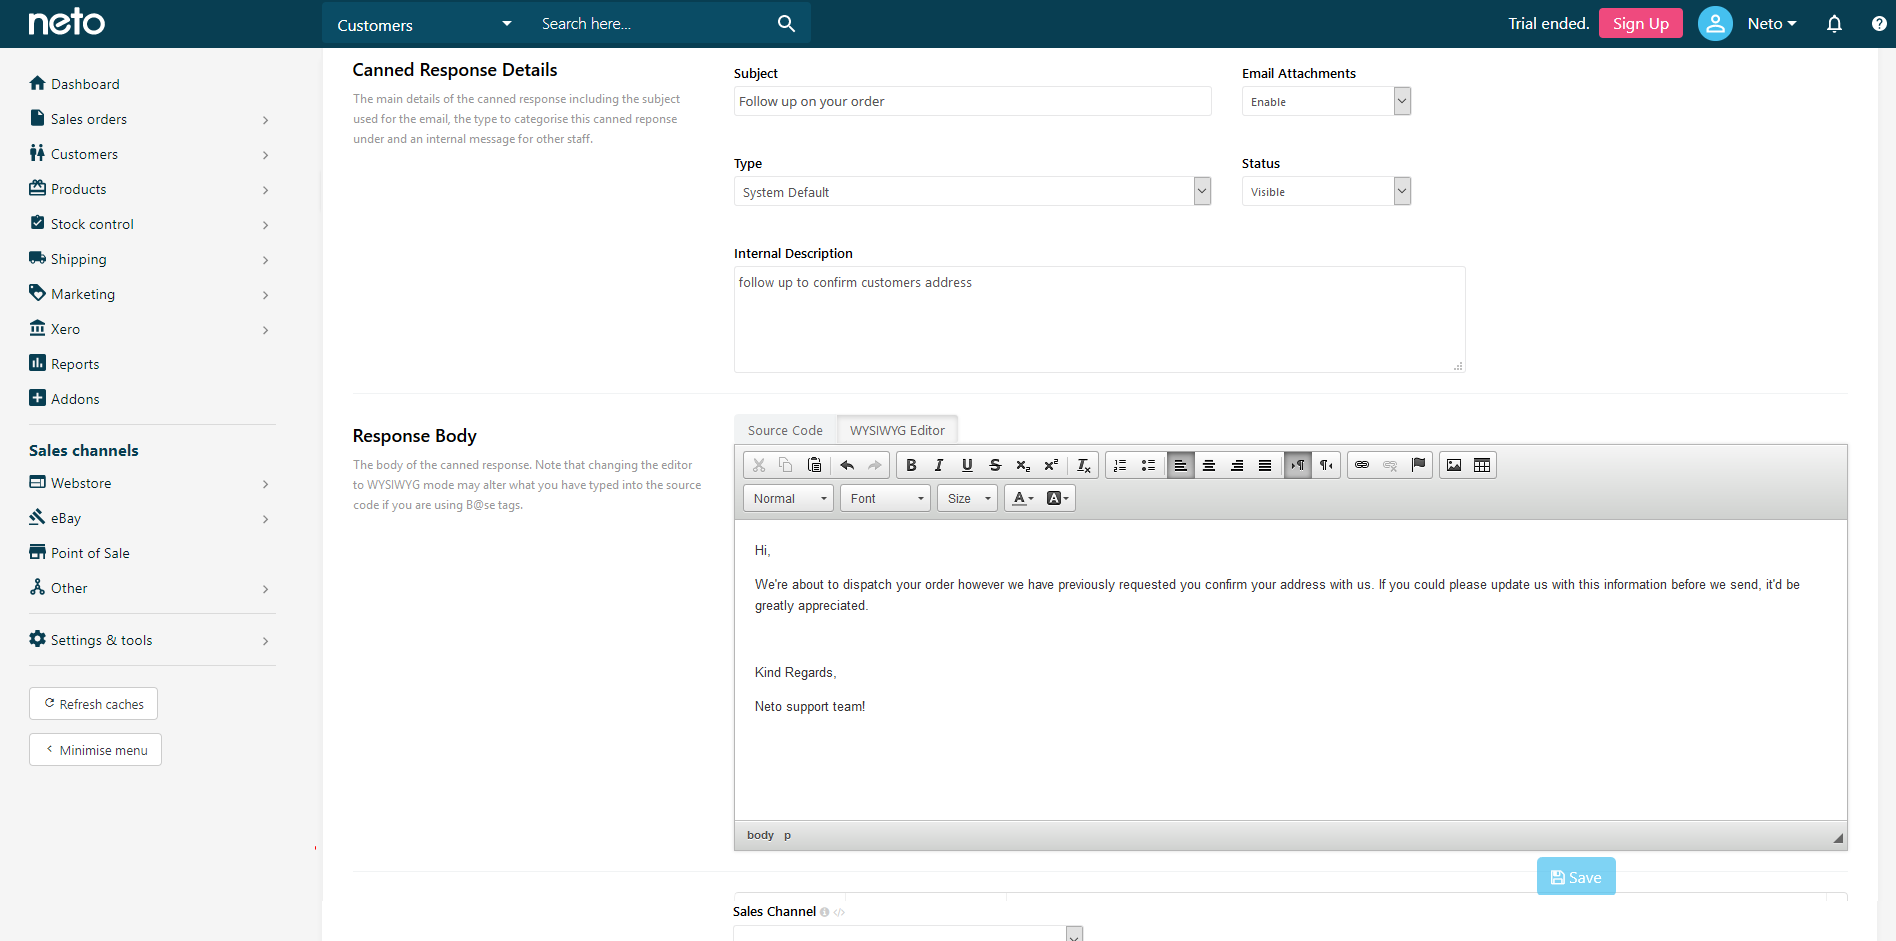
- Enter the default email subject.
- If you want to include file attachments with this response, set Email Attachments to Enable.
- You can organise the responses by setting a Type. See the next section for details on how to create canned response types.
- The Internal Description is for your reference only. It will not be included in the email so you can add any notes you want here.
Add a Canned Email Response Type
You can organise the canned responses to make them easier to find and select by creating canned response types. To add a new type:
- In your Neto control panel navigate to Settings & Tools > All settings and tools.
- Click on Canned Response Types.
- Click the Add New button and choose Add New Canned Response Types.
- Enter a Name and a Description for the type.
- Click the Save button.
- In the Response Body section, click on the WYSIWYG Editor tab to enter the email content.
- You can use tags in your email that will be replaced with details from the customer, sales order, RMA, or your web site details. Refer to our designer documentation for the list of the tags you can use.
- If you want an attachment included with the response, under the Attachments section, select Browse or Choose File. You can attach more than one file to the response.
- Click the Save button.
You will now be able to organise your canned responses into this type when you create or edit them.
You can view the history of canned responses and other emails you've sent (not automatically generated) in the Settings & tools > All settings & tools > Customer messages. Change Folder to Outbox and click Apply.
Change your Email From Address
To change the 'From' email address for order confirmations and other system generated mail:
- In your Neto control panel navigate to Settings & Tools > Business Details.
- Change the System Email Addresses to the email address you want mail sent from.
- Click the Save Changes button.
When emails are sent from Neto they will use the email address here.
Set up a "Friendly From" Address
A "friendly from" lets you specify a name that that your email is from, so the reciever sees it instead of your email address. For example, ABC Company <service@abccompany> in the friendly from field will display the email from "ABC Company". To set up a friendly from address:
- In your Neto control panel navigate to Settings & Tools > All settings and tools.
- In the System Templates section click on Email Templates.
- Click on an email template group that is sent to your customers (e.g. order)
- Click on an email template to open it.
- In the From field enter
"[@config:company_name@]" <[@config:company_email@]>. - In the Reply to field enter
[@data_email@]. - Click the Save button.
- Repeat this for any email that is set to a customer.
Emails that are sent to you (e.g. contact us form) can use "[@config:website_name@] Contact Us Form" <notifications@netomail.com.au> in the From field instead.
Invoice and Statement Settings
Please refer to the Sales Order Settings article to customise your invoice and statement settings.
Send Email Settings
You can control which emails are sent to customers during the different stages of the sales order process. Refer to this article to learn what settings can be changed and where.
Sales Follow Up Email
You can set up your Neto control panel to automatically send customers a follow up email requesting for feedback and product reviews.
Please Note: Sale follow up emails are not sent to customers unless they are subscribed to your newsletter.
- In your Neto control panel navigate to Addons > and install or set up Sales Follow Up Email.
- Set up your settings to send a follow up email.
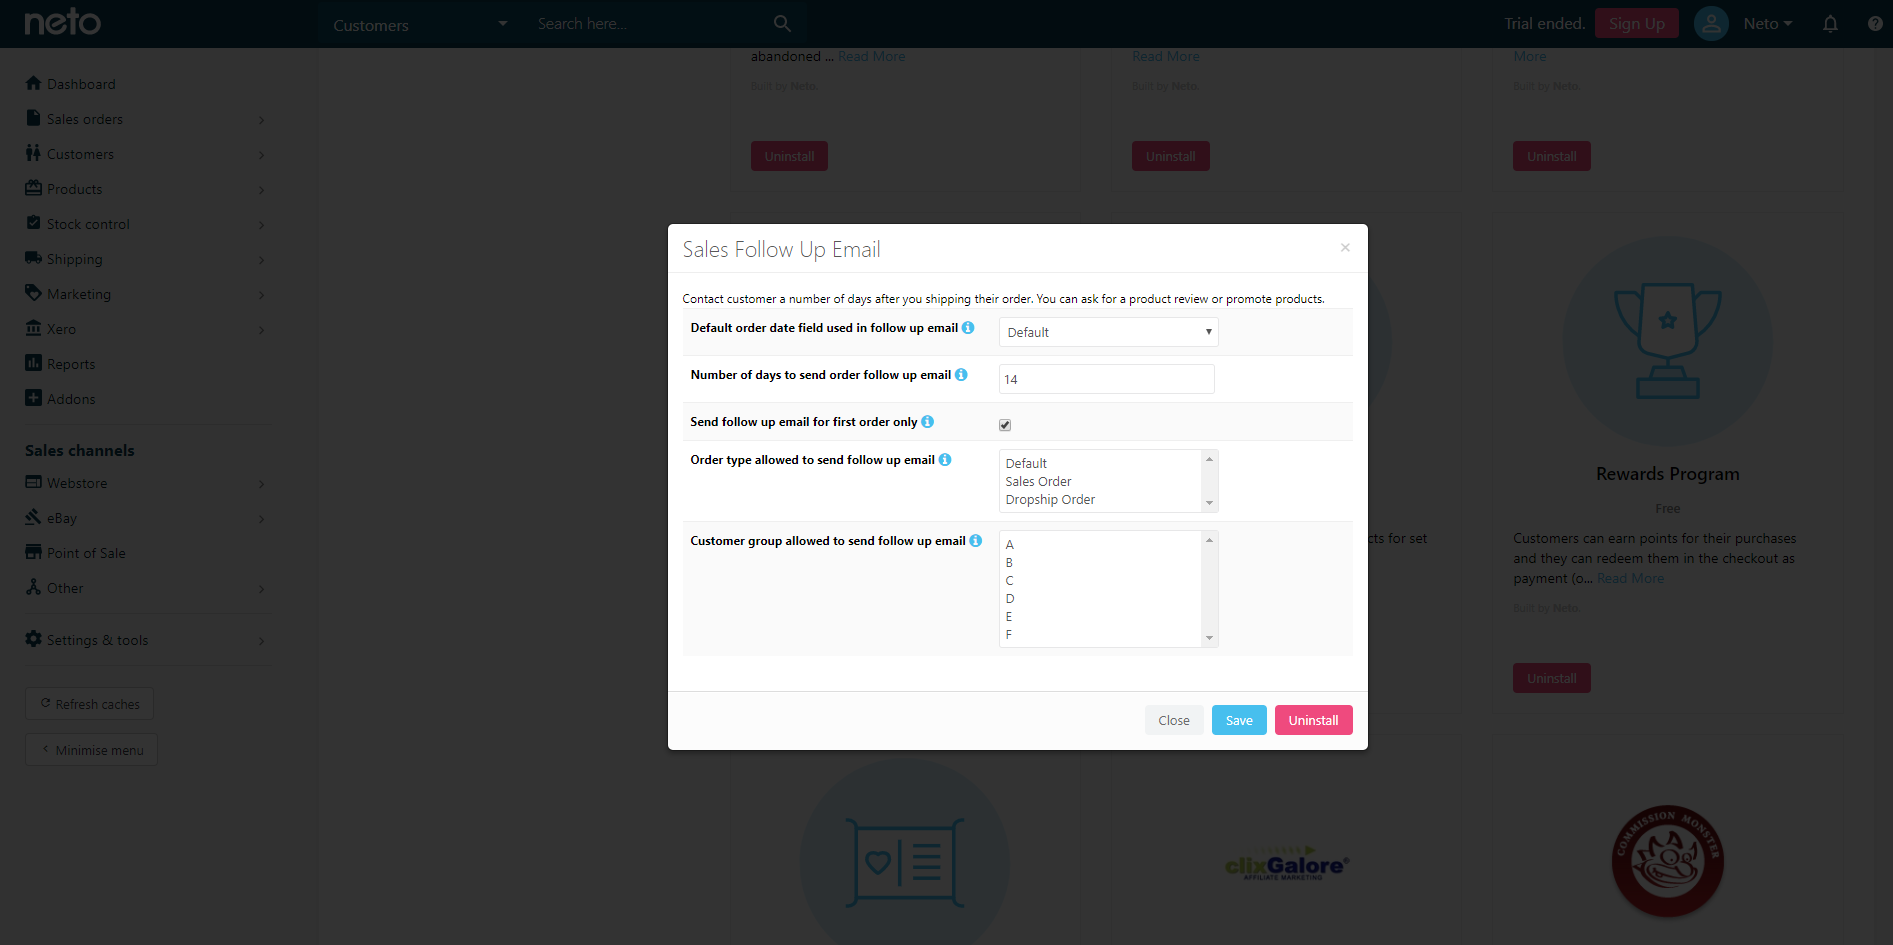
- Save your changes.
To test that everything is working correctly by setting the number of days to 0, the default order date to Date Placed, and creating a test order. To trigger the followup email, navigate to Settings > Tools > All Settings > Tools and search for System Scheduled Tasks. Find the Send Follow Up Email, and click Run Now.
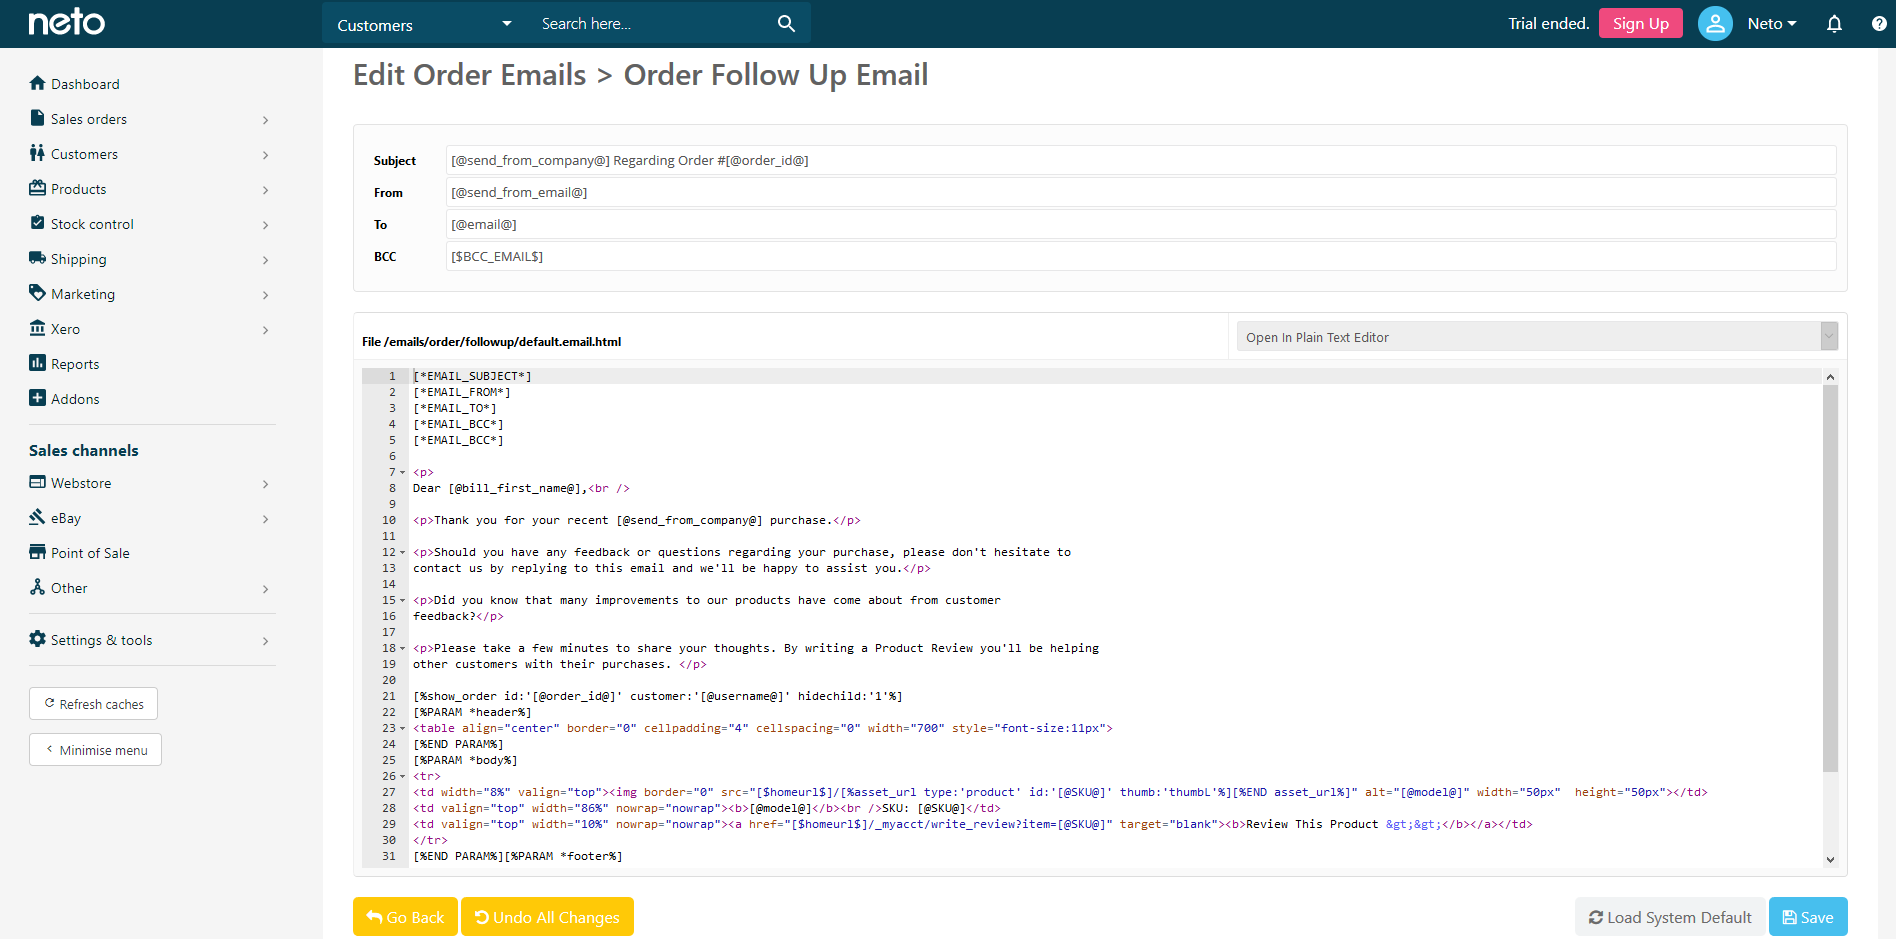
You can also edit the email template used for the follow up email. To do this, follow the steps below.
- In your Neto control panel navigate to Settings & Tools > All settings & tools
- Click on the System Templates tab and click Email Templates.
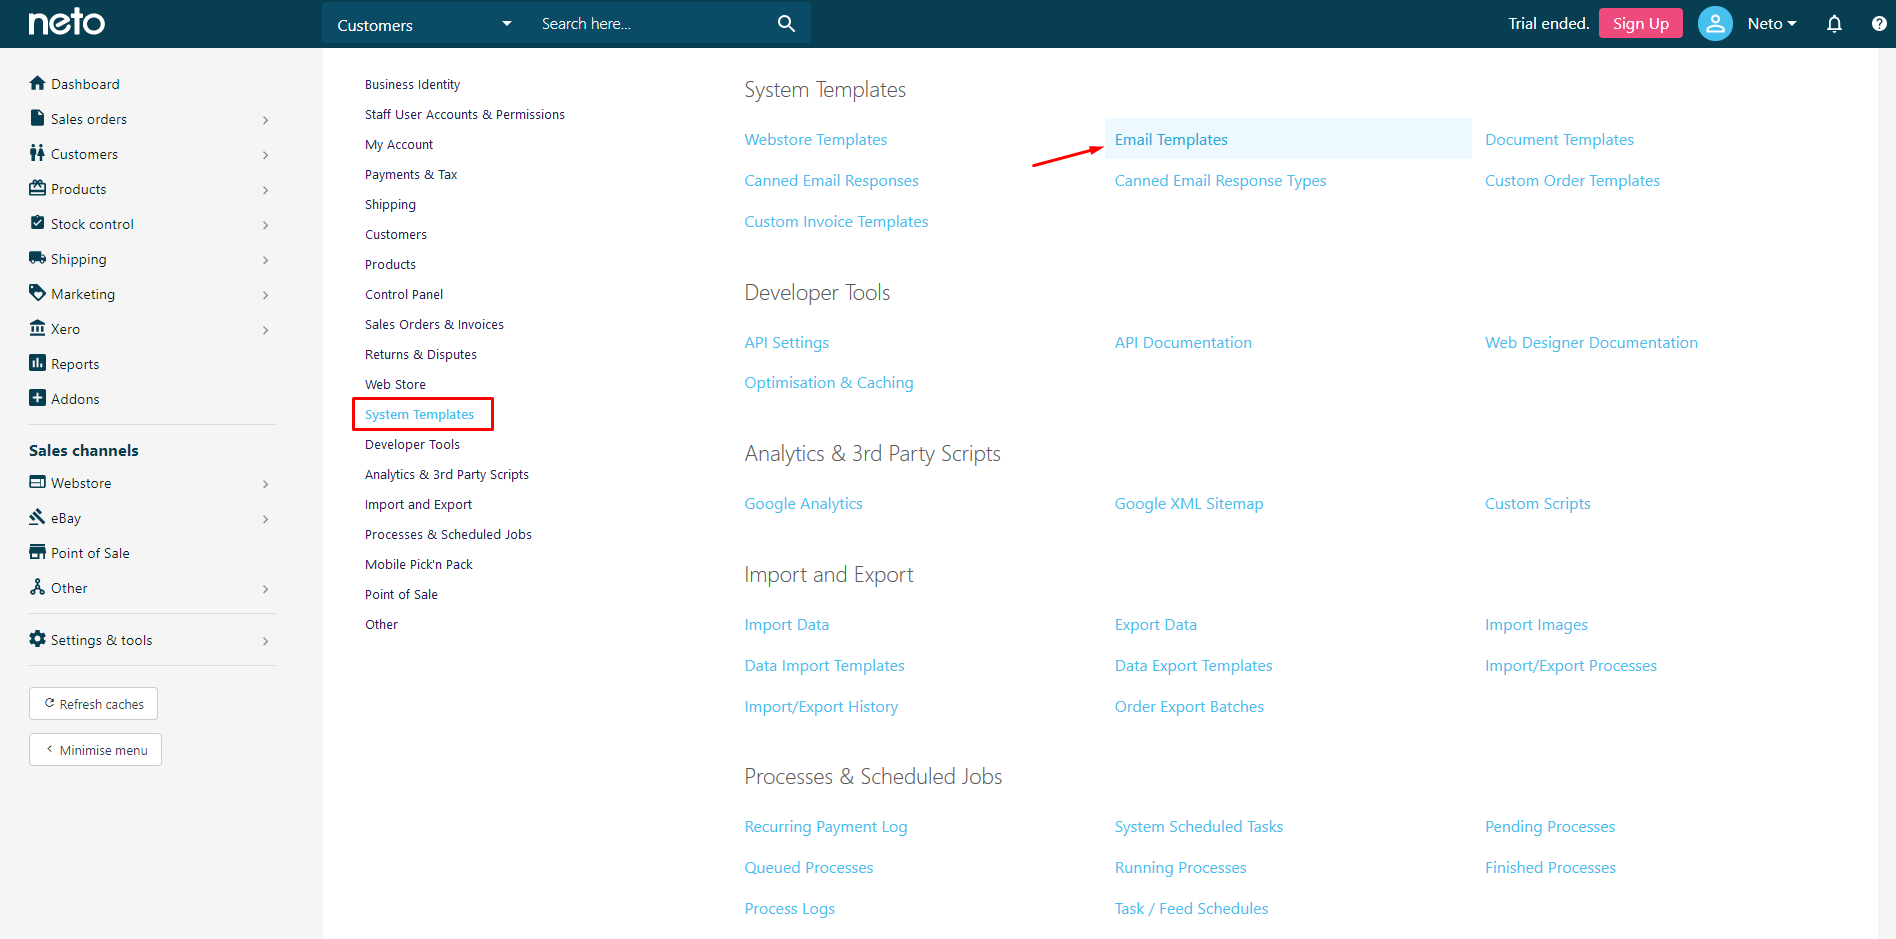
- Here you can edit your email template. If you don't feel comfortable making changes here, you can request a quote for the templates to be professionally created.
Click on Order Emails and then click Order Follow Up Email.