Variation products are used to sell items that are essentially the same, but are different by one or two key features. Variations can differ by colour, size, type, material, or almost any differing feature of a product can be used as a variation. For example, a large t-shirt vs a small t-shirt would have variations based on size, whereas gold jewellery could have variations on the purity. Each individual item is treated as a separate product with its own unique SKU, set of images, price, stock level and dimensions. For it to become a variation product, each variant needs to be linked to a parent product.
The parent product is the container which is linked to each variation. It is not a purchasable item, and is simply used for storing default product information (such as shipping category, common specifics or title) and its variations. The diagram below shows a basic variation product, with the parent and variants (also called child products).
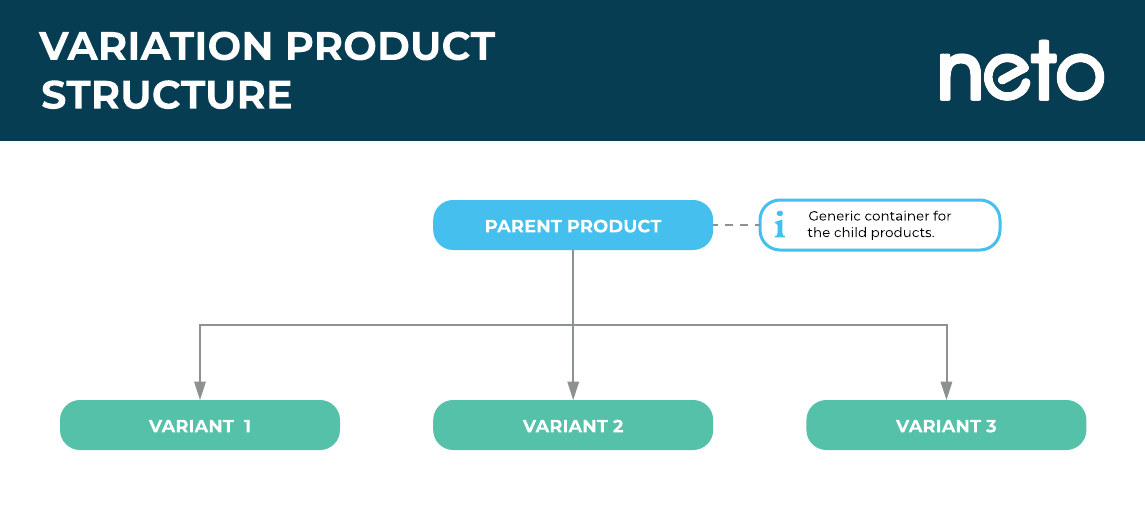
For example:
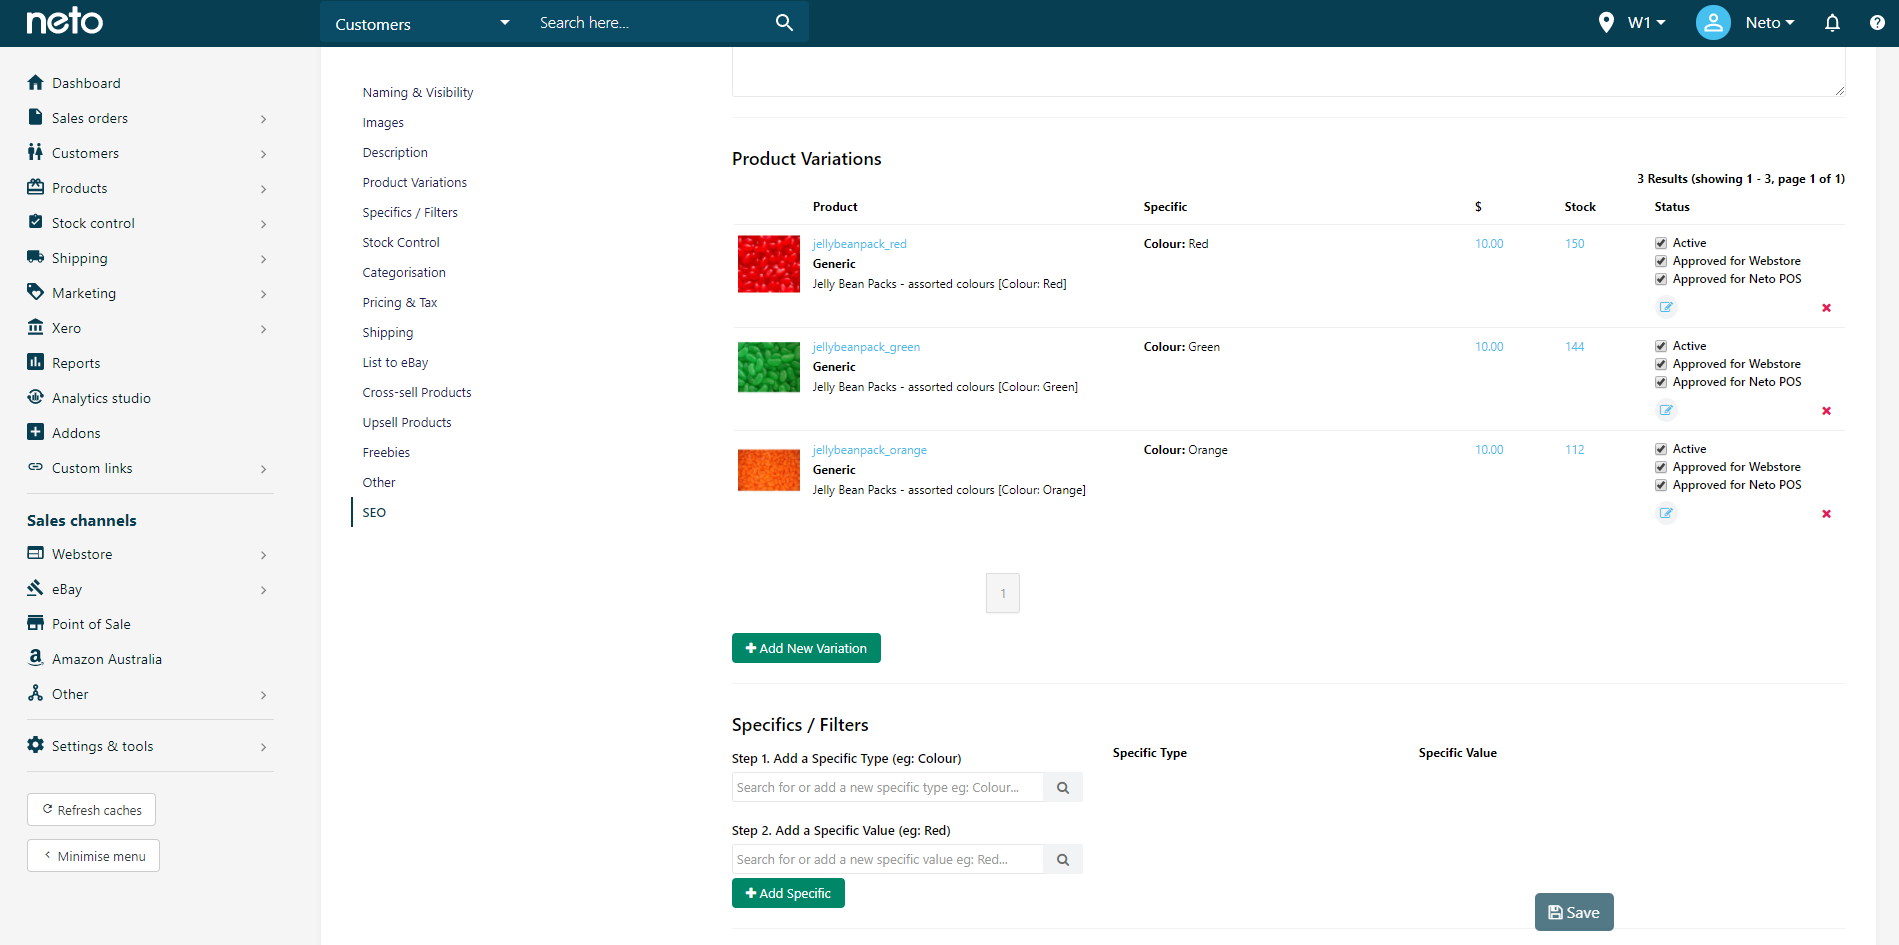
- 'Jellybeanpack'
- 'Jellybeanpack_red' (This is a child SKU with stock, customers can select this as a dropdown option)
- 'Jellybeanpack_orange' (This is a child SKU with stock, customers can select this as a dropdown option
- 'Jellybeanpack_green' (This is a child SKU with stock, customers can select this as a dropdown option)
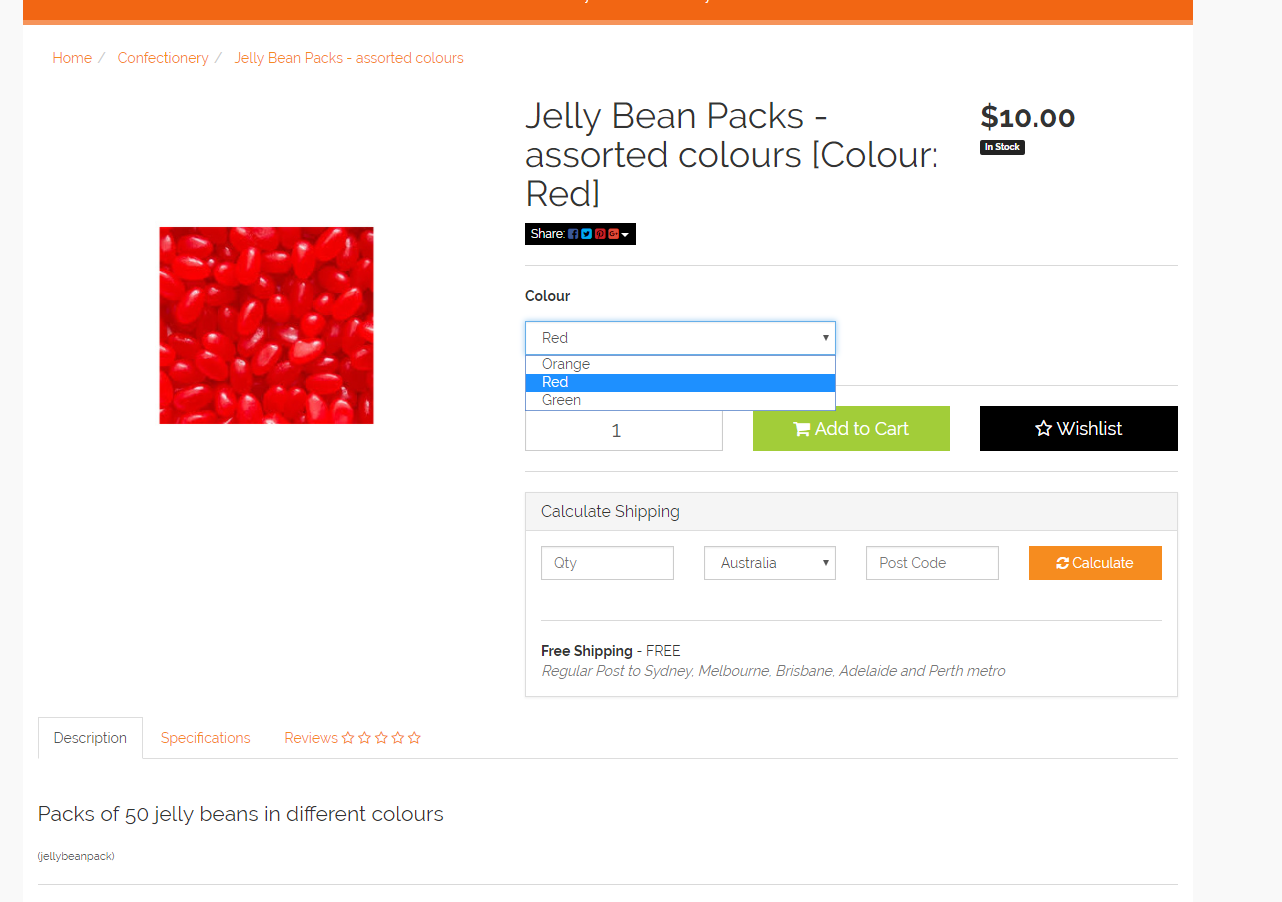
The following is an example of how a variation product will look on the webstore.
While all variations differ on at least one feature, they can have multiple differing features. Here's an example of a more complex variation product with two differing specifics: size and colour.
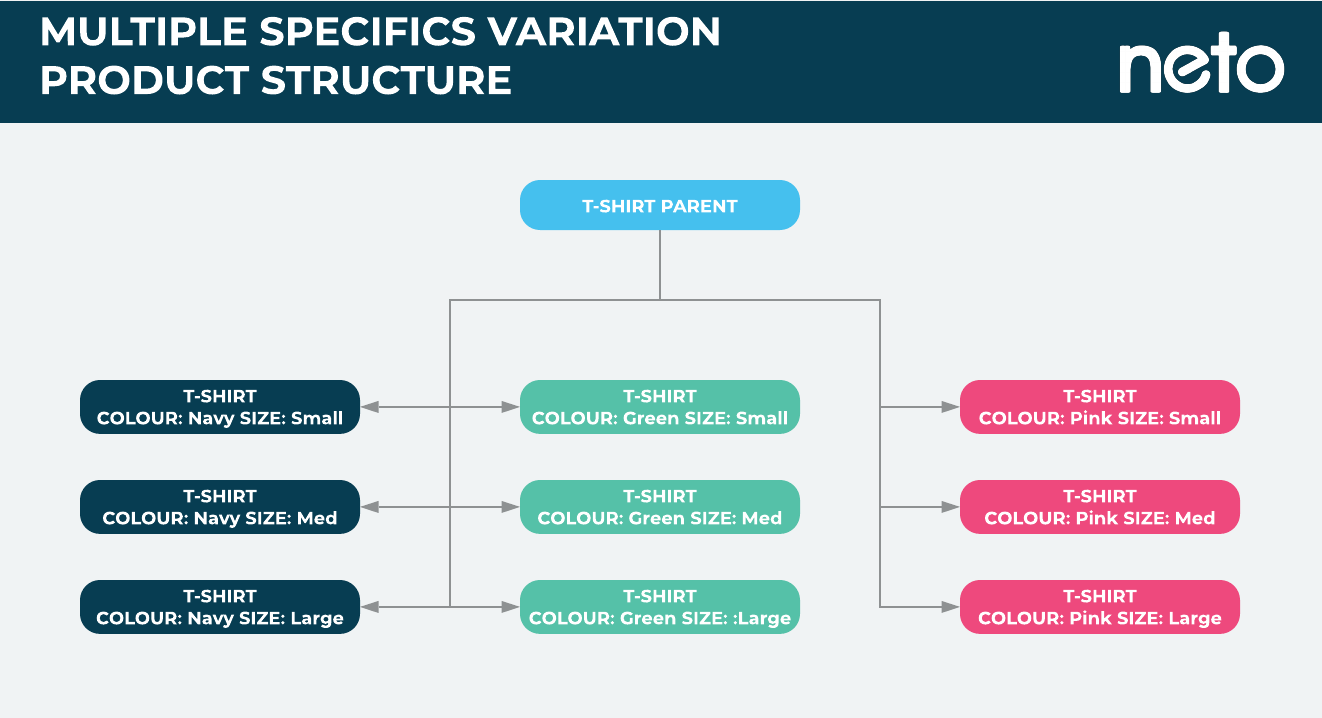
It's important to note that each variant needs to have both specifics (size and colour), otherwise your customers won't be able to tell if it is what they want. In addition, all of the variation combinations must be a unique set.
Add a Parent Product
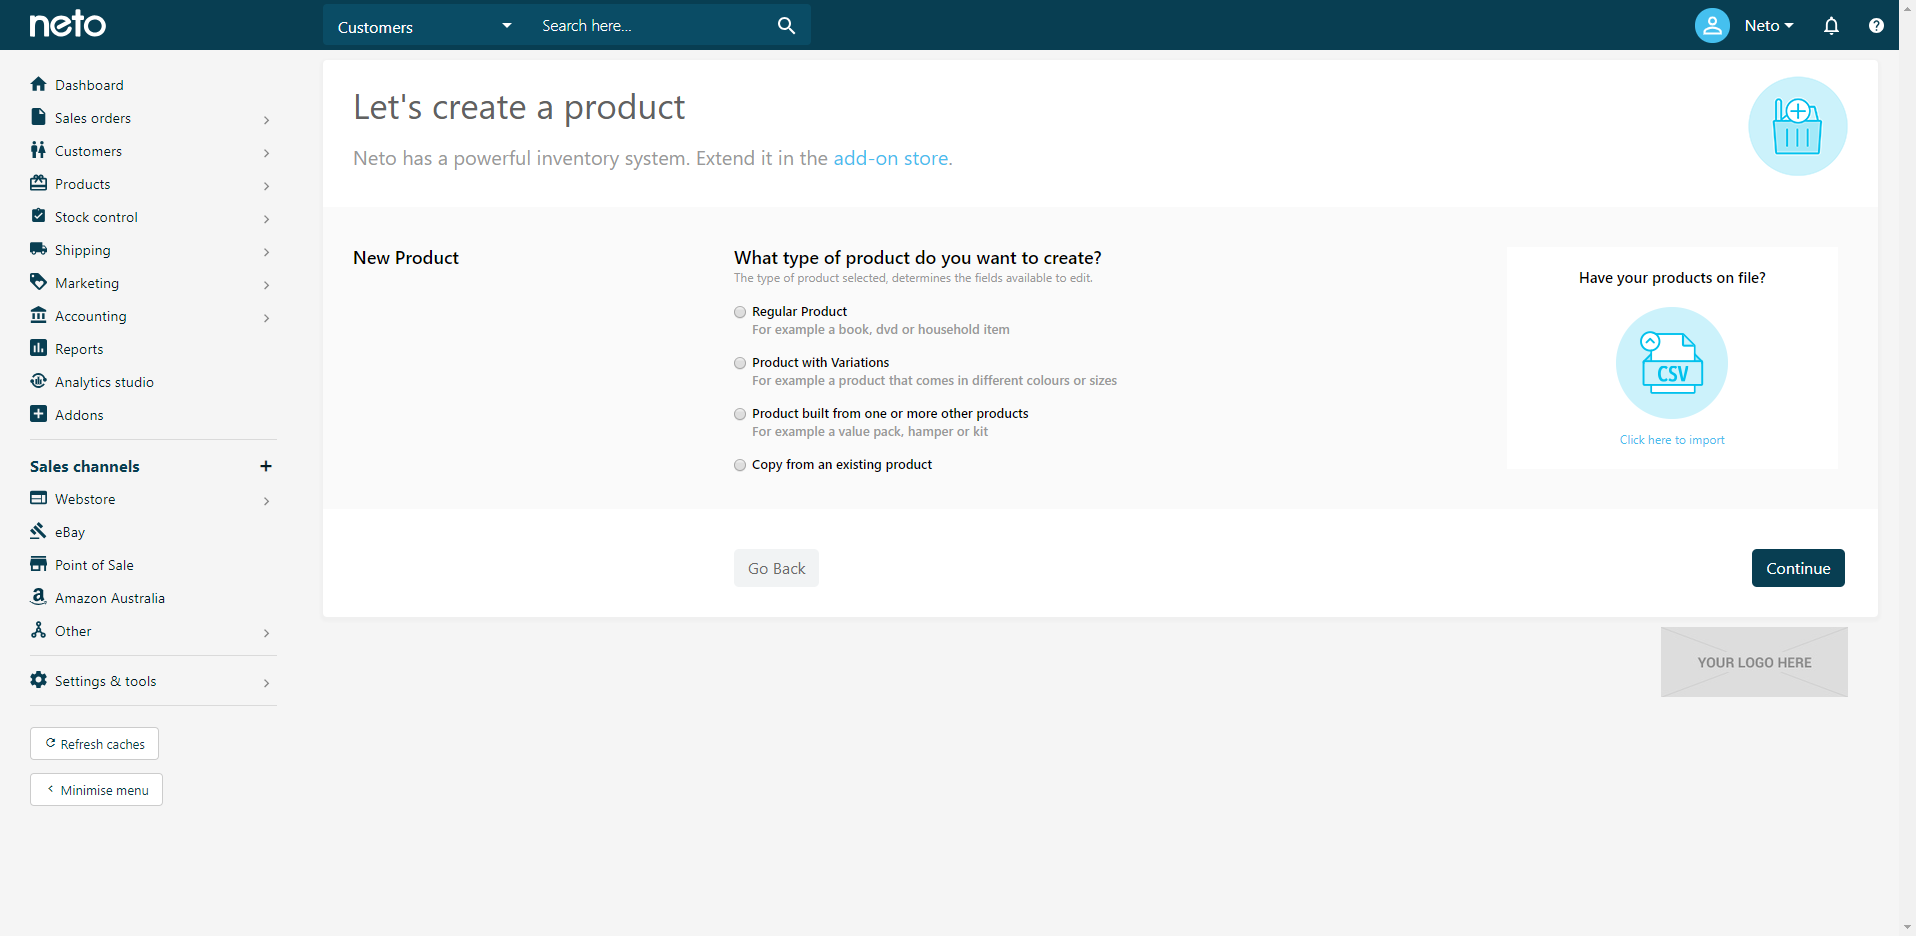
- In your Neto control panel navigate to Products > Add Product.
- Click the Product with Variations radio button.
- Enter a title for your product in the Name field.
- Enter a Description.
- Enter a SKU ID.
- Continue button (at the bottom of the page).
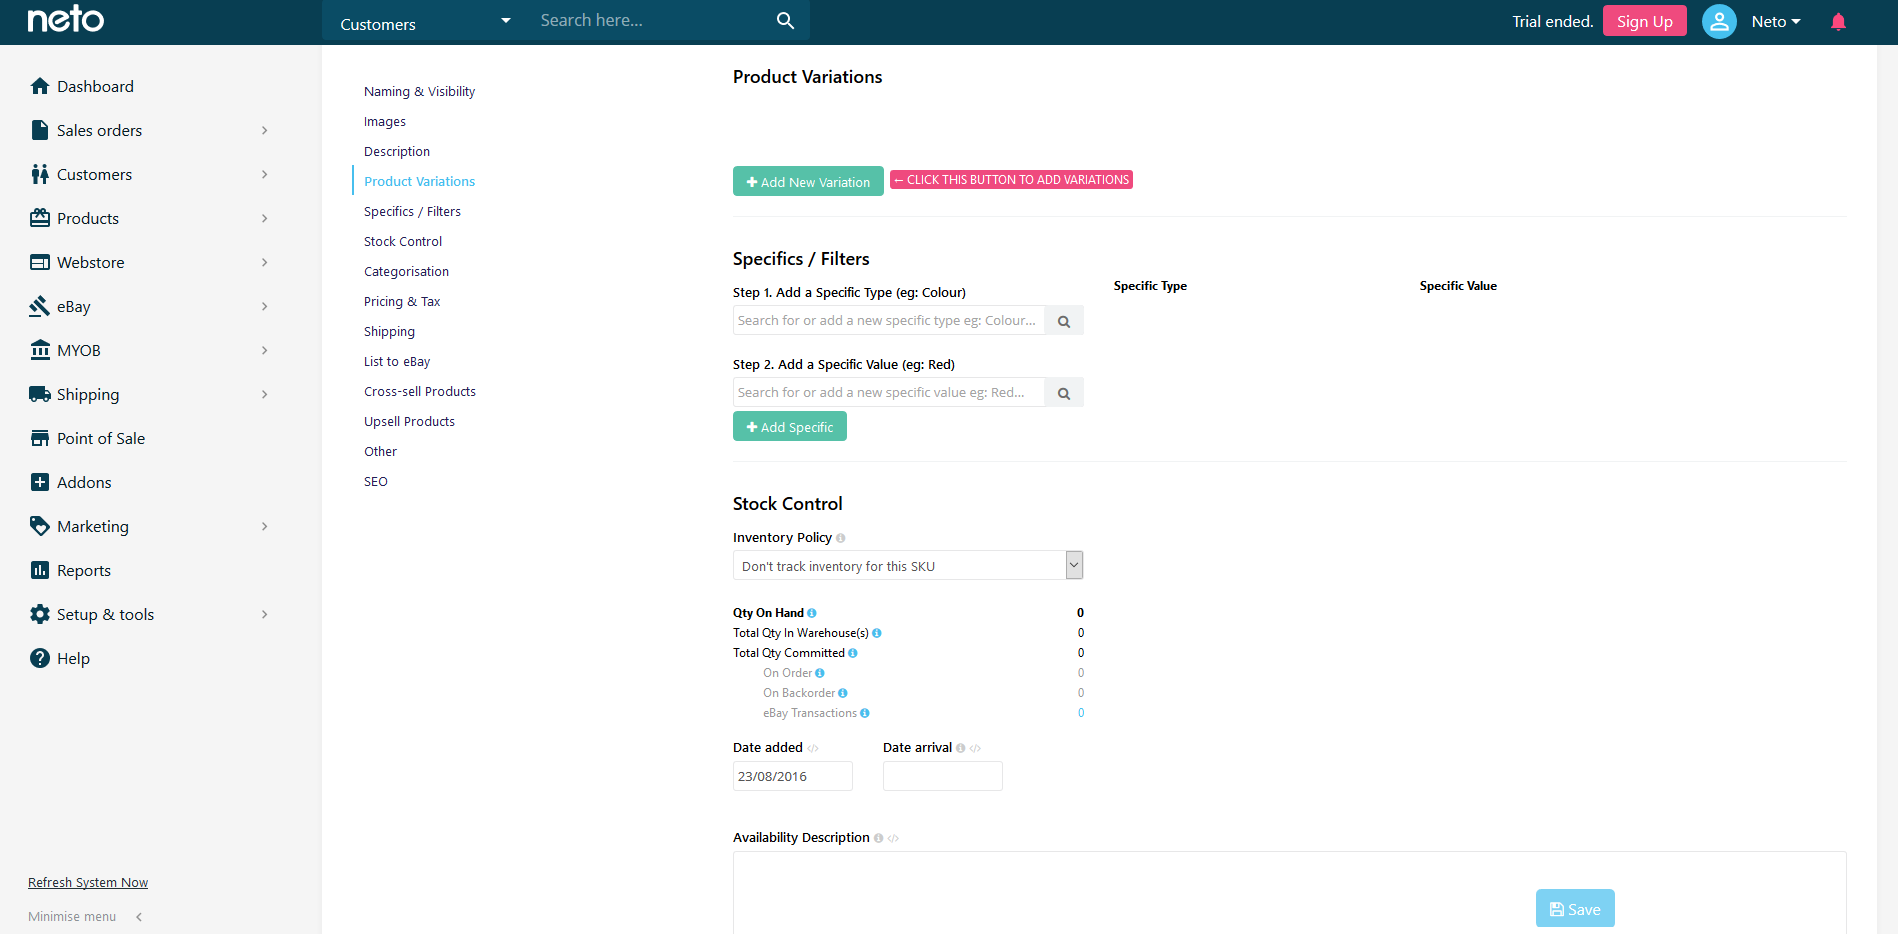
- Click the Continue Editing button and the page will scroll to the Product Variations section.
Please Note: Price does not need to be added to the parent product as the parent product will become a container for the child products.
Add Child / Variant Products
When you add child products to a parent, they will automatically turn into a dropdown menu on your webstore. To add child products:
- In the Product Variation section, click the Add New Variation button.
- The Create New Variation pop-up window displays.
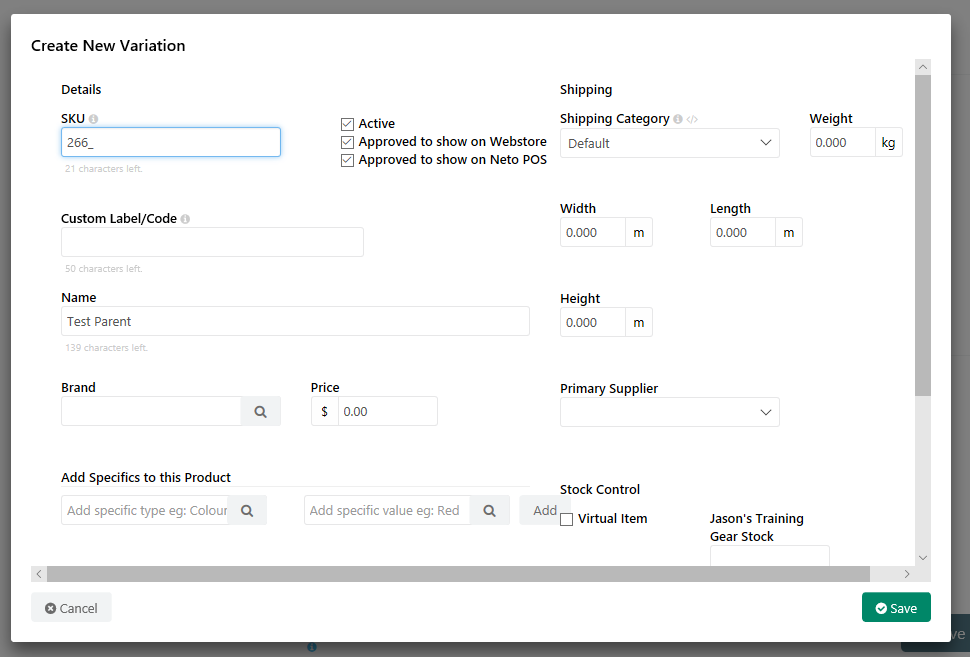
- Enter a child product SKU (in the example below, we've followed our jellybean example above by placing an underscore (_) and the colour for easy management).
- Enter a Name.
- Enter a product Specific type below the Add Specifics to this product section.
Specific types are used to categorise differences between products that are part of the same parent. For example, if the main difference between your product variations is colour, then you can have the specific typecolour specified for each product variation.
In the field next to it, you specify the specific value that applies to this particular child product you're adding (e.g Red). The end result for the customer will be the option to select which colour they want to buy on your webstore.
- Add any additional infromation to the product, such as stock level, brand, or item dimensions.
- Click the Save button to complete.
Repeat this process with all the variations you wish to create.
Multiple specifics per product variation is also possible. In such cases, the customer will presented with multiple buying options. For example Colour and Size.
To do this, add another specific type in the Add Specifics To This Product field for an additional dropdown to appear.
Variations will appear under the parent SKU as per the example below.
Set the Product Variation Order
Variations can be forced to display in a specific order by assigning a sort order number to the specific value. You can use this to make them display alphabetically, or in order of size, or quantity.
- In your Neto control panel, navigate Products > Product Specifics.
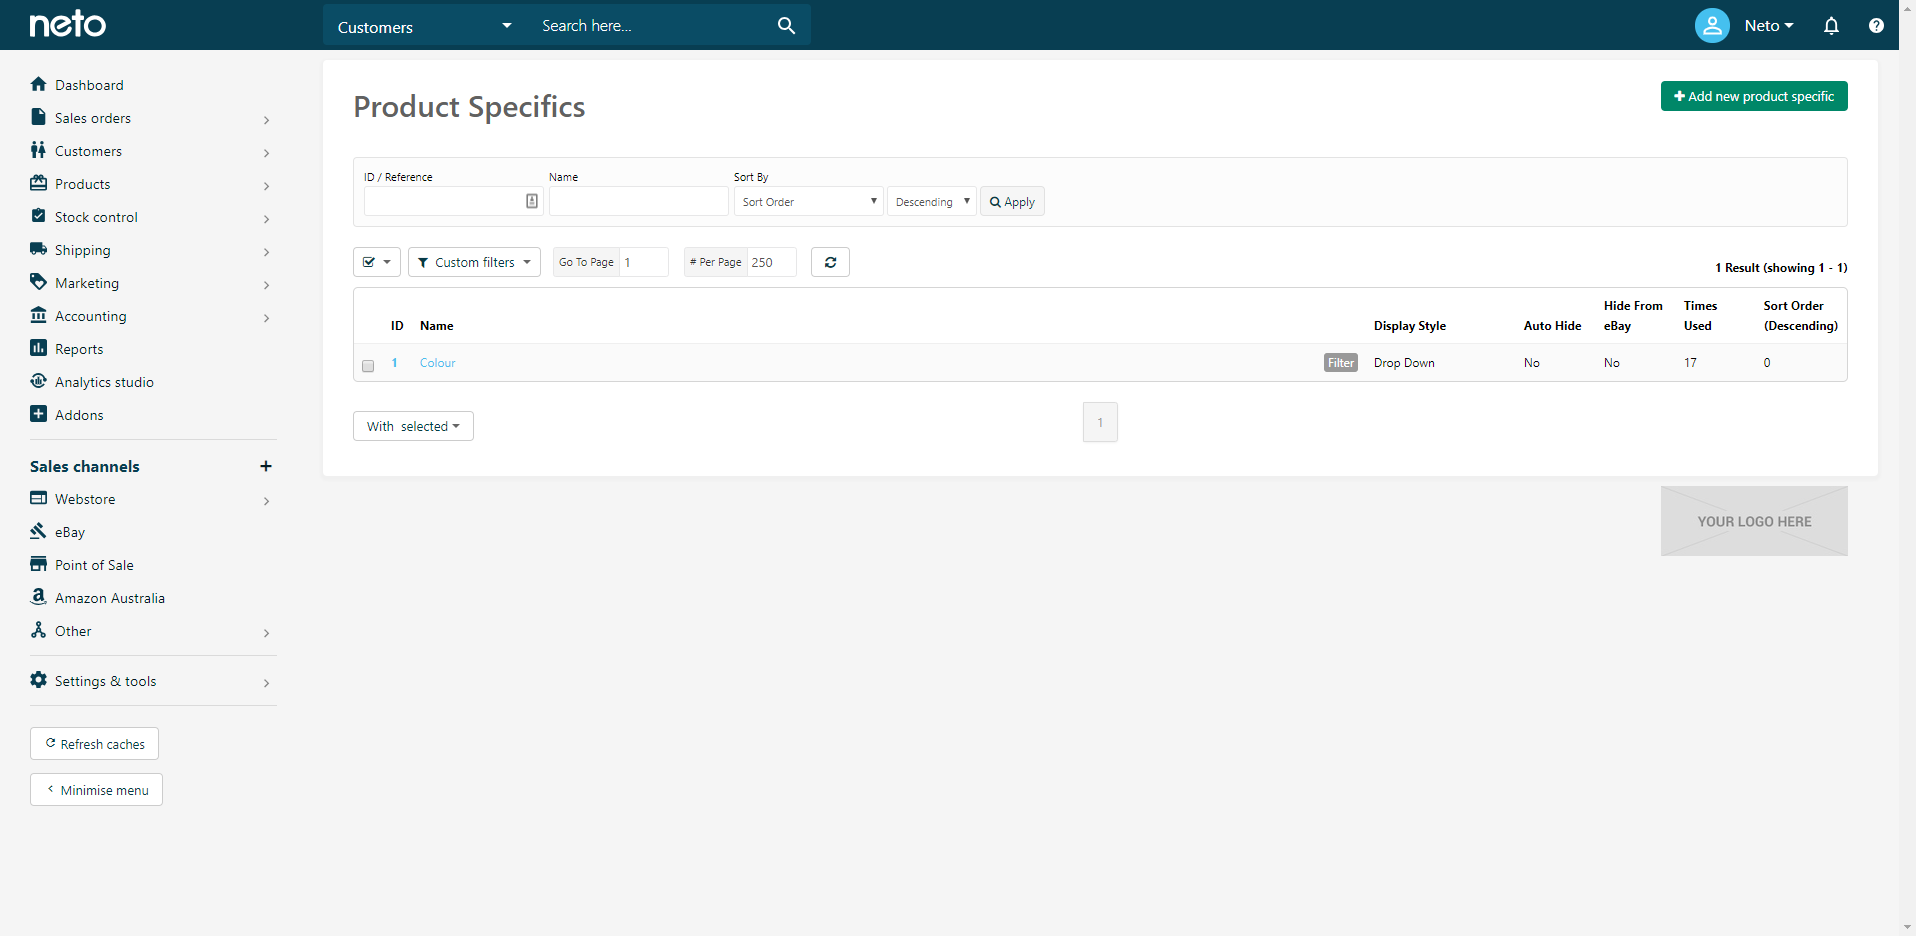
- Select the Specific Name where you wish to set a custom order.
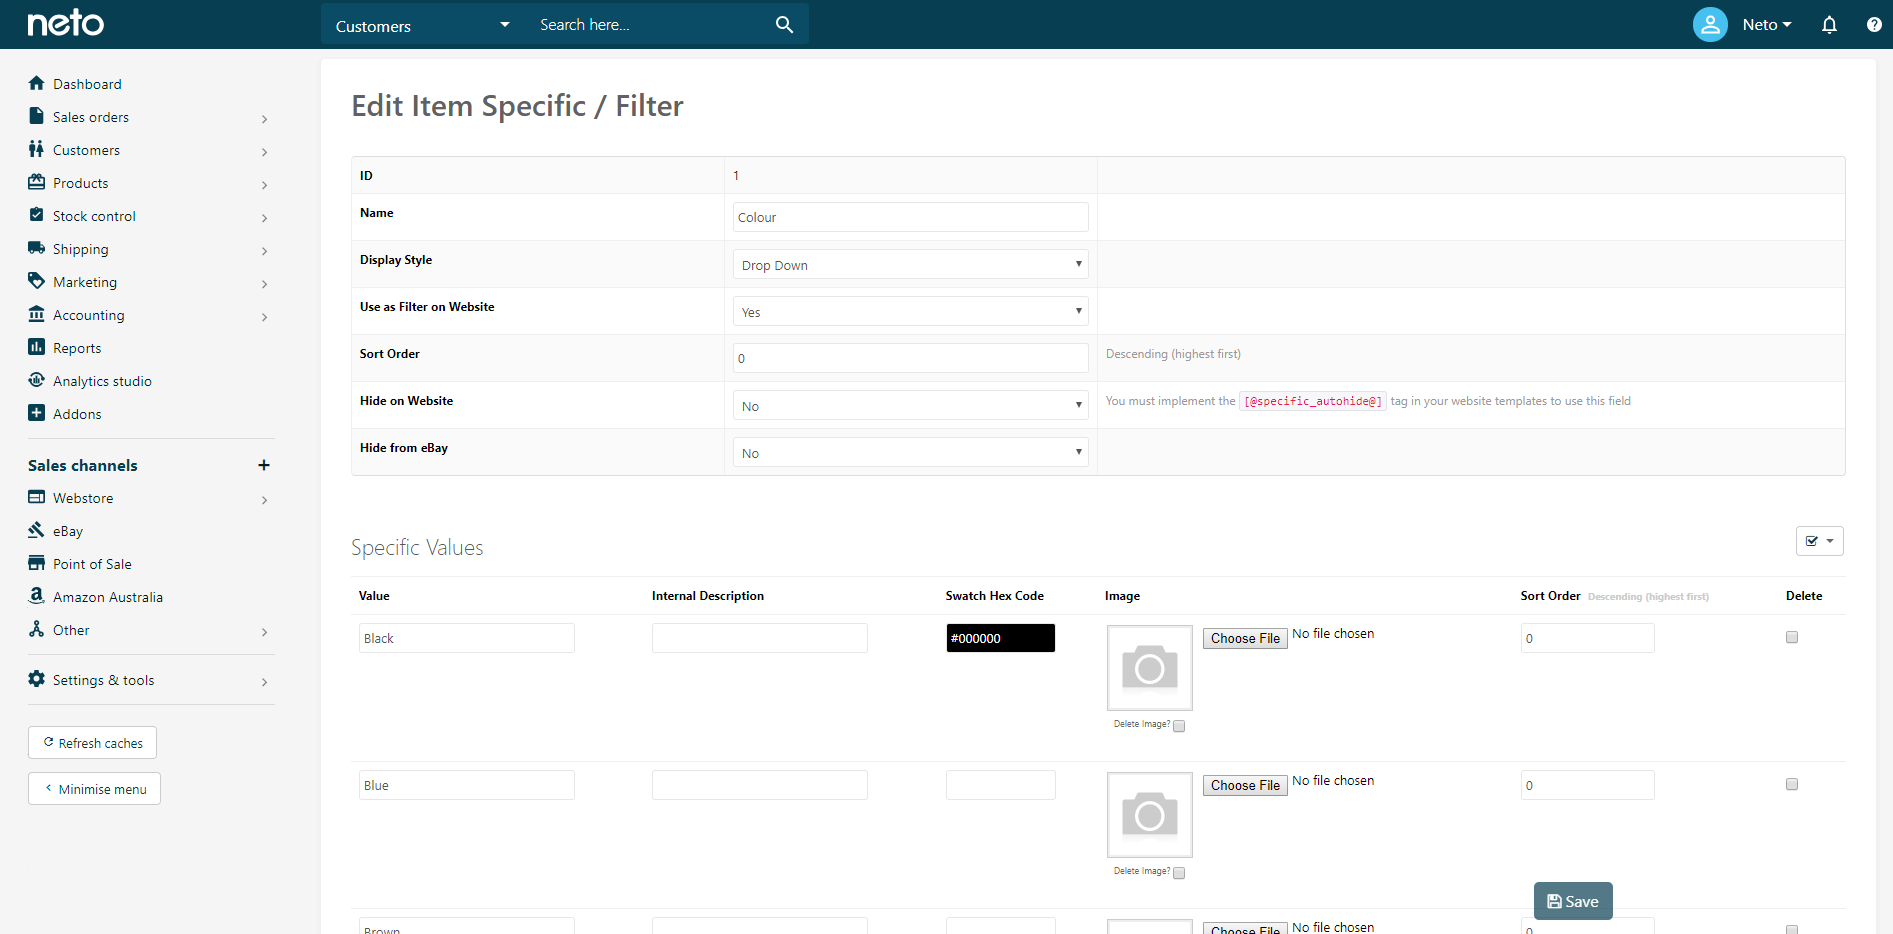
- Set the custom order by entering a number into the Sort Order field for each value.
Larger numbers will make the variation appear higher in the list.
- Click the Save button to confirm your changes.
By default, Neto will use the image you specify on your parent product for all its variations unless you upload images to each variation. Therefore, if you want to show specific images for each variation, you will need to upload images to each product.
Import Variation Products
Start by downloading and populating the Product Variation Template with your product data. The most important fields to remember are:
- Parent SKU: Links the variation products to the parent product.
- Specifics: A list of the products specifics (e.g. colours & sizes available) for the variation product (e.g. Colour:Red;Size:Medium;Style:Polo;)
Please Note: Parent and child links will update after the Inventory Cache process runs automatically (every 6 hours).
Once you have prepared your Product Variation CSV for import:
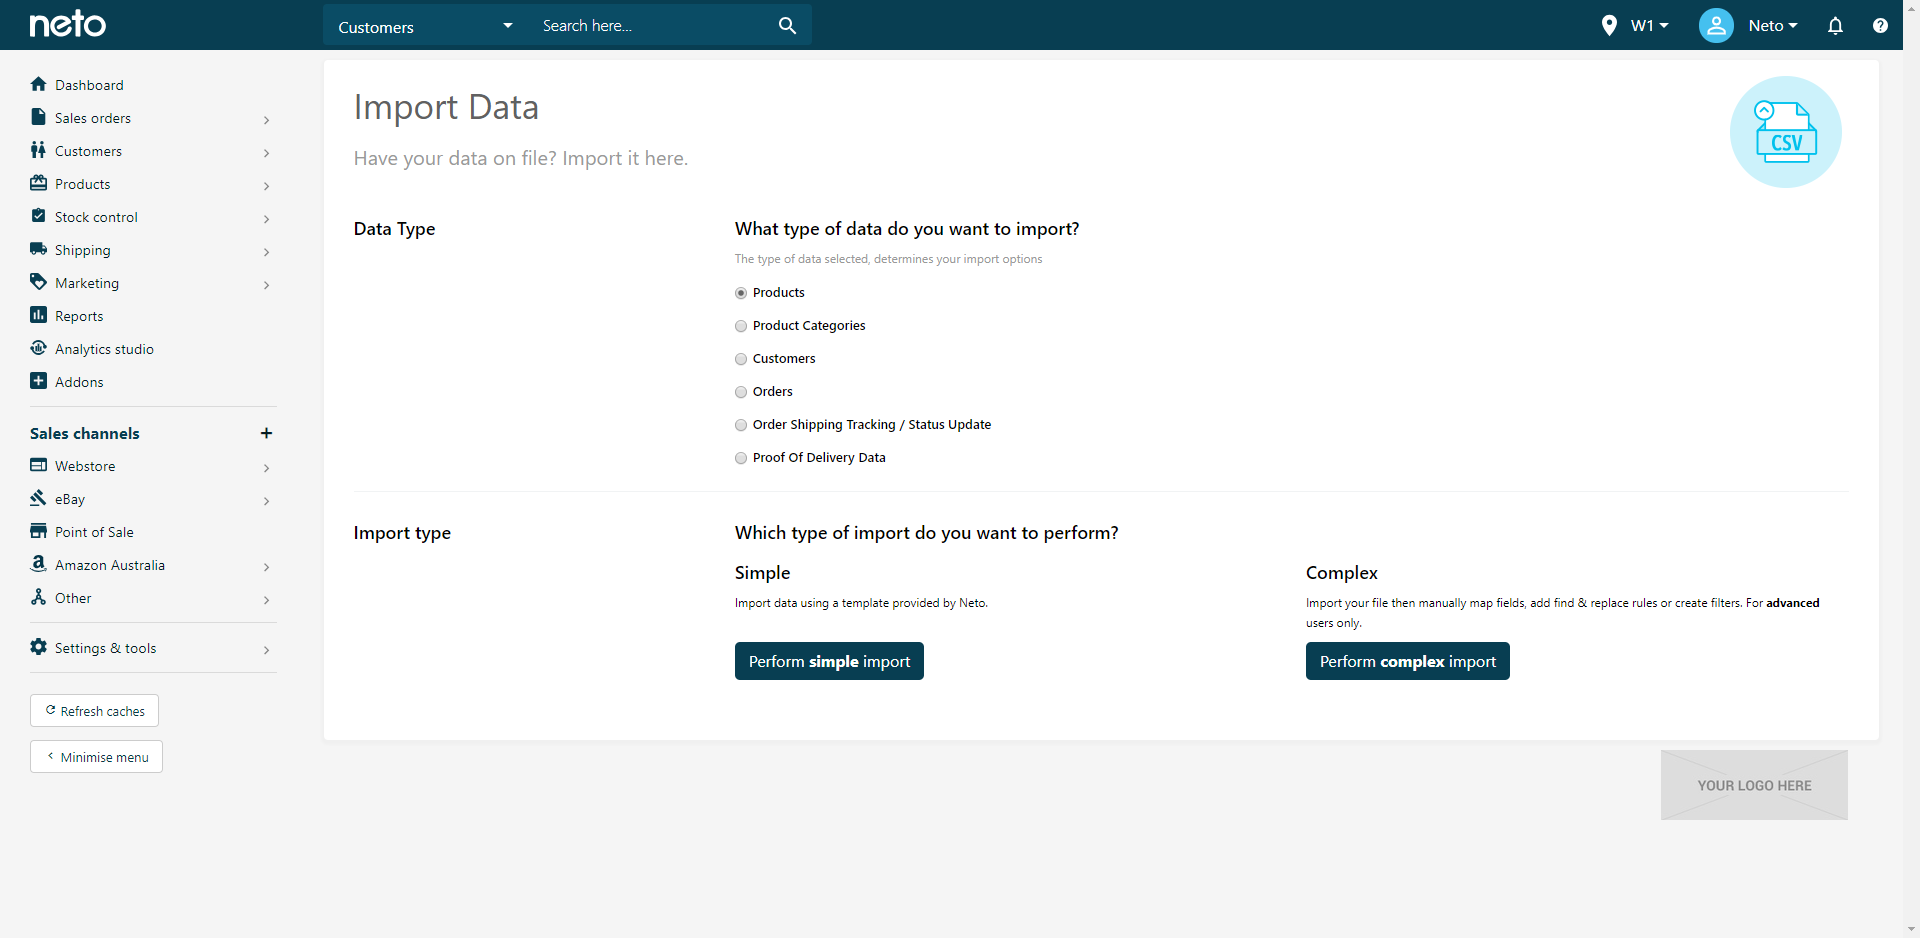
- In your Neto control panel select Settings & Tools > Import Data.
- On the Import Page, select Products as the Data Type you will be importing. Click the Perform Complex Import button and choose Start Data Import Wizard.
- Locate and Upload your prepared CSV file and click the Continue to Next Step button.
- Match the fields in your file to Neto's database fields and click the Continue to Next Step button.
- Set your update options (add new & update existing or update existing) along with any advanced features you want and click the Continue to Next Step button.
- Start your import. Neto will import your products behind the scenes automatically. This may take a few minutes depending on how many products you are importing.
- After a few minutes, you can view your newly imported Products by selecting Products > View Products from the top menu bar and locating your new products in the Product List.
Add Child Product Variations to a Parent
Products that don't have a parent/child relationship can be given one at any time, turning them into a variation product. To add child products to a parent, making them a variation product:
From the product page
- In your Neto control panel navigate to Products > View Products.
- Select the child product by clicking the product SKU.
- In the Naming & Visibility section click the three dots next to field called Parent and select Change.
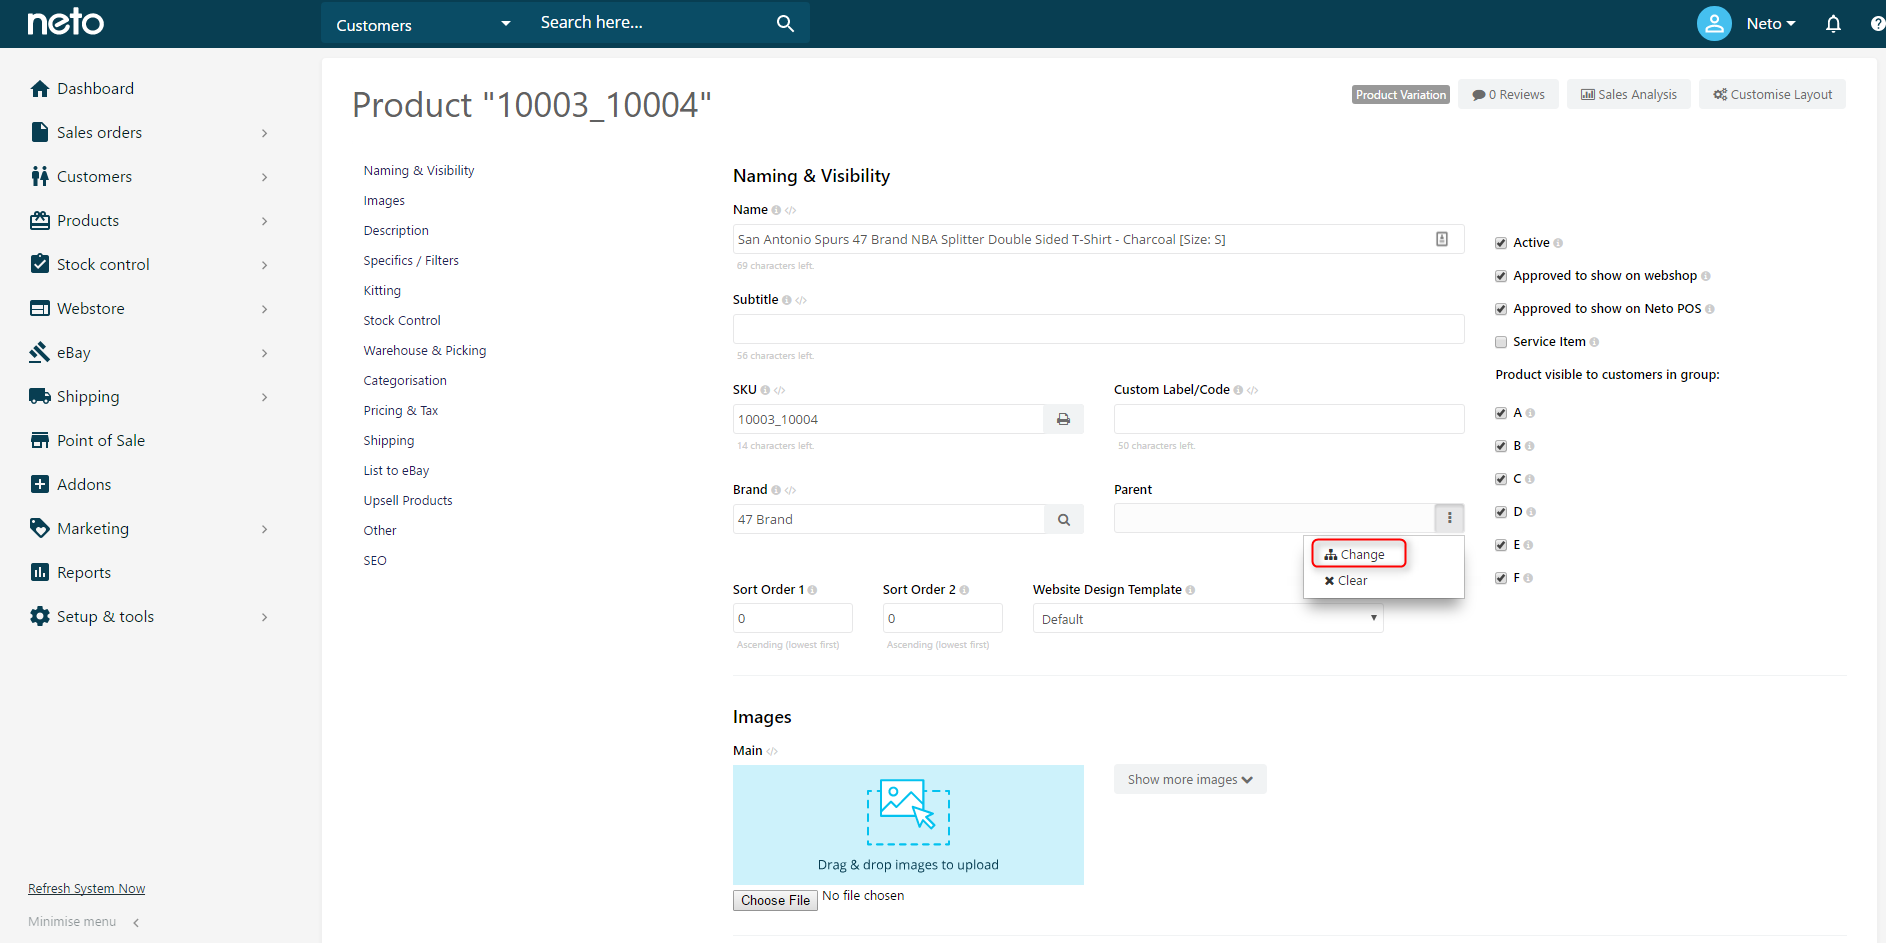
- Click on the field under Change Parent and enter the parent SKU or name. In this example, the parent product was already in Neto as a separate product, with the SKU is 306858.
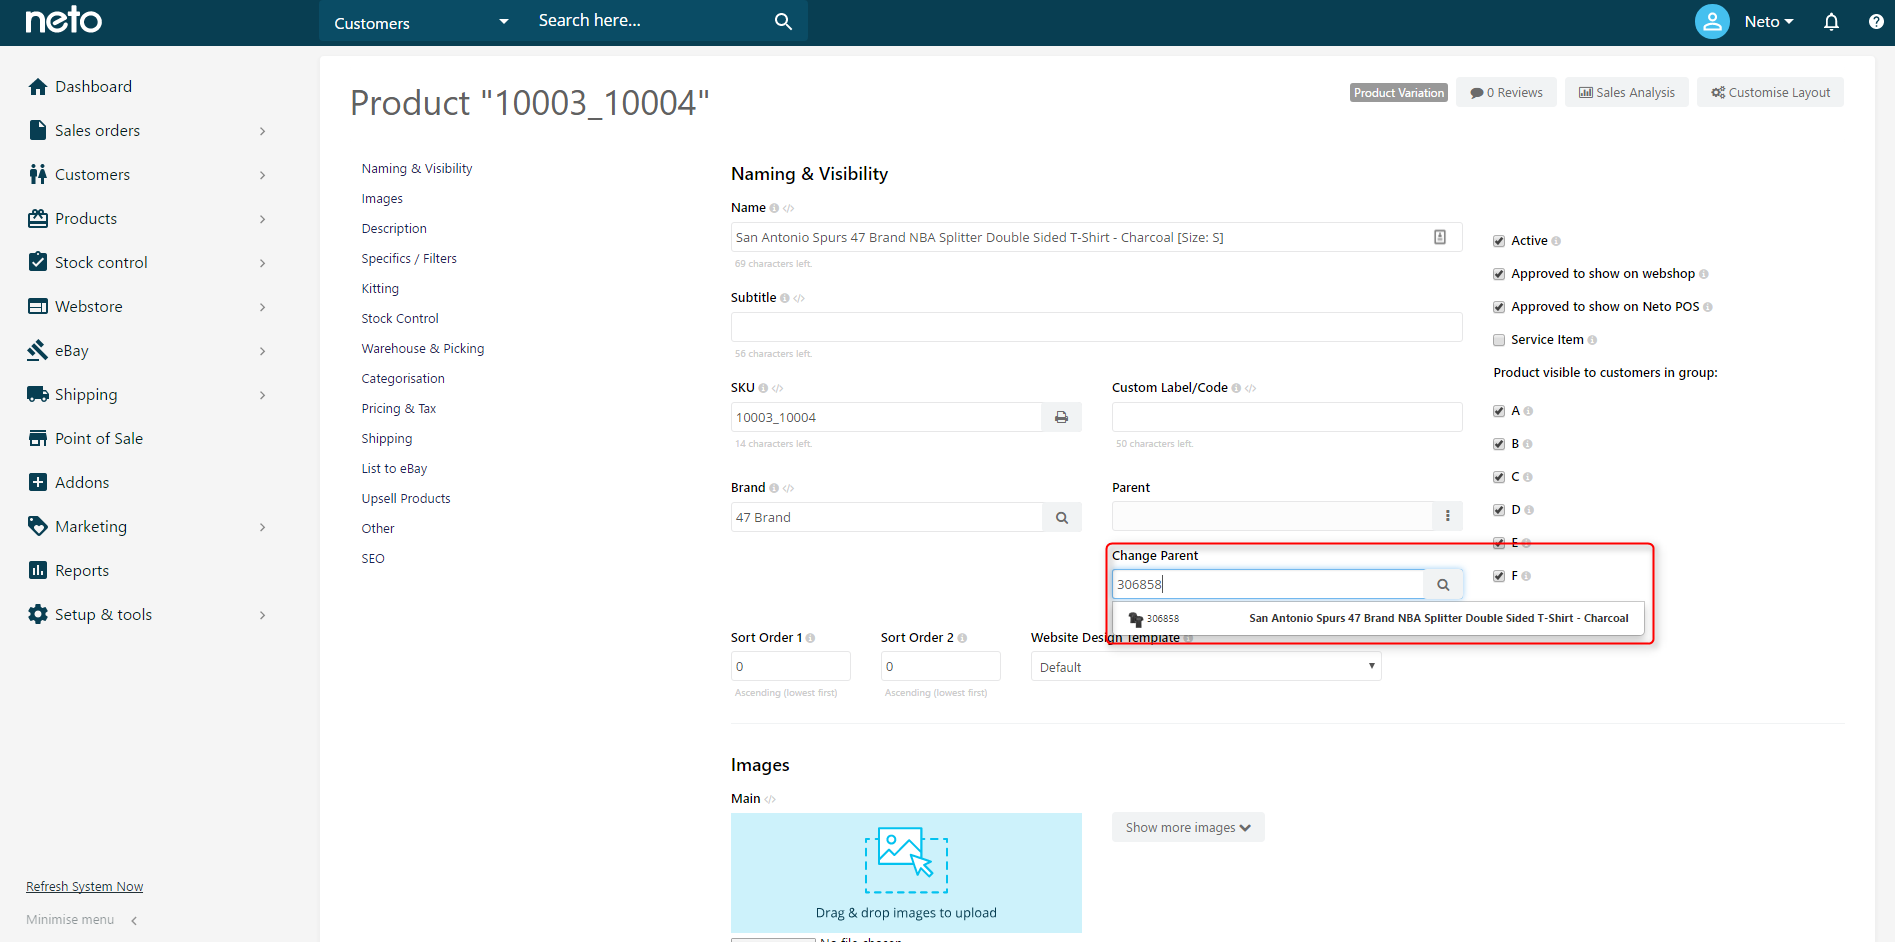
- Select the parent from the search results and Save the changes.
Your child product will now be linked to the parent SKU. Any specifics on the child product (e.g. colour, size, etc) will appears as different options when viewing the parent product.
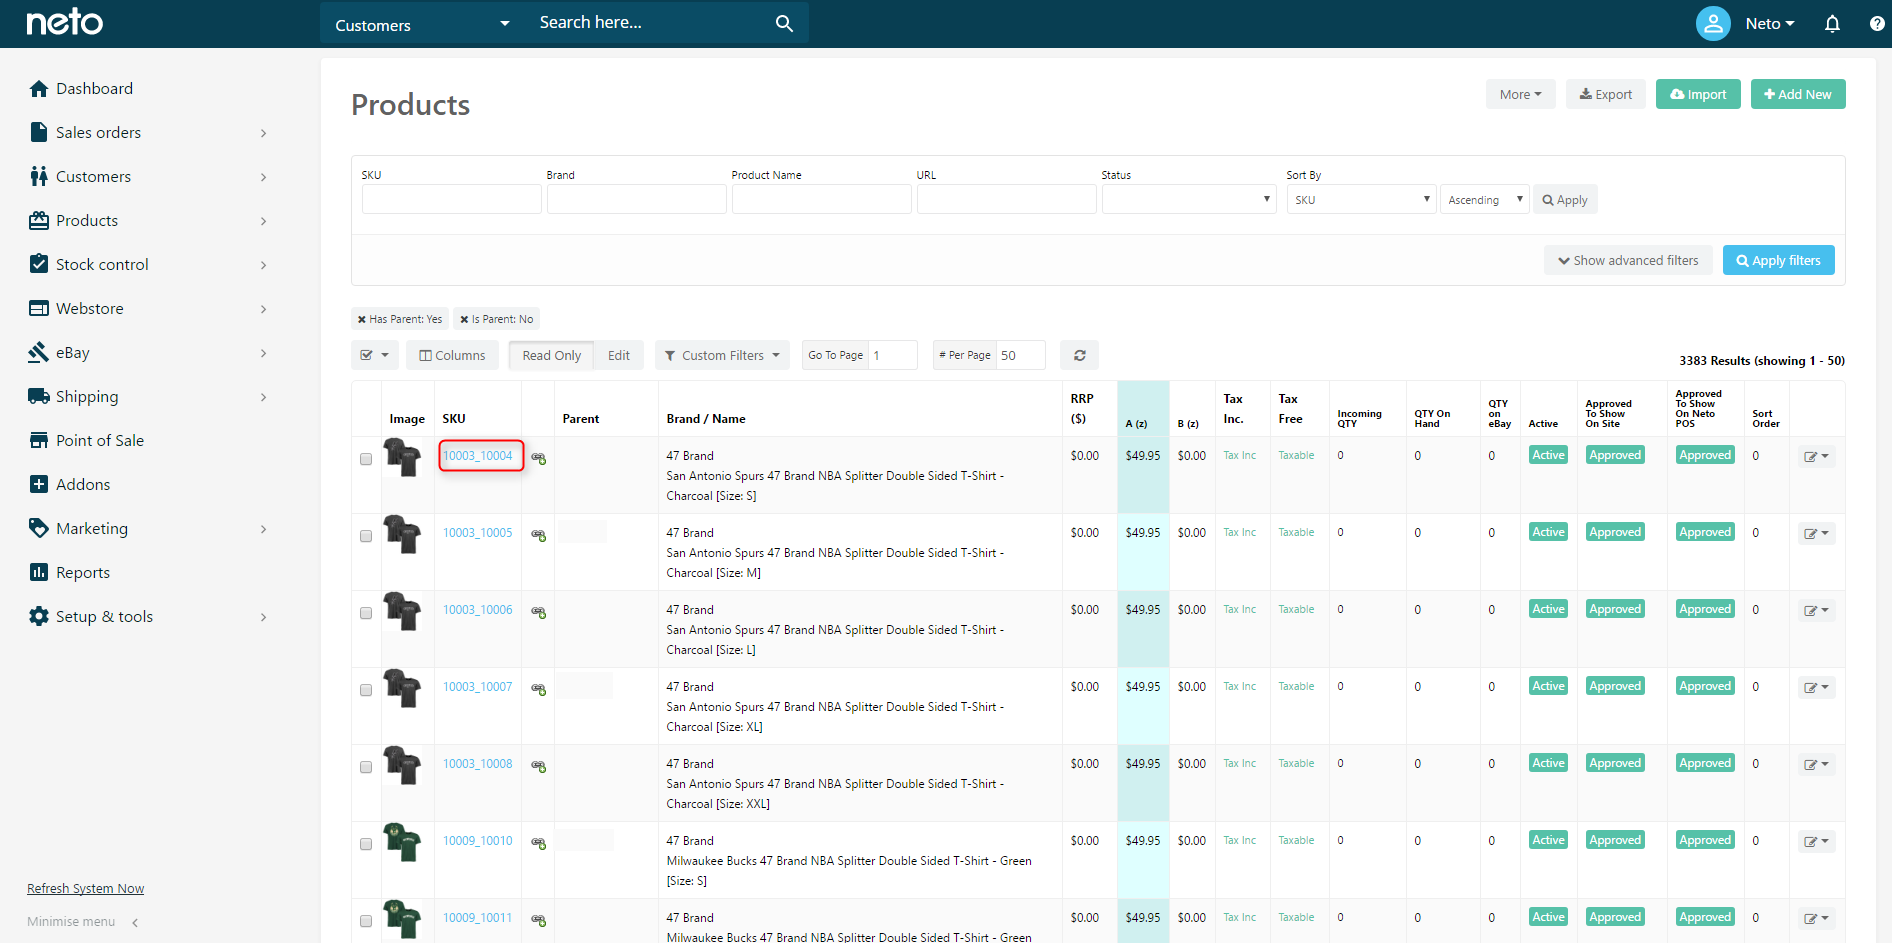
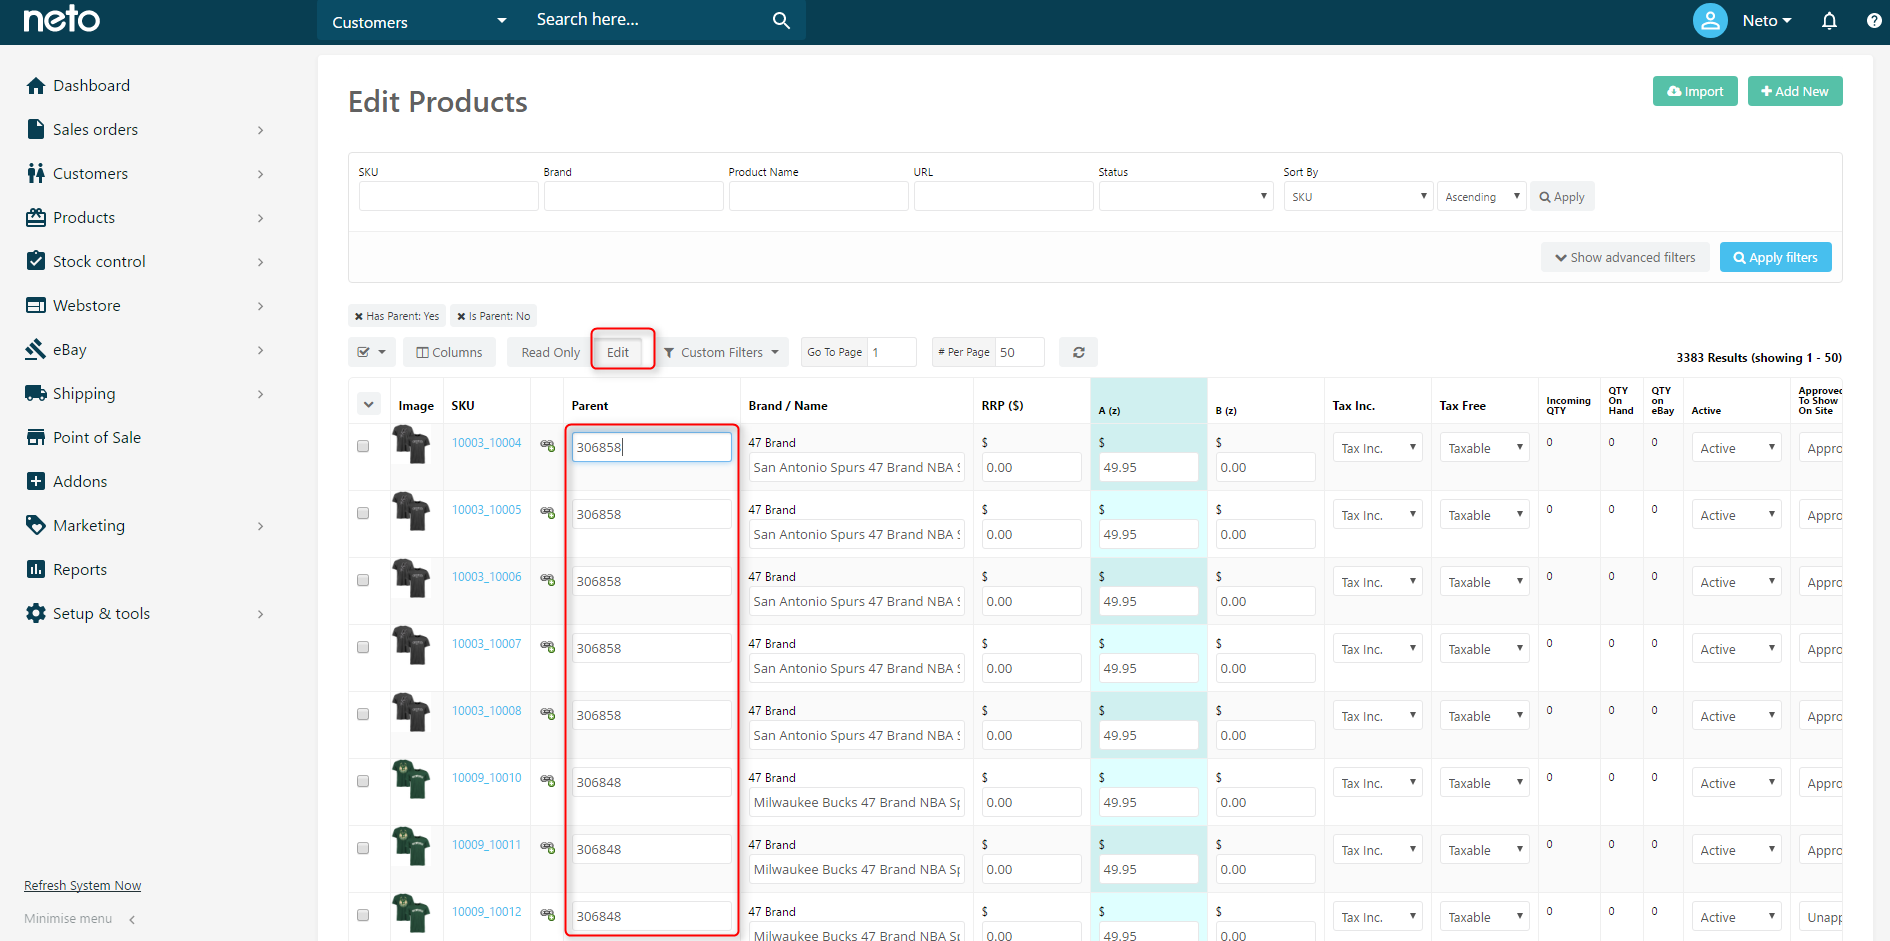
From the product list
- In your Neto control panel navigate to Products > View Products.

- Click the Edit Button, and add the parent SKU to each Parent field. In this example, the parent product has the SKU 306858, and will be used as a container for the different sizes and colours of this style t-shirt.
Your child products will now be linked to the parent SKU. Any specifics on the child products (e.g. colour, size, etc) will appears as different options when viewing the parent product.