Please Note: This article requires the Warehouse Locations addon.
If you have multiple warehouses, it's important to setup your default fulfillment location so that you can ship from the location that's closest to your customer. If you haven't set up your warehouses already, see our guide on adding new warehouse locations.
Set up Warehouse Zones
To begin with, you need to set the zones you want to associate with each warehouse so Neto knows where to fulfil from. To set up your warehouse zones:
- In your Neto control panel navigate to Stock control > Locations / warehouses.
- Click on the warehouse you want to edit and scroll down to the Zones section.
- Under the Search For Zones to Add drop down, click the courier zones you wish for this warehouse to fulfil. For example, if it's a Brisbane based warehouse, add the Brisbane zones for all the couriers you use.
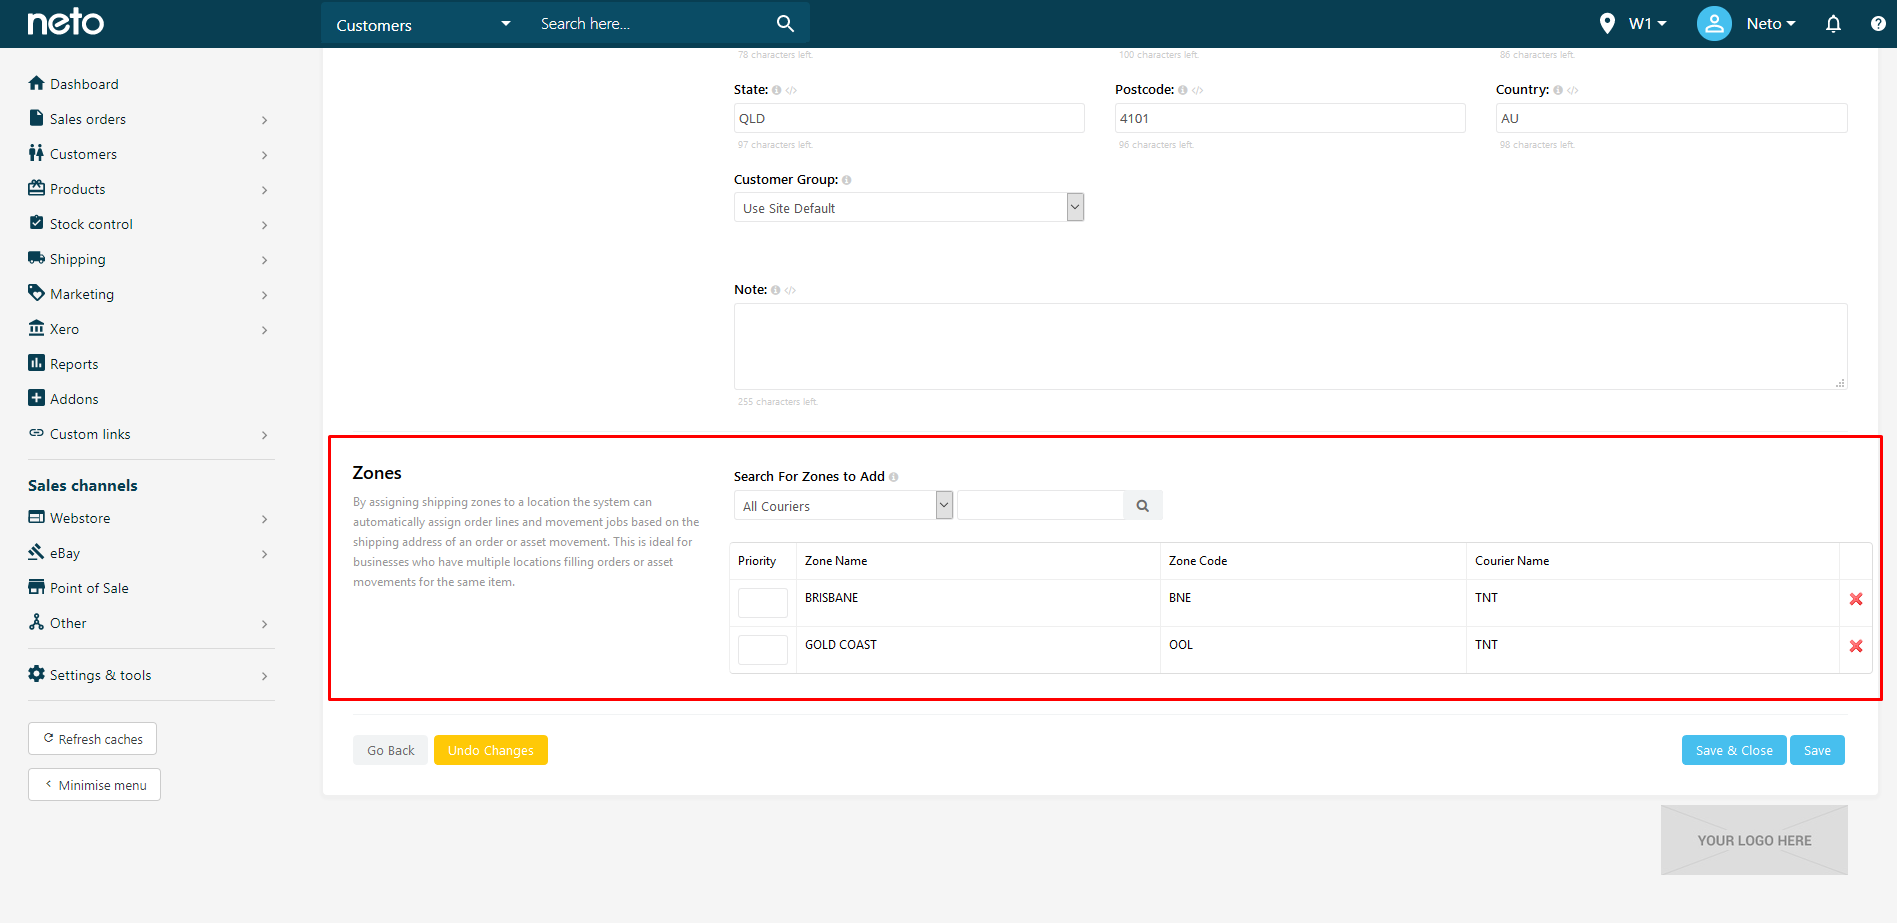
- Click the Save button.
Repeat these steps for the remaining warehouses, by adding the delivery zones they relate to.
Set Fulfilment Locations
You now need to set the fulfilment locations on every product so that Neto won't just select a default warehouse:
- In your Neto control panel navigate to Products > View products.
- Click on the product you wish to make changes to.
- Click on the Warehouse & Picking tab.
- Under Default Fulfillment Warehouse / Pick Locations, add your warehouse locations. If you have a preference over the warehouse you wish to use instead, set a priority number next to the warehouse (remembering the lowest number will be used first).
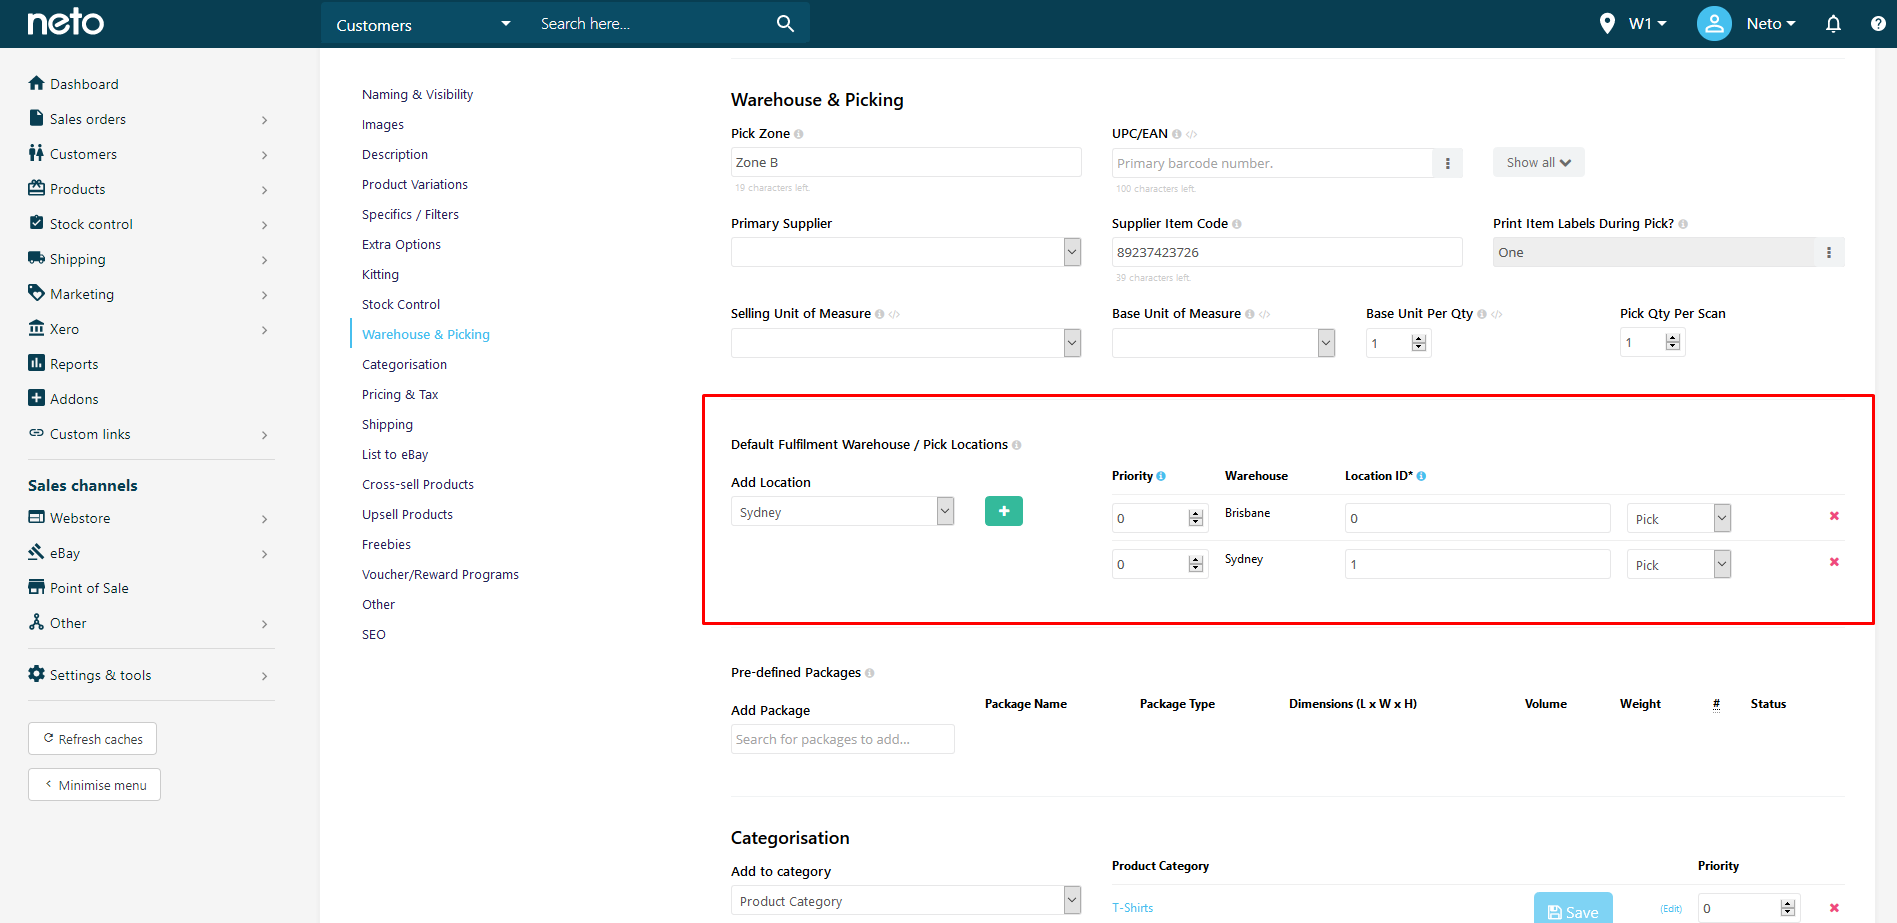
- Click the Save button.
The product will now be fulfilled from the warehouse locations selected, to the zones it is set to serve. You need to do the same for your other products, which can also be done in bulk.
- Download the example template we've setup to assist you. Under the Warehouse Locations column, use the following to set out your warehouse locations, pick priorities and locations within the warehouse.
warehouse_name::location_id::pick_priority::location_type;
An example:
Brisbane::0::100::pick;Sydney::1::99::pick
- Once complete, navigate to Settings & Tools > Import Data. Select Simple Import and upload the CSV file.
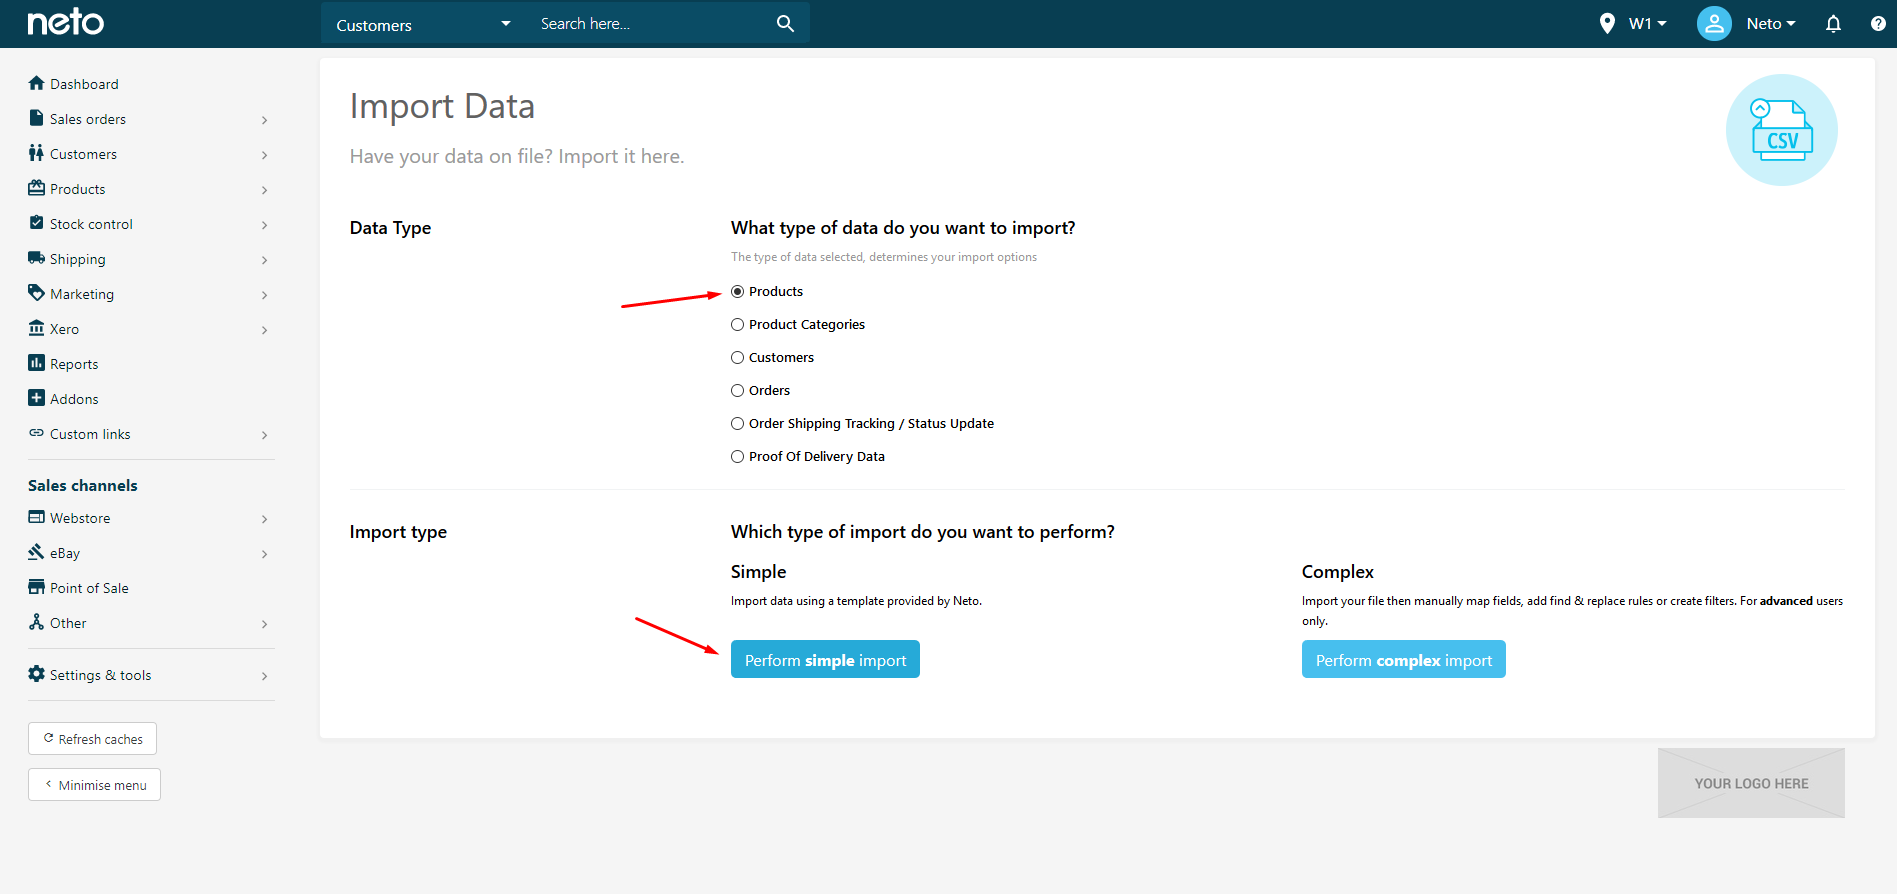
Neto will import and process your file, adding the default fulfilment location to all products.