Neto by Maropost supports both native and third-party loyalty initiatives, rewarding shoppers with a proven history of high-level engagement, purchases, and feedback with their merchants. The more shoppers place an order and contribute to a merchant’s overall business growth, the better rewards these shoppers earn.
Merchants can enable this payment method in their Neto POS system, allowing shoppers to use their accrued reward points from previous purchases during their current checkout.
Manage Rewards Payment Settings
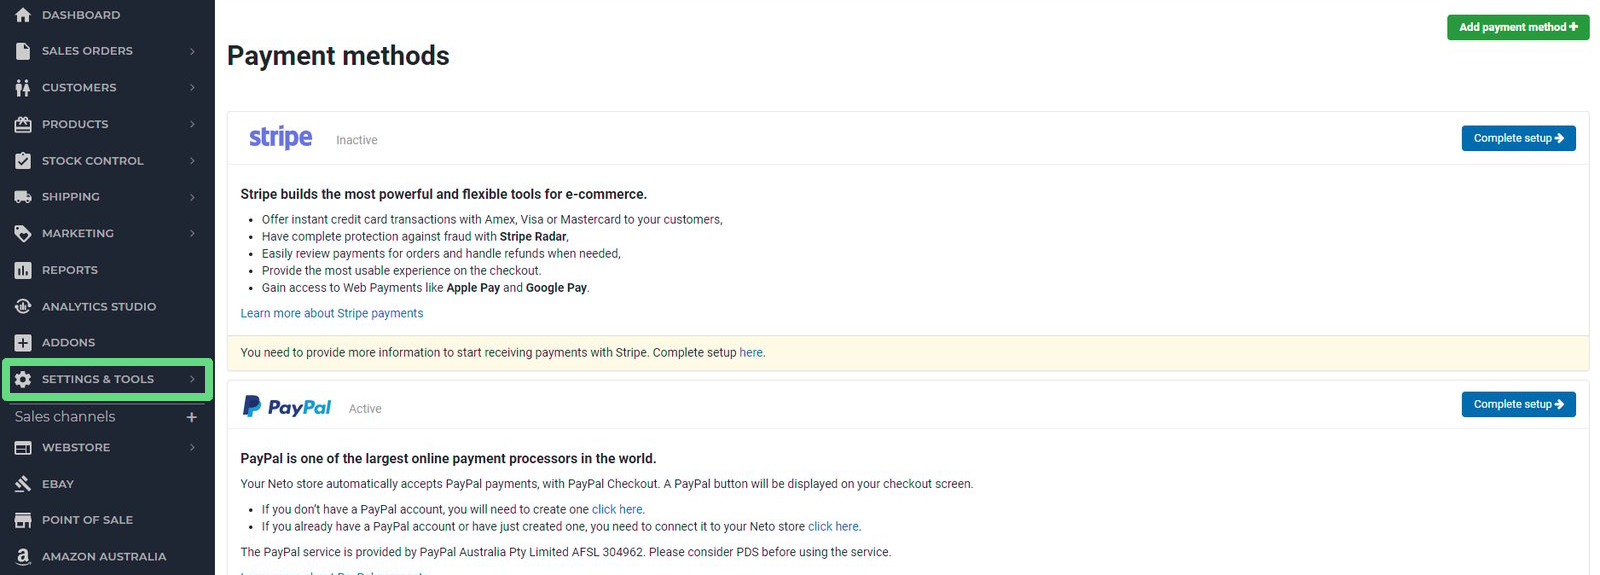
1. To access this section, click on Settings & Tools and select Payment Methods.
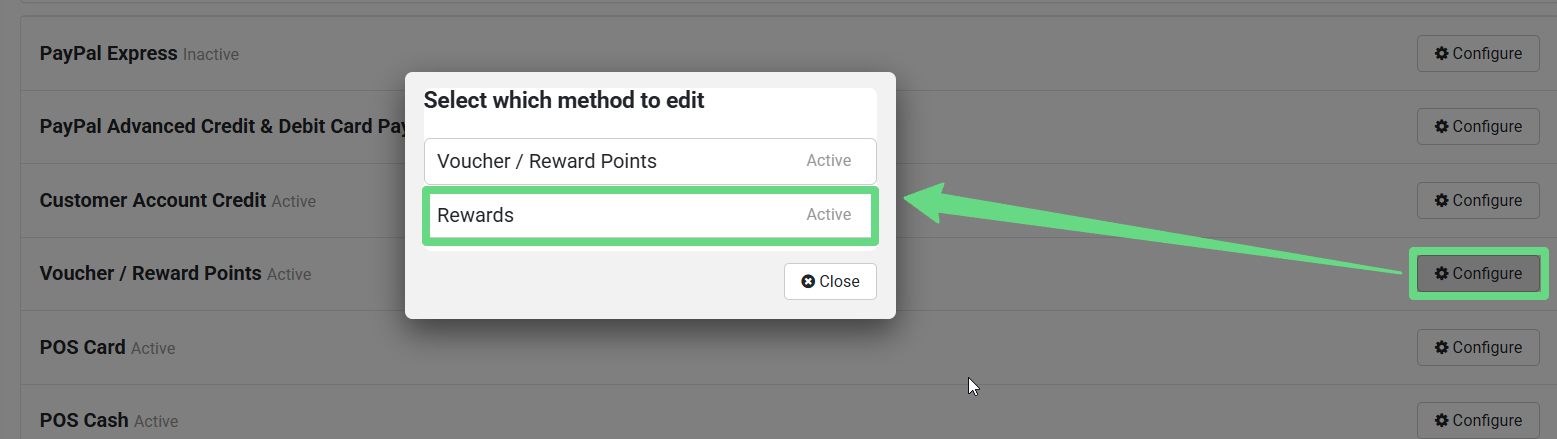
2. Scroll down to the “Voucher / Reward Points” section and click on Configure. The system provides two options for editing, namely, “Voucher / Reward Points” and “Rewards”. Ensure you have configured the rewards program feature beforehand. To learn more about configuring such reward programs, read our Set up a Customer Rewards Points Program article.
3. Upon clicking “Rewards,” you will be redirected to the Edit Payment Method page. Ensure the settings are configured adequately. If you wish to display the payment settings on the Neto webstore or “Point Of Sale” register, enable the “Active” and “POS” options, while the “Show on Website” toggle should be disabled, respectively.
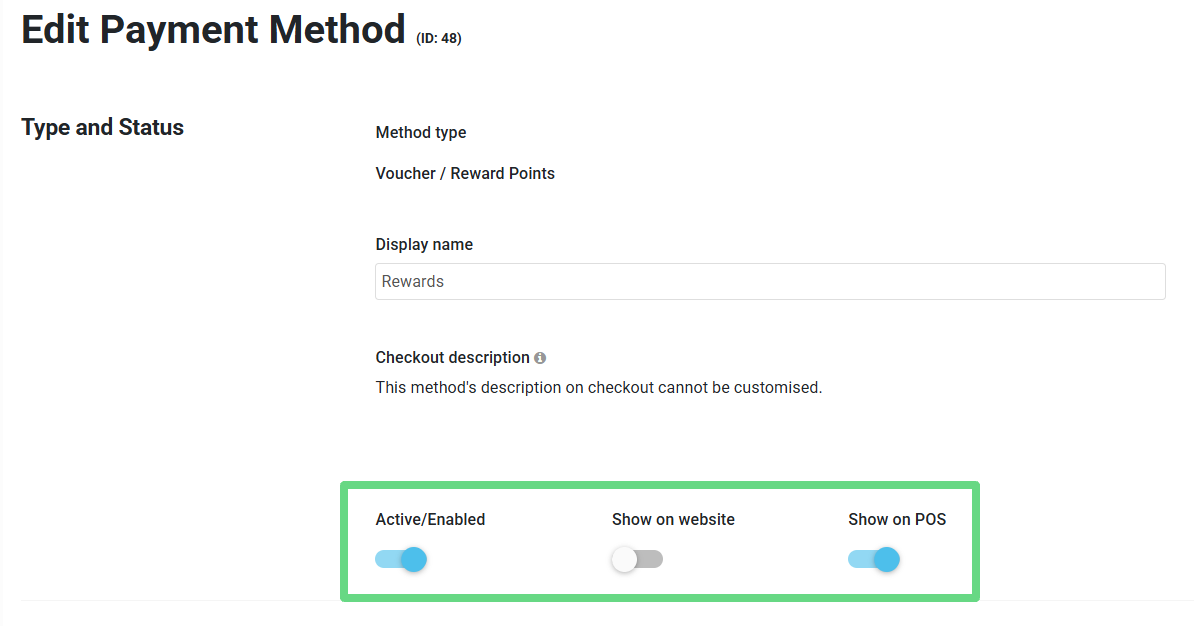
Important: Do take utmost care in not renaming the display name to anything other than “Rewards,” as the system will display it as a “Voucher” payment method, which requires a voucher and secret key, rather than a reward payment method.
Alongside configuring reward payment settings, be sure to set up its redemption rules. Such rules can impose a cap (minimum-maximum limit) on the reward amount that can be used per order. Additionally, you can allow shoppers to redeem the rewards only in multiples of a certain number.
For example, if a client has a total of $250 reward points and a merchant configures the reward payment rules allowing shoppers to redeem the reward in multiples of 100, the client can redeem from a starting amount of $100, $200, etc., but not the entire $250 during a single payment checkout.

Redeeming Rewards During Checkout
1. Once configured, the “Rewards” method becomes available on the Neto POS payment screen.
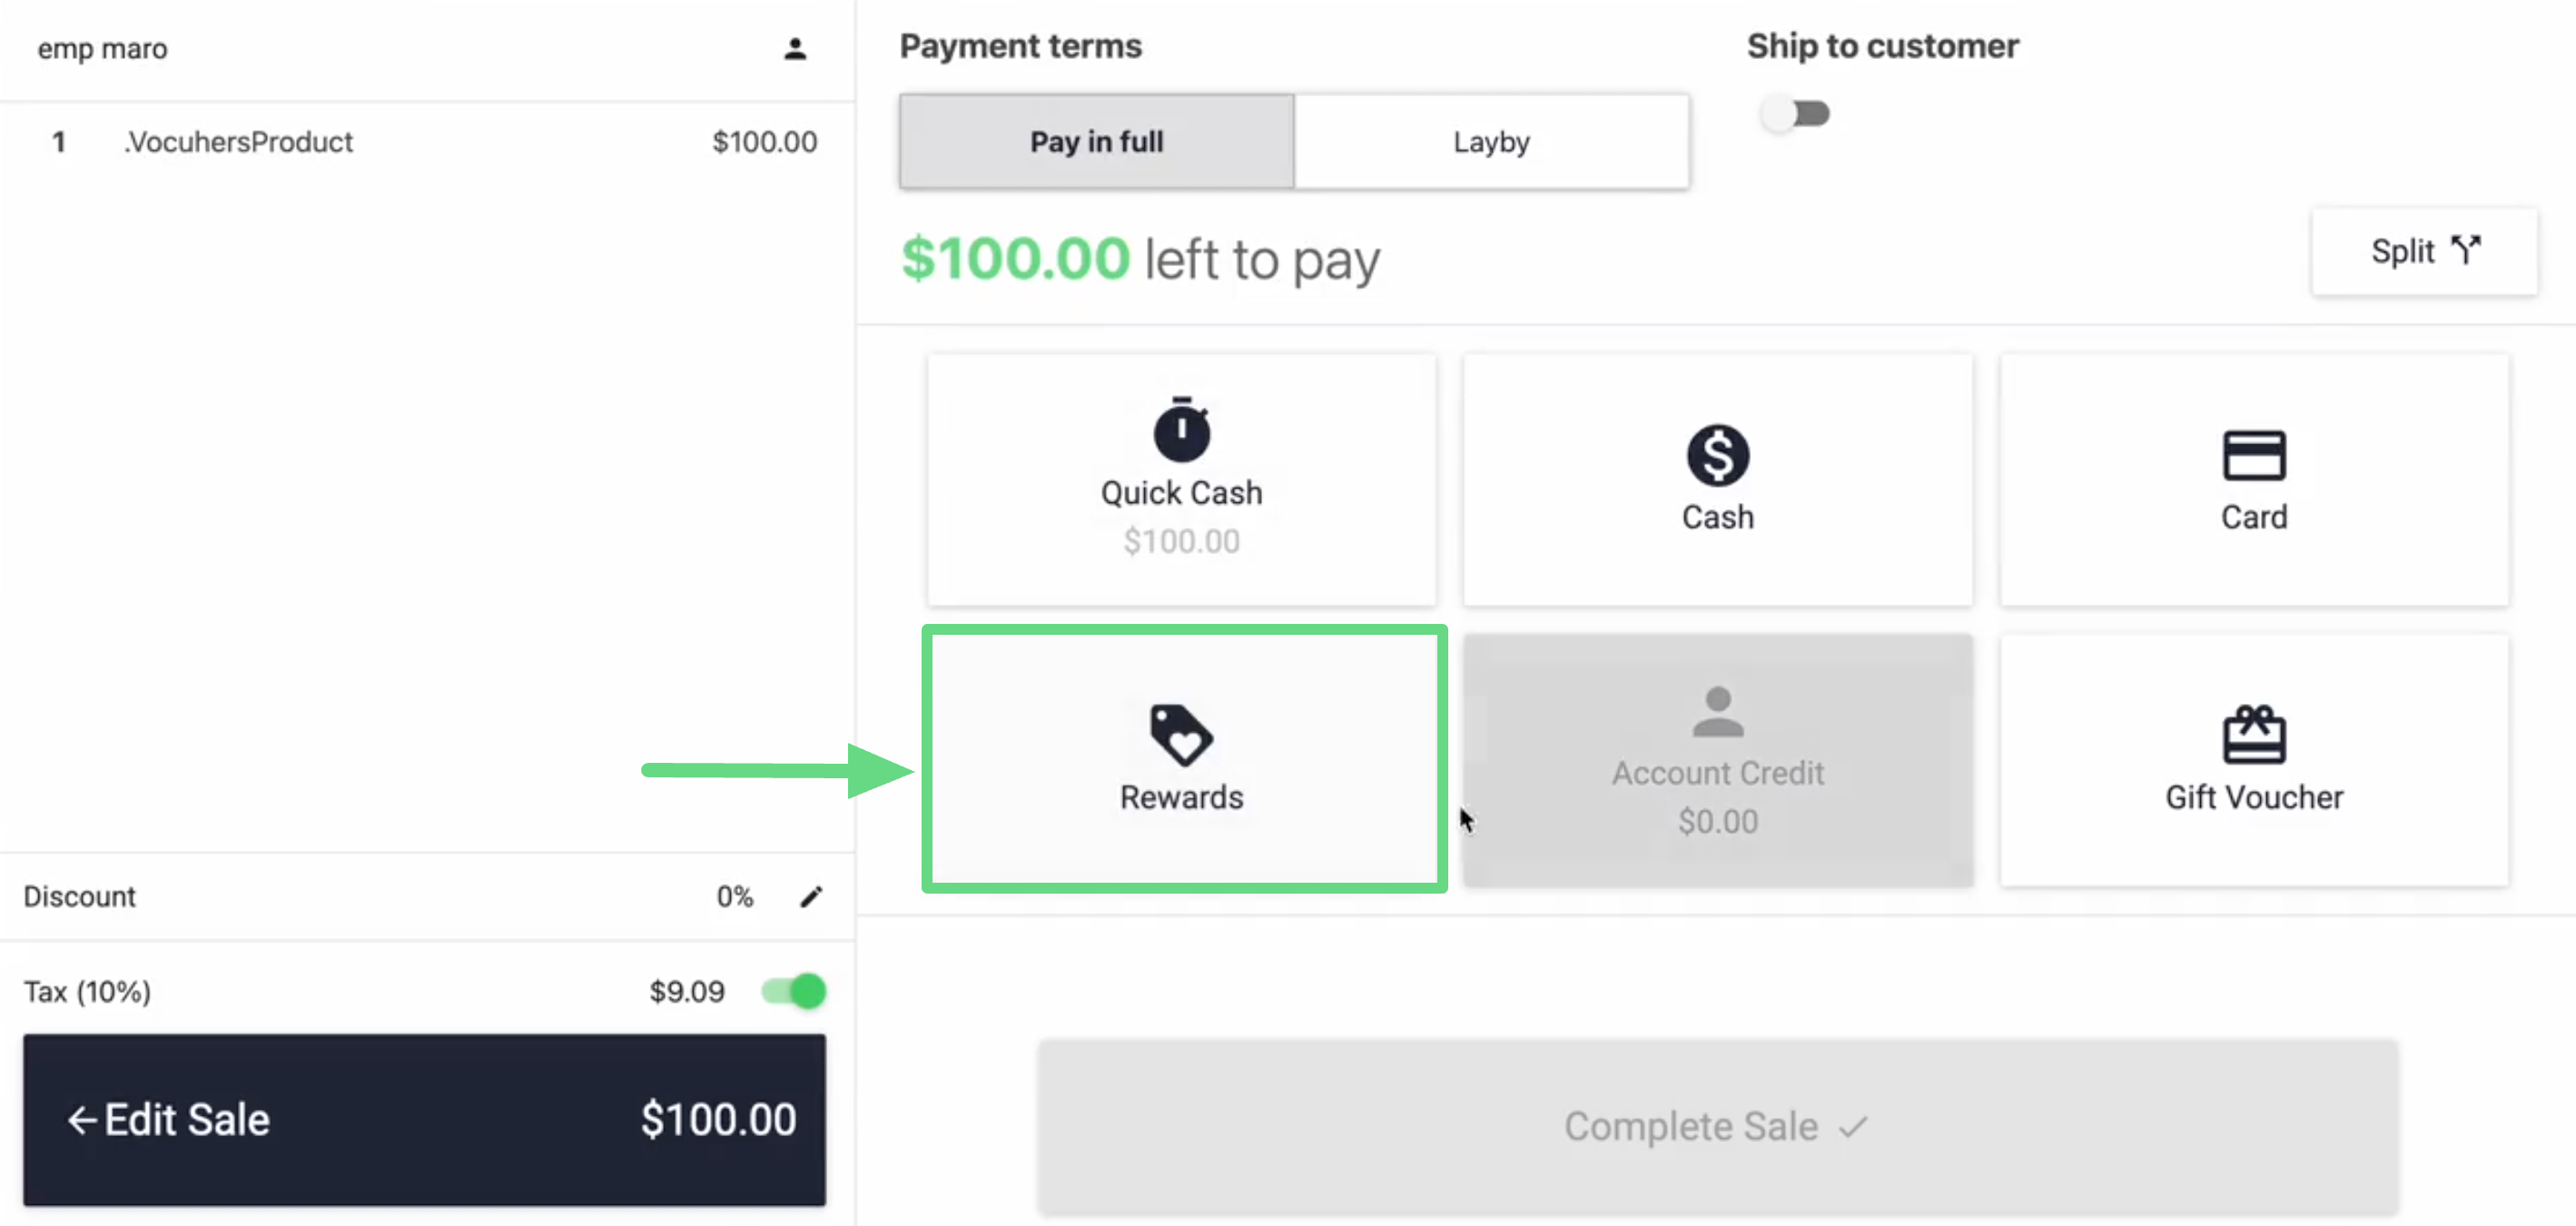
2. When a shopper proceeds to complete a purchase, the POS system provides an option to use their rewards balance. The shopper must enter the balance they wish to utilize and apply the newly calculated points during checkout.
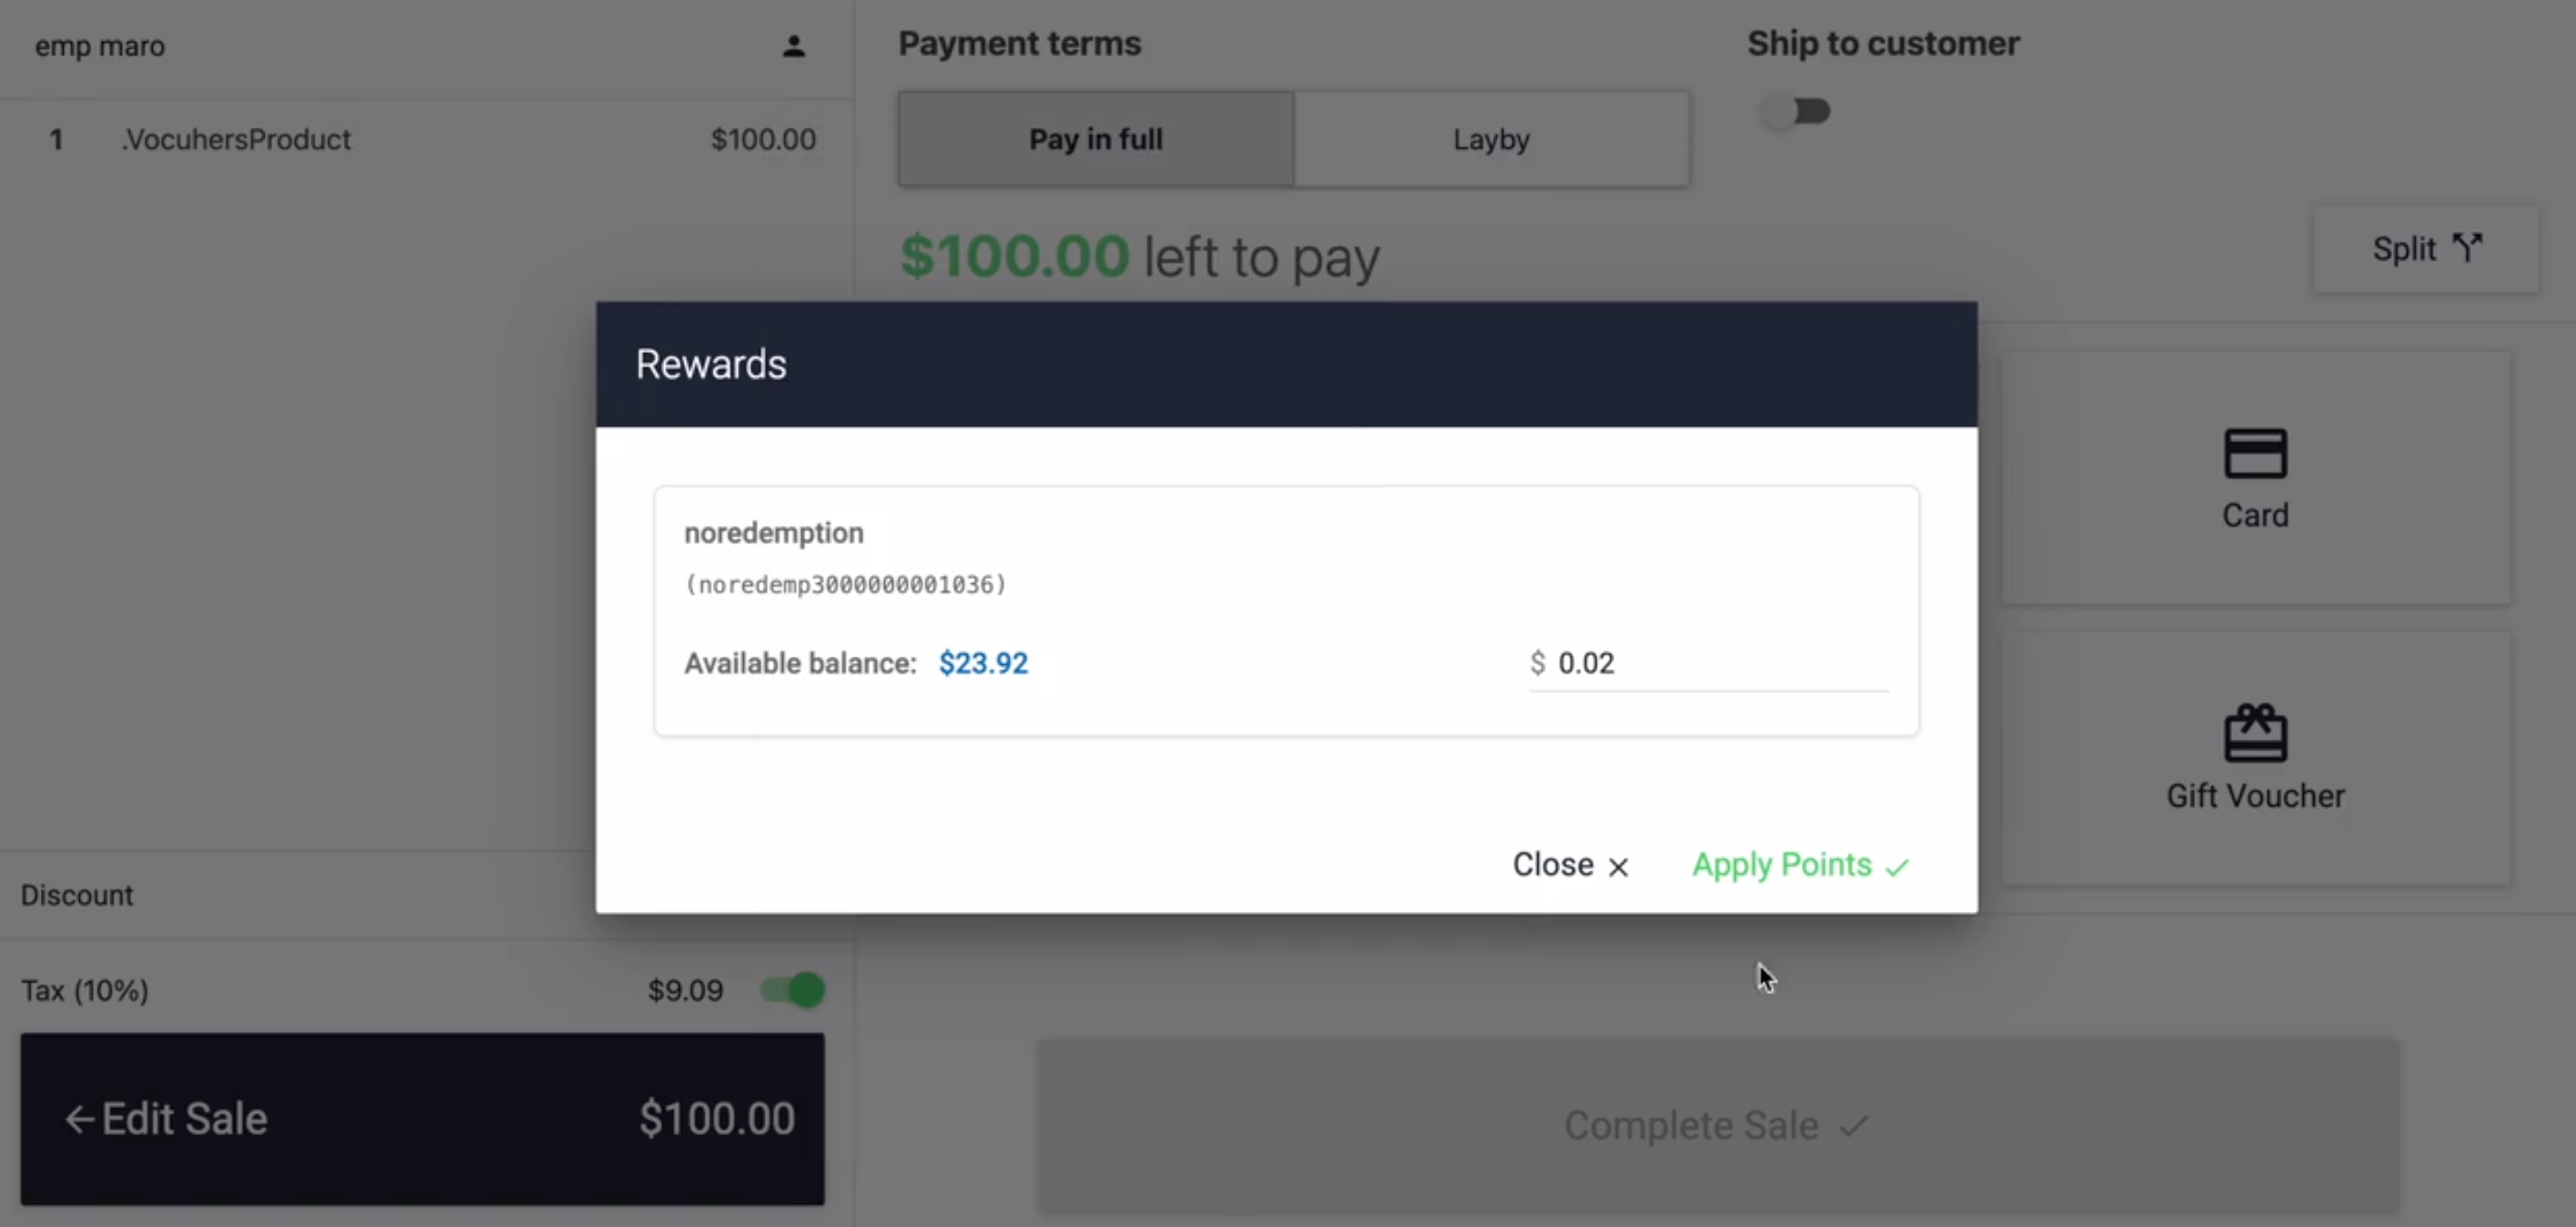
3. The system then verifies whether the entered balance amount is eligible for redemption. Such redemption rules can be configured during the rewards program setup.
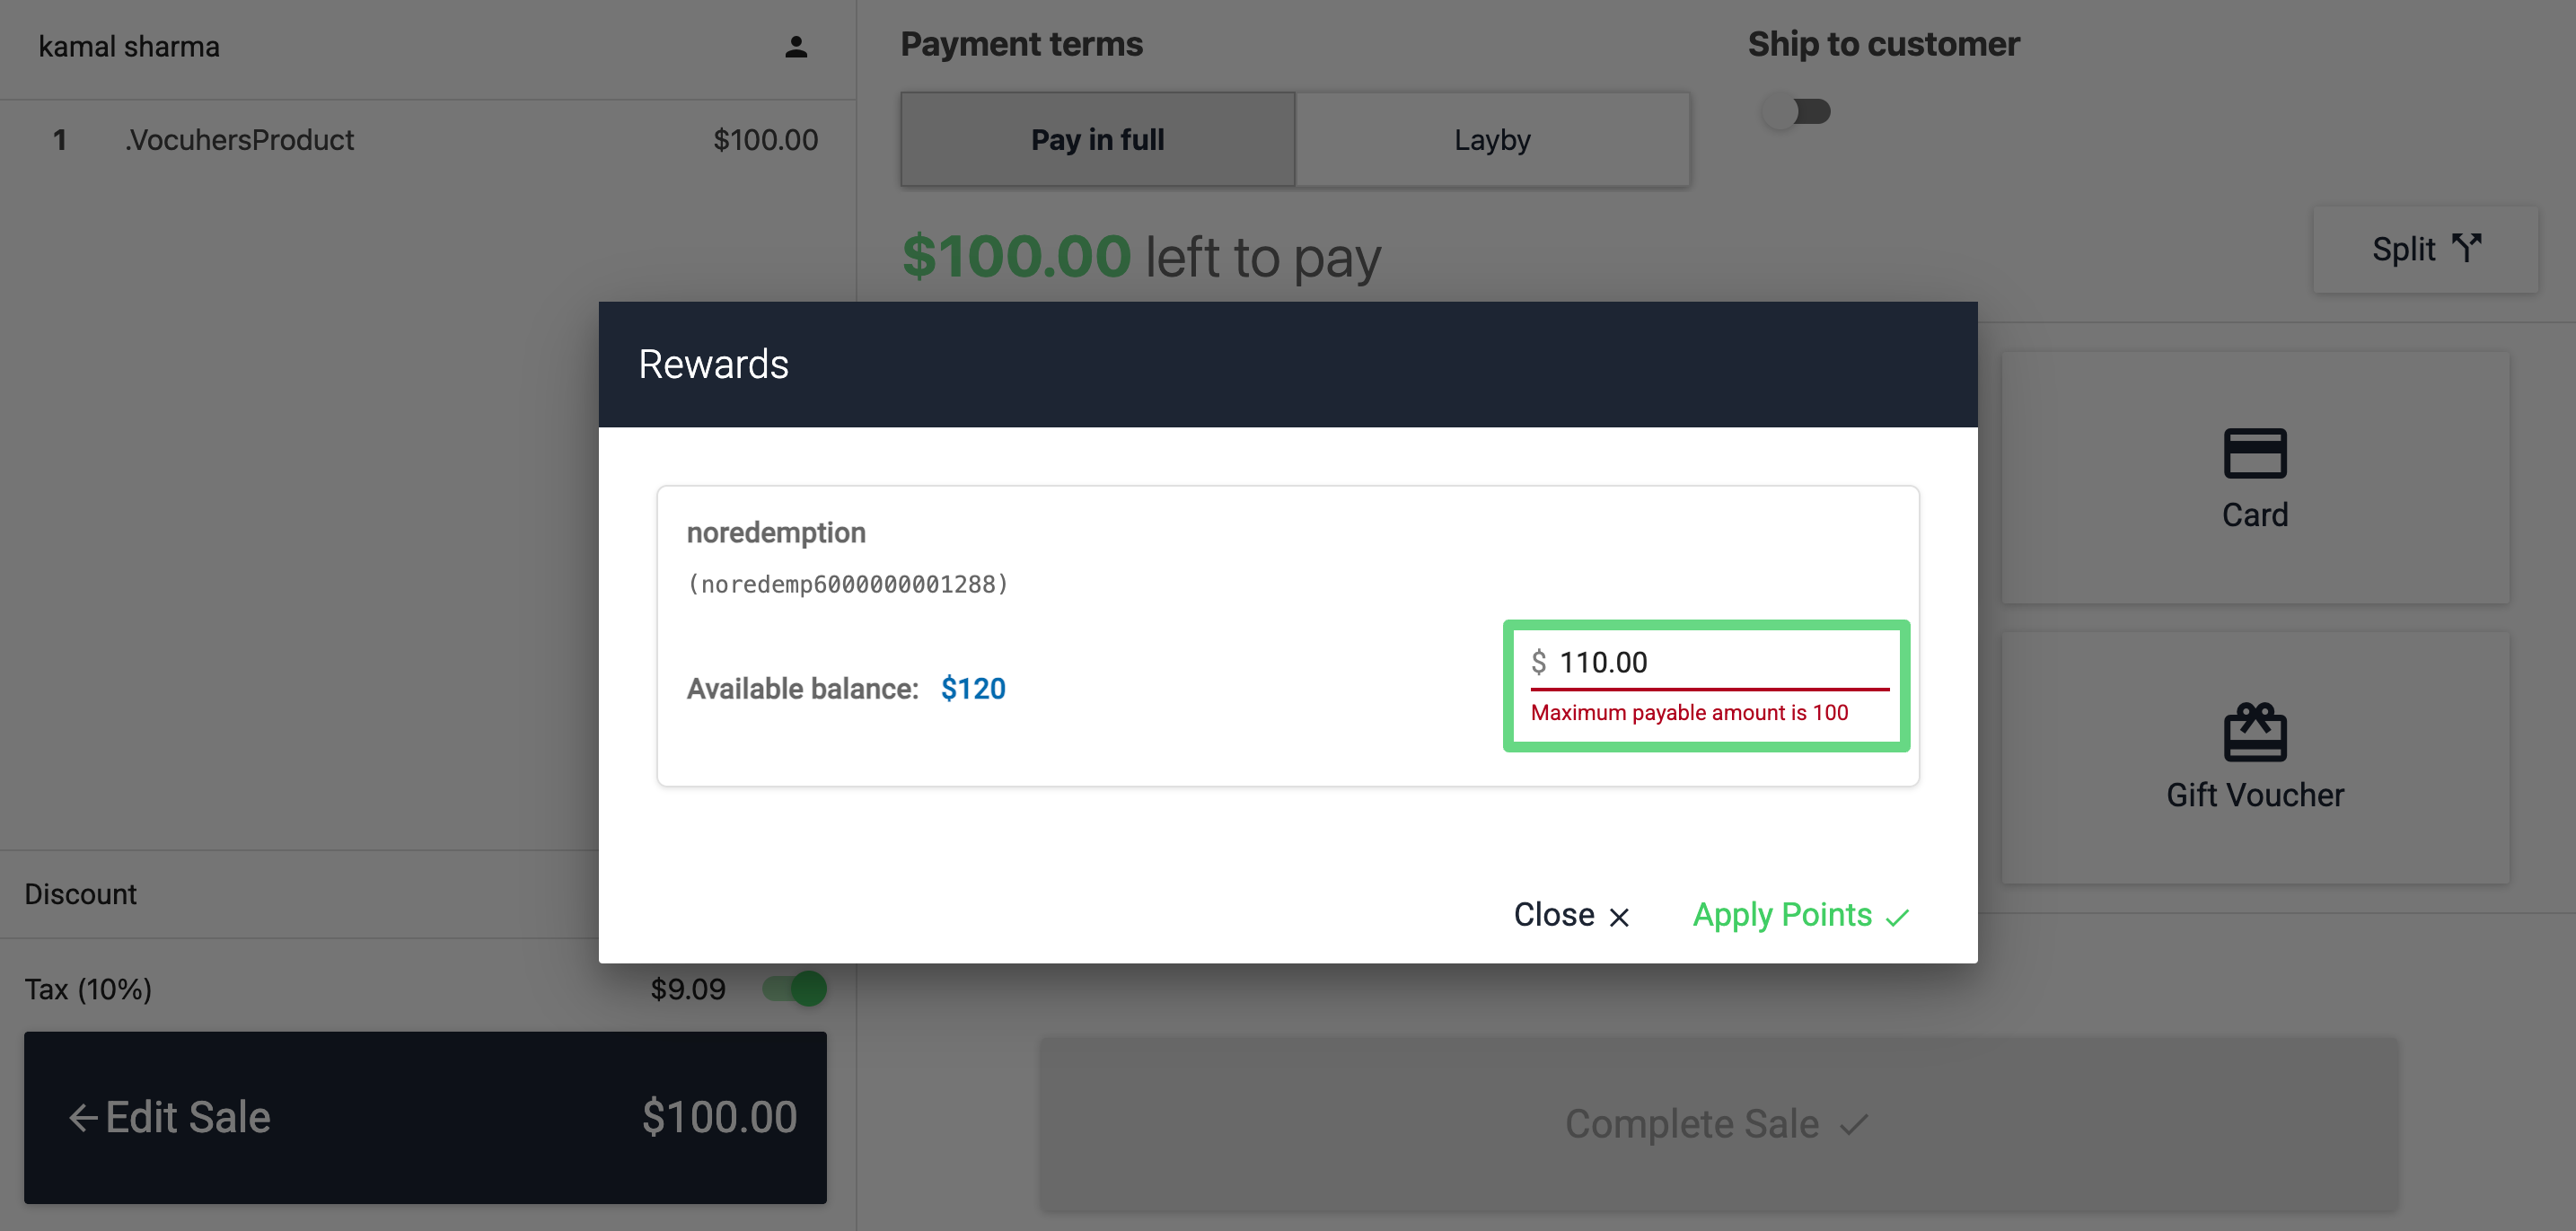
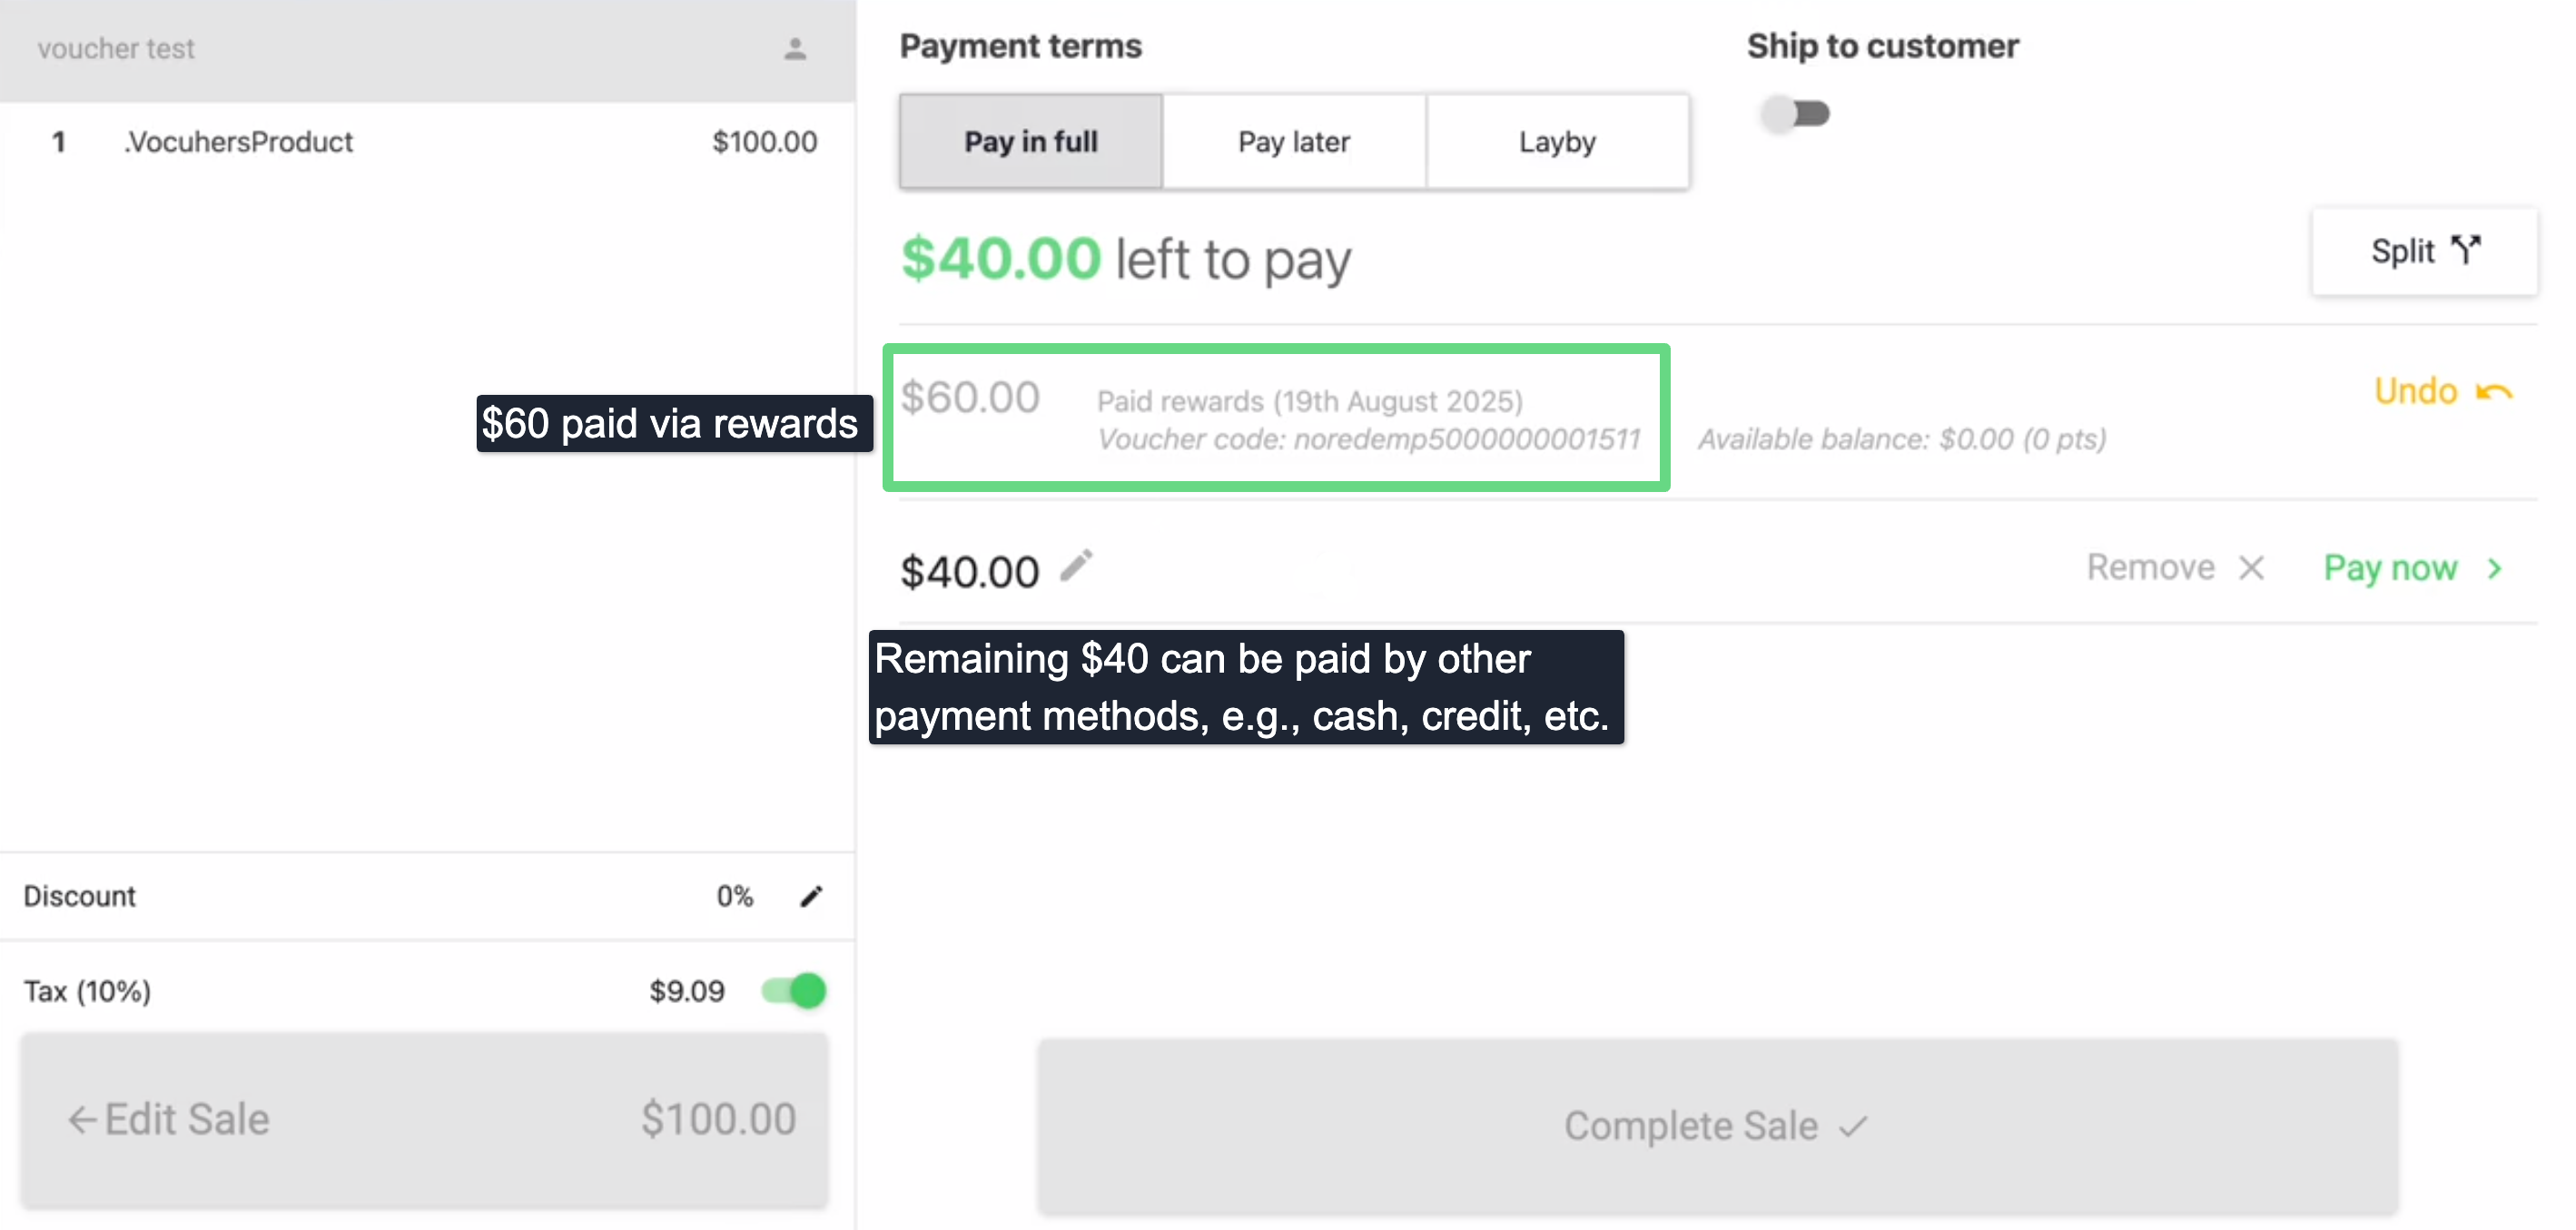
4. After the system verifies and clears the entered reward balance, it's applied to the order amount as a payment method. Any additional amount remaining after the reward payment deduction can be paid off through other payment options.
Earning Rewards on Neto POS
Shoppers can earn reward points on purchases, both in-store and online. Merchants should have their Neto POS account configured beforehand. To learn more about configuring the Neto POS register, read our Log in and Navigate POS article.
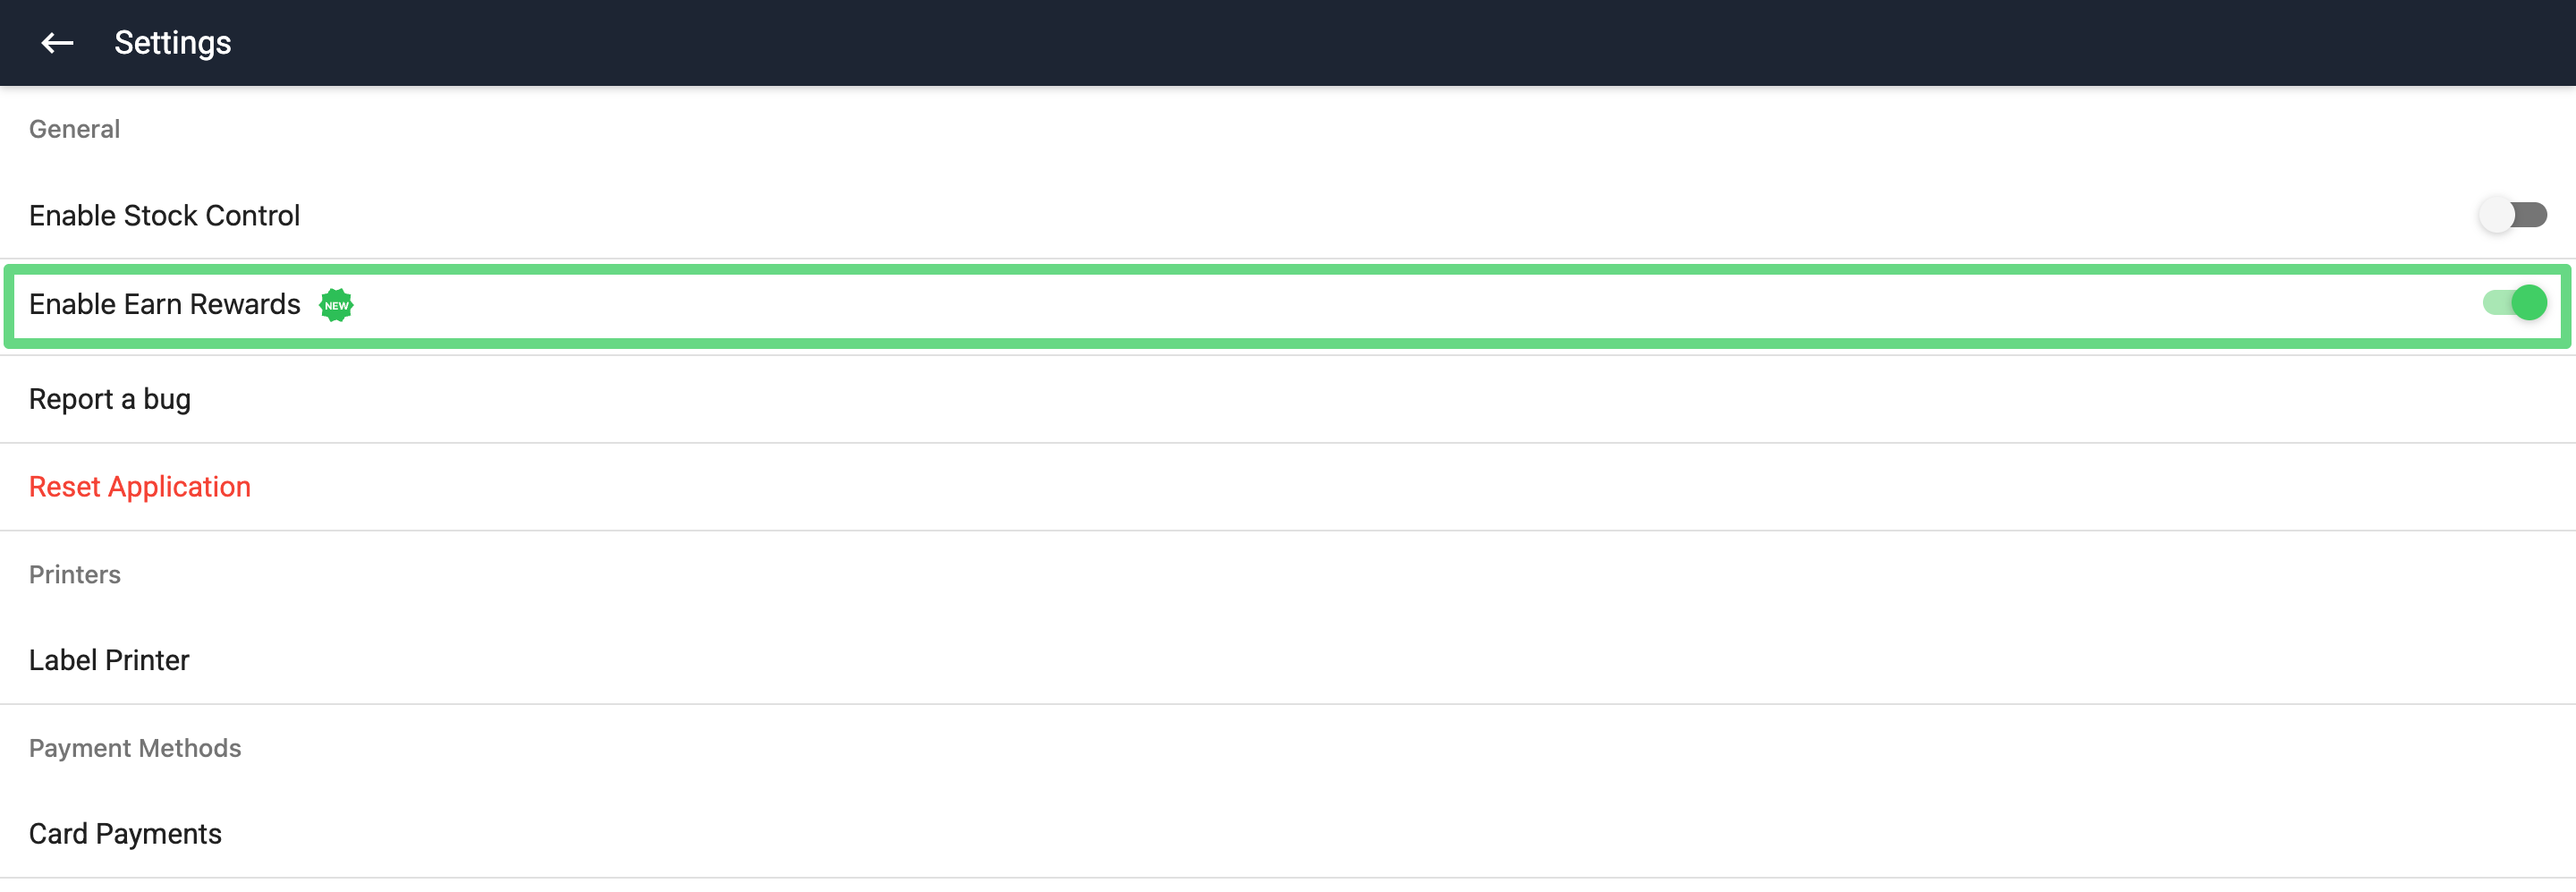
1. You can activate the reward feature for Neto POS by visiting the Navigation panel and clicking on Settings.
2. Enable the “Earn Rewards” toggle to trigger the feature. Since this feature is disabled by default, ensure it is enabled before handling customer orders.
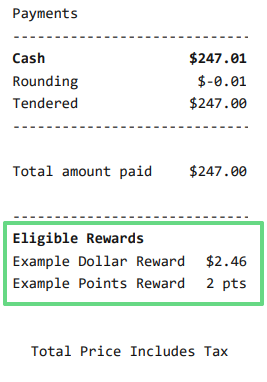
3. Once the feature is activated, the shoppers can begin earning rewards based on their purchases. When you’re processing an order, you can view the shopper's total reward earned, which is reflected during checkout.
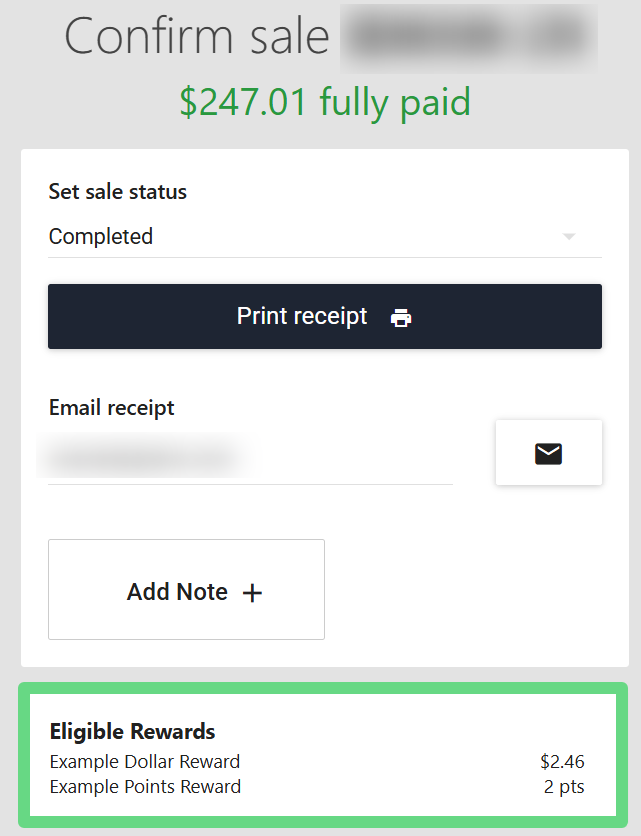
4. The reward details are printed on the order receipt and can be shared with the shopper via email.