An RMA (Return Merchandise Authorisation) is a numbered authorisation provided by a mail-order merchant to permit the return of a product.
By creating an RMA, you are able to:
- Track the progress of a return through Neto.
- Credit the customer (if required).
- Adjust stock levels correctly.
RMAs are the supported process to handle returns in Neto. Avoid cancelling, crediting or deleting the sales order, as it can cause inconsistencies in your data.
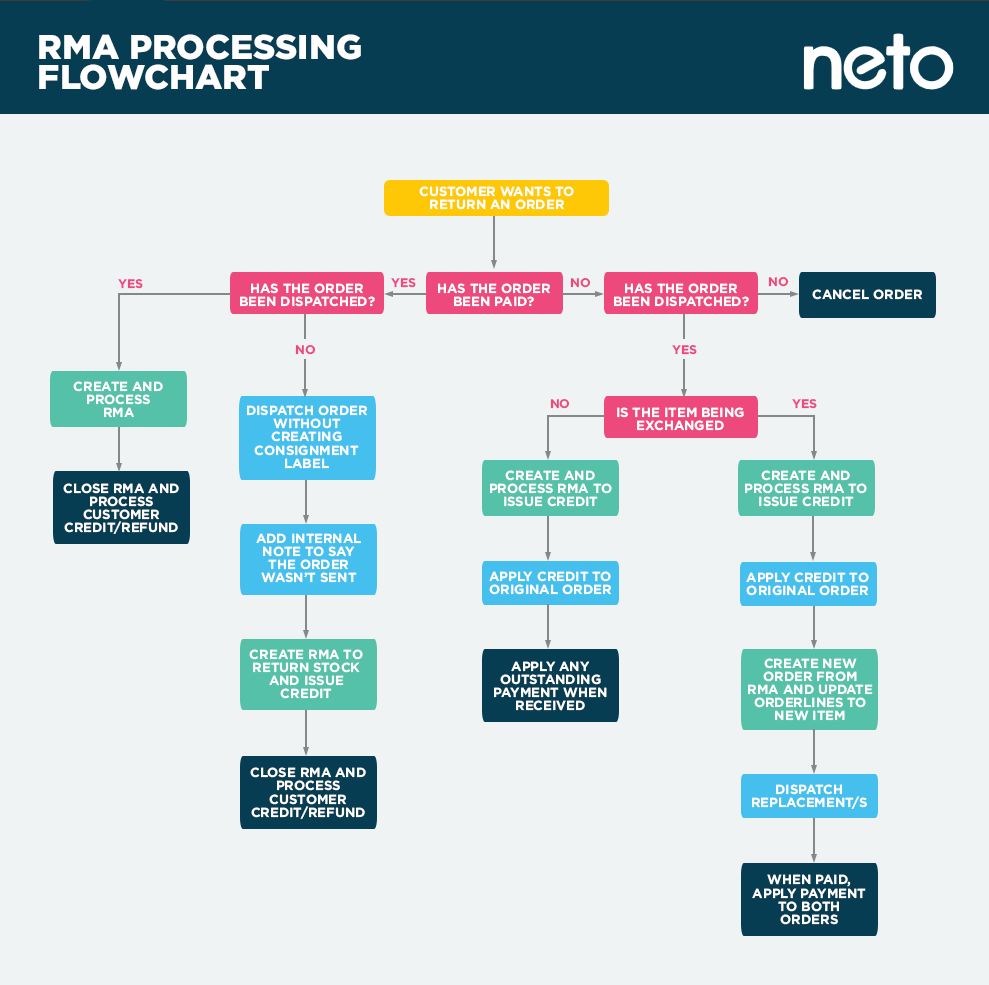
RMA Flowchart
While most returns will be carried out on orders which have been paid for and dispatched, there are occasions when you need to do a return for orders which aren't paid or sent. To ensure your stock levels and customer credit are correct, use the flowchart below to guide your steps:
Create an RMA
RMAs can only be created from sales orders or disputes in Neto. To create an RMA:
- In your Neto control panel, navigate to the Sales Orders > View Orders or Disputes menu.
- Click on the order/dispute ID you wish to create the RMA for.
- Click the More button, and choose RMA or Credit. On a dispute, click the Dispute Options button and choose Create RMA for disputed products.
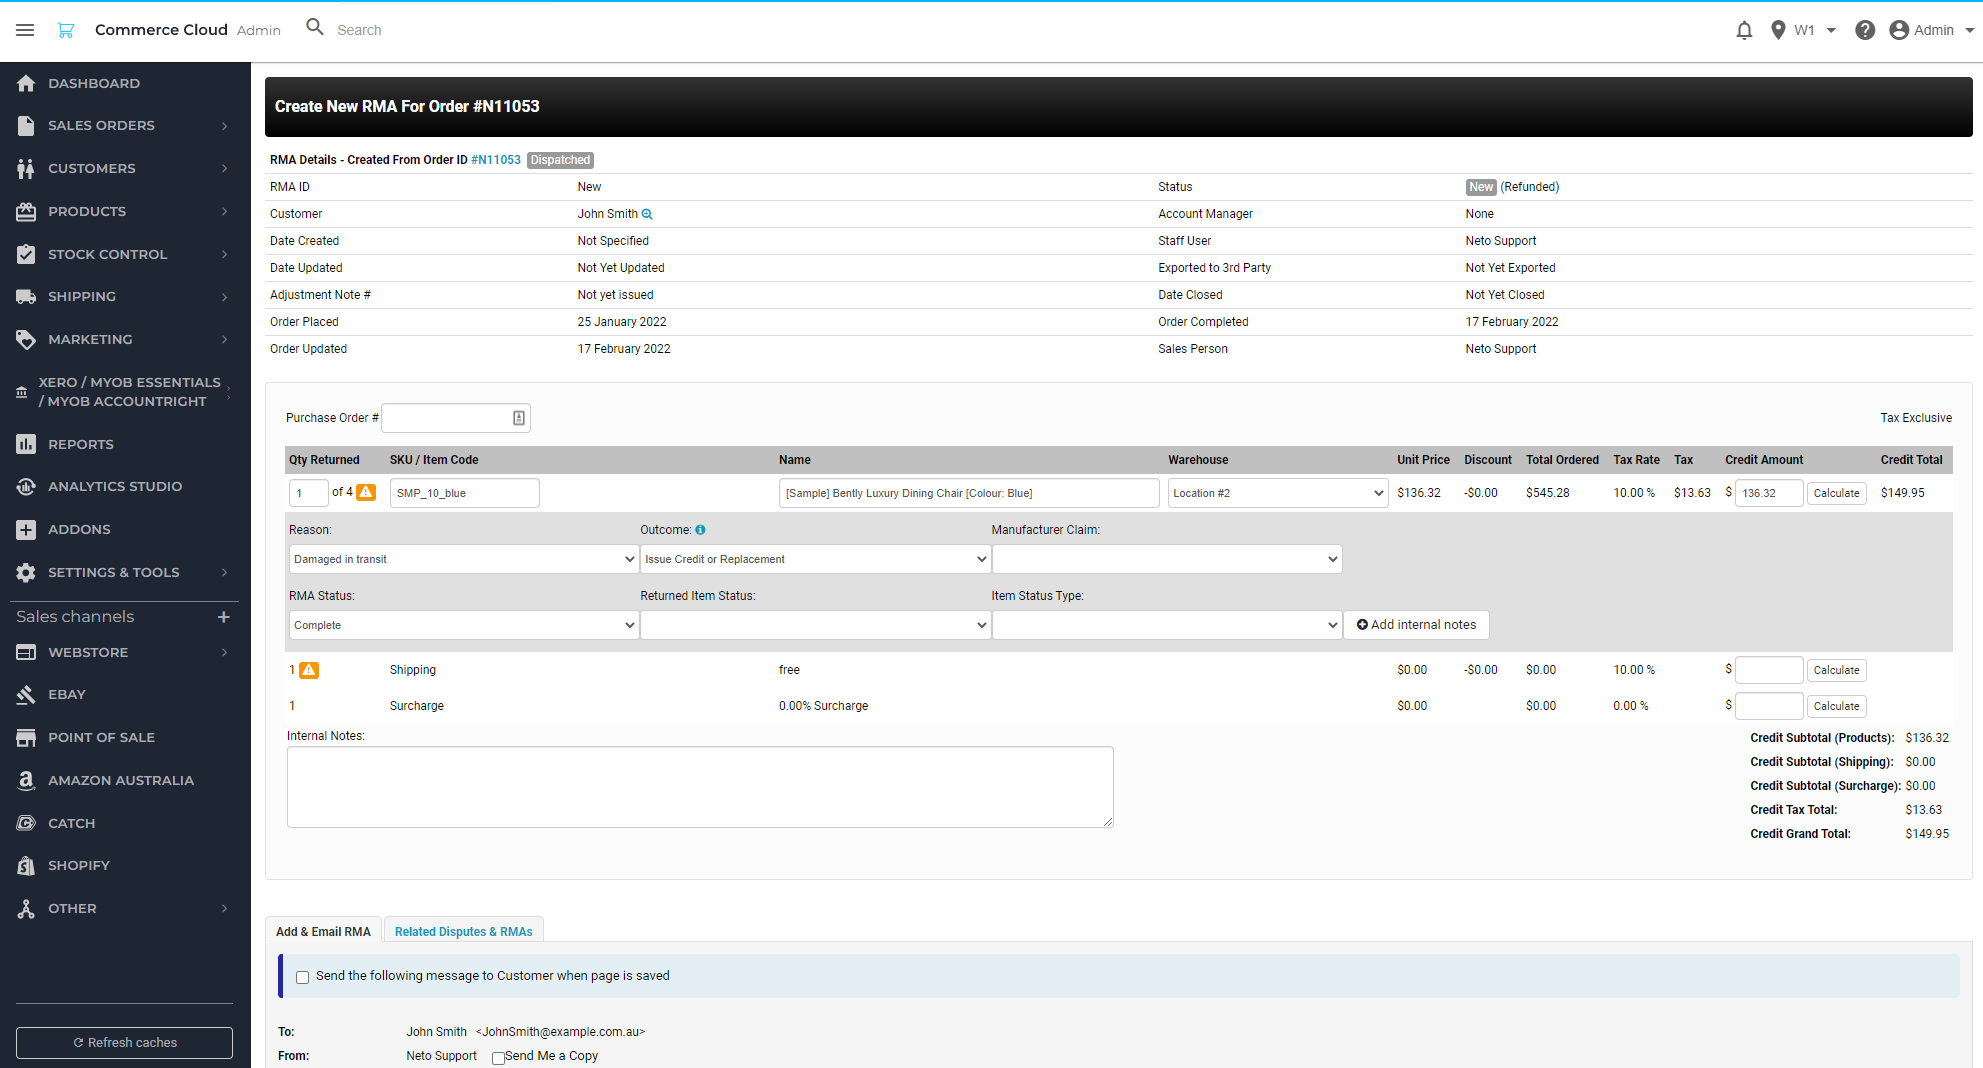
- Enter a number in the Qty Returned field(s) for the orderlines that will be on the RMA. The credit amount will be populated automatically.
RMAs must have an orderline to export to Xero. To create a shipping only RMA, add a $0 credit product to the RMA.
- Select a Reason for the return, from the dropdown menu.
- Select an Outcome for the RMA from the dropdown menu. This selection will help to keep track of the RMA, determine what you wish to do with the stock and the outcome for the customer. If you're not yet sure what the outcome will be, leave this field as awaiting outcome.
- Add a shipping cost in the Shipping section if you intend to refund or credit these costs.
- Add a surcharge if any, in the Surcharge section.
- If you wish to email the customer the RMA details, select the Send the following message... on the Add & Email RMA tab. If you do, make sure to add information to the email body section.
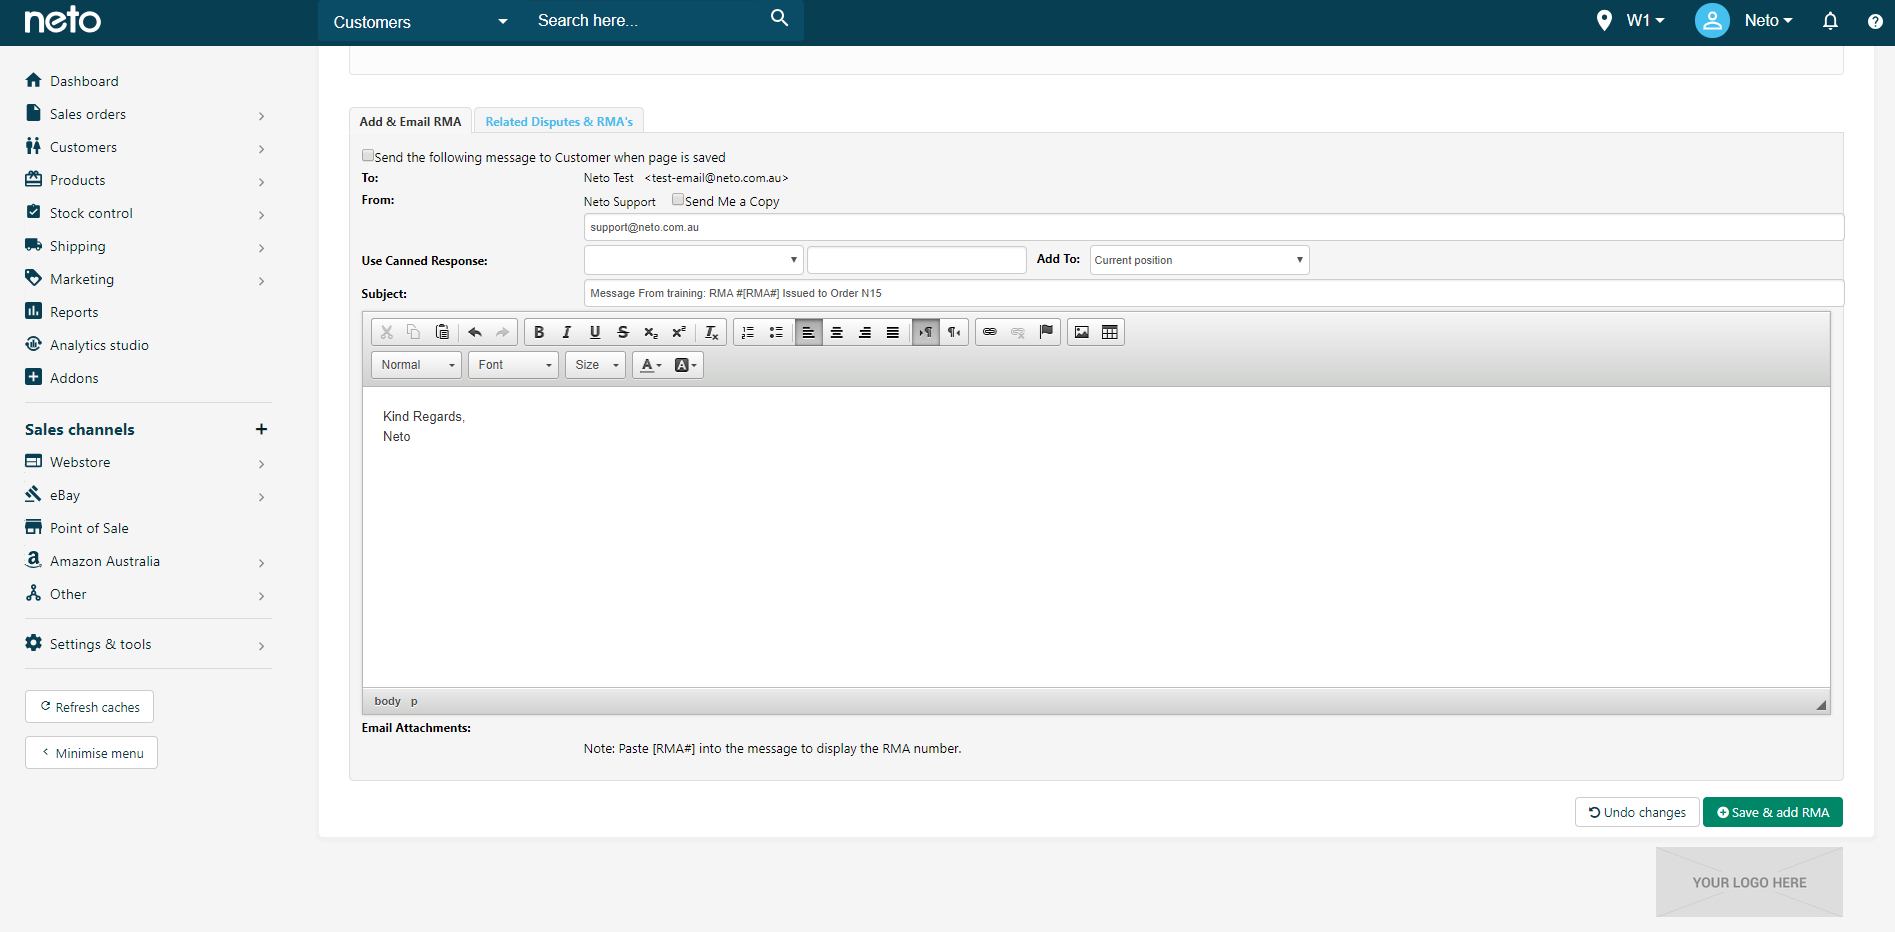
- Click the Save & Add RMA button at the bottom of the page.
Your RMA is now created. What happens next depends on the details of the RMA. For example, if the customer is exchanging the product you will need to wait until it is returned before a replacement is sent.
Process an RMA
When you are ready to process the RMA:
- In your Neto control panel, navigate to the Sales Orders > Returns & credits page.
- Click on the RMA ID you want to process.
- Outcome
- Manufacturer Claim
- RMA Status
- Returned Item Status
- Item Status Type
Update the dropdown menus corresponding to the change in status:
- When you're ready to close the RMA, set the RMA status to Complete and click the Close RMA, issue credits & generate adjustment note button.
The customer's account will be updated to include any credits applied in the outcome, and stock will adjust depending on the item status type. Credits can then be paid out a refund from the customer's account page, and transferred through your gateway of choice.
Once an RMA is closed you can:
Delete an RMA
Please Note: To delete an RMA it must be Open. To re-open a closed RMA, open the RMA, and at the bottom right hand side click the Open RMA button.
To delete an RMA:
- In your Neto control panel, navigate to Sales Orders > Returns & Credits
- Select the checkboxes that correspond to the RMA IDs you wish to delete.
- Scroll to the bottom of the page and click the With Selected button. Click the Delete option.
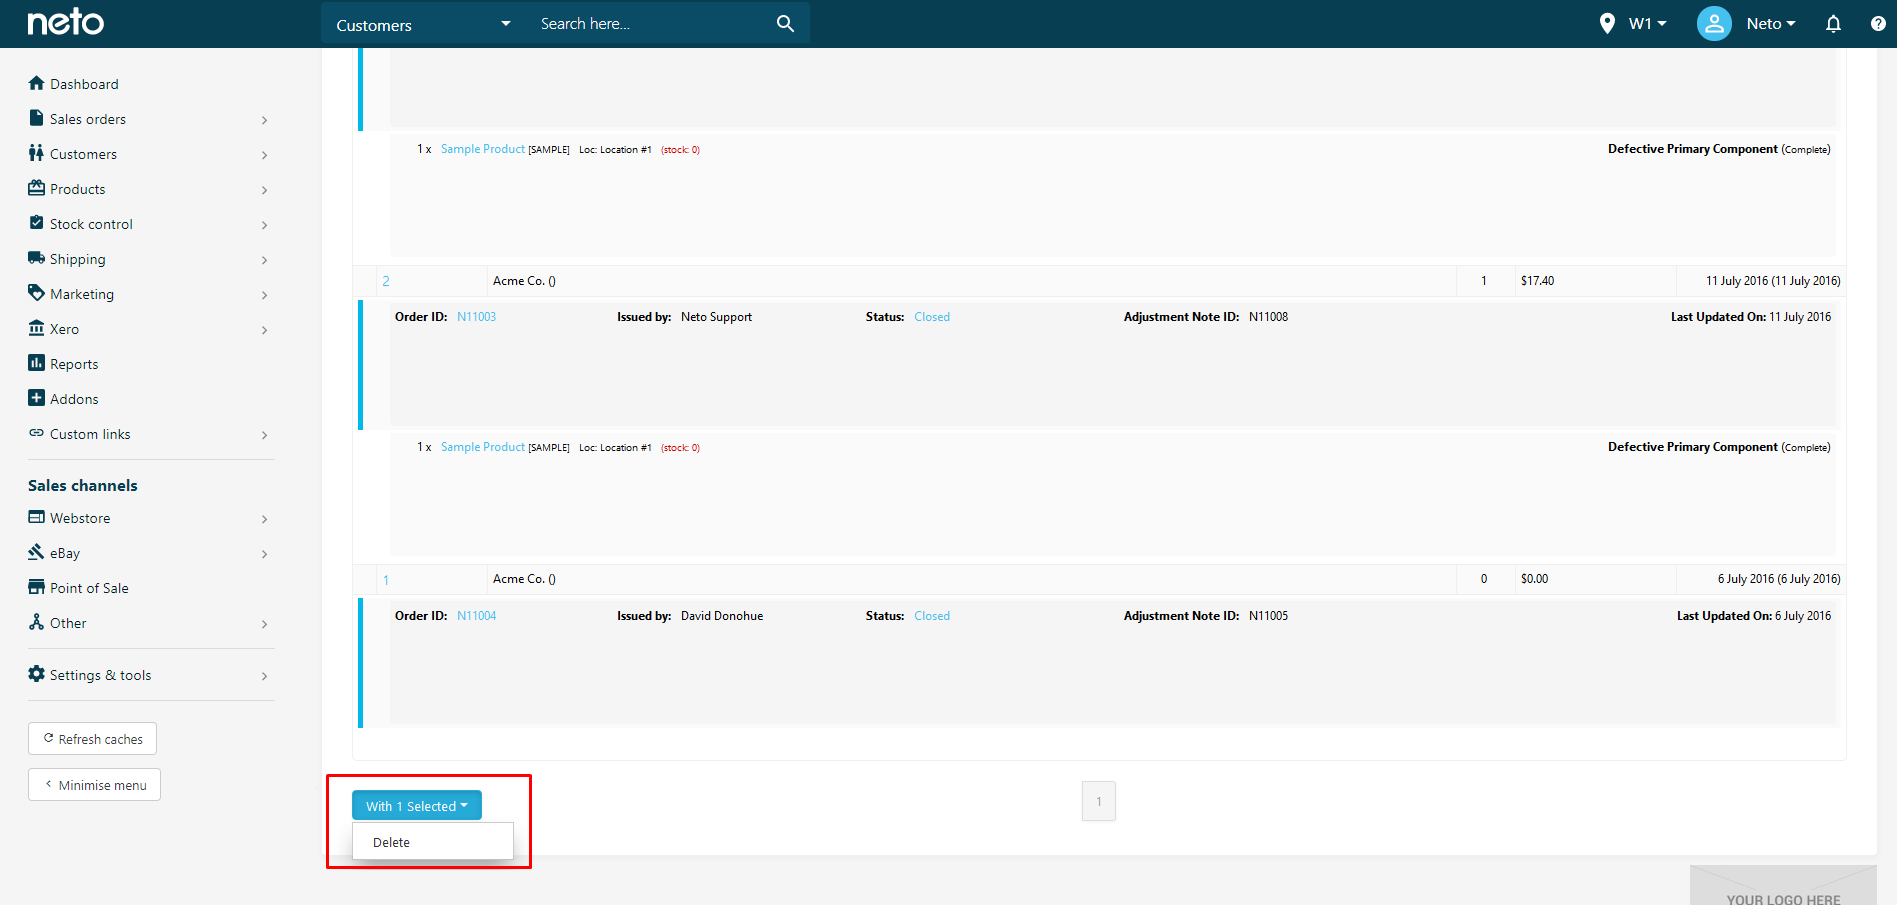
The selected RMAs will be deleted.
Refund a Customer
Using an accounting integration? Refunds must be paid out manually in using the pay money function. Neto will not debit the customers account in your accounting software or perform the journal entries related to a refund payment.
To mark a payment as refunded in Neto:
- In your Neto control panel, navigate to Sales Orders > Returns & Credits
- Click on the RMA ID you wish to refund.
- On the bottom right hand side of the RMA, click the Issue Refund button.
If you don't see the Issue Refund button then it's likely you have not completed the RMA process.
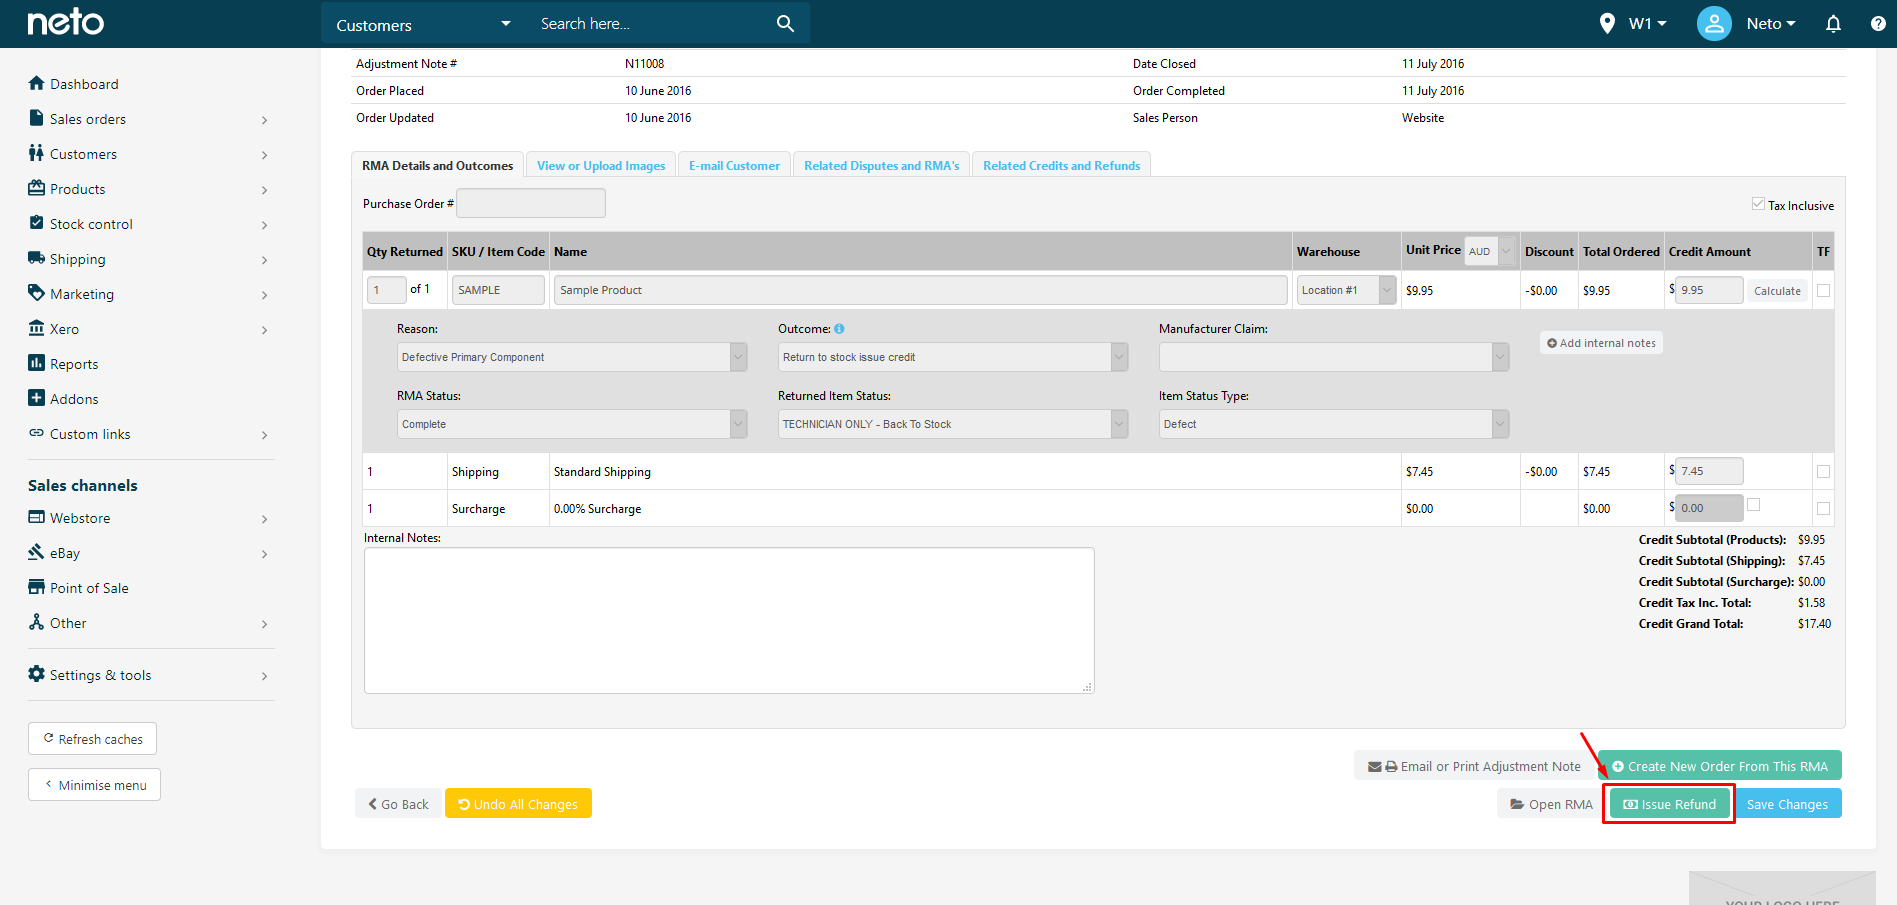
- Select the Payment Method (the rest of the fields are optional) to refund the payment to and press Process Refund.
You will have to manually refund the customer as this is not done by Neto. If you have a payment gateway installed, this will have to be done within the payment gateway itself.
- Once this is done, click the Mark As Paid and Complete button.
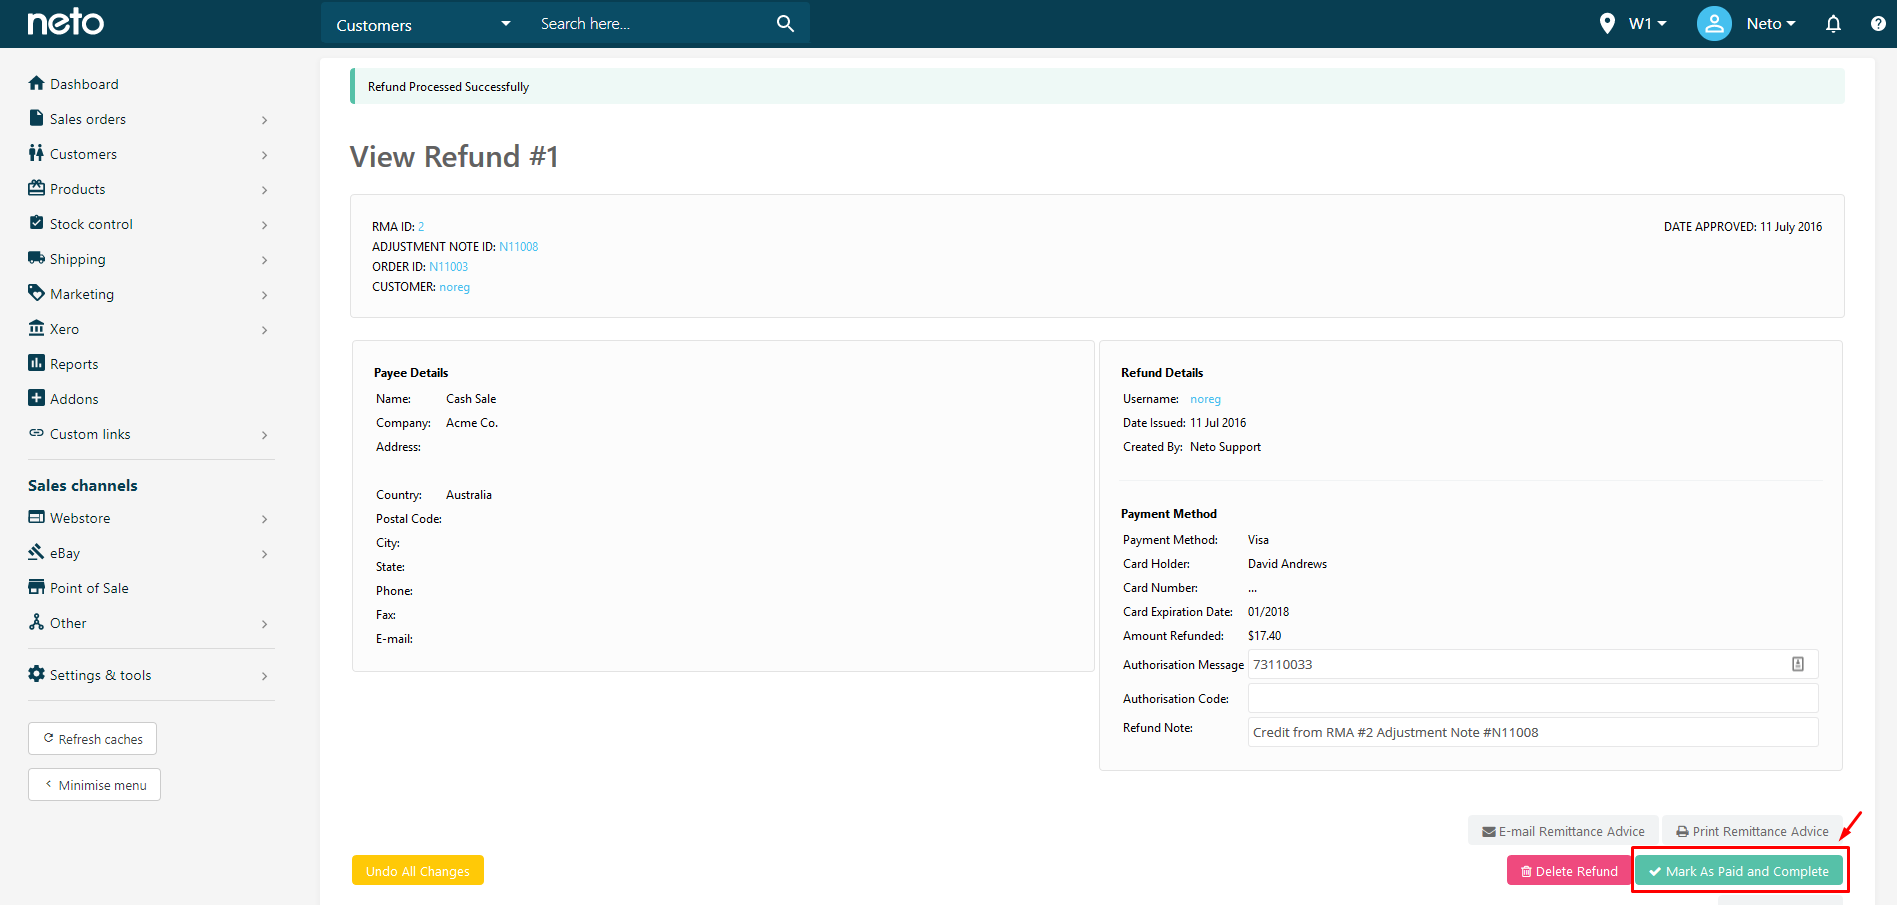
Your customer is now refunded.
Refund Reward Points
RMAs will not refund reward points used in the purchase back to the customer. The RMA will instead add the value to the customer's account as a credit. To avoid this, and refund reward points to the customer:
- Create a product that is Active but not Available on Webstore (or any other sales channel), and has a price of $0.00. Select the Service Item checkbox as well, so it does not require shipping. This product will allow you to add rewards points.
- Add a reward rule so that when this product is purchased it only adds x number of points (where x = the number of points required for 1 AUD) as set in the rewards program. This goal is to ensure that purchasing 1 of this product will provide 1 point in the rewards program.
- Create a new sales order for the customer. Add this product to the order a number of times that matches the number of rewards points you want to refund to the customer.
- Once you dispatch this order, the reward points will be added back to the customer's account.
You can now complete the RMA process for the return making sure the credit amount doesn't include the reward points value.