This is advanced documentation. We do not provide general support for this setup. If you don't feel comfortable with data feeds, Neto partners can set this up for you. Request a data service job for a quote.
The problem with running two or more websites is the constant management. In this tutorial, we'll show you how to run a primary website which controls all your products, stock control, accounting and orders for multiple stores you're running through the use of data feeds.
It's important to note this is a general advice article only and does not fit all scenarios. Customers running sites in different currencies will still need to run separate accounting integration's for each site. We strongly recommend reviewing your websites to ensure this data feed article is suitable for your business.
Data Flow Between Parent and Child Website

Before you Begin
- Products you send from a parent to a child site need to be identified via a product field. Create a short text custom product field called
Website. Populate it with the name of the child website either individually or in bulk. Skip this step if the child site will have all the products from the parent site. - Request SFTP access for the parent and child sites. SFTP is used to securely transfer data between your sites.
- Once you have an FTP account, login to the child site FTP and navigate to /httpdocs/export. In this directory, create new folders called
orders and tracking. In each of these folders, create another folder named archive. - Create a sales channel in your parent website, named after your child site. This will identify orders from your child site.
- Product data export - once a day
- Product data import - once a day (1 hr after export)
- Stock level export - every 30 mins
- Stock level import - every 30 mins (15 mins after export)
- Order export - every 30 mins
- Order import - every 30 mins (15 mins after export)
- Tracking export - every hour
- Tracking import - every hour (30 mins after export)
Create process schedules for the different import and export tasks that will be set up:
- Add a customer to your parent site that all orders in your child site can be allocated to. This will prevent customers receiving emails from your parent site when orders are dispatched.
- Shipping methods in your child site need to be added in your parent site with the same name.
Invoice & Statement Settings
On your child site, you will need to change the invoice id prefix (eg. the N in invoice number N11195) so that you can distinguish orders and so you don't have conflicting invoice numbers from your primary site.
- In your Neto control panel navigate to Settings & tools > All settings & tools.
- Click on the Sales Orders & Invoices tab and click Invoice & Statement Settings.
- Under Order/invoice id prefix, change the prefix to a different letter and save changes.

Export Products from Parent Website
Products need to be exported from your parent site into your child site using scheduled templates. To create the export template, follow the steps in this article. Use the information below for the settings:
Save the template after entering the name to see all fields.
Setting | Value |
|---|
Export Template Name | <child site name> products
|
File Name | product_data.csv
|
File Type | CSV Data |
Send File To | Local Server |
Location or Email Address | Local server |
Export Schedule | Once a day |
File Builder
File Header
"SKU","Parent SKU","Name","Brand","Description","Specifications","Features","Specifics","Sort Order 1","Sort Order 2","Short Description","Length (m)","Width (m)","Height (m)","Weight (kg)","Cubic","Tax Inclusive","Tax Free Product","Product Category","RRP",Price A","Price B","Price C","Price D","Price E","Shipping Category","Upsell","Cross-sell","Active","Approved","Approved POS","Main Image","Alt 1","Alt 2","Alt 3","Alt 4","Alt 5","Alt 6","Alt 7","Alt 8","Alt 9","Alt 10"
File Body - Body
"[@SKU@]","[@parent_sku@]","[@model@]","[@brand@]","[%format type:'text' noeol:'1' %][@description@][%end format%]","[%format type:'text' noeol:'1' %][@specifications@][%end format%]","[%format type:'text' noeol:'1' %][@features@][%end format%]","[@ebay_specifics@]","[@sortorder@]","[@sortorder2@]","[%format type:'text' noeol:'1' %][@short_description@][%end format%]","[@itm_length@]","[@itm_width@]","[@itm_height@]","[@weight@]","[@cubic@]","[@tax_inc@]","[@notax@]","[@category_1_ns@]","[@retail@]","[@price_1@]","[@price_2@]","[@price_3@]","[@price_4@]","[@price_5@]","[@sh_type_name@]","[@upsell_products@]","[@crosssell_products@]","[@active@]","[@approved@]","[@approved_pos@]","[@image_full@]","[@thumb_full_1@]","[@thumb_full_2@]","[@thumb_full_3@]","[@thumb_full_4@]","[@thumb_full_5@]","[@thumb_full_6@]","[@thumb_full_7@]","[@thumb_full_8@]","[@thumb_full_9@]","[@thumb_full_10@]"
Filter Tab
On the filter tab scroll to the Custom Product Fields section. Enter the name of your child site (the same as you've added to the products) into the Website field. Skip this step if all products are being sent to the child site.
Find & Replace Tab
On the find & replace tab, select Standard CSV from the bulk add dropdown menu.
Save your template. Wait until the scheduled time to check that products will be exported to your child site. Copy the file location URL in template. It will let you access the file and you'll need it to set up the import.
Import Products into Child Website
To set up the product import on your child site:
- In your child site control panel navigate to Setings & Tools > Import Data.
- Select products and click Perform complex import then Start Data Import Wizard.

-

In the 'How Are You Uploading Your File?' dropdown box, select URL. Paste the URL made previously into File Location. In the Request Method dropdown menu select GET, otherwise you will get an error.
Click the Continue to Next Step button.
-

The export file from your parent site will load up for the fields to be mapped. Match all fields in the file to Neto database fields except for the Custom Website field which can be ignored.
Click the Continue to Next Step button.
- Set the Update Options to Add New / Update Existing Products and click the Continue to Next Step button.

- Select the option to save the import and name the template appropriately and click Process File Now.

- The process and template will be created. Click on the import template link to open the template.
- Click on the Import Method & Schedule tab and scroll down to the Import Schedule dropdown menu. Set this approximately 1 hour later than the previous feed in case there is a delay or backlog on your primary site.

- Click the Save Changes button. This will now send any products on your primary site flagged for your secondary website to be sent through on a daily basis.
Export Stock Levels from Parent Website
Stock levels need to be updated on your child site more frequently than the full product list to ensure you don't oversell. A separate export and import just for stock levels scheduled every 30 mins keeps stock accurate. To set up the stock level export follow the steps in this article in your parent website. Use the information below for the settings:
Save the template after entering the name to see all fields.
Setting | Value |
|---|
Export Template Name | <child site name> stock
|
File Name | stock_levels.csv
|
File Type | CSV Data |
Send File To | Local Server |
Location or Email Address | Local server |
Export Schedule | Every 30 mins. |
File Builder
File Header
"SKU","Qty-1"
File Body - Body
"[@SKU@]","[%calc [@warehouse_quantity_1@] - [@committed_quantity_1@] /%]"
The tag for the Qty-1 is a calculation, which subtracts the committed quantity from the warehouse quantity to leave the QOH, which stock available for purchase.
Save your template. Wait until the scheduled time to check that stock is exported. Copy the file location URL in template. It will let you access the file and you'll need it to set up the import.
Import Stock into Child Website
To set up the stock import on your child site:
- In your child site control panel navigate to Settings & Tools > Import Data.
- Select products, and click Perform complex import then Start Data Import Wizard.

- In the How Are You Uploading Your File? dropdown box select URL. Paste the URL made previously into File Location. In the Request Method dropdown menu select GET, otherwise you will get an error.
Click the Continue to Next Step button.
- The export file from your parent site will load up for the fields to be mapped. Map the SKU and Qty-1 fields in the file to your Neto SKU and warehouse. Click the Continue to Next Step button.
- Set the Update Options to Add New / Update Existing Products and click the Continue to Next Step button.
- Select the option to save the import and name the template appropriately and click Process File Now.
- The process and template will be created. Click on the import template link to open the template.
- Click on the Import Method & Schedule tab and scroll down to the Import Schedule dropdown menu. Set this to run 15 mins later than the previous feed in case there is a delay or backlog on your primary site.
- Click the Save Changes button. Stock will now be imported into your child site every 30 mins.
Export Sales Orders from Child Website
Orders placed on your child website need to be sent to your parent website so all orders can be processed in the one control panel. Sales orders should only be exported via SFTP, as this keeps your customer data secure, with a password required to access it. To create the export template follow the steps in this article. Use the information below for the settings:
Save the template after entering the name to see all fields.
Setting | Value |
|---|
Export Type | Order Export |
Export Template Name | <child site name> orders
|
File Name | <child sites name>_Orders_@@@@@.csv
|
File Type | CSV Data |
Send File To | FTP (Specify FTP host below) |
Location or Email Address | sftp.neto.net.au/httpdocs/export/orders
|
FTP Username | As provided by Neto support |
FTP Password | As provided by Neto support |
Record Each Export in Batch Export History Log | Yes |
Export Schedule | Every 30 mins. |
File Builder
File Header
"Order ID","Ship First Name","Ship Last Name","Company","Ship Address Line 1","Ship Address Line 2","Ship Suburb","Ship State","Ship Post Code","SKU","Qty","Ship Method","Unit Price","Shipping Cost","Delivery Instruction","Amount Paid","PaymentMethod","Bill First Name","Bill Last Name","Bill Address","Bill City","Bill Post Code","Bill State","Bill Phone","Extra Options","Payment Terms","Discount"
File Body - Body
"[@order_id@]","[@ship_first_name@]","[@ship_last_name@]","[@ship_company@]","[@ship_street1@]","[@ship_street2@]","[@ship_city@]","[@ship_state@]","[@ship_zip@]","[@supplier_code@]","[@quantity@]","[@shipping_method@]","[@unit_price@]","[@shipping_cost@]","[@ship_comment@]","[@amount_paid@]","[@payment_method@]","[@bill_first_name@]","[@bill_last_name@]","[@bill_street1@]","[@bill_city@]","[@bill_zip@]","[@bill_state@]","[@bill_phone@]","[@itm_options@]","[@terms@]","[@product_discount@]"
Filter Tab
On the Filters tab, select the below filters and values:
- Order Status - New, Pick and Pack
- Approval Status - Approved Orders
- Batch Export History Status - Not Yet Exported
Save your template. Wait until the scheduled time to check that orders are exported. Copy the file location URL in template. It will let you access the file and you'll need it to set up the import.
Import Orders into Parent Website
To set up the order import on your parent site:
- In your parent site control panel navigate to Settings & Tools > Import Data.
- Select Orders, and click Perform complex import then Start Data Import Wizard.

- In the How Are You Uploading Your File? dropdown box select FTP. Set the File Location to
sftp.neto.net.au/httpdocs/export/orders/*.csv, and enter the FTP username and password provided to you. In the Move File To section enter /httpdocs/export/order/archive.Click the Continue to Next Step button.
- The export file from your parent site will load up for the fields to be mapped. Map the order fields in the file to your Neto database fields. Add three additional fields with the below names and static values:
Field Name | Static Value |
|---|
Approved | Yes
|
Sales Channel | Enter the sales channel name you created in your parent website. |
Click the Continue to Next Step button.
- Set the Update Options to:
Setting Name | Setting Value |
|---|
For pricing calculations use user group of specified customer | No |
Disable addition of automatic discount percentages | Yes |
Disable addition of automatic discount coupons / codes | Yes |
Use system product name by default | Yes |
Use system cost price by default | Yes |
Use system shipping weight / cubic by default | Yes |
Disable automatic shipping cost calculations | Yes |
Allow import of payments to existing orders | No |
Disable addition of payment surcharges | Yes |
Click the Continue to Next Step button.
- Select the option to save the import and name the template appropriately and click Process File Now.
- The process and template will be created. Click on the import template link to open the template.
- Click on the Import Method & Schedule tab.
Setting Name | Setting Value |
|---|
Import Method | FTP |
File Location | sftp.neto.net.au/httpdocs/export/orders/*.csv
|
FTP Username | Username provided by Neto support |
FTP Password | Password provided by Neto support |
Move File To | /httpdocs/export/order/archive |
- Click the Save Changes button. Sales orders will now be imported into your child site every 30 mins.
Set up data feeds for order tracking
Orders processed in your parent website need their tracking information exported to your child website. This ensures your customers receive the dispatch notification from the website they purchased from. To create the export template follow the steps in this article. Use the information below for the settings:
Save the template after entering the name to see all fields.
Setting | Value |
|---|
Export Template Name | <child site name> tracking export
|
File Name | <child site name>_tracking_@@@@@.csv
|
File Type | CSV Data |
Send File To | FTP (Specify FTP host below) |
Location or Email Address | sftp.neto.net.au/httpdocs/export/tracking |
FTP Username | Provided by Neto support |
FTP Password | Provided by Neto support |
Record Each Export in Batch Export History Log | Yes |
Export Schedule | Every hour. |
File Builder
File Header
"Order ID","Tracking Number","Ship Method"
File Body - Body
"[@order_id@]","[@ship_tracking@]","[@ship_method@]"
Filter Tab
Setting | Value |
|---|
Order Status | Dispatched |
Batch Export History Status | Not yet exported |
Order ID | Enter the order prefix for the child website (eg. N, P, TS etc.) |
Save your template. Wait until the scheduled time to check that products will be exported to your child site. Copy the file location URL in template. It will let you access the file and you'll need it to set up the import.
Import Order Tracking into Child Website
To set up the order tracking import in your child website:
Order tracking will now be imported into your child site every 30 mins.
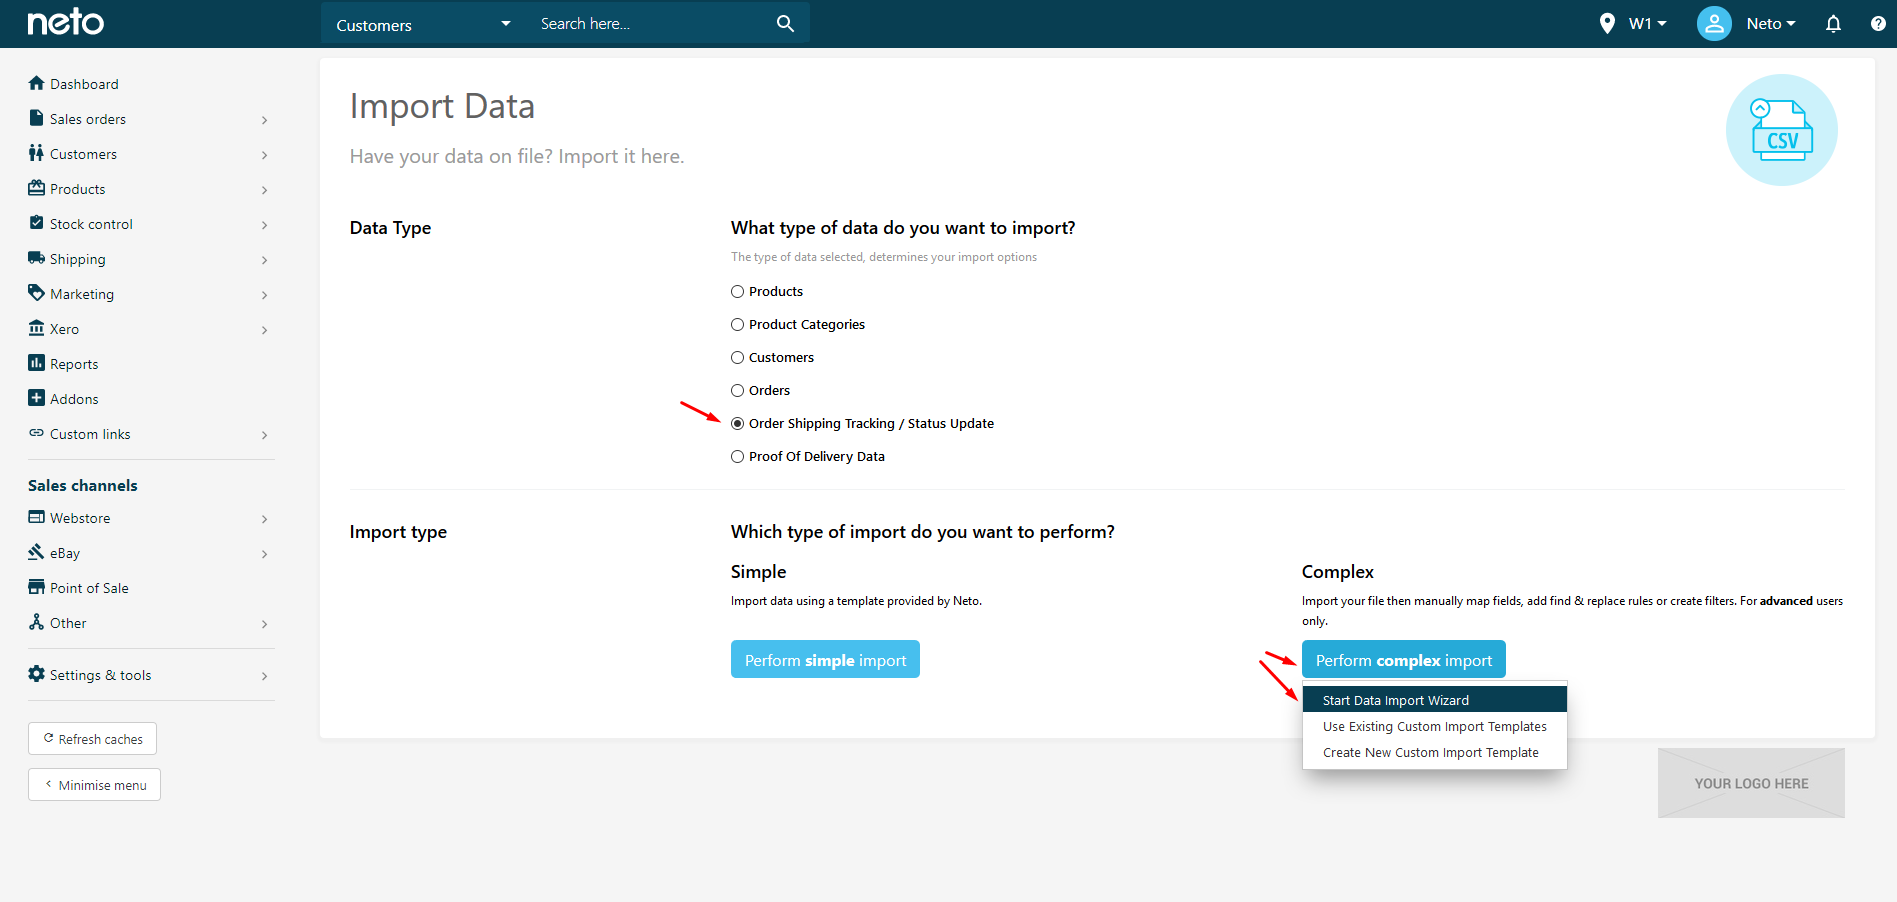
- In your child website, navigate to Settings & tools > Import Data.
- For the data type, click Order Shipping Tracking / Status Update and click Perform Complex Import > Start Data Import Wizard.
- In the How Are You Uploading Your File? dropdown box select FTP. Set the File Location to
sftp.neto.net.au/httpdocs/export/tracking/*.csv, and enter the FTP username and password provided to you. In the Move File To section enter /httpdocs/export/tracking/archive.

- In the field mapping section map your fields and add three additional fields:
Setting | Value |
|---|
Action | Ship
|
SKU | *
|
Do not send email | No
|
Click the Continue to Next Step button.
- Click the Continue to Next Step button.
- Select the checkbox to save the settings as a template, and give the template an appropriate name. Click the Process File Now button.