You can preview landing pages before publishing to ensure professional presentation and optimize conversion rates across all devices. This quality control step helps ensure your email marketing campaigns direct visitors to pages that display properly on tablets, desktops, and smartphones, which significantly improves user experience and campaign effectiveness.
When properly tested through preview mode, landing pages typically perform better by avoiding layout issues and broken functionality that could reduce conversion rates. This enhanced preparation helps ensure your marketing campaigns maintain brand consistency and deliver the intended user experience across all customer touchpoints.
Once you have finished designing your web pages, you may want to have a glance or add some final touch-ups before publishing them to your targeted users. In such a scenario, you can use the Preview Landing page feature at your disposal.
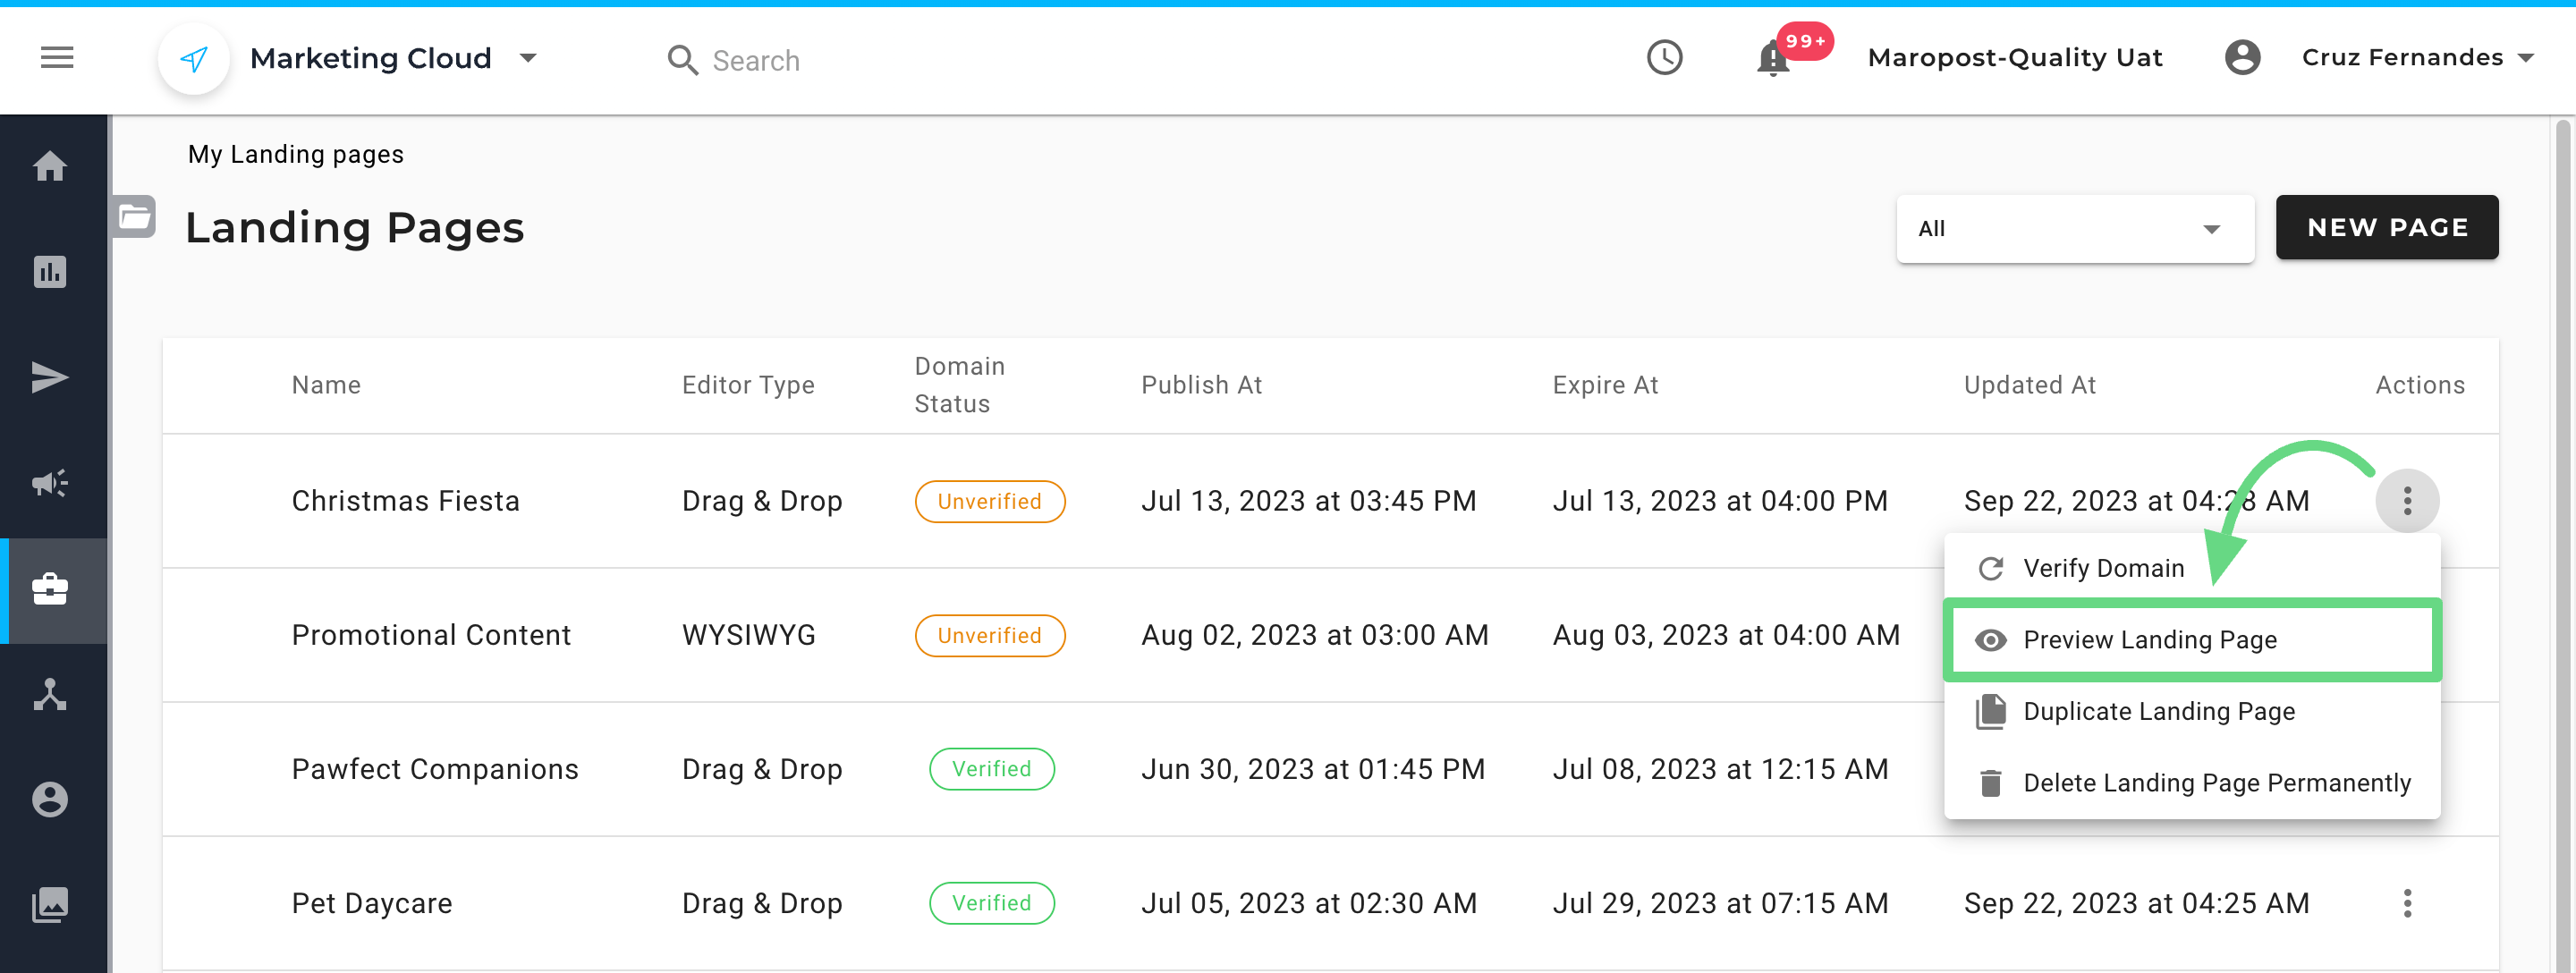
- Choose a web page from the Landing Pages index list and select Preview Landing Page under the Actions column.
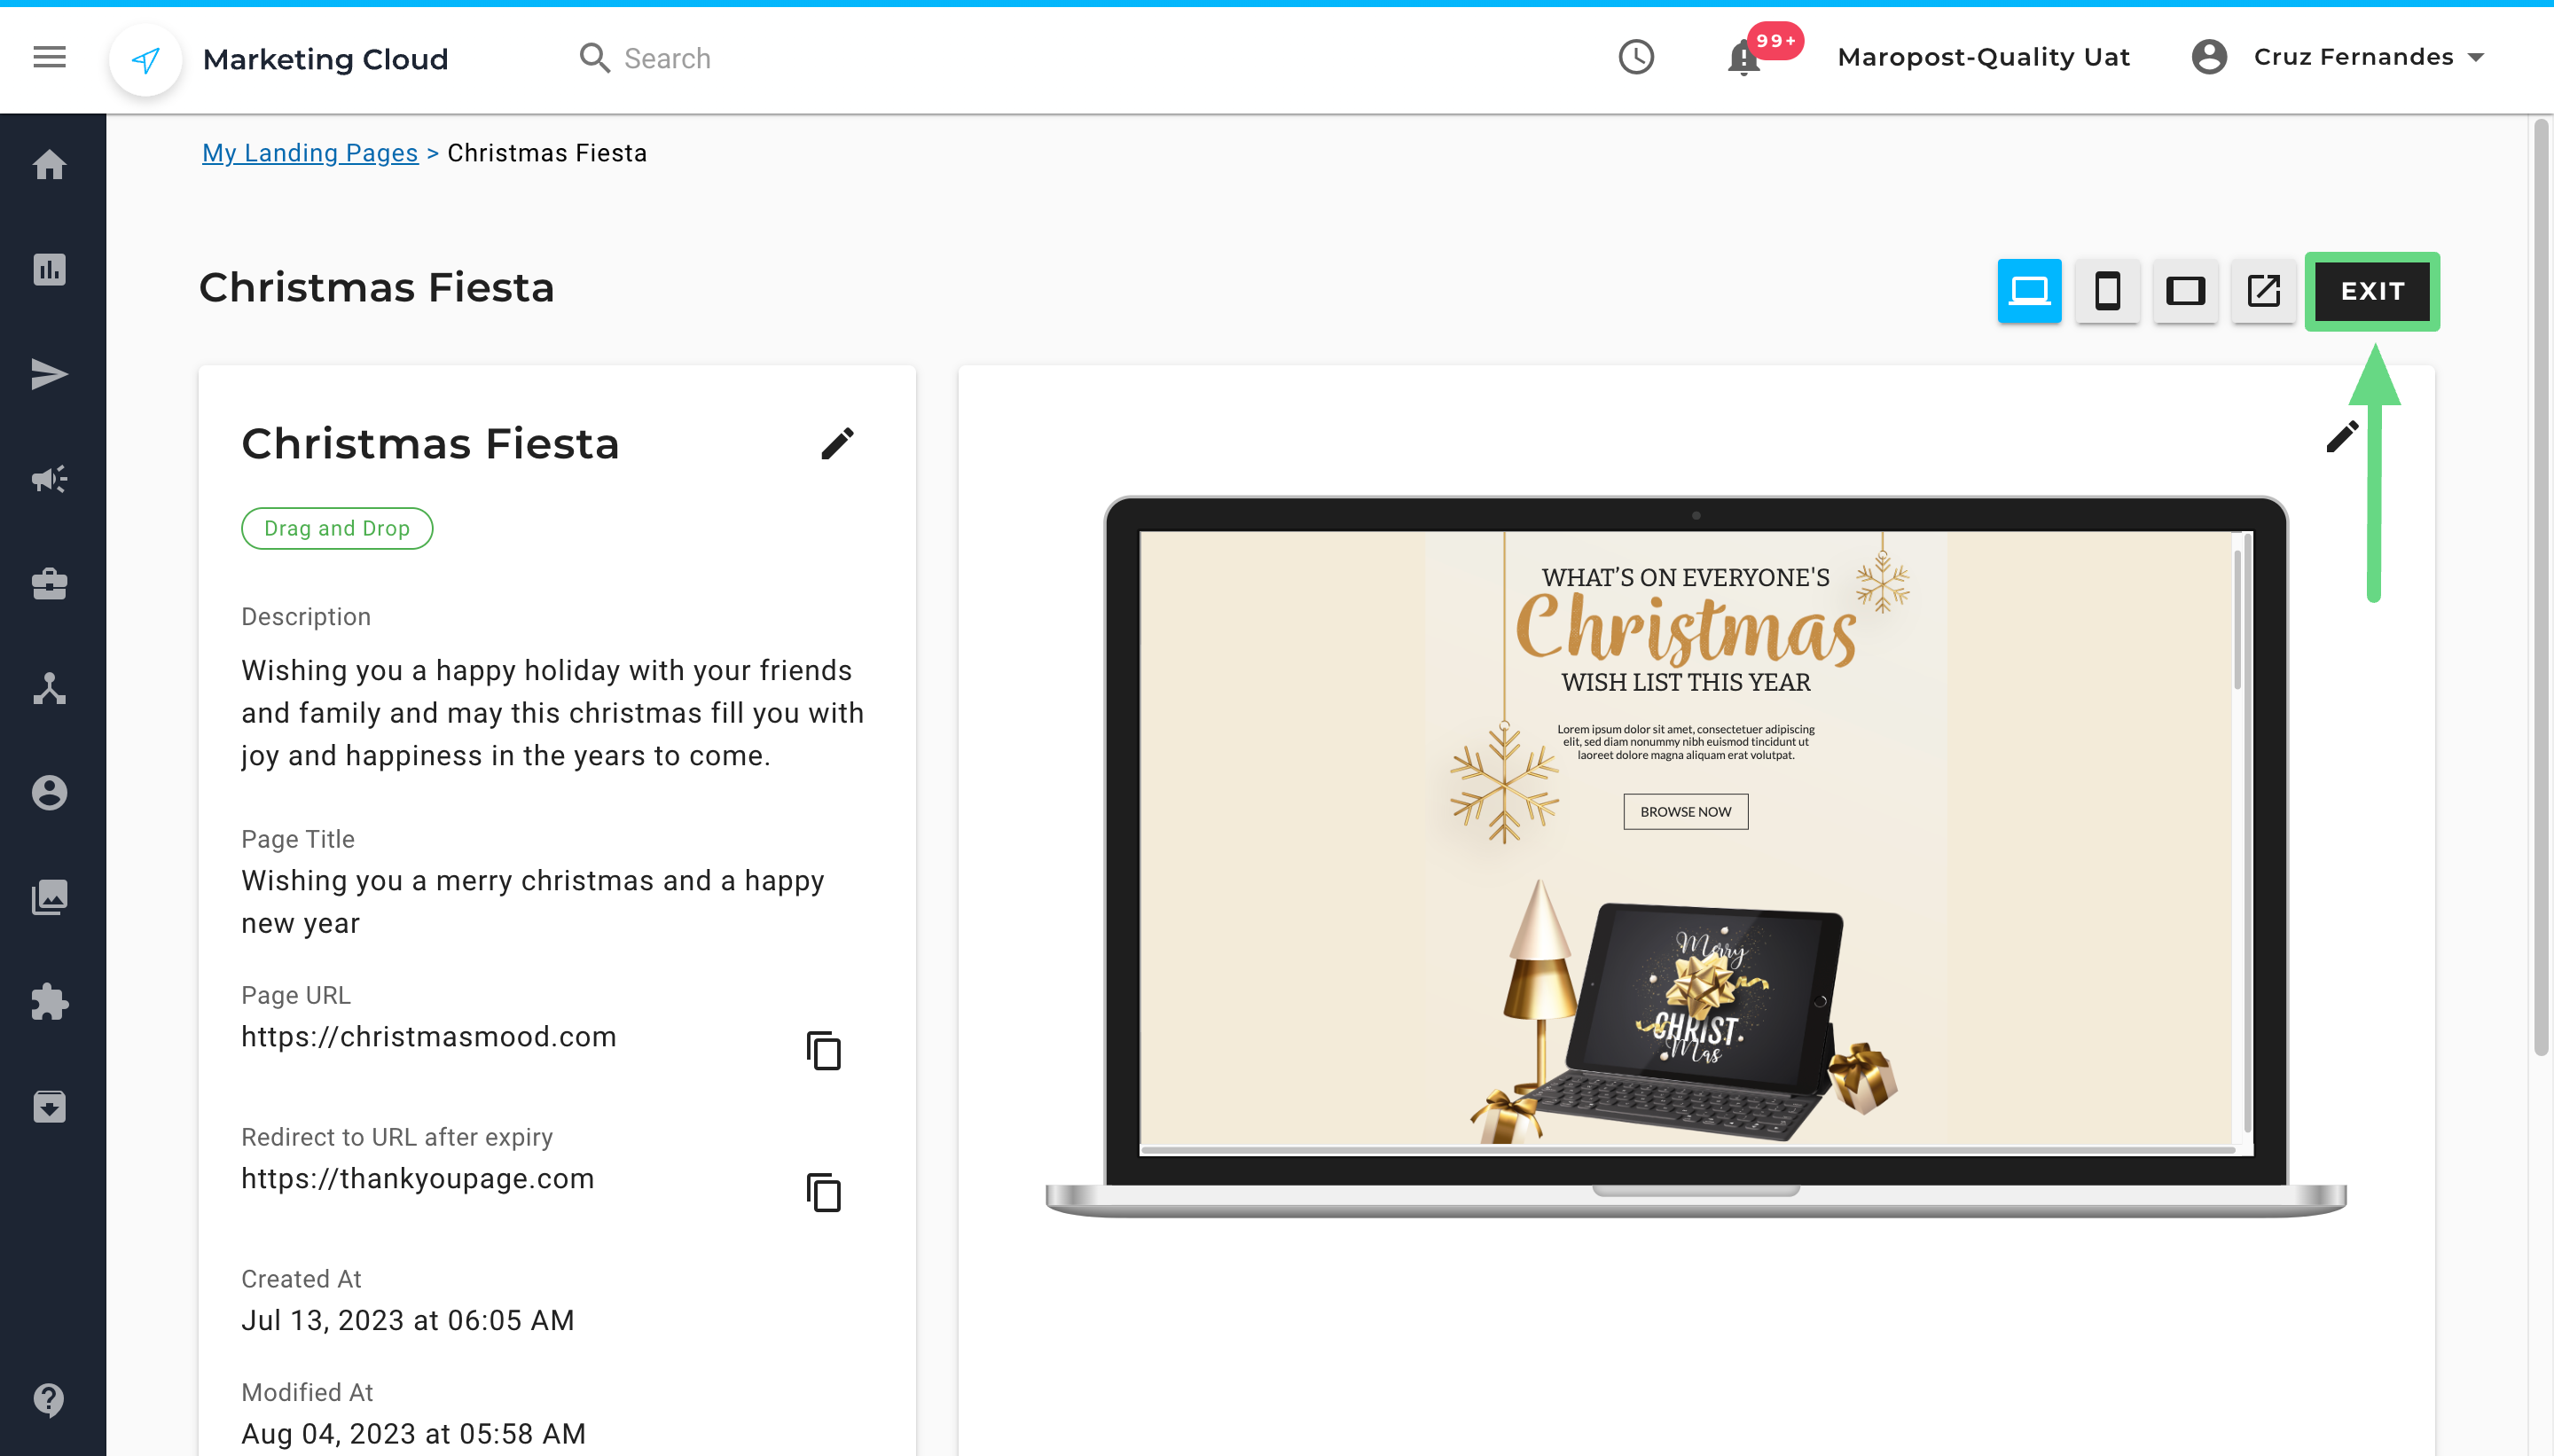
The Preview mode is divided into two sections. The section on the left displays the web page’s title, URL, description, publication, and expiry information, while the right section displays a preview of the web page’s content.
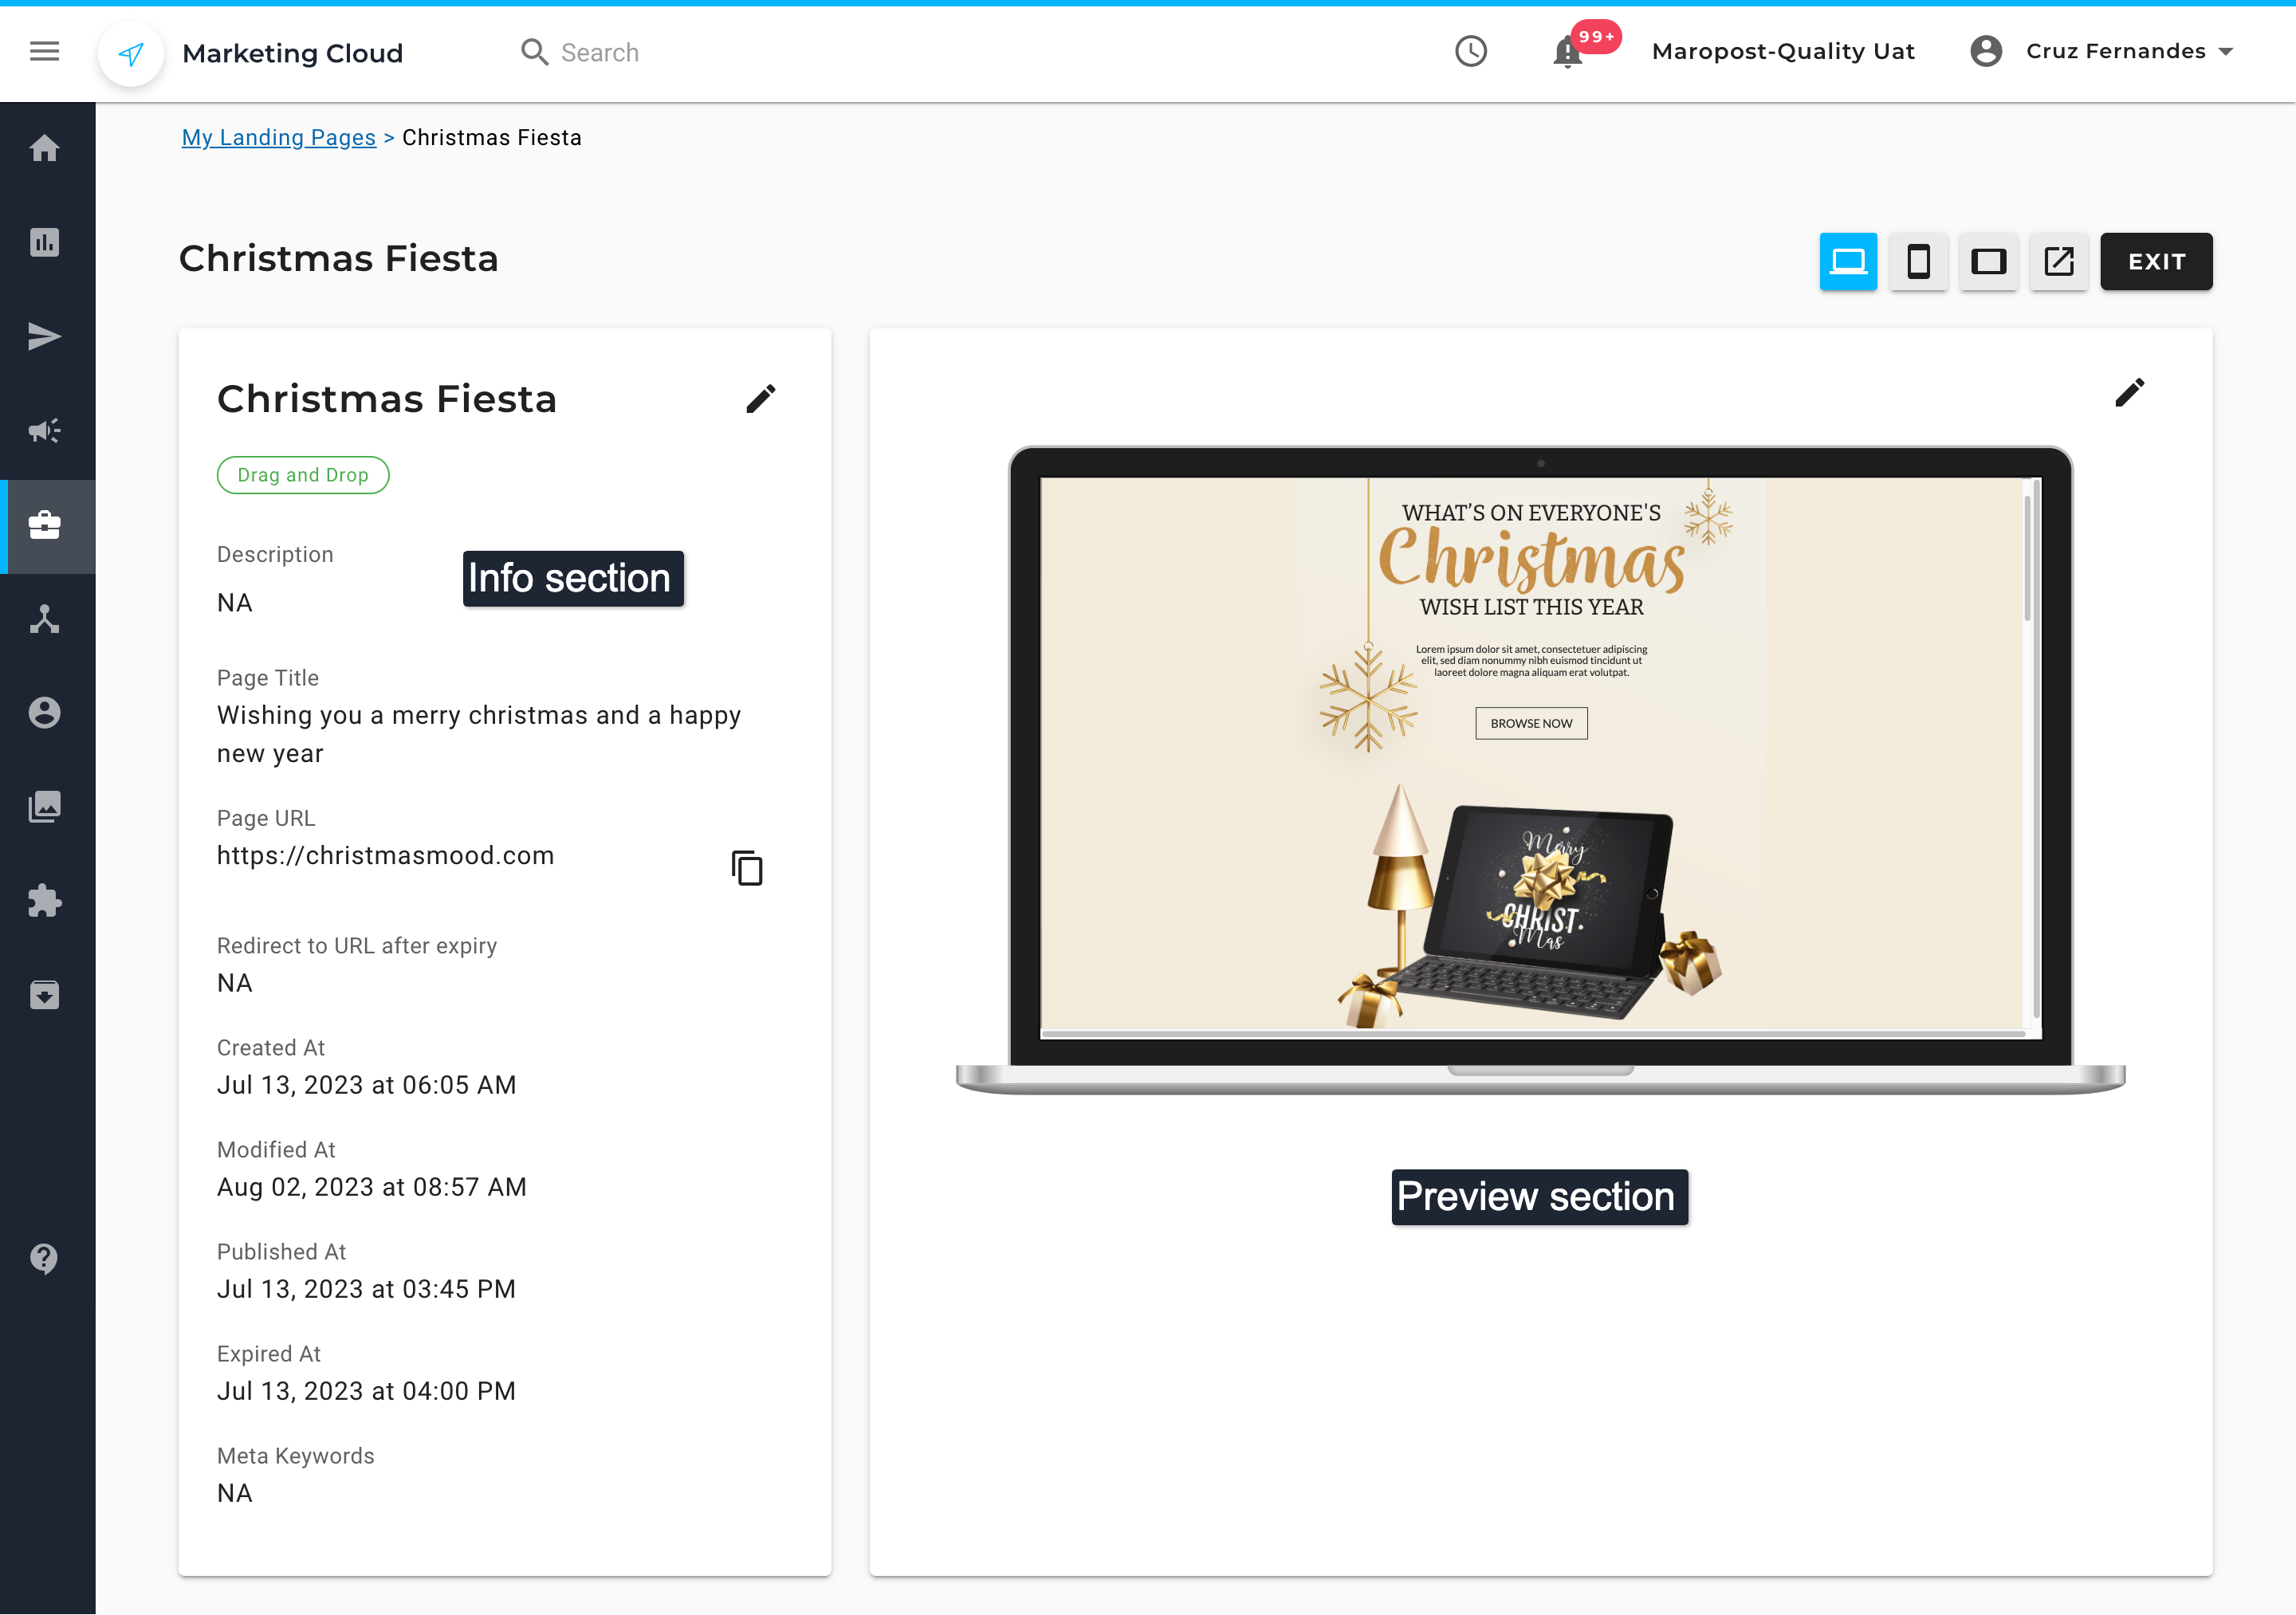
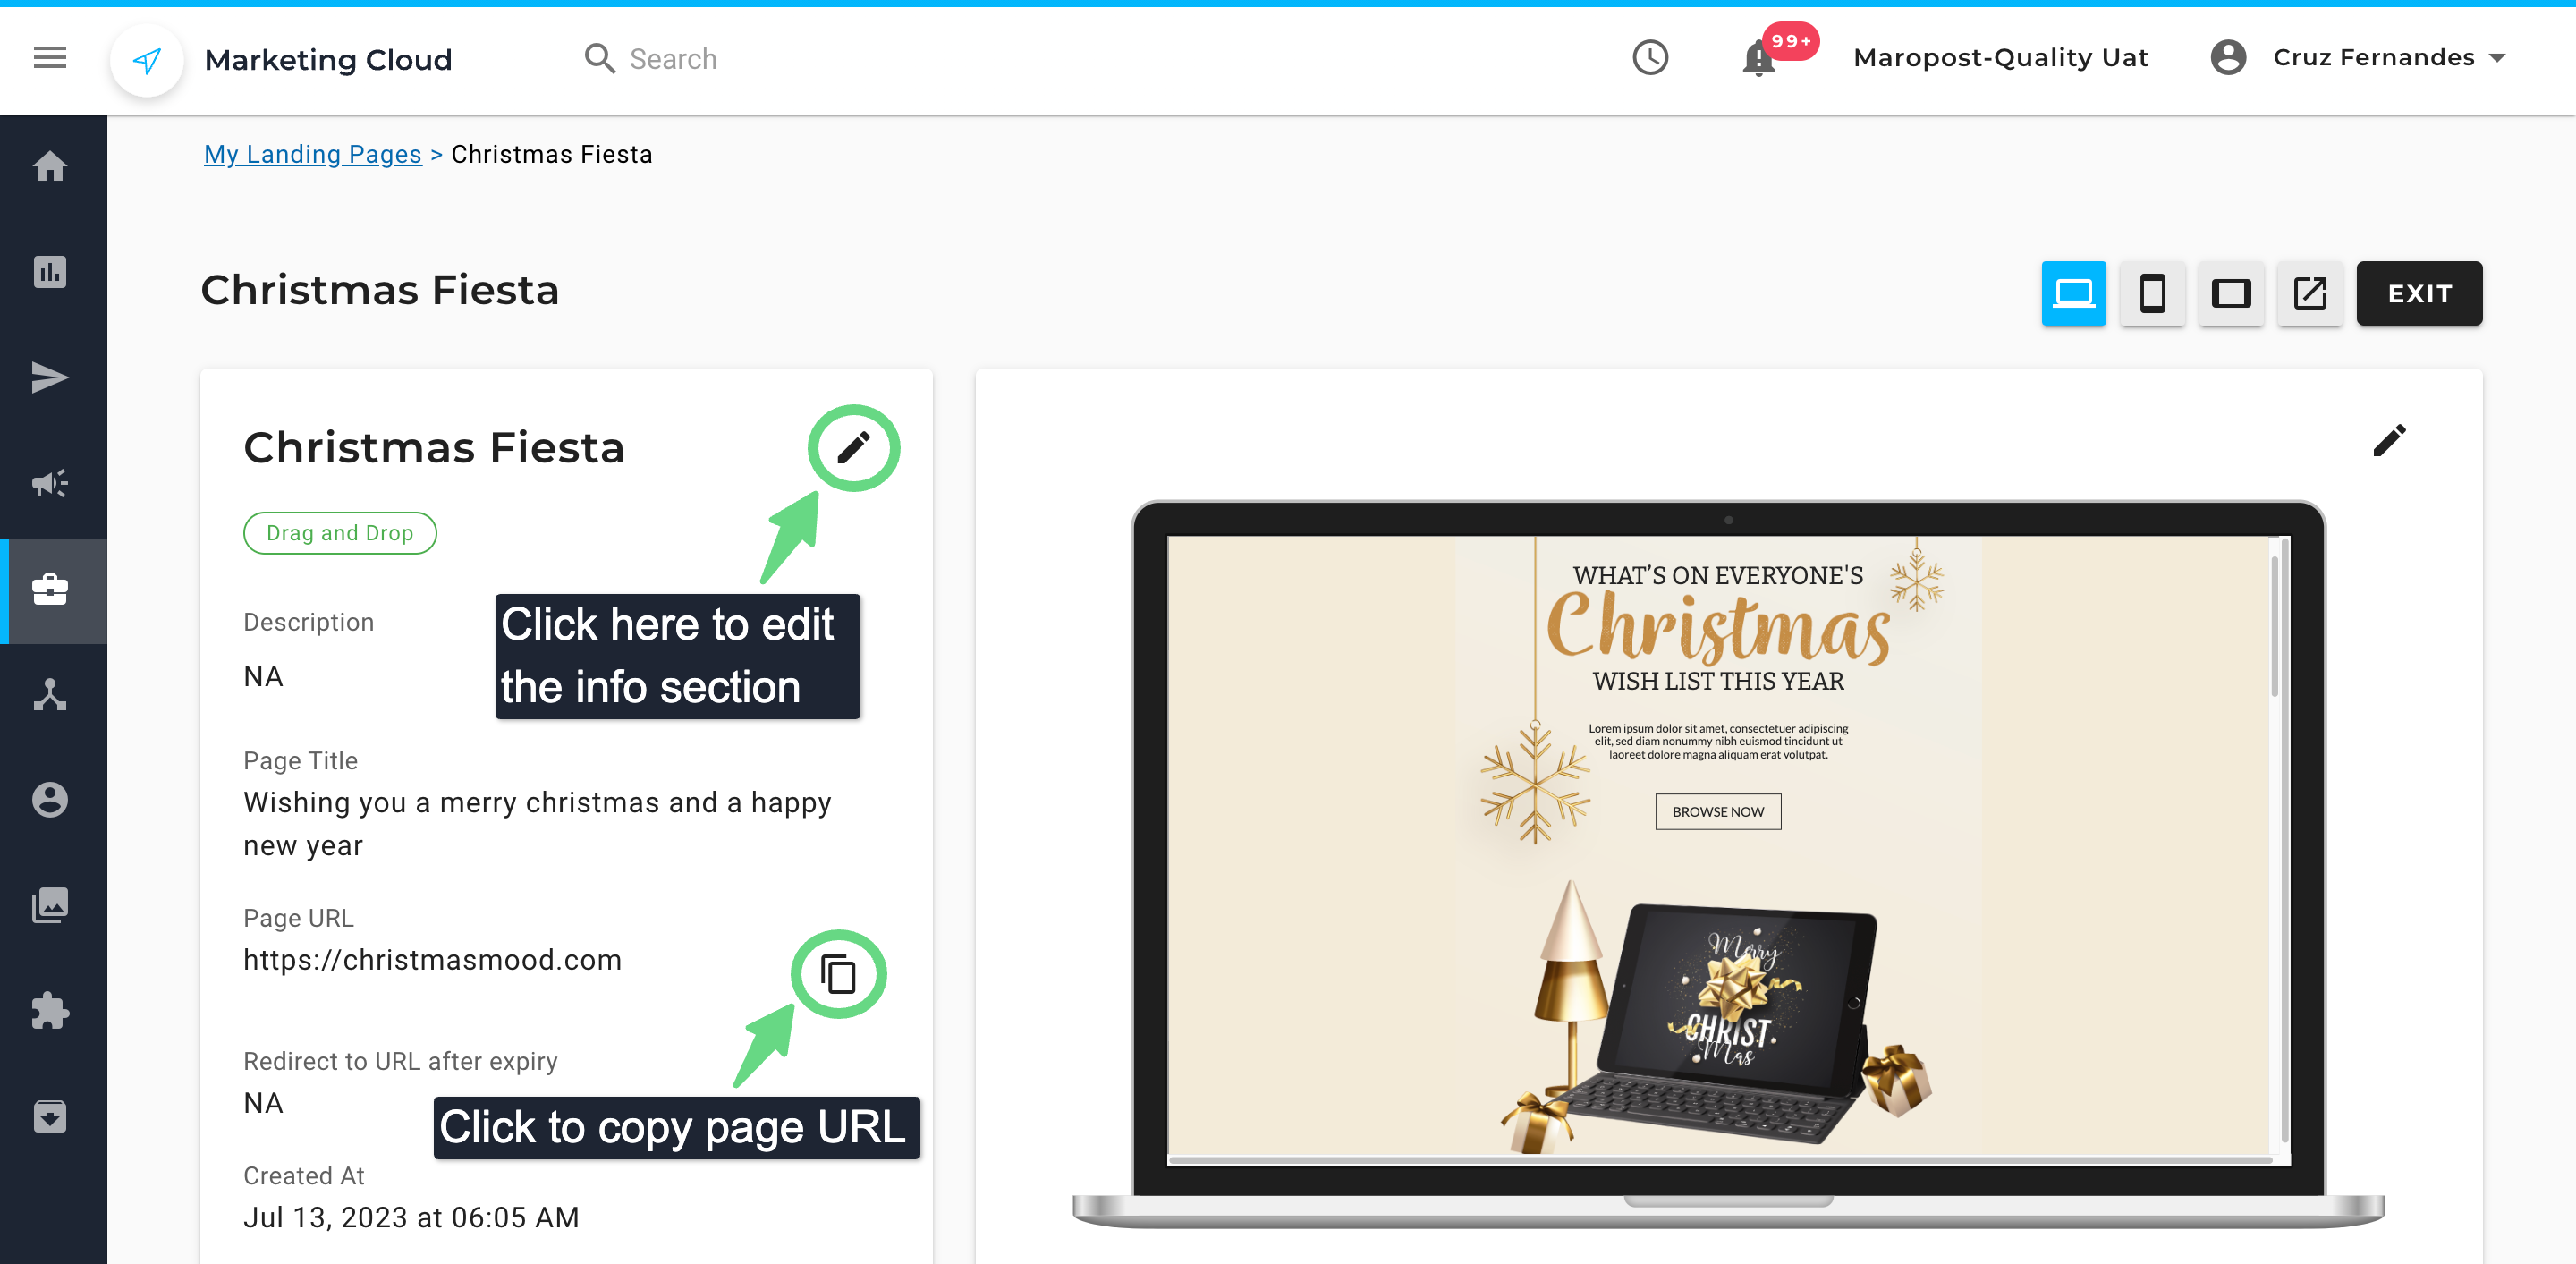
2. To edit the details of the Landing page, select the pencil icon next to the name. Also, you can copy the page URL to see whether it redirects users to the correct location or not.
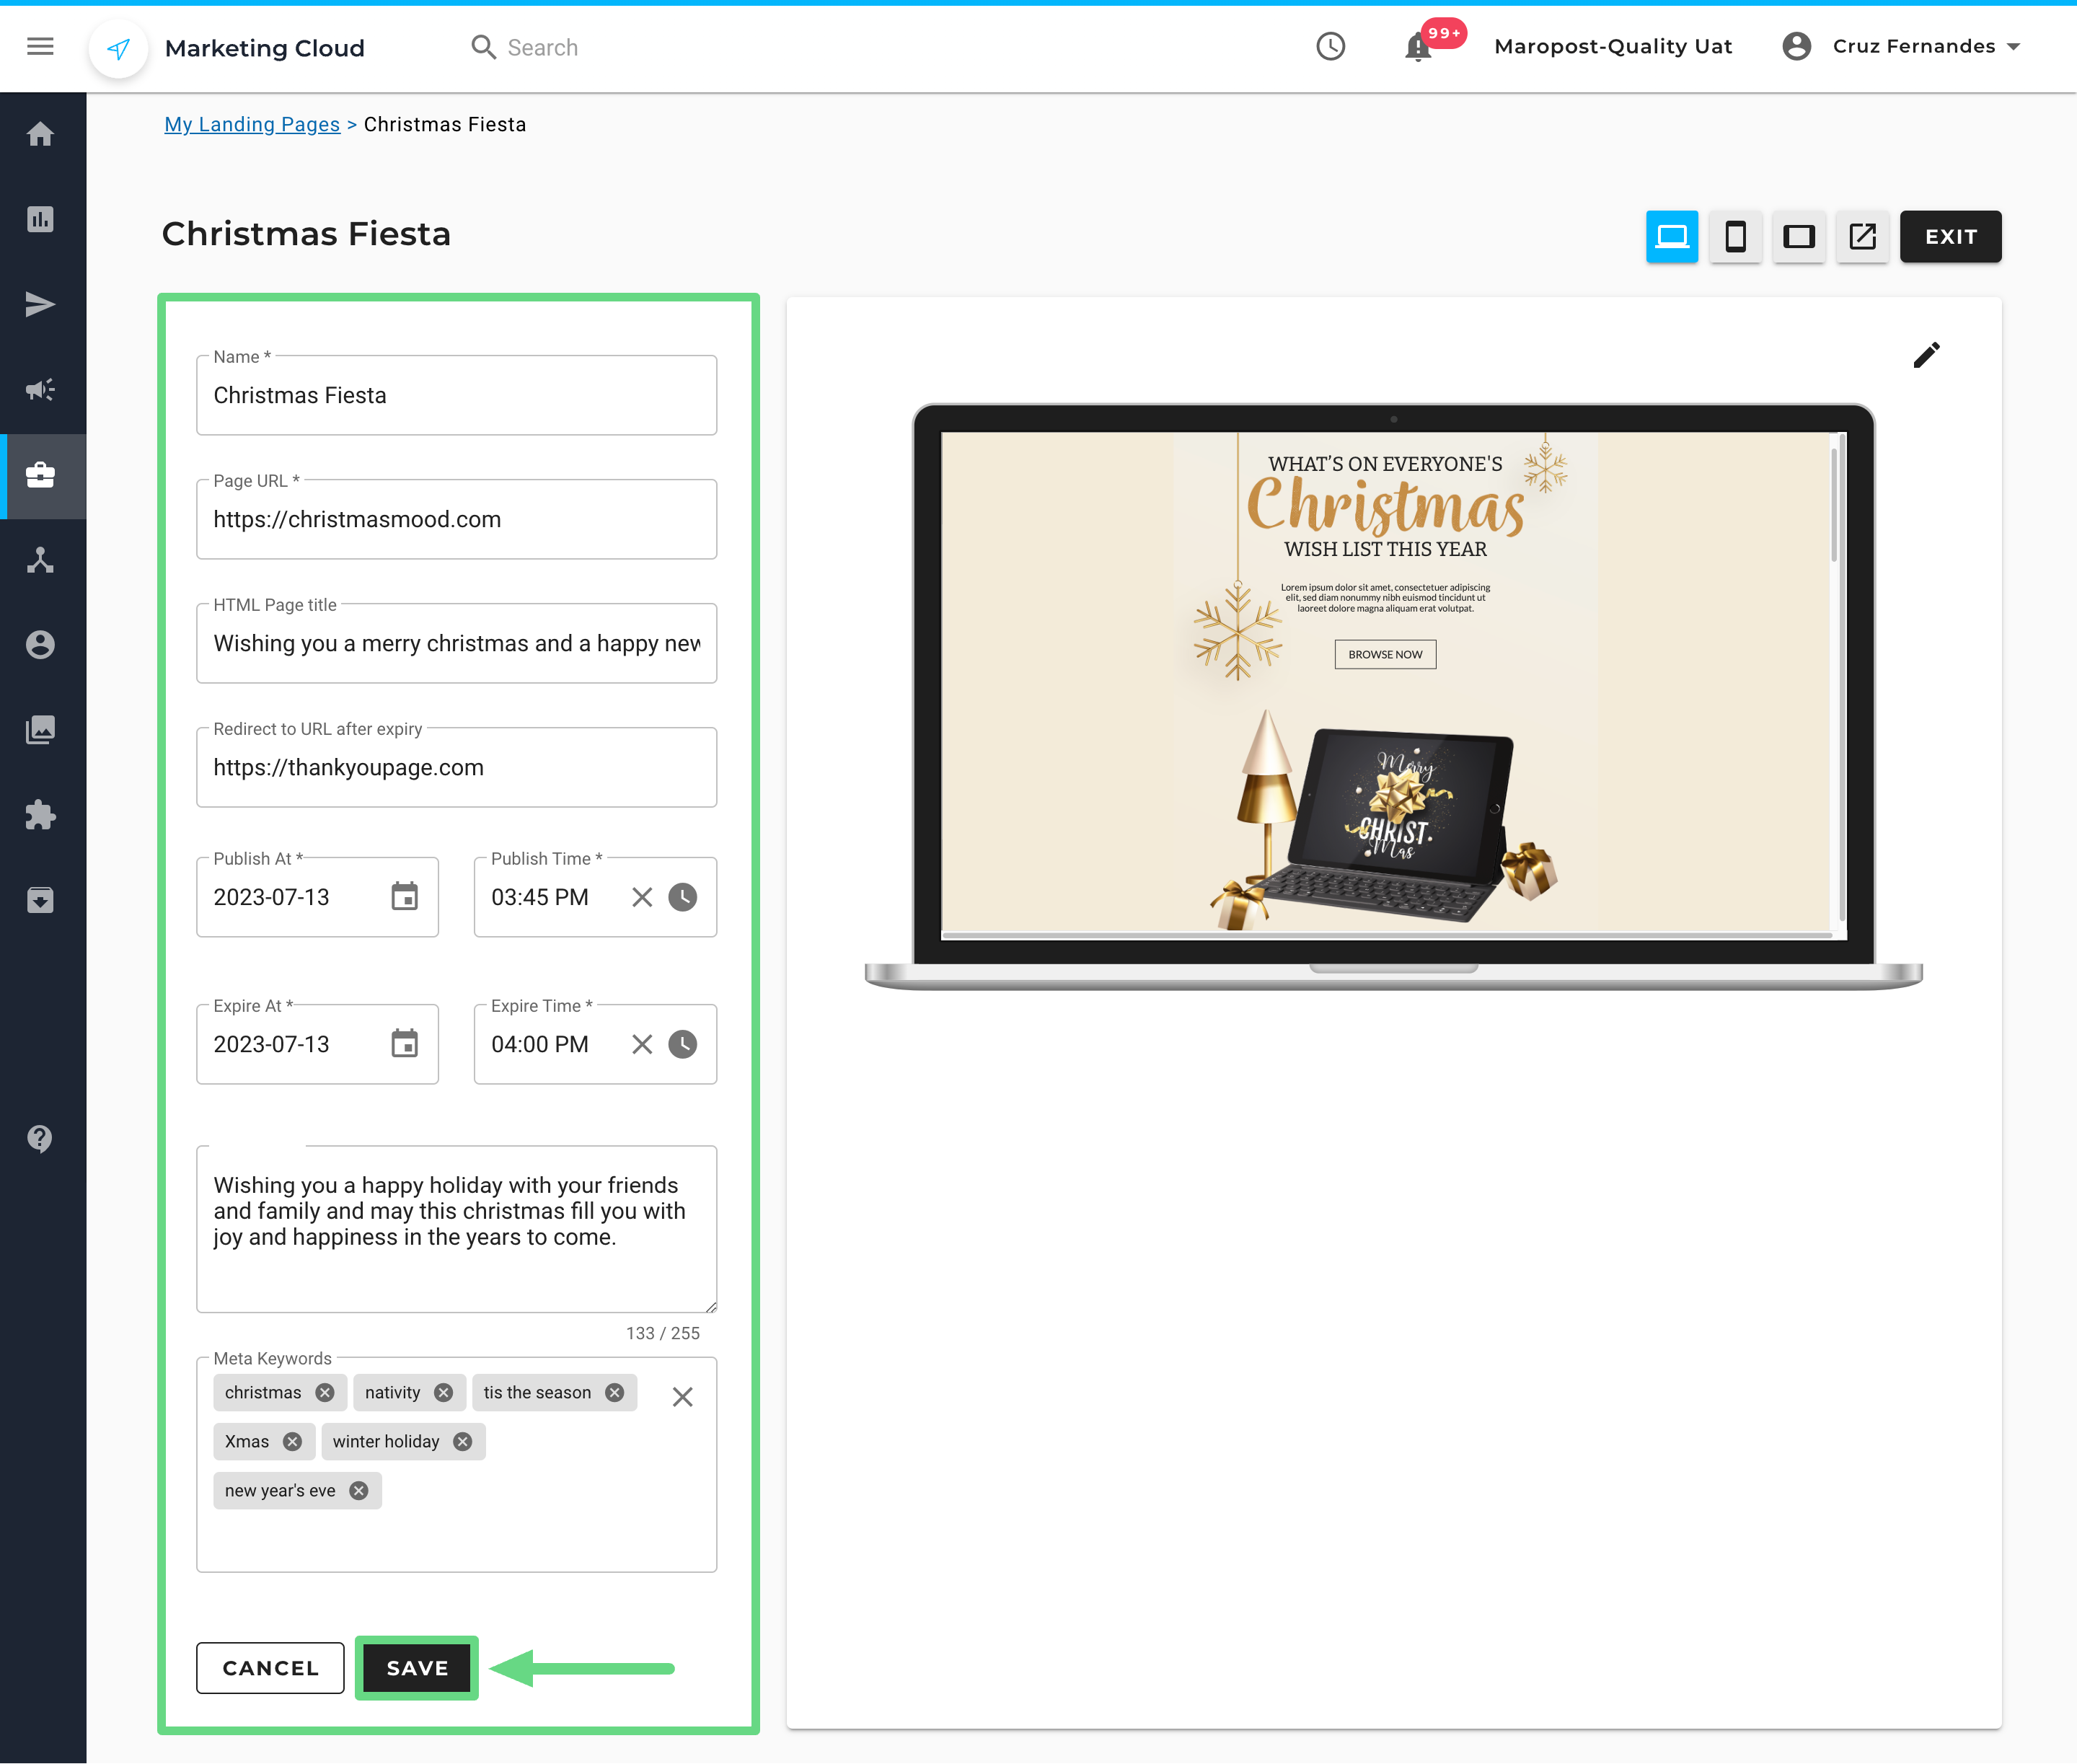
3. Upon selecting the pencil icon, edit the necessary regions and save your changes.
Besides editing URLs and publication timings, use the preview tools to glance at how the contents will appear to your users. This step is important, as users tend to open your email or SMS campaigns either from their tablets, desktops, or smartphones. Hence, you need to optimize your web pages and their contents to ensure they load properly on such devices. The preview tool helps you detect any flaws in the layout, allowing you to make corrections before you publish the web page.
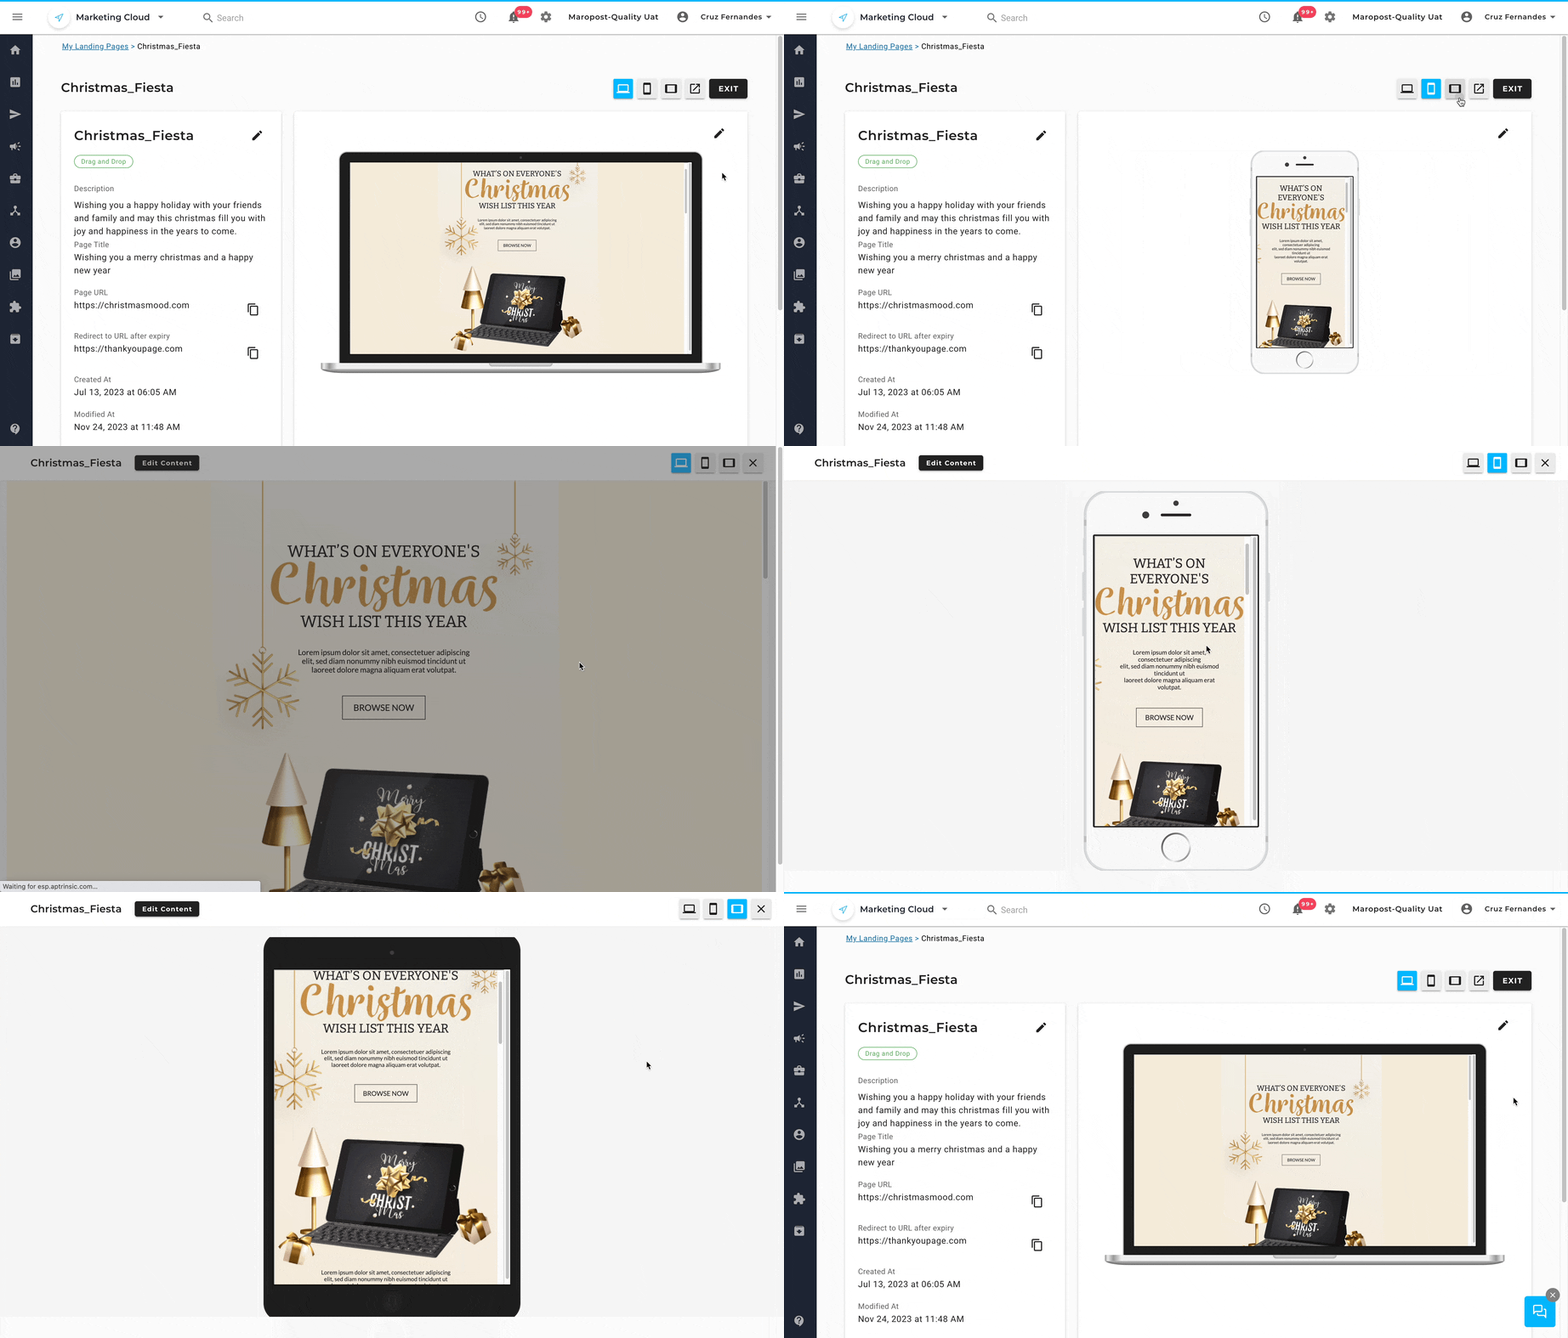
4. Once you have finished previewing your Landing page, you can exit from this section.
5. Once a Landing page has been created, make sure to verify its domain. Upon failing to do so, the published landing page won’t load properly, and certain page elements may not be visible to users due to its unverified URL status. If you find your landing page has an unverified status tag and is set to be published within two to three days, we will notify you from the account itself. Click on the “Bell” icon, view the notification message, and click on the link to take the necessary action to verify the domain status.

Related Articles
Landing Page Management:
Content Creation:
Campaign Integration: