You can implement 1-Click Unsubscribe functionality to ensure compliance with email regulations while protecting your sender reputation through proper subscriber management. This streamlined approach helps maintain deliverability performance by providing subscribers with an immediate, hassle-free way to opt out when they no longer want to receive communications.
1-Click Unsubscribe significantly enhances your email program's compliance and reduces spam complaints by offering subscribers a quick exit option. When properly configured, this feature helps optimize your sender reputation by demonstrating to ISPs that you respect subscriber preferences and handle opt-out requests in a timely and appropriate manner.
A 1-Click Unsubscribe page is displayed when a contact clicks the 1-Click Unsubscribe link in the email. You can use the Preference Management feature to implement the 1-Click Unsubscribe functionality.
Your contacts can opt out of receiving emails from you at any time with the 1-Click Unsubscribe link found in the Marketing Cloud default footer. It's not the same as simply unsubscribing from a list.
For instance, if your contact is subscribed to other lists, they can still receive emails from you. Furthermore, if you're utilizing segments to send your email campaigns to a particular audience, they will still receive emails from you.
Additionally, such contacts will receive emails that are sent via Journeys. Regardless of how you deliver your campaigns, the 1-Click Unsubscribe link ensures the recipient never receives them again. To learn more about contacts being linked to branded/unbranded lists, refer to our Brand Management article.
How it works
The 1-Click Unsubscribe feature works differently for both branded and non-branded campaigns.
When a contact clicks on a link in a non-branded campaign (also known as a "general campaign"), they will be removed from all non-branded lists and added to the general Do Not Mail List. The contact will continue to be subscribed to the branded lists.
If you send a branded campaign, the contact will be removed from all lists that share the same brand as your campaign as soon as they click the unsubscribe link. Additionally, they will be added to the Do Not Mail List for that specific brand. The contact, however, will continue to be subscribed to all non-branded lists and all lists with a distinct brand.
The following table shows how the 1-Click Unsubscribe link behaves when used in branded versus non-branded campaigns:
Campaign Type | Unsubscribed from non-branded list | Unsubscribed from branded list | Added to general Do Not Mail list | Added to Brand Do Not Mail List |
|---|
Non-Branded | Yes | No | Yes | No |
Branded | No | Yes (only the specific brand) | No | Yes (only the specific brand) |
Creating a 1-Click Unsubscribe page
To create this page, follow the steps as shown below:
- From the Navigation panel, go to Audience and choose the Preference Management module.
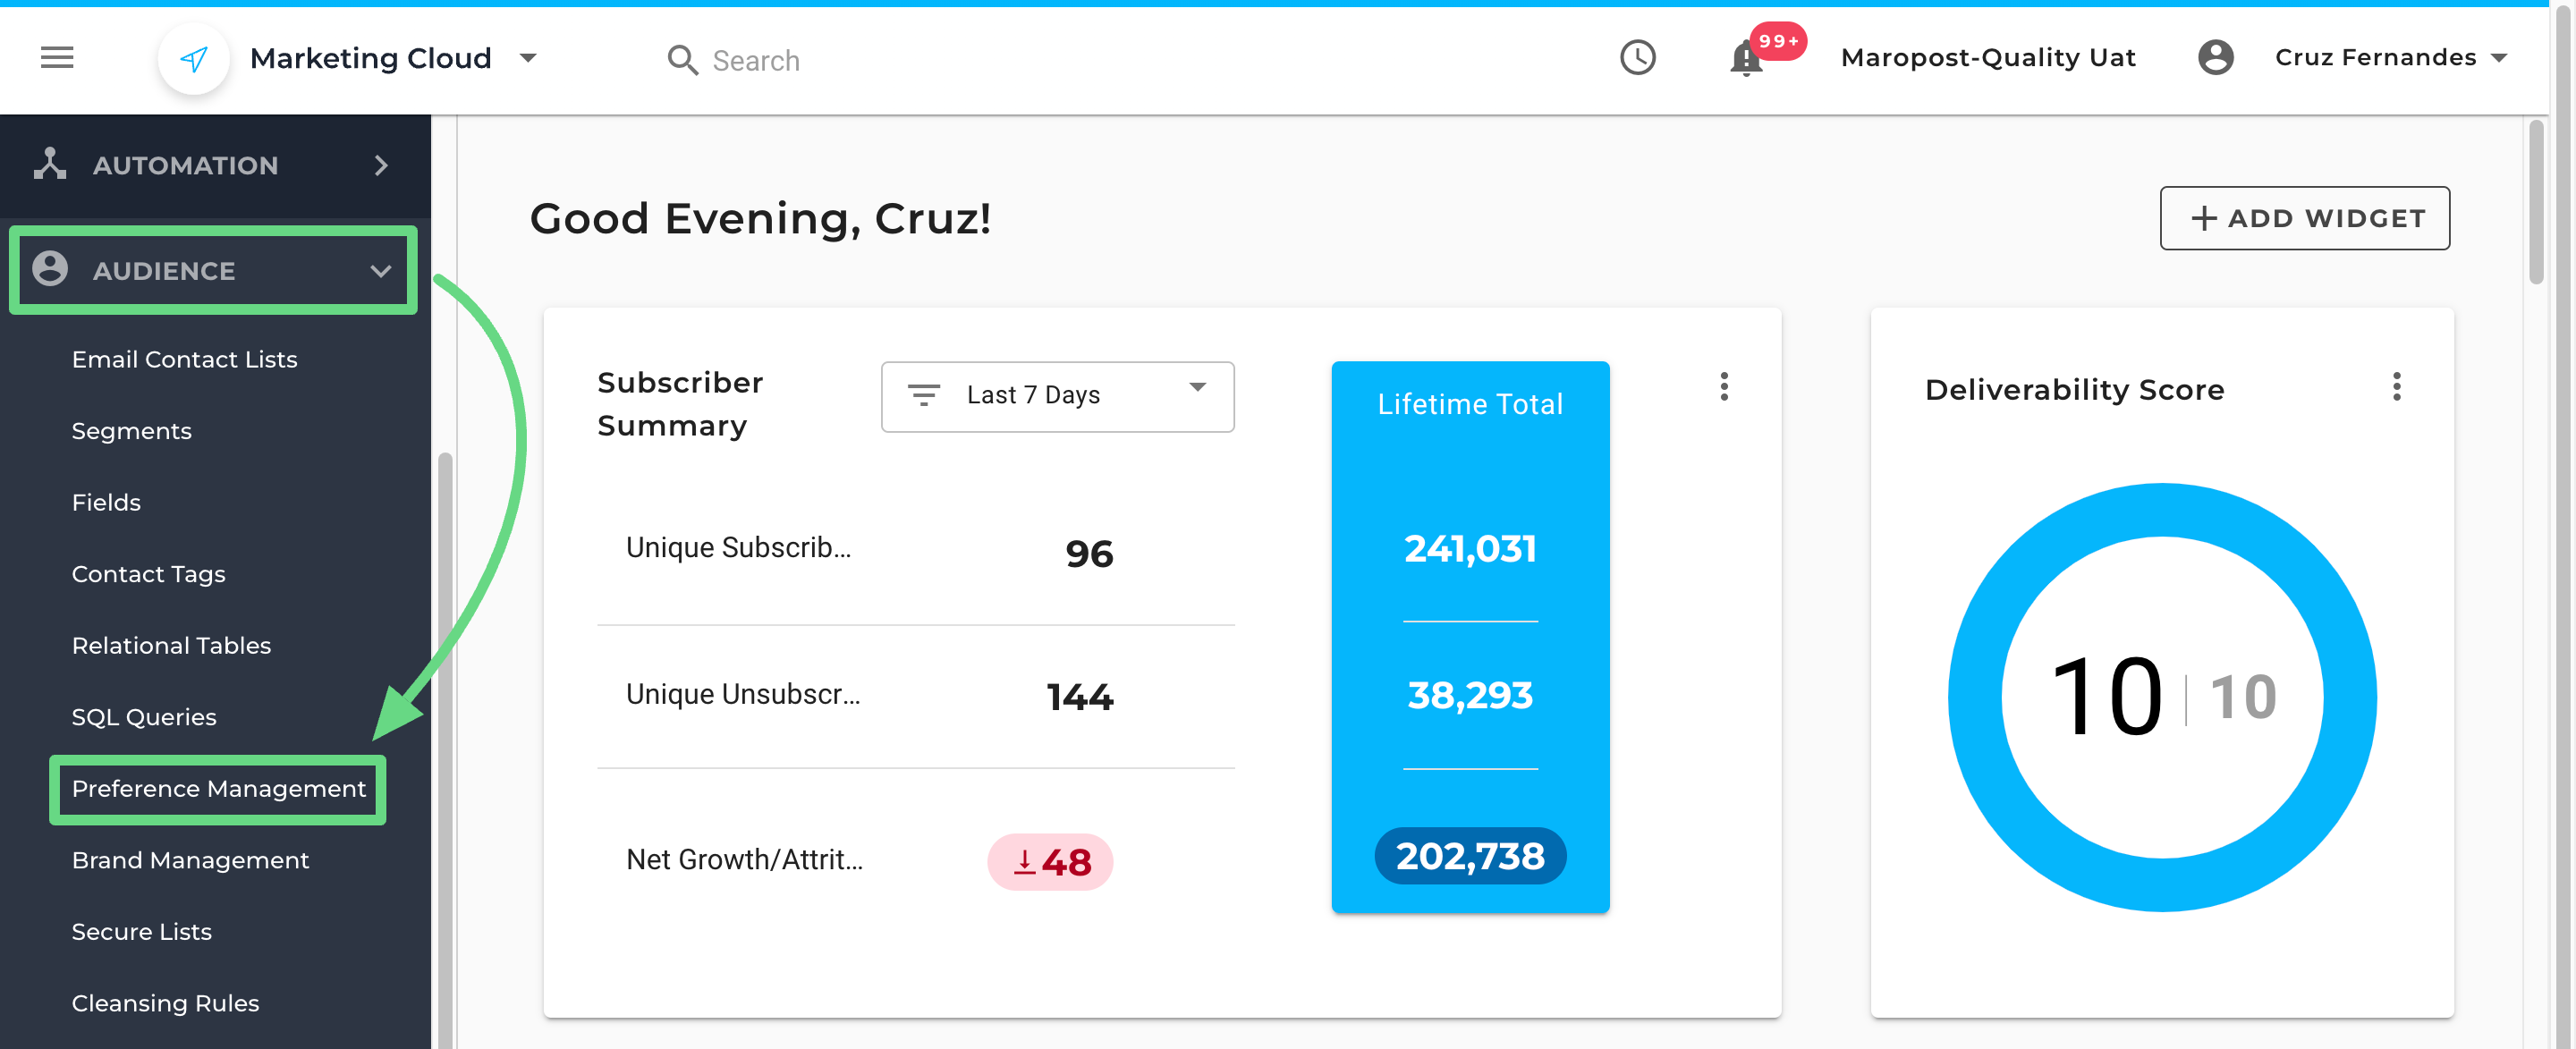
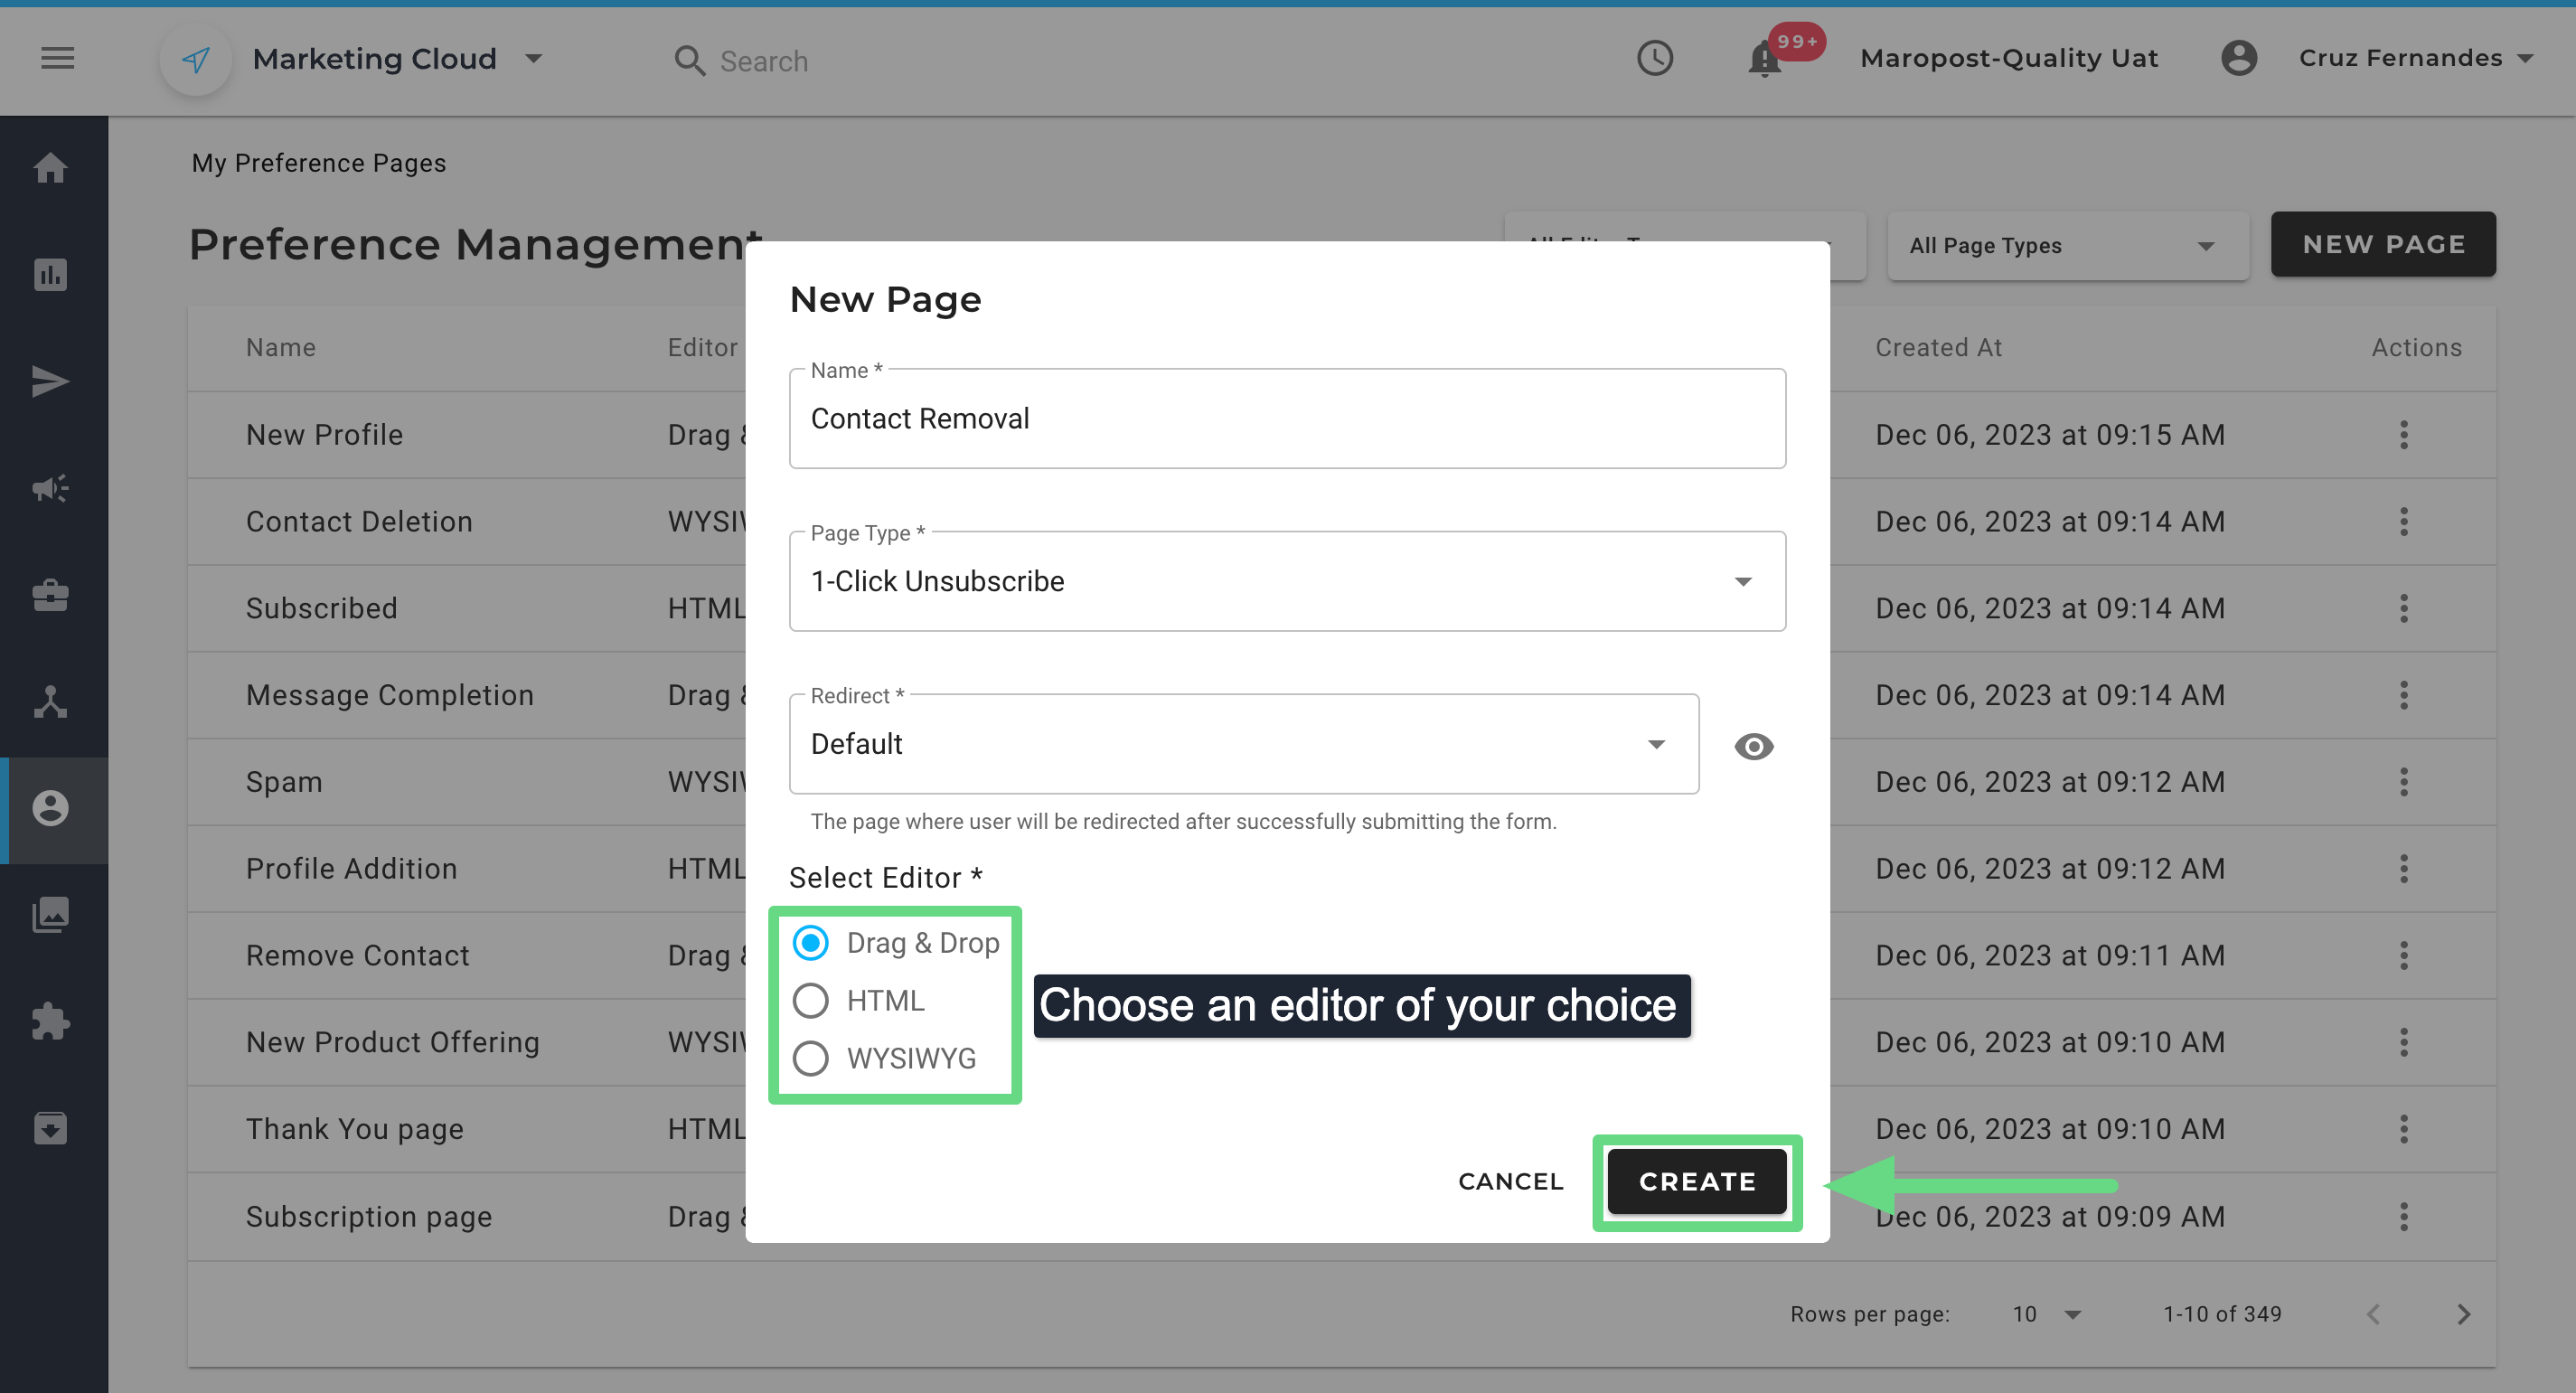
- To create a 1-Click Unsubscribe page, click on the New Page tab.

- The following details have to be entered and selected from the modal window:
Name: Enter a name for your preference page.
Page Type: Select the page type as “1-Click Unsubscribe.”
Redirect: Choose a confirmation page or a thank-you page for your contacts to be redirected to after they have clicked the 1-Click Unsubscribe link. By default, Marketing Cloud's Thank You page is selected. To learn about creating the Thank You page, see Preference Management: Thank You Page.
Select Editor: Choose an editing mode to design your subscription page. Marketing Cloud provides three format modes for designing your pages: Drag & Drop, HTML, and WYSIWYG.
Once you have entered the details, click on Create to proceed ahead.
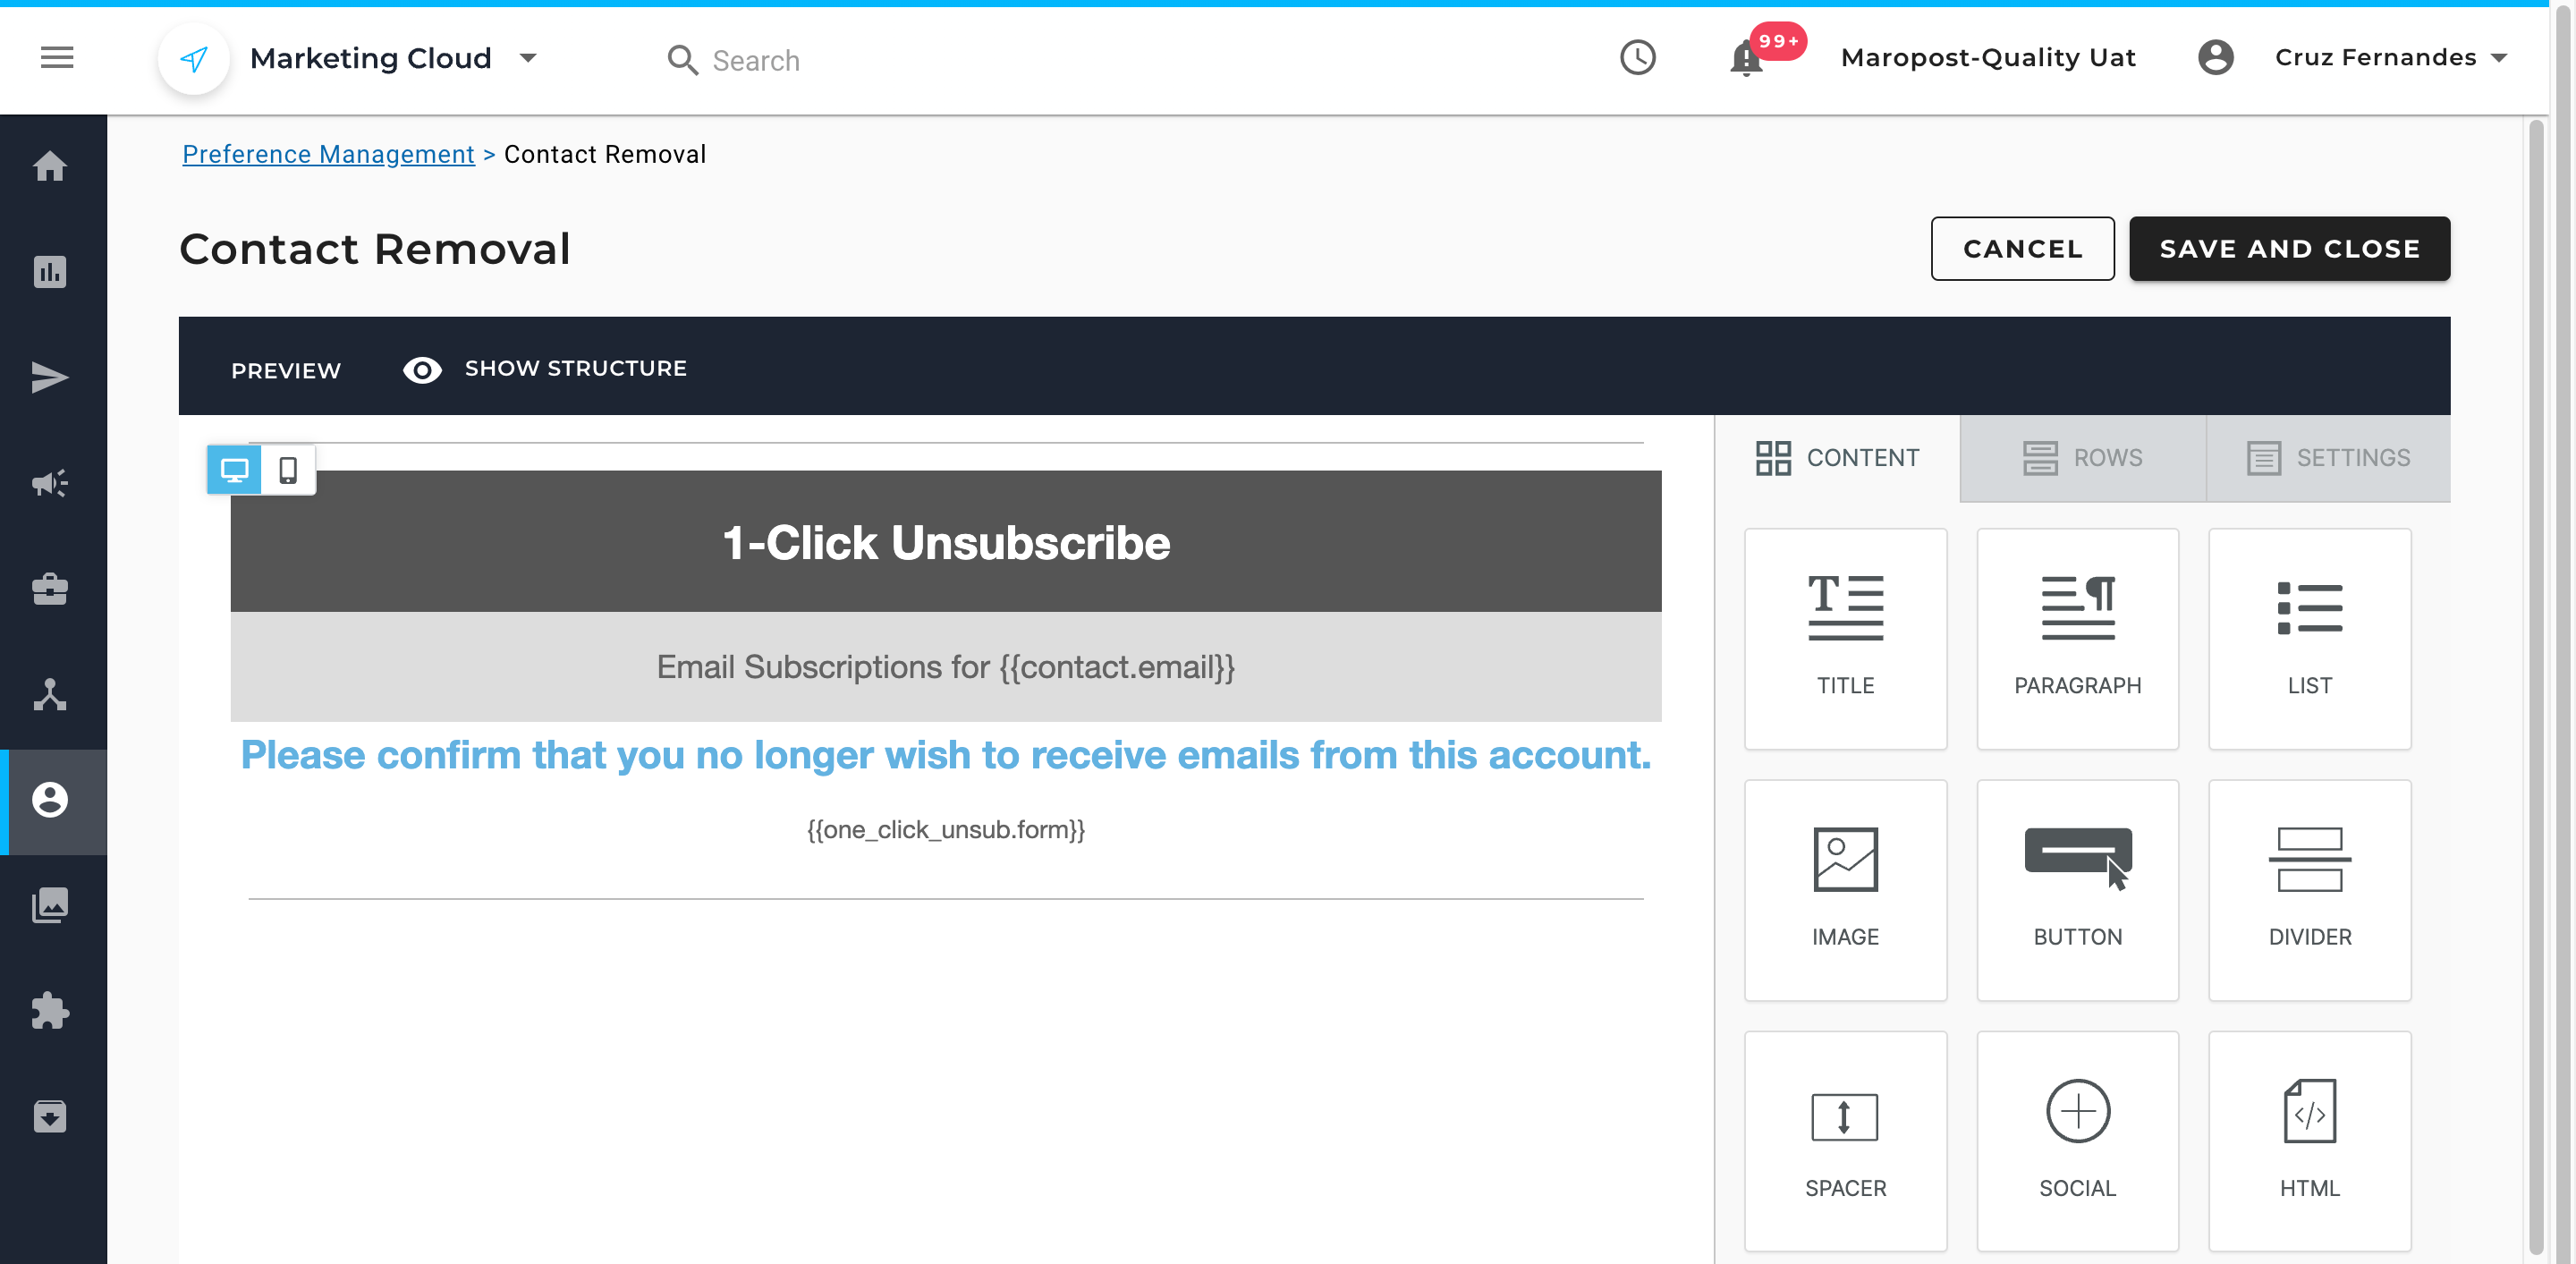
- In the case of the Drag & Drop editor, design your subscription page by using the customizable tools available on the right-hand side of the editing workspace.
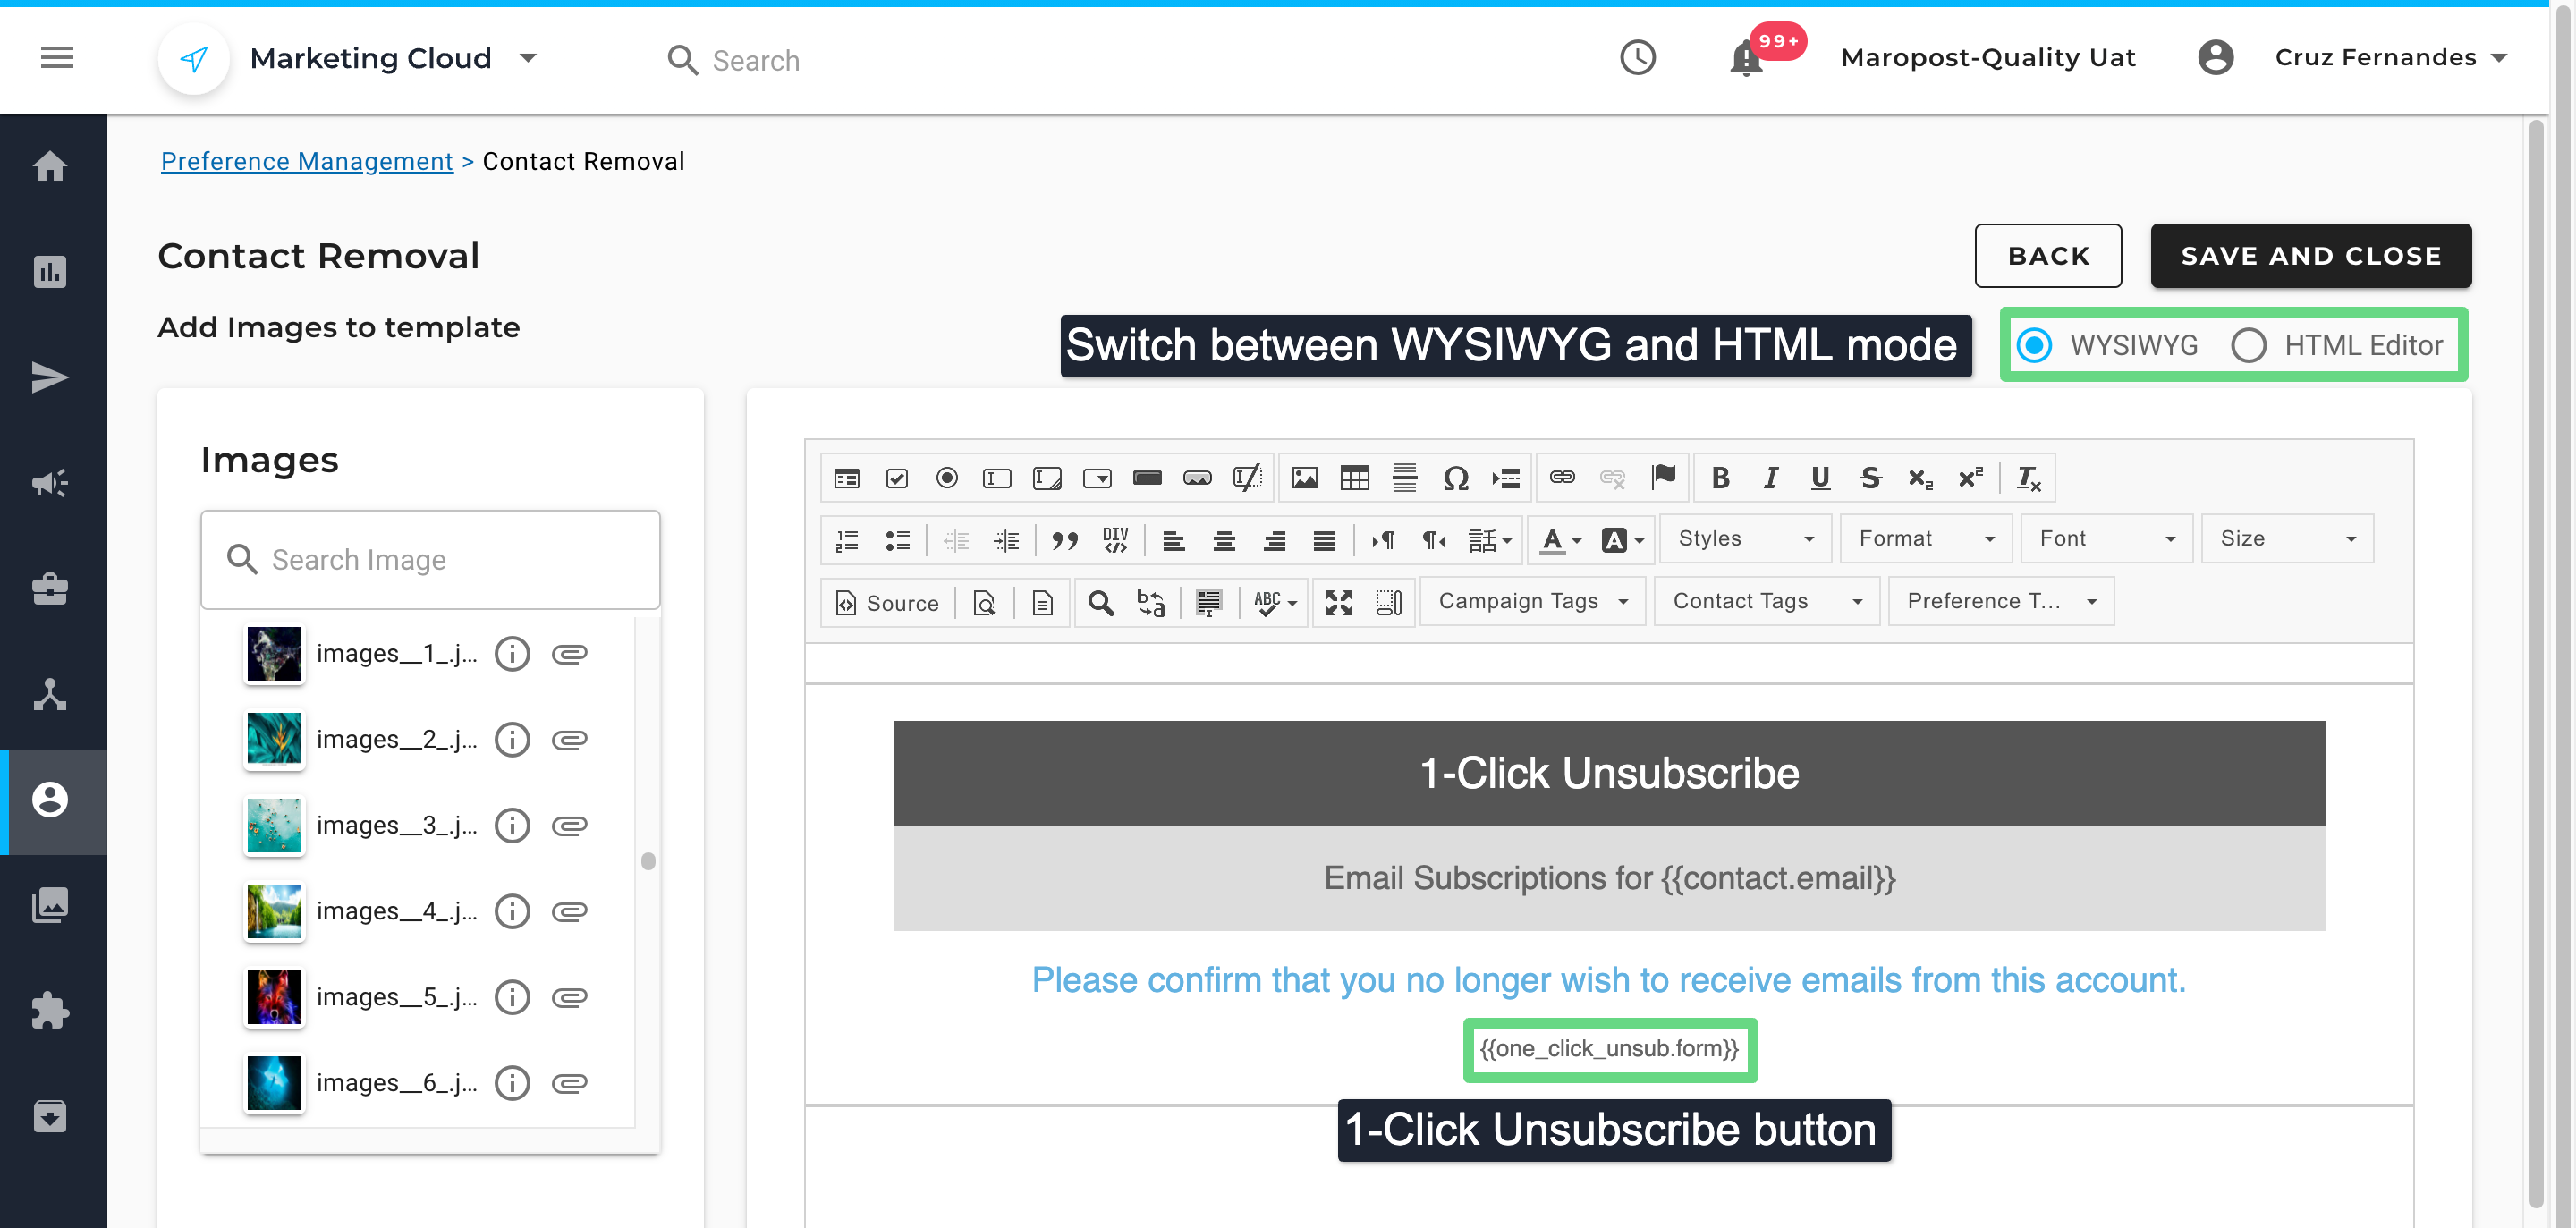
- If you have chosen either the WYSIWYG or HTML option, use the editor tools, or you can add your own source code to make your subscription page more interactive or appealing to your audience. Make sure you add the {{one_click_unsub.form}} tag to your page to create an unsubscribe button for your contacts to click on. Once you have finished designing your page, save it.
Using a 1-Click Unsubscribe Page
You can use the 1-Click Unsubscribe page while creating a custom footer for your campaigns. To learn more about footers in an email campaign, see Footer Management.
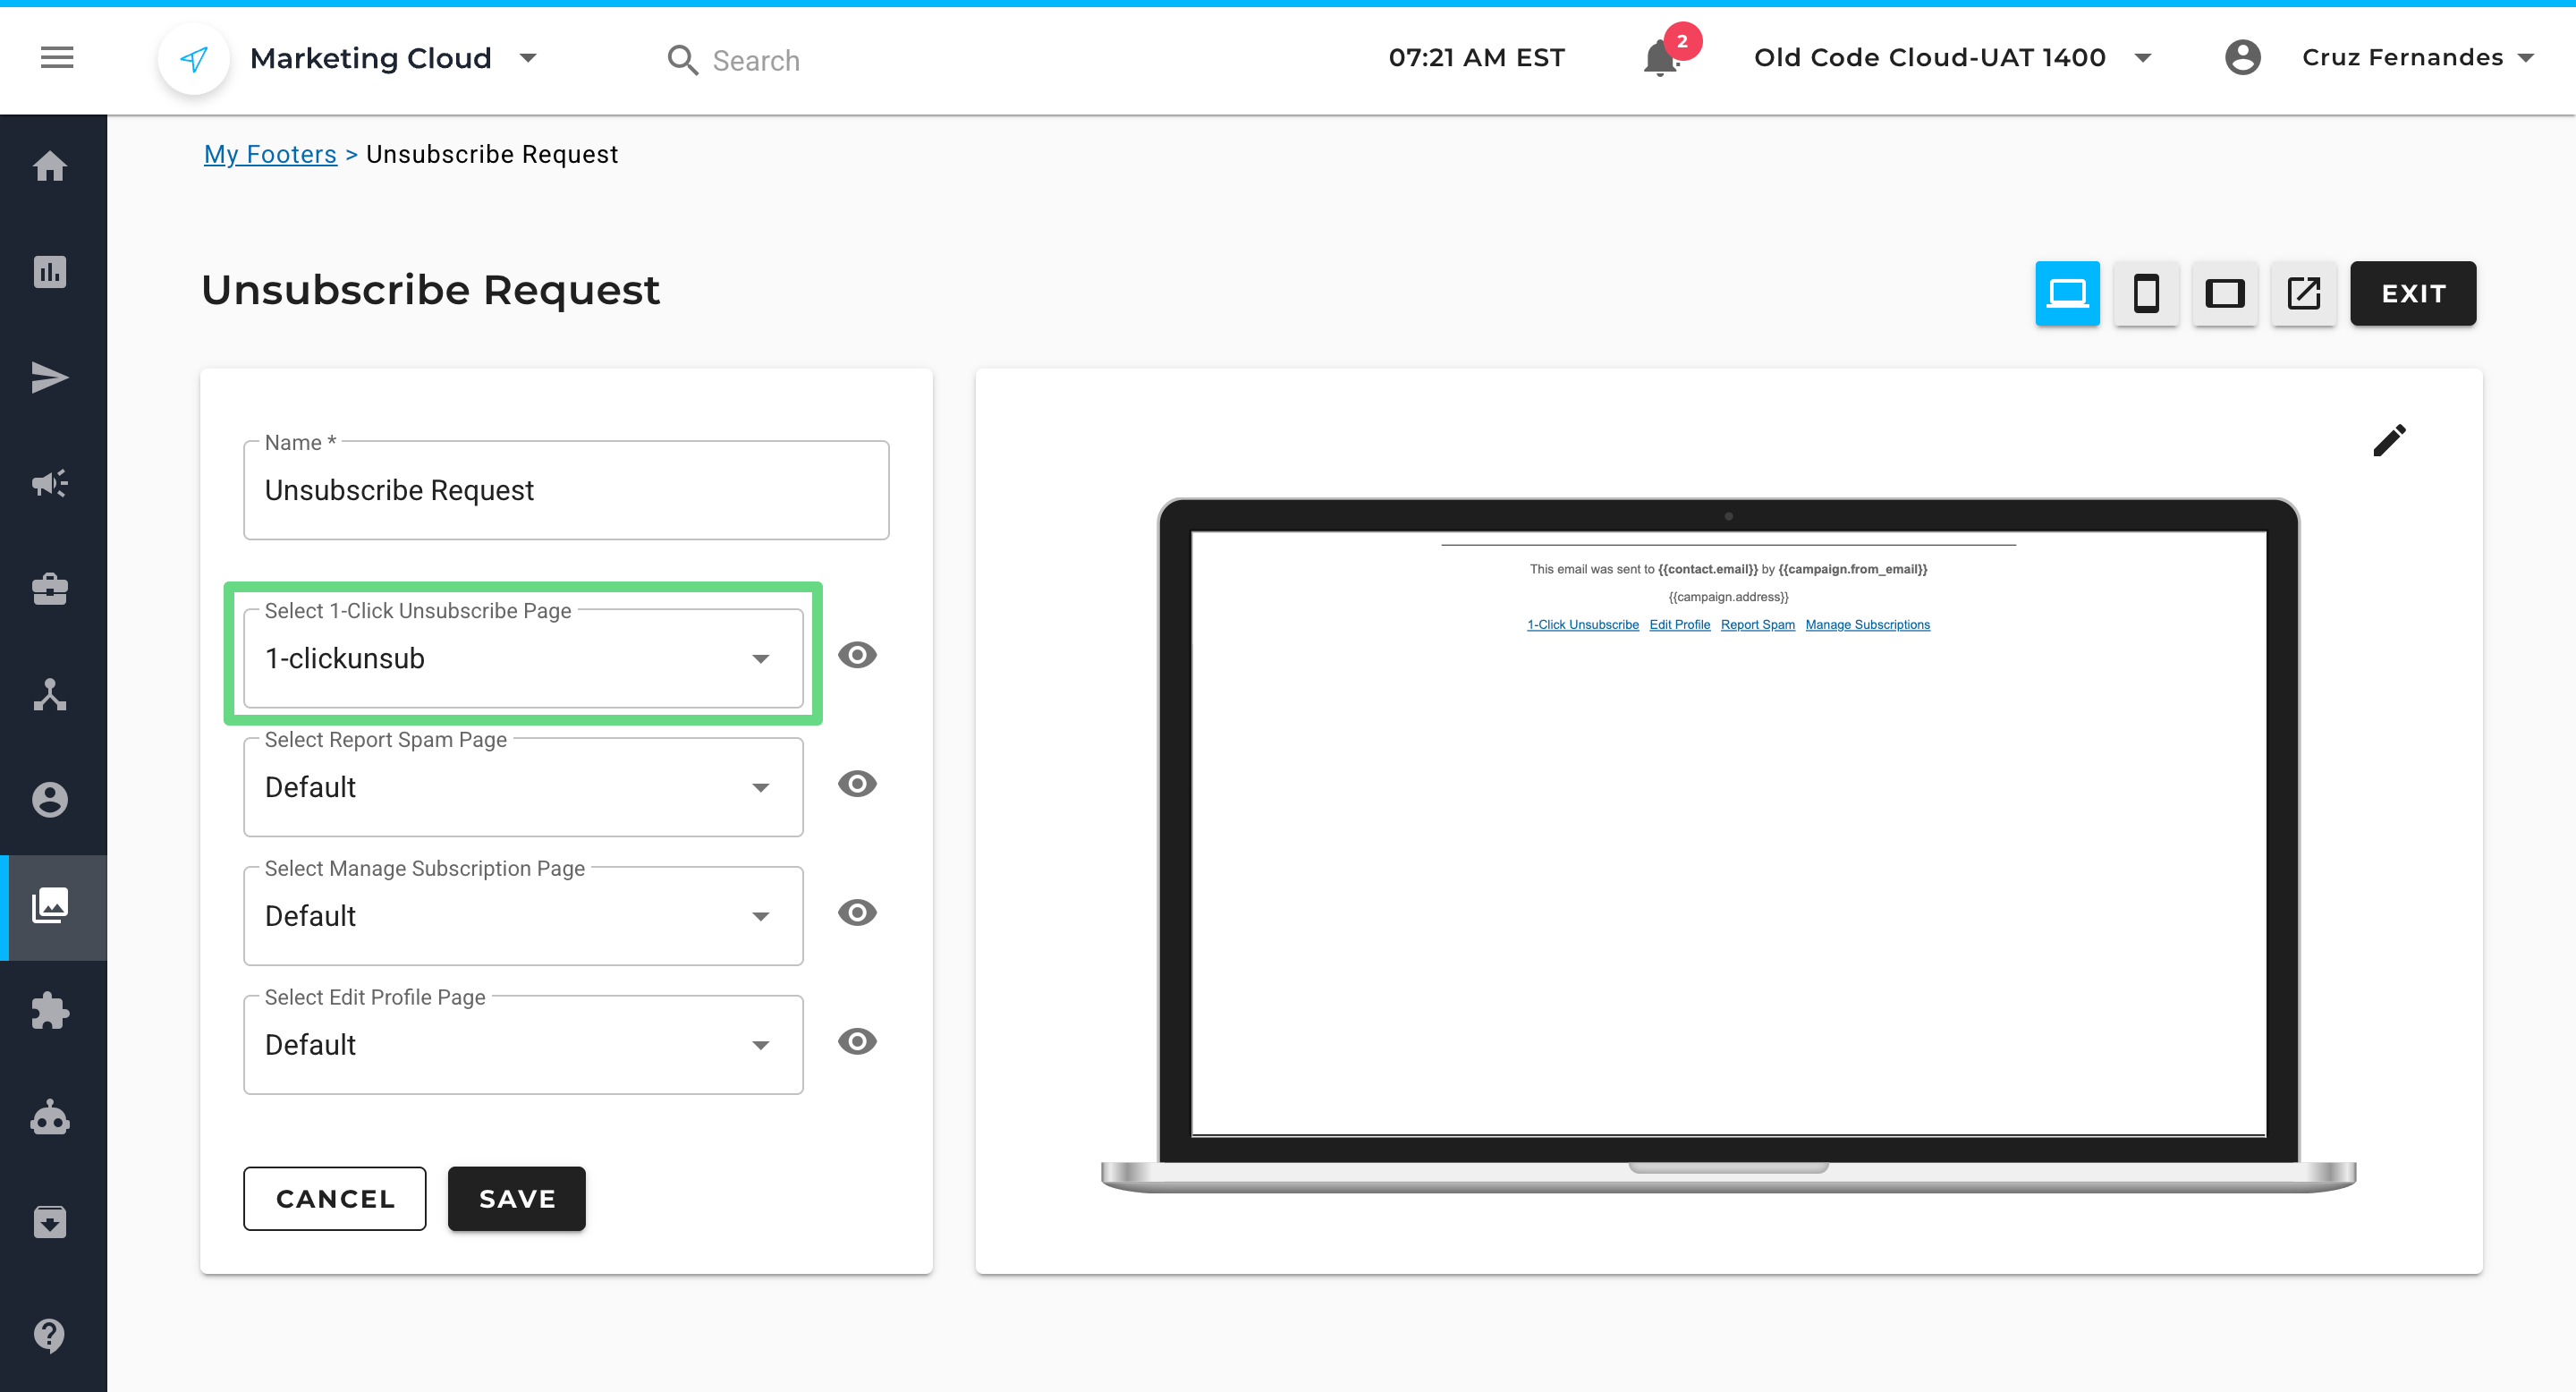
Note: A user can resubscribe to a list through the "Manage Subscription" page if you add the email back to new lists or if you use the toggle status on the contact show page.
Related Articles
Preference Management:
Email Compliance: