Journey Actions enable you to create sophisticated automated marketing workflows that nurture leads, engage customers, and drive conversions without manual intervention. This marketing automation capability significantly improves operational efficiency while delivering personalized customer experiences that typically lead to better engagement and higher conversion rates.
You can orchestrate complex multi-channel campaigns using email, SMS, and push notifications within automated customer journeys, which helps optimize your marketing effectiveness while reducing manual workload. When properly configured, these automated actions help maximize customer lifetime value through timely, relevant communications.
An Action widget denotes a process that is initiated and performed in Maropost, such as sending an email, changing a subscription, ending a Journey, and so on.
There are multiple actions available to you in Maropost. Using a specific action, you can achieve your goal, and keep your automated Journey and customers active and engaged.
Send Email
The Send Email action enables you to send an email campaign. You have the same options as you have when you're creating a new campaign.
The following screenshot shows how the Send Email widget appears on the canvas:

The following screenshot shows the Send Email dialog box that appears when you double-click the widget:

Send SMS
The Send SMS action is available only if you have defined a unique identifier for your contact profiles. The widget is similar to the Send Email action widget except that it sends a text message to the contact. You can select Mobile Keywords and contact tags that will appear in the SMS message.
If a contact flowing through a Journey reaches this action widget but does not have an SMS contact record, then the action widget is ignored, and the contact moves on to the next item in the sequence flow.
The following screenshot shows how the Send SMS widget appears on the canvas:

The following screenshot shows the Send SMS dialog box that appears when you double-click the widget:

You can check and edit the compliance information on the Compliance tab, as shown below:

Send Push Message
The Send Push Message action is available only if you have defined a unique identifier for your contact profiles. The widget is similar to the Send Email action widget except that it sends a push notification to the contact's mobile device, assuming that (i) your mobile app is implementing Maropost for Marketing's mobile messaging SDK, and (ii) the mobile app is installed on the contact's smartphone.
If contact flowing through a Journey reaches this action widget but does not have a mobile app messaging contact record, then the action widget is ignored and the contact moves on to the next item in the sequence flow.
The following screenshot shows how the Send Push Message widget appears on the canvas:

The following screenshot shows the Send Push Message dialog box that appears when you double-click the widget:

HTTP Post
The HTTP Post action enables you to send a formatted or custom payload, based on your preference, to the API endpoint that you provide. The data in the payload represents the Contact object in the database. It includes the subscription status of the email lists that the contact is subscribed to, as well as the standard and custom fields.
The following screenshot shows how the HTTP Post widget appears on the canvas:

Here are the two ways in which you can use the HTTP Post action widget:
Formatted Payload:

To enter the details, double-click on the (HTTP Post) widget and then enter the POST URL. Select the format (JSON or XML) and save.
The following is an example of a JSON-formatted payload that is sent to the API endpoint:
{ "subscriptions": [ { "list_id": 1, "list": "Maropost Test List", "status": "Subscribed" }, { "list_id": 14, "list": "DNDContentContactList", "status": "Subscribed" }, { "list_id": 16, "list": "List-Unsubscribe Test List", "status": "Subscribed" } ], "contact": { "id": 3, "email": "tester1@gmail.com", "first_name": "Tester1", "last_name": "Test", "phone": "123456789", "fax": "123456789", "created_at": "2017-01-04T11:21:40.000-05:00", "updated_at": "2017-06-09T10:49:55.000-04:00", "domain_name_id": 2, "city": “Toronto”, "suffix": “Mr.”, "gender": null, "profession": “QA Tester”, "birthmonth": null }, "workflow": "New Journey for Test ", "workflow_id": 36, "tags": [ { "tag_id": 5, "tag_name": "trigger journey" } ]}
Custom Payload:
You can also send a custom payload with the headers of your choice to the target endpoint. By customizing the header and body of an HTTP Post, you can reference the contact data and push it to another platform.

The following is an example of a customized JSON payload with contact fields and contact tags:
{ "contact": { "first_name": "{{contact.first_name}}", "email": "{{contact.email}}", "phone": "1234567890", "fax": "1234567890", "last_name": "email", "uid": "abcd", "custom_field": { "custom_field_1": true, "custom_field_2": null, "custom_field_3": "abc123" }, "add_tags": [ "tag_name", "tag_name" ], "remove_tags": [ "tag_name", "tag_name" ], "subscribe": true, "remove_from_dnm": true }}
Trigger Journey
The Trigger Journey action enables you to trigger a different Journey within the current Journey or to pass contacts from one Journey to another. You can use this action to loop contacts in Journeys as well.
The following screenshot shows how the Trigger Journey widget appears on the canvas:

The following screenshot shows the Trigger Journey dialog box that appears when you double-click the widget:

When you open this element, you will see all existing Journeys and their corresponding triggers listed. A Journey can have multiple triggers so you may find multiple options in the drop-down list. If there are no Journey triggers, then 'No trigger found' is shown with the Journey name.
End Journey
The End Journey action can be used to end a Journey sequence, but not the complete Journey. To end a Journey completely, you will need to attach an End widget. You can select single or multiple Journeys with this action.
The following screenshot shows how the End Journey widget appears on the canvas:

The following screenshot shows the End Journey dialog box that appears when you double-click the widget:

Send to Facebook
The Send to Facebook action enables you to send a Maropost for Marketing contact to Facebook, where you can either add it to or remove it from any Facebook Custom Audience that you have pre-defined in your Facebook Ad Account.
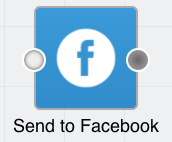
The following screenshot shows how the Send to Facebook widget appears on the canvas:
The following screenshot shows the Send to Facebook dialog box that appears when you double-click the widget:

Prerequisites:
In order to properly use this action widget, make sure you have done the following:
- Have an existing Facebook Ad Account.
- Have created at least one Custom Audience for that Ad Account.
- Have the connection set up between Maropost for Marketing and the Facebook profile that the Ad Account is associated with.
- The same user who set up the Facebook account integration must accept the Customs Audiences Terms of Service for the Lead Ad account being used.
Mapping
Facebook requires that you map the fields of your Maropost contacts with the Facebook user profile fields. This mapping is necessary to determine whether a Maropost contact is indeed a Facebook user. At a minimum, an email address is required. There are additional fields that you can optionally use to increase the accuracy of the matching.
Facebook imposes specific restrictions on how your contact profile data is formatted. If your data is not properly formatted, then it will not be used in the matching.
- First Name: select the custom field that contains the first name of your contact.
- Last name: select the custom field that contains the last name of your contact.
- Gender: Accepts 'm' and 'f' as valid values for this field.
- City: Accepts city name in all lowercase, with no punctuation, special characters, or white space.
- State: Applicable to the United States of America only. Must be the 2-character ANSI abbreviation in all lowercase.
- Country: Must be ISO 3166-1 Alpha-2 format. (for example, 'US', 'CA', 'CN', and so on.)
- Zip Code: Only the first 5 digits (for the US). Use the Area/District/Sector format for UK addresses.
- Mobile Advertiser ID: Use this only if you have this data available as provided initially from Facebook.
- App Scoped User ID: Use this only if you have this data available as provided initially from Facebook.
- Date of Birth: Check to see if your date is formatted according to any of the date formats in the list.
Audiences
- Facebook Account: Select the name of the Facebook account that you have linked with Maropost for Marketing.
- Ad Account: Once you've selected the Facebook account, a list of Ad Accounts for the Facebook Account will appear.
- Custom Audiences: After selecting the Ad Account, the list of Custom and Lookalike Audiences that you've already created under that Ad Account will now appear. Select the Audience that you want to push the contact to.
You can view and use an unlimited Facebook custom audience in your journey actions.
- Add to Fb: When you select this option, the contact's attributes you've selected will be used to find a matching Facebook user. If there is a match, then Facebook will add that user to the selected Audience. If the matching user is already a member of the Audience, then no further action will occur.
- Remove from Facebook: When you select this option, the contact attributes you've selected will be used to find a matching Facebook user that is a member of the selected Audience. If there is a match, then Facebook will remove that user from the Audience.
It can take up to 24 hours after pushing a contact to a Custom Audience before any paid promotions or display ads will appear in that person's Facebook timeline.
Change Contact Field
The Change Contact Field action enables you to change the contact field (default and custom). When a contact within a Journey reaches this widget, its contact field is changed to the value set in this action.
Multiple selections can't be done in a single Change Contact Field action; you must have separate Change Contact Field widgets to perform each task.
The following screenshot shows how the Change Contact Field widget appears on the canvas:

The following screenshot shows the Change Contact Field dialog box that appears when you double-click the widget:

Change Table Field
The Change Table Field action enables you to change the table field for a contact in a table. When a contact reaches this action, the field selected in the action is changed to the specified value. You can only select a table field in this action.
The following screenshot shows how the Change Table Field widget appears on the canvas:

The following screenshot shows the Change Table Field dialog box that appears when you double-click the widget:

In the screenshot, "Jagdeep.iD" is the selected table field, where "Jagdeep" is the table and "iD" is the table field.
Change Subscription
The Change Subscription action enables you to change the subscription status of a contact within a list to subscribed or unsubscribed. This action allows you to select multiple lists and change their status to either 'Subscribed' or 'Unsubscribed' using the drop-down selection.
The following screenshot shows how the Change Subscription widget appears on the canvas:

The following screenshot shows the Change Subscription dialog box that appears when you double-click the widget:

If a contact is not present in the selected list and you have selected ‘Unsubscribed’, then the contact is added as ‘Unsubscribed’ to the list. The same rule is followed when it is set to subscribe. However, if the contact is already in the list, then the action only changes the subscription status as specified.
Change Tags
The Change Tags action enables you to change contact tags through the add and remove tags options.
The following screenshot shows how the Change Tags widget appears on the canvas:

The following screenshot shows the Change Tags dialog box that appears when you double-click the widget:

On the left side, select the tags that should be added to a contact. And, on the right side, select the tags that should be removed from a contact.
It’s not mandatory to select both options. You can also use either of the add tags or remove tags options. Multiple selections are allowed.