You can use table tags to create highly personalized email experiences by dynamically pulling relevant data from your relational tables. This feature enables you to display complex, relationship-based information in your campaigns, helping create more engaging and relevant messaging that can substantially improve engagement rates.
Table tags help maximize email marketing ROI by leveraging your existing data relationships to deliver more targeted content. When properly configured, this feature enables sophisticated personalization beyond basic contact fields, allowing you to create emails that reflect each recipient's unique transaction history, preferences, or behavioral data.
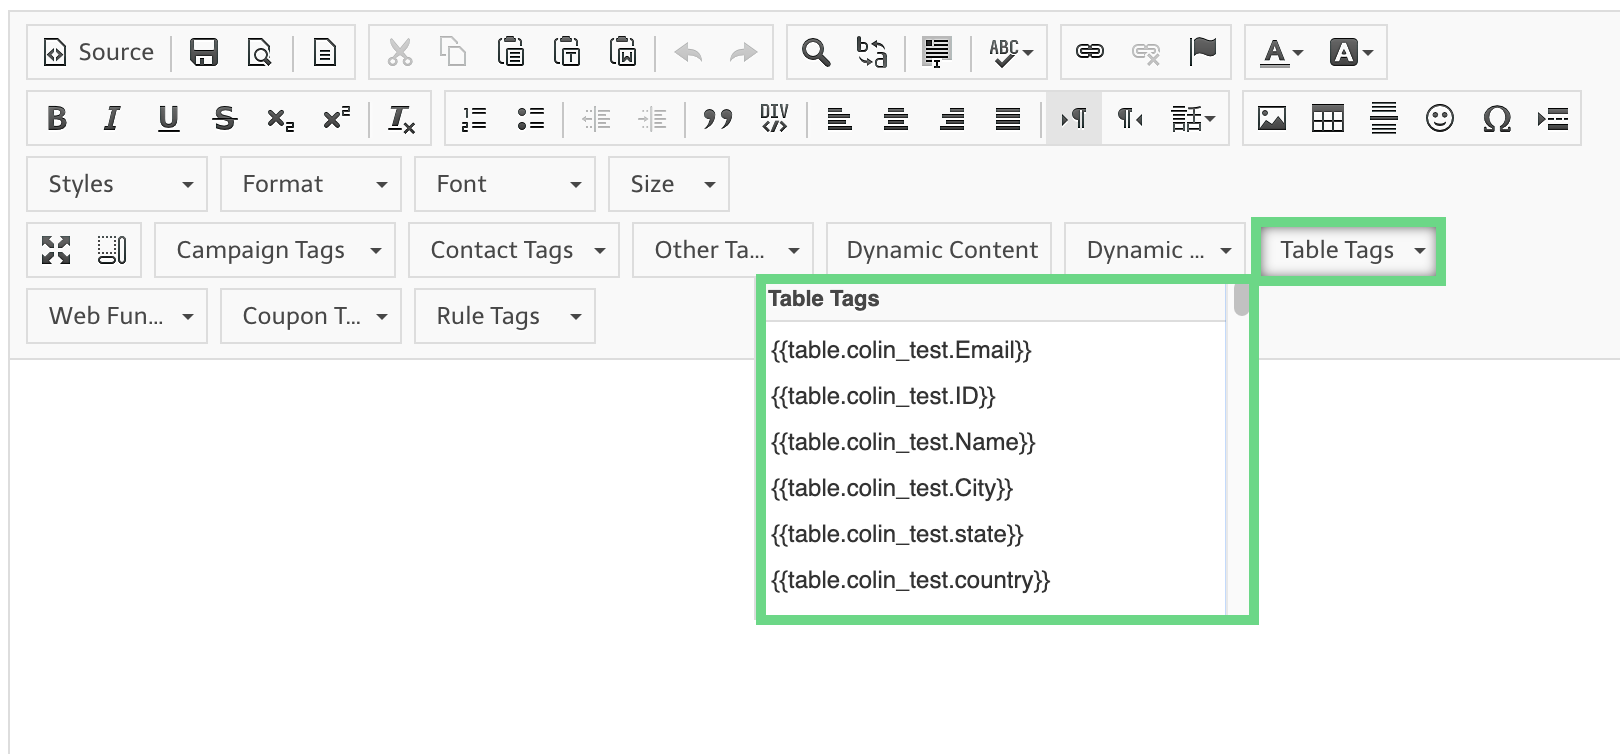
A Table Tag within email content allows you to utilize the data from a selected relational table in your account, rather than using contact tags, which are based on custom fields in your Maropost account. Table tags are specific to the table you plan on utilizing within your content.
The following is a screenshot of the WYSIWYG content editor with the Table Tags drop-down highlighted:
Maropost for Marketing uses the Liquid script to display data from relational tables within the email body.
For all table tags, the middle section is the table’s name, and the end section is the field that you want to be displayed in the body of the email. The following is an example of a table tag: {{table.table_name.registered_course}}. Here, table_name is the table’s name, and registered_course is the field within the relational table that you wish to utilize.
- You can have as many different table tags as you need.
- The data pulled from a relational table for any given contact is stored in a Liquid script array.
- Tables have an "All" option, for example, {{table.example_all}}, that displays all of the records and fields stored in a table.
- To display all records for a contact, you will need to place the table tags inside a Liquid "FOR" loop.
- Use the Liquid Script sort filter to sort the data in alphabetical, numeric, or date order.
Example: Sort by posting date with the most recent date listed first.
{% assign sorted_postings = table.job_postings_all | sort: 'posting_date' | reverse %}
- Only the first 100 records from the relational table will be stored for any given contact. Since personalization from relational tables is entirely data-driven, this restriction is implemented to prevent a contact from accidentally receiving an email containing thousands of records.