The Automated Import feature allows you to import contacts into your contact lists via an automated process.
In this option, you specify the file path on the FTP server of your Maropost account (external FTP is not supported) where the file is located. Our system scans the file path every couple of minutes to check for any new or updated .csv or .txt files in that location. After a file is imported, the older version is moved to the archive folder.
Importing Contacts Using Automated Import
Perform the following steps to import contacts into a list via the Automated Import method:
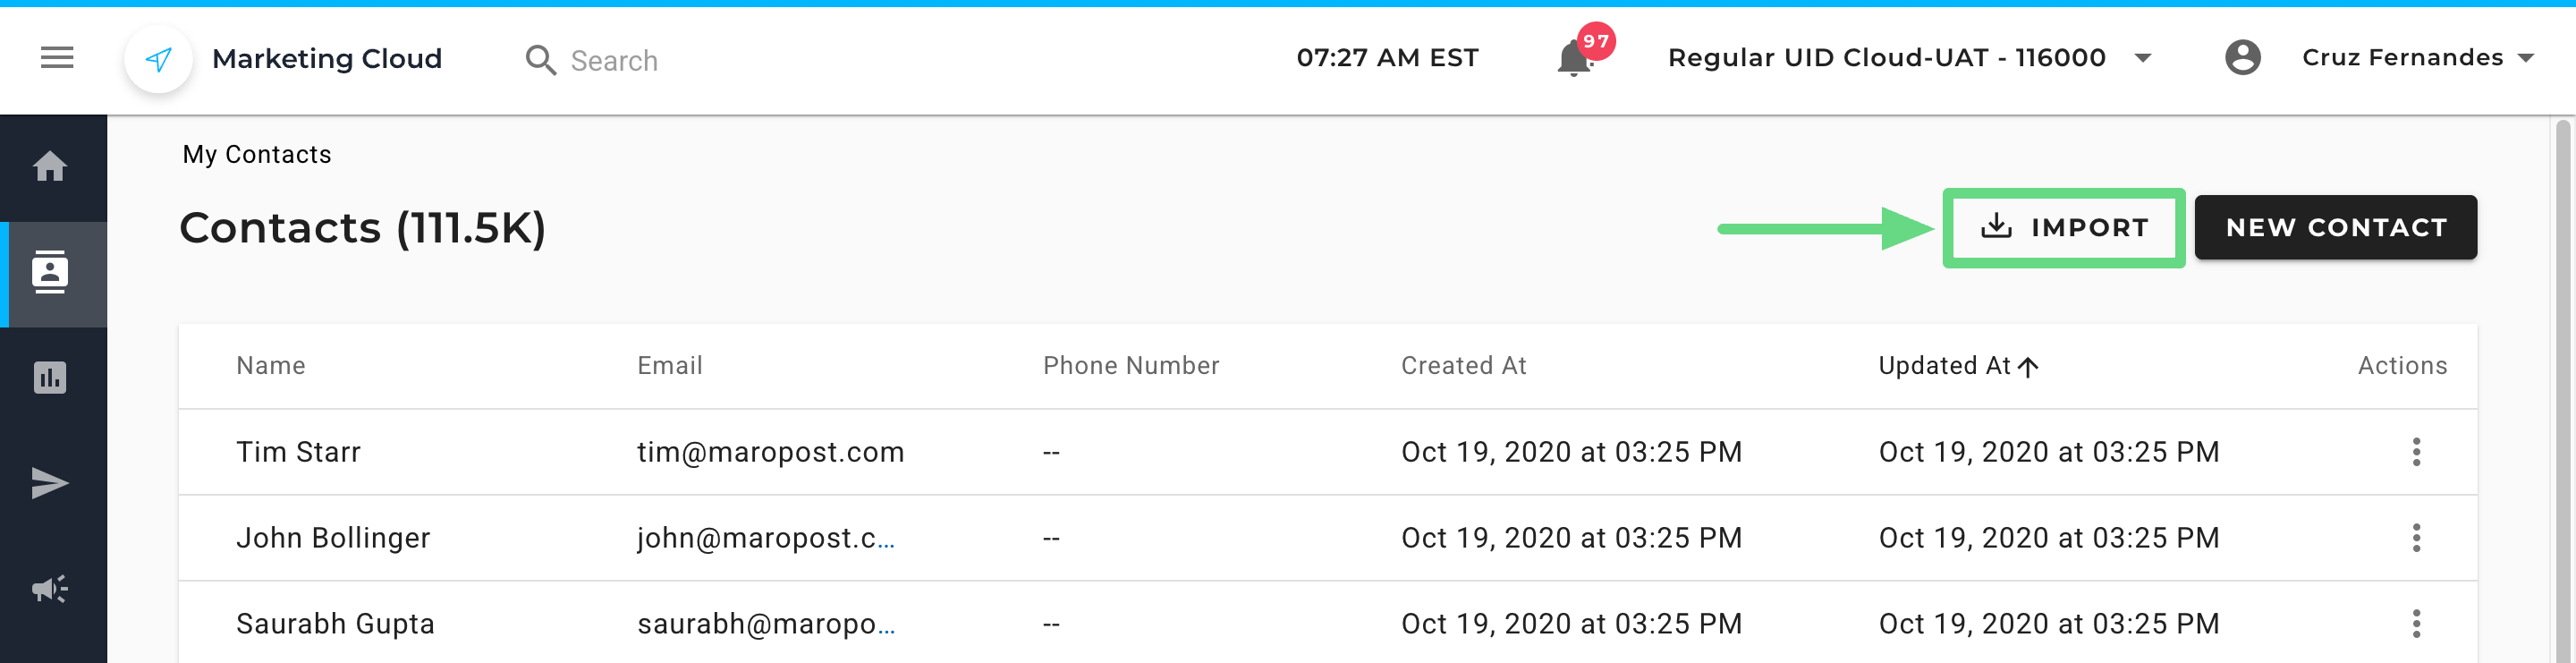
- To access the import feature, go to Contacts from the Navigation panel. You can also access the import feature by visiting the Contact Lists section under the Audience menu.

- From the contacts index page, click on the Import tab to begin importing contacts to your account. You can also initiate the import process from the Contact Lists by first clicking on the Actions drop-down menu next to the list name and choosing Import Contacts.
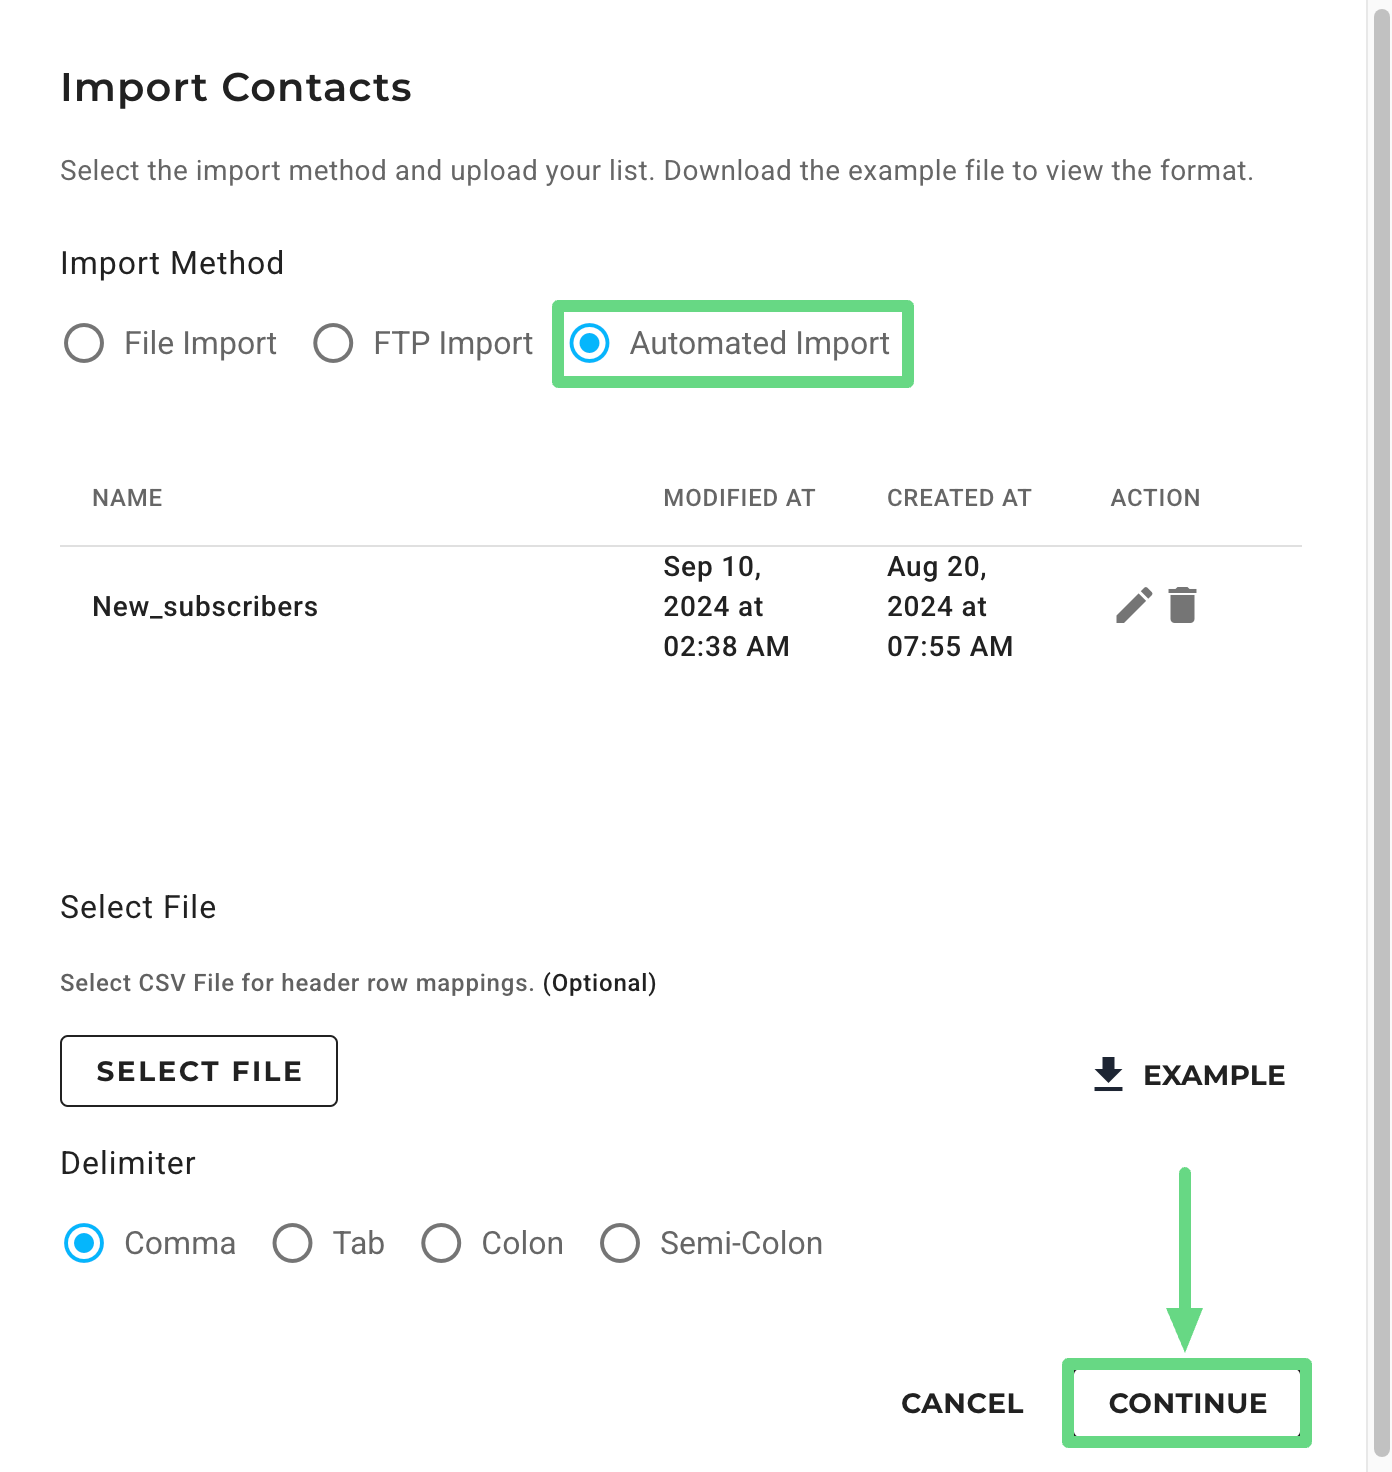
- In the Import List dialog box, choose “Automated Import” as the import method. Below, you can see an array of contact lists that the system has scanned from the previously specified file path, along with the creation and modification dates for these lists. Also, select the field delimiter that is used in the file. Click Continue to proceed ahead.
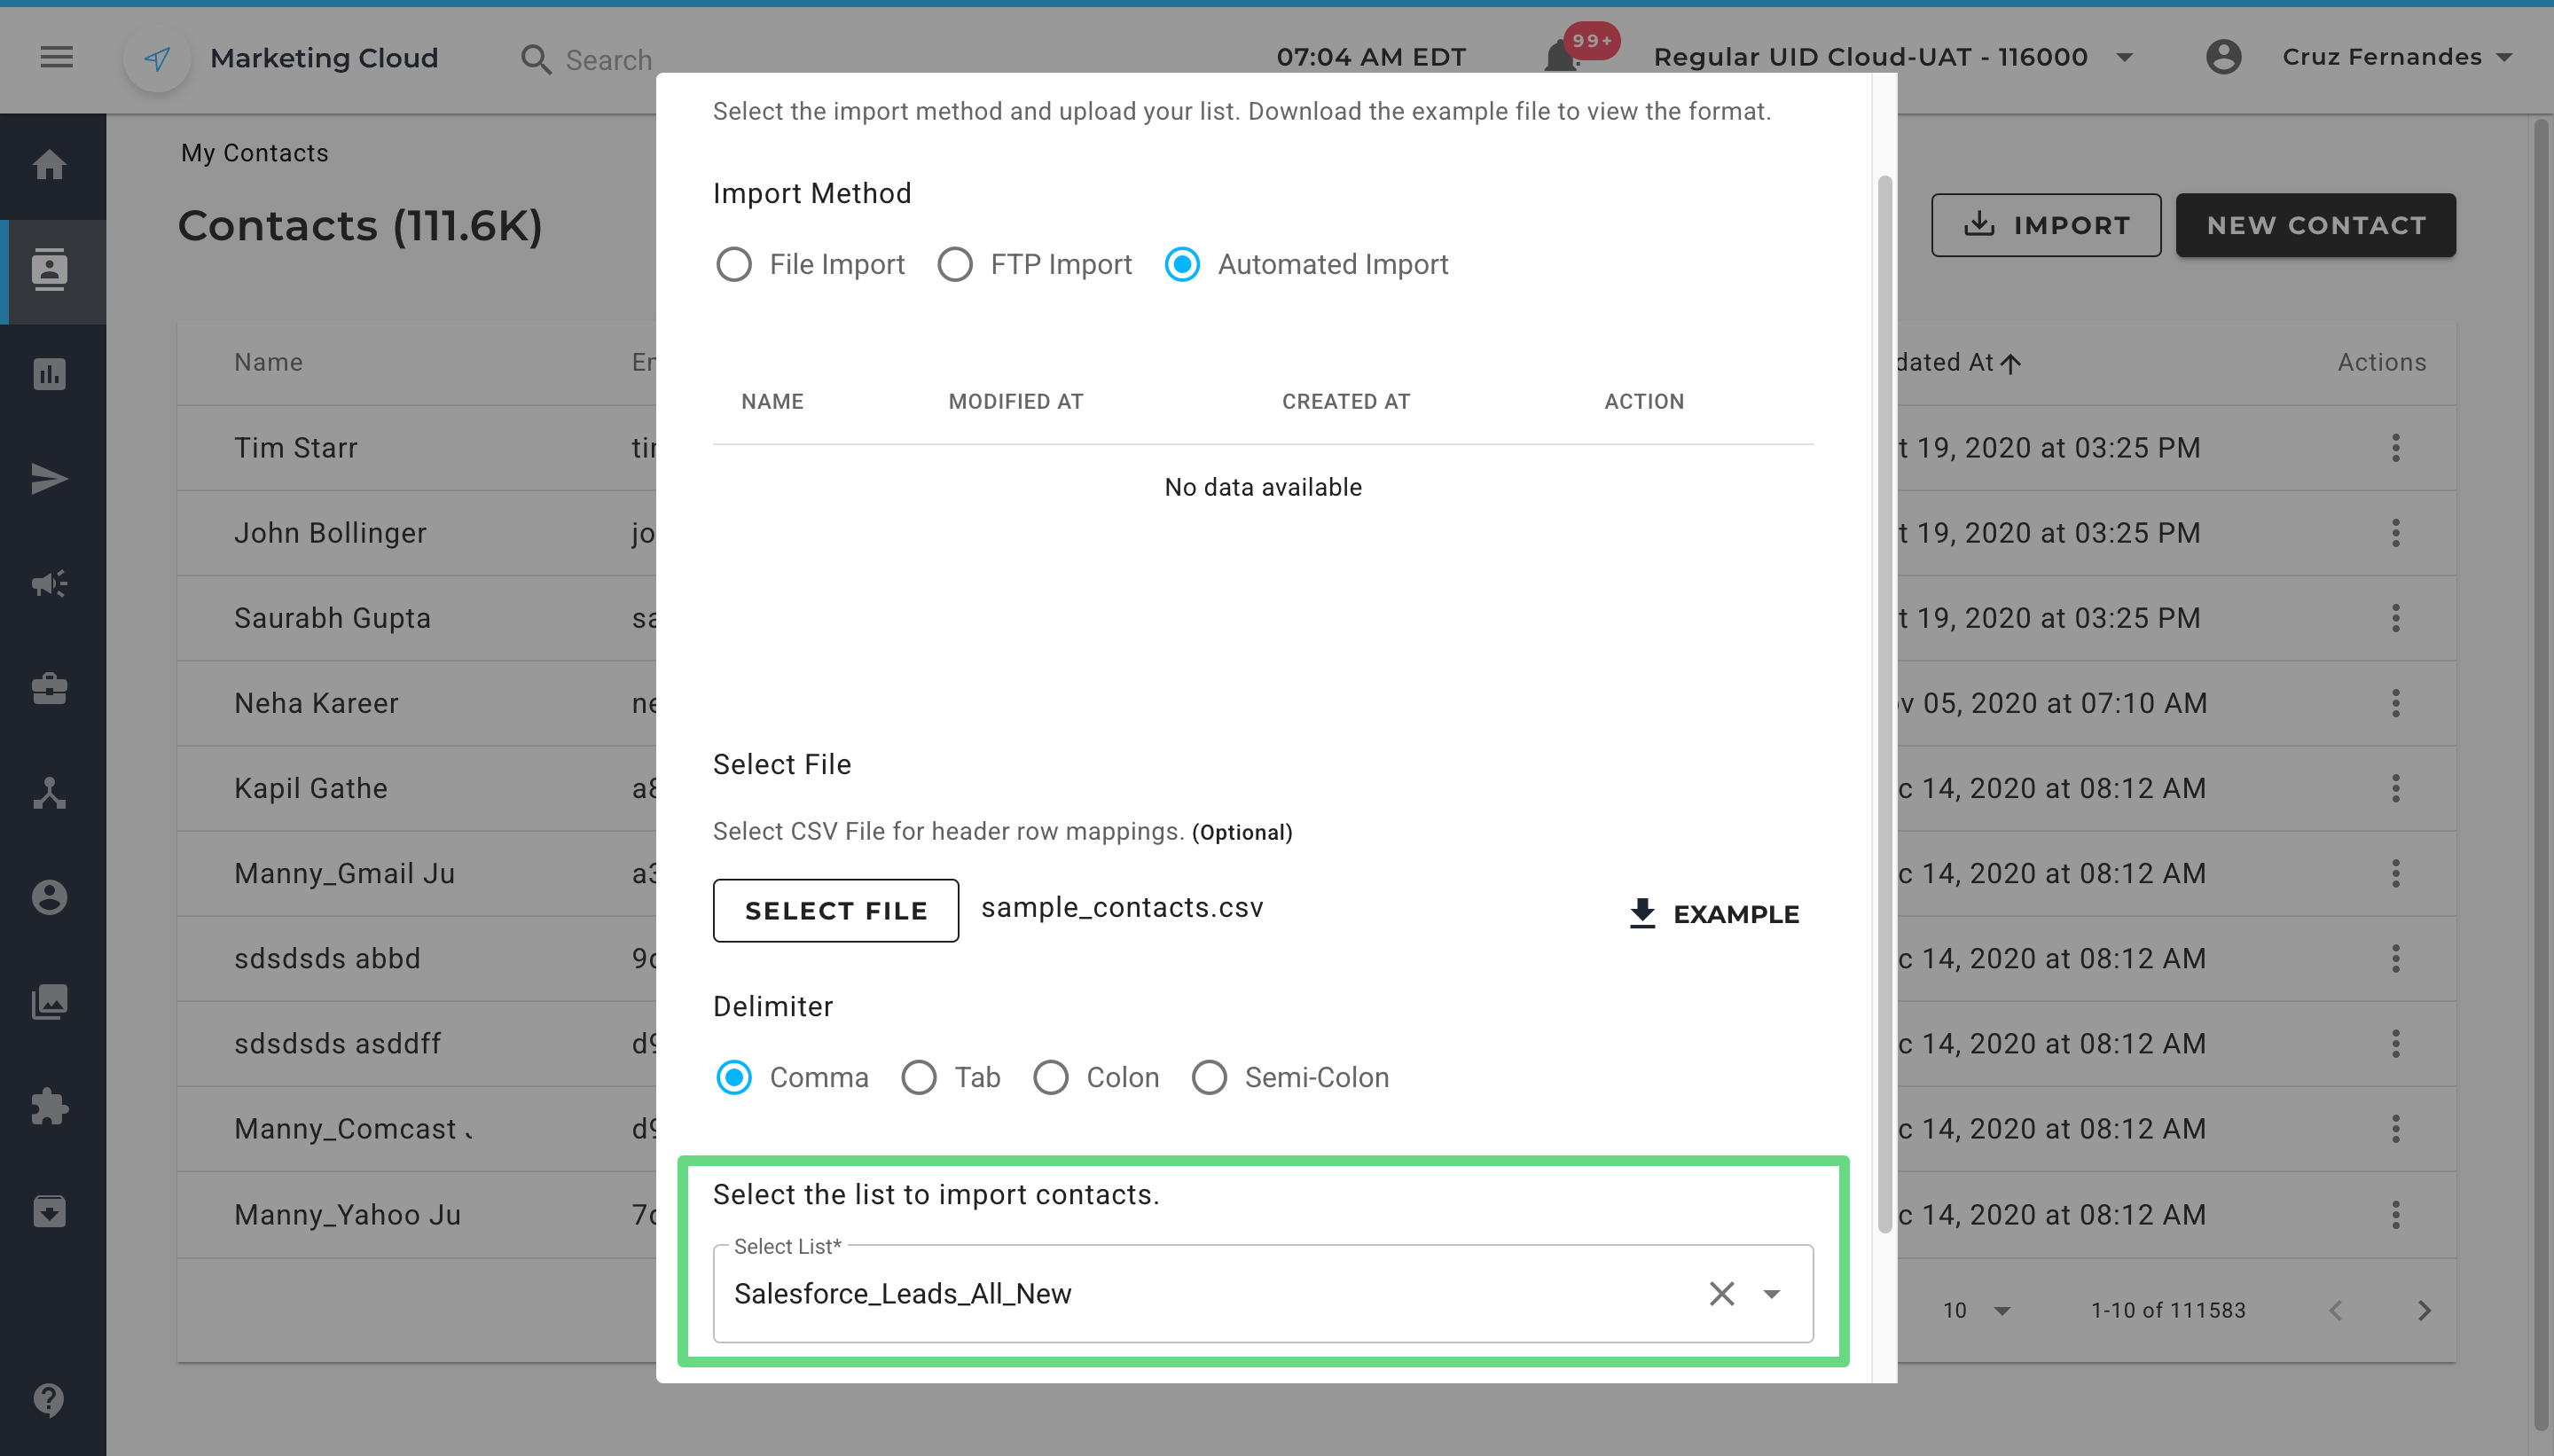
- However, please note that when importing contacts from the Contacts menu, the Import List dialog box will display an additional List field. Here, you must select the list into which the contact should be imported.
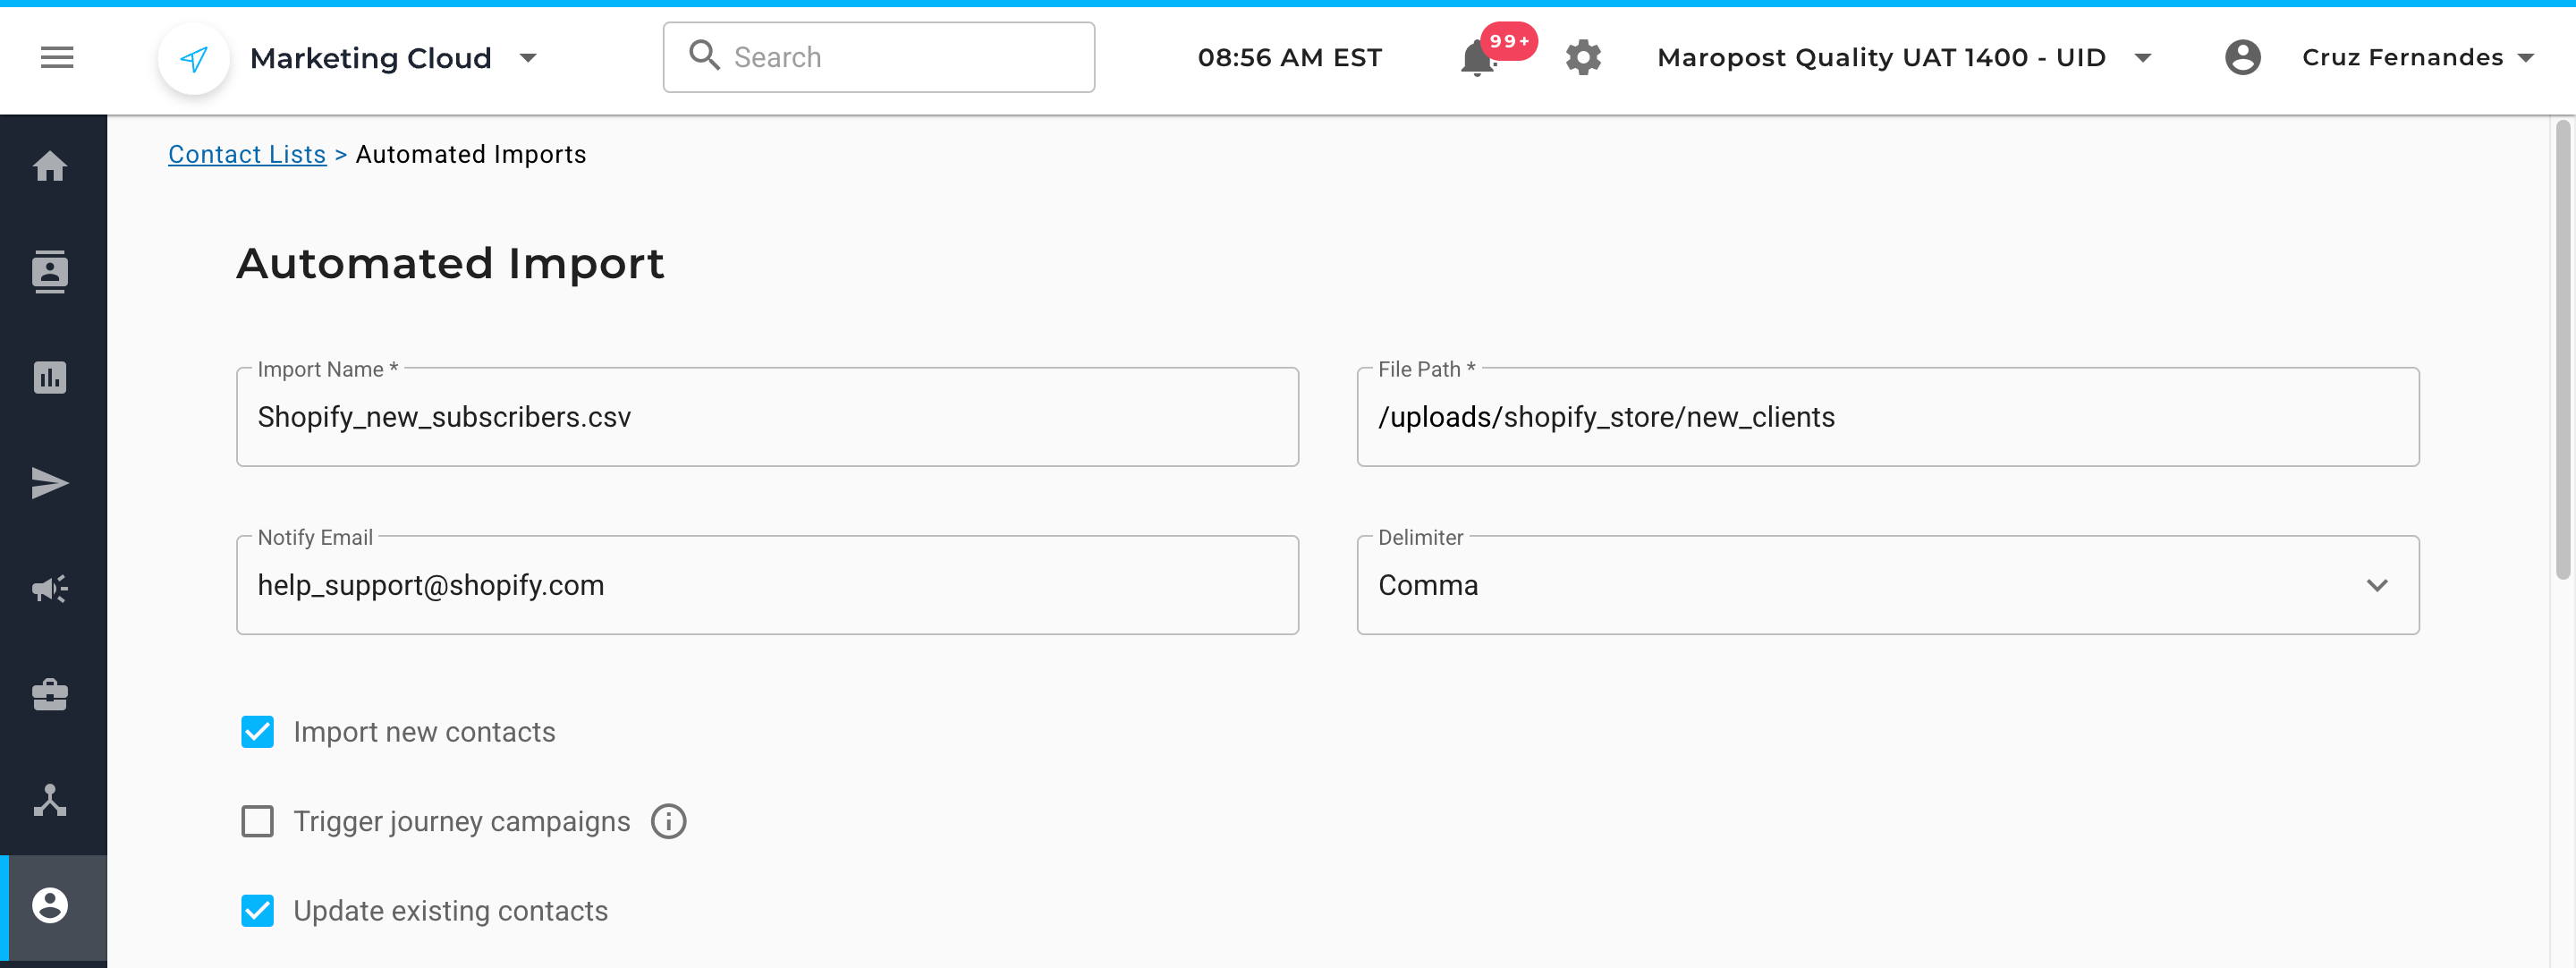
- On the Automated Import page, enter the required details, such as the name of the import and the file path to where our system will search for the files to be imported. Additionally, you can insert a delimiter and an email address if you wish to be notified about the modifications being made to the list. Next, proceed to select the following checkboxes as applicable:
Import New Contacts: This option imports new contacts only.
Trigger Journey Campaigns: This option triggers a new journey while onboarding new subscribers via a product purchase, surveys, newsletters, feedback forms, etc.
Update Existing Contacts: This option updates information on existing contacts in a list.
- Upload a .csv or .txt file to accurately map heading fields with the fields currently registered in Marketing Cloud. Do the same for the remaining fields in the Mapping section as well. The standard default fields include name, email, phone number, subscription status, contact tags, etc.

- If you are importing contacts directly from the Contacts menu, you can change the list by selecting a new one from the drop-down list. However, if you are importing a new batch of contacts from the Contact List section, the List Subscription field will be grayed out.

- Optionally, if you have designated a custom field for your contact records, then select the name of the field in your import file that contains the member IDs, subscriber IDs, or any other type of profile IDs that your internal system is using to uniquely identify each contact record. Once you have properly configured the basic details, contact fields, mappings, list subscription, and custom fields sections, click on Save.

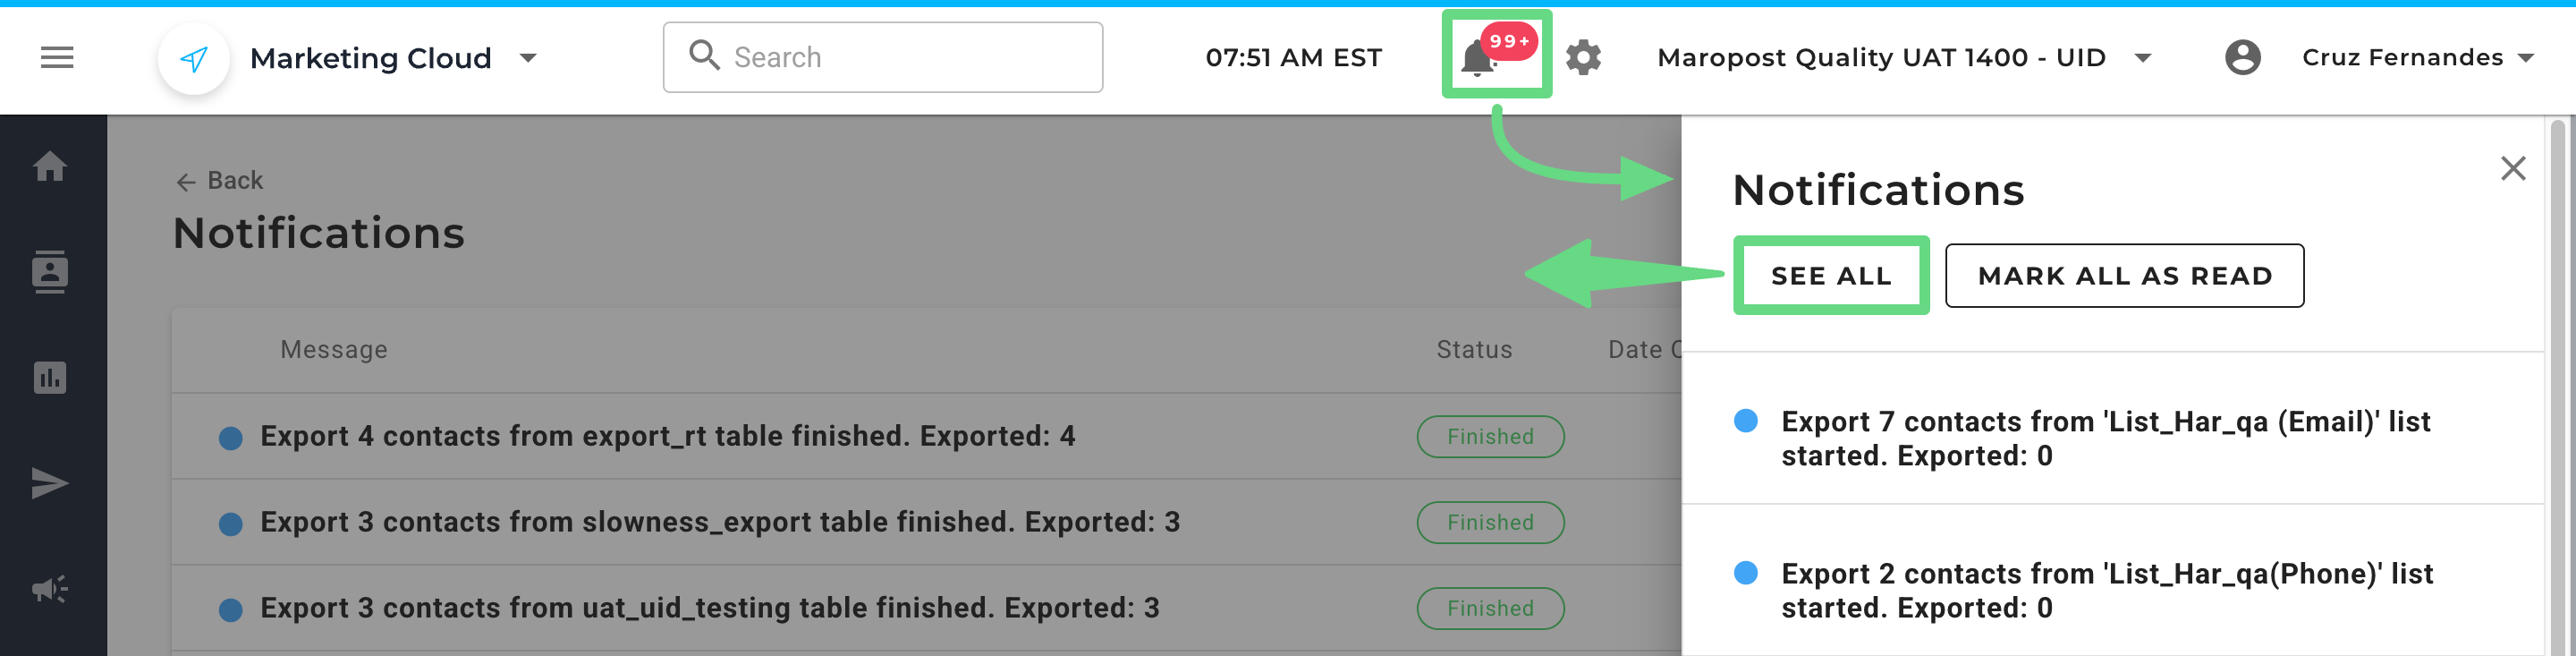
- You can track the progress of the import by clicking on the notification icon. To view and download past imports, click on the See All tab under the notifications slider, which redirects you to the notifications page.
 The system begins scanning the uploaded file or the file path URL entered. If there are no discrepancies in the file or the path URL, the system starts importing the contacts into the selected contact list.