You can configure automated imports to streamline your workflow by eliminating manual contact upload processes and ensuring your subscriber data stays current. This reduces manual effort while maintaining data accuracy through scheduled file monitoring, and helps optimize marketing effectiveness by keeping contact information synchronized across your email campaigns.
Automated import functionality enables you to establish reliable data pipelines from your existing systems while maintaining control over journey campaign triggers to prevent unintended automated workflows from activating during data updates.
In this option, you specify the file path on the FTP server of your Maropost Account (external FTP is not supported) where the file is located. Our system scans the file path every couple of minutes to see if there is a new or updated .csv or .txt file in that location. After a file is imported, the older version is moved to the archive folder.
Importing Contacts Using Automated Imports
Perform the following steps to use file import to import contacts into a list:
- In the Navigation panel, go to Audience, and select Email Contact Lists.
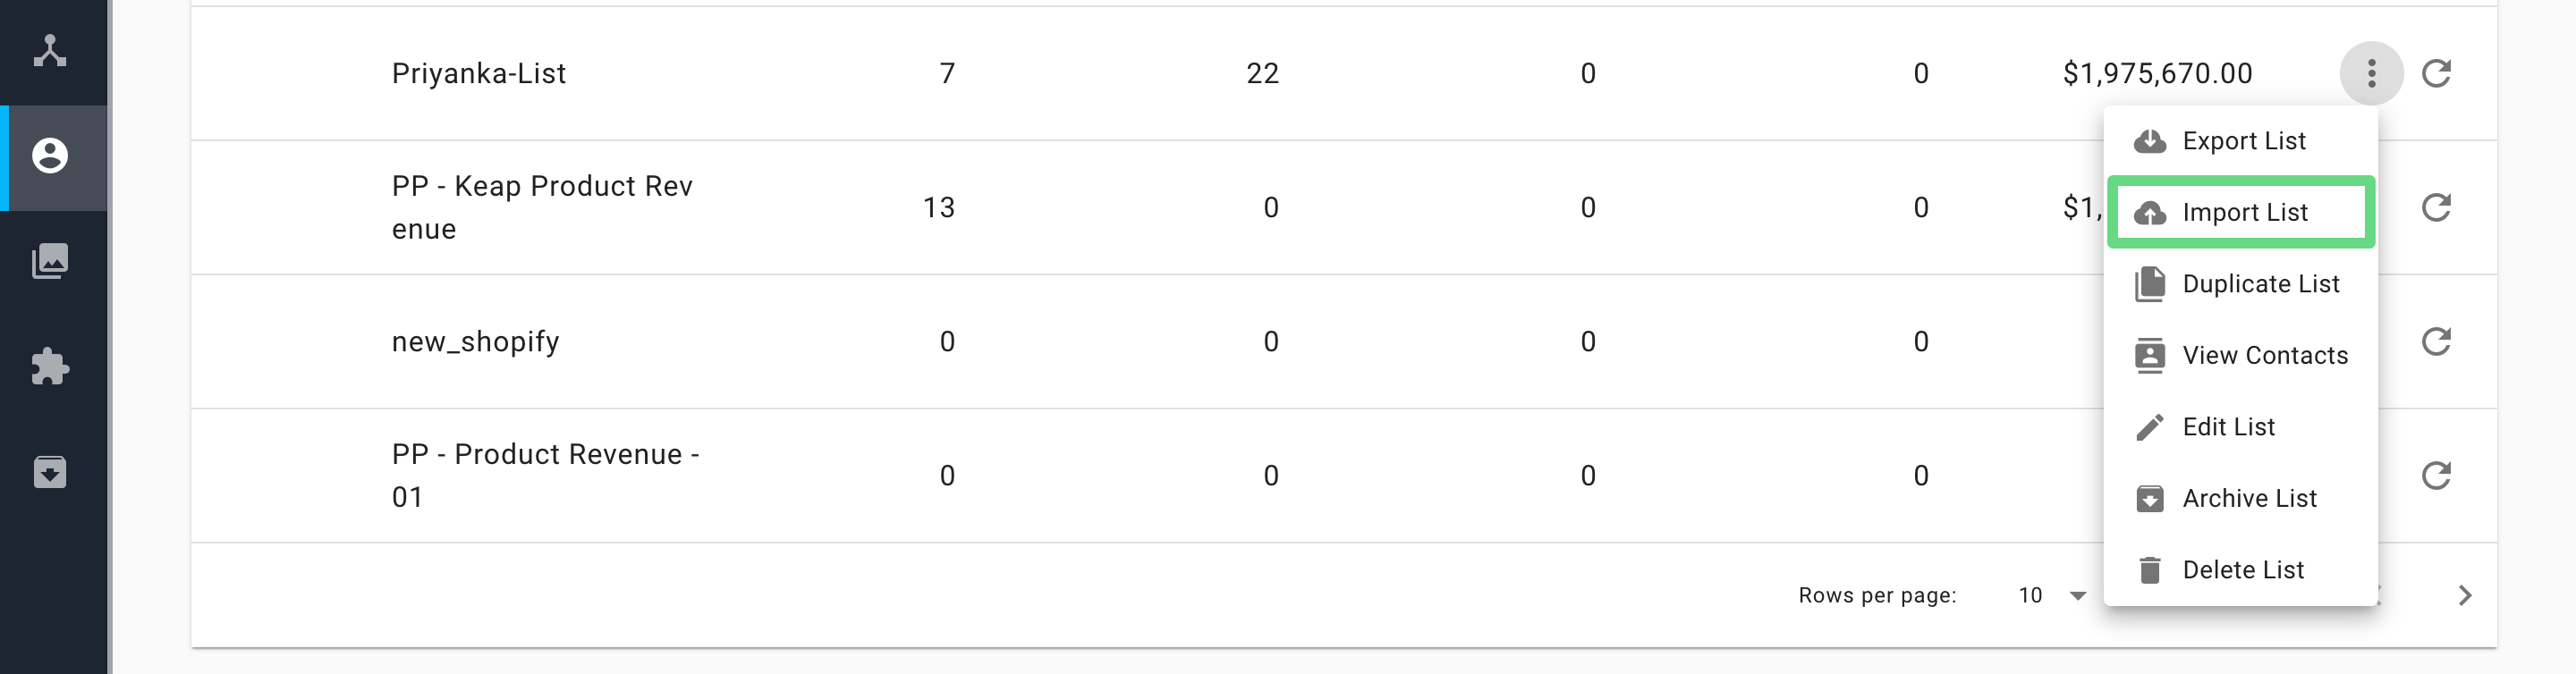
- On the Contact Lists index page, find the contact list into which you want to import your contacts. From the Actions drop-down list, select Import List.
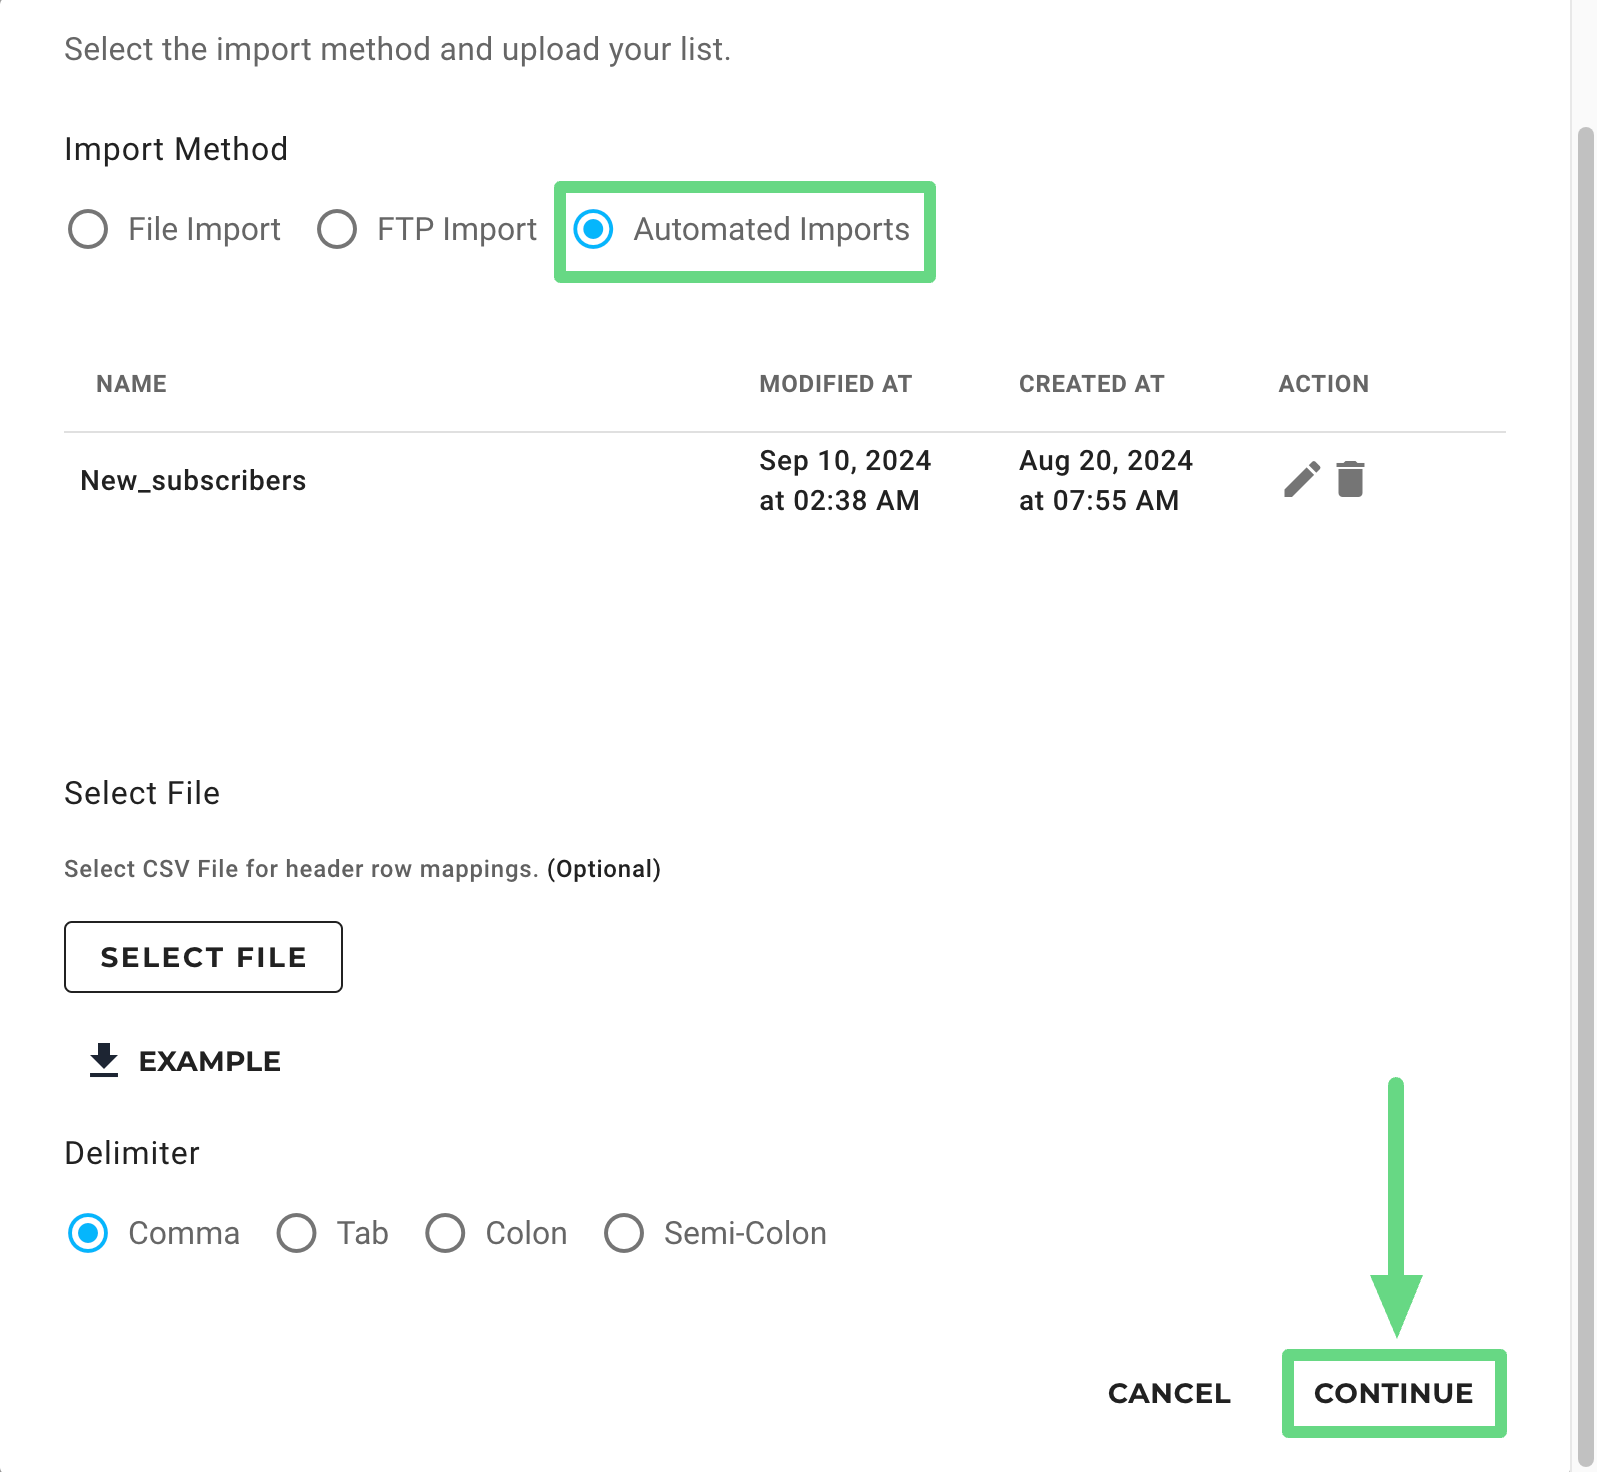
- In the Import List dialog box, select Automated Imports as the import method. Then, click Continue.
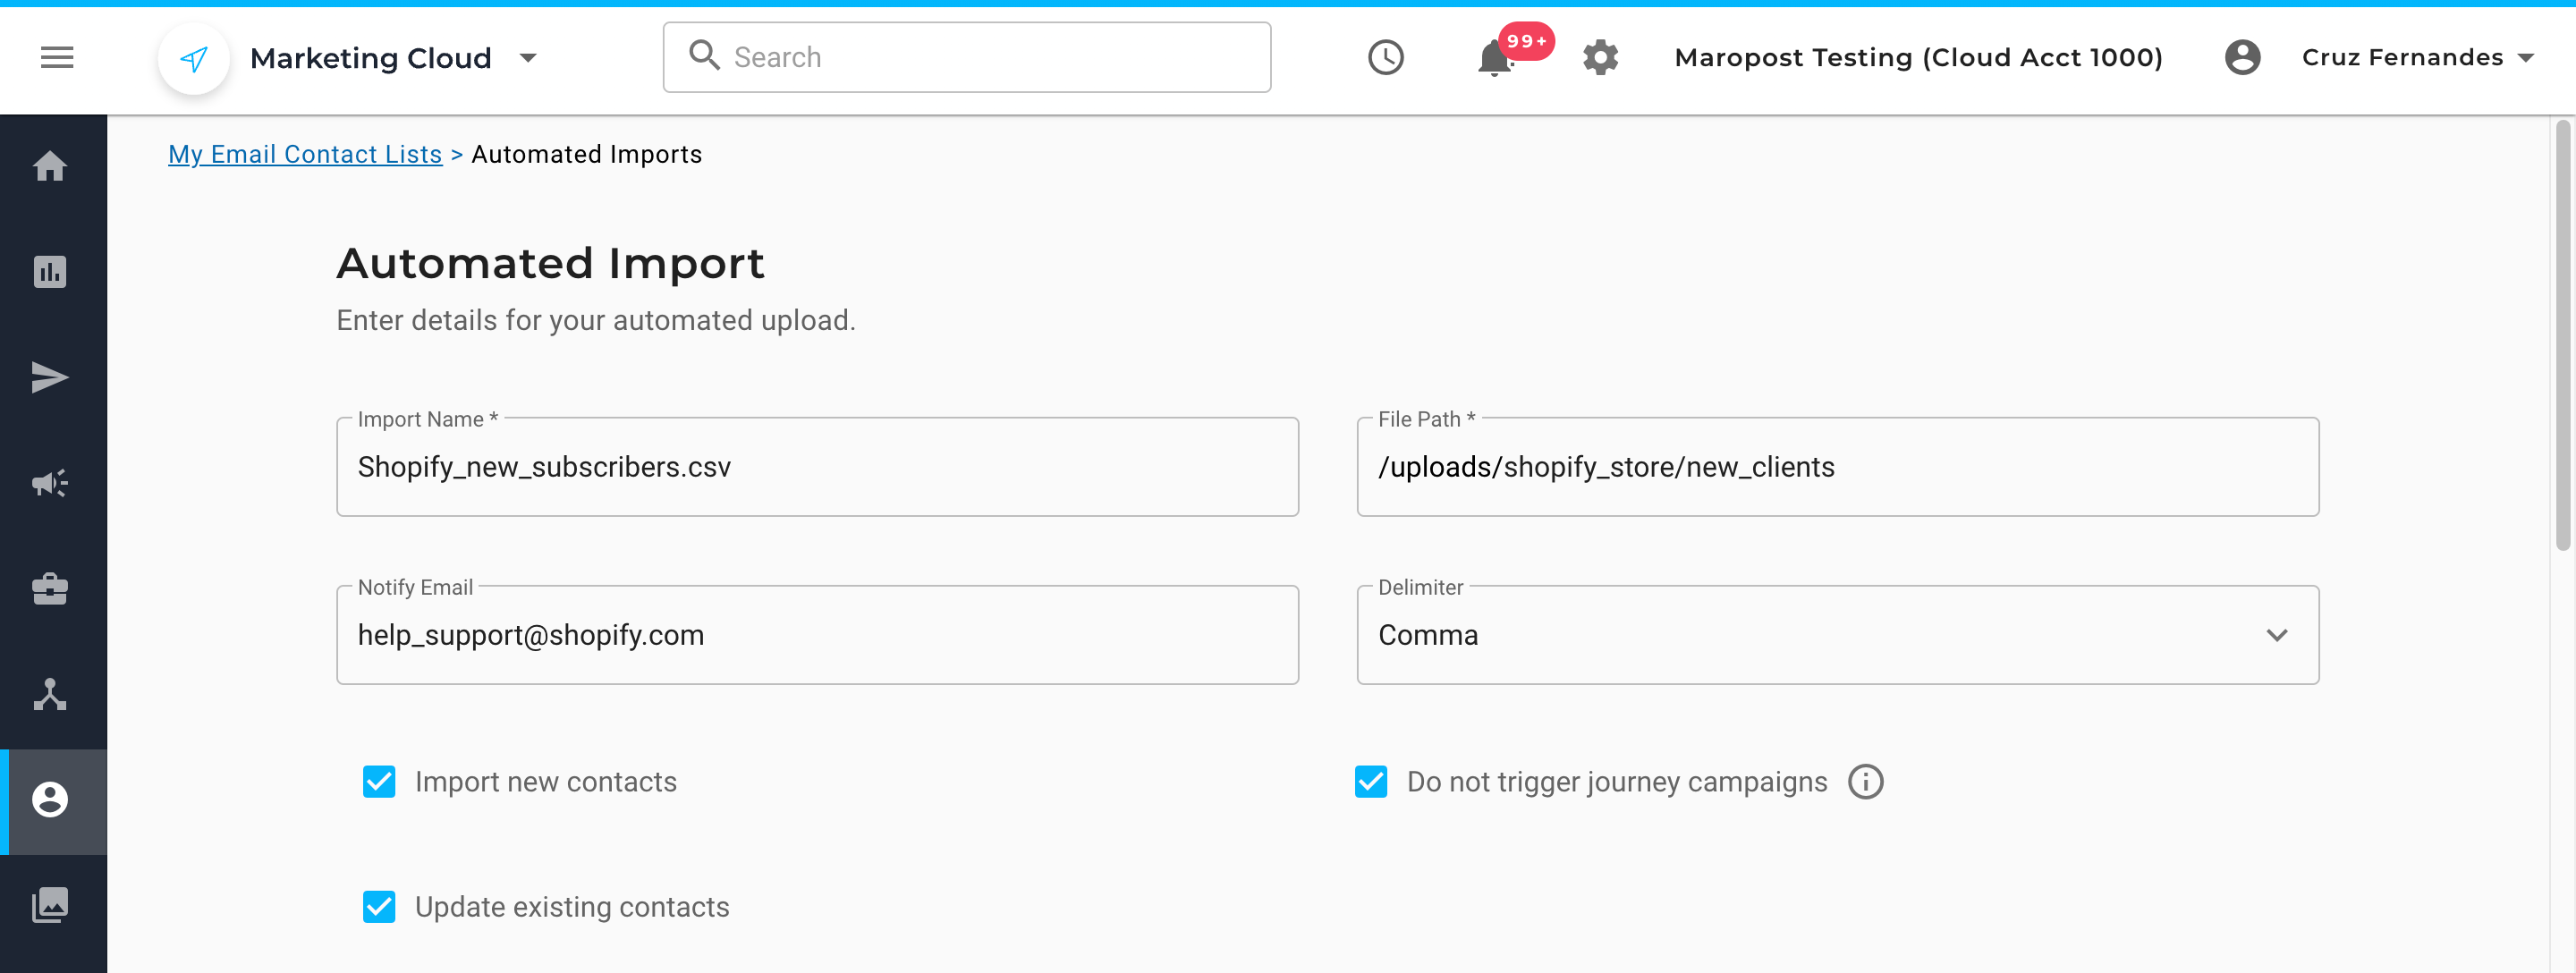
- On the Automated Import page, enter the required details, such as the name of the import and the file path to where our system will search for the import files. Next, select the following checkboxes, as applicable:
- Import new contacts: This option imports new contacts. The checkbox is selected by default.
- Update existing contacts: This option updates the existing contacts. The checkbox is selected by default.
- Do not trigger journey campaigns: This option prevents the triggering of workflow campaigns. The checkbox is selected by default.
The journey campaign checkbox only applies to workflows using a "New Subscription" trigger widget with this list selected in the trigger. If the checkbox is left selected, then contacts included in the data file will not enter any of the workflows.
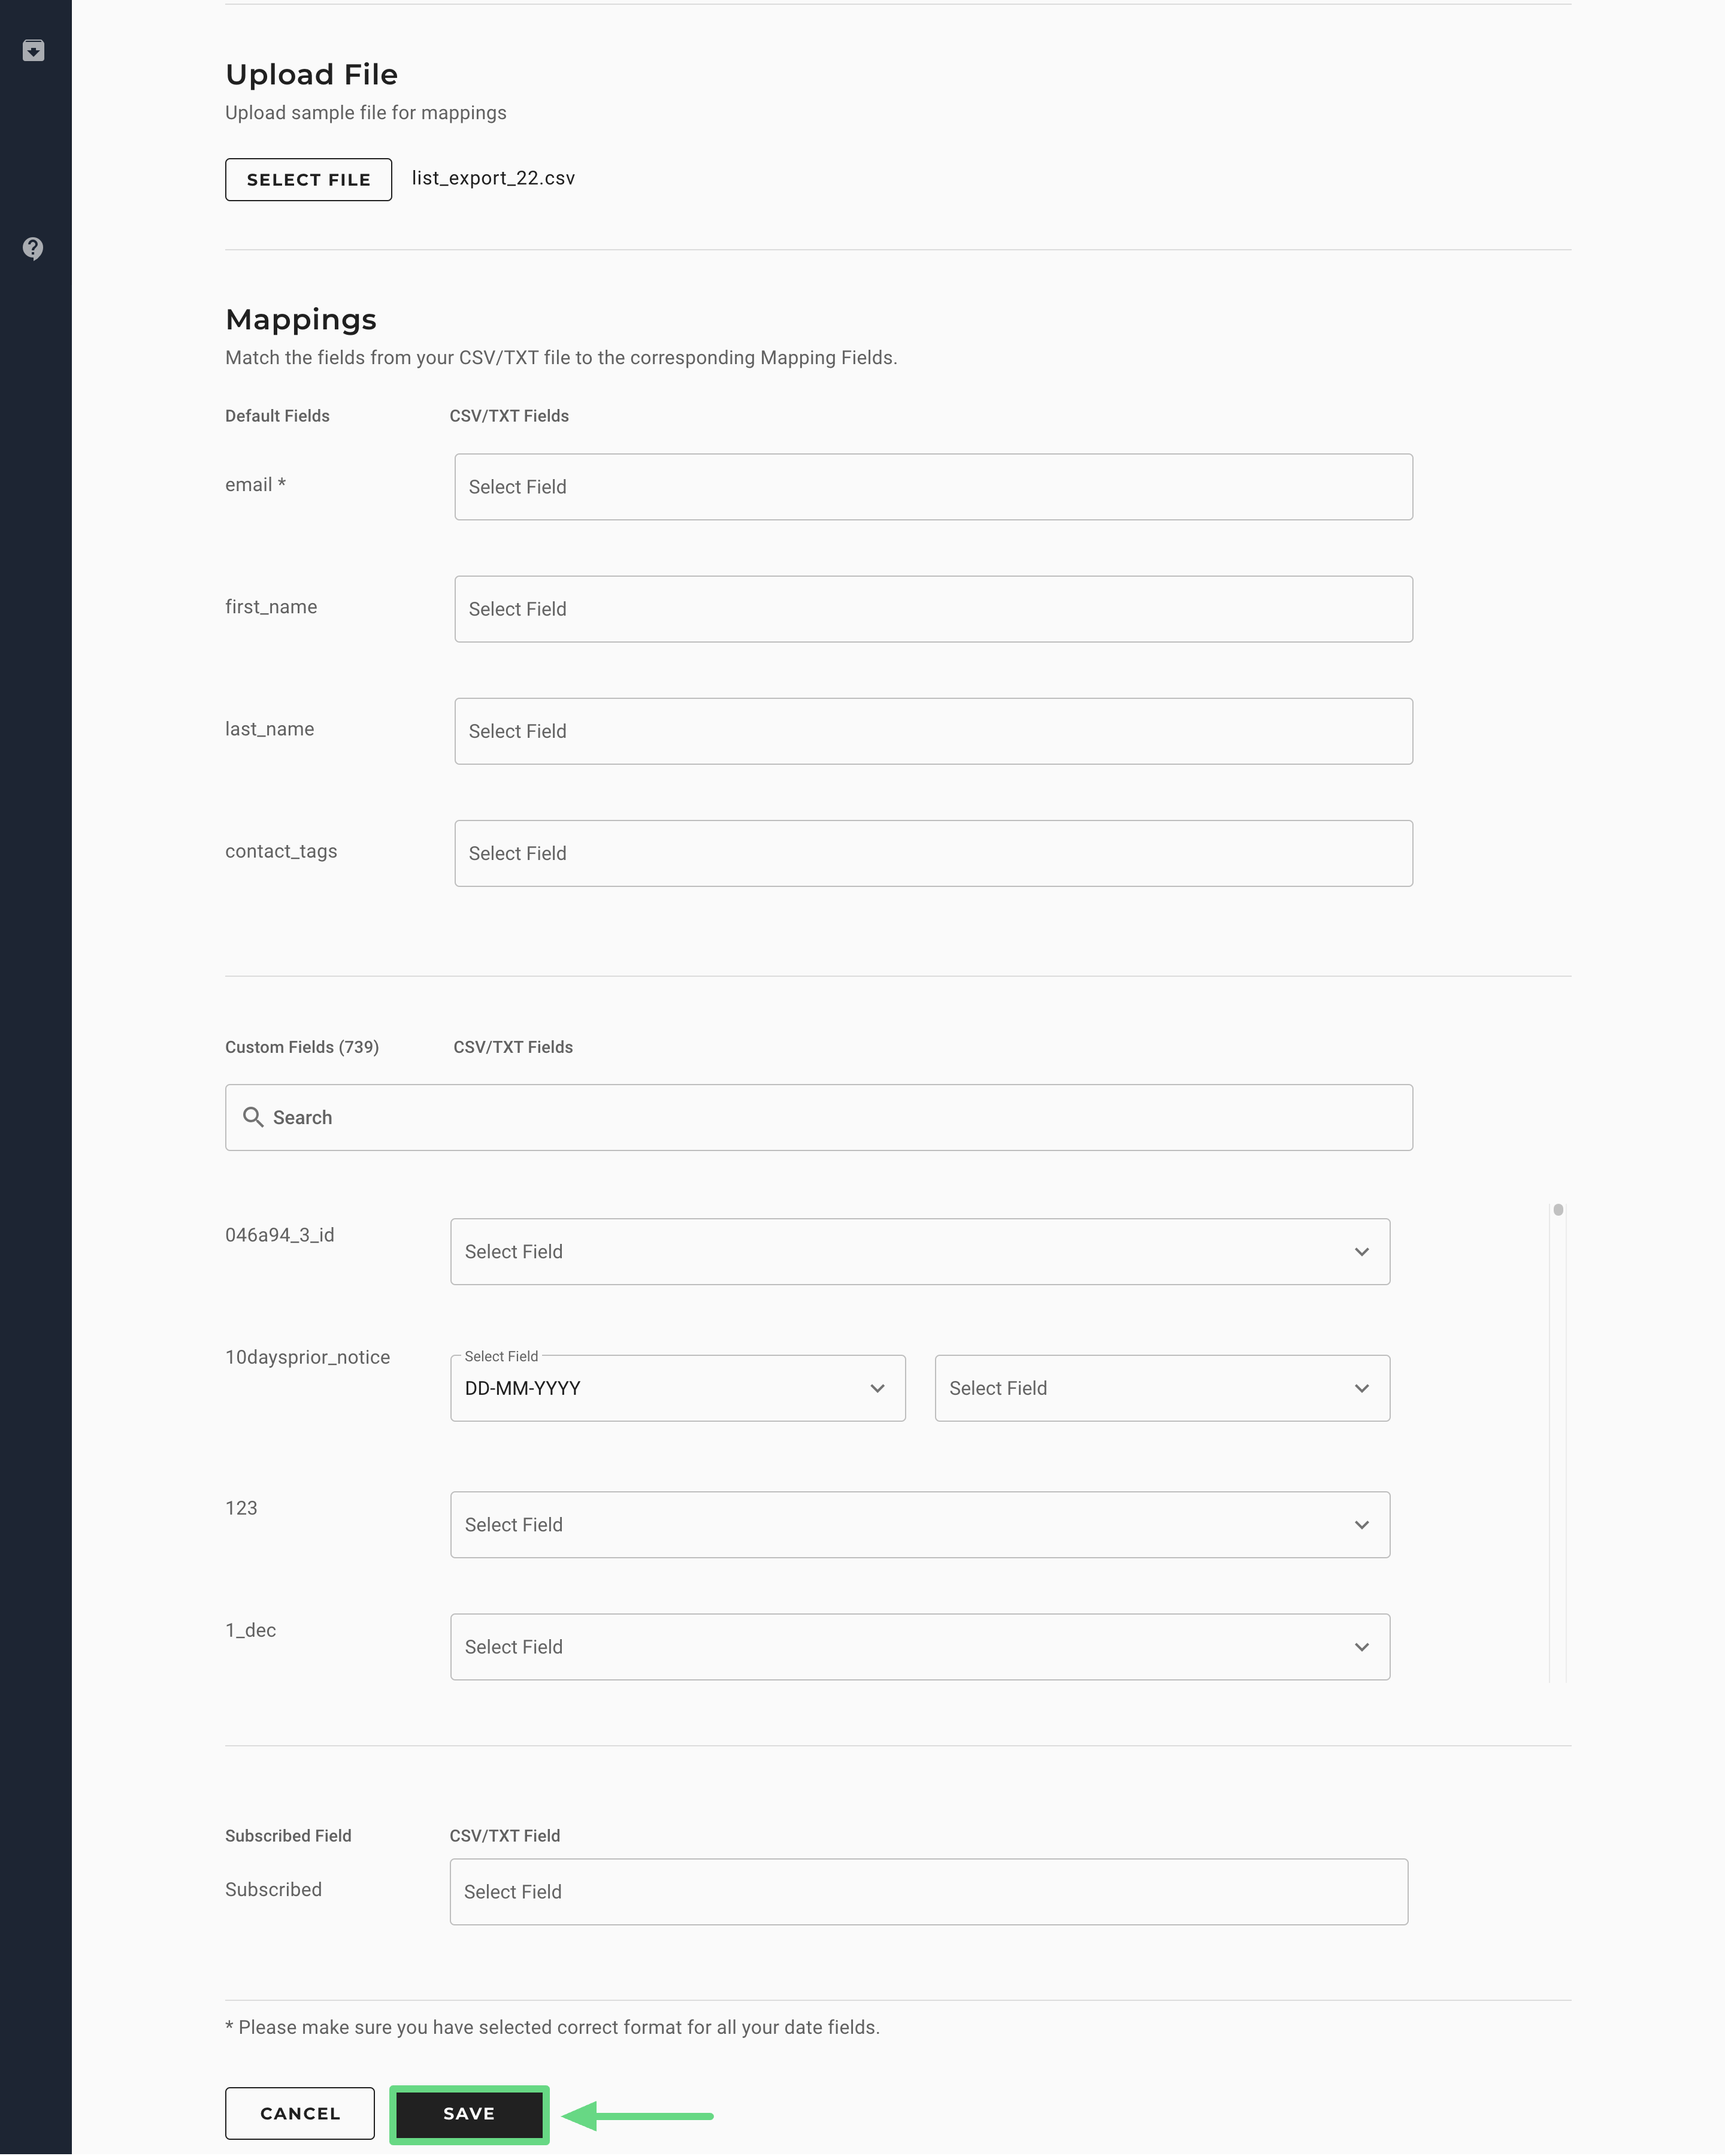
- You can also upload a .csv or .txt file and map the fields in the import file to the standard, custom, and subscribed fields in your contact list under the Mappings section. After you're done, click Save.
The system begins scanning the uploaded file or the file path URL entered. If there are no discrepancies in the file or the path URL, the system starts importing the contacts in the selected contact list.