A Custom Email Campaign Report is a detailed record of the campaigns that you have chosen. You can define the email campaigns and the metrics to be included in them. Plus, you can set a schedule as per the date range you have selected.
Besides the standard fields, Maropost Marketing Cloud allows you to create curated and comprehensive reports by allowing you to specify additional data on the basis of the information you want your report to provide.
Creating a Custom Email Campaign Report
To create a custom email campaign report, perform the following steps:
From the Navigation panel, click on Analytics and select the Custom Reports option.

To create a new custom report, click on New Report.

Select Email Campaign.

A new campaign report page opens up wherein you’ll need to mention the campaign details, its metrics, and schedule timings.

Step 1: Schedule & Delivery
In the first step, you’ll need to add the report name and choose the schedule type. If you have chosen to generate the report only once, you’ll need to select the “From Date” and “To Date” respectively. The date range you enter will be used to select all campaigns that were delivered and responses received within that range. Both ‘from’ and ‘to’ dates are inclusive, meaning the report will be generated from 12 AM of the ‘from’ day to 11:59 PM of the ‘to’ day.
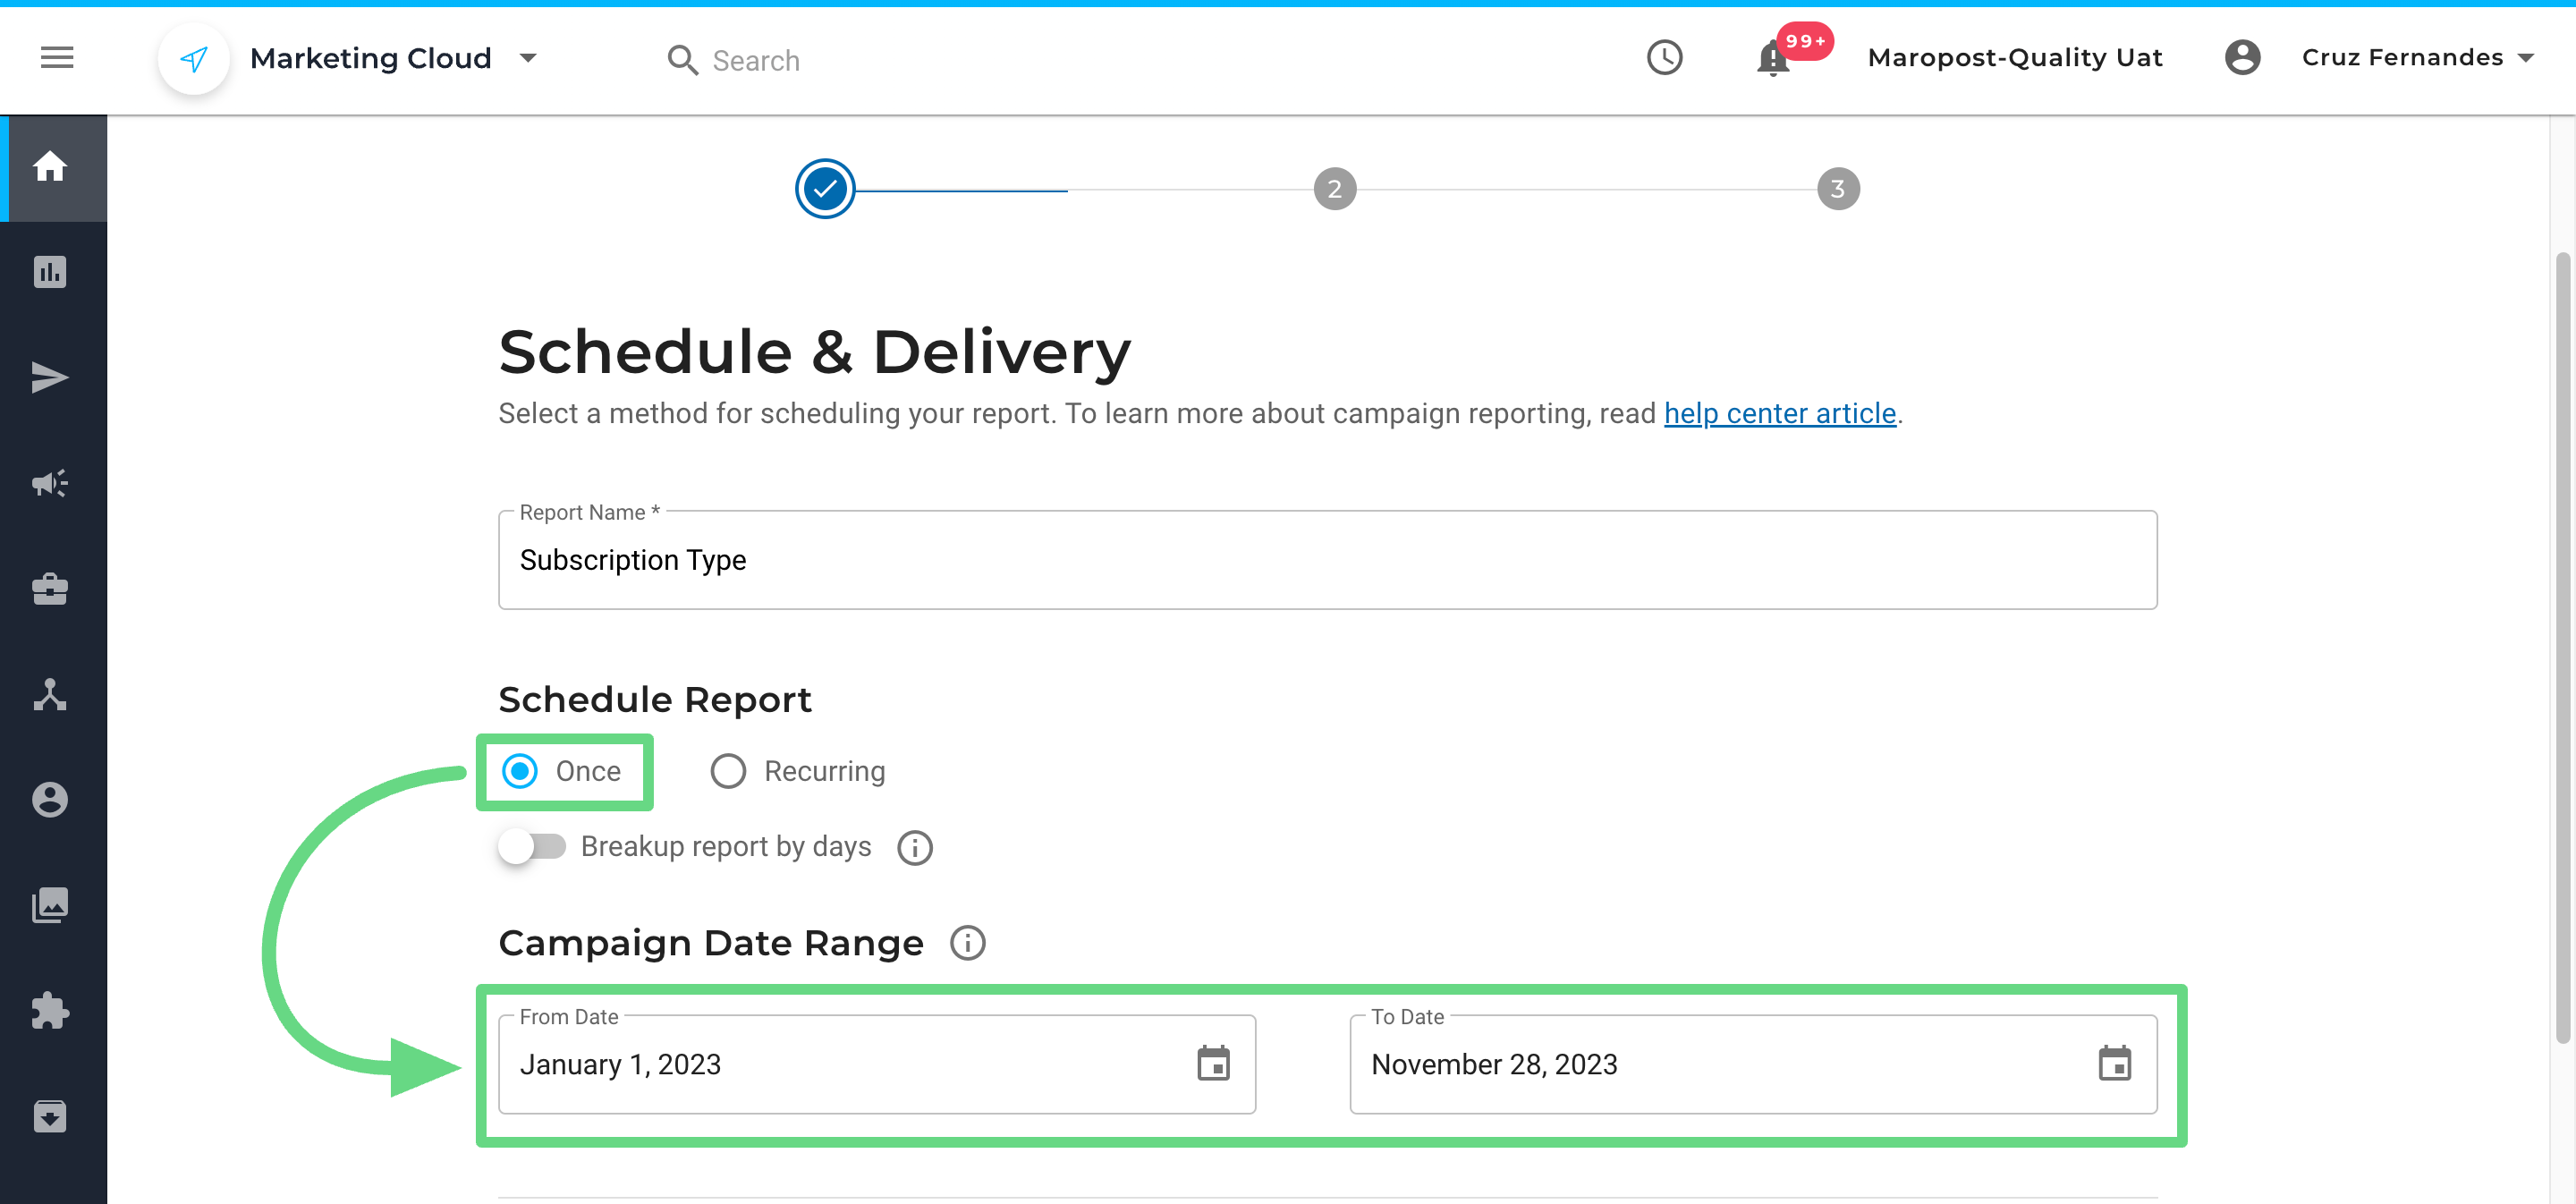
📋 Note: The dates and times are in the Eastern Time Zone.
If you have chosen to generate the report on a recurring basis, you’ll have to select the recurring interval either on a daily, weekly, monthly, or yearly basis. Also, you need to specify the time (in the Eastern Time Zone) as well as the date at which the report needs to start getting generated.

To receive a day-by-day breakdown of report data, you can enable the “Breakup report by days” toggle. Since the majority of responses to an email campaign occur within 24 hours of sending, this option is helpful for marketers who want to analyze the "long tail” of their campaigns.

📋 Note:
- For the recurring reports to include the new campaigns sent during the reporting time period, you must select the appropriate campaign tags in step 1 of the report creation flow. Also, remember to tag your campaigns.
- The totals in the report reflect the delivery and response data collected from the preceding time period based on the recurring interval that you have selected. For example, if on Wednesday, you created the custom report and selected the option to have the recurring report generated every day at 6 AM, then Thursday’s report will include total delivery and response data collected from 6 AM Wednesday to 6 AM Thursday.
To receive the report via email, enter the email address of the recipient, mention a subject line, and add some description about the generated report to be sent. Click Next to proceed further.

Step 2: Report Details
In the next step, mention the format of the report output. The supported formats are .cvs, .xls, .pdf, and .xlsx. Now select the date formats in which the dates need to be shown in the reports. Currently, the supported date formats are MM/DD/YYYY and DD/MM/YYYY.

Select either all the campaigns or a particular campaign type from the given list.

Now, select the campaign tags associated with the campaigns that you want to generate in the custom report. Next, choose the brands that are associated with the selected campaign.

The campaign name will be filtered based on the campaign type and tag, and date range filter selected in Step 1. Choose the name from the filtered list.

📋 Note: Under the Custom Reports Details section, users must select a Campaign Type since it is a mandatory field. Campaign Tags, Brands, and Campaign Name are all optional.
If you have chosen to generate the report on a recurring basis under “Step 1: Schedule & Delivery,” the campaign names get displayed based on the brand specifications, campaign type, and tag selected in the previous steps. Choose the name from the filtered list. You can include all the new campaigns in the recurring reports by enabling the ‘All New Campaigns’ toggle. This data consists of all the new campaigns, right from the time of report creation to their delivery date that matches the specified criteria.

📋 Note: New campaigns won’t be included if more than 500 campaigns already exist in the report.
Upon selecting the “OR / AND” option, the system will create the report only when either one or all of the conditions in the report criteria are met. In this case, either Campaign Tags and Campaign Name or both of the fields need to be valid, depending on the logic chosen.

You can check the preview of the selected criteria for the report to be generated at the bottom of the Report details page. Click on Next to continue.

Step 3: Report Fields / Metrics
In this step, you can view the mandatory fields that will form a part of the report output as shown below. Besides these, you can add optional fields if you want a more detailed report output. Click on Add Optional Fields to select them.

Finally, click on Submit to complete the report creation process.
