You can create acquisition forms to significantly improve your email list growth and subscriber quality by capturing leads directly from your website visitors. These customizable forms enable more relevant messaging by allowing you to collect specific subscriber information and preferences, which helps enhance subscriber engagement throughout your email campaigns. When properly configured with compelling offers and strategic placement, acquisition forms typically perform better than basic signup methods by providing targeted experiences that match visitor interests.
Acquisition forms also help streamline your workflow by automatically adding qualified leads to appropriate contact lists and enabling automated follow-up sequences, which improves operational efficiency and maximizes email marketing ROI from your website traffic.
The Acquisition Form Builder consists of 5 quick steps. The builder comes with default values for most of the settings, and you've got the flexibility to customize the form as per your needs.
Follow the steps below to create and use an Acquisition Form on your website:
- Navigate to the Acquisition Form Builder
- Enter Form Details (In Step 1)
- Select Form Settings (In Step 2)
- Design the Form Layout (In Step 3)
- Create Content for Main Form and Thank You (In Step 4)
- Verify Details in the Preview (In Step 5)
- Saving and Enabling the Acquisition Form
- Using the Acquisition Form on Your Website
To learn about Acquisition Forms, see Acquisition Forms.
Navigate to the Acquisition Form Builder
Follow the steps to go to the Acquisition form builder:
- In Navigation, go to ACQUISITION, and select Acquisition Forms. Then, on the Acquisition Forms index page, click NEW FORM.
- On the Form Selection page, select the template that you want to use. You can choose to create from scratch or choose one of our templates to customize as per your requirements.

After making the selection, you'll be redirected to the Acquisition Form builder, where you can specify the form details and design the form.
Enter Form Details (In Step 1)
In step 1 – New Form, you can specify the form-related details.

Enter a value or select from the following fields:
- Form Name: Enter a name for your acquisition form.
- Subscription Lists: Select the contact lists into which you want to add the contacts acquired through the acquisition form.
- Domains: Enter the domain of the website that will be displaying the form. You can add multiple domains and have your form appear on multiple sites. This feature is here for your security. It prevents someone from maliciously copying the Acquisition script tag from your website and placing it on another unauthorized site.
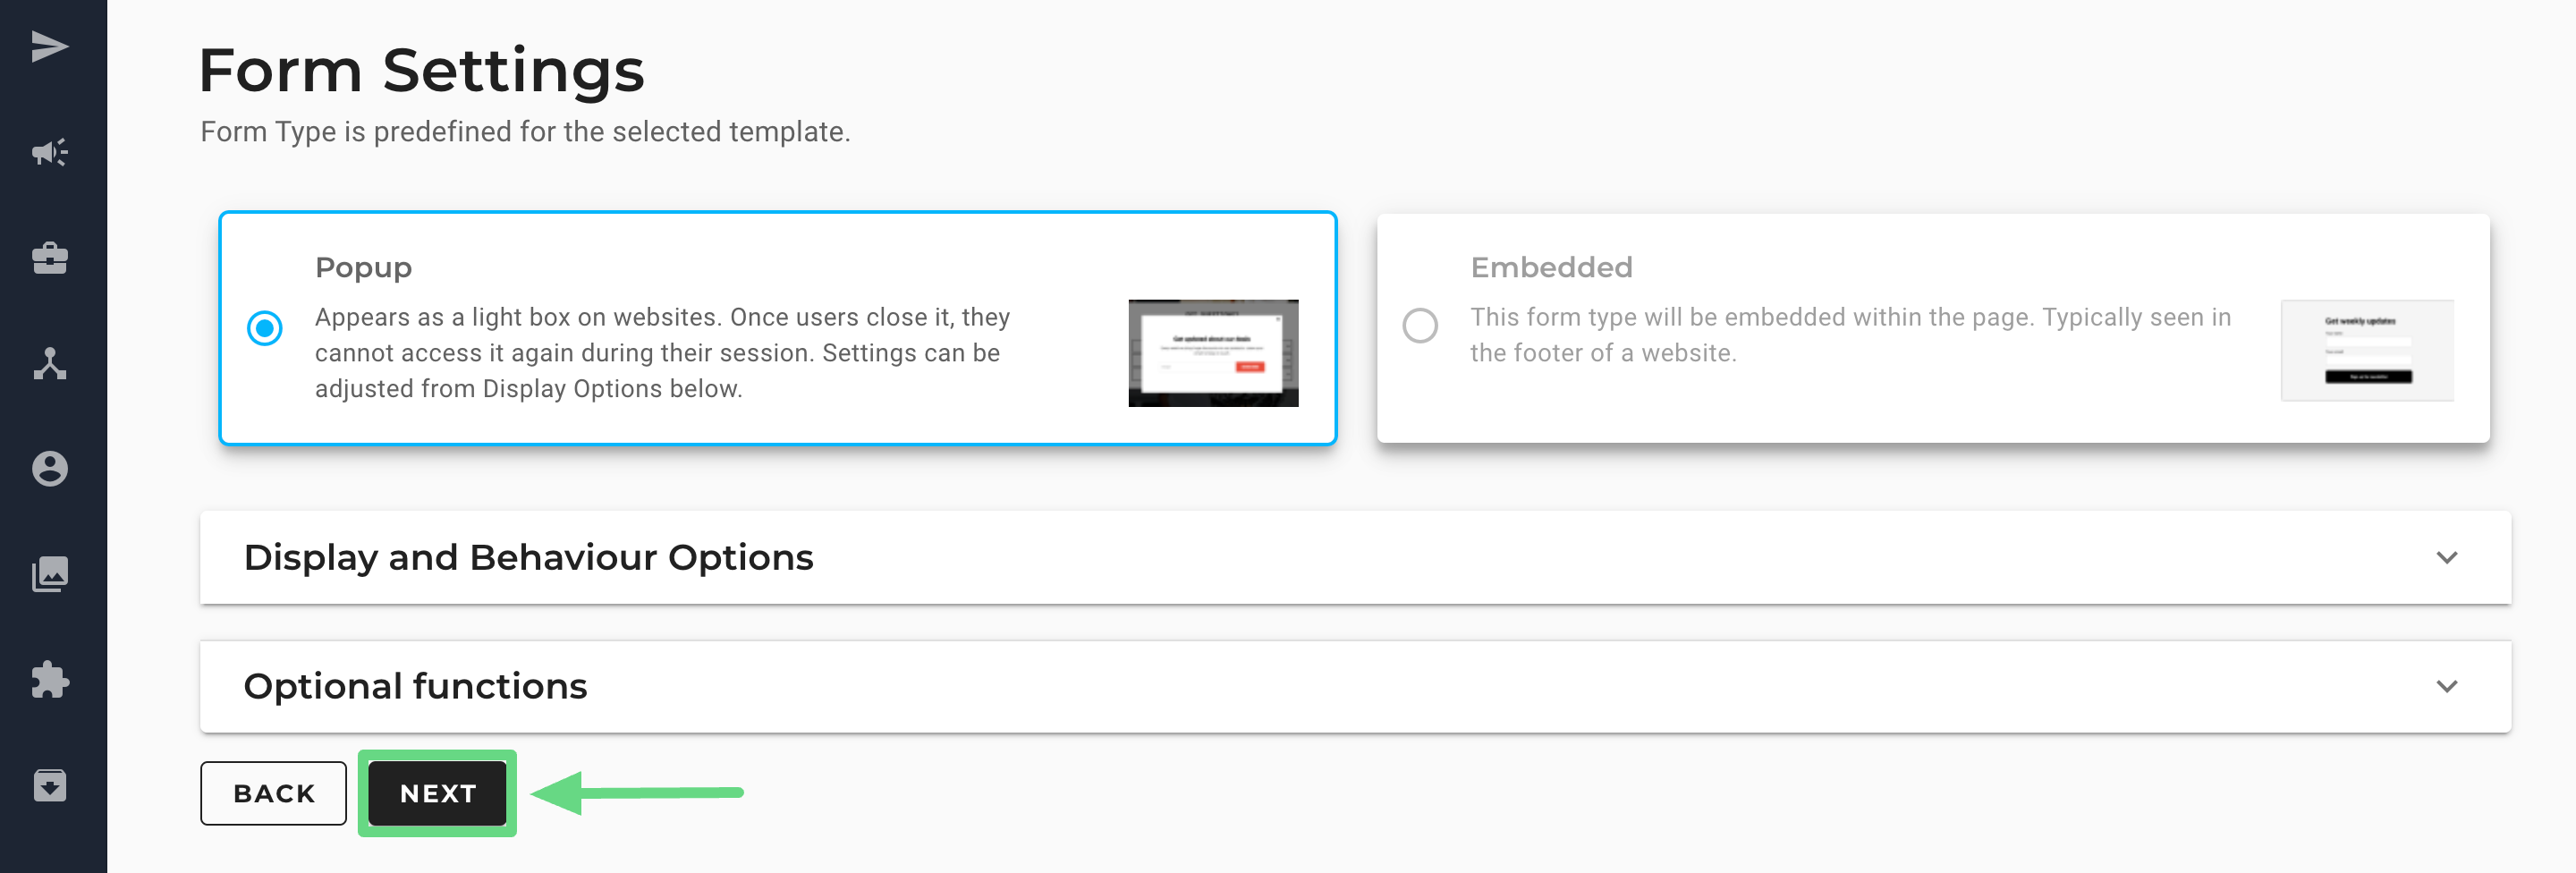
Select Form Settings (In Step 2)
In step 2 – Form Settings, select the form-related settings.
You can now have a pop-up and an embedded form together on a website. Choose a form type from the given options. The form types available are as follows:
- Popup: Appears as light boxes on the web page when a user is browsing the site.
- Enabled: The form is embedded within the website and is normally present at the footer.

Next, choose your form’s display and behavior options.

- Don’t show form again after submission: When this option is enabled, the form won’t be displayed again after a user submits the form. This option is enabled by default.
- Display On: It displays the form to users depending on their website interaction, i.e., whenever they open a website, exit a website, or have scrolled and read a percentage amount of the content present on the webpage.
- Page URL: It allows you to display the form on a particular web page. By enabling the “Only show on these URLs” checkbox, you can decide for which web pages the form needs to be shown by mentioning the web page URL in the given field.
- Hide: It helps you specify the number of days for which the form should not be shown to a user if they have exited the web page without filling in and submitting the form. After the mentioned days have elapsed, the form will reappear to such users upon visiting the website.
Along with display options, use the settings (add-ons) present under Optional functions to add some functionality to your forms.

- Redirect to URL after form submission: This add-on redirects users to a specific website after they have submitted a survey, feedback, or newsletter registration form.
- Send an email to this address when a subscriber is added: It sends an email to the mentioned email address notifying that a new contact has been added via the acquisition form.
- Enable Recaptcha: When enabled, it serves as an additional layer of protection against spam and misuse. To demonstrate whether they are human or not, users must interpret and match images as asked in the reCAPTCHA window. This step guarantees high-quality form submissions and prevents bots from creating new contacts.
- Enable double opt-in: This is an extra step that confirms a user's addition request. When a user submits a form, they must verify the confirmation email sent to their email address to validate their interest. You can customize the confirmation email by entering a “sender” and “reply to” email address, its subject, and additional information that is deemed necessary in the email. Remember, since this add-on is only available for email subscribers, you need to notify users in advance about giving SMS consent if they provide their SMS contact alongside their email. Only after the user has confirmed the subscription request does the SMS contact appear in your list.
After you have customized and selected your form settings, click Next to proceed ahead.
Design the Form Layout (In Step 3)
In step 3 – Form Design, you can design the form layout.

Expand each item and edit the design layout:
- Builder Background: Select an image to set as the background behind your form while building it. This will help you match the layout of the form to your current webpage. You can choose an image from the Image Library or upload a new image to the Image Library from here.
- Popup Position: Select the position where the pop-up will show up on your web page. Only applicable to Popups.
- Drop Shadow: Adjust the drop shadow under the form. Only applicable to Popups.
- Overlay Colour: Adjust the colour and opacity of the overlay. Only applicable to Popups.
- Dimensions: Edit the height and width of the form. You can also choose to edit the width and automatically adjust the height based on your components.
- Padding: Specify in pixels the white space around the form.
- Border: Select the colour and thickness of the form border.
- Background: Change the colour of the form or choose an image to appear as the form's background.
Create Content for Main Form and Thank You (In Step 4)
In Step 4 – Form Content, you can edit the content on your Main Form and the Thank You confirmation message. The content editor here is our regular Drag-and-Drop content editor, which provides the flexibility and powerful features that come with it. You can click the form headings: "Main Form" and "Thank You" to toggle between the forms.
The following screenshot shows the Main Form:

The following screenshot shows the Thank You UI layout:

In the editor, you can add or modify your standard fields, such as “Email,” which is present by default in your acquisition form. Additional standard fields such as “First Name”, “Last Name”, and “Phone” can be inserted into the form by clicking on the Add new field tab.

Important Points to Consider:
If you wish to capture only SMS contacts, you can do so by replacing the “Email” field with a “Phone” field. The contact’s SMS details appear in the list after the user has confirmed their interest in subscribing. Conversely, you can insert only the “Email” field if you want to acquire only email-related information.
You can create multiple combinations of standard fields within an acquisition form depending on the kind of information you want to collect from your users. It can be a mix of “email” and “Phone”, solely “Email”, or only the “Phone” field. As a result, you have greater flexibility when adding fields to your acquisition forms.
However, ensure there is at least one standard field (email or phone number) in an acquisition form. Without these fields, you cannot go ahead with the form creation process.
Furthermore, you can change your chosen standard fields by editing them. The “Edit field” dialog box contains the following fields:
- Label: This field allows you to enter a text denoting the standard field.
- Type: This field lets you choose the data class that the standard field represents.
- Placeholder: You can write instructions in this field to help users add the correct information during form submission.
- Field Permissions: It includes two checkboxes, allowing you to make standard fields optional or mandatory for users to fill in, plus a "read-only" mode, which means the data submitted by the user can only be read and copied, but cannot be updated later on.

You can also insert custom fields in your acquisition forms with the help of the Drag & Drop editor tool. While editing, click on the email section of the acquisition form and click on Add Custom Fields.

Mention the required fields in the dialog box and click on Save.

Your acquisition form is now equipped with custom fields, thus enabling you to acquire contacts with unique attributes you can use to promote your marketing campaigns. To learn more about creating such custom attributes, read our Custom Fields article.

Verify Details in the Preview (In Step 5)
In Step 5 – Form Preview, you can see the form details and a preview of how the form will look to your users. You'll also find the script for using the form on your website.
The following shows a screenshot of the Form Preview for a Popup:

For an embedded form, you'll also find a tag for the embedded form. The following shows a screenshot of the Form Preview for a Popup:

Saving and Enabling the Acquisition Form
The Acquisition form is automatically saved when you reach step 5, that is, Form Preview.
If you click EXIT, your form is saved, but it's still in "Disabled" status, and the script link is unavailable for use. If you click Publish, your form is saved in the "Enabled" status.
Note: You can quickly edit the status of a form on the Acquisition Forms index page.
Using the Acquisition Form on Your Website
In order to use the Acquisition Forms on your website, all you need is the script link that is generated for the form. The script link is only available when the form is enabled.
The Acquisition Forms index page shows all the Acquisition Forms created in your account. Find the form that you want to use on your website, and then from the Actions menu, select Show Script Link.

The Acquisition Form Script dialogue box contains the script required to call the form. You can copy the script using the copy icon and paste it at the end of the <head> tag in the web pages where you want the form to appear.
The following screenshot shows the script for a pop-up form:

The following screenshot shows the script for an embedded form:
