You can create engaging email experiences using the drag-and-drop editor to design professional content without technical restrictions or coding requirements. This flexible design tool enables you to maintain brand consistency across campaigns while streamlining campaign production through reusable templates and content blocks. When properly utilized with compelling visual elements and optimized layouts, drag-and-drop designed emails typically perform better than basic text emails by delivering more visually appealing and interactive subscriber experiences.
The drag-and-drop editor also helps improve operational efficiency by reducing the time needed to create professional email designs, allowing marketing teams to focus on strategy and messaging while the intuitive interface handles the technical aspects of email layout and formatting.
The Drag and Drop content editor gives you the flexibility to design your content without any restrictions, as compared to a traditional content editor. It also gives you the ease of having all the formatting tools at your disposal, thus enabling you to control the design aspect of your email contents in real-time.
Thus, an easy-to-use interface combined with great compatibility on several platforms makes it an ideal tool for experts and novice email content creators alike.
Some of its notable features are:
- Separation of structure and content: One of the most important traits of the drag-and-drop feature is its design characteristics being unique and independent from content to content. This means every piece of content can have a different design layout and behavior than the rest of the email message.
- Flexible and compatible: The Drag and Drop editor has an array of tools to help make a content layout flexible without compromising on compatibility, i.e., there is no adverse effect on the way the message is delivered and displayed on various client applications.
- Structured and distinguishable workspace: We have designed the feature in such a way that you can navigate through the editing canvas without any hassle. The formatting and properties panel is placed on the right-hand side, and the blank canvas is placed on the left-hand side. Simply select the formatting tools and drag and drop them into the blank workspace. You can make fine adjustments to the content’s appearance and function with the help of the properties panel that each formatting region possesses. This is true for all the structures (for example, a single-column row) and the individual content blocks (for example, a text content block).
- Highly customizable: Not only does the feature support various multimedia extensions such as dynamic images, GIFs, URLs, etc., but you can also create highly interactive content by using custom HTML in your email messages.
- Supports reusability: Since the contents (e.g., rows, email content templates, footers, etc.) are created within separate blocks with their own design properties, they can be reused in multiple email campaigns, thus reducing your workload in creating new content from scratch.
Creating Content using Drag and Drop Editor
Perform the following steps shown below to access the Drag and Drop editor tool and use it to create email content:
Under the Navigation panel, go to Content and select the Email Content option.

On the Email Content Index page, click New Content.

In addition to creating your own personalized email content, you can also browse our extensive library of ready-to-use Drag and Drop templates consisting of themes like newsletters, business, events, e-commerce, etc. to industry and seasonal-related categories such as fashion, manufacturing, media & entertainment, spring, festivities, etc.

If you want to create content from scratch, click the Start Designing button.
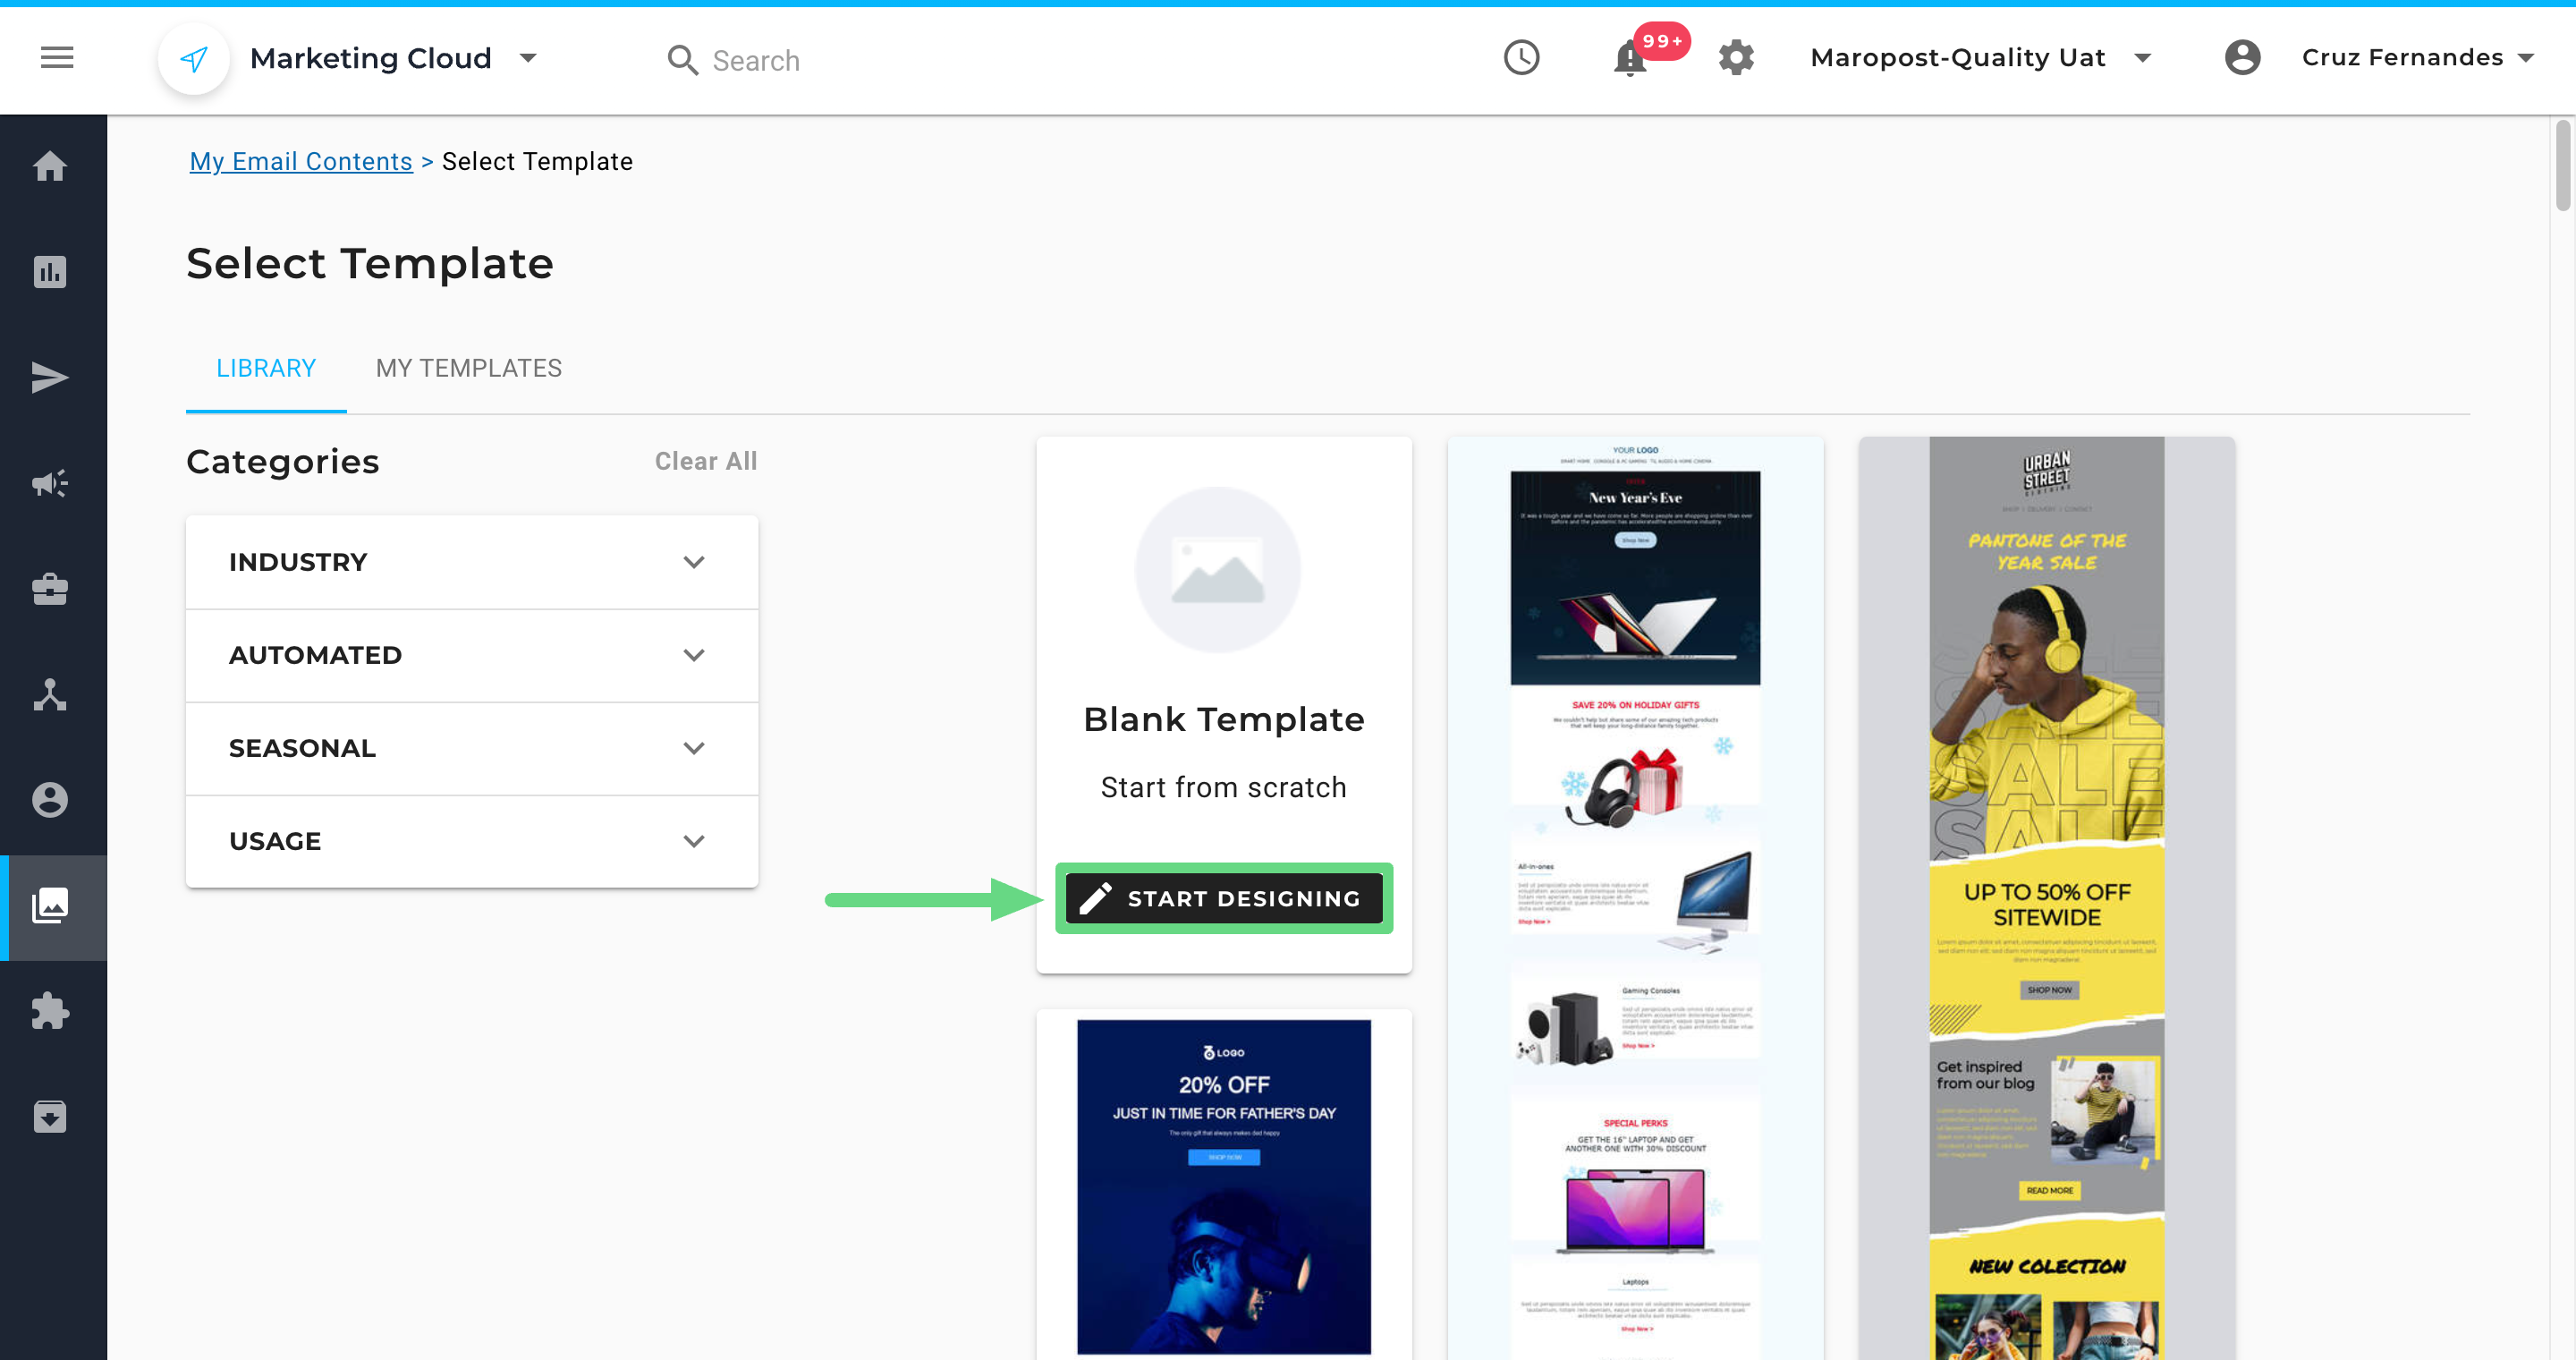
Choose the Drag and Drop template.

Select a template layout from the list and click on Next.

Enter a new title for your content draft, in the Name field.

The editor page will be divided into two sections. On the left is the editing canvas where you can see the layout of your email message. On the right are the formatting tools to help you design the email content. Depending on the template you selected in Step 5, the content blocks will be preloaded in the canvas region for you to work on.

The elements present in this editor are explained below:
- Editing Canvas: The editing canvas provides a blank space where you can drag and drop the structural elements and content elements, and edit them to create your desired content. To learn more about editing content, see Drag and Drop Builder: Editing Content.
- Properties Panel: The properties panel is divided into the following three sub-sections and lists the rows and content elements for you to pick and use, enables you to edit their properties, and contains the general settings for the entire content.
- Content: In this section, you can choose and edit the specific content elements that make up your message, for example, buttons, images, text blocks, and so on.
- Rows: In this section, you can select different structural elements to organize your content, for example, a single-column versus a three-column row.
- Settings: In this section, you can edit the overall settings that affect the entire message. For example, a default font family.
For more information about the properties panel and its sub-sections, see Drag and Drop Editor Properties Panel.
Once you have finished designing your email content, switch to the Footer section and either create a custom footer or choose a default one offered by Marketing Cloud. Make sure to add the necessary details that need to be mentioned in the footer of your emails. For example, in compliance with Anti-Spam email laws, an email content should contain address information of the email sender “{{campaign.address}}”, and an unsubscribe link to a particular campaign “{{campaign.unsubscribe_link}}”, “{{campaign.unsubscribe_url}}” or “{{campaign.one_click_unsub_url}}”. To learn more about creating custom footers, see Footer Management.

To check how your email content will appear to your clients, visit the Preview section. Select a contact or a list to preview the email content as they would see it. Read our Previewing Content in Content Editors article to learn more.

To ensure the ease of email deliverability to your clients, we have included an email scorecard in the preview section. With the help of such ratings, you can make adequate changes such that only necessary details are mentioned in the email or newsletter, thus making the file size as small as possible. A smaller file size guarantees minimal processing delay, enabling prompt email content delivery to the intended recipient.

Currently, Marketing Cloud displays three types of labels that denote the email score and size parameters. They are namely:
- Excellent: Email content size less than 100 KB.
- Good: Email content size between 101 KB and 249 KB.
- Poor: Email content size above 250 KB.
Please note that these ratings don’t prevent you from sending email campaigns to your clients. However, for faster email delivery and a smoother user experience, we do recommend optimizing your email file size whenever possible.
You can also add web tracking parameters and Content Feed details for your content templates under the Advanced section. With Web tracking, you can collect various parameters that help you understand how the audience interacts with your content. With Content Feed, you can reuse your email templates that display specific information to its users. To learn more about these features, read our Web Analytic Tracking and Content Feeds articles.

Use the Custom Row Categories section to save and store customized row templates so they can be reused in email campaigns whenever you need them. To learn more about customizing row categories, read our Drag and Drop Editor: Custom Row Categories article.

To save the draft, click on Save and Close.

Related Articles
Content Design & Creation:
Form & Interactive Elements: